

Page 1
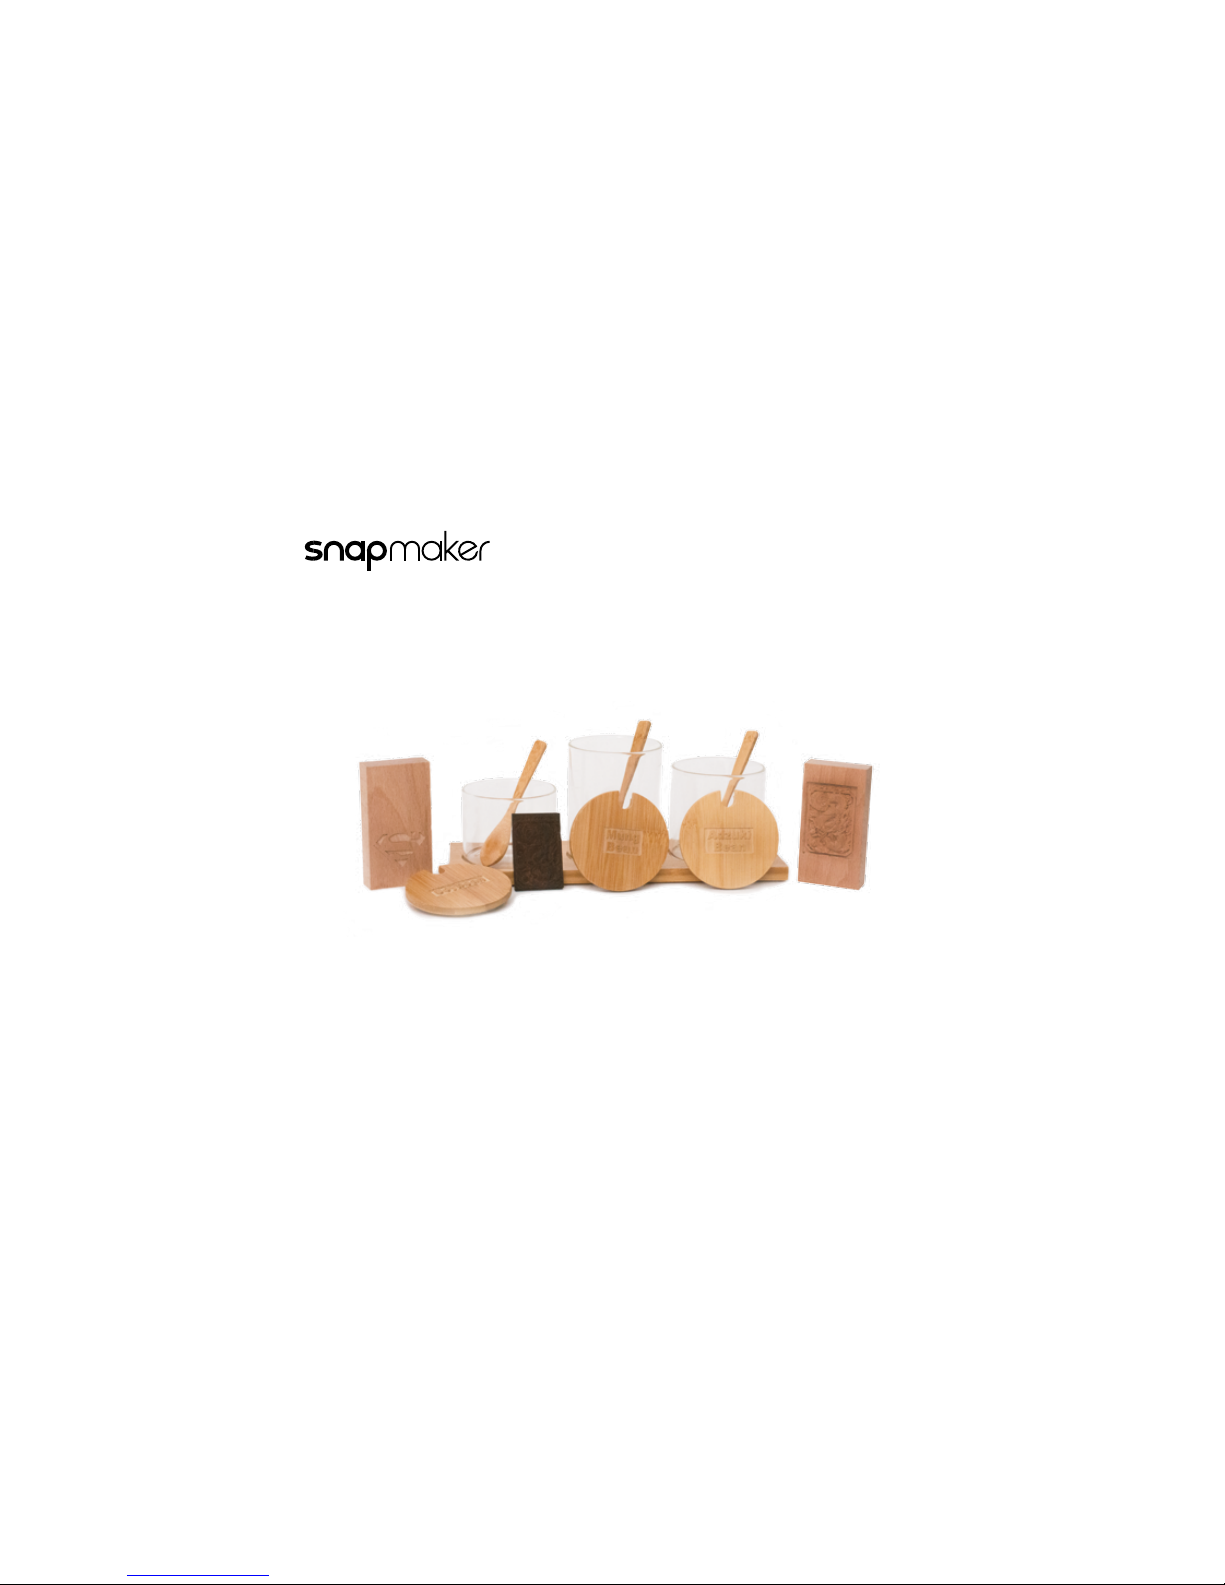
| Guide for CNC Carving
Page 2
2
Guide for CNC Carving
Transform into a CNC Carver
Start CNC Carving
Prepare
Start
B
C
Before you Start
A
Support
Page 3
3
Guide for CNC Carving
Before You Start
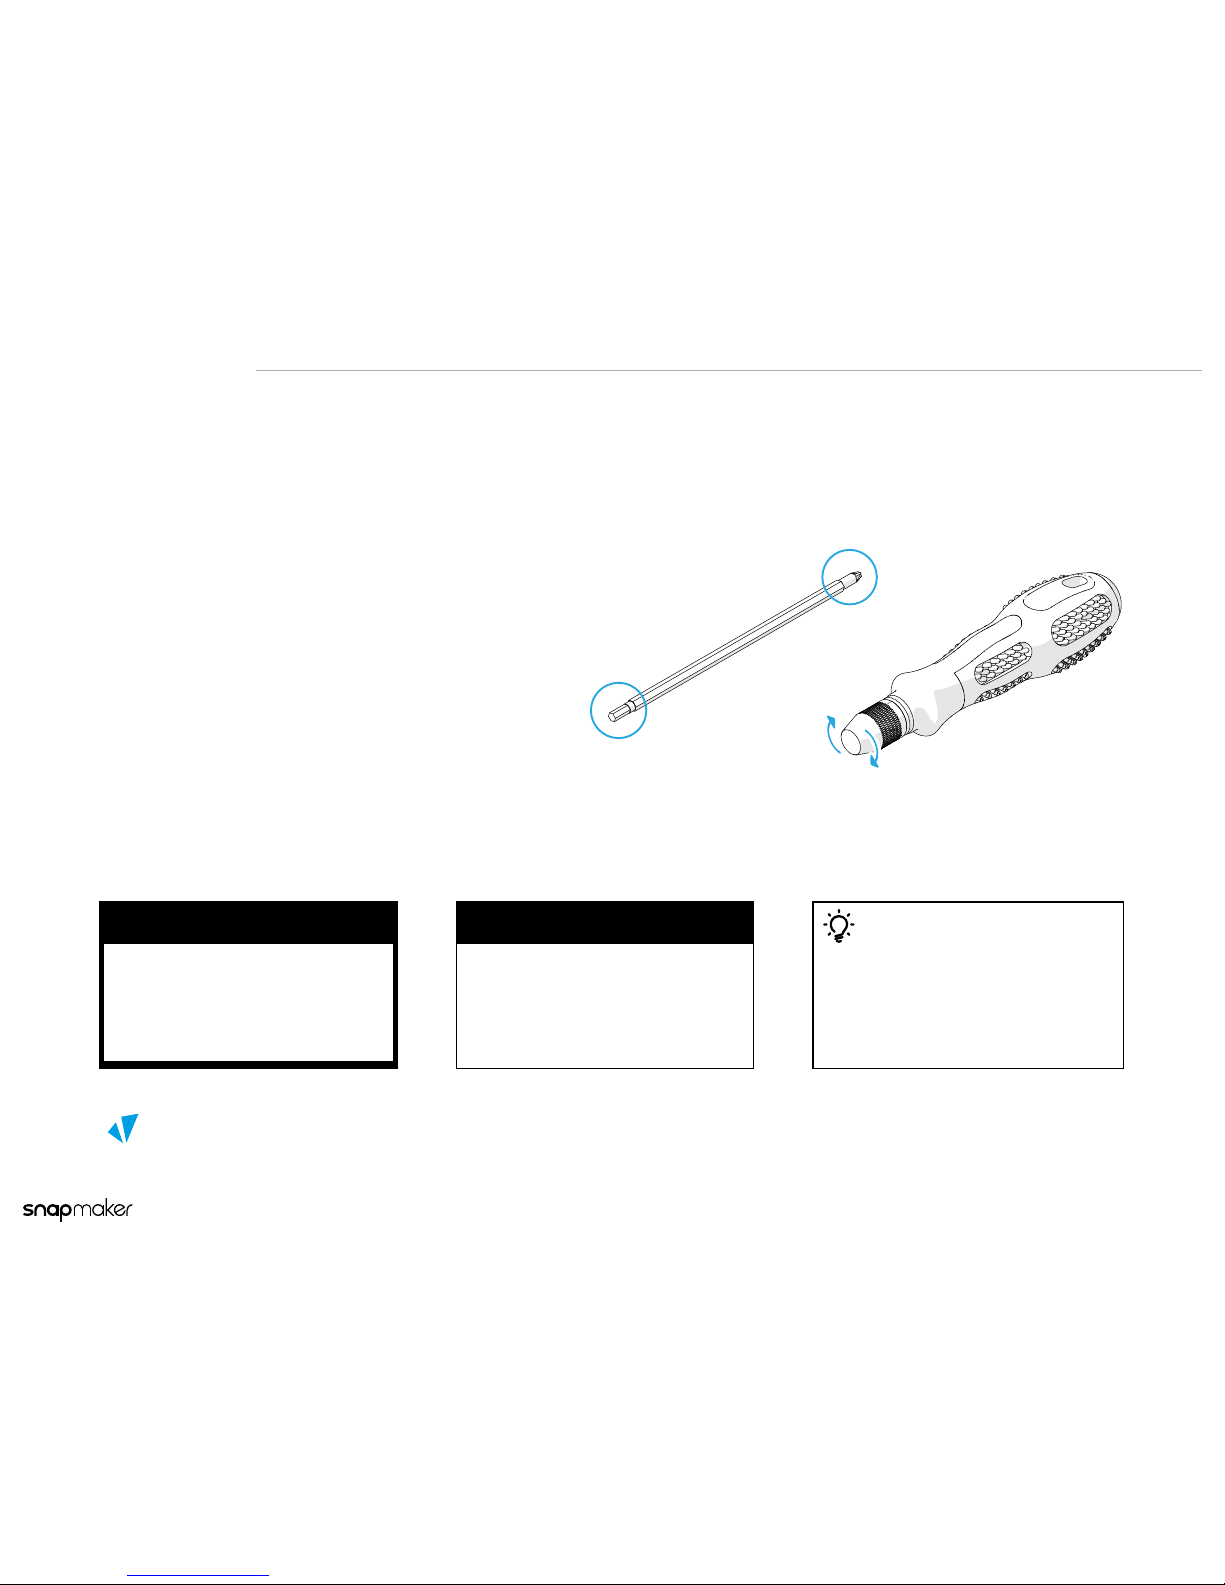
Get the Screwdriver Ready
Used Symbols
The screwdriver is dual-purpose. Change
the blade as you need.
Caution
Tips
Notice
Ignoring this type of message might
result in malfunction or damage of the
machine.
Make sure that the highlighted part is facing the right way.
Details you should be aware of throughout the process.
Tips offer you convenient operations and
additional options.
!
Page 4
Transform into a CNC Carver
4
Guide for CNC Carving
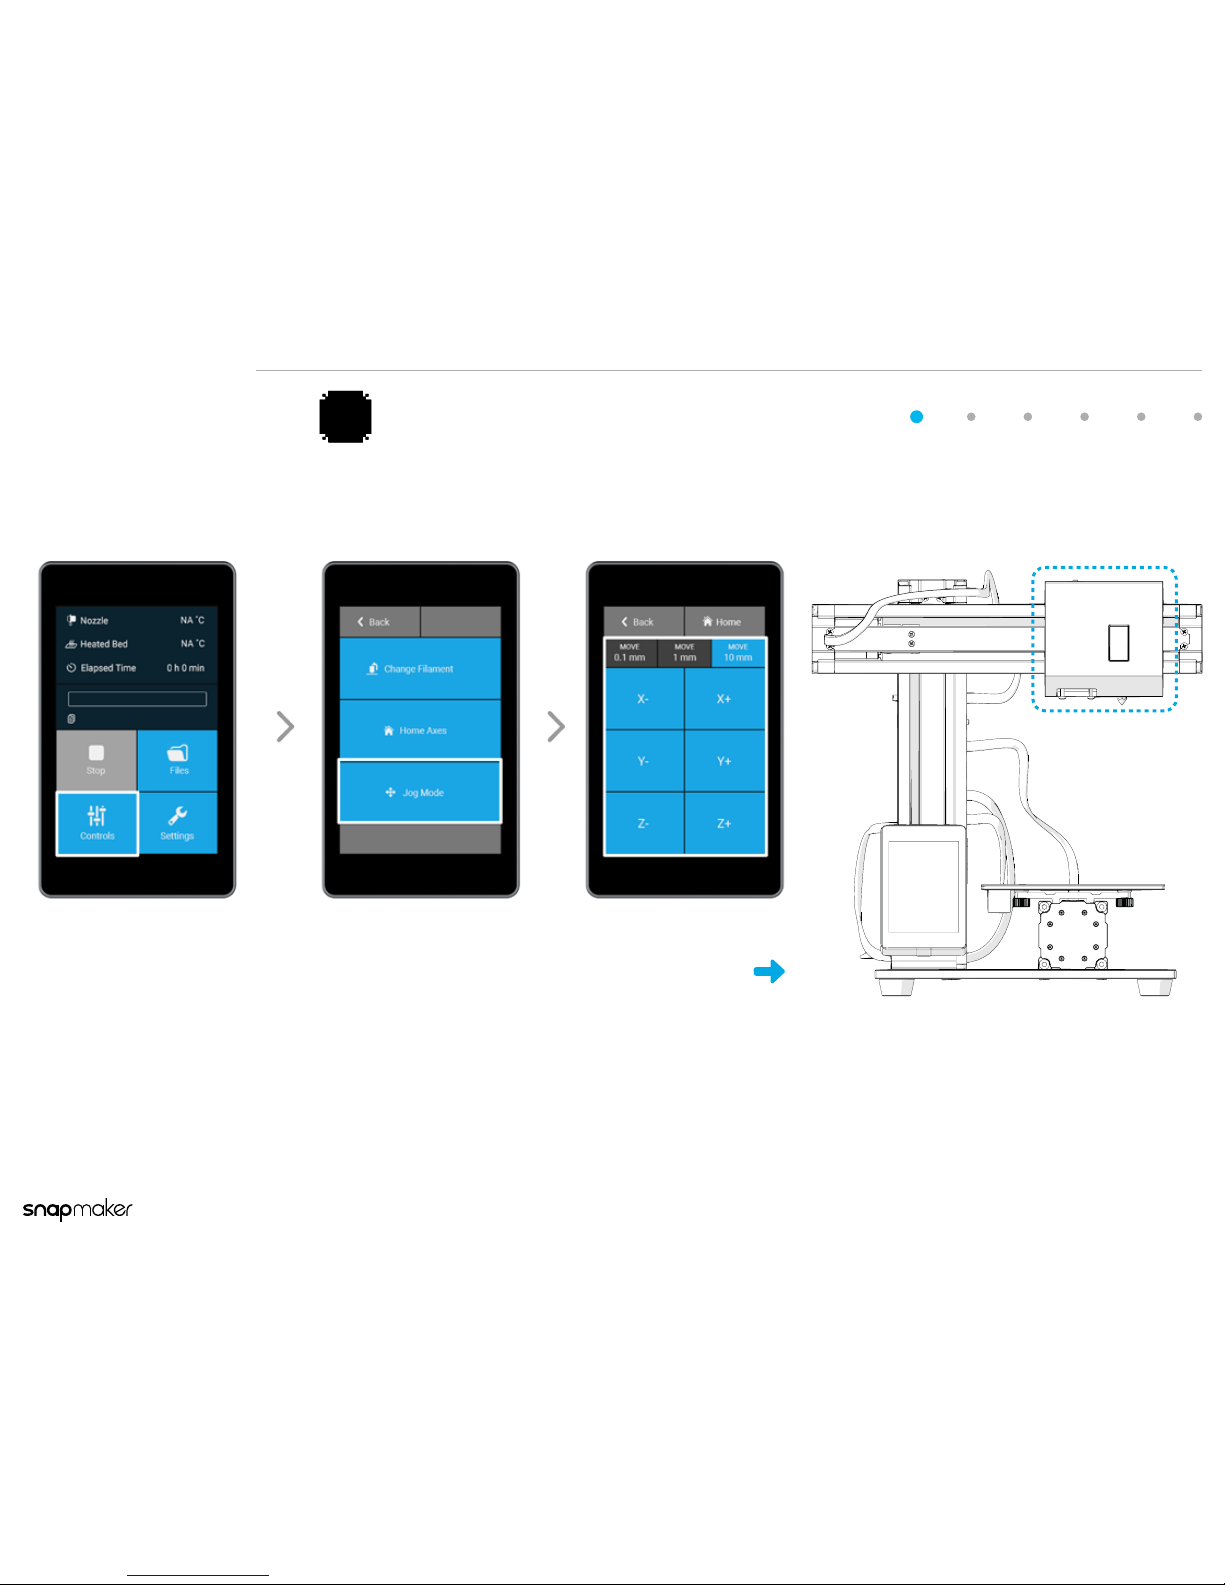
Reposition the 3D Printing Module
1
On the Touch Screen, go to Controls > Jog Mode > X+/Z+. Keep
tapping X+/Z+ until the 3D Printing Module is moved to the
illustrated position.
Page 5
Transform into a CNC Carver
5
Guide for CNC Carving
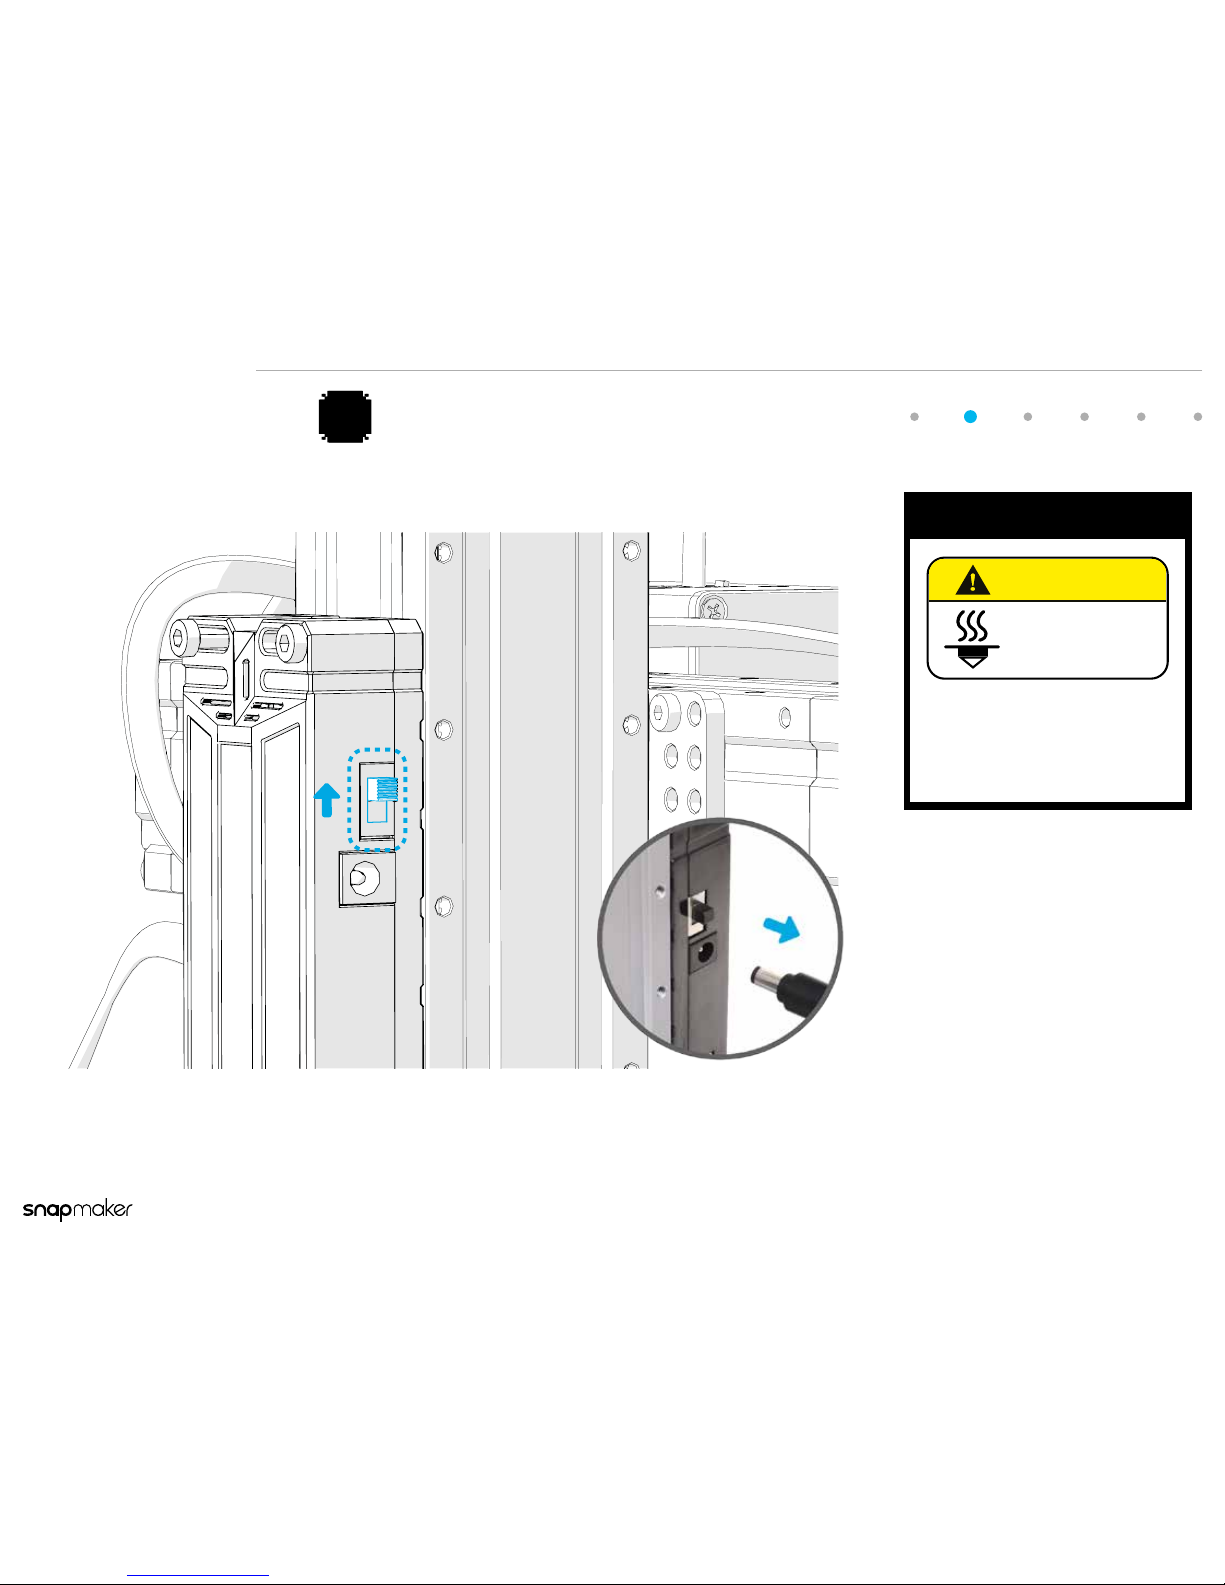
Power Off the Machine and Unplug the Power Adapter
2
OFF
DO NOT TOUCH
High Temperature
CAUTION
Caution
If you just nished 3D printing, wait
about 5 minutes for the 3D Printing
Module and Heated Bed to cool off
after the machine is powered off.
!
Page 6
Transform into a CNC Carver
6
Guide for CNC Carving
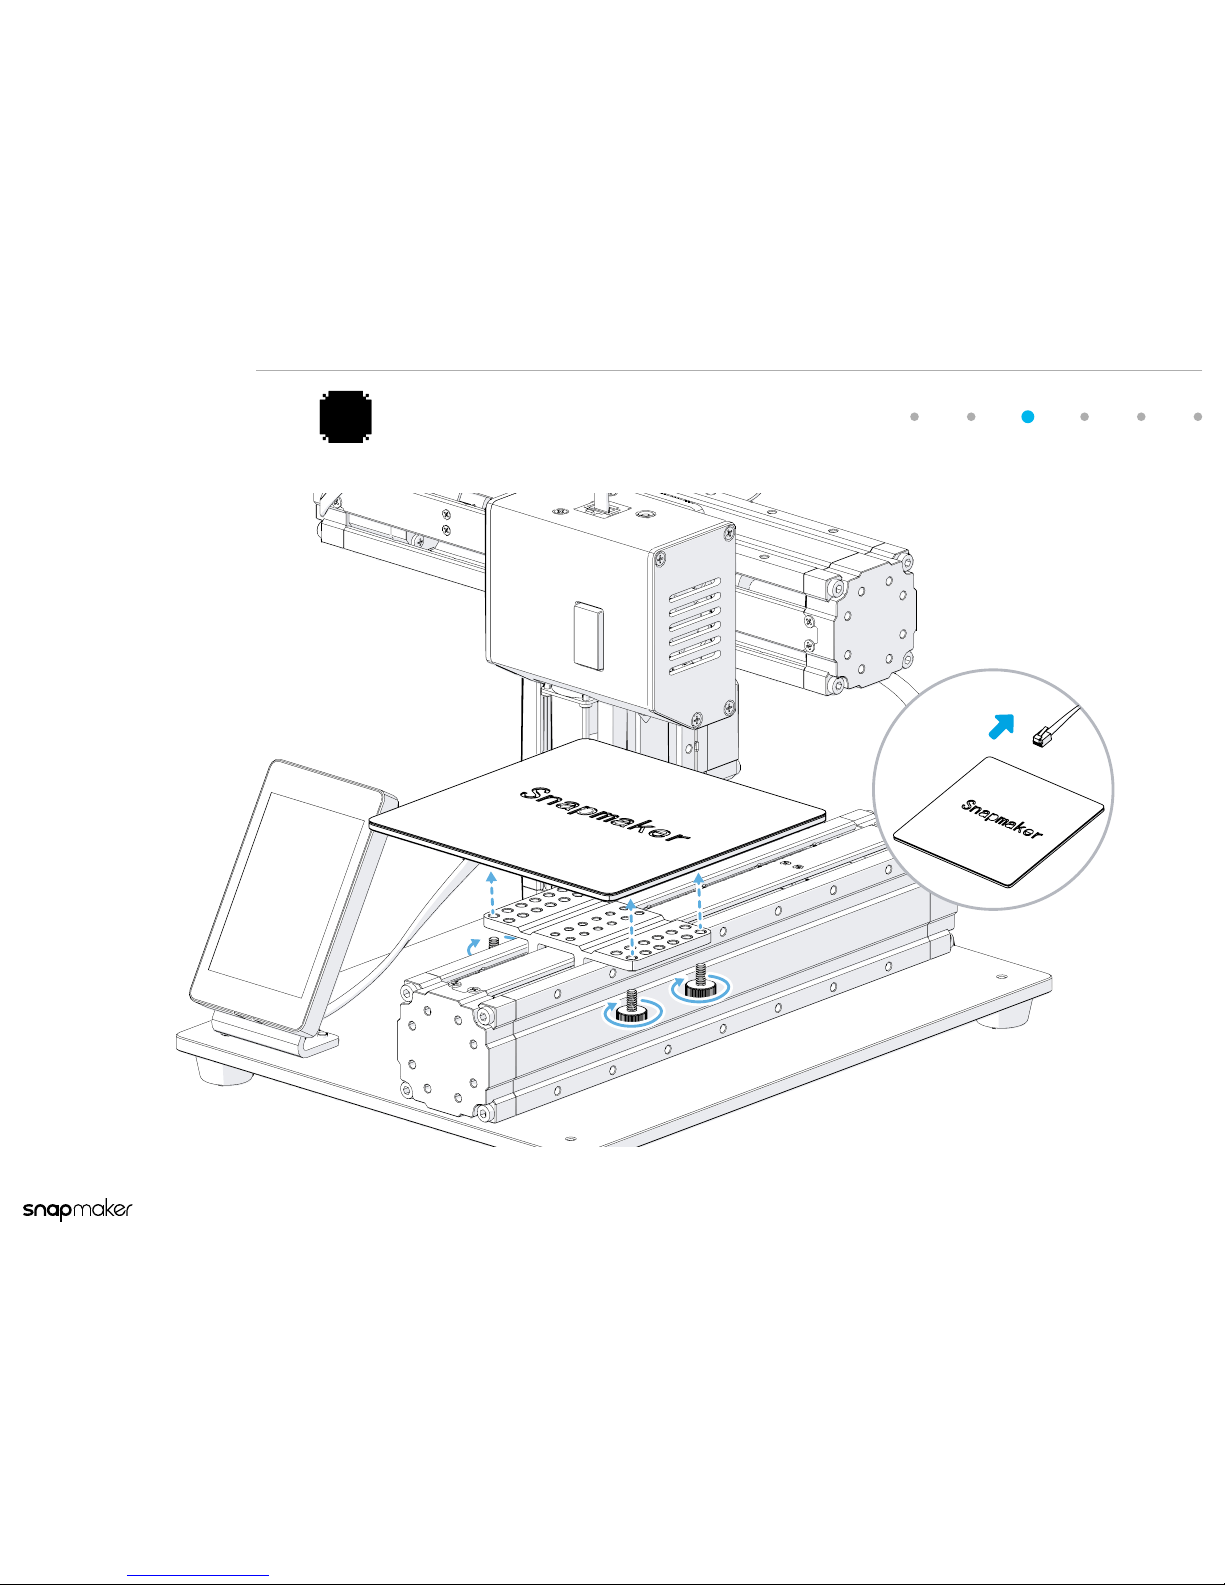
Unplug the Heated Bed Cable and Detach the Heated Bed
from the Y Axis
3
Page 7
Transform into a CNC Carver
7
Guide for CNC Carving
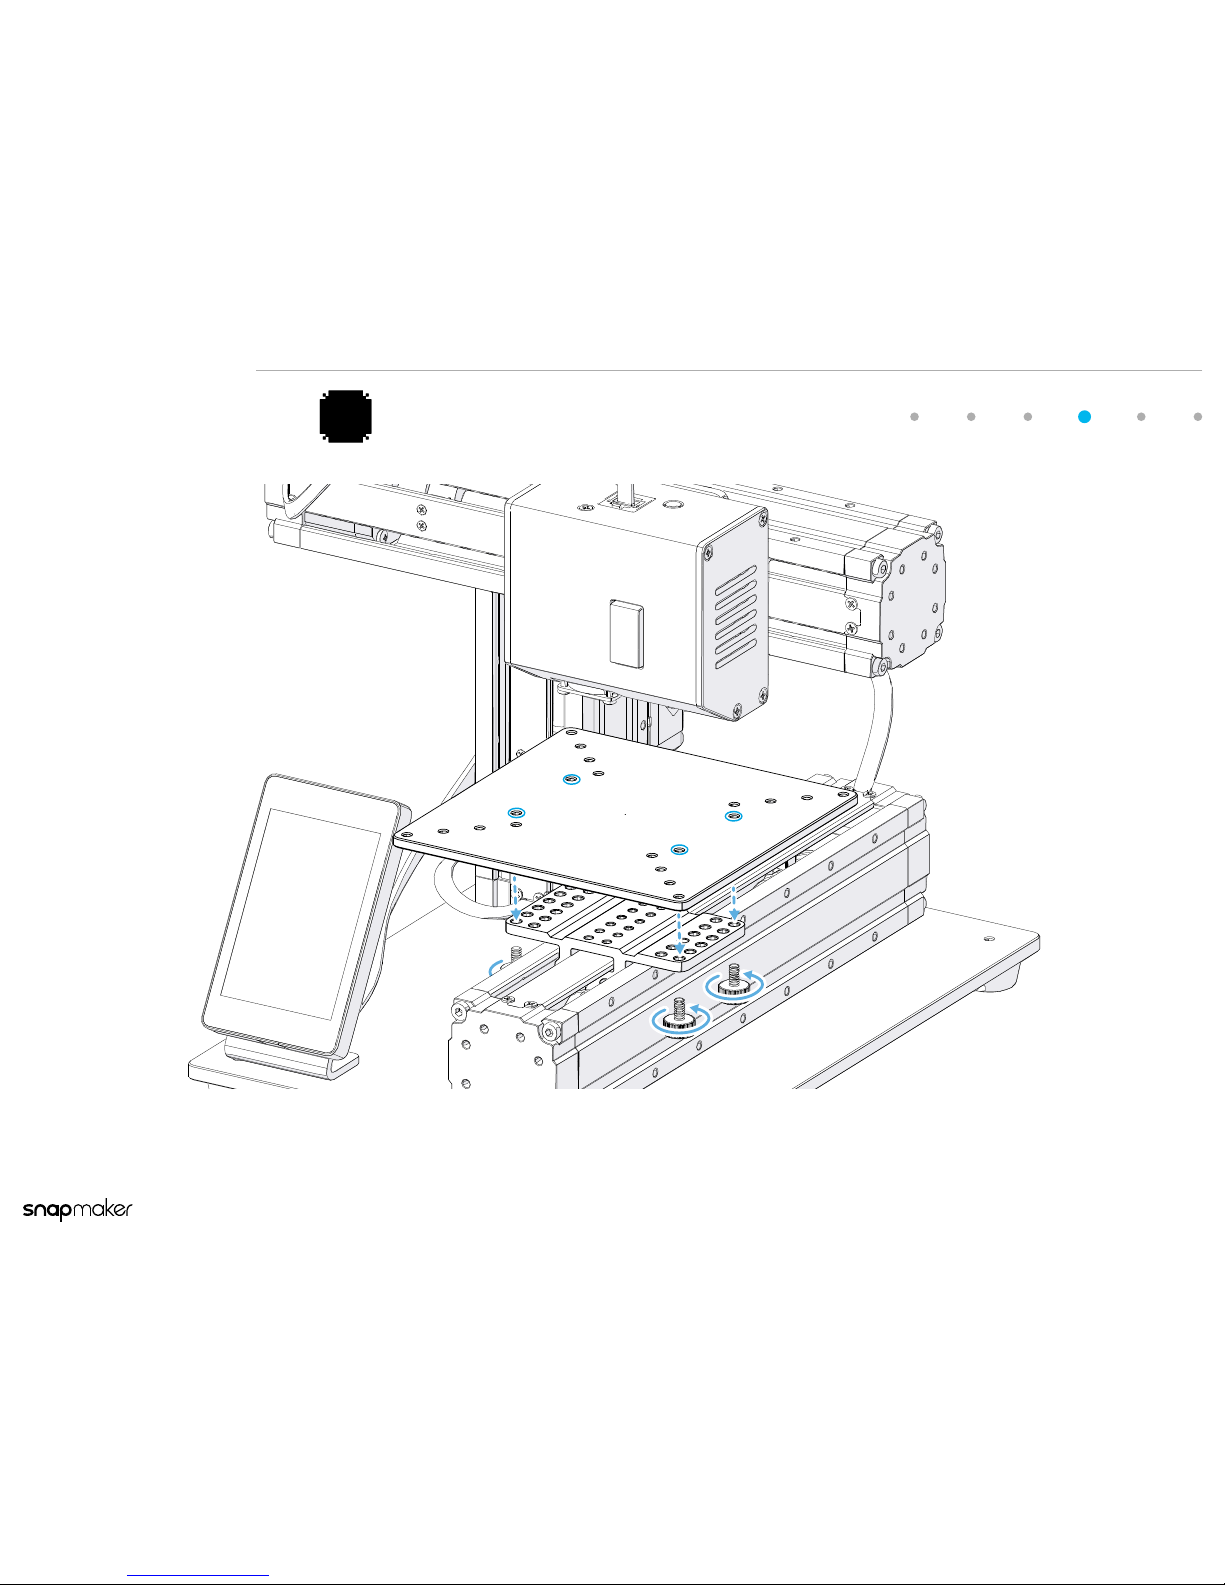
Attach the Engraving & Carving Platform.
4
Page 8
Transform into a CNC Carver
8
Guide for CNC Carving
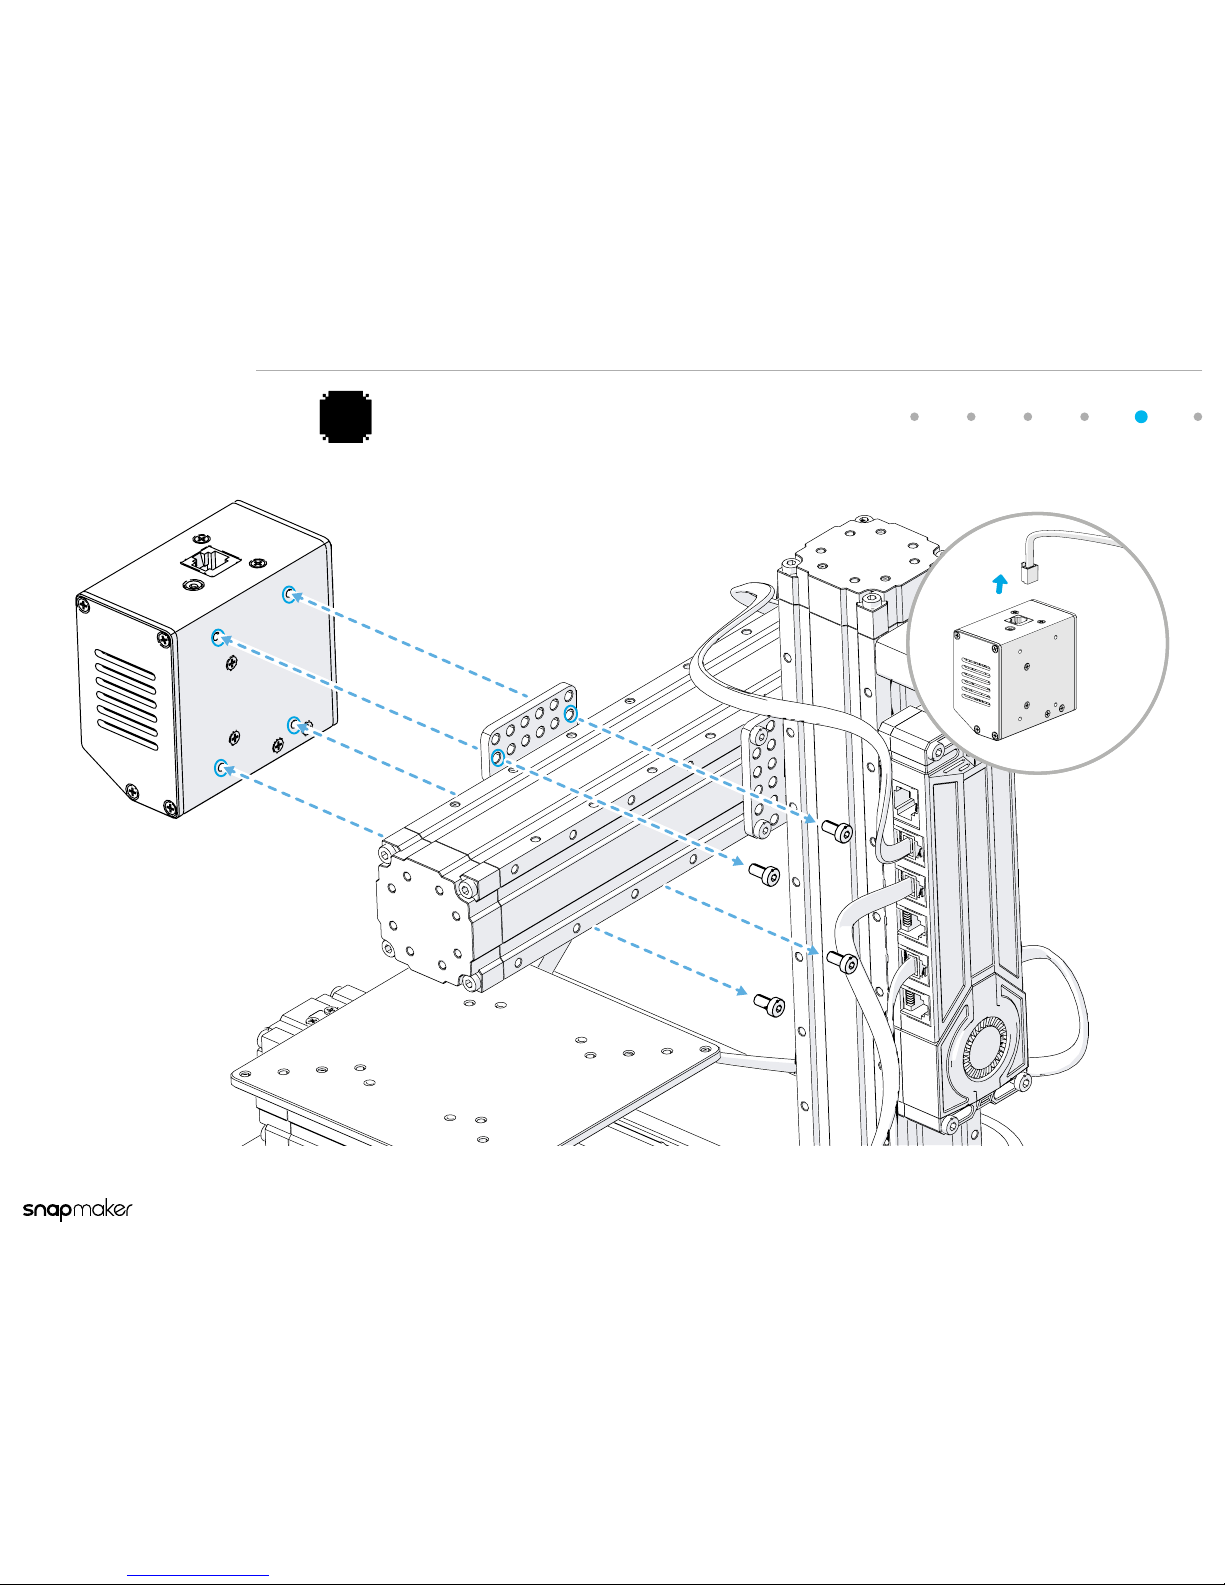
Unplug the Module Cable and Detach the 3D Printing
Module from the X Axis
5
Page 9
Transform into a CNC Carver
9
Guide for CNC Carving
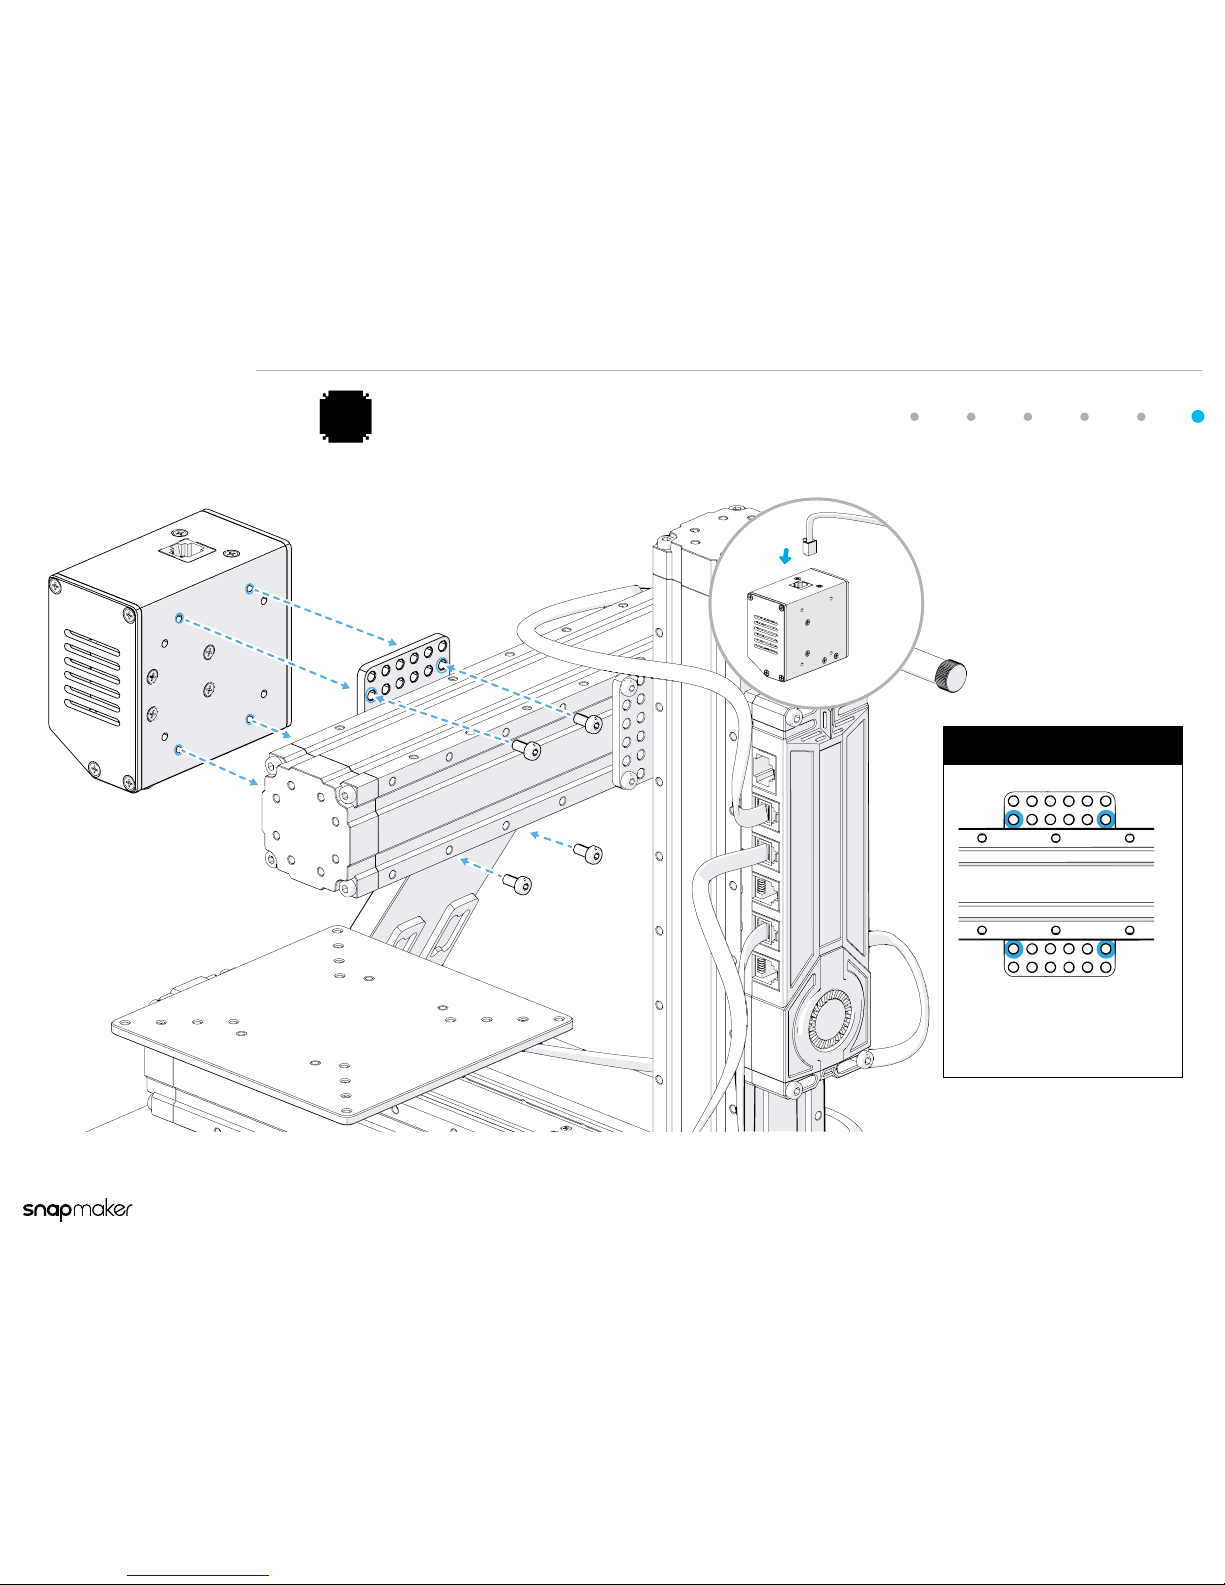
Attach the CNC Carving Module to the X Axis and Plug in the
Module Cable
6
The installation position of the
srews must be the same as
illustrated.
Notice
Page 10
10
Guide for CNC Carving
1
2
3
5
Screen
1
2
3
5
Power
(RJ 45)
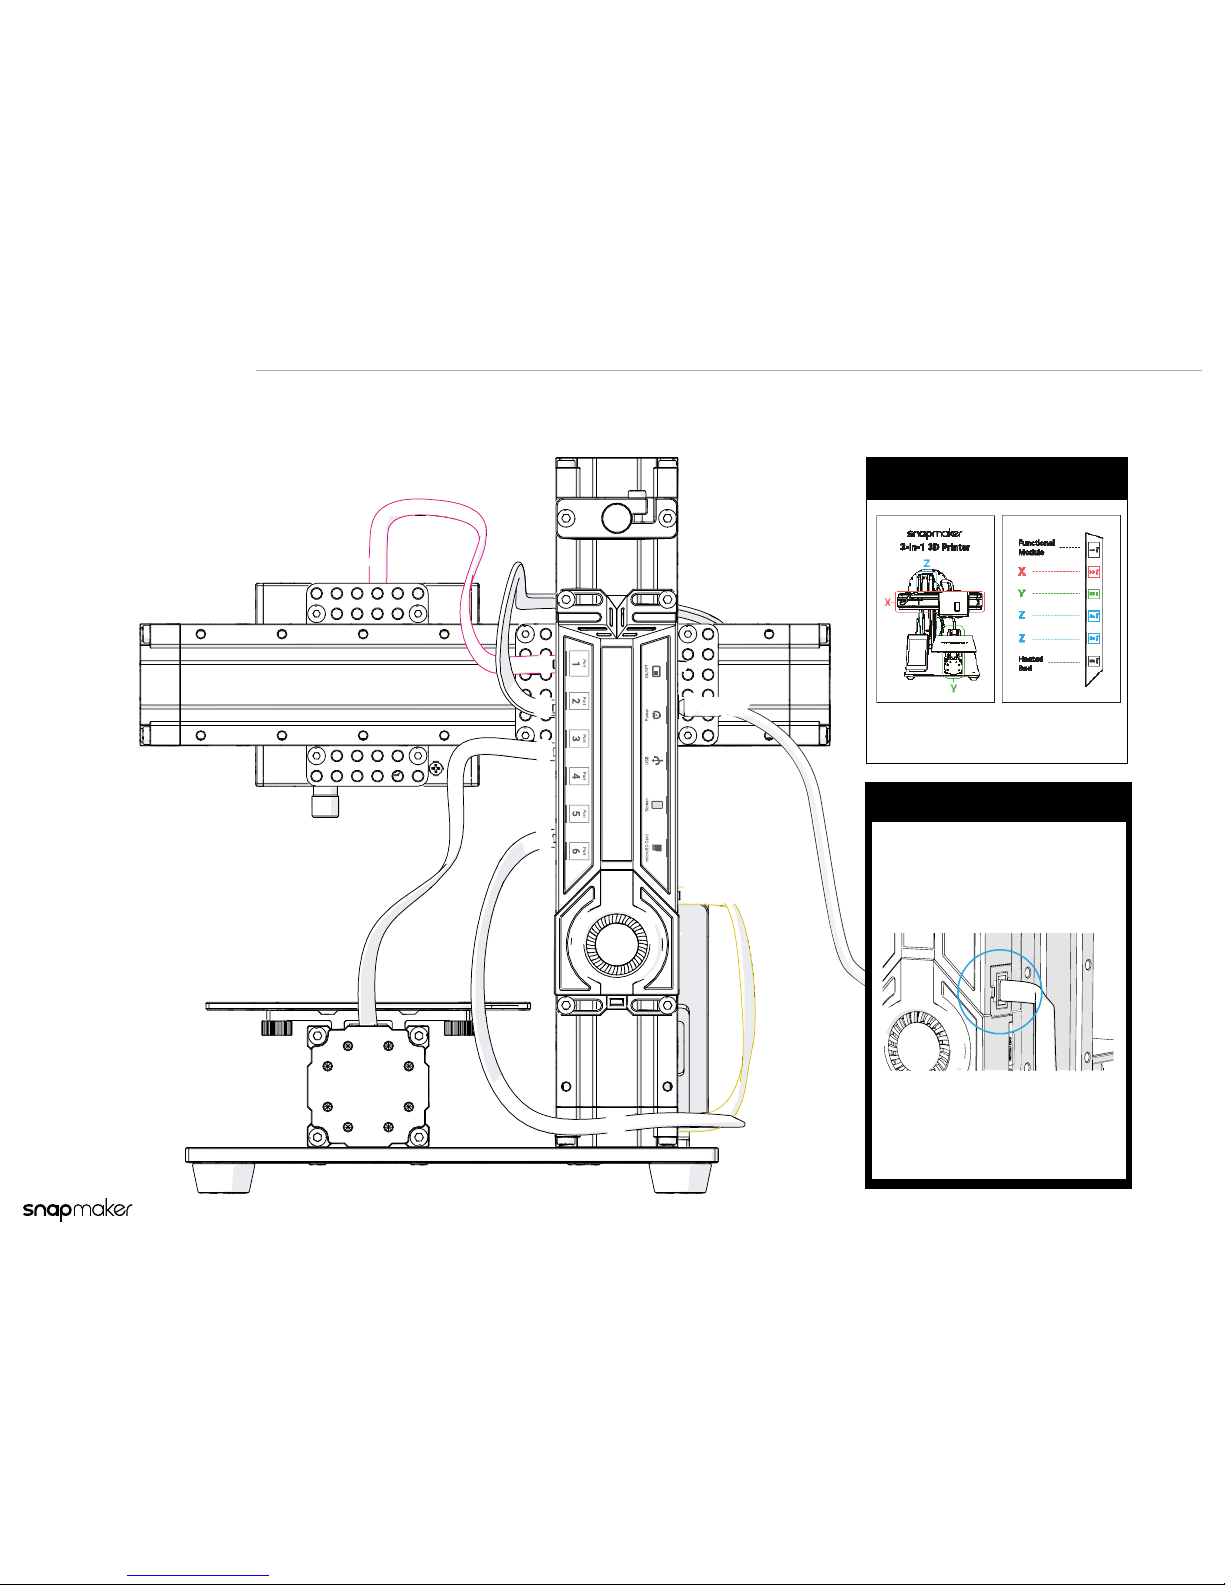
Make Sure the Cables are Connected Correctly
Caution
Do NOT connect or disconnect the
cables or USB when the machine
is powered on.
!
Make sure all the cables are
correctly and properly connected as
illustrated before you power on the
machine.
You can also connect the cables
according to the provided card.
Notice
Page 11
11
Guide for CNC Carving
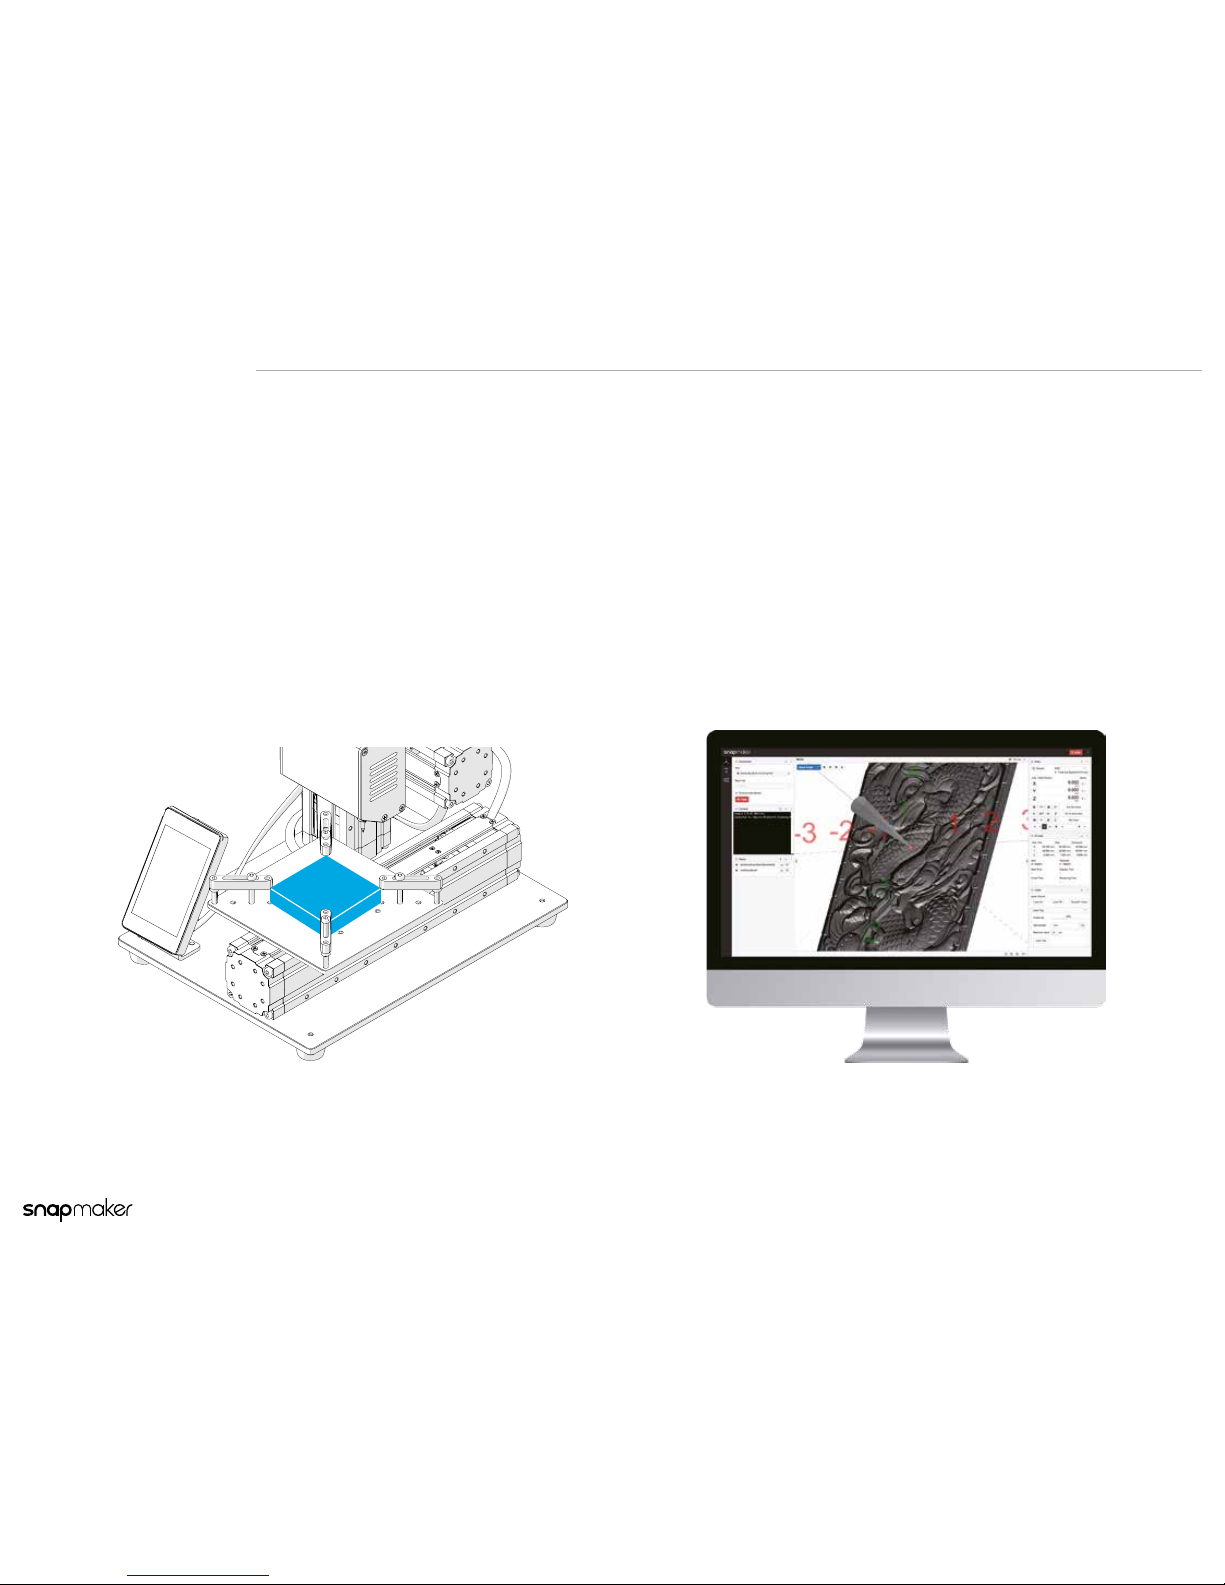
Start CNC Carving
Prepare Start
Improperly operating the Snapmaker can cause injury. It’s recommended that experienced
users perform the following actions. Keep a safe distance from the machine when it’s carving.
For more safety information, please visit manual.snapmaker.com/cnc_carving.
>>
Page 12
Prepare
12
Guide for CNC Carving
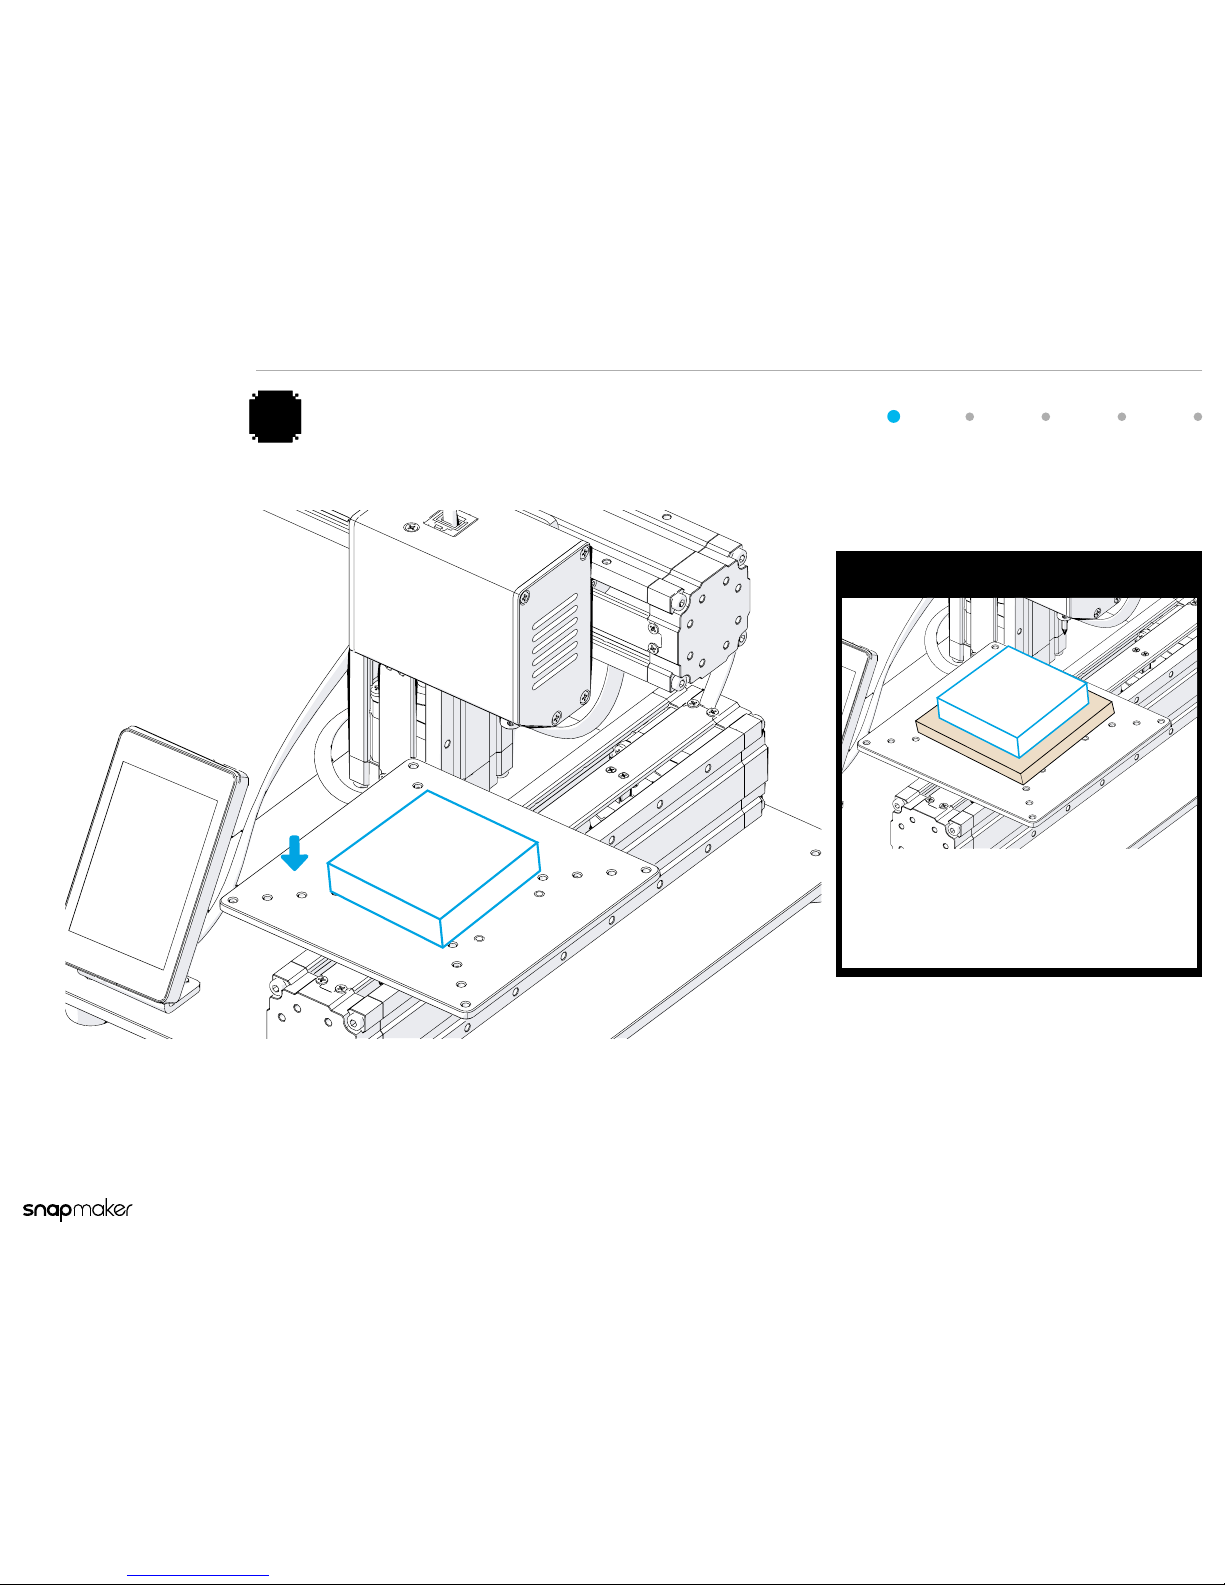
Place the Material
1
Put the material you want to carve on the platform.
Caution
!
If you need to cut through the material, a
spoilboard must be put under the material. If no
spoilboard is used, the CNC bit and the Engraving
& Carving Platform will be damage.
Page 13
Prepare
13
Guide for CNC Carving
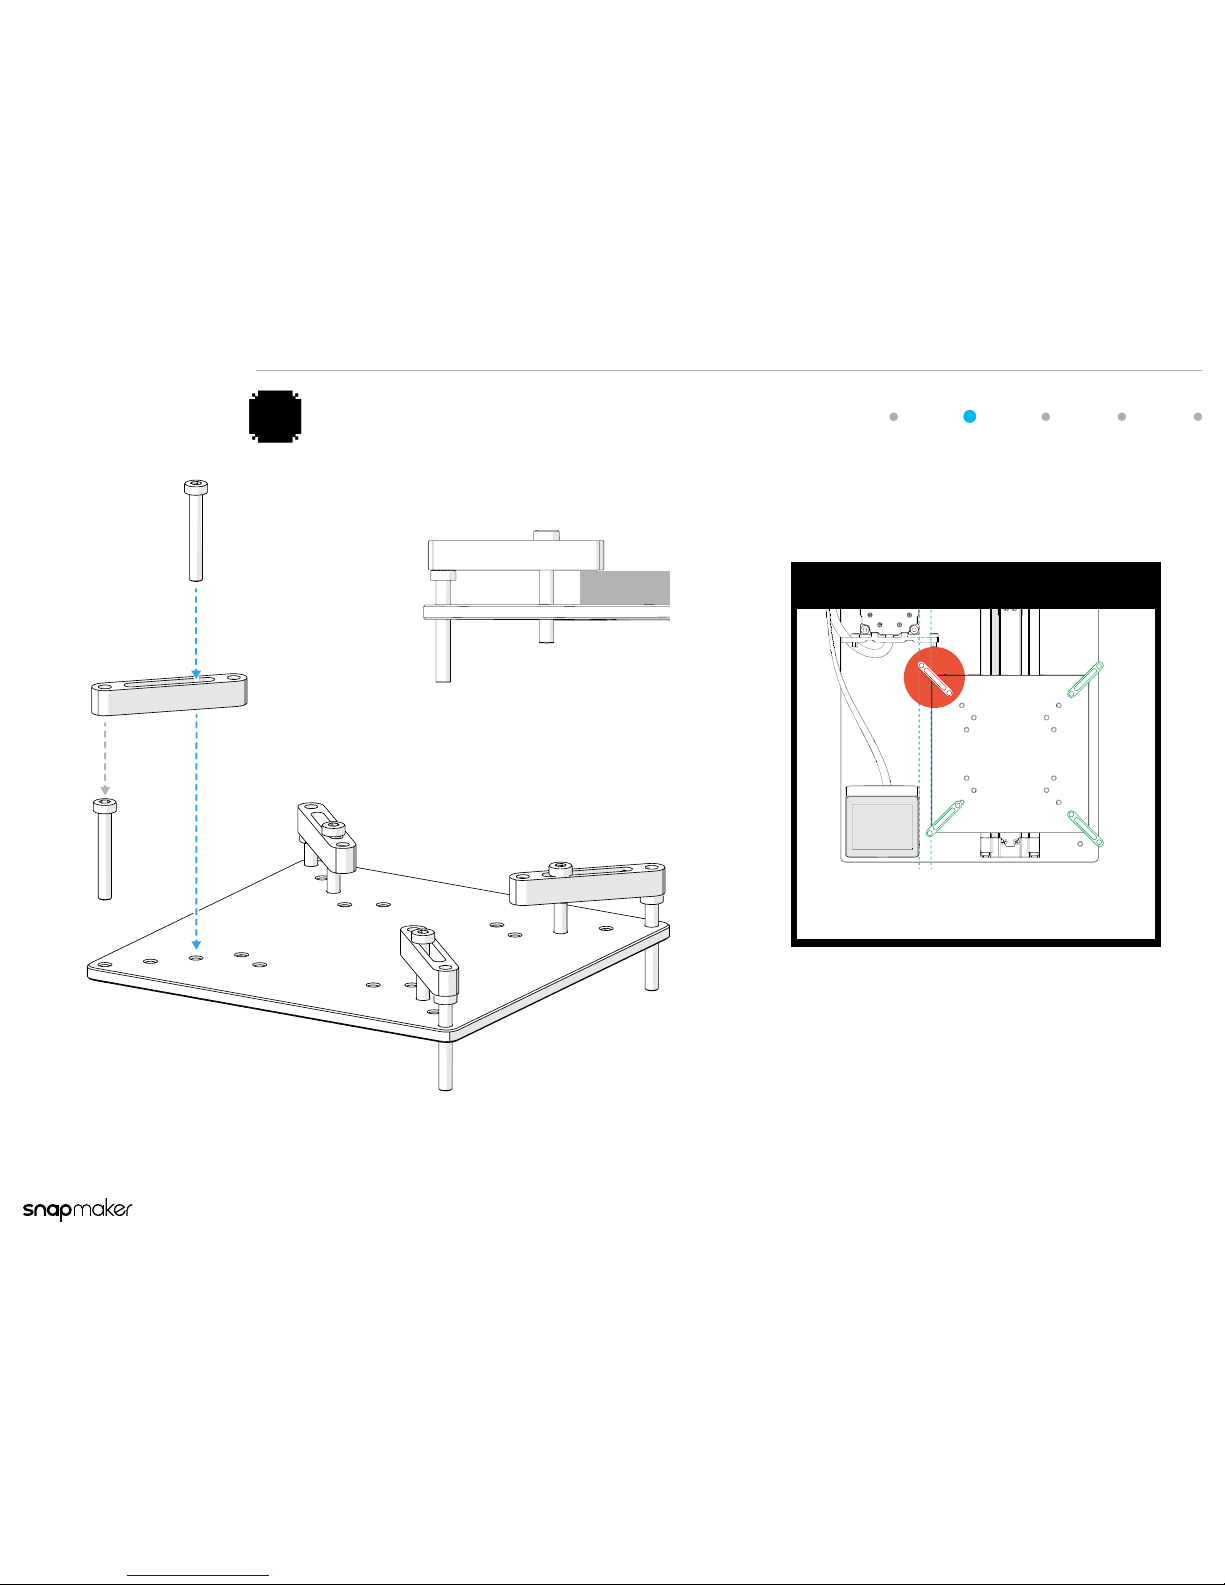
Immobilize the Material
2
Use the xtures to immobilize the material.
Caution
!
Make sure the xtures don’t impede the movement
of the linear modules.
Page 14
Prepare
14
Guide for CNC Carving
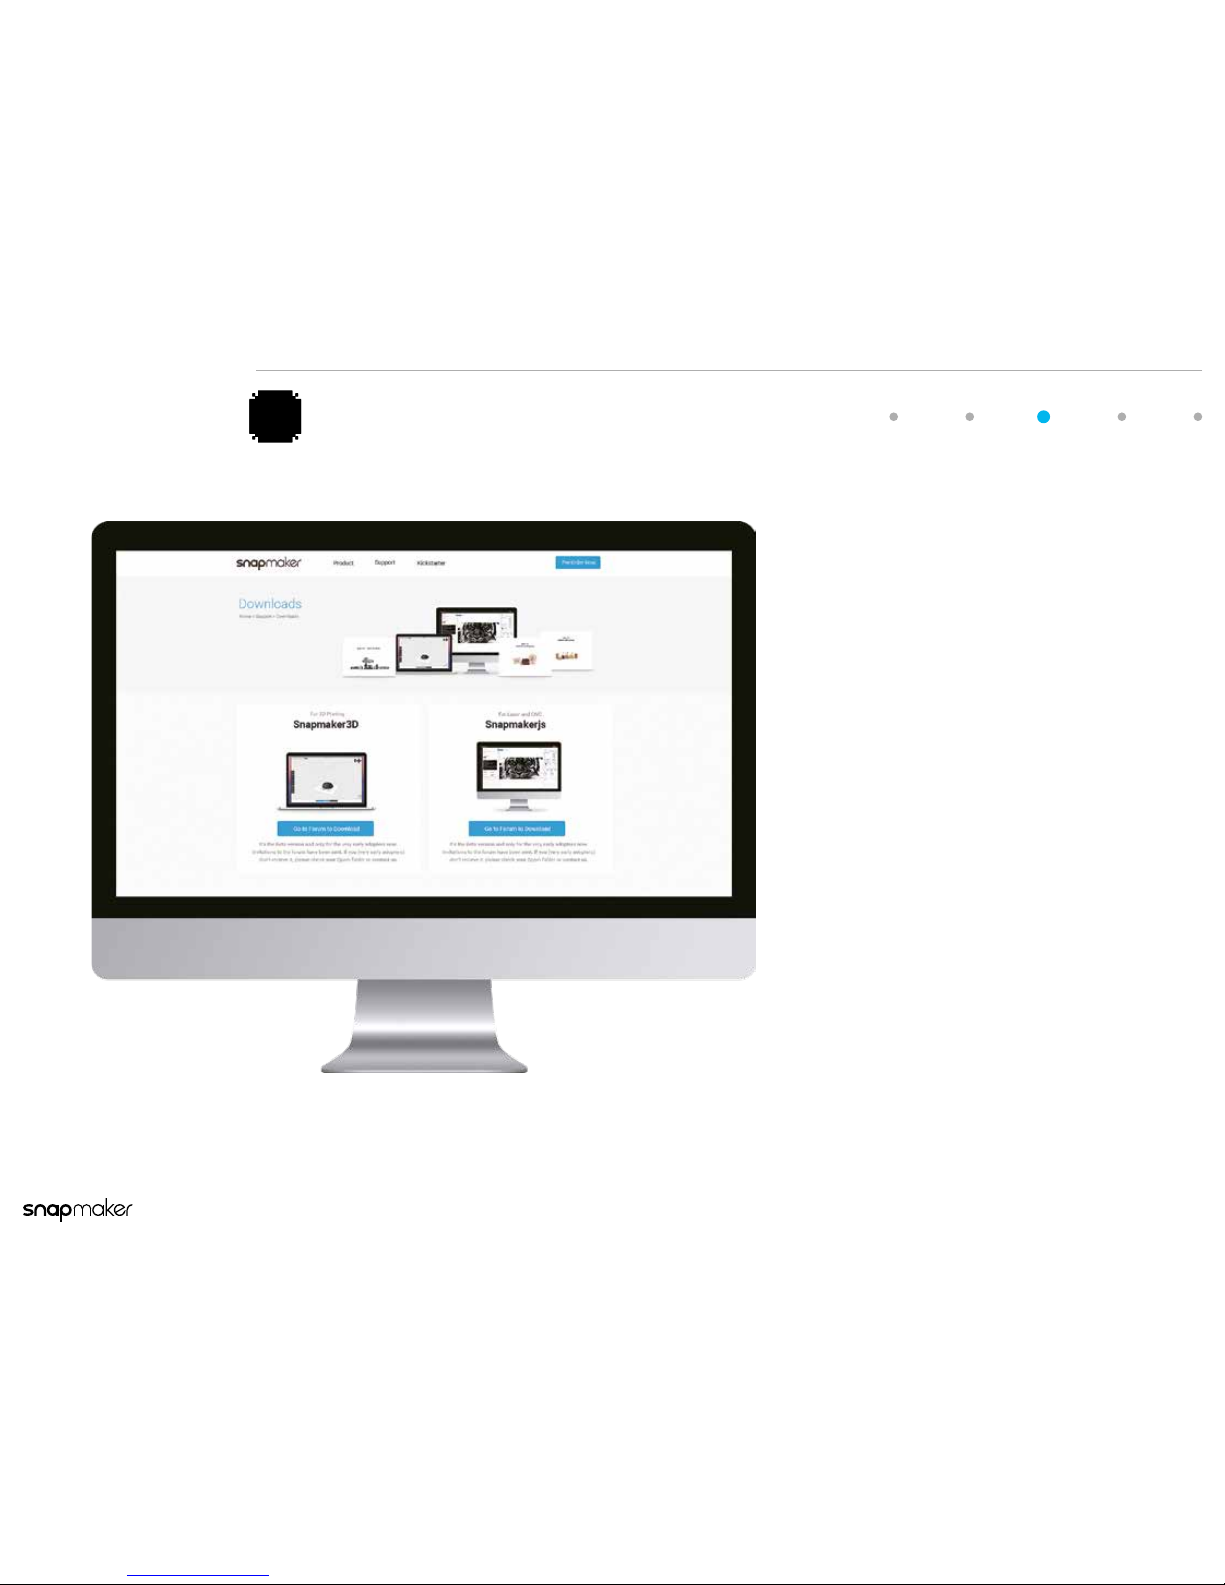
Download the Software
3
Download the software from
our ofcial website:
snapmaker.com/download
Page 15
Prepare
15
Guide for CNC Carving
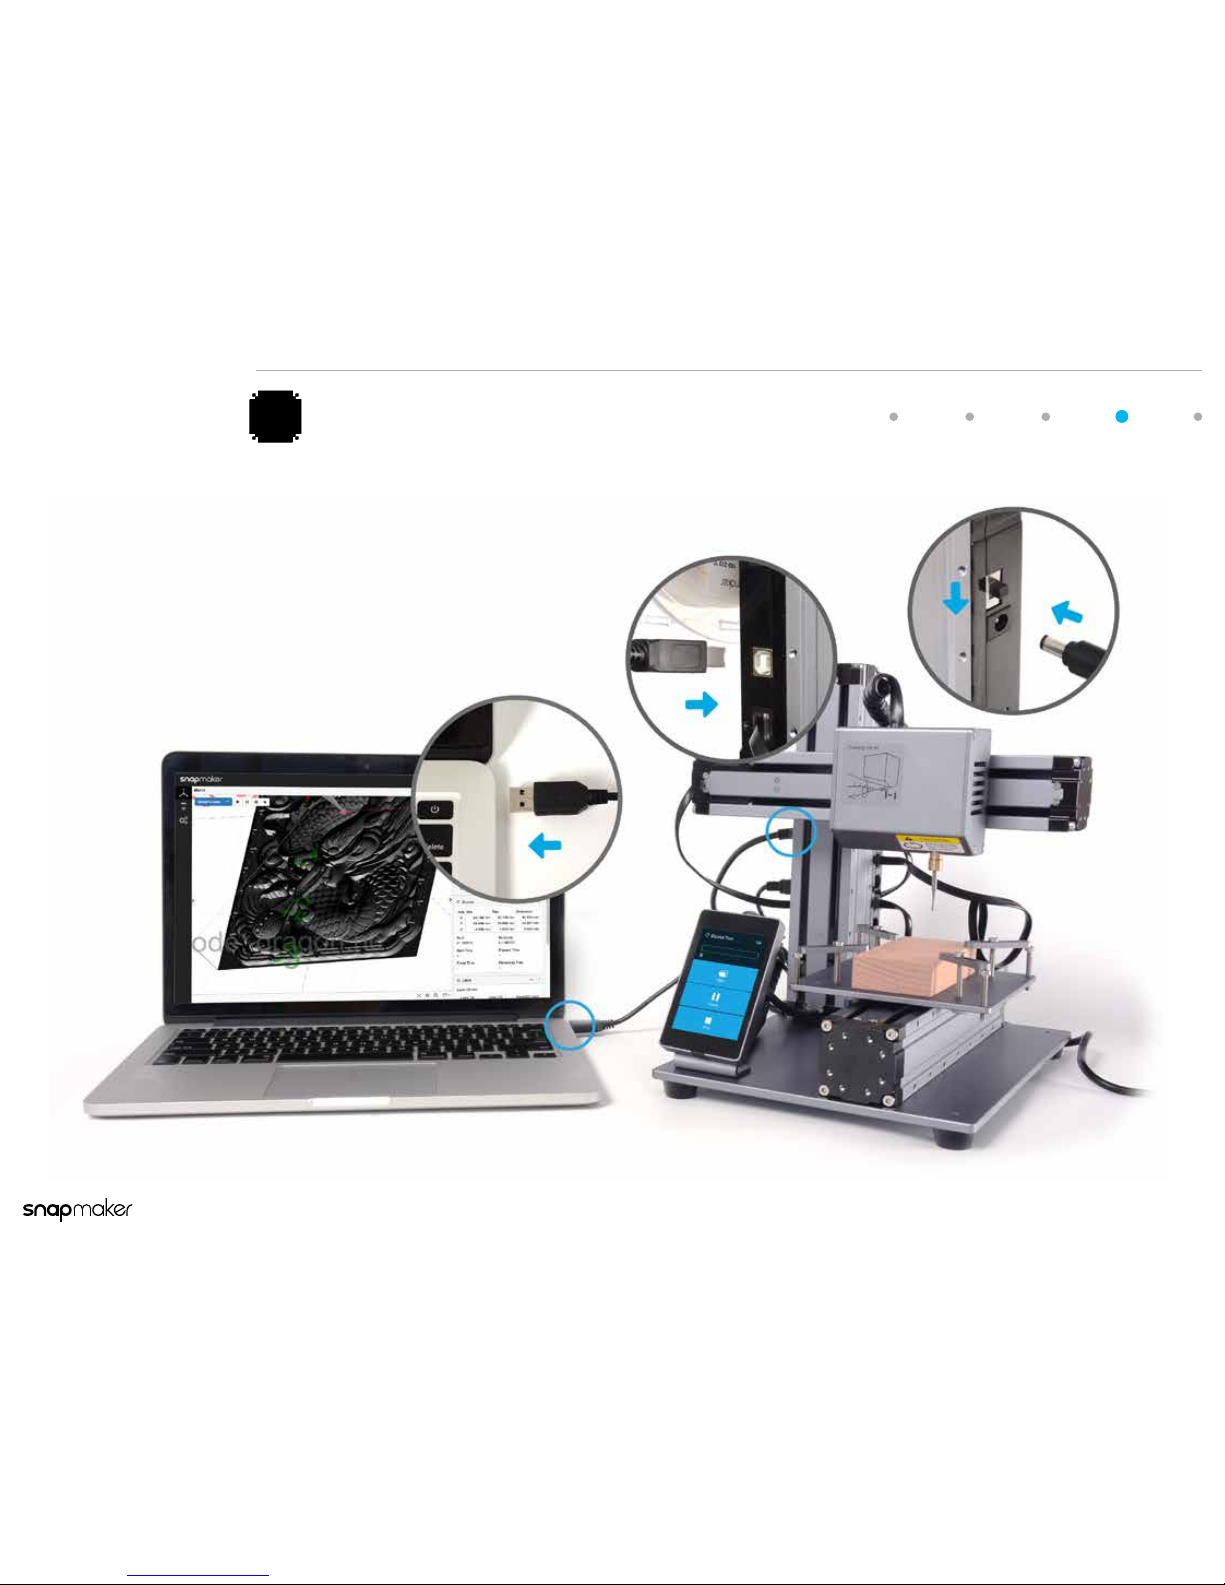
Connect to the Computer
4
Connect the computer to the machine using the provided USB Cable.
Connect the power adapter and power on the machine.
Page 16
Prepare
16
Guide for CNC Carving
1
2
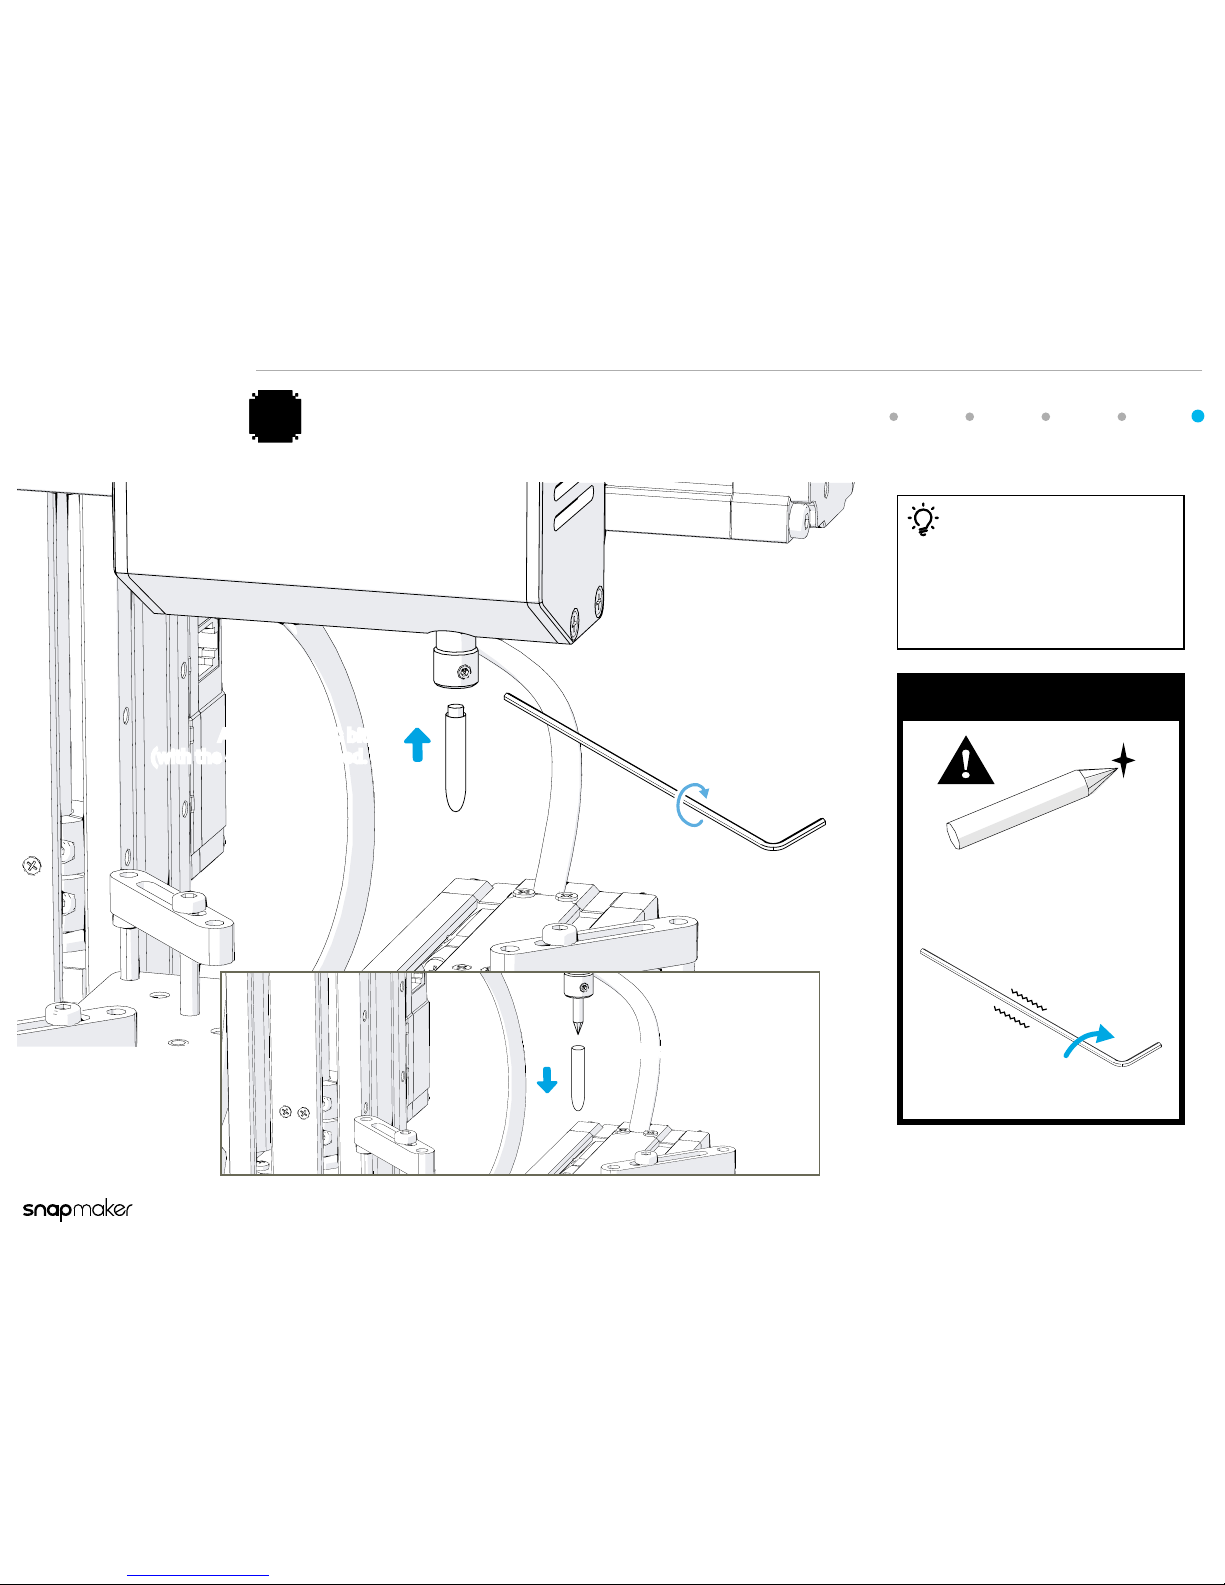
Tighten the screw.
Attach the CNC bit
(with the cap) as you need.
Attach the CNC Bit
5
Caution
The CNC bits are sharp. Please handle
them carefully and keep them out of
reach of children.
Turn the screw as tight as possible.
!
Tips
The Flat End Mill is usually used for
cutting materials, while the Carving
V-bit is usually used for engraving.
3
Take away the cap.
Page 17
17
Guide for CNC Carving
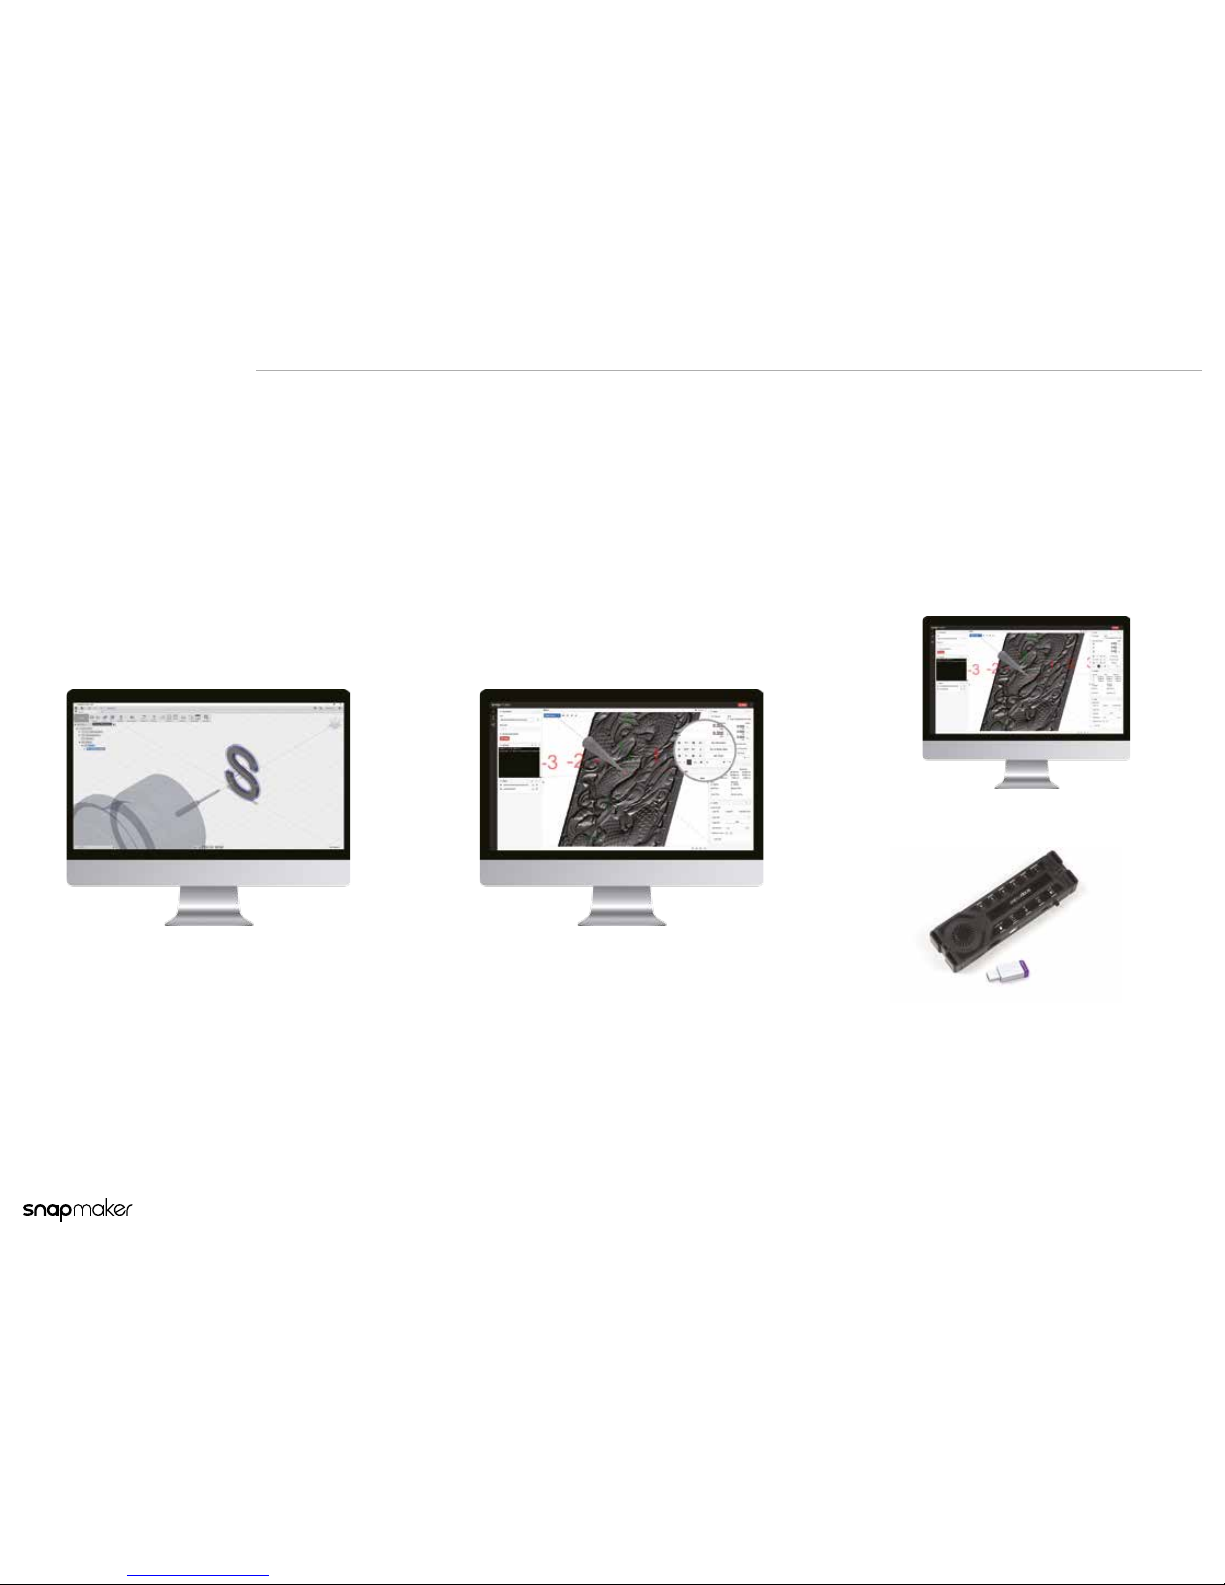
Start
We only provide a general description of the setup procedure in this guide. Please
refer to the online manual for details: manual.snapmaker.com/cnc_carving/
Set Work Origin
>>
>>
>>
Generate G-code
Choose a Way to Carve
Page 18
Start
18
Guide for CNC Carving
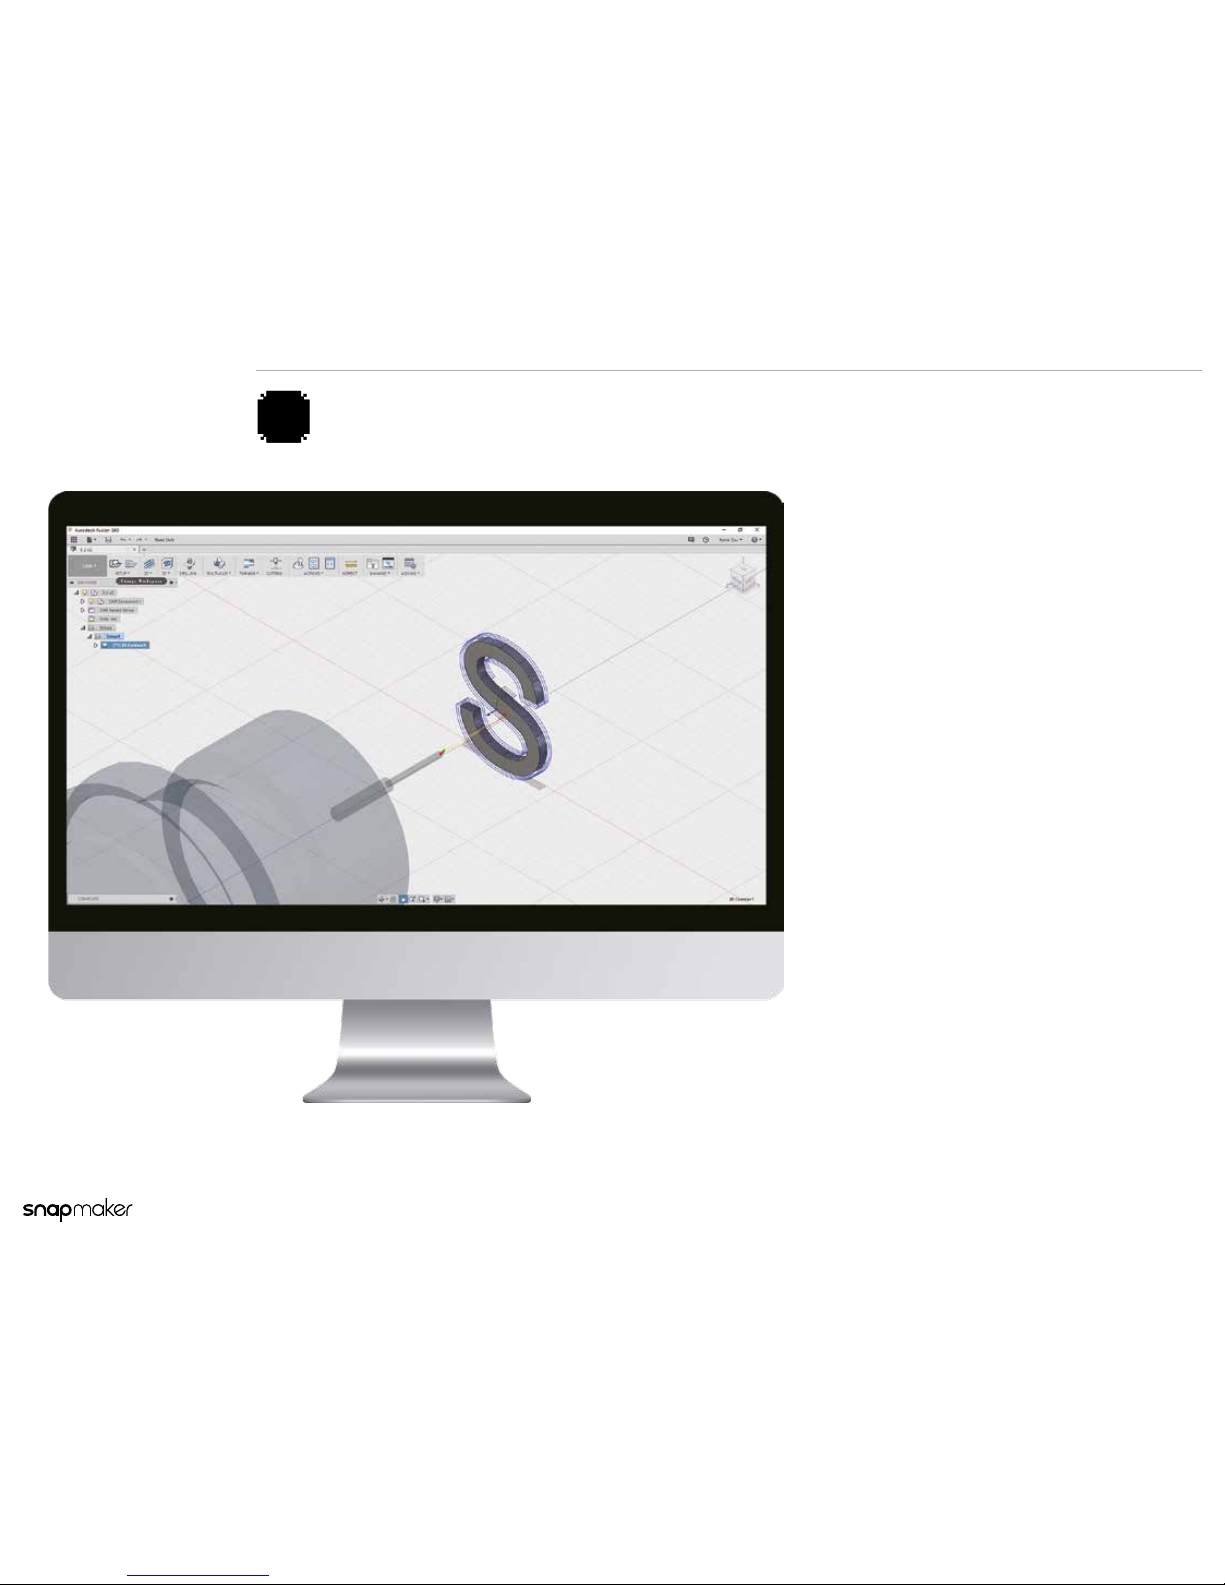
1
Generate G-code
Generate G-code of the le you want carve
using Fusion 360.
For more information, please visit:
manual.snapmaker.com/cnc_carving/
generate_g-code_using_fusion_360.html
Page 19
Start
19
Guide for CNC Carving
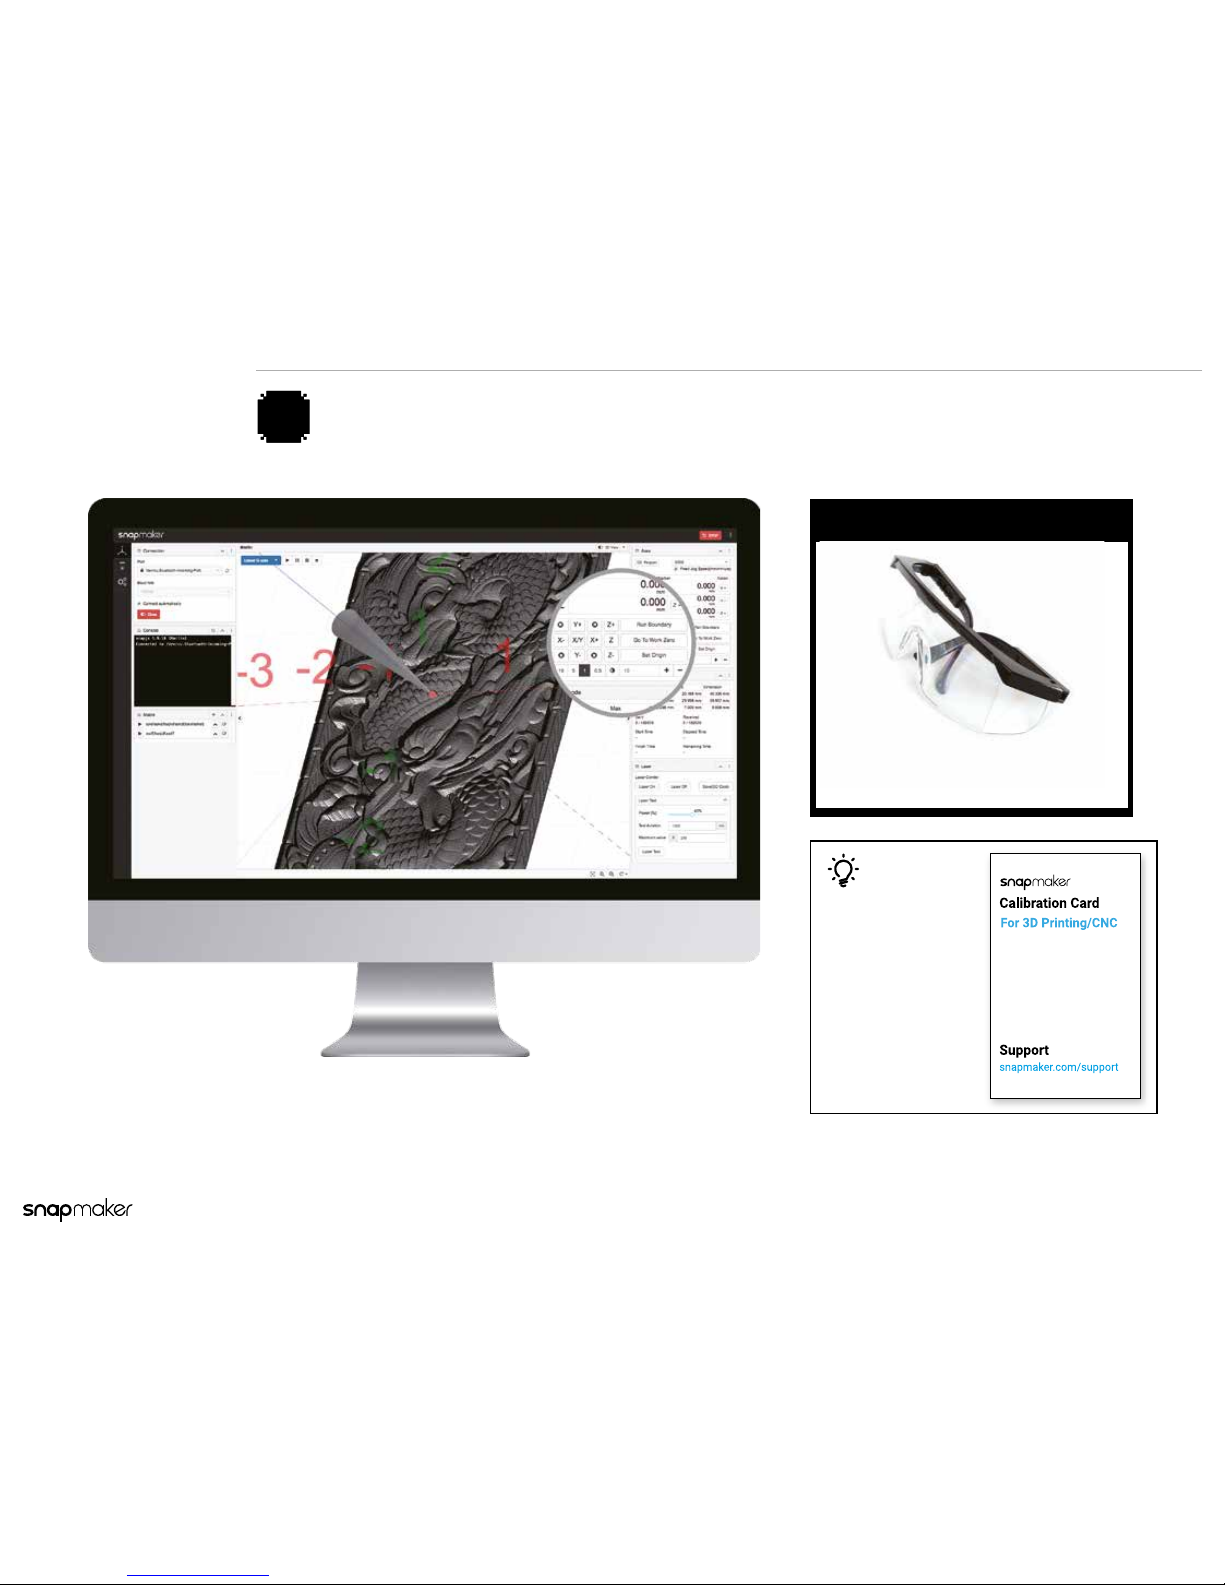
Caution
Make sure you wear the CNC Safety Glasses
before setting work origin.
!
2
Set Work Origin
Use these buttons to set work origin.
Tips
You can also use the
Calibration Card to
calibrate.
Page 20
Start
20
Guide for CNC Carving
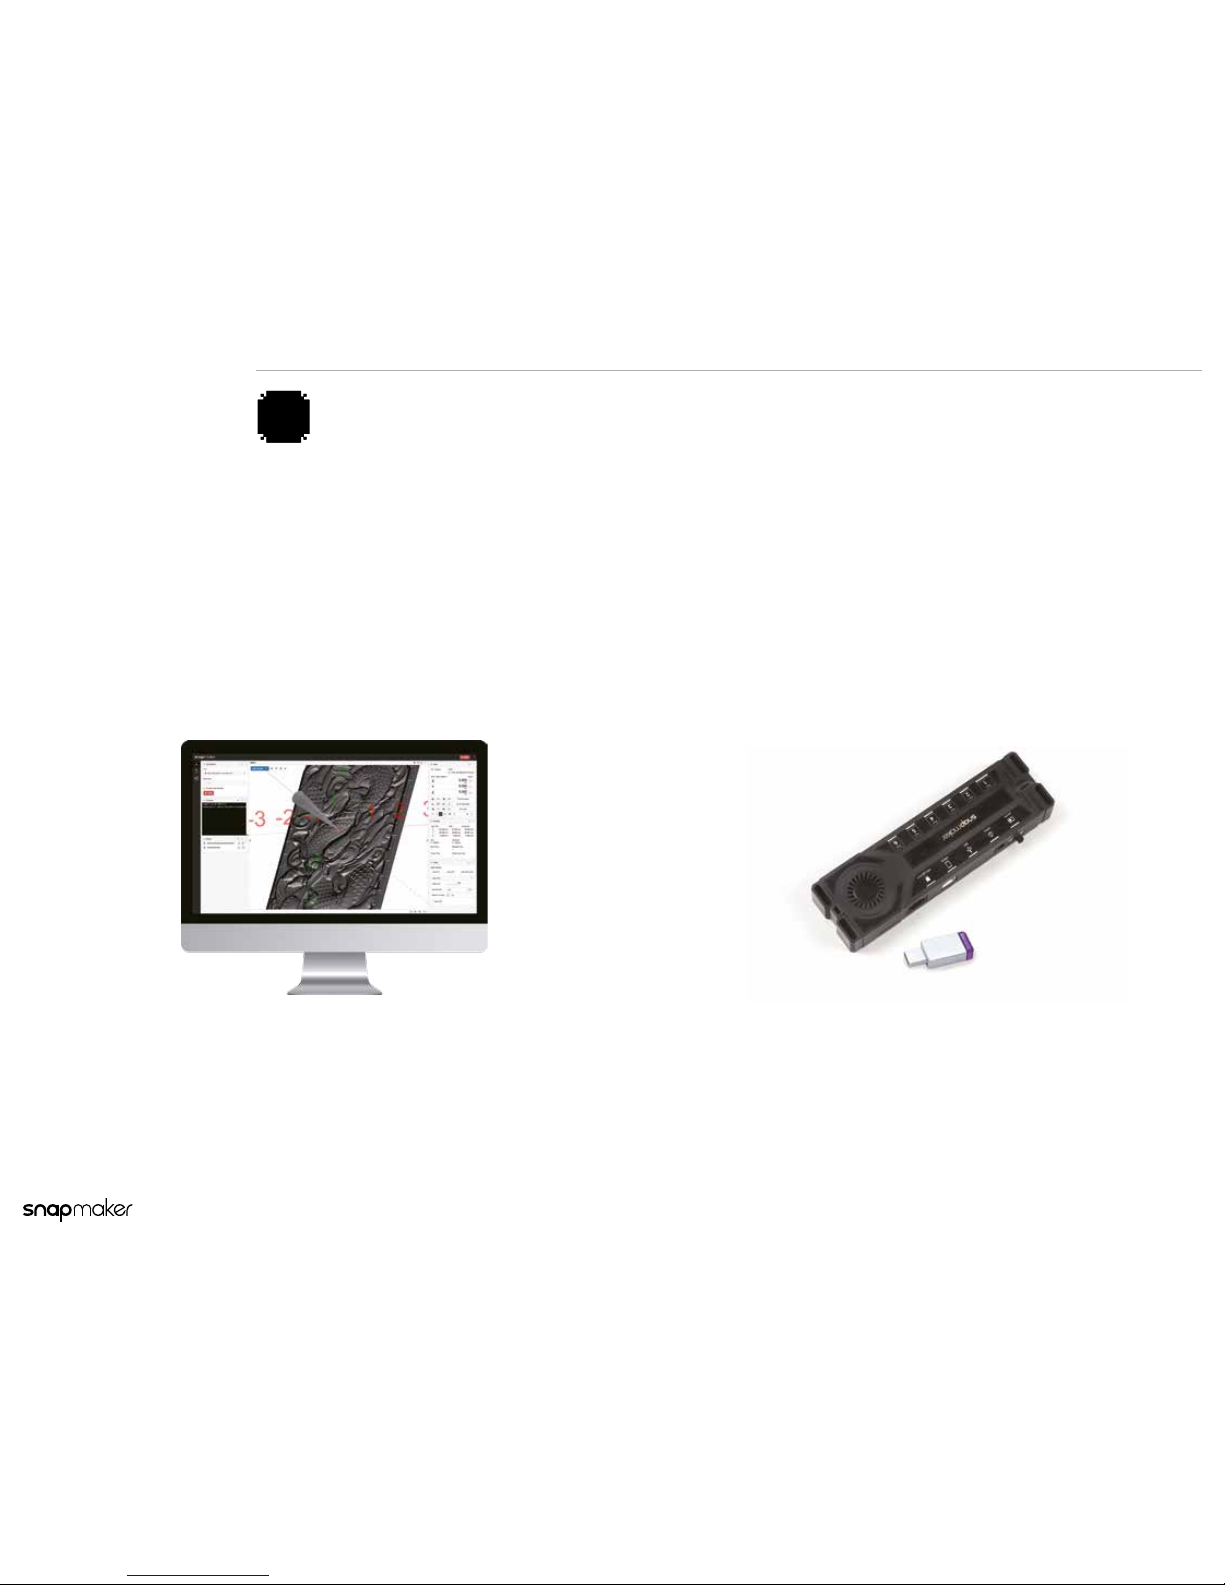
Option 2
Using the USB Disk
(No need to connect your computer to
the machine.)
Option 1
Using the Computer
(The computer must be connected to the
machine throughout the process.)
3
Choose a Way to Carve
Page 21
21
Guide for CNC Carving
Support
Besides this guide, there is also a User Manual available on our website: snapmaker.com/document
Find the answers in our FAQ page if you run into any problem during assembly: faq.snapmaker.com
Share anything you want with other Snapmaker users at our forum: forum.snapmaker.com
Any news from you is good news for us. If you have any questions, don’t hesitate to contact us. We are
here for you whenever you need general information, technical support or have any sales inquiries.
General [email protected]
Support [email protected]
Marketing [email protected]
See more fun stuff at:
Page 22

Grace Hopper said, “A ship in port is safe, but that’s not what ships are built for.”
So, use the Snapmaker more often and create more!
To use the 3D printer or laser engraver, please read the corresponding guide.
Part No.: FA003 V1.0.1
 Loading...