

Smiths detection HI-SCAN 5180si, HI-SCAN 6040-A, HI-SCAN 5180i, HI-SCAN 6030di, HI-SCAN 6046si User Manual
...Page 1
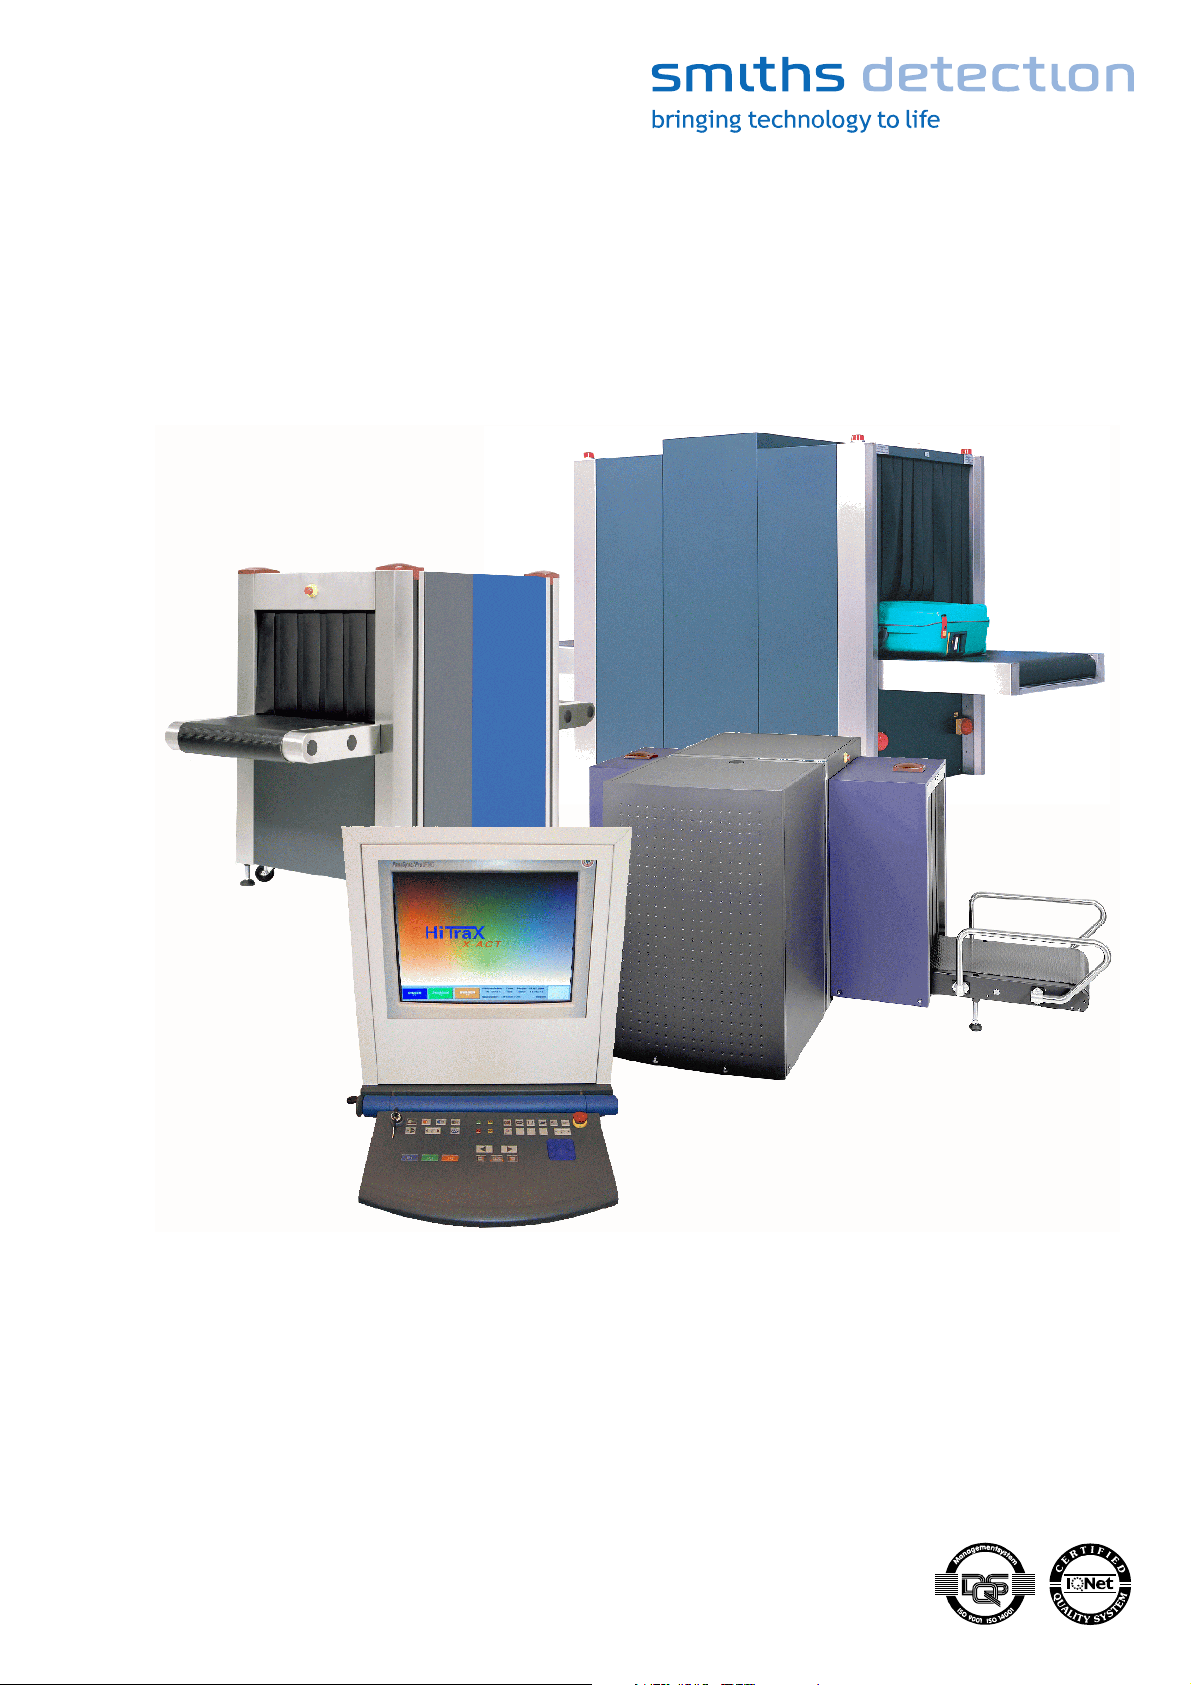
Conventional X-ray Inspection Units HI-SCAN
with HiTraX Electronics
The reproduction, transmission or use of this document or its contents
is not permitted without express written authority. Offenders will be
liable for damages.
All rights, including rights created by patent grant or registration of a
utility model or design, are reserved. Modifications reserved.
95584681 01/01/09 © Smiths Heimann
All rights reserved!
User's guide for users with
supervisor access level
SMITHS HEIMANN
www.smithsdetection.com
Page 2

95584681 01/01/09 © Smiths Heimann
Page 3

Contents
Contents
Guide for users with operator access level................................................................Section 1
Additional guide for users with supervisor access level............................................Section 2
For users with operator access level, you can order the following, abridged user's guide.
The guide only contains the 1st section.
Order no.
User's guide for users with operator access level.....................................................95584682
95584681 01/01/09 © Smiths Heimann
III
Page 4

Contents
IV
95584681 01/01/09 © Smiths Heimann
Page 5

1
95584770 01.03.2003 © Smiths Heimann
Page 6

Page 7

Guide for users with operator access level
Guide for users with operator access level
Preface................................................................................................................................................................1-1
How to ensure safety.........................................................................................................................................1-3
Warning signs used in the safety instructions..............................................................................................1-3
Warning signs installed on the X-ray inspection unit...................................................................................1-3
Comply with all legal requirements and official conditions of use ..............................................................1-4
Pay attention to the safety instructions........................................................................................................1-5
How to check the HI-SCAN X-ray unit before switching on..........................................................................1-9
What to observe when evaluating X-ray images.........................................................................................1-10
Here you find controls and indicators.............................................................................................................1-12
How to adjust the operating unit*...............................................................................................................1-12
How to unfold the keyboard*..................................................................................................................1-12
How to adjust the operating unit adjustable in height*.........................................................................1-12
How to adjust the operator rest*............................................................................................................1-13
The controls on the HI-SCAN X-ray unit housing.......................................................................................1-13
The main switch*....................................................................................................................................1-13
The power-on indicator*........................................................................................................................1-14
The emergency stop buttons..................................................................................................................1-14
The radiation indicators.........................................................................................................................1-15
The counters* ........................................................................................................................................1-16
Further control elements............................................................................................................................1-16
The separate emergency stop button for integrated units*..................................................................1-16
The contact mat* and the attendance detector*...................................................................................1-16
The hand-held bag code scanner*.........................................................................................................1-17
The keyboard of the HI-SCAN X-ray unit.....................................................................................................1-17
The screen indication field..........................................................................................................................1-23
The indication field on the second screen*.................................................................................................1-27
How to start and terminate your work............................................................................................................1-28
How to remove the tunnel covers*..............................................................................................................1-28
How to connect the X-ray unit to the mains................................................................................................1-28
How to shift a mobile X-ray unit*................................................................................................................1-30
How to switch on..........................................................................................................................................1-31
Restart after emergency stop................................................................................................................1-33
How to log in................................................................................................................................................1-34
Login via ISIS card*................................................................................................................................1-34
Login via keyboard..................................................................................................................................1-36
How to clear the tunnel and the conveyors.................................................................................................1-37
Automatic clearing.................................................................................................................................1-37
Controlled clearing.................................................................................................................................1-38
How to regenerate the X-ray generators*...................................................................................................1-39
How to test indicators and audible alarm...................................................................................................1-40
How to log out..............................................................................................................................................1-40
Logout via ISIS card*..............................................................................................................................1-40
Logout via keyboard................................................................................................................................1-41
How to switch off.........................................................................................................................................1-41
95587412 01/01/09 © Smiths Heimann
I
Page 8

Guide for users with operator access level
How to carry out inspections...........................................................................................................................1-43
How to place baggage and freight items.....................................................................................................1-43
Particularities of units equipped with roller conveyors and modular plastic belt conveyors...............1-45
How to control the scanning process .........................................................................................................1-46
One-way mode........................................................................................................................................1-47
Automatic return mode*........................................................................................................................1-48
How to lead suspect items to the recheck..................................................................................................1-50
Mark suspicious objects in the X-ray image*........................................................................................1-50
Mark scanned baggage or freight item as suspicious...........................................................................1-50
Send X-ray image to recheck station(s)* ..............................................................................................1-51
Send X-ray image to Central Image Data Archive CIDA*.......................................................................1-51
Particularities of units equipped with the Xport image transfer system*..................................................1-51
Particularities of units equipped with Full-reverse mode* .......................................................................1-52
Particularities of units equipped with Reverse scanning*.........................................................................1-53
Particularities of units equipped with Continuous scanning*....................................................................1-53
Particularities of units equipped with Second, parallel conveyor control*................................................1-53
Particularities of units equipped with contact mat* or attendance detector*...........................................1-54
Particularities of units equipped with safety switches*.............................................................................1-54
Particularities of units integrated into a baggage handling line*..............................................................1-56
Particularities of units integrated into an iLane system*...........................................................................1-56
How to use the automatic detection functions*..............................................................................................1-57
The X-ACT system*......................................................................................................................................1-57
Radioactivity detector*................................................................................................................................1-58
The functions HI-SPOT* and High Density Alert* - HDA............................................................................1-59
How to display X-ray images...........................................................................................................................1-60
The default image display...........................................................................................................................1-60
How to select other image display modes..................................................................................................1-60
The black and white monitor*.....................................................................................................................1-60
The black and white image - BW.................................................................................................................1-61
The HI-MAT
The image displays Organic Only(
PLUS
system* - the basic material detection*............................................................................1-61
PLUS
)* and Organic Stripping(
PLUS
)* - O²/O²+/OS/OS+.............................1-63
How to vary the absorption range - VARI....................................................................................................1-64
The image display with higher penetration - HIGH.....................................................................................1-65
The image display with lower penetration - LOW.......................................................................................1-66
The negative image display - NEG..............................................................................................................1-66
The special function X-PLORE*...................................................................................................................1-67
The image displays with Superenhancement* - SEN*...............................................................................1-67
The HI-CAT color- and HI-CAT black and white images.............................................................................1-69
The color images....................................................................................................................................1-69
The black and white images...................................................................................................................1-70
The function VARI-CAT.................................................................................................................................1-70
The Zoom function.......................................................................................................................................1-71
The function Opti-Zoom*.............................................................................................................................1-72
The object finder*........................................................................................................................................1-72
How to work with the HI-TIP
PLUS
* and aTIP* system*.....................................................................................1-73
Recognized objects.................................................................................................................................1-73
Missed objects........................................................................................................................................1-75
Aborted projections................................................................................................................................1-76
95587412 01/01/09 © Smiths Heimann
II
Page 9

Guide for users with operator access level
How to work with the OTS Xtrain system*......................................................................................................1-77
Training with feedbacks...............................................................................................................................1-78
Recognized objects.................................................................................................................................1-78
Missed objects........................................................................................................................................1-79
Aborted projections................................................................................................................................1-80
Training without feedbacks.........................................................................................................................1-81
How to work with the IMS image store system*.............................................................................................1-82
Store images................................................................................................................................................1-82
Recall and print* images.............................................................................................................................1-84
Select a category/subcategory...............................................................................................................1-84
Select images.........................................................................................................................................1-86
Print images*.........................................................................................................................................1-88
Set recall options....................................................................................................................................1-88
Start the recall........................................................................................................................................1-89
Interrupt and terminate the recall.........................................................................................................1-89
How to work with the other functions.............................................................................................................1-90
The print function*.......................................................................................................................................1-90
The baggage counters.................................................................................................................................1-90
The audible baggage marking alarm..........................................................................................................1-91
The silent alarm*.........................................................................................................................................1-91
How to correct operating troubles..................................................................................................................1-92
The Configuration display............................................................................................................................1-92
The Error report...........................................................................................................................................1-93
The X-ray unit cannot be switched on or switches off by itself..................................................................1-93
How to reset the emergency stop buttons..................................................................................................1-94
The X-ray unit switches off because of a power failure .............................................................................1-94
No test image/wait indicator does not light up or flashes..........................................................................1-95
No or insufficient test image/wait indicator lights up briefly after switching on.......................................1-95
Error messages...........................................................................................................................................1-95
Error messages with error code............................................................................................................1-95
Messages without error code...............................................................................................................1-103
The image deteriorates after some time of operation .............................................................................1-104
The X-ACT system* does not work correctly.............................................................................................1-105
A short image scroll is triggered without any object being scanned .......................................................1-105
The X-ray unit shows other image interferences......................................................................................1-105
Conveyors reverse when stopping or starting them.................................................................................1-105
The conveyors only move when the start key is constantly actuated.......................................................1-105
When selecting certain image displays and/or the Zoom function, the conveyors stop..........................1-106
A warning signal is sounded......................................................................................................................1-106
Other errors...............................................................................................................................................1-106
95587412 01/01/09 © Smiths Heimann
III
Page 10

Page 11

Preface
Preface
Using this manual you will be able to correctly operate the HI-SCAN X-ray unit as user with operator access
level. The detection of objects searched for in X-ray images is, however, not dealt with in this manual.
These instructions include units that are equipped with an X-ray generator for generating an X-ray image
with one view of the baggage and freight items (single view units) as well as units with two generators for
displaying objects in two different views (dual view units - 2is). It also includes units with increased resolu-
tion (HR - High Resolution) and units equipped with precision X-ray detectors (XADA).
Units that are equipped with one or several conveyor belts or with one or several roller or modular plastic
belt conveyors are also included as well as units integrated into a baggage handling system or line,
however, the conveyors of which are controlled manually (option InLine - Variante Start/Stop).
The following unit types are included:
HI-SCAN 5170-A
HI-SCAN 5180i
HI-SCAN 5180si
HI-SCAN 6030di
HI-SCAN 6040i
HI-SCAN 6040-A
HI-SCAN 6046si
HI-SCAN 7085-A
Units with automatic conveyor control integrated into a baggage handling system or line (option InLine
variants Handshake & Result and Integration Network) are not included in this instruction. For these units
a separate User's Guide for integrated X-ray units is provided.
In order to effectively apply the numerous functions offered by the HI-SCAN X-ray unit and to detect objects
searched for in the scanned items, a certain "Know-How" is required which you can obtain in operator training courses tuned to the HI-SCAN X-ray unit and in training courses for the detection of objects in X-ray images.
We recommend to read the instructions carefully before using the HI-SCAN X-ray unit. In particular, pay attention to the following paragraph “How to ensure safety” which contains important information regarding
your safety.
HI-SCAN 7555i
HI-SCAN 7555si
HI-SCAN 7555-A
HI-SCAN 7760
HI-SCAN 8585
HI-SCAN 85120
HI-SCAN 9075
HI-SCAN 100100T
HI-SCAN 100100T-2is
HI-SCAN 100100V
HI-SCAN 100100V-2is
HI-SCAN 100170
HI-SCAN 11080
HI-SCAN 12080
HI-SCAN 13090
HI-SCAN 130100
HI-SCAN 130100T
HI-SCAN 130130T-2is
HI-SCAN 135135
HI-SCAN 145180
HI-SCAN 150150 (140kV)
HI-SCAN 150150 (300kV)
HI-SCAN 180180 (300kV)
HI-SCAN 180180-2is (300kV)
The trouble shooting guide which is part of the manual (F 1-92 onwards) is to allow you to correct minor operating troubles yourself.
95587412 01/01/09 © Smiths Heimann
1-1
Page 12
Preface
Symbols and text representations used
Main menu Text displayed on the X-ray unit screen is printed in bold/italics in this manual.
(F 1-3) Page references lead to additional information and instructions.
*
I
Equipment, accessories or functions marked * are options which are not part of the standard
equipment of the HI-SCAN X-ray unit.
Your sales partner will inform you about which of the mentioned options are available to the Xray inspection unit. To get to know the functions the X-ray unit is already equipped with, please
have a look at the Configuration display (F 1-92).
These instructions give further important information and facilitate the use of the HI-SCAN
X-ray unit.
This symbol refers to further documentation.
G
The Technical specifications of the X-ray unit are contained in the corresponding Technical Manual.
I
The X-ray inspection unit meets EC standards. The EC declaration of conformity or the manufacturer's declaration will be forwarded to you on request.
Use as agreed
The HI-SCAN X-ray inspection units are exclusively intended for the X-ray inspection of items. The X-ray inspection may only be carried out by qualified personnel. Human beings and live animals must not be
scanned. In particular, pay attention to the following paragraph “How to ensure safety”.
In case of questions referring to this instruction, please contact the editorial department:
1-2
95587412 01/01/09 © Smiths Heimann
Page 13
How to ensure safety
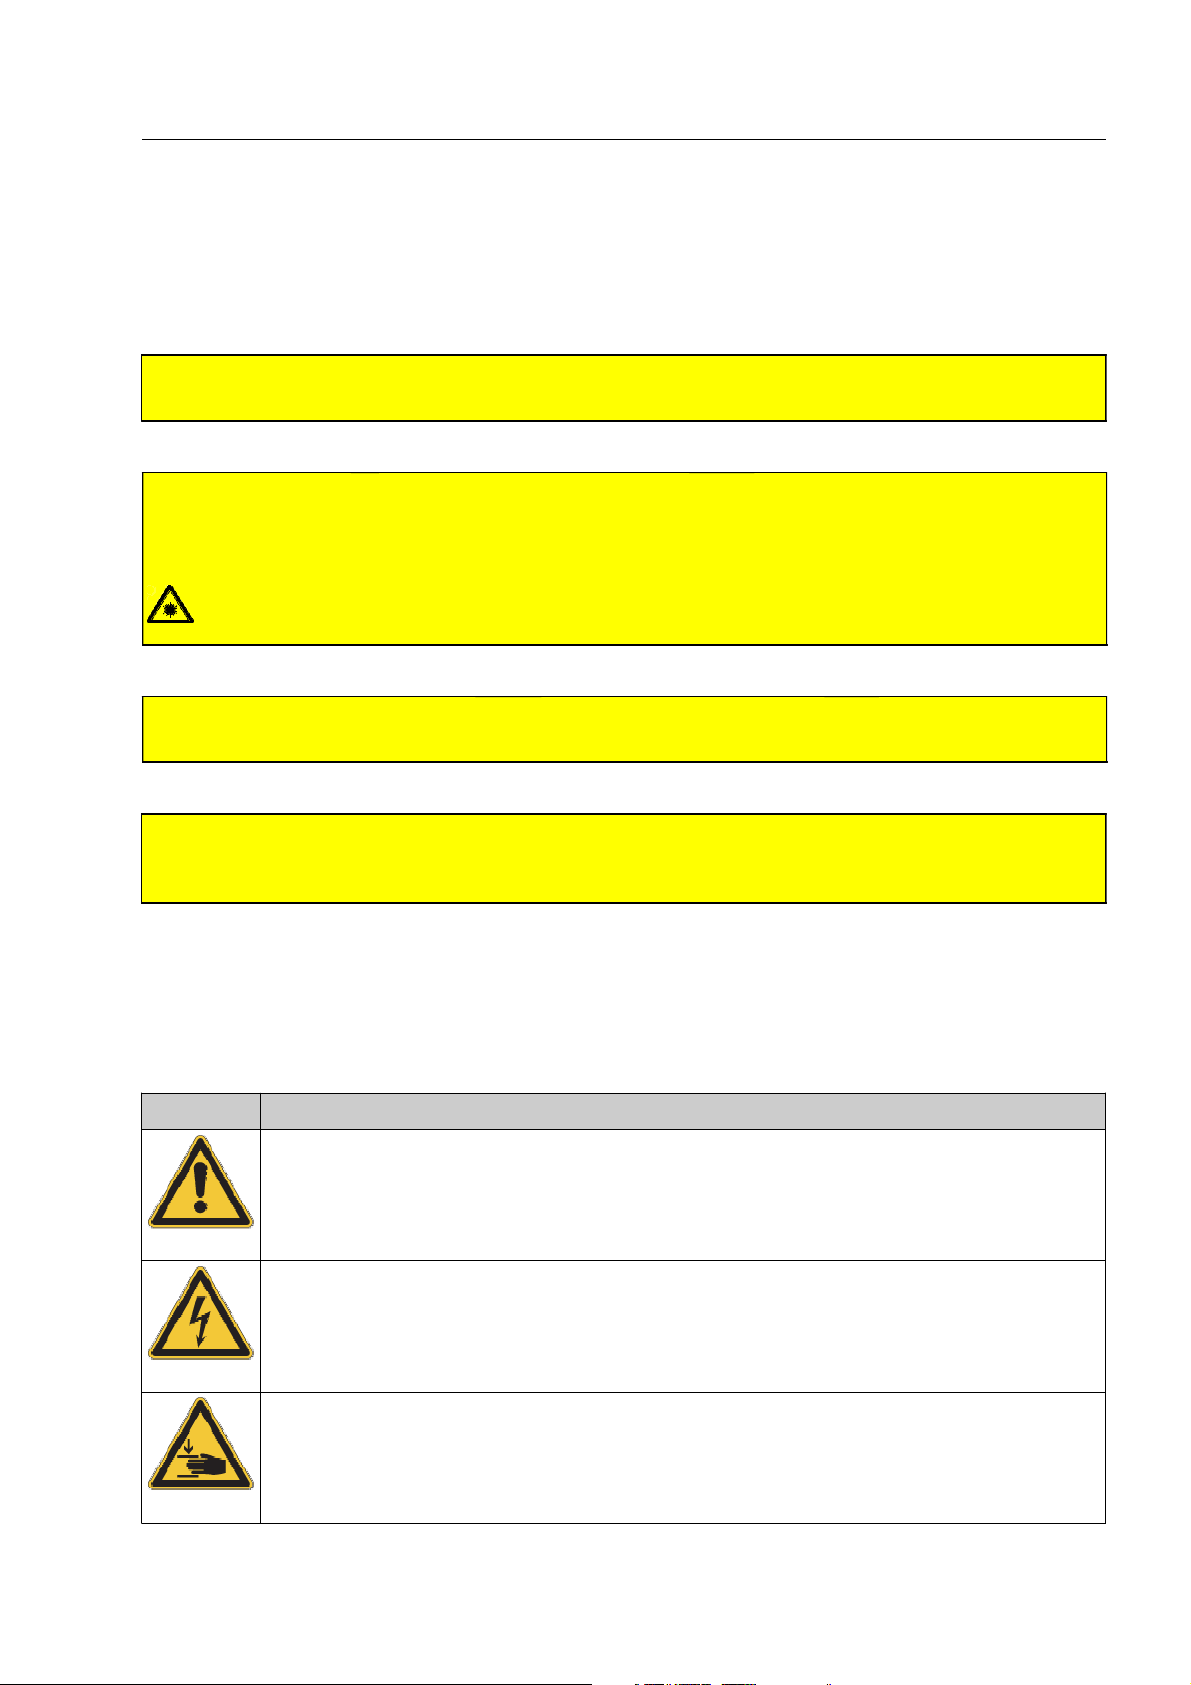
Warning signs used in the safety instructions
Danger!
A
Indicates a directly threatening danger. Non-compliance leads to the most severe injuries or death!
Warning!
A
Indicates a possibly dangerous situation. N
death!
on-compliance leads to the most severe injuries or
R
How to ensure safety
Caution!
A
Indicates a possibly dangerous situation. Non-compliance can lead to slight or minor injuries!
Attention!
S
Indicates a possibly detrimental situation for the unit. Non-compliance can lead to damages on the
HI-SCAN X-ray inspection unit and to data loss and malfunctions!
Warning signs installed on the X-ray inspection unit
Sign Meaning
Hazard!
Observe the instructions in the documentation!
Dangerous voltage!
Doors or hatches marked by this symbol may only be opened by an electrician or personnel instructed accordingly!
Danger of crushing!
Danger of crushing parts of the body between moving equipment.
95587412 01/01/09 © Smiths Heimann
1-3
Page 14
How to ensure safety
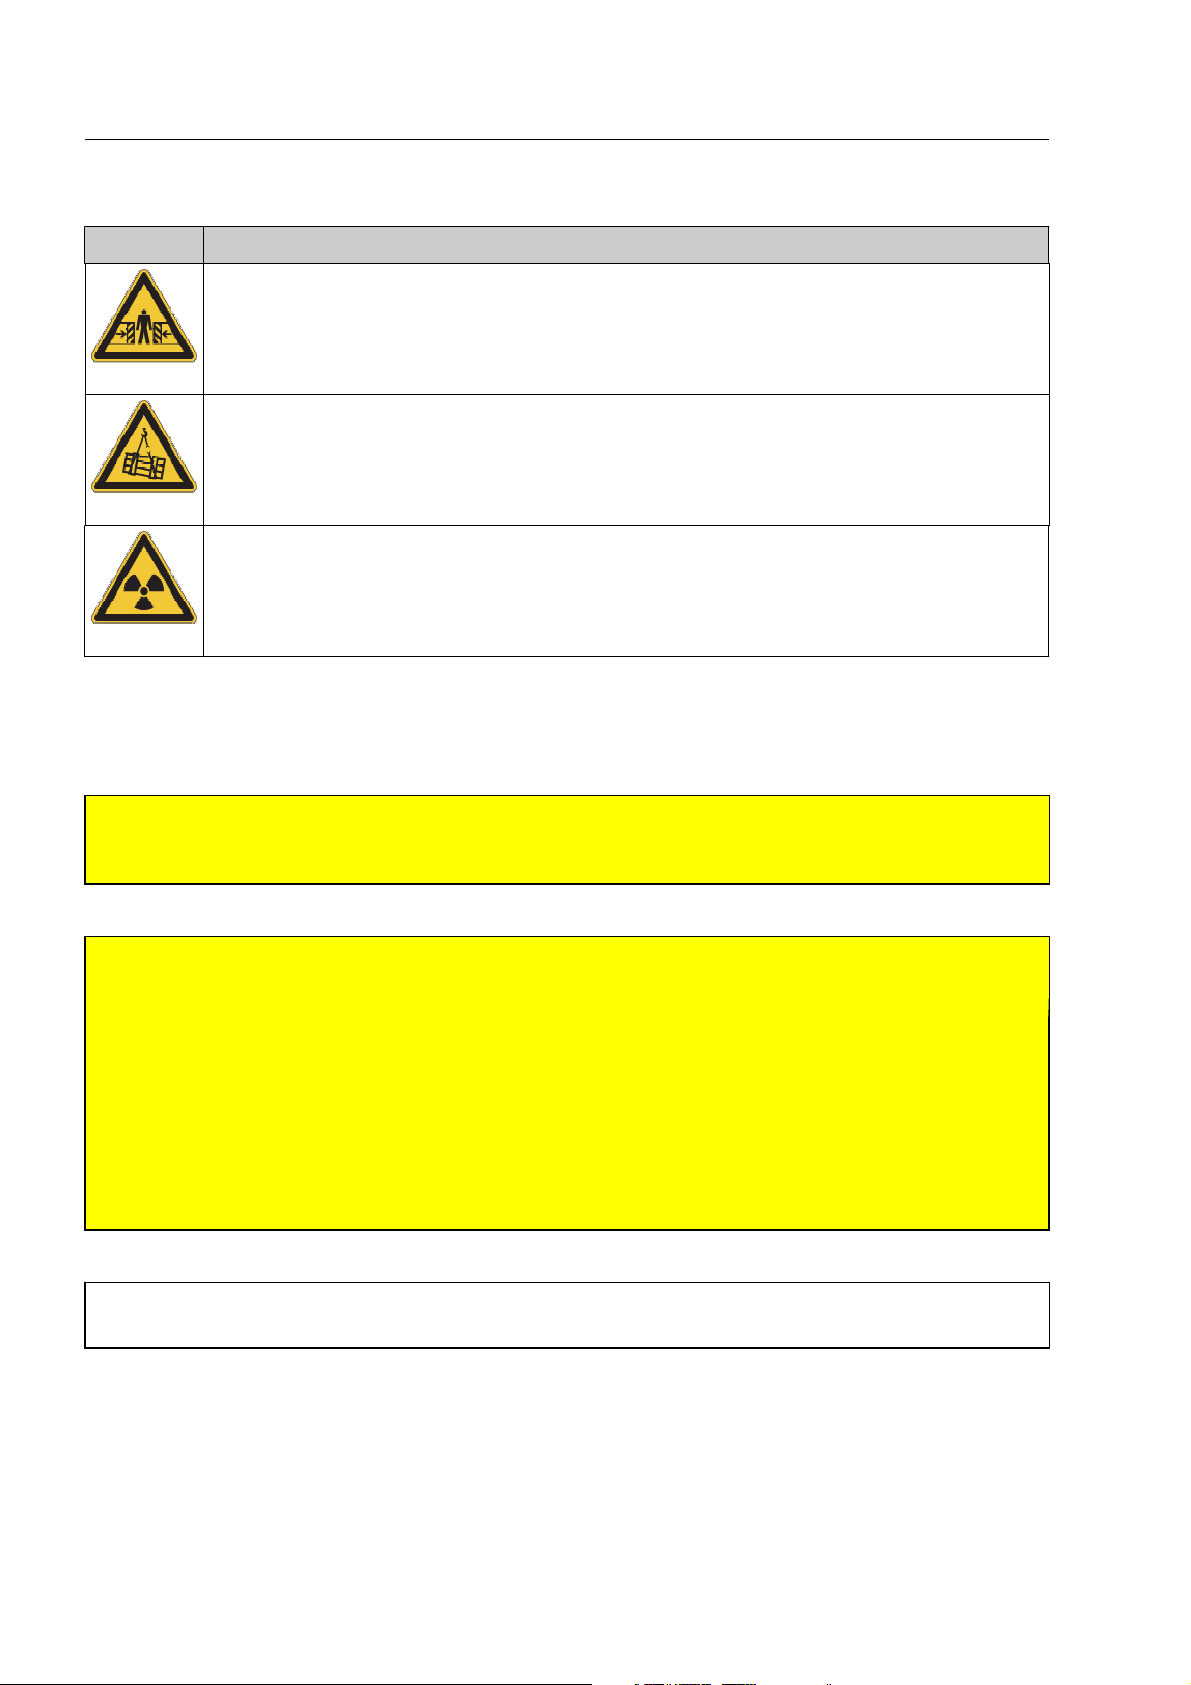
Sign Meaning
Danger of crushing!
Danger of crushing between moving equipment!
Overhead load!
Risk of injuries while staying in the load’s swinging area!
Ionizing radiation!
Hazard due to ionizing radiation!
Comply with all legal requirements and official conditions of use
Warning!
A
Before operating the HI-SCAN X-ray unit, you have to be aware of the applicable radiation protection
and accident prevention regulations!10
Attention!
S
If necessary, you have to give notice of the installation and operation of the HI-SCAN X-ray unit to the
competent authority and/or you may have to obtain the permission for it!
When the HI-SCAN X-ray unit has been installed, a technical inspection (acceptance test) regarding
X-ray protection must be carried out if necessary!
Should the X-ray unit be moved to another installation site, these regulations also possibly apply!
The inspection and approval of the X-ray unit with regard to radiation protection must be repeated at
certain time intervals if required!
The detection characteristics of the unit must possibly comply with national and international regu-
lations depending on its use (e.g. use in the flight baggage inspection) and the unit may have to be
checked periodically according to these regulations!20
You will be informed by your sales partner about the provisions applicable to your country. You r
I
sales partner will also help you during the notification and approval procedures.
1-4
95587412 01/01/09 © Smiths Heimann
Page 15
Pay attention to the safety instructions
Attention!
S
Do not switch on the HI-SCAN unit, if it has not been operated for a period of 6 months! The X-ray
generators must first be regenerated by a competent service technician! The non-respect of this rule
may lead to the destruction of the X-ray generators!30
Warning!
A
Store the X-ray unit in closed rooms only and do not operate it outdoor! Only operate the unit if the
operating conditions regarding ambient temperature (0°C to 40°C) and humidity of the air (10% to
90%, not condensing) are kept during operation! (In units with extended climatic range, please obtain
the operating conditions from the unit's purchase documents.)
Protect the unit entirely against heavy dirt (dust, waste gas etc.) as well as humidity (rain, snow etc.)
and direct sunlight by appropriate measures! This also applies to units installed in vehicles, special
containers etc. for mobile use! 40
How to ensure safety
Warning!
A
If other persons are charged with the operation of the HI-SCAN X-ray unit, ensure that they are competent operators who know all the safety instructions and legal and official provisions! Roller and
modular plastic belt conveyors may only be loaded and unloaded by trained staff who are familiar
with the accident prevention regulations!50
Warning!
A
Be absolutely sure that the local mains voltage corresponds to the value indicated on the X-ray unit
type plate and the fusing of the provided mains outlet meets at least the value indicated on the type
plate!
Be also sure that the provided mains outlet is equipped with a protective earth conductor! A connec-
tion without PE conductor is not allowed!
If you connect the unit to the on-board supply system of a vehicle, airplane or ship or to another spe-
cial mains supply, pay attention to the prevailing safety instructions! 60
Warning!
A
Make sure that all available emergency stop keys (F 1-12pp.), the mains plug and the main switch*
at the mains input of the X-ray unit or the mains plug at the mains outlet are accessible during operation! If required, remove objets that might obstruct the access! 70
Warning!
A
Mechanical and electrical modifications of the X-ray unit may only be performed by a trained service
technician! The regulations and instructions given in the Technical Manual must be adhered to! 80
95587412 01/01/09 © Smiths Heimann
1-5
Page 16
How to ensure safety
Warning!
A
Ensure that the HI-SCAN X-ray unit is regularly serviced and checked for electrical safety by a quali-
fied service technician! 90
Warning!
A
If there are damages on housing parts, cables, conveyors or lead curtains of the HI-SCAN X-ray unit
you have to stop operation! 100
Warning!
A
Inside the X-ray unit there are no parts to be operated or serviced by the user! Screwed covers and
parts of the housing may only be removed by a qualified service technician!
The same applies to covers bearing the label illustrated even if
such covers can be opened by means of a key!
110
Caution!
A
Ensure that the HI-SCAN X-ray unit is supervised as long as it is switched on! 120
Warning!
R
The HI-SCAN X-ray unit exclusively serves the purpose of X-raying movable items! You must not inspect human beings or live animals! 130
Warning!
A
Do not sit on the operator rest* of the X-ray unit! Keep your feet in contact with the ground! 140
Warning!
A
To be able to adhere to the following instructions it is indispensable that you are able to see the conveyor's entry and exit! If this is not possible, arrange for appropriate measures to be taken, e.g. cor-
dons, video surveillance or further operating personnel to ensure that the following regulations are
nevertheless observed! 150
A
1-6
Warning!
While the X-ray unit is activated ensure that nobody sits or stands on the conveyors or touches moving parts! 160
95587412 01/01/09 © Smiths Heimann
Page 17
How to ensure safety
Warning!
A
When working near running conveyor belts or rotating rollers, do not wear loose scarves or identity
card or key lanyards put around your neck or ties, or, if so, only use those provided with a safety
breakaway buckle! Do not wear your hair hanging loose! If you are charged with loading and unload-
ing roller or modular plastic belt conveyors, wear clothes that fit tightly! 170
Warning!
R
Ensure that no person puts a hand into the inspection tunnel while the X-ray unit is activated! Switch
off the X-ray unit by means of the key switch and withdraw the key before you manually clear bag-
gage or freight items that have got stuck or before you correct other malfunctions in the inspection
tunnel or on the conveyors! If the unit does not have a key switch, wait until all indicators on the keyboard have extinguished and separate the unit from the mains by pulling the mains plug! 180
Attention!
S
Stop the conveyors before baggage or
freight items pile up inside the inspection tunnel or at the end of the conveyors! 190
Warning!
A
Control the conveyors so that nobody risks to be injured by falling baggage or freight items and no
baggage or freight item is damaged! 200
Warning!
A
If you notice an electrical defect at the X-ray unit, e.g. through smoke or unusual heat build-up,
switch off the unit at once and disconnect it from the mains by unplugging the mains plug! If the unit
is equipped with a UPS unit (Uninterruptible Power Supply unit), switch it off as well (F 1-31 "How to
switch on") or ensure it is switched off! Make sure the unit remains turned off (e.g. by removing the
mains cable (F 1-28 "How to connect the X-ray unit to the mains") or the key) until it has been
checked by a competent service technician! 210
In case of proper use, the HI-SCAN X-ray
I
unit is film safe, i.e. even highly sensitive film material (1600 ASA) is not affected after repeated exposures during
several inspection cycles. Food,
audio-/video tapes, magnetic data carriers and semiconductor memories
(EPROMs) are not affected.
Attention!
S
Keep away open containers with liquids or any other non-solid materials as well as dirty or wet objects from all parts of the X-ray unit and from the feed and discharge conveyors! Closed containers
with liquids or non-solid materials as well as dirty and rain-wet baggage or freight items may only
be scanned after having been put into appropriate plastic containers (see below)! 220
95587412 01/01/09 © Smiths Heimann
1-7
Page 18
How to ensure safety
Attention!
S
If liquids or other non-solid materials are spilled in the X-ray unit or on the feed and discharge conveyors, or, if the X-ray unit has got dirty for any other reason, switch the unit off immediately and
disconnect the unit from the mains by unplugging the mains plug in order to avoid damage to the unit
or soiling of the objects to be scanned! If the unit is equipped with a UPS unit, switch it off as well
(F 1-31 "How to switch on") or ensure it is switched off! Make sure the unit remains turned off (e.g.
by removing the mains cable (F 1-28 "How to connect the X-ray unit to the mains") or the key) until it
has been cleaned by a competent service technician! 230
Attention!
S
Items with loose belts or loose packaging and objects which cannot be placed firmly on the conveyors as well as all kinds of clothes must be placed into appropriate plastic containers (see below) to
avoid damages! The objects must not move during the inspection. If required, use plastic containers
with structured foam insert!240
Attention!
S
Short or flat items have to be put into plastic containers (see below) to be sure they will be detected
and scanned even if placed in an unfavorable position! Alternatively, the X-ray unit can be operated in
Continuous scanning mode! 250
Attention!
S
Keep in mind that the material and structure of the plastic containers mentioned above may affect
the X-ray unit's material detection characteristics! Inappropriate plastic containers may also cause
electrostatic charging! Therefore, contact your sales partner when choosing suitable plastic contain-
ers. 260
Attention!
S
Do not cover the ventilation openings of the X-ray unit and the monitors! 270
Warning!
Do not look into the laser beam of the bar code scanner* which is available as an accessory and do
not point the beam at other persons! 280
A
S
1-8
Warning!
Observe all warnings and instructions attached to the unit! 290
Attention!
Switch the HI-SCAN X-ray unit off by means of the key switch before doing any cleaning and maintenance work! You can clean the mechanical parts of the unit by means of a soft, slightly damp cloth
and a gentle cleaner. Do not use chemical cleaning agents because they might damage the unit's
surface and/or labels! 300
95587412 01/01/09 © Smiths Heimann
Page 19
How to check the HI-SCAN X-ray unit before switching on
Warning!
A
Be sure to perform the following visual checks before switching on the HI-SCAN X-ray unit!
How to ensure safety
R
Check the HI-SCAN X-ray unit for damages on housing panels, monitors, keyboards and visible cables!
Warning!
A
If there are damages, the X-ray unit must not be switched on and should be disconnected from
the mains by unplugging the mains plug!
If the unit is equipped with a UPS unit, switch it off as well (F 1-31 "How to switch on") or ensure it
is switched off!
Make sure the unit remains turned off (e.g. by removing the mains cable (F 1-28 "How to connect
the X-ray unit to the mains") or the key) until it has been checked by a competent service technician! 320
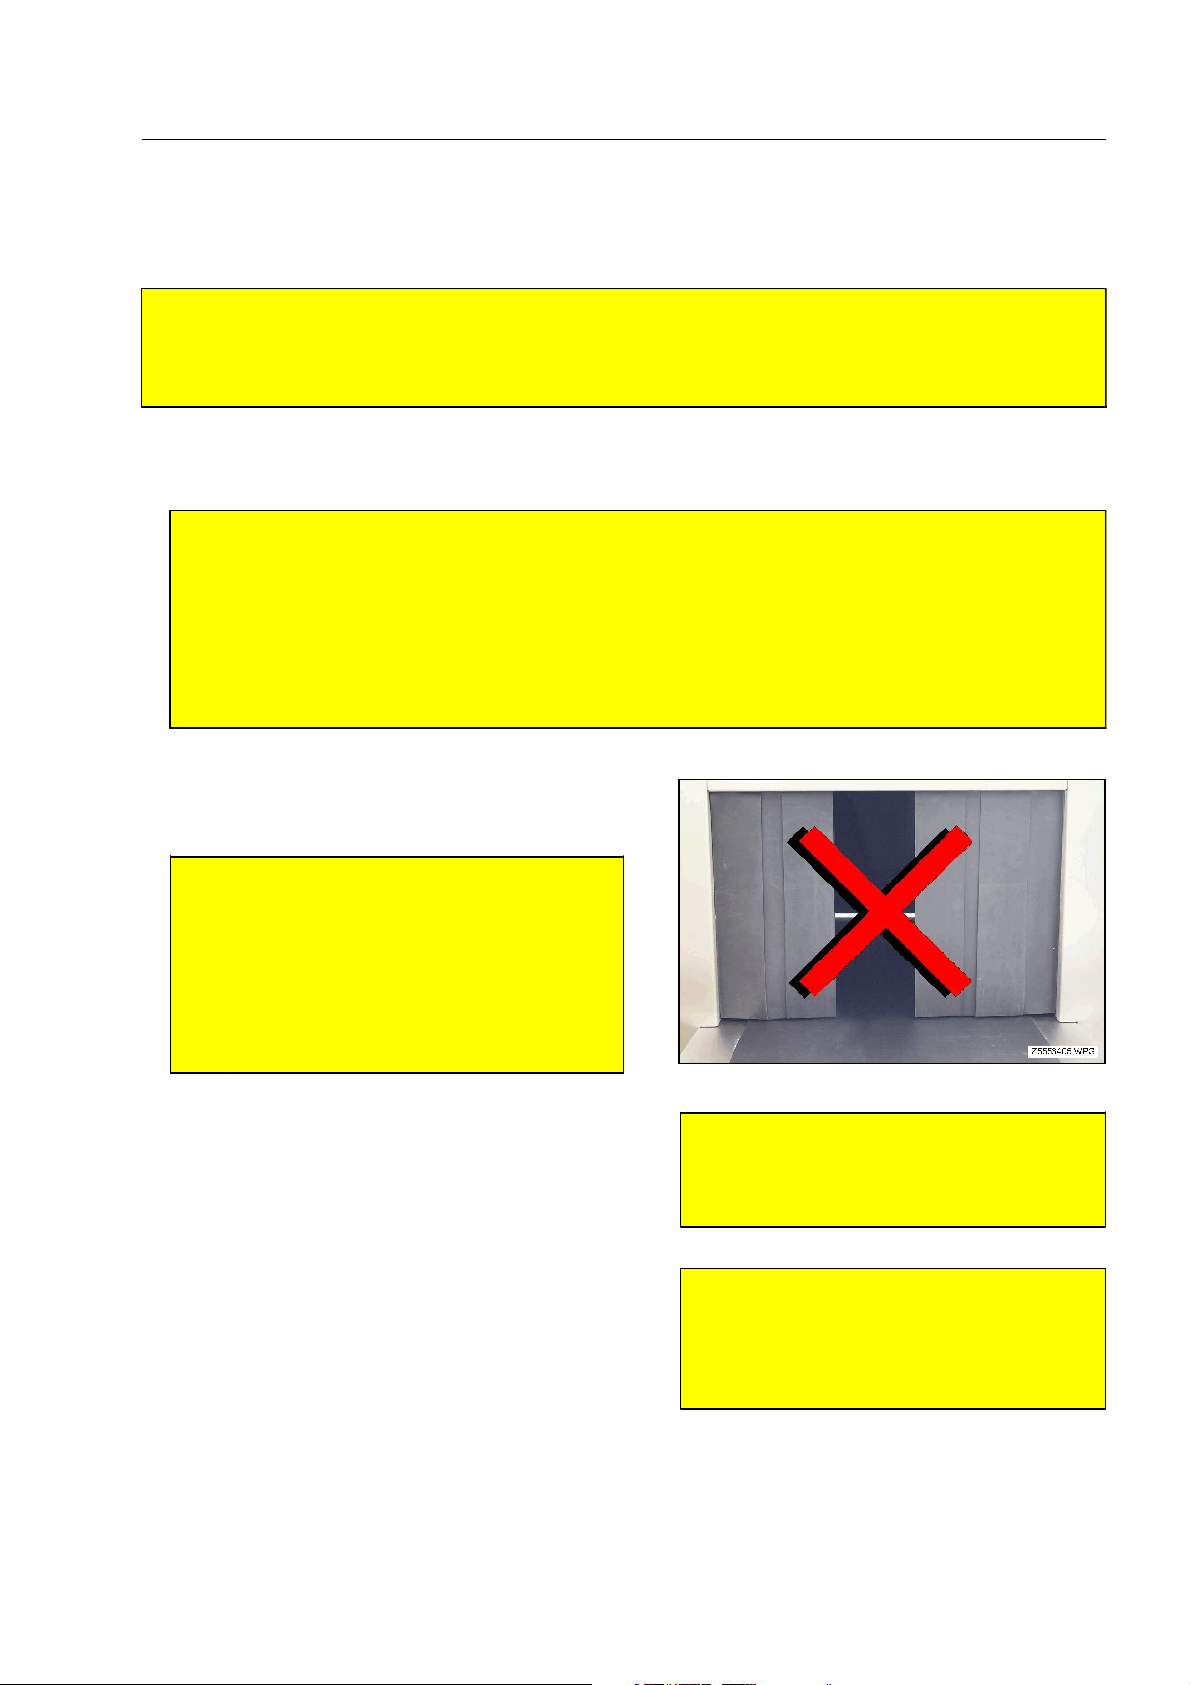
Check the lead curtains for tears and missing seg-
ments!
Warning!
R
In case of defective lead curtains, the HISCAN X-ray unit must not be operated!
Make sure the unit remains turned off (e.g.
by removing the mains cable (F 1-28 "How
to connect the X-ray unit to the mains") or
the key) until it has been checked by a competent service technician! 330
310
Check the conveyors of your X-ray unit for damages
and dirt as well as for items caught in the conveyors!
If the X-ray inspection unit is equipped with roller or
modular plastic belt conveyors, check, if objects have
fallen between the rollers or into they chain drive, and
check if rollers, plastic belt or chains have been damaged.
95587412 01/01/09 © Smiths Heimann
Attention!
S
Major tears, especially on the edges of
the belt, will lead to further damage!
Attention!
S
If there are big damages, starting the
conveyor will lead to further damages!
Objects have to be removed before
switching on! 350
340
1-9
Page 20
How to ensure safety
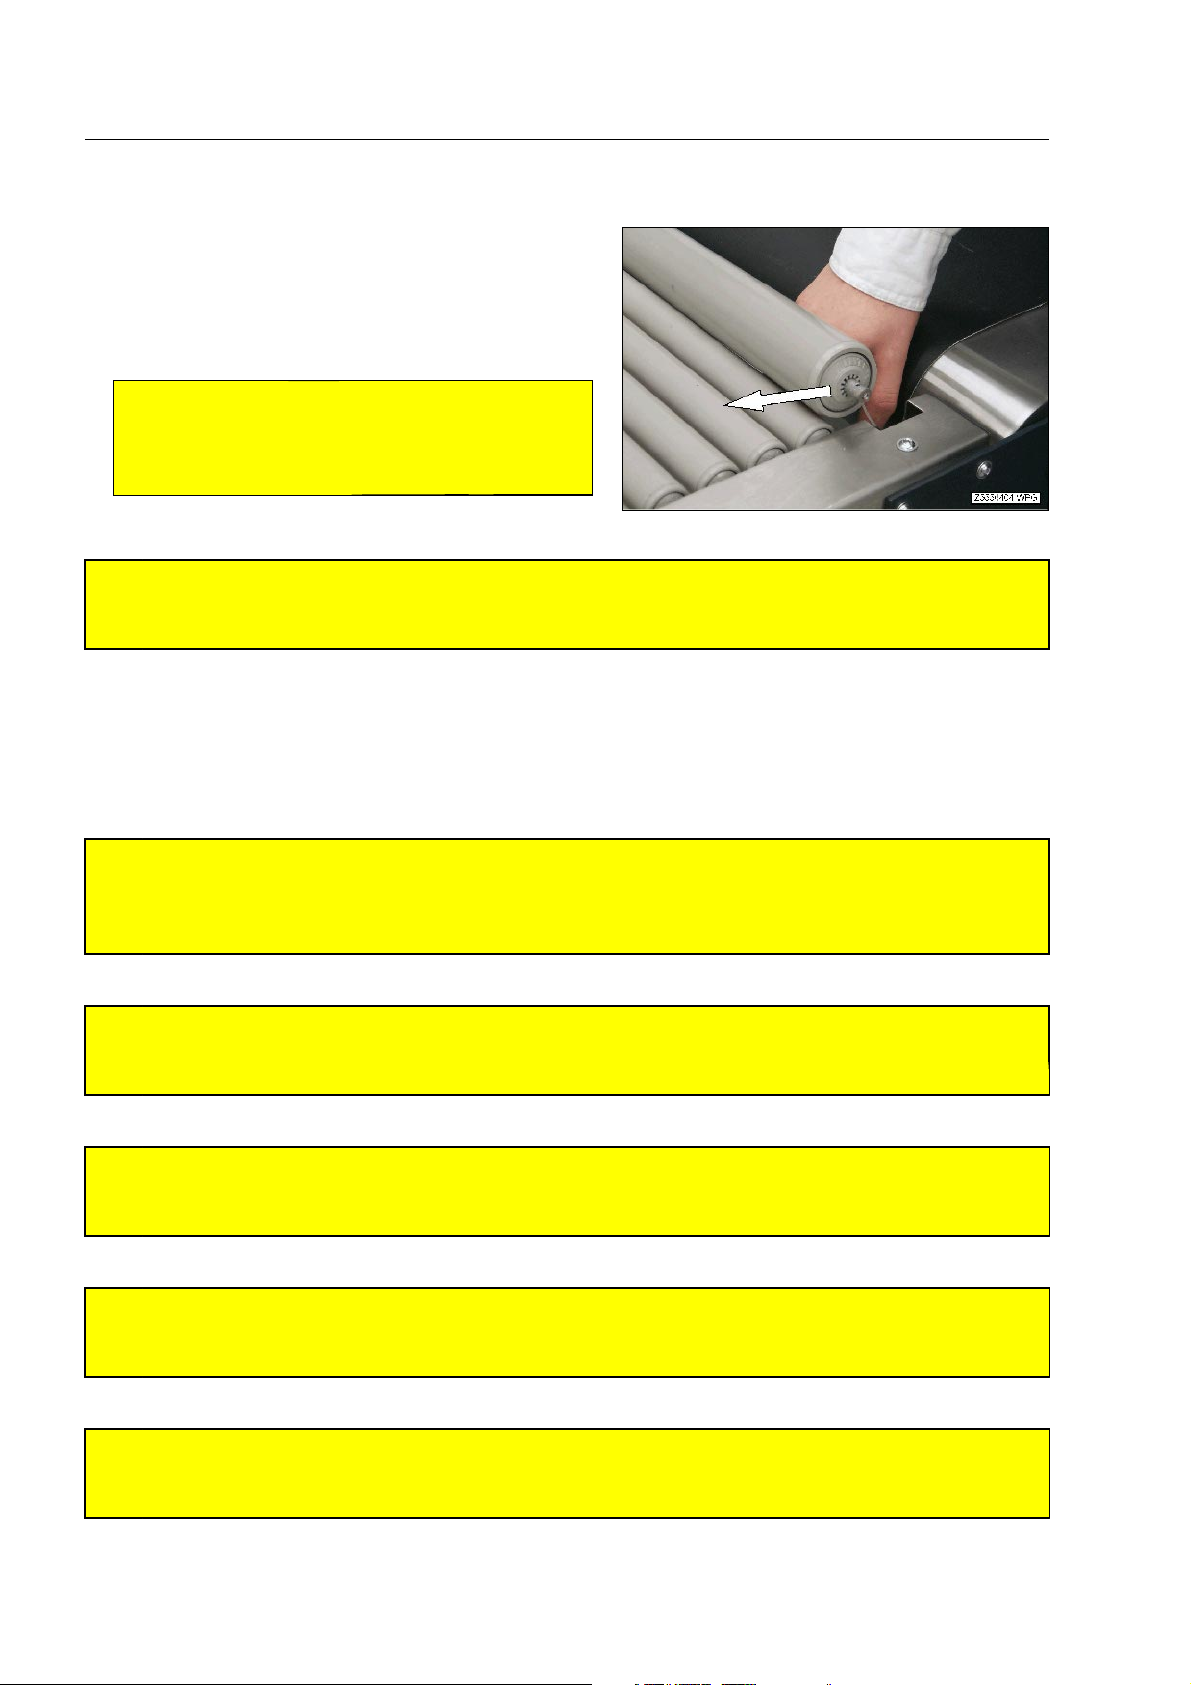
Between the conveyor belt of the HI-SCAN X-ray unit
and the roller input and output conveyors*, motorized
belt conveyors* or baggage chutes* installed behind, a
safety roller is located. Check, if this roller can be
pushed down or lifted up.
Warning!
A
The roller must not be fixed in any way. Otherwise, injuries may be caused when hands are
put in the gap between the conveyors! 360
Warning!
A
Obey the safety instructions of other manufacturers, if the X-ray unit is equipped with roller input and
output conveyors not manufactured by Smiths Heimann!370
What to observe when evaluating X-ray images
Warning!
A
Never work under time pressure when evaluating X-ray images. The obtained security standard depends decisively upon your work. Stop the conveyors if you have not enough time to carefully evaluate an image! 380
Warning!
A
Make sure only scanned and checked baggage or freight items will be forwarded or returned to the
passengers! 390
Warning!
A
Be always aware of the fact that the HI-SCAN X-ray unit generally does not automatically detect dangerous items! 400
Warning!
A
Regard objects which cannot be identified as suspect and lead such objects to the recheck!
410
A
1-10
Warning!
Objects represented in black, which cannot be brightened up with the different image display modes,
always need a manual recheck. Dangerous objects might be hidden behind! 420
95587412 01/01/09 © Smiths Heimann
Page 21
How to ensure safety
Warning!
A
Do not get distracted from evaluating the whole image by some easily recognizable details!
Warning!
A
When rechecking suspect objects proceed according to the provisions and safety instructions given
to you! 440
Warning!
A
If you wear coloured or tinted seeing aids, bear in mind that you might see the colours in X-ray im-
ages differently and thus interpret the image wrongly! 450
430
95587412 01/01/09 © Smiths Heimann
1-11
Page 22
Here you find controls and indicators
Here you find controls and indicators
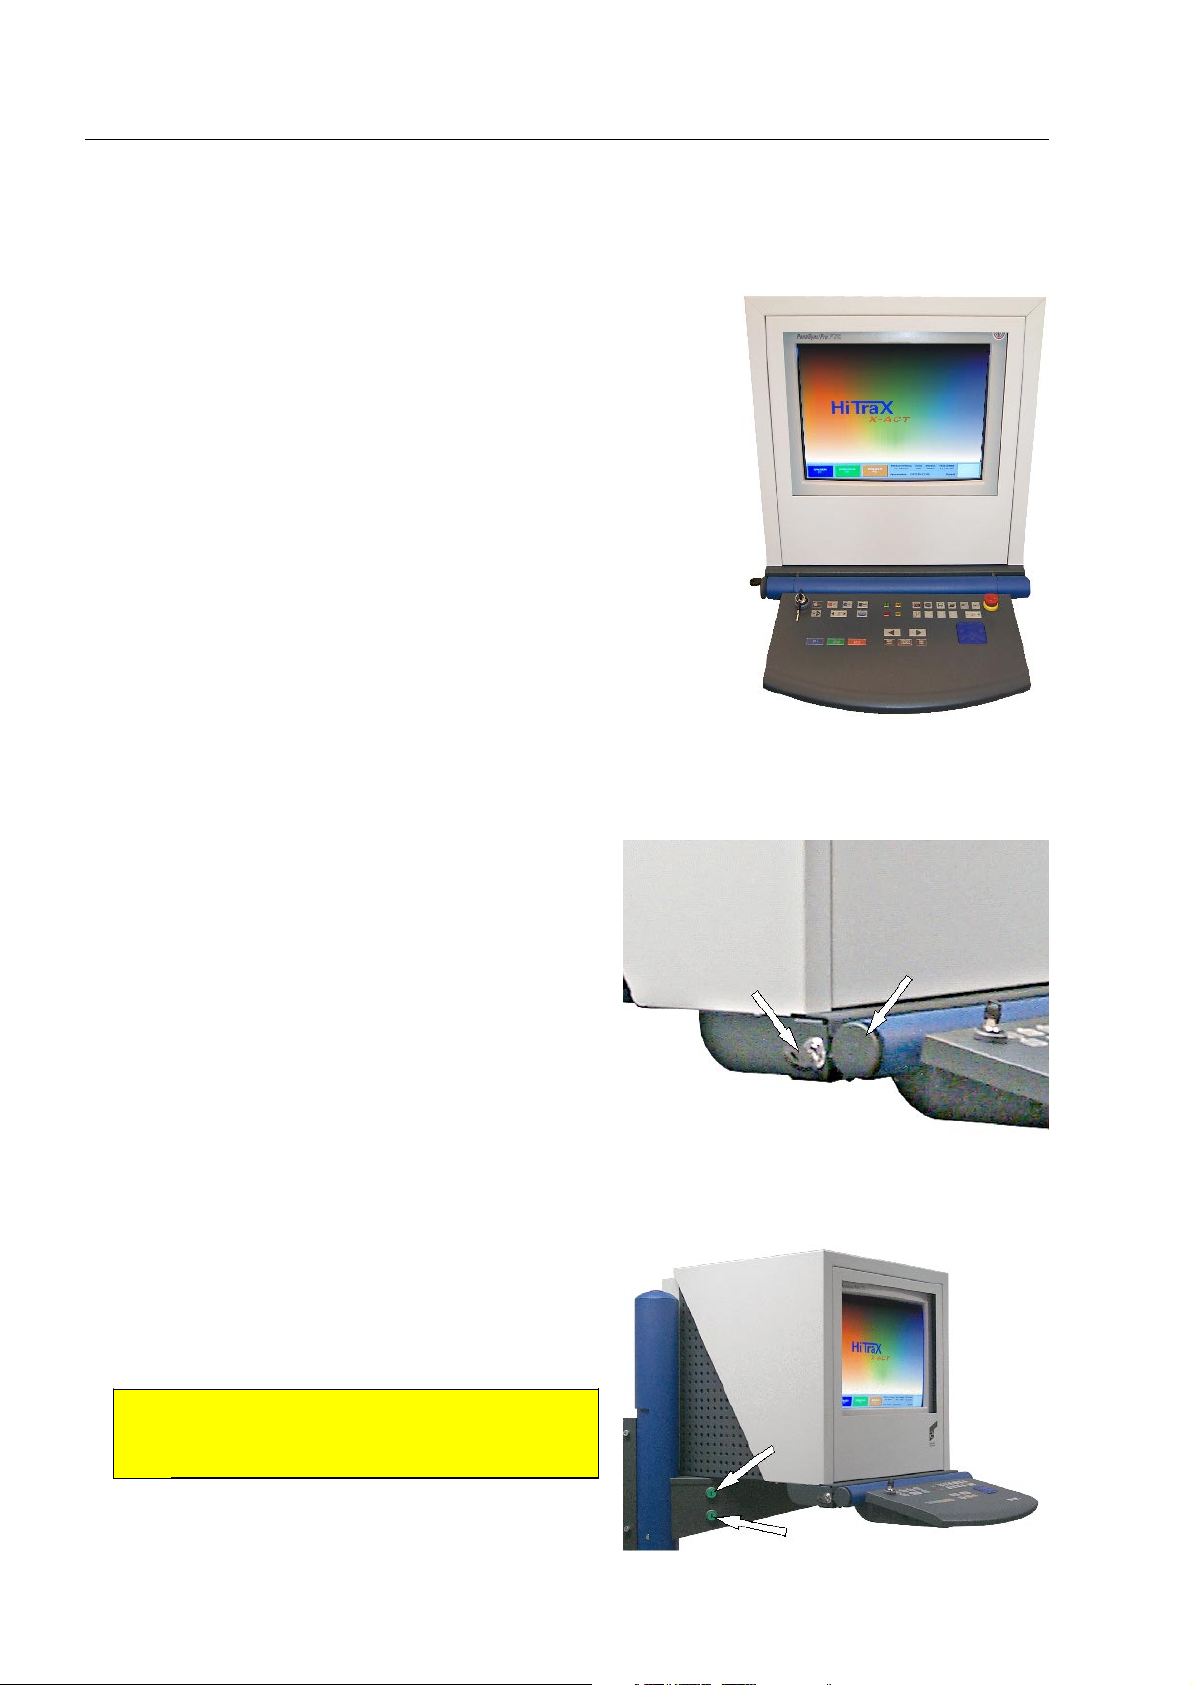
As basic version, the HI-SCAN X-ray unit is equipped with a keyboard
and a colour monitor. For single view units a further monitor* can be
used to display the black and white image. Dual view units are equipped
with a main monitor and a second monitor for displaying the two object
views. Screen menus and messages are displayed only on the main
monitor.
Keyboard and monitor(s) can be integrated in an operating unit*. The
latter can either be attached to the X-ray unit as operating unit adjustable in height* provided with a lifting pillar, or placed on top of the
X-ray inspection unit (option operating console*), or located on an operating desk*.
Further controls and indicators are located on the X-ray unit housing.
How to adjust the operating unit*
How to unfold the keyboard*
Insert the appropriate key into the lock of the keyboard
support and turn it to the right.
Pull out the black button to the left on the keyboard
support and pan the keyboard into the desired position.
The button engages at 3 positions.
How to adjust the operating unit adjustable in height*
Use the two buttons on the lifting pillar arm to move
the operating unit up and down electrically.
Additionally, the operating unit can be panned by about
90° to the right/left.
1-12
Caution!
A
Take care not to catch any parts of the body or
items when moving the operating unit! 460
95587412 01/01/09 © Smiths Heimann
Page 23
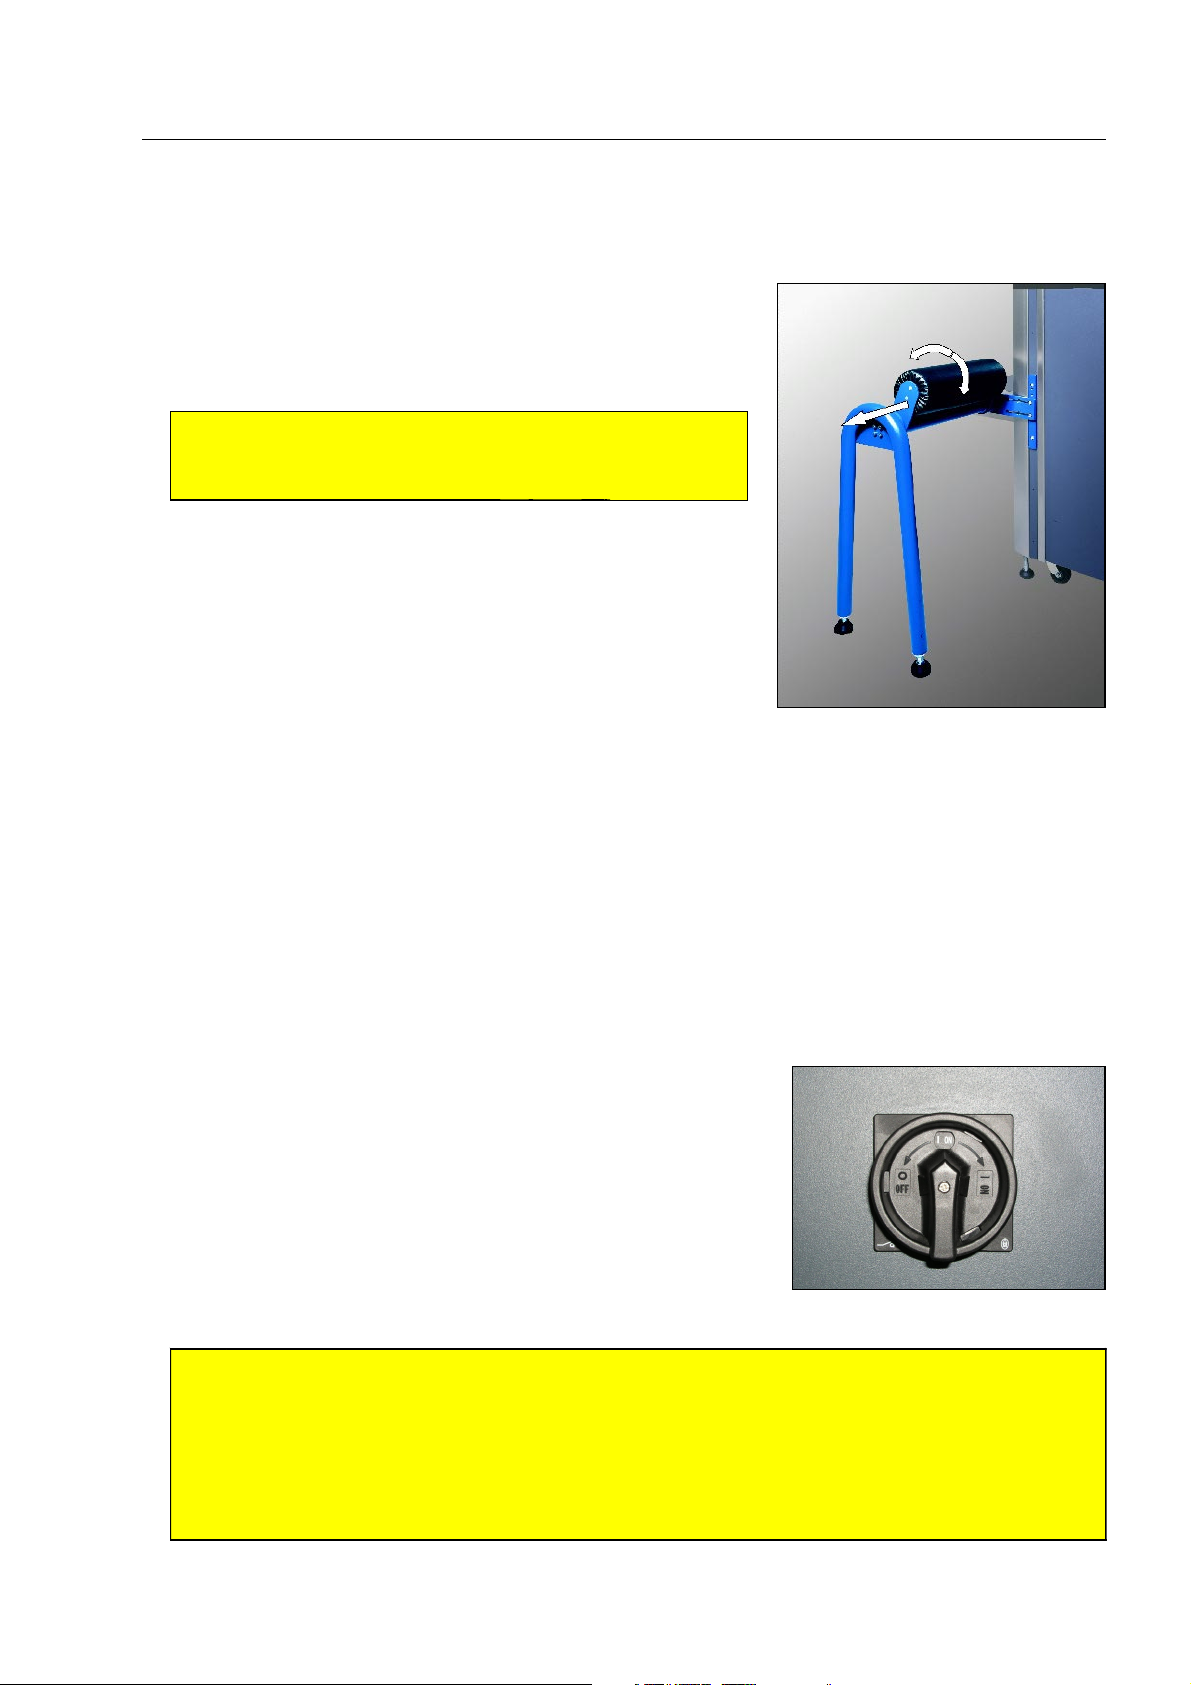
How to adjust the operator rest*
The upholstery can be adapted to your height by pulling and enga-
ging at the desired position. Do not adjust the upholstery to a position too low in order not to risk falling over when leaning against
it.
Warning!
A
Do not sit on the operator rest*! Keep your feet in contact
with the ground! 470
Here you find controls and indicators
The controls on the HI-SCAN X-ray unit housing
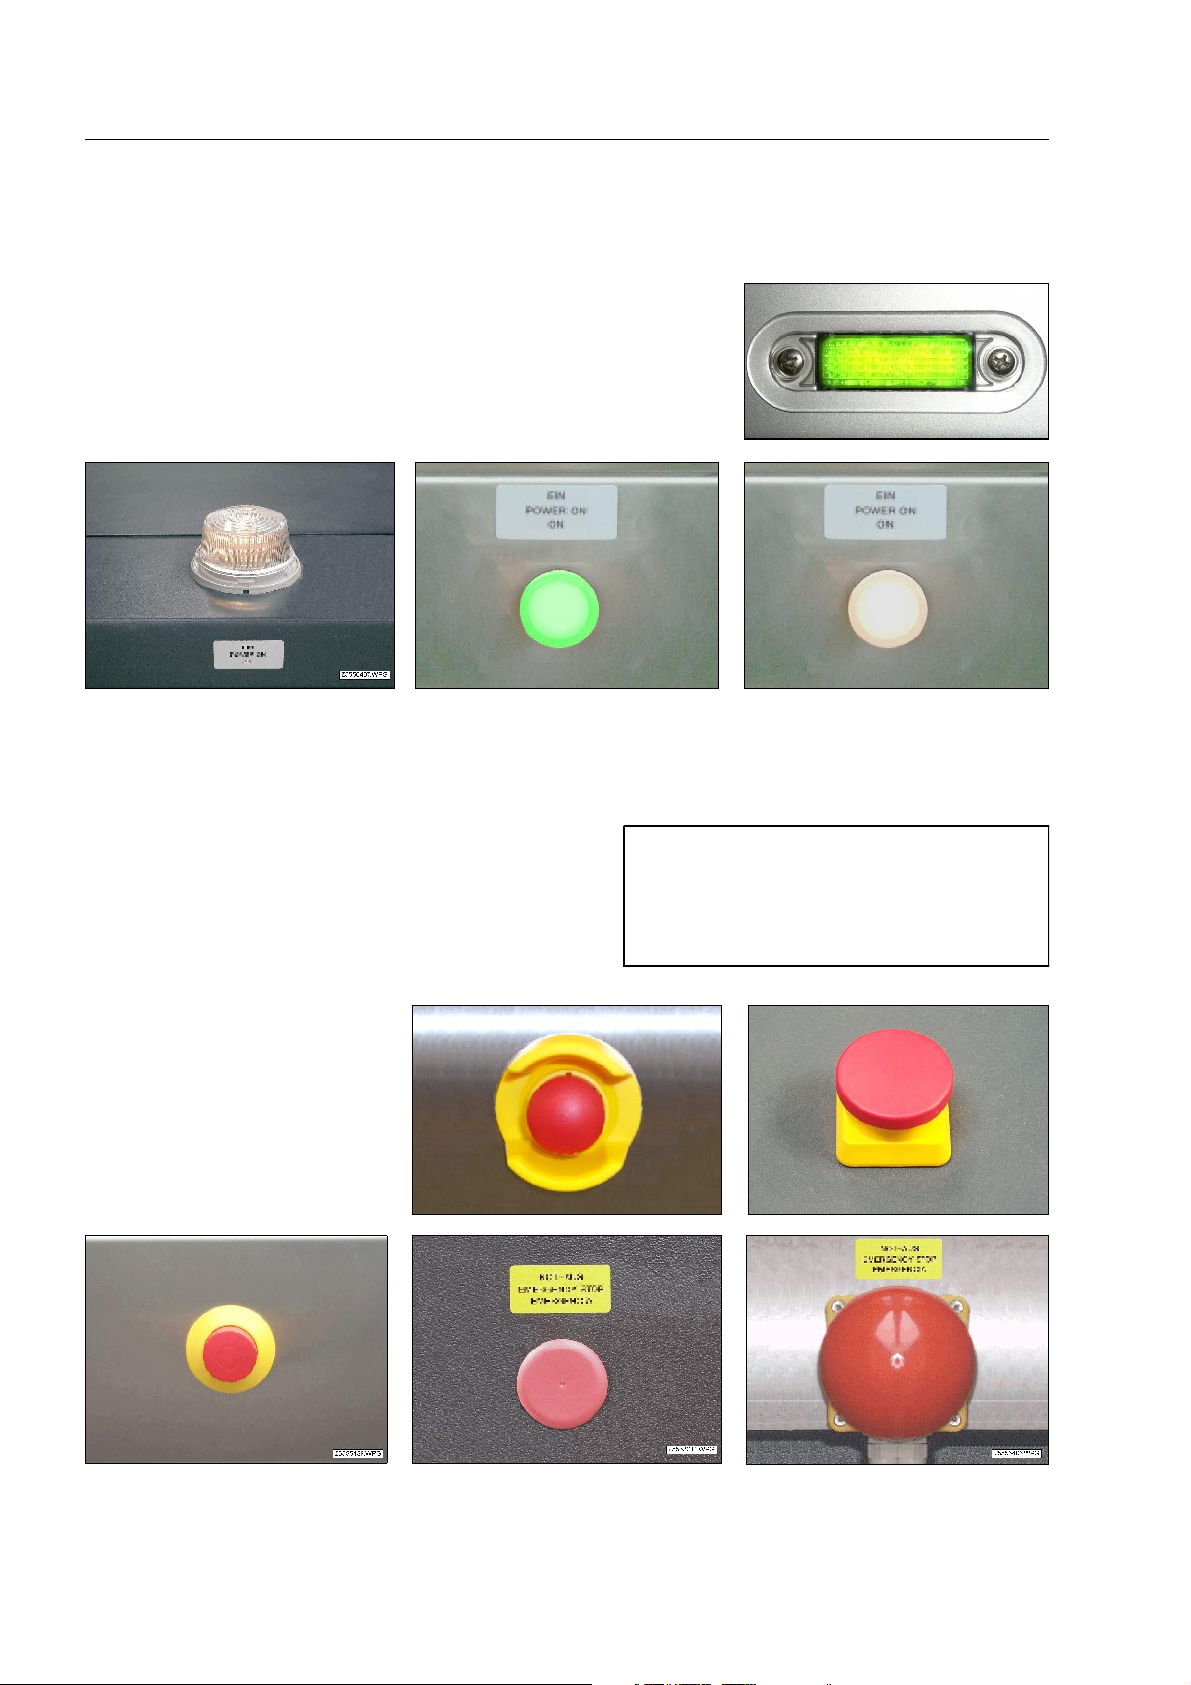
The main switch*
By means of the main switch you can separate the X-ray unit completely from the mains.
To separate the unit from the mains, first ensure that all indicators
on the keyboard have extinguished after you have switched off by
means of the key switch. Then turn the switch from position I to position 0.
Attention!
S
If the X-ray inspection unit is equipped with the option power fail buffer*, audible warning signals
will be sounded when the unit is separated from the mains! These signals will not stop until you
reconnect the unit to the mains (see below) or switch off the incorporated UPS unit (Uninterruptible Power Supply unit) (F 1-31 "How to switch on").
Even if you do not use the X-ray unit, it should always be connected to the mains to keep the buf-
fer batteries charged! 480
95587412 01/01/09 © Smiths Heimann
1-13
Page 24
Here you find controls and indicators
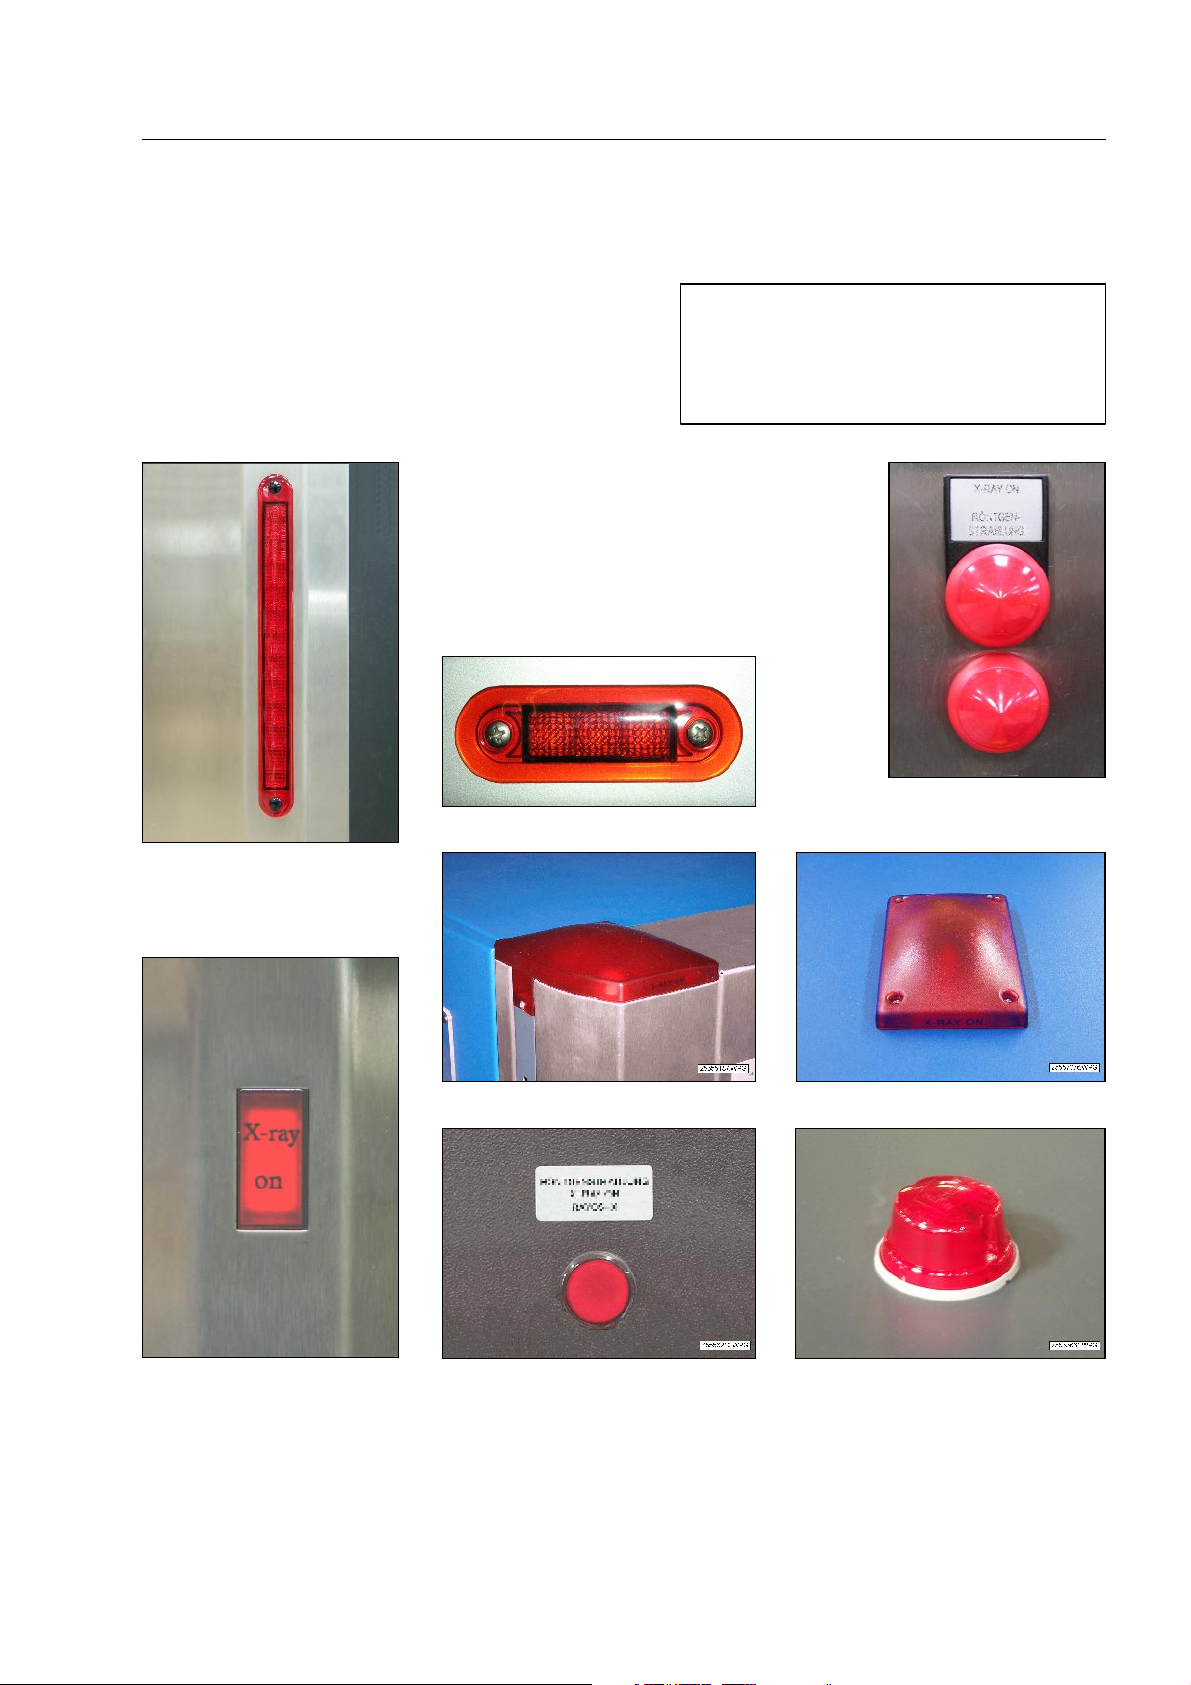
The power-on indicator*
The power-on indicator* shows that the X-ray unit is switched on.
The emergency stop buttons
The emergency stop buttons serve to quickly switch off
conveyors and X-ray generators of the HI-SCAN X-ray unit
or the complete unit in case of emergency.
If the X-ray inspection unit is integrated
I
into a baggage handling line, the line is
switched off as well.
To restart the unit, follow the corresponding instructions (F 1-33).
1-14
95587412 01/01/09 © Smiths Heimann
Page 25
The radiation indicators
Here you find controls and indicators
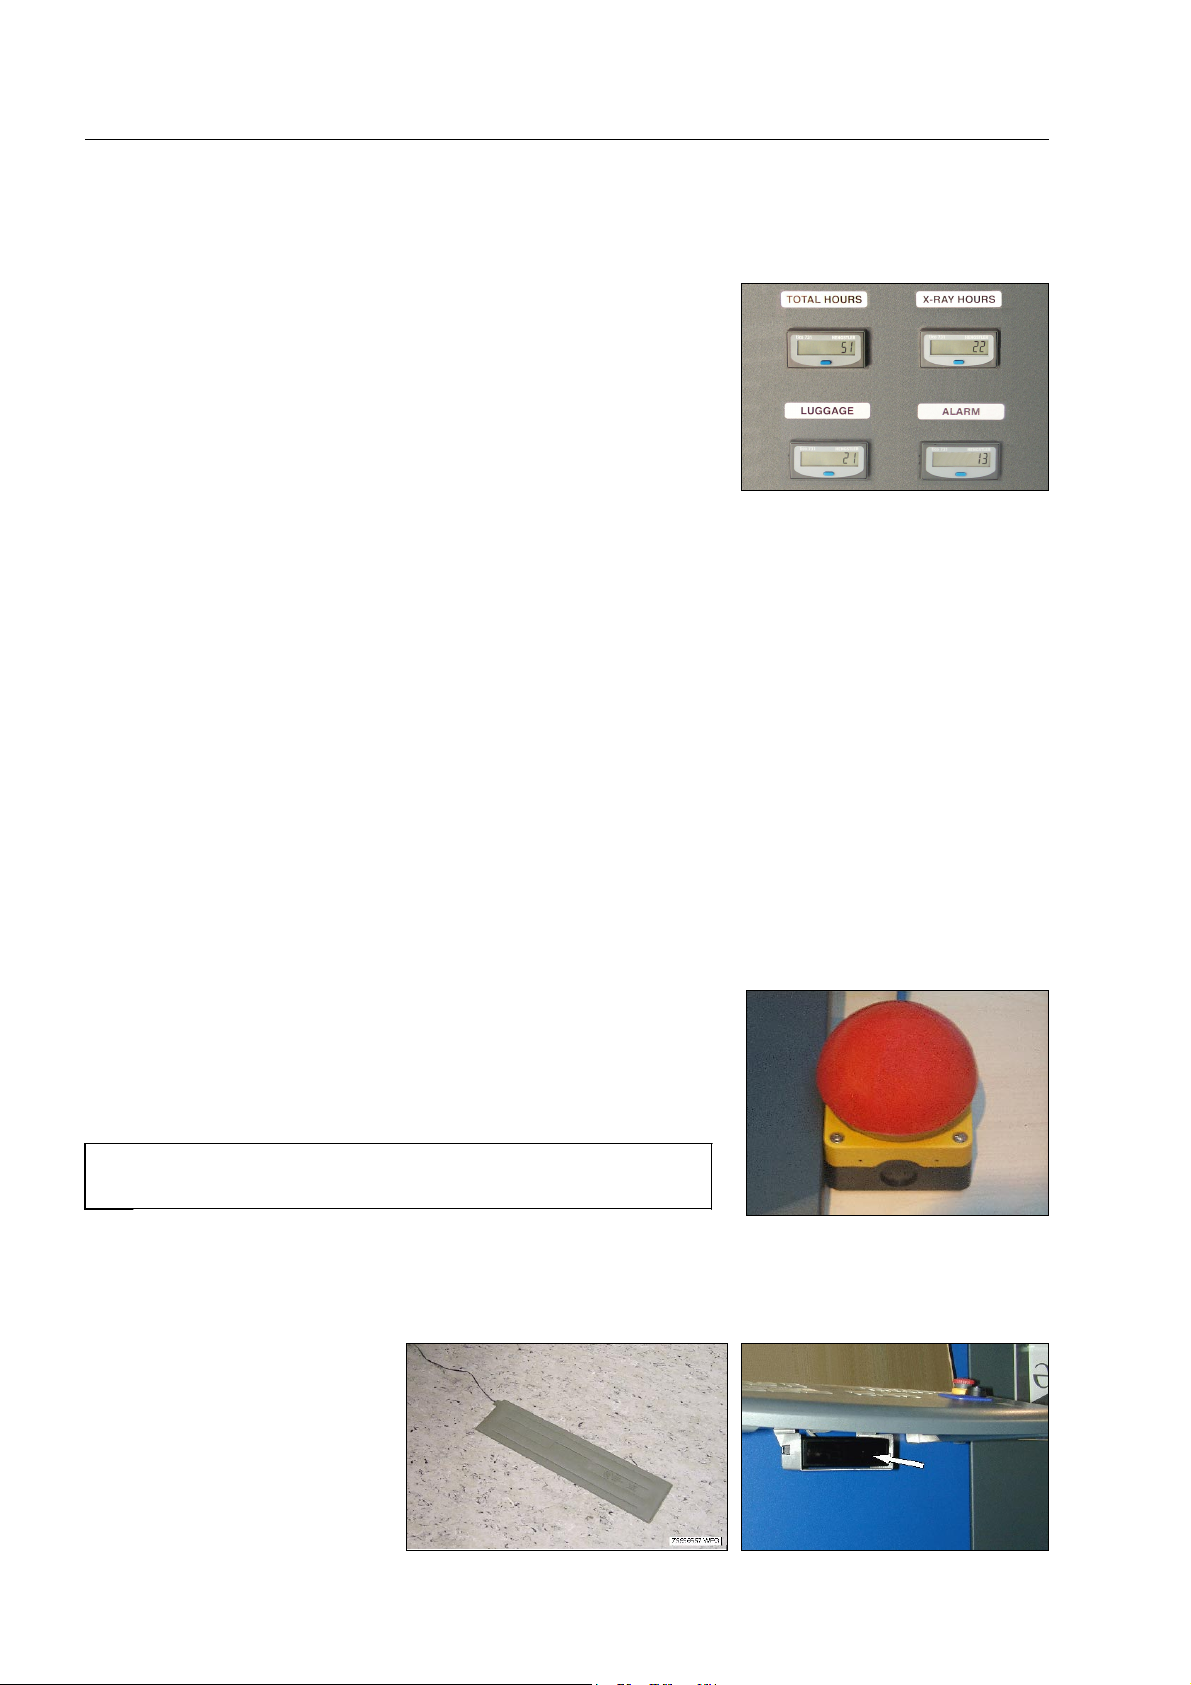
The radiation indicators warn of X-rays inside the inspection tunnel. The X-ray unit may be equipped with a blink-
ing function* of the indicators. In this case, the indicators
blink at a second's time.
In case of power failure or if an emer-
I
gency stop button has been actuated,
the radiation indicators may light up
shortly several times. This is however
meaningless.
95587412 01/01/09 © Smiths Heimann
1-15
Page 26
Here you find controls and indicators
The counters*
The counters* serve statistical purposes.
TOTAL HOURS indication of the total working hours of the X-ray in-
spection unit
X-RAY HOURS indication of the working hours of the X-ray generat-
ors
LUGGAGE number of scanned baggage or freight items
ALARM number of suspect baggage or freight items marked with
Further control elements
The separate emergency stop button for integrated units*
On a unit integrated into a baggage handling line the emergency stop
button* located beside the keyboard serves to quickly switch off conveyors, baggage handling line and X-ray generators in case of emergency.
On newer units the monitors and the electronics of the X-ray inspection
unit stay on.
H (F 1-50)
To restart the unit, follow the corresponding instructions
I
(F 1-33).
The contact mat* and the attendance detector*
The contact mat* or the attendance detector* mounted below
the keyboard prevent the conveyors and X-ray generators from
remaining active when you leave
the X-ray inspection unit
(F 1-54).
1-16
95587412 01/01/09 © Smiths Heimann
Page 27
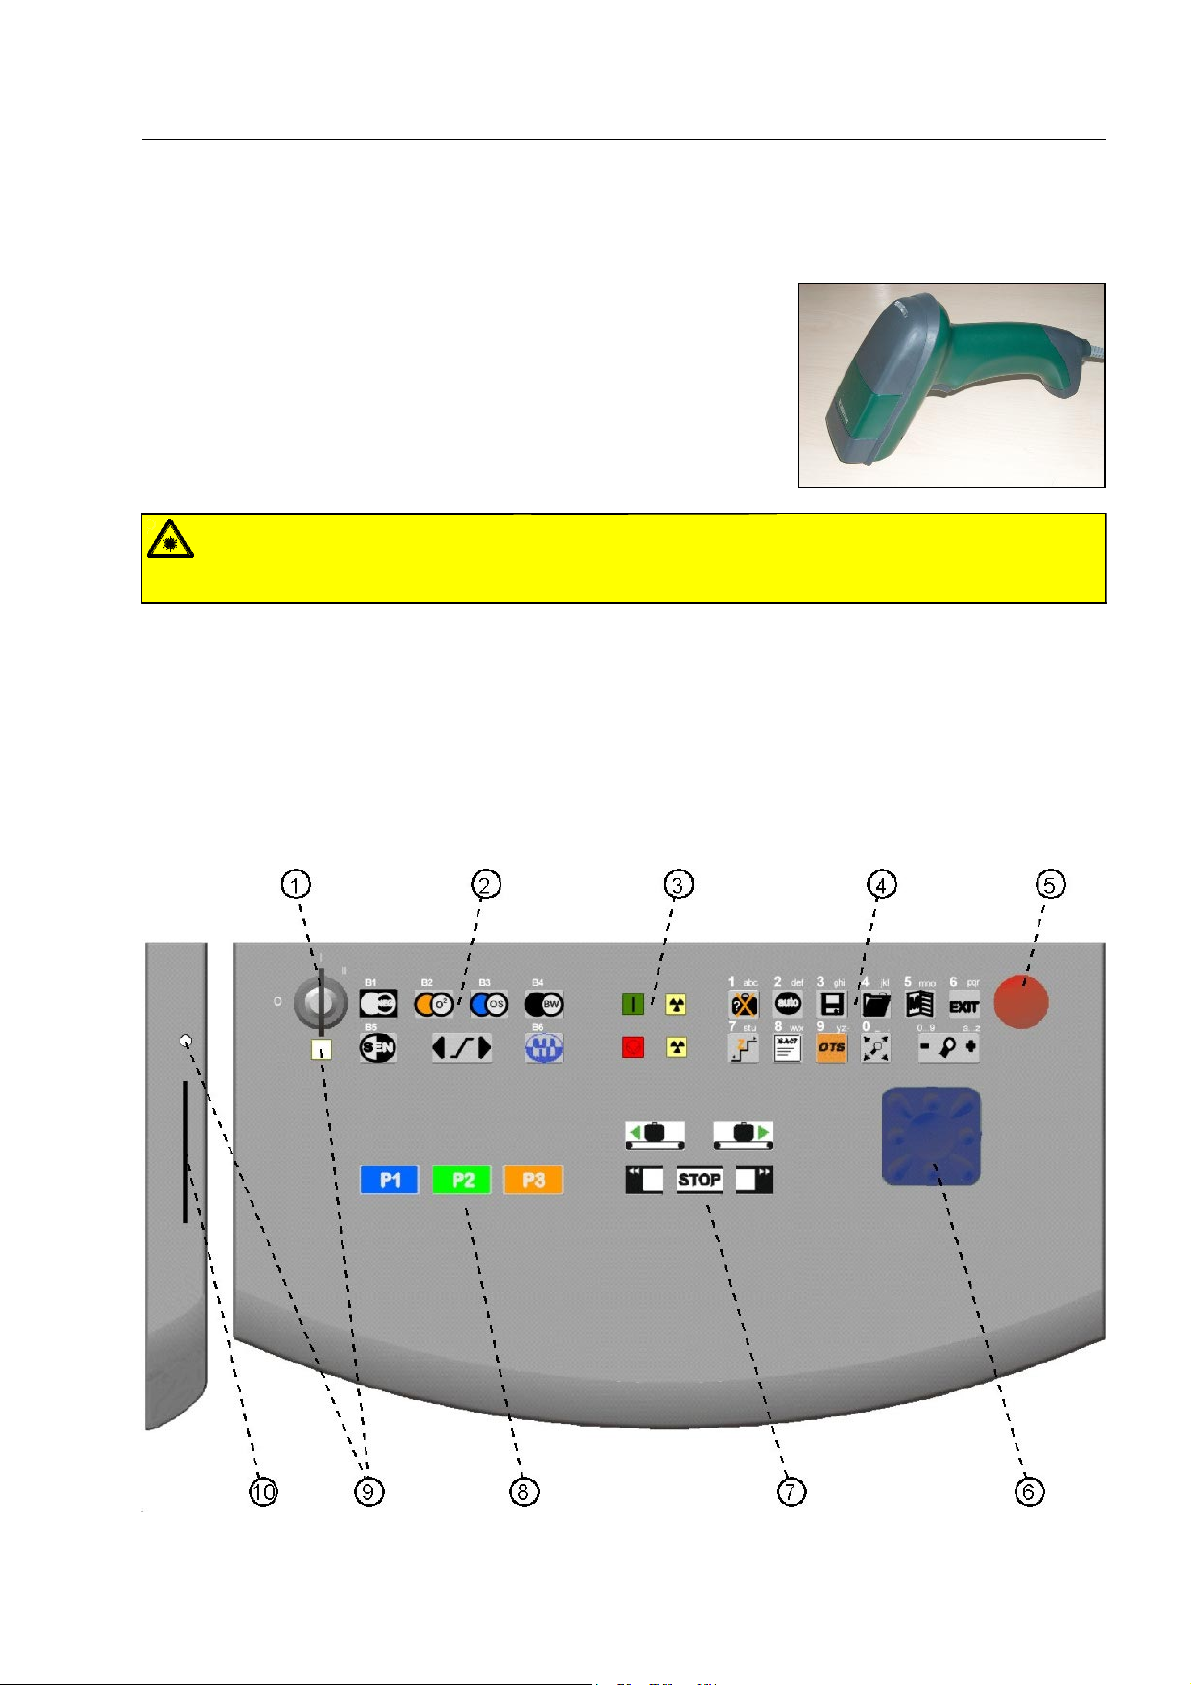
The hand-held bag code scanner*
Use the hand-held bar code scanner* to read in the bag identification
code (bag ID) from the baggage or freight item's bag tag. After the inspection, the X-ray image of such baggage or freight item will hence be
automatically stored (F 1-82). X-ray images memorized that way may
be searched for in the image directories later on by scanning the bag
code again to recall or manage them (F 1-84).
Warning!
Do not look into the laser beam of the bar code scanner and do not point the beam at other persons!
Here you find controls and indicators
490
The keyboard of the HI-SCAN X-ray unit
95587412 01/01/09 © Smiths Heimann
1-17
Page 28
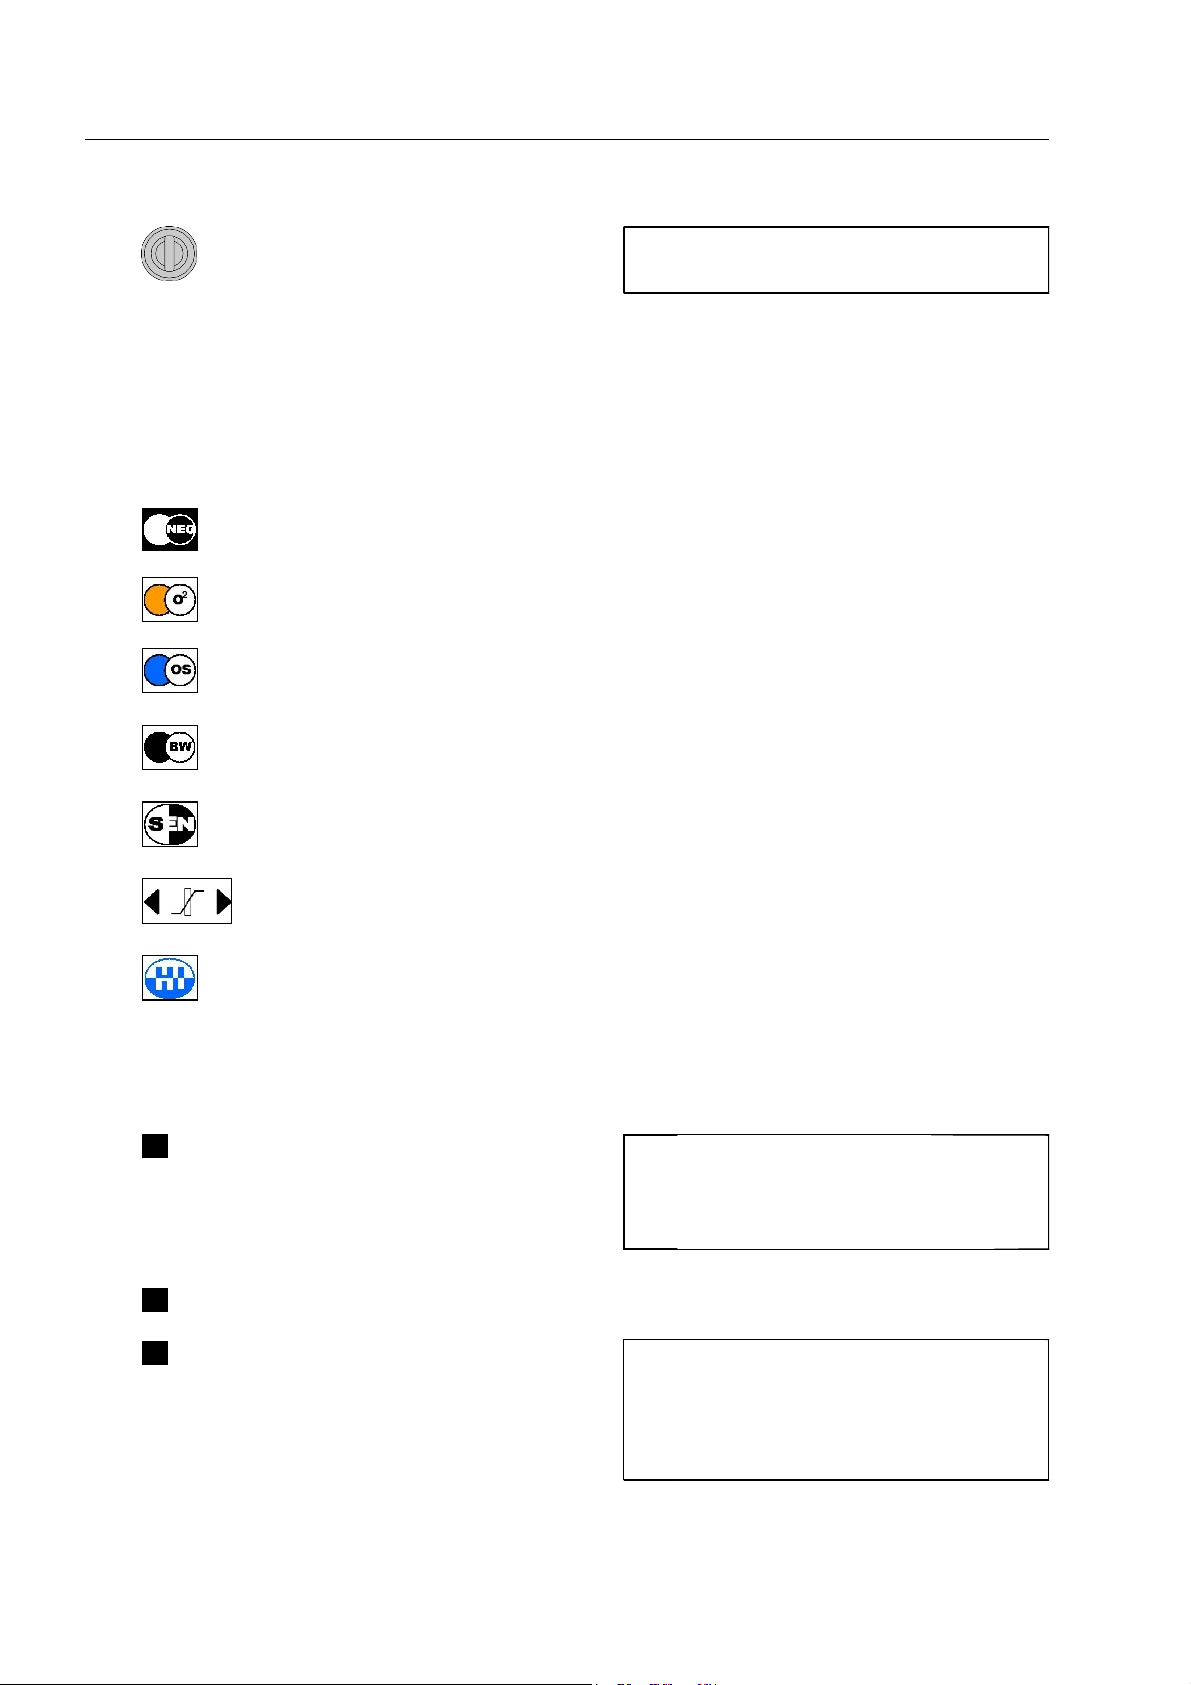
Here you find controls and indicators
1
Image display keys
2
use the key switch to switch on
the HI-SCAN X-ray unit and to
switch off (F 1-31 and -41) and
reset the emergency stop state
(only in units that are not entirely switched off when an emergency stop button is
actuated - F 1-33).
negative image (NEG) (F 1-66)
image display mode Organic Only* (OxO = O²) or Organic Only
image display mode Organic Stripping* (OS) or Organic Stripping
(F 1-63)
black/white X-ray image (BW) (F 1-61)
image display mode Superenhancement* (SEN) (F 1-67)
As an optional equipment, a turn-knob
I
switch* without a key can be installed.
PLUS
* (O²+) (F 1-63)
PLUS
* (OS+)
vary the currently active image display mode (F 1-64, -67 and -70)
image display mode with higher penetration (HIGH) (F 1-65)
Indicator section
3
K
L
The power-on indicator shows
that the X-ray unit is switched
on.
The wait indicator shows, that the X-ray unit is not yet ready for operation.
J The radiation indicators warn of
X-rays in the inspection tunnel.
During the automatic shut down cycle
I
the power-on indicator is illuminated for
about 1 minute after turning the key
switch to position O.
In case of power failure or if an emer-
I
gency stop button has been actuated,
the radiation indicators may light up
shortly for several times. This is
however meaningless.
1-18
95587412 01/01/09 © Smiths Heimann
Page 29
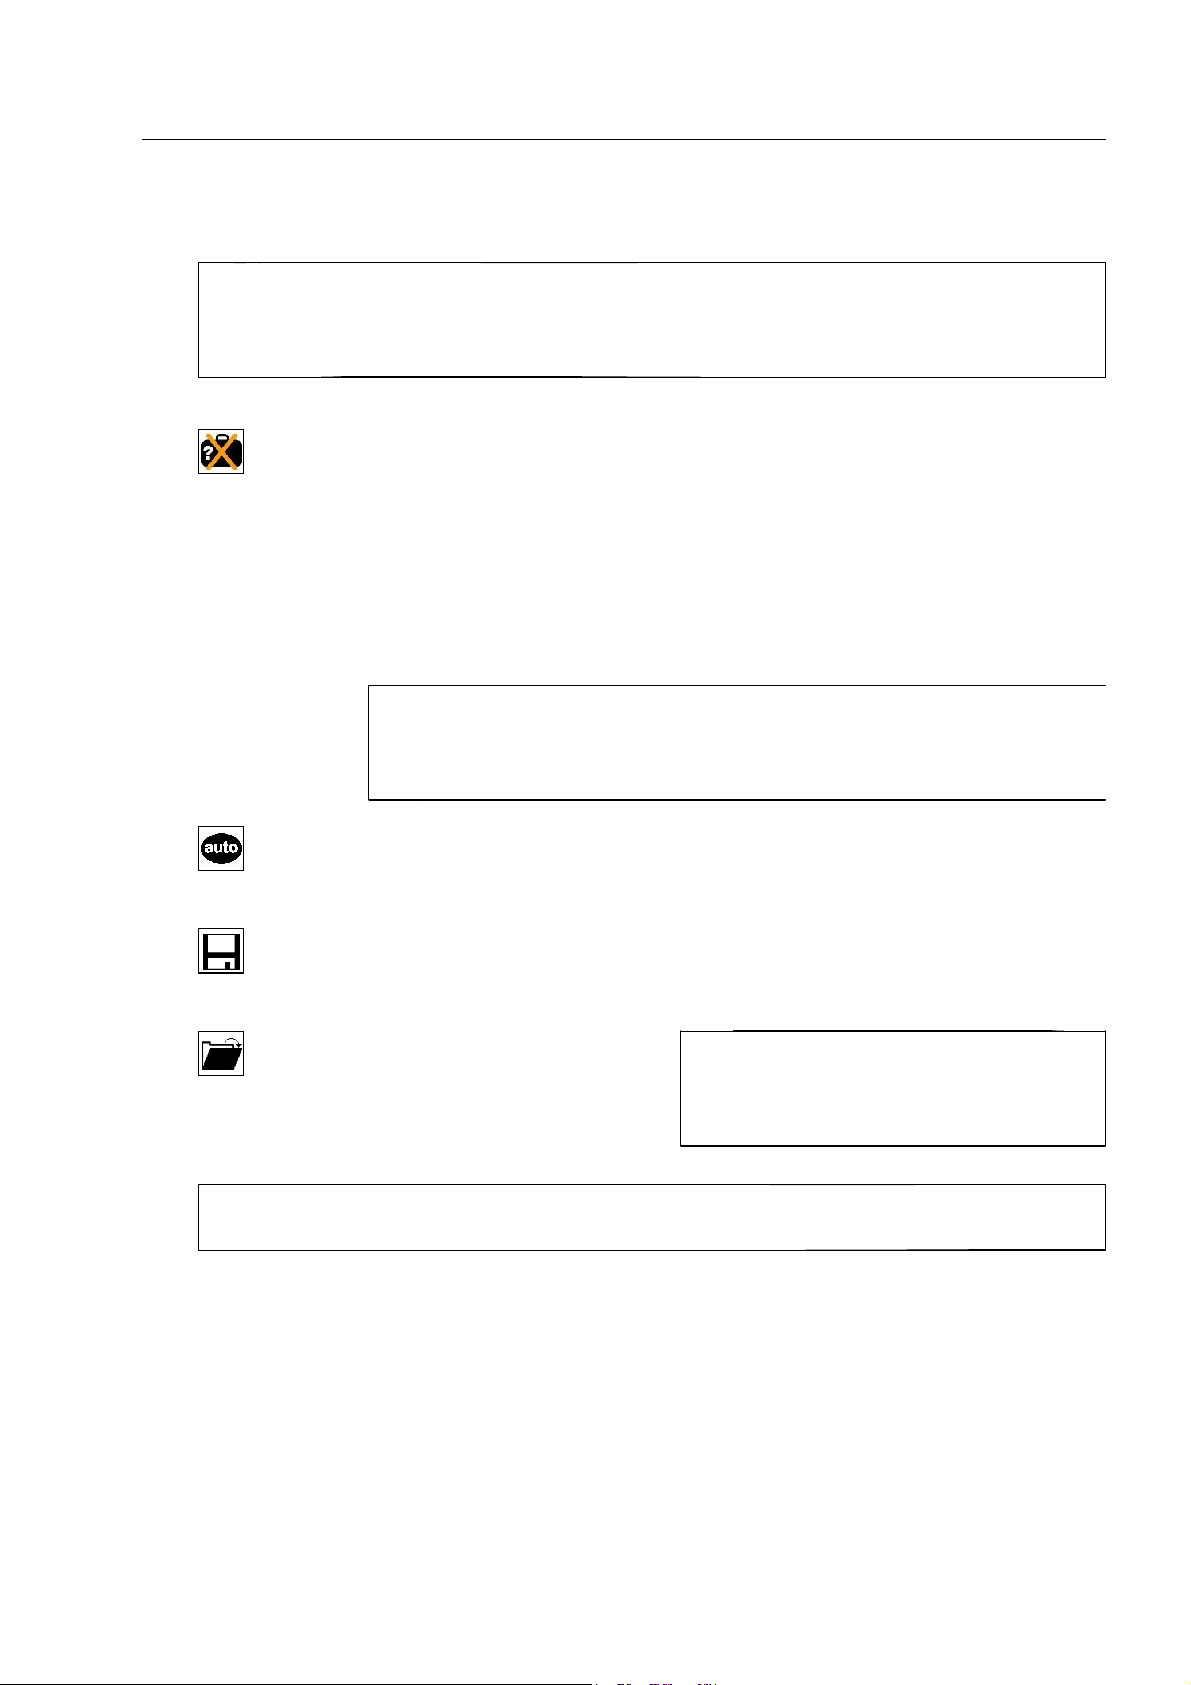
4
Here you find controls and indicators
Function keys
The function keys are also used to select functions from screen menus and to enter digits and
I
text. In this case, the numerals and letters printed above the keys prevail [1 abc] ... [0 _ .]. Depending on the configuration of the X-ray unit, not all of the keys described in the following are
available on the keyboard.
1st key depression:
– acknowledgment and deletion of recognized fictional threat objects and threat
images projected by the HI-TIP systems* (F 1-73) or
– acknowledgment and deletion of recognized fictional threat objects and threat
images projected by the Operator Training System OTS XTrain* (F 1-77)
2nd key depression:
–electronic marking of suspect baggage or freight items to generate an audible
signal (F 1-50) as well as simultaneous transmission of the corresponding Xray image to a recheck station* and/or to the Central Image Data Archive CIDA*
Units with newer software* can be adjusted in such a way that the electronic
I
baggage marking takes already place simultaneously with the 1st key de-
pression, however, only in case that no fictitious object was inserted by the
TIP* system.
switching on and off the image markings* set by the user (F 1-50) and the inser-
tion of markings of the automatic detection functions X-ACT*, radioactivity detect-
or*, HDA* and HI-SPOT* (F 1-57)
key appropriate to store X-ray images by means of the IMS Image Store System*
(F 1-82) as well as simultaneous transmission of the X-ray image to the Central
Image Data Archive CIDA*
key to select the menu for im-
age recall and organization of
the IMS Image Store System*
(F 1-82)
Though available, the keys X, S and T may have no function, if users of higher access
I
levels have locked up the automatic detection functions or the store and recall functions.
When selecting this IMS menu, the con-
I
veyors of the X-ray unit will be stopped
and a running scanning process will be
interrupted!
95587412 01/01/09 © Smiths Heimann
1-19
Page 30
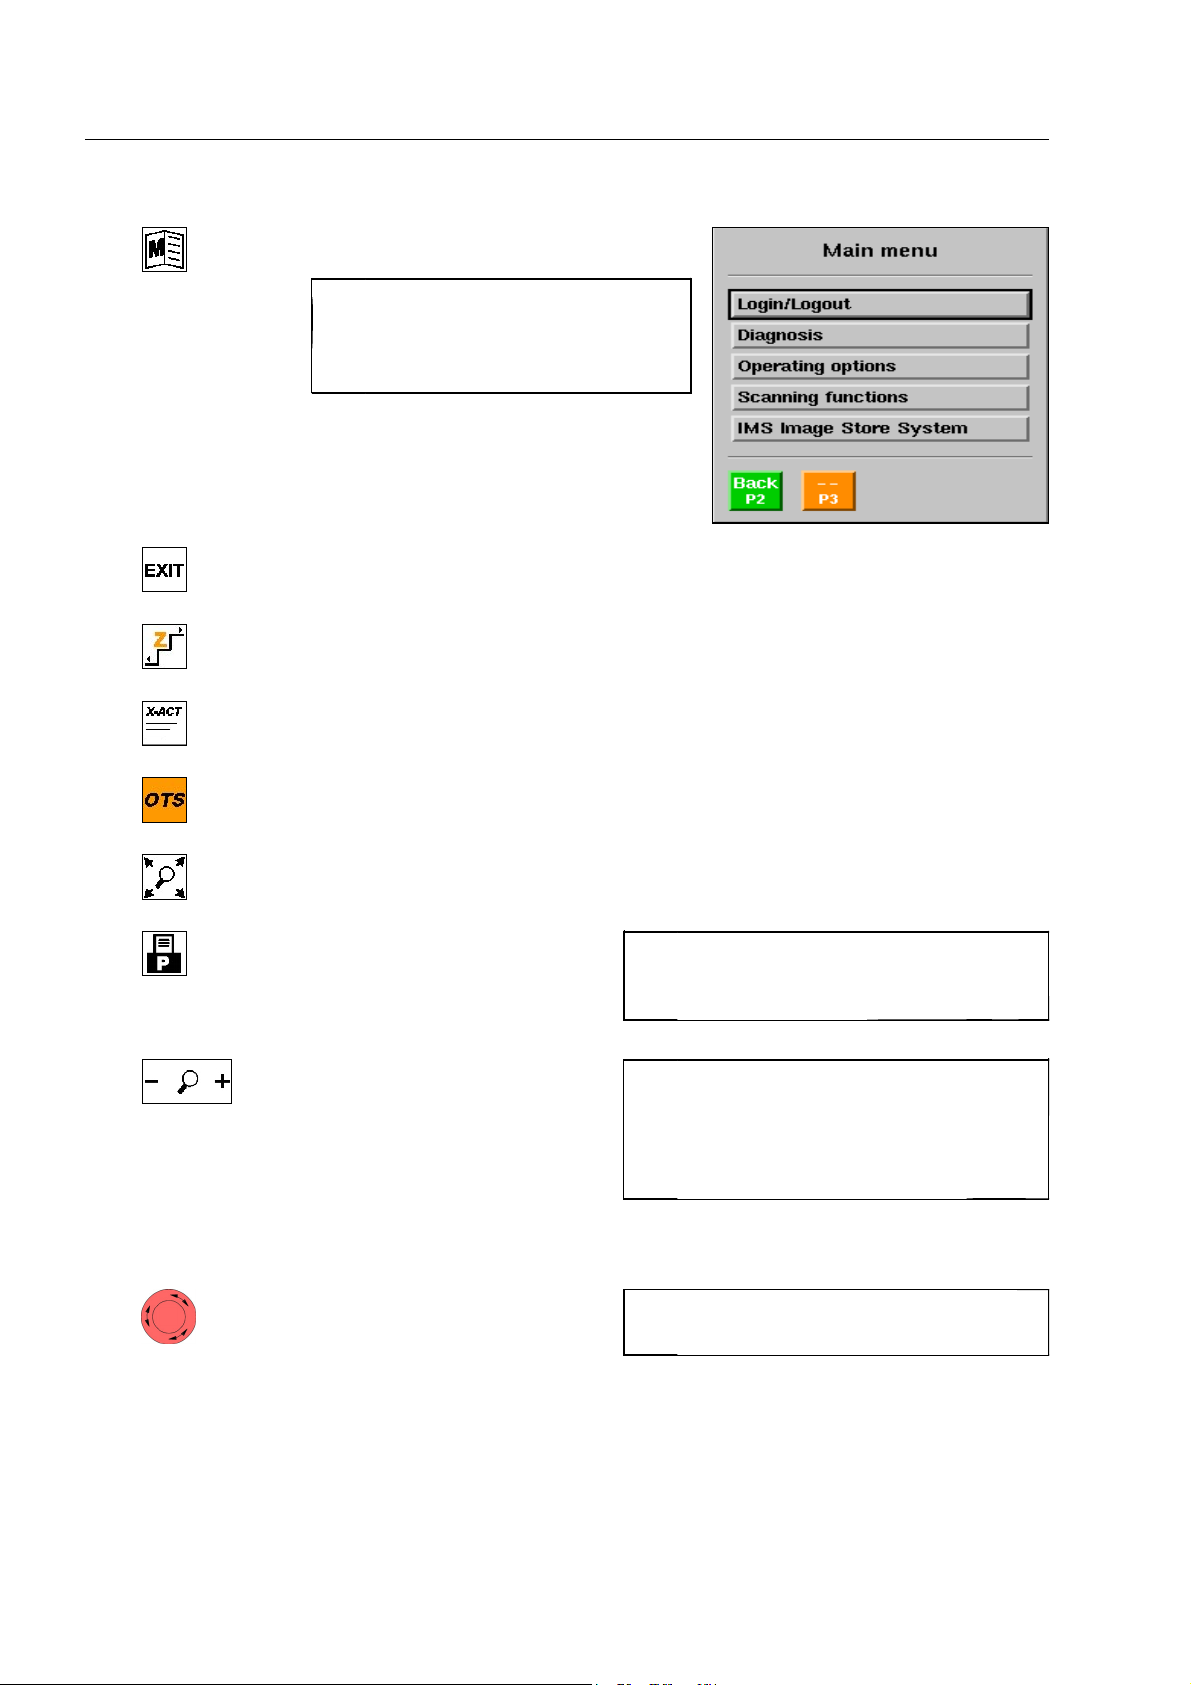
Here you find controls and indicators
key to select the Main menu
When selecting the Main menu, in
I
most cases the conveyors of the Xray unit will be stopped and a running inspection will be interrupted!
return to the default image display (F 1-60)
call up the image display mode X-PLORE* (F 1-67)
key to select the X-ACT menu* (F 1-57)
starting and terminating a training session of the Operator Training System OTS
XTrain* (F 1-77).
magnification to screen size of the displayed item (Opti-Zoom*) (F 1-72)
print* current X-ray image
(F 1-90)
selection of the magnification
factor for the Zoom function
(F 1-71) and switchover of mode
for alphanumerical entries
Key R may be without function if the
I
users of higher access level have locked
the print function.
In case of alphanumerical entries,
I
pressing the key to the left [0...9] selects
the entry of digits whereas pressing the
key to the right [a...z] selects the entry
of letters and special characters.
5
1-20
Emergency stop button to
quickly switch off conveyors and
X-ray generators of the HI-SCAN
X-ray unit or the complete unit
in case of emergency (possibly not existing at X-ray inspection units integrated into
baggage handling lines. These are partly equipped with a separate emergency stop
key located next to the keyboard (F 1-16)
To restart the unit, follow the corres-
I
ponding instructions (F 1-33).
95587412 01/01/09 © Smiths Heimann
Page 31
Here you find controls and indicators
6
7
Control keys
Navigator for the selection of image sections for the Zoom function (F 1-71) and
for the selection of functions in screen menus and windows
Move between items listed one on top of the other or next to each other in
I
screen menus or windows by directing the navigator downward or upward.
If you direct the navigator to the right or to the left, you change the entries
or call up a selected menu item or function.
You can delete wrong text entries by moving the cursor to the left using the
navigator.
– start the conveyors to the left or right (F 1-43pp),
– call the next image selected for recall by the IMS Image Store System* (F 1-82),
– call the next image during a training session of the Operator Training System
OTS XTrain* (F 1-77) after a stop.
– stop the conveyors,
– stop and abort the image recall of the IMS Image Store System* (F 1-82),
– stop the image scroll during a training session of the Operator Training System
OTS XTrain* (F 1-77),
–leave the REVIEW function (F 1-48, -49, -77 and -89).
selection of the preceding X-ray
images - REVIEW function
(F 1-48, -49, -77 and -89).
Priority keys
8
combinations of above mentioned image display functions and further individual
functions can be assigned to three priority keys by users with higher access level.
The programmed functions are indicated in the screen indication field (F 1-23).
In screen messages and within screen menus and windows, the keys have the following functions:
– acknowledging the message,
– acknowledging and memor-
izing entries and returning to
the parent menu,
– activating a function,
– accepting a proposed action
When selecting the REVIEW function, the
I
conveyors of the X-ray unit will be
stopped and a running inspection will be
interrupted!
Attention!
S
If the parent menu to which you return
also provides a key
must also be left with
ize the entries in the subordinate menu!
r, this menu
r to memor-
500
95587412 01/01/09 © Smiths Heimann
1-21
Page 32
Here you find controls and indicators
– canceling entries and returning to the parent menu,
– refusing a proposed action
calling up the help function* (only in some menus)
9
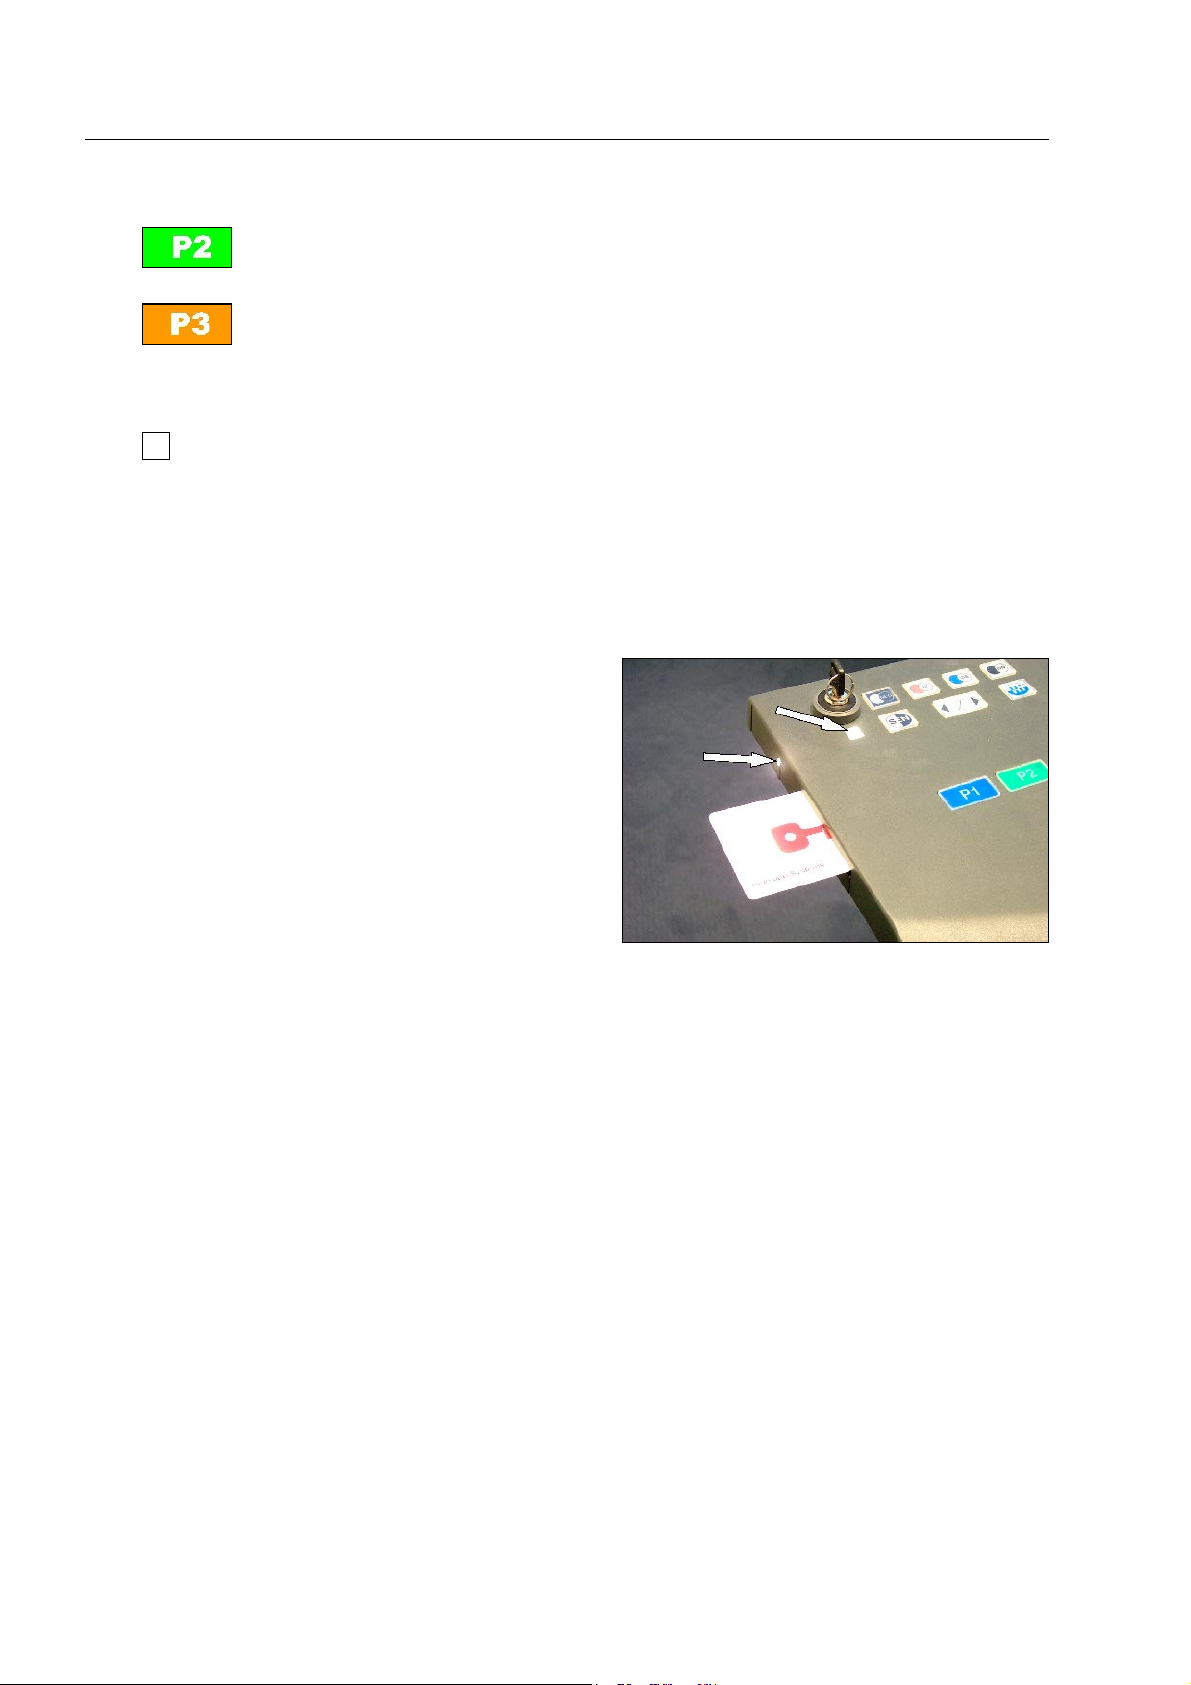
Card reader* for logging in and out at the X-ray
0
unit via ISIS cards (Intelligent Screener Identification System)
This indicator or the indicator located next to the card reader (on older keyboards)
lights up permanently as long as an ISIS card is correctly inserted in the keyboard's
card reader
does not light up at all, the card has either been wrongly inserted or it is not readable.
0 (see below). If the indicator flashes after inserting a card, or if it
1-22
95587412 01/01/09 © Smiths Heimann
Page 33
Here you find controls and indicators
The screen indication field
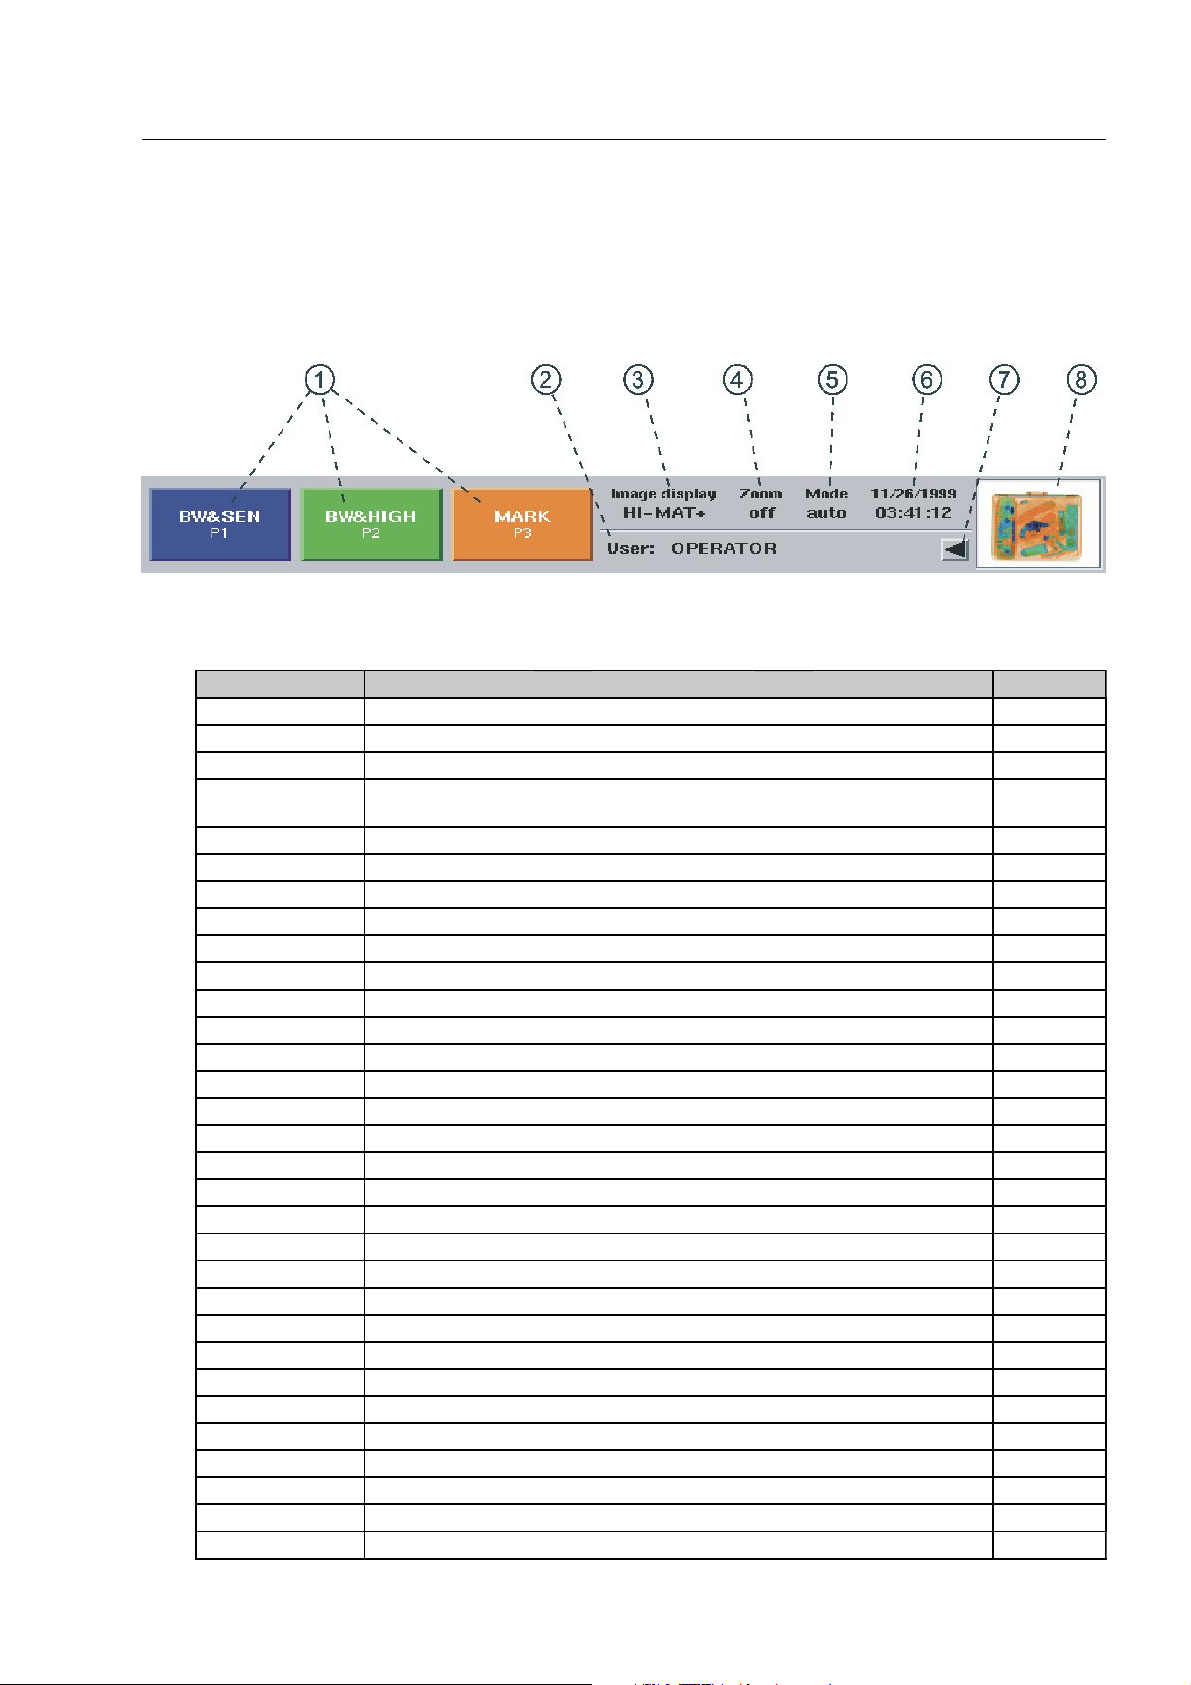
After switching on (F 1-31) the HI-SCAN X-ray unit, the indication field is displayed in the lower screen area
(in dual view units only on the main monitor).
1 display of functions or combinations of functions to be called up via r, s and t
Display Function F
−− without function
ALARM send silent alarm 1-91
ALARM ON silent alarm is active 1-91
AUTO switching on/off markings set by the user and the insertion of markings of the automat-
ic detection functions
BW black/white image 1-61
BW-HIGH black/white image with higher penetration 1-65
BW-LOW black/white image with lower penetration 1-66
BW-NEG black/white image in negative image display 1-66
BW-NEG-SEN black/white image in negative image display with Superenhancement 1-66 & -67
BW-SEN black/white image with Superenhancement 1-67
ENTER BAG ID enter bag ID manually to store the next image 1-82
EXIT default image display 1-60
FRAME OBJECT mark suspicious object in the X-ray image 1-50
HI-CAT1...8 HI-CAT image 1...8 1-69
HI-MAT+ HI-MAT
PLUS
color image
1
HIDE INFORMATION Hide written information in X-ray images 1-89
HIGH+ current image with higher penetration 1-65
HIGH HI-MAT
PLUS
color image1 with higher penetration 1-65
HIGH-NEG+ current image with higher penetration in negative image display 1-65 & -66
HIGH-NEG HI-MAT
PLUS
color image1 with higher penetration in negative image display 1-65 & -66
IMS MENU call up image recall menu 1-82
LOW+ current image with lower penetration 1-66
LOW HI-MAT
PLUS
color image1 with lower penetration 1-66
MARK mark baggage item, acknowledge and delete recognized threat object or image 1-50, -73 & -77
PLUS
MAT+-HIGH HI-MAT
MAT+-HIGH-NEG HI-MAT
MAT+-LOW HI-MAT
MAT+-NEG HI-MAT
MAT+-NEG-SEN HI-MAT
MAT+-SEN HI-MAT
color image1 with higher penetration 1-65
PLUS
color image1 with higher penetration in negative image display 1-65 & -66
PLUS
color image1 with lower penetration 1-66
PLUS
color image1 in negative image display 1-66
PLUS
color image1 in negative image display with Superenhancement 1-66 & -67
PLUS
color image1 with Superenhancement 1-67
NEG+ current image in negative image display 1-66
1-50 & -57
1-61
95587412 01/01/09 © Smiths Heimann
1-23
Page 34

Here you find controls and indicators
Display Function F
NEG HI-MAT
NEG-SEN+ current image with Superenhancement in negative image display 1-67 & -66
NEG-SEN HI-MAT
NO STOP avoid automatic conveyor stop of detection functions 1-57
OBJECT FINDER activating/deactivating the object finder 1-72
O² Organic Only image 1-63
O²+ Organic Only
O²-SEN Organic Only image with Superenhancement 1-67
O²+-SEN Organic Only
OPTI-ZOOM magnify displayed item optimally 1-72
OS Organic Stripping image 1-63
OS+ Organic Stripping
OS-SEN Organic Stripping image with Superenhancement 1-67
OS+-SEN Organic Stripping
PRINT print current image 1-90
SEN+ current image with Superenhancement 1-67
SEN HI-MAT
STORE store current image 1-82
TRANSFER IMAGE transfer current image by means of the Xport system 1-51
X-ACT MENU call up X-ACT menu 1-57
X-PLORE X-PLORE image 1-67
X-PL-SEN X-PLORE image with Superenhancement 1-67
1
on the black/white monitor* you see the corresponding display for the black/white image
PLUS
color image1 in negative image display 1-66
PLUS
color image1 with Superenhancement in negative image display 1-67 & -66
PLUS
image 1-63
PLUS
image with Superenhancement 1-67
PLUS
image 1-63
PLUS
image with Superenhancement 1-67
PLUS
color image1 with Superenhancement 1-67
2 name or user identification code of the user logged in to the HI-SCAN X-ray unit (F 1-34)
3 indication of the current image display mode. The same abbreviations as under 1 are valid plus the
following:
Display Function F
VARI HI-MAT
VARI... the image display mode defined after VARI (see above) is optimized for a certain ab-
VARI-CAT1...9 HI-CAT image 1..9 with varied color-/absorption assignment 1-70
X-PLORE Z7...9 X-PLORE image at Z=7...9 1-67
X-PL Z7...9-SEN X-PLORE image at Z=7...9 with Superenhancement 1-67
PLUS
color image1 is optimized for a certain absorption range 1-64
sorption range
1
on the black/white monitor* you see the corresponding display for the black/white image
1-64
4 display of magnification factor for the Zoom function (F 1-71)
1-24
95587412 01/01/09 © Smiths Heimann
Page 35
Here you find controls and indicators
5 display of the currently active operating mode of the HI-SCAN X-ray unit
Display Function F
−− normal
auto markings set by the user and markings of one or more automatic detection functions
(X-ACT*, radioactivity detector*, HDA* and HI-SPOT*) are inserted
IMS images stored in the IMS Image Store System* are recalled 1-82
(IMS) IMS recall stopped temporarily 1-82
IMS&auto IMS recall with markings of automatic detection functions 1-82
IMS&REV recalled IMS images are reviewed 1-82
OTS OTS training session is in progress 1-77
(OTS) OTS training session stopped temporarily 1-77
OTS&auto OTS training session is in progress with markings of the automatic detection functions 1-77
OTS&REV preceding OTS X-ray images are reviewed 1-77
REVIEW preceding X-ray images are reviewed 1-48, -49, -77
REV&auto review of images with markings of automatic detection functions 1-48, -49, -77
1-50& -57
& -89
& -89
6 display of date and time
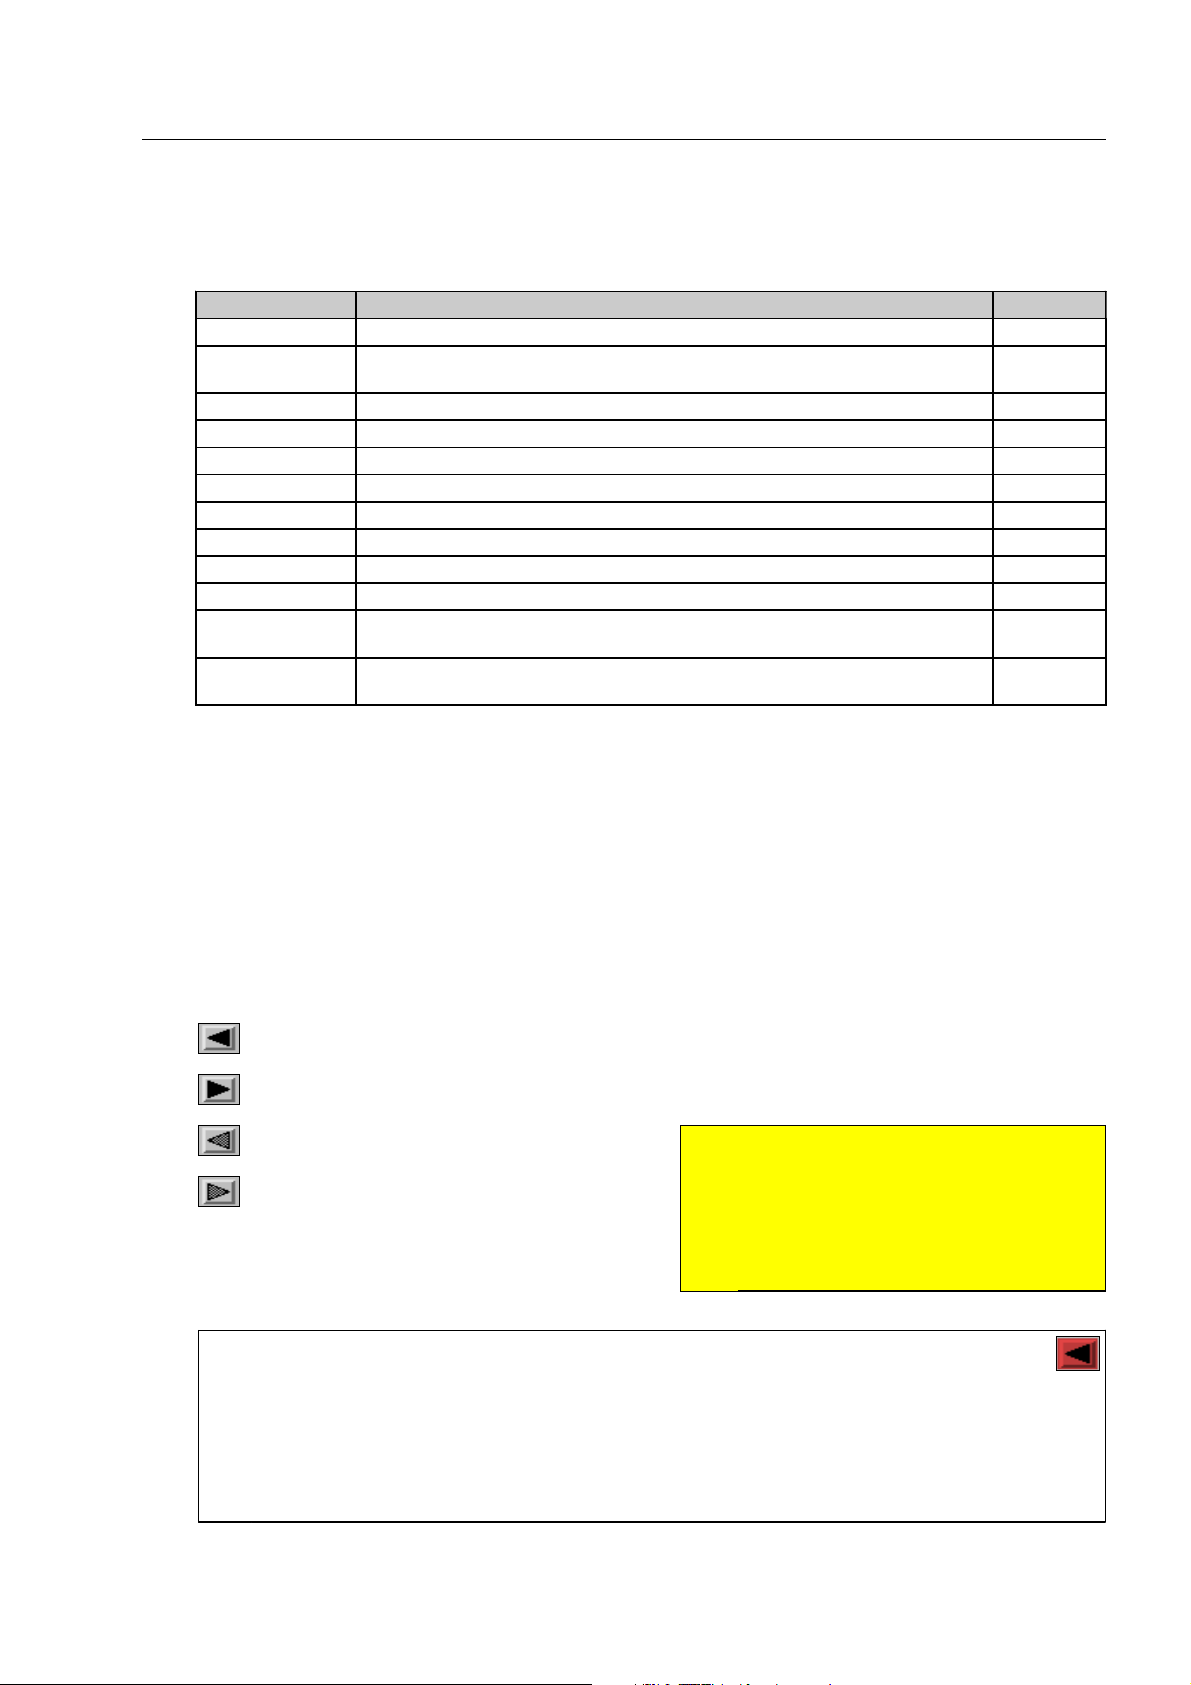
display of conveying directions
7
In this direction scanning procedures can be carried out in the one-way mode (F 1-47).
Press the corresponding key
veyors press
In this direction scanning procedures can
be carried out in the one-way mode
(F 1-47). The corresponding key
n must be kept depressed during the
inspection.
If the color of an arrow changes into red in the one-way mode (F 1-47), this means that
I
the conveyor's run has been interrupted, or can still not be initiated despite pushing the
conveyor start key. This may occur if safety switches* at the conveyor ends and/or the tunnel
entrances and exits (conveyor end or oversize detectors* - F 1-54) have detected that baggage
items have got stuck, or, if the X-ray inspection unit is integrated into a baggage handling system or line with the feed and discharge conveyors being out of service or occupied with baggage.
1.
m or n shortly to start the conveyors. To stop the con-
Attention!
S
m or
Units with newer software* can also be
set so as to stop the conveyors only
after up to 3 seconds after the key is released! Immediate conveyor stop is possible with key
1! 510
95587412 01/01/09 © Smiths Heimann
1-25
Page 36
Here you find controls and indicators
Objects can be scanned in the automatic return mode* (F 1-48) in this direction. The corresponding
stopped with
m or n key must be pressed briefly to start the conveyor. The conveyor is
1.
Objects can be scanned in the automatic
return mode* (F 1-48) in this direction.
The corresponding
must be kept pressed constantly during
the inspection and the following automatic return.
If the color of the arrow changes to red in the automatic return mode*, then the auto-
I
matic return was interrupted and must be restarted manually. No further scanning can
be started as long as this has not been done.
The active scanning direction can be inversed for one-way and automatic return mode*, if the
I
unit is equipped with Full-reverse mode* (F 1-52).
The inspection in both directions is possible with the function Reverse scanning* (F 1-53).
In this direction objects can only be reversed. Press the corresponding key
shortly to start the conveyors (only on units equipped with newer software*). To stop the conveyors press
m or n key
1.
Attention!
S
The unit can also be set so as to stop
the conveyor only after up to 3 seconds
after the key is released! Immediate
stopping is possible with
m or n
1!520
In this direction objects can only be reversed. The corresponding key
m or
n must be kept depressed during the
reverse run.
Attention!
S
Units with newer software* can also be
set so as to stop the conveyors only after
up to 3 seconds after the key is released! Immediate conveyor stop is possible with key
1!530
8 miniature display of the complete X-ray image. Image sections which are magnified on the screen will
be provided with a frame in the miniature display.
1-26
95587412 01/01/09 © Smiths Heimann
Page 37
Here you find controls and indicators
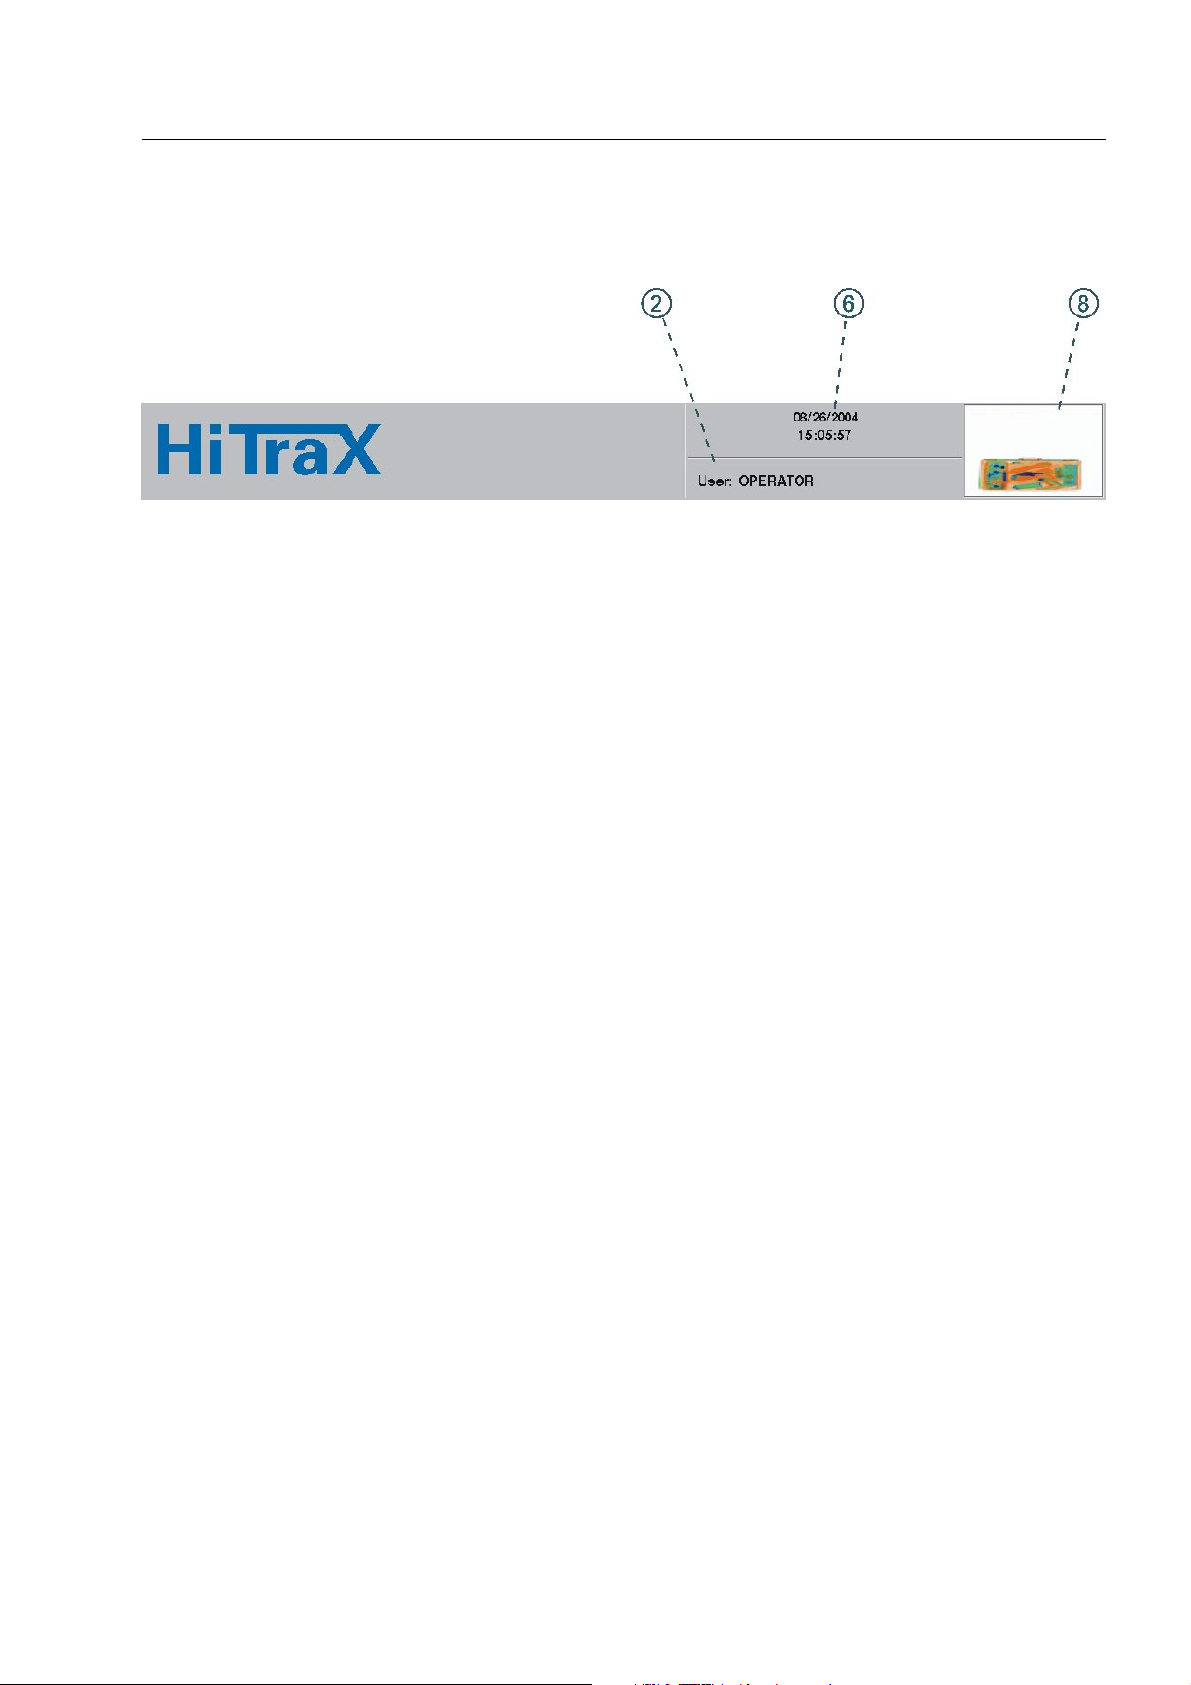
The indication field on the second screen*
(only in dual view units)
2 name or user identification code of the user logged in to the HI-SCAN X-ray unit (F 1-34)
6 display of date and time
8 miniature display of the complete X-ray image with the second view of the baggage or freight item. Im-
age sections which are magnified on the screen will be provided with a frame in the miniature display.
95587412 01/01/09 © Smiths Heimann
1-27
Page 38
How to start and terminate your work
How to start and terminate your work
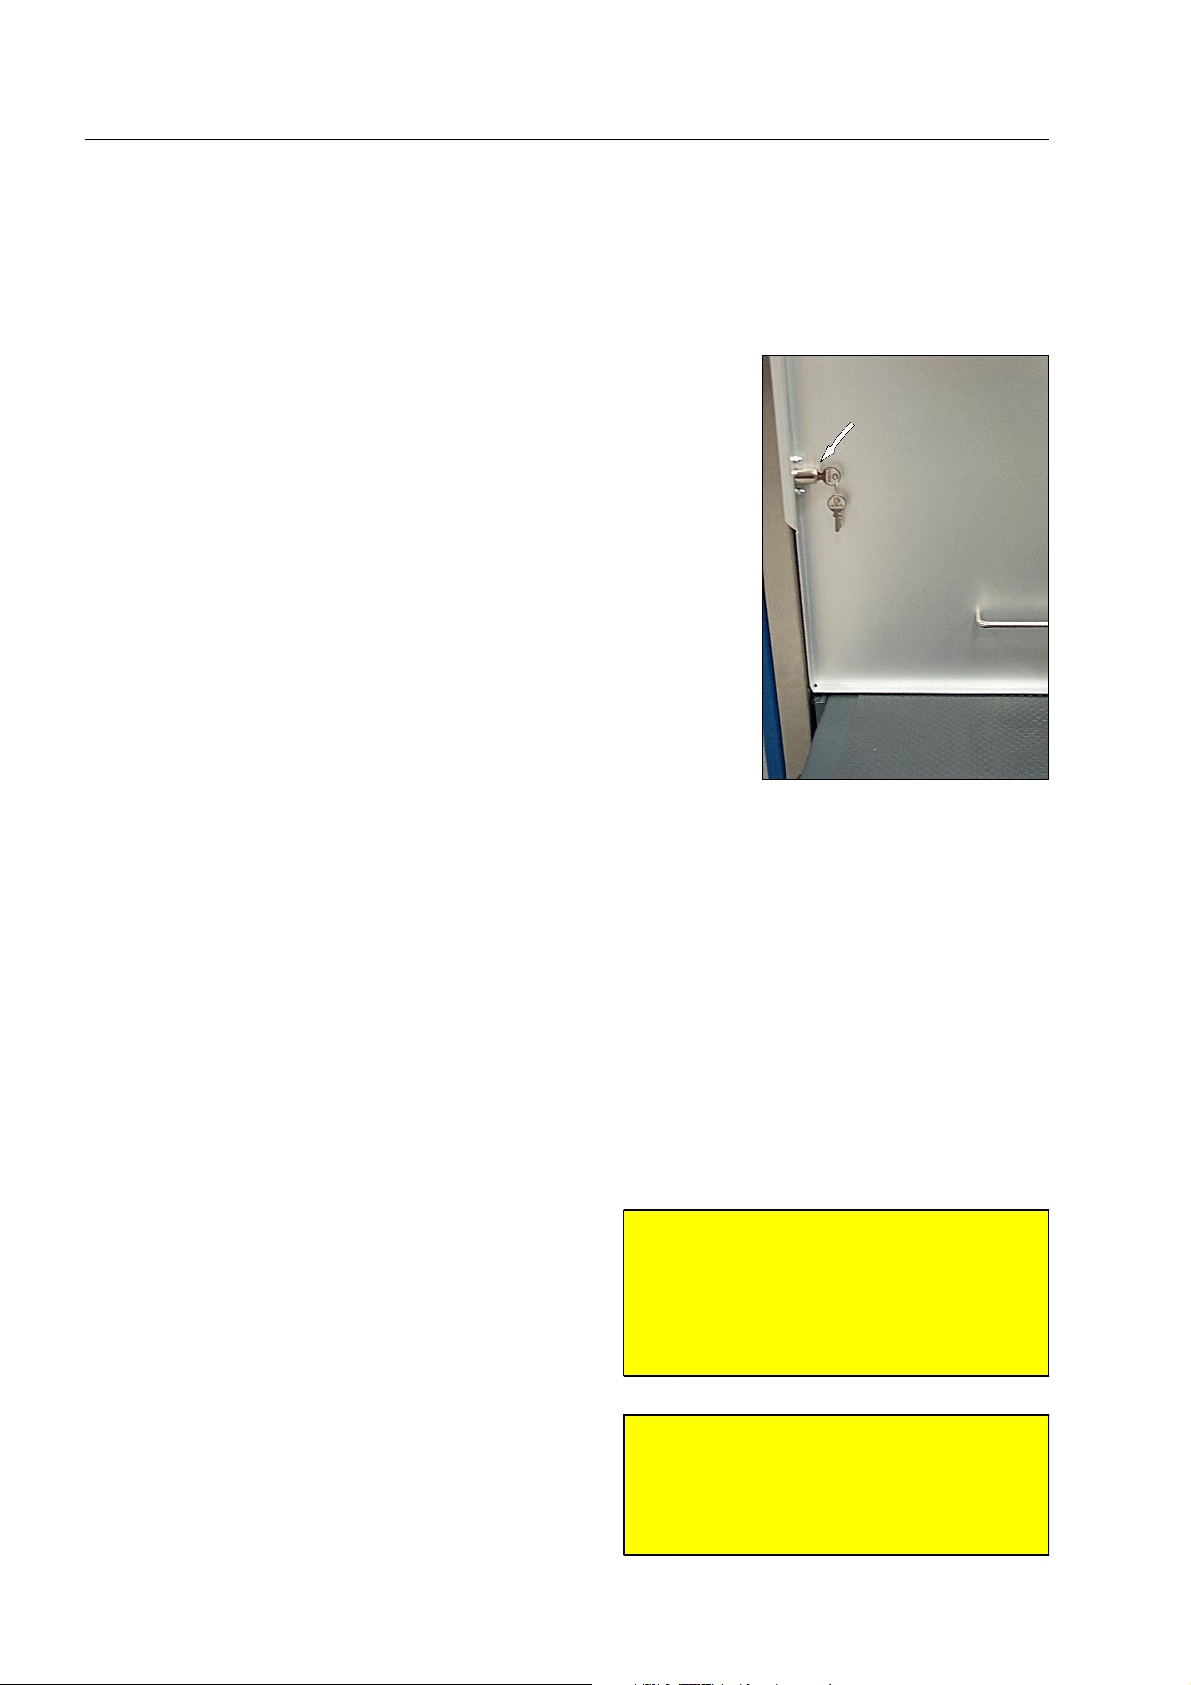
How to remove the tunnel covers*
Insert the key into the covers' locks one after another and turn it to the
right until the bolt comes out. To withdraw the key, turn it to the left
again.
Afterwards you can take off the covers.
How to connect the X-ray unit to the mains
With the exception of mobile X-ray inspection units* (see
following paragraph) the X-ray inspection unit will be connected to a mains outlet by the technician carrying out the
installation. Adhere to the following instructions if you do
the connection yourself.
If the X-ray unit has already been connected and you
want to disconnect it, make sure in advance that the
unit has been shut down completely, i.e. no indicator
lights up on the keyboard any more!
1-28
Attention!
S
An X-ray inspection unit which is not
provided for mobile use requires special
settings after a change of site. Such settings can only be carried out by a quali-
fied technician! 540
Attention!
S
If the unit has not yet completely
switched off, first follow the instructions
in paragraph "How to switch off"
(F 1-41). 550
95587412 01/01/09 © Smiths Heimann
Page 39
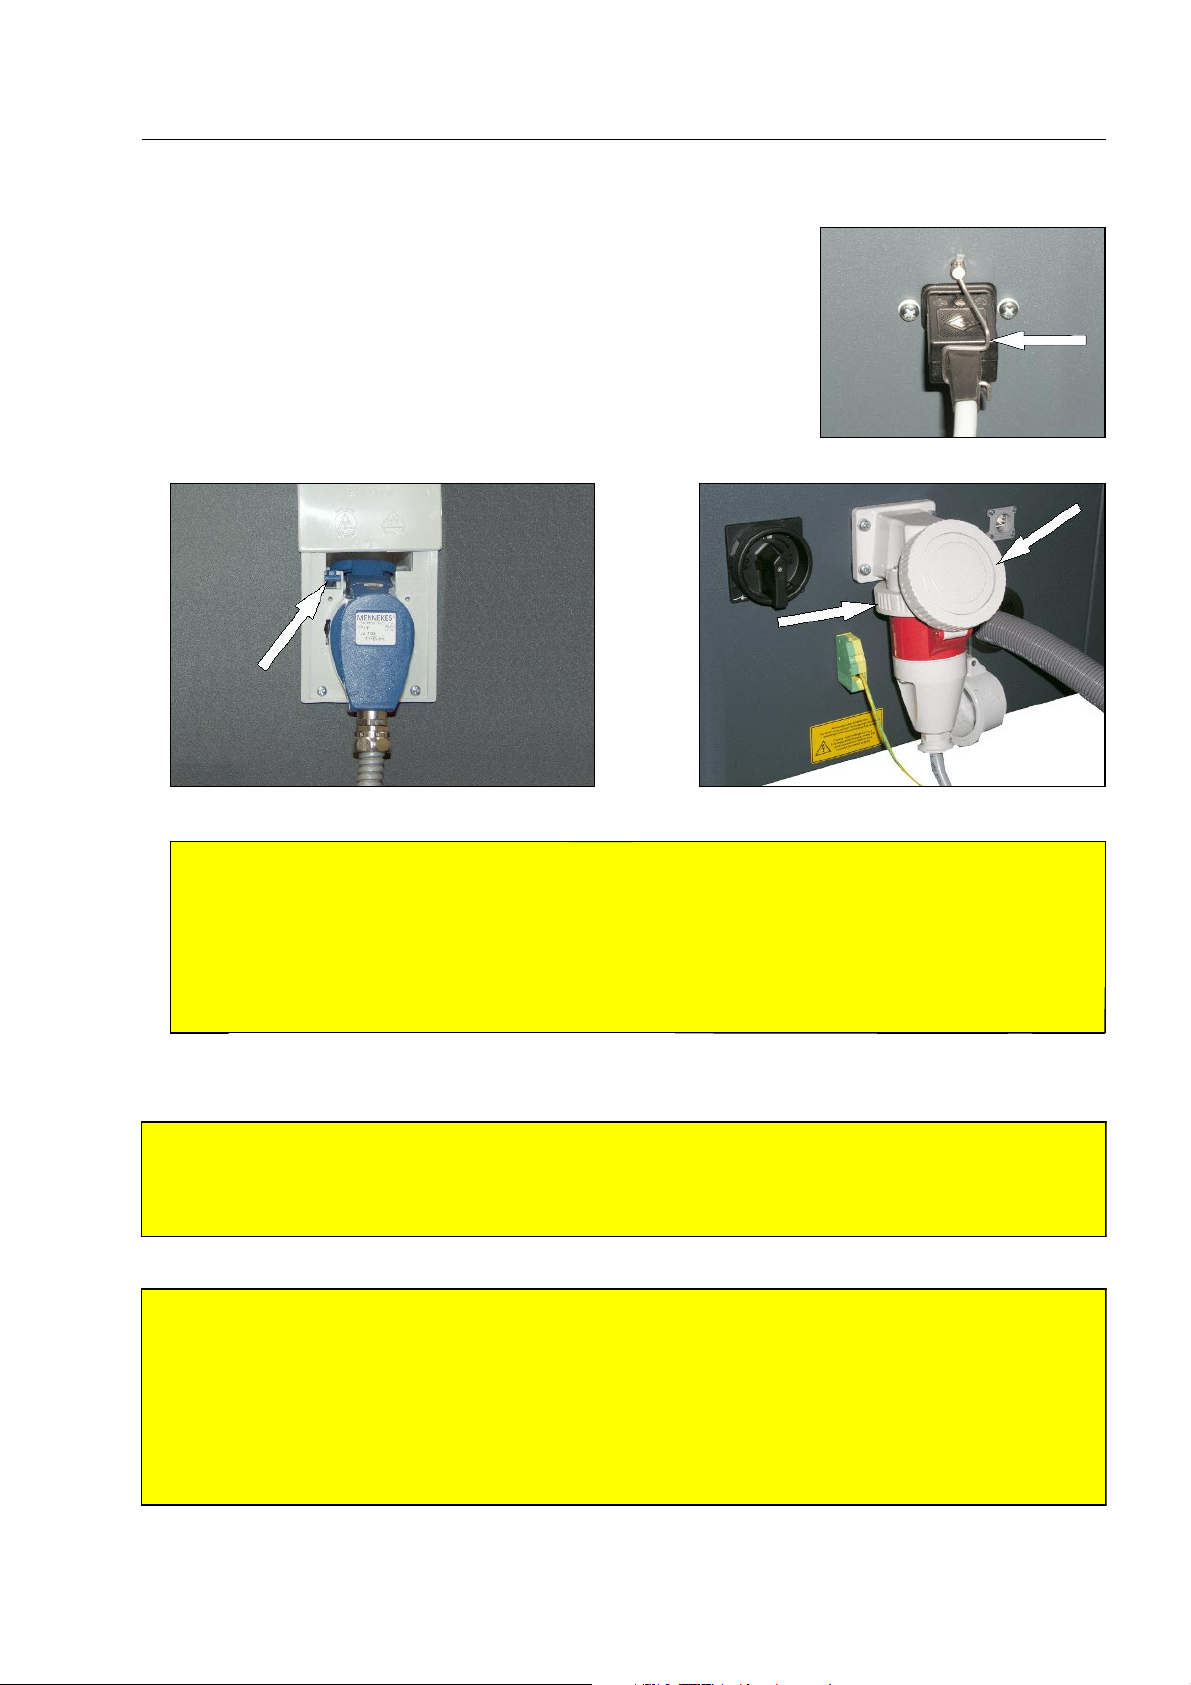
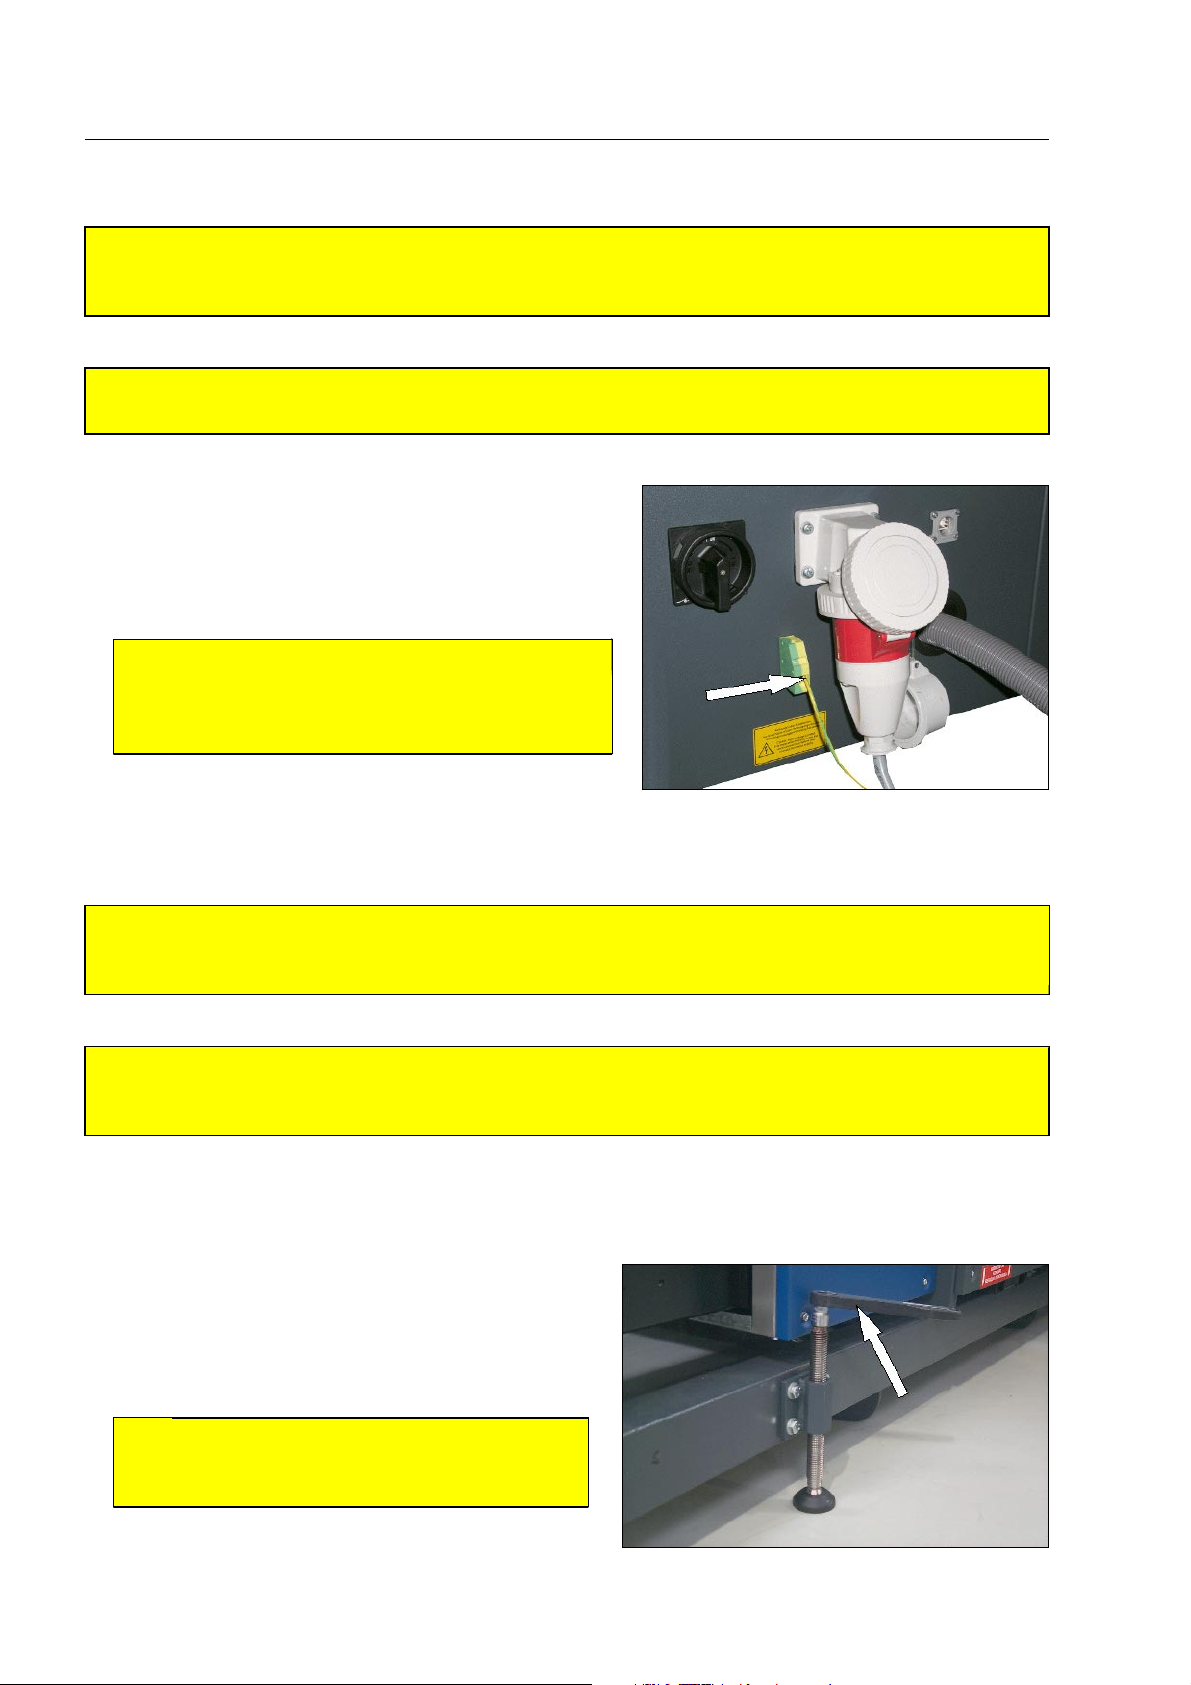
Then withdraw the plug from the mains outlet and from the unit's
socket*.
For the plug illustrated beside, press the retaining clip to the left simultaneously.
For the plugs illustrated below, press the small blue lever downward
(figure left) or open the cover and turn the locking ring counterclockwise (figure right).
How to start and terminate your work
Attention!
S
If the X-ray inspection unit is equipped with the option power fail buffer*, audible warning signals
will be sounded when you unplug it! These signals will not stop until you reconnect the unit to the
mains (see below) or switch off the incorporated UPS unit (Uninterruptible Power Supply unit), if
accessible (F 1-31 "How to switch on").
Even if you do not use the X-ray unit, it should always be connected to the mains to keep the buffer batteries charged! 560
Before connecting the unit to the mains, adhere to the following instructions.
Attention!
S
Do not switch on the HI-SCAN unit, if it has not been operated for a period of 6 months! The X-ray
generators must first be regenerated by a competent service technician! The non-respect of this rule
may lead to the destruction of the X-ray generators! 570
Warning!
A
Be absolutely sure that the local mains voltage corresponds to the value indicated on the X-ray unit
type plate and the fusing of the provided mains outlet meets at least the current value indicated on
the type plate!
Be also sure that the provided mains outlet is equipped with a protective earth conductor! A connec-
tion without PE conductor is not allowed!
If you connect the unit to the on-board supply system of a vehicle, airplane or ship or to another spe-
cial mains supply, pay attention to the prevailing safety instructions! 580
95587412 01/01/09 © Smiths Heimann
1-29
Page 40
How to start and terminate your work
Warning!
A
The supply cable should not be pulled over sharp edges! Keep the cable dry and protect it against
heat, oil and grease! 590
Caution!
A
Lay the mains cable in such a way that people do not step on or trip over cables! 600
Having successfully checked the latter, plug in the mains
cable at the unit and the appropriate mains outlet.
If a separate earth clamp* exists on the unit, make sure
an earthing wire is connected to the clamp.
Warning!
A
Operation without protective earthing is not
permitted! If necessary have the protective
earthing installed by a technician! 610
How to shift a mobile X-ray unit*
Attention!
S
You may move the X-ray unit to another installation site only if it is installed on a mobile base delivered by Smiths Heimann! 620
Attention!
S
When changing the installation site, it is imperative that the legal and official regulations are complied with (F 1-3)! 630
Adhere to the instructions of the preceding paragraph, then withdraw the mains cable from the socket
and from the unit.
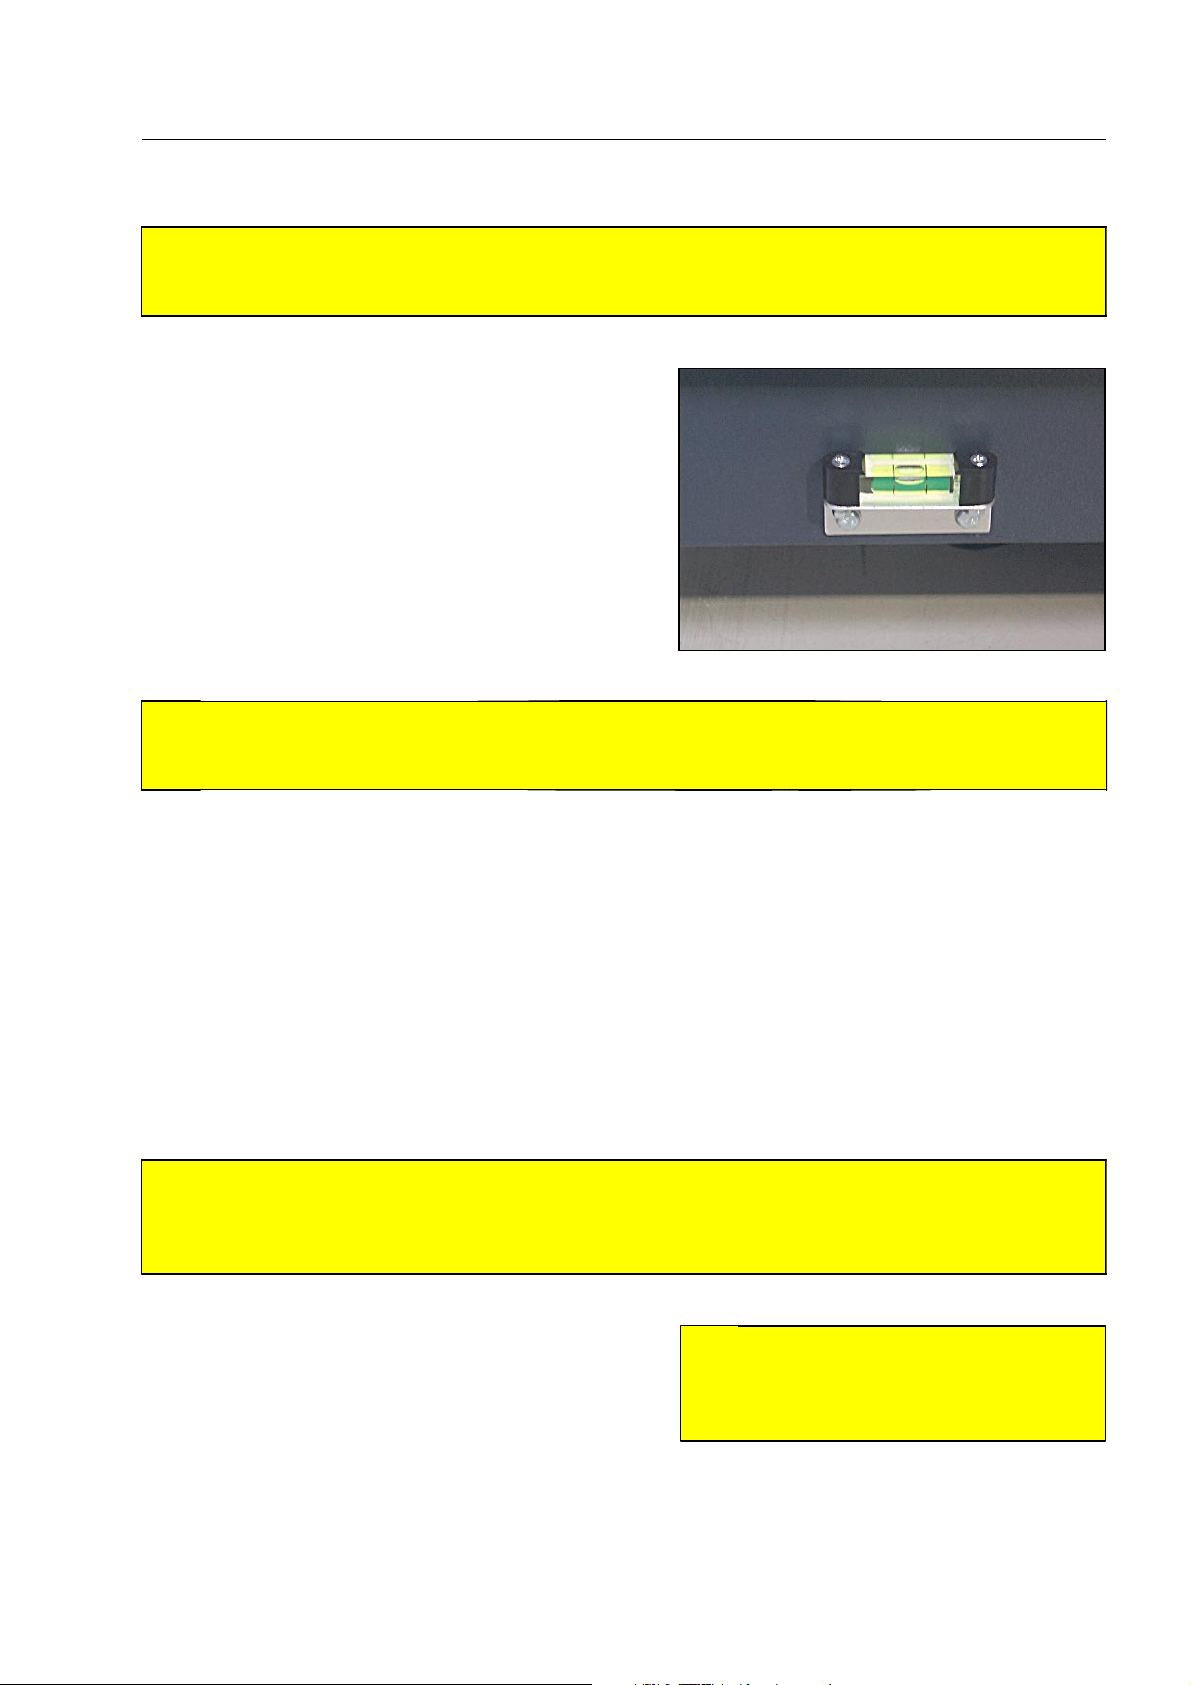
Use the enclosed wrench to turn all adjusting feet
completely upward.
Carefully shift the X-ray unit to the new place of in-
stallation. Be aware of ground unevenness.
Attention!
S
In any case avoid heavy vibrations!
640
1-30
95587412 01/01/09 © Smiths Heimann
Page 41
Warning!
A
At the new installation site, all the emergency stop buttons (F 1-12pp.) and the mains plug at the
mains input* of the X-ray inspection unit or the mains outlet shall be easily accessible! 650
At the new place of installation, first turn the outer ad-
justing feet down until they touch the ground by means
of the wrench. Observe the spirit level and exactly level
the unit by further turning the adjusting feet downward. The adjustment being finished the unit may no
longer stand on the castors.
If there are any other adjusting feet located inside, only
turn them downward until they touch the ground.
How to start and terminate your work
Attention!
S
The rubber inlays of the unit's feet may cause coloring and bruises on floors! If required, place the
unit on an appropriate base! 660
Establish the mains connection, as described in the preceding paragraph.
How to switch on
Attention!
S
Do not switch on the HI-SCAN unit, if it has not been operated for a period of 6 months! The X-ray
generators must first be regenerated by a competent service technician! The non-respect of this rule
may lead to the destruction of the X-ray generators! 670
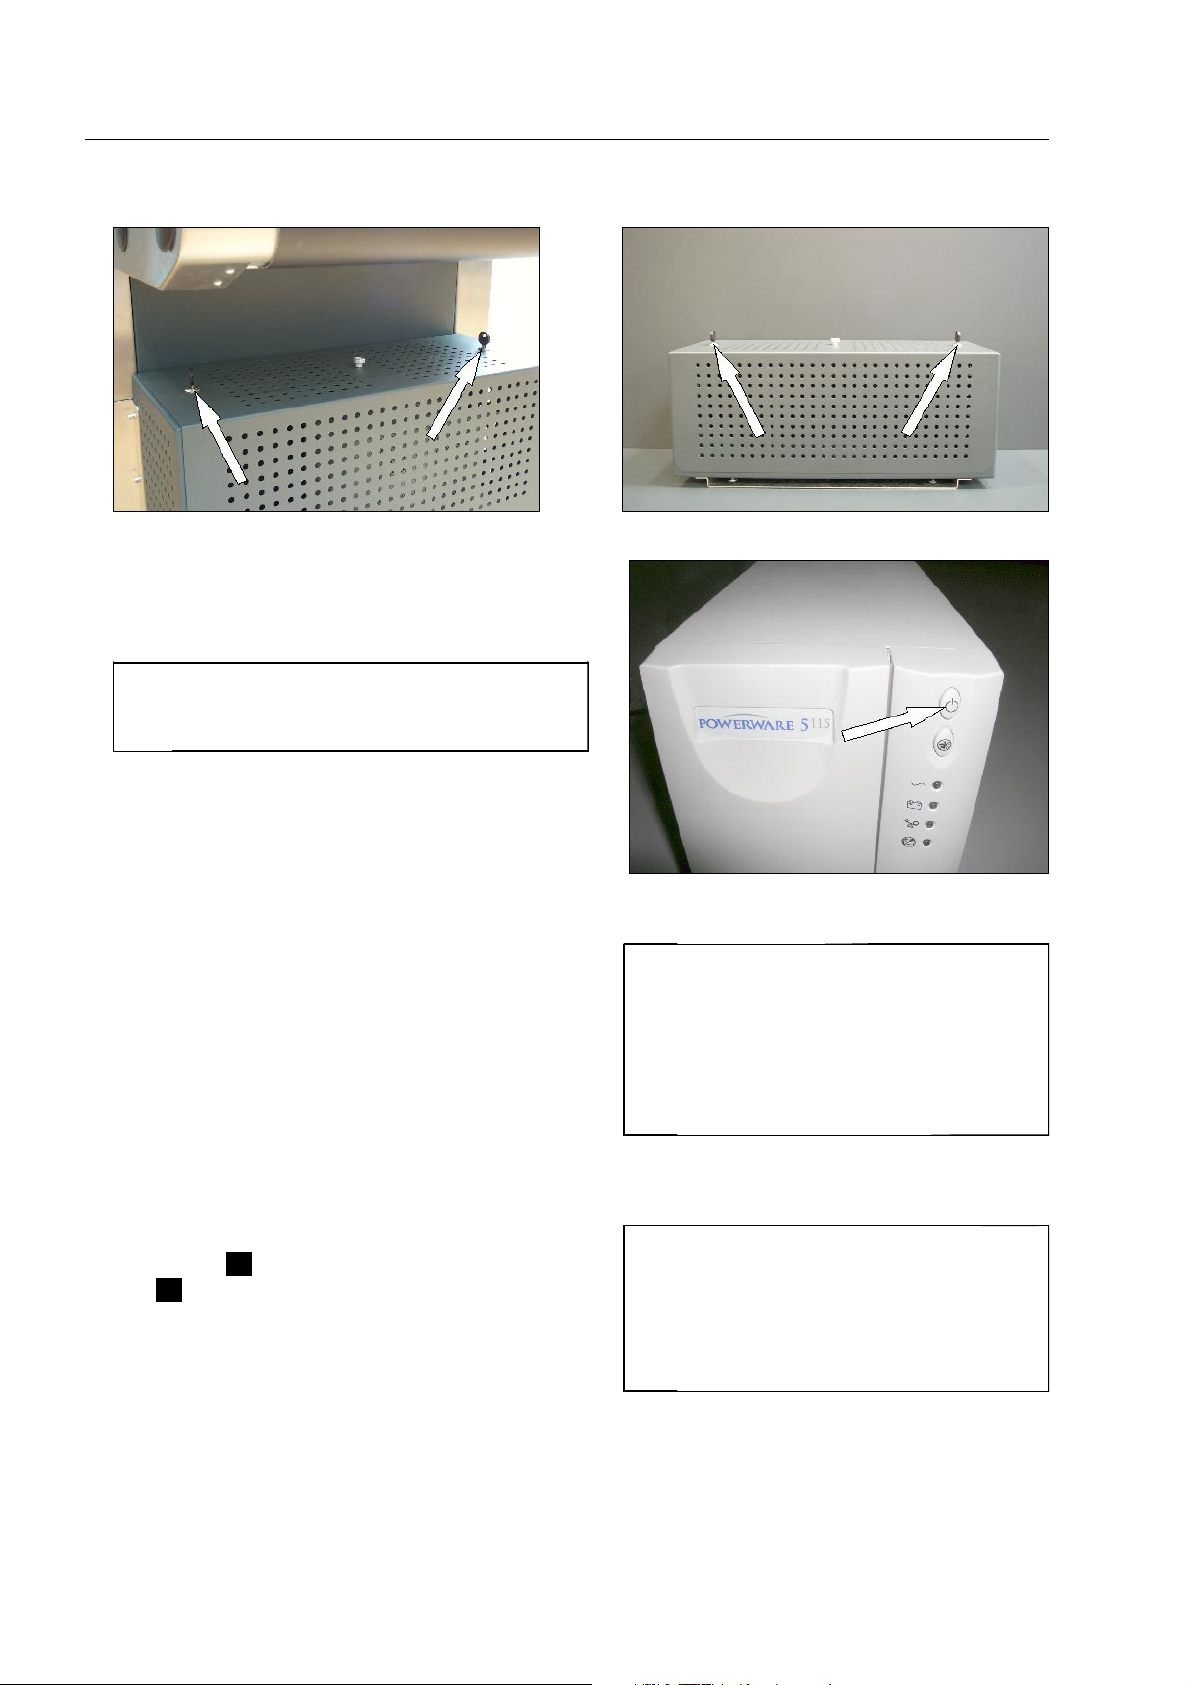
If the HI-SCAN unit is equipped with a power fail buf-
fer*, you may have to switch on the associated UPS
unit* first, if it has been switched off during the transport or owing to a longer break of operation. This is,
however, only possible in units allowing access to the
UPS unit through a lockable cover*.
On externally accessible boxes for the UPS unit open the locks and remove the cover.
95587412 01/01/09 © Smiths Heimann
Warning!
A
Screwed covers and housing panels
may only be removed by a competent
service technician! 680
1-31
Page 42
How to start and terminate your work
Keep the ON/OFF key of the UPS unit depressed until
the unit switches on (see enclosed User's guide of the
UPS unit).
The UPS unit can be switched off in the same
I
way if the X-ray unit has to be disconnected
from the mains for a longer period of time.
Close the cover again.
After having carried out the checks mentioned in para-
graph “How to ensure safety” (F 1-3) insert the appropriate key into the key switch on the keyboard of the
HI-SCAN X-ray unit and turn it to the right to position II
as you do when starting a vehicle. As soon as you hear
the X-ray unit switching on, release the key to position
I.
Switch on the monitors if they have not been switched
on together with the unit.
On the keyboard of the HI-SCAN X-ray unit the power-
on indicator
ator
L light up. The HI-SCAN X-ray unit is carrying
out a self-test first.
K and, after a short delay, the wait indic-
In units equipped with power fail buffer*
I
you have to wait about 3 seconds after
the end of a power failure before you can
switch on again.
If you have just turned off the unit also
wait at least 3 seconds before turning on
again.
In case of emergency, you can always
I
switch off conveyors and X-ray generators of the X-ray unit or the complete unit
by actuating one of the emergency stop
buttons (for the restart see next paragraph).
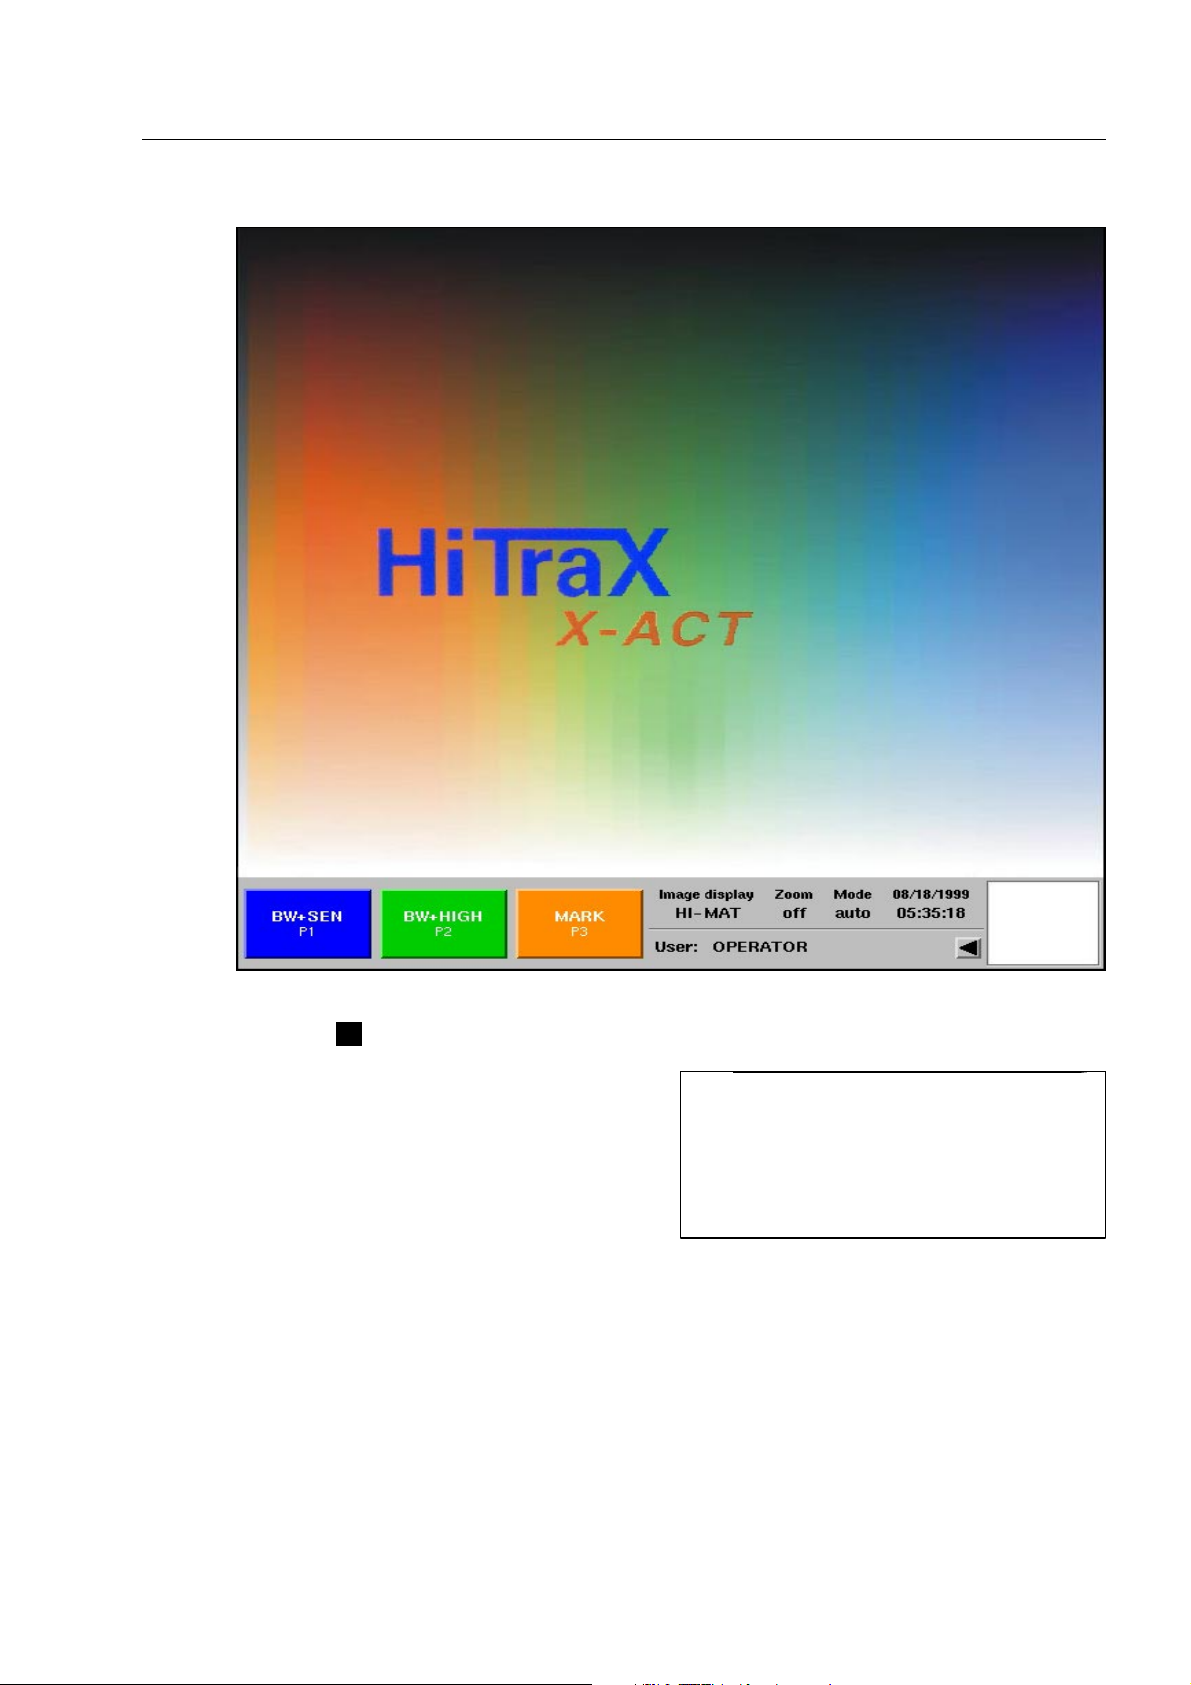
After a short moment, the display illustrated appears. In the upper screen area, a test image appears, in
the lower screen area, the indication field (F 1-23) is displayed. In dual view units a second test image
appears on the second screen with a second indication field (F 1-27).
1-32
95587412 01/01/09 © Smiths Heimann
Page 43
How to start and terminate your work
The wait indicator
If required, you can adjust contrast and brightness on
the monitor so that all brightness and color levels of
the test image can be clearly distinguished (see enclosed operating manual of the monitor).
L extinguishes.
If the screen saver is activated and the
I
X-ray unit is not used for a certain time
(adjustable from 1 to 30 minutes), the
screen will be switched to dark. By
pressing any key the last image will appear again.
Restart after emergency stop
Variant 1 - complete switch-off in case of an emergency stop
Conveyors, conveyor line* and X-ray generators are switched off immediately when an emergency stop button is pressed, the X-ray unit is then shut down and switched off as well.
After you have eliminated the safety risk reset the emergency stop button by turning or pulling (F 1-94)
and restart the unit as described above.
95587412 01/01/09 © Smiths Heimann
1-33
Page 44
How to start and terminate your work
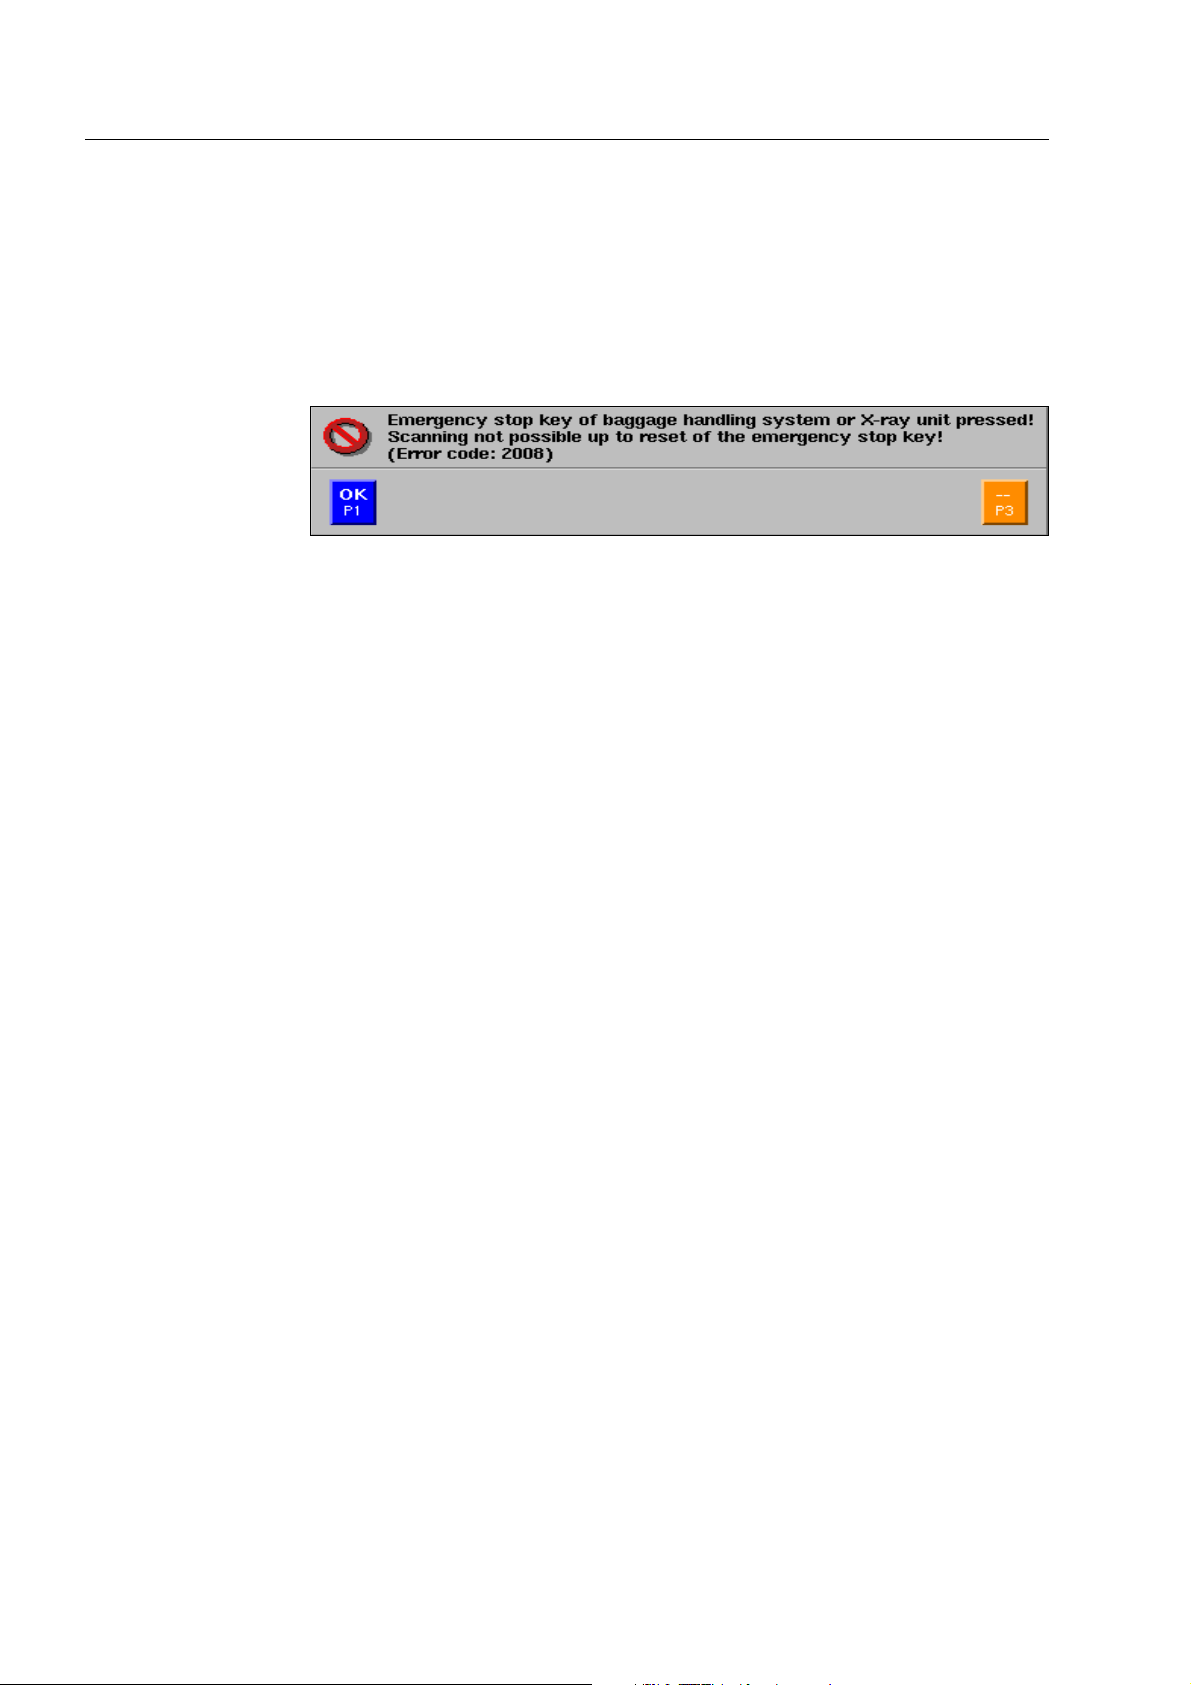
Variant 2 - partial switch-off in case of an emergency stop
Conveyors, conveyor line* and X-ray generators are switched off immediately when an emergency stop button is pressed, the electronics and monitors of the X-ray units remain switched on.
Possibly, the following window or other error message appears:
If neither the illustrated window nor any other error message appears after an emergency stop button
was actuated, press the
diately when resetting the emergency stop state!
After you have eliminated the safety risk reset the emergency stop button by turning or pulling (F 1-94).
In older units the power supply for the conveyors and X-ray generators will be thus restored automatic-
ally.
1 key first. Doing so, you avoid that the conveyors possibly start running imme-
In newer units, however, you have to briefly turn the key switch on the keyboard of the X-ray unit to the
right to position II (clearing the emergency stop state and restoring the power supply for conveyors an X-
ray generators).
Delete possibly existing error messages with
After a short while you can restart the conveyors.
r.
How to log in
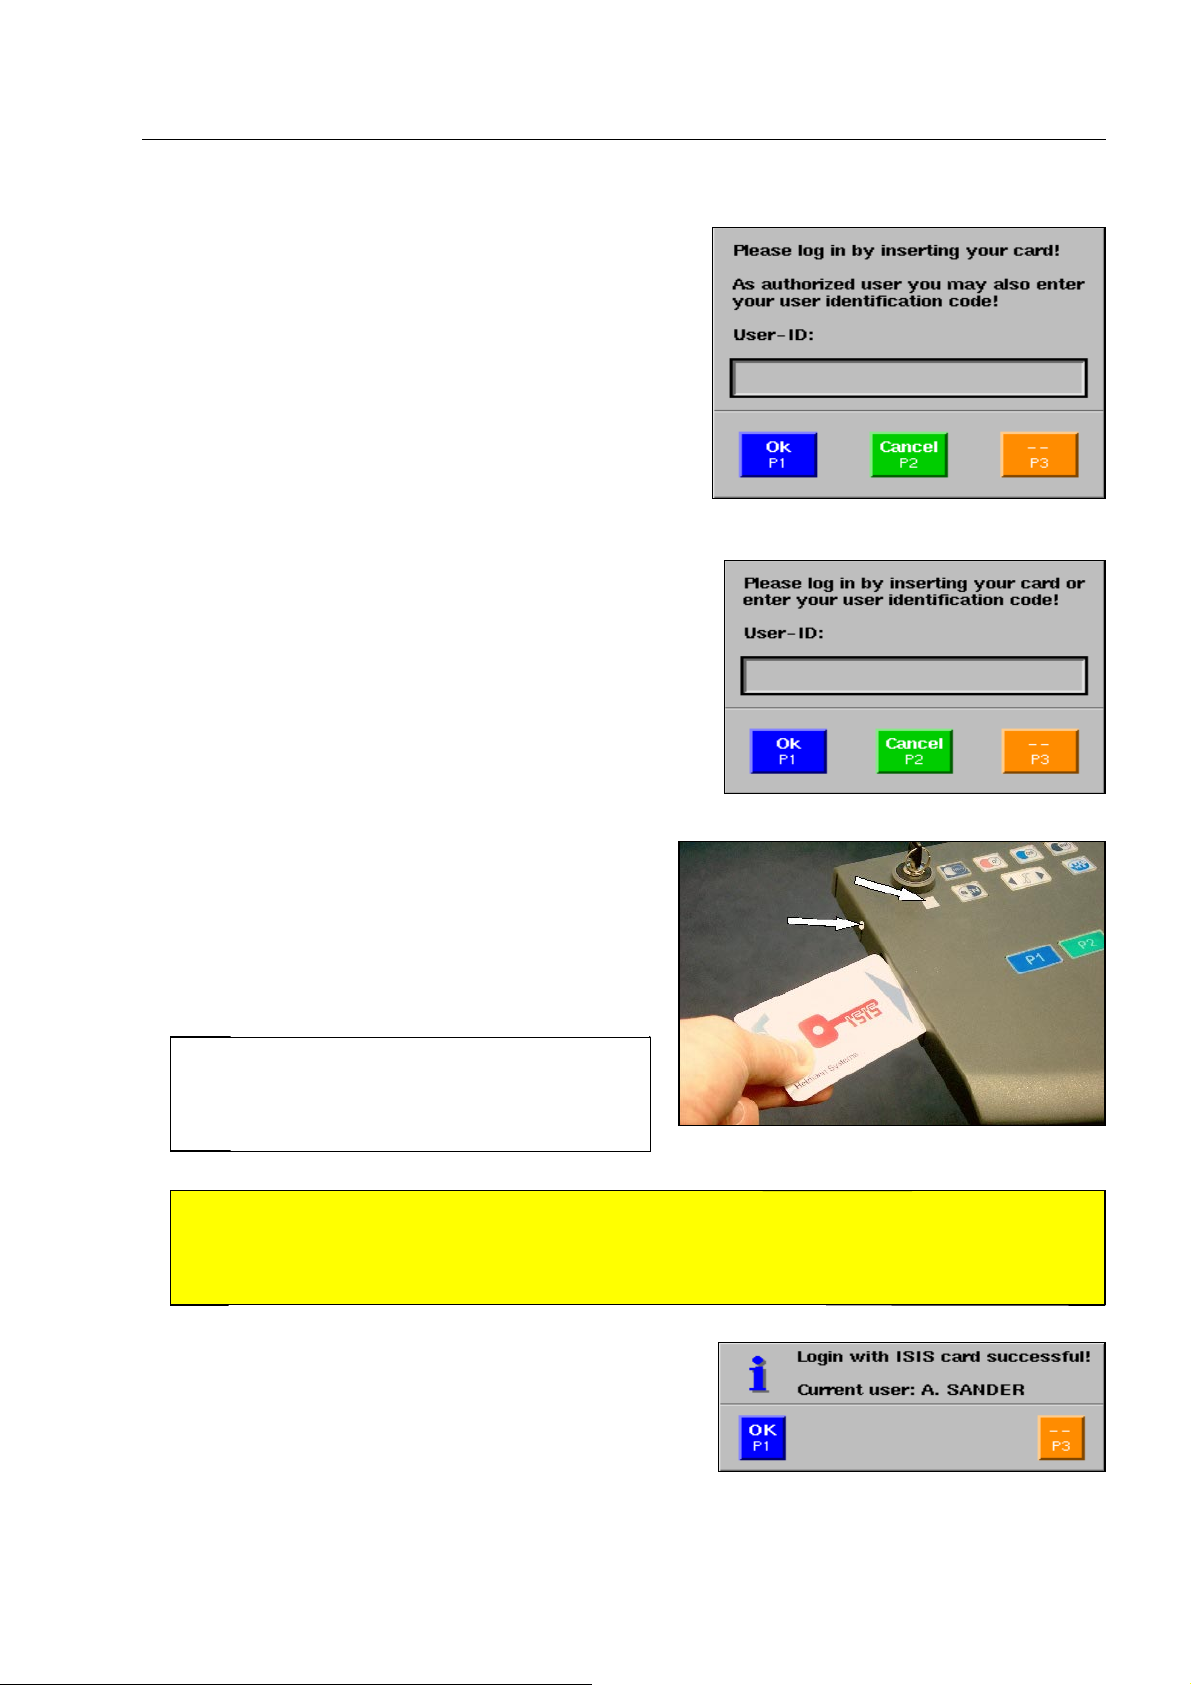
If a login procedure has been selected for the HI-SCAN X-ray unit, the window for entering your User ID will
be displayed on the screen.
Login via ISIS card*
If the X-ray unit is equipped with ISIS* (Intelligent Screener Identification System), you can or have to log in
with your ISIS card.
1-34
95587412 01/01/09 © Smiths Heimann
Page 45
If this window appears, a login will only be possible for you by
means of the card. Only users with higher authorization level
are allowed to log in by entering their code via the keyboard
(see following paragraph).
If this window appears, a login will be possible with the card as
well as with entering the code via the keyboard (see following
paragraph).
How to start and terminate your work
To log in with the ISIS card, just insert your card into
the card reader as illustrated. Now you have logged in.
Your card remains in the card reader during your work.
The indicator
card reader (on older keyboards) lights up permanently as long as the card is correctly inserted.
I
S
On units equipped with newer software the acknowledg-
ment illustrated beside is displayed if provided like that by
higher access level users. After a short delay the message
will automatically disappear; you may also delete it with
☐ or the indicator located next to the
If the indicator flashes after inserting a card,
or if it does not light up at all, the card has
either been wrongly inserted or it is not readable.
Attention!
When using the X-ray unit in the following course, statistics and reports referring to your work will
be recorded. It is therefore important to you to log out by withdrawing your card when you leave
the X-ray unit or when you pass it over to a colleague! 690
r.
95587412 01/01/09 © Smiths Heimann
1-35
Page 46
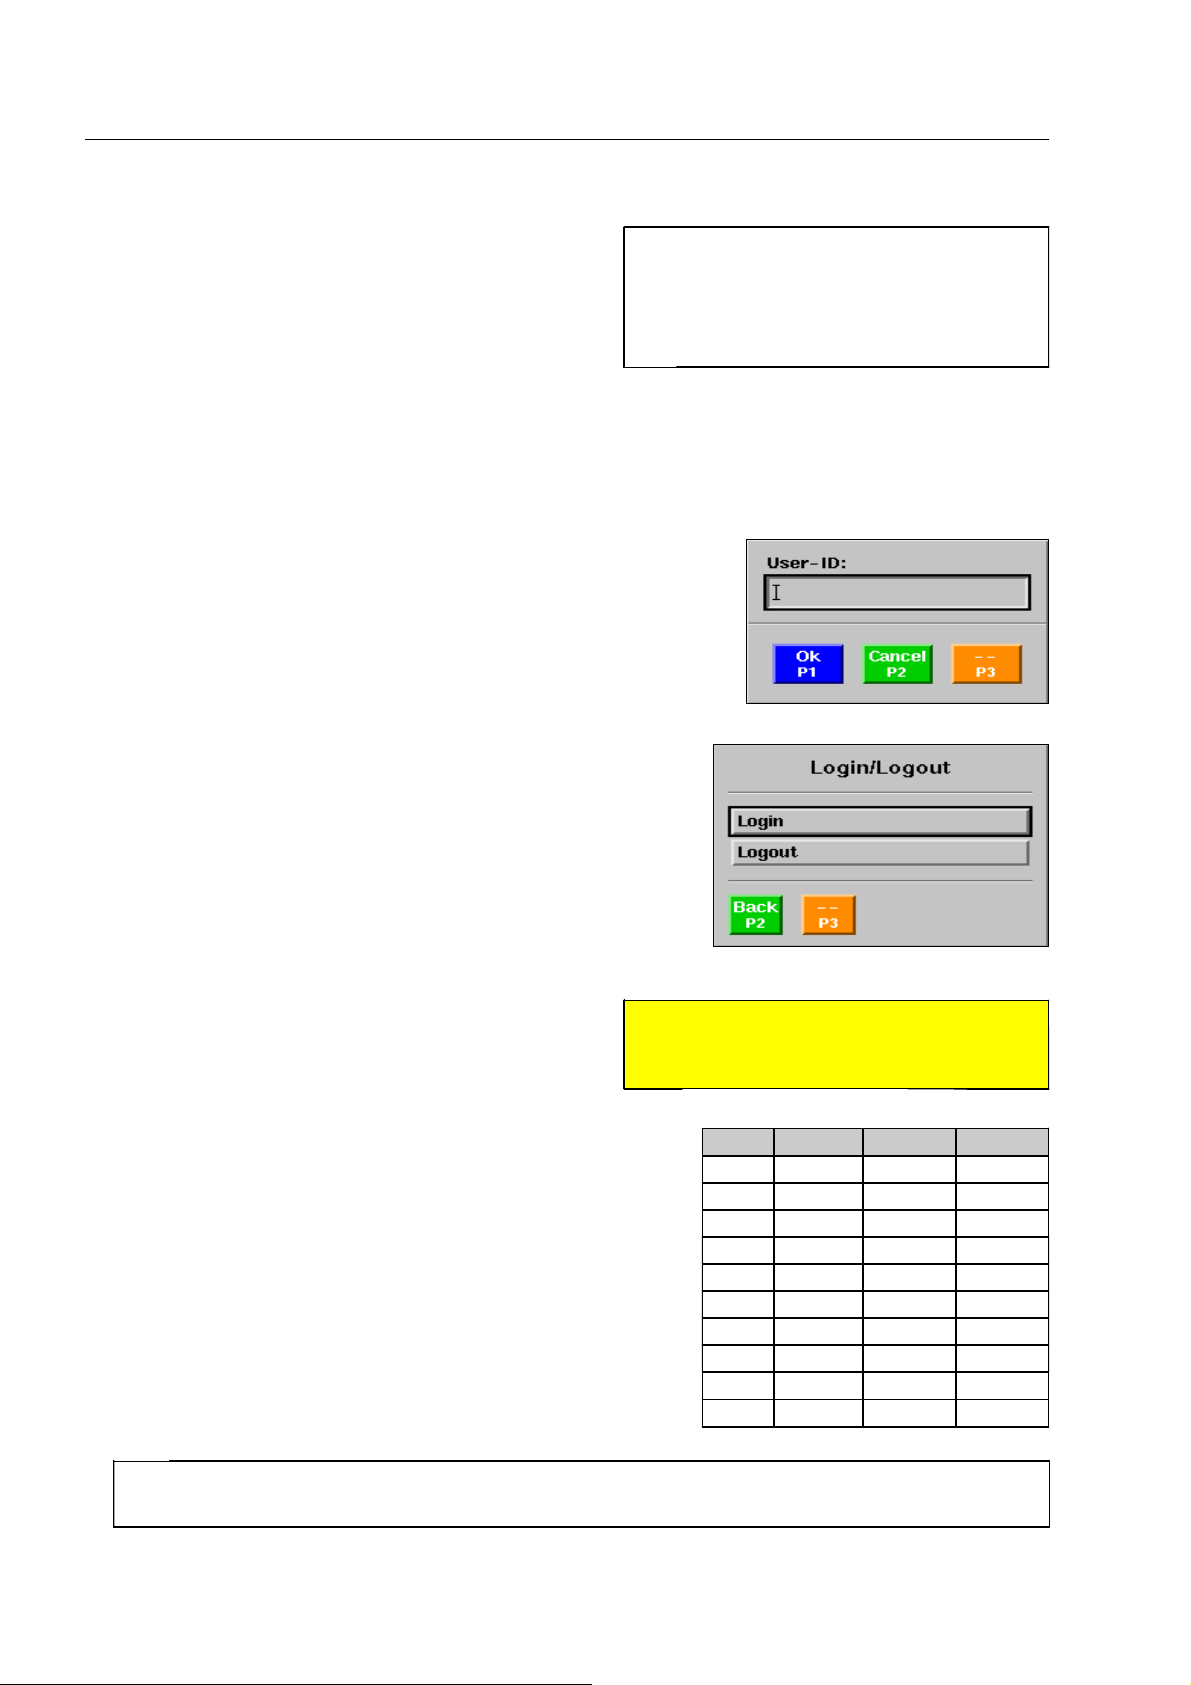
How to start and terminate your work
After login the HI-SCAN X-ray unit is ready to be operated
by you. In the screen indication field your name is displayed, or, instead, if your name was not entered by the
higher level users, your user ID would be displayed.
I
Login via keyboard
A flashing cursor markings the position of the first character to be
entered.
If you have taken over the running X-ray unit from a colleague and
this colleague had not logged off before, you have to select the user
ID entry window first.
Use the navigator to activate the first item Login/Logout in the
Main menu. The menu illustrated appears.
If message Wrong login data! is always
displayed when inserting the card, your
login data has been modified by a higher
access level user, or you are not registered as user to this unit.
Use the navigator to activate the first item Login. The entry win-
dow shown above appears.
To log in, you possibly need a password besides your
personal user identification code (User ID). You receive
both from a higher access level user.
Use
Now enter your user ID via the keyboard. When entering letters
o to select the entry mode before entering a charac-
ter:
pressing to the left [0...9] - entry of digits
pressing to the right [a...z] - entry of letters and special characters
and special characters, you have to keep on pressing the keys
labeled [1 abc] ... [0 _ .] as often and quickly until the desired
character has been obtained. If you do not press quickly
enough, you obtain two or more characters.
S
Attention!
Always keep your user identification
code and your password secret! 700
Key press 1x press 2x press 3x
[1 abc] AB C
[2 def] DE F
[3 ghi] GH I
[4 jkl] JK L
[5 mno] MN O
[6 pqr] PQ R
[7 stu] ST U
[8 vwx] VWX
[9 yz-] YZ −
[0 _ .] _space.
1-36
You can delete wrong text entries by moving the cursor to the left using the navigator.
I
95587412 01/01/09 © Smiths Heimann
Page 47
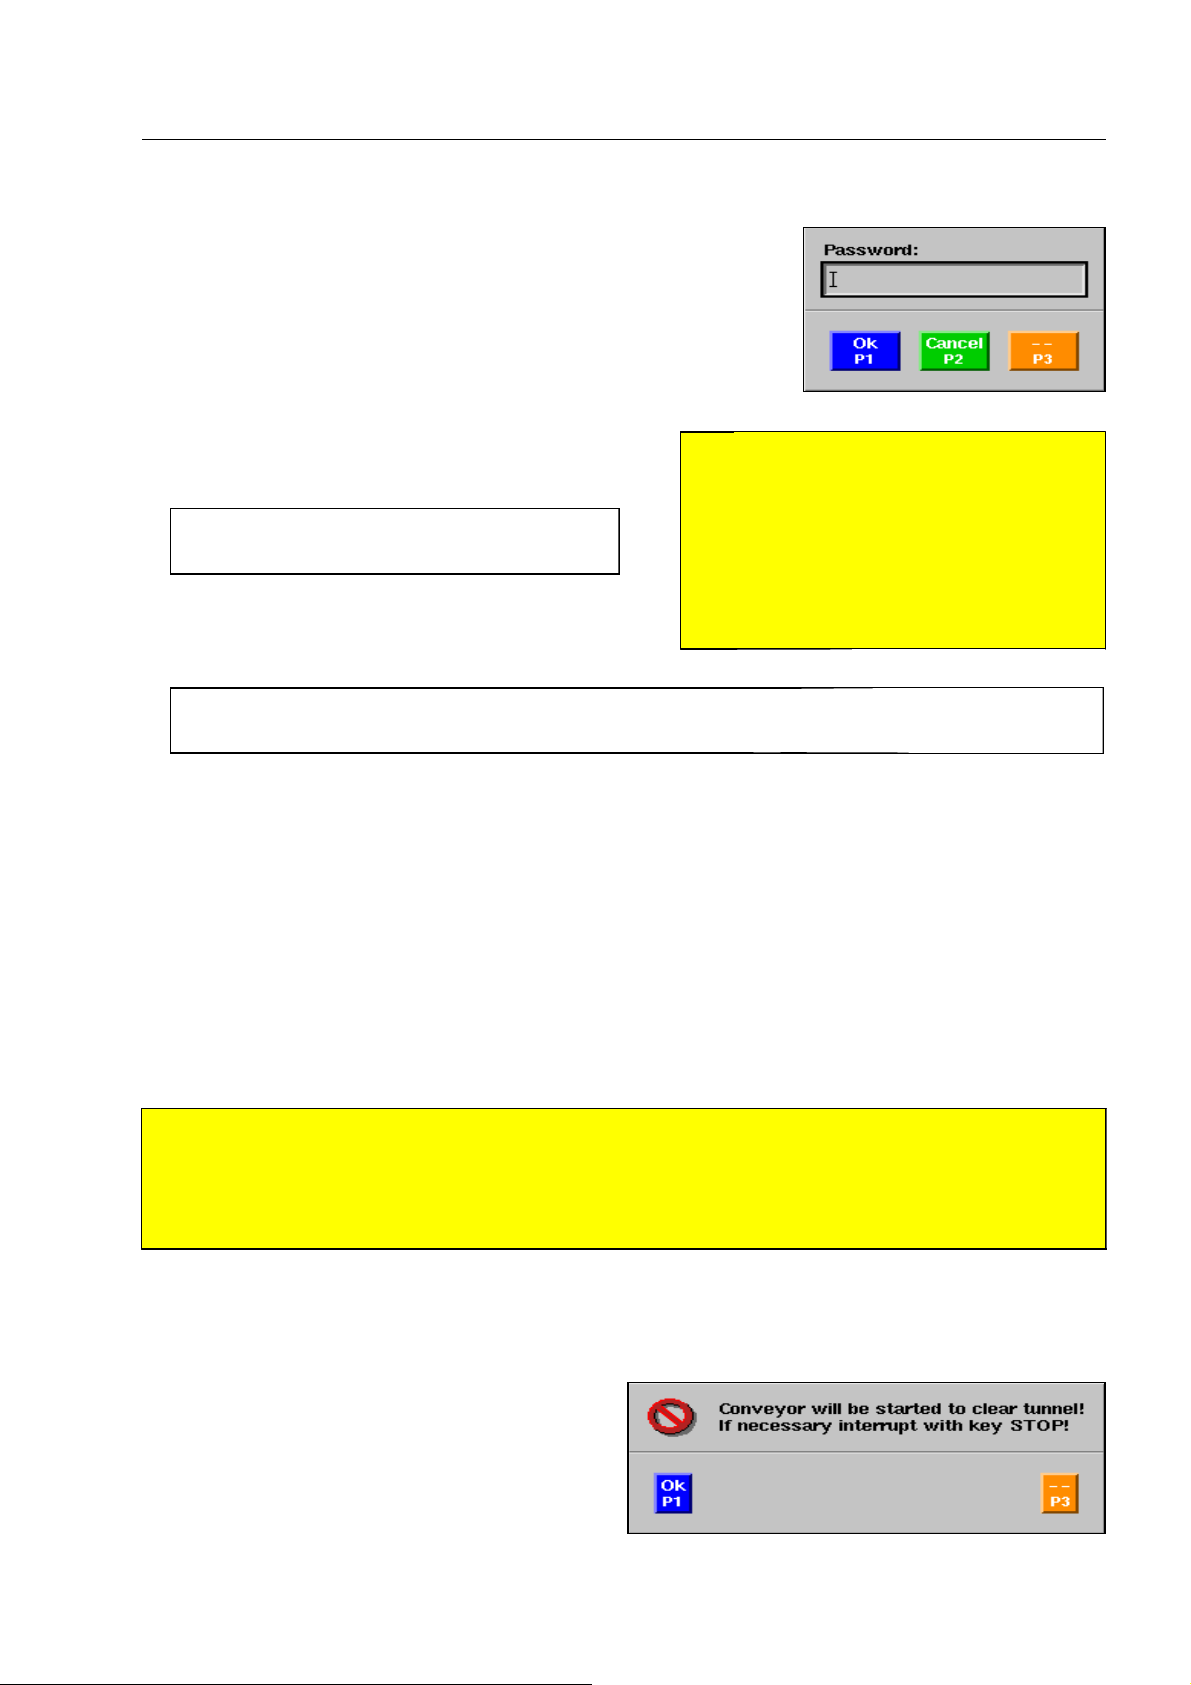
How to start and terminate your work
After having correctly entered your user ID, acknowledge with
The entry window for your password will then appear.
Enter your password in the same way and acknow-
ledge with
I
I
The HI-SCAN X-ray unit is now ready to be operated by you. In the screen indication field your name is displayed, or, instead, if your name was not entered by the higher level users, your user ID is displayed.
r.
In order to keep your password secret, only
symbols appear instead of your password.
If message Wrong login data! is always displayed when entering the data, the latter has been modified by a higher access level user, or you are not registered as user to this X-ray unit.
r.
Attention!
S
When using the X-ray unit in the following course, statistics and reports referring to your work will be recorded. It is
therefore important to you to log out
when you leave the X-ray unit or when
you pass it over to a colleague (F 1-40)!
710
How to clear the tunnel and the conveyors
If you did not take over the HI-SCAN X-ray unit in a ready-to-operate status, but switched on the X-ray unit
yourself, the inspection tunnel must be cleared from left baggage or freight items as soon as you have logged
on.
Warning!
A
Switch off the X-ray unit by means of the key switch and withdraw the key before you manually clear
baggage or freight items that have got stuck or before you correct other malfunctions in the inspec-
R
tion tunnel or on the conveyors! If the unit does not have a key switch, wait until all indicators on the
keyboard have extinguished and separate the unit from the mains by pulling the mains plug! 720
Automatic clearing
The window illustrated will appear at first.
95587412 01/01/09 © Smiths Heimann
1-37
Page 48
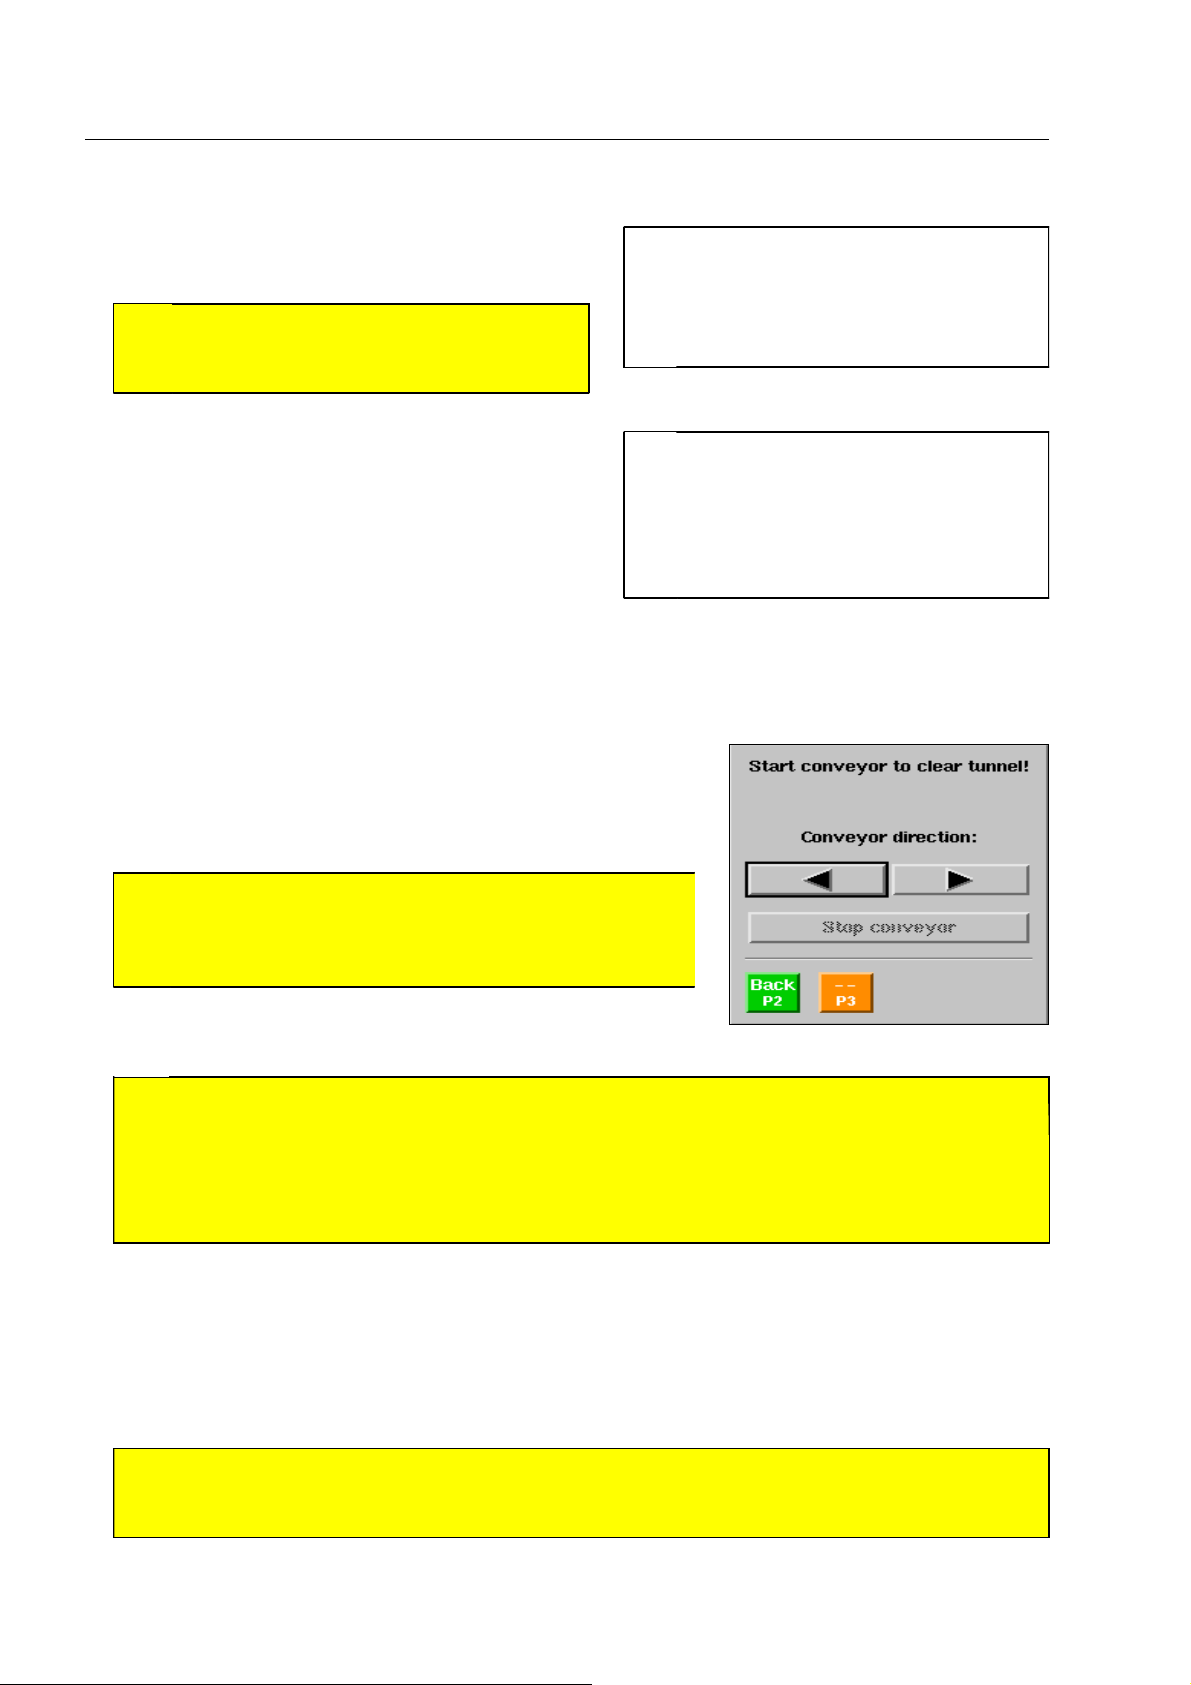
How to start and terminate your work
After your acknowledgment with
are activated in reverse direction.
Attention!
S
Ensure that no baggage items fall down! The
conveyors can be stopped with
If you have stopped the conveyors with
illustrated above is displayed again. The conveyors will
only stop automatically until the tunnel has been properly cleared.
r the conveyors
I
1! 730
1 the window
I
Controlled clearing
The shown window will appear.
Select the desired Conveyor direction and start the conveyors with
the navigator or with
m or n.
The X-ray generators are active while
the conveyors are being cleared for an
automatic calibration of the imaging
system and for the detection of baggage
items.
If a standard HI-SCAN X-ray unit has
only be turned off for a short moment,
for example, because of the pressing of
an emergency stop button, only one baggage item will be reversed and the X-ray
generators will not be activated.
Warning!
A
If you want to make sure objects which may have been left
in the inspection tunnel do not pass the unit without being
scanned, start the conveyors in reverse direction! 740
Attention!
S
Units with newer software* may be set in a way that the keys
pressed briefly or have to be kept depressed (according to the arrow symbols in the screen indication field (F 1-25))! In the latter case the unit can also be set so as to stop the conveyors only after
up to 3 seconds after the key is released! An immediate conveyor stop is possible with
Stop the conveyors again with
gage or freight items.
As soon as you have conveyed all items out of the tunnel in the manner described above, leave the window
with
s.
Attention!
S
If the tunnel is not completely cleared, error messages regarding the light barriers and incomplete or missing X-ray images will result during following inspections! 760
1 or in field Stop conveyor using the navigator to allow unloading bag-
n and m either have to be
1!
750
1-38
95587412 01/01/09 © Smiths Heimann
Page 49
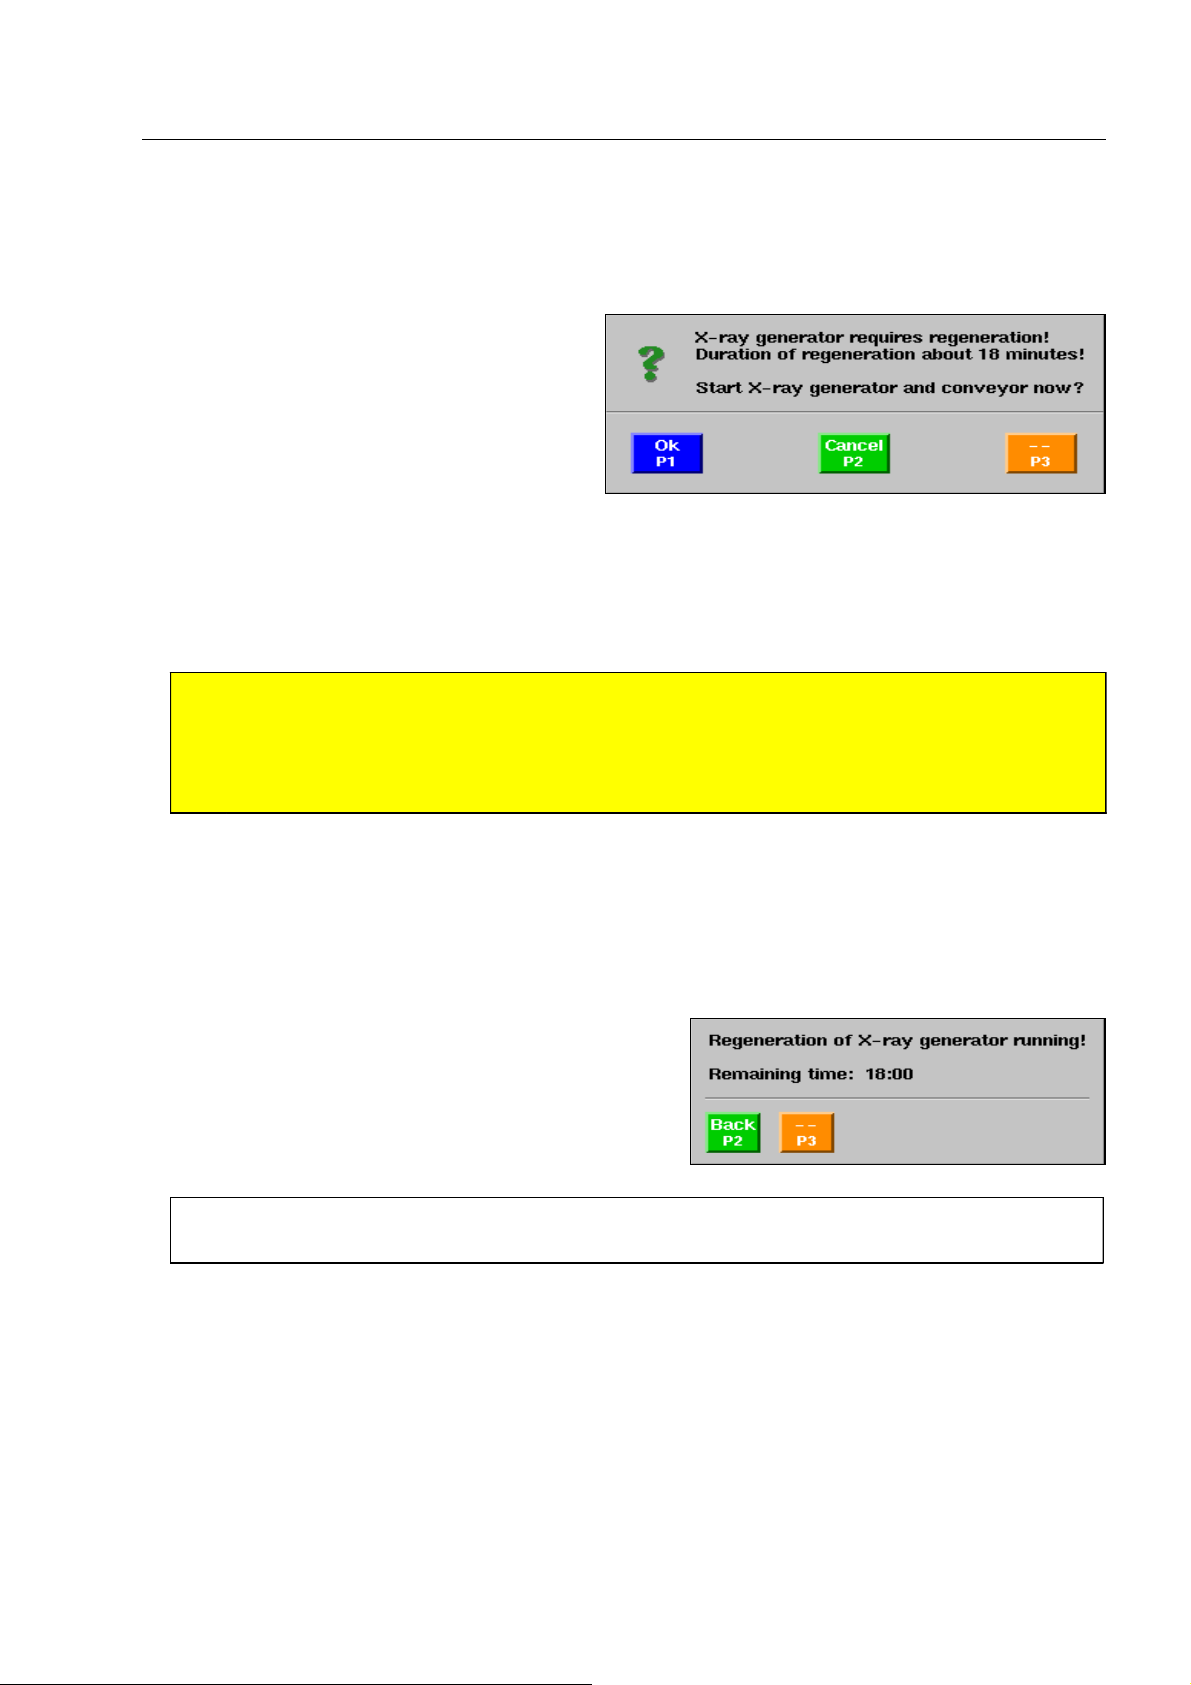
How to start and terminate your work
How to regenerate the X-ray generators*
(applies only to X-ray units with 300kV X-ray generators*)
If the X-ray unit is equipped with 300kV X-ray
generators*, the generators have to be regenerated provided that more than 72 hours have
passed after the last operation. After that period
the window illustrated appears when switching
on the X-ray unit.
If any freight items are still placed on the conveyors, do not start the regeneration, but abort the process
s.
with
To convey the freight items back, move the conveyors in reverse direction with
Attention!
S
Units with newer software* may be set in a way that the keys
pressed briefly or have to be kept depressed (according to the arrow symbols in the screen indication field (F 1-25))! In the latter case the unit can also be set so as to stop the conveyors only after
up to 3 seconds after the key is released! An immediate conveyor stop is possible with
If you are going to unload a freight item, stop the conveyors with
When you have unloaded all freight items in the manner described, press shortly the key
pointing into the scanning direction. With that the conveyors are not started, but the window illustrated
above displayed again.
Confirm with
X-ray generators are automatically regenerated with re-
duced high tension. During the process of 18 minutes
the window illustrated is displayed.
r. The conveyors are started and the
n and m either have to be
1.
m or n.
1! 770
m or n
After longer break times it may happen that the regeneration must be prolonged because of tech-
I
nical reasons. In this case the Remaining time will be automatically reset to 18 minutes.
95587412 01/01/09 © Smiths Heimann
1-39
Page 50
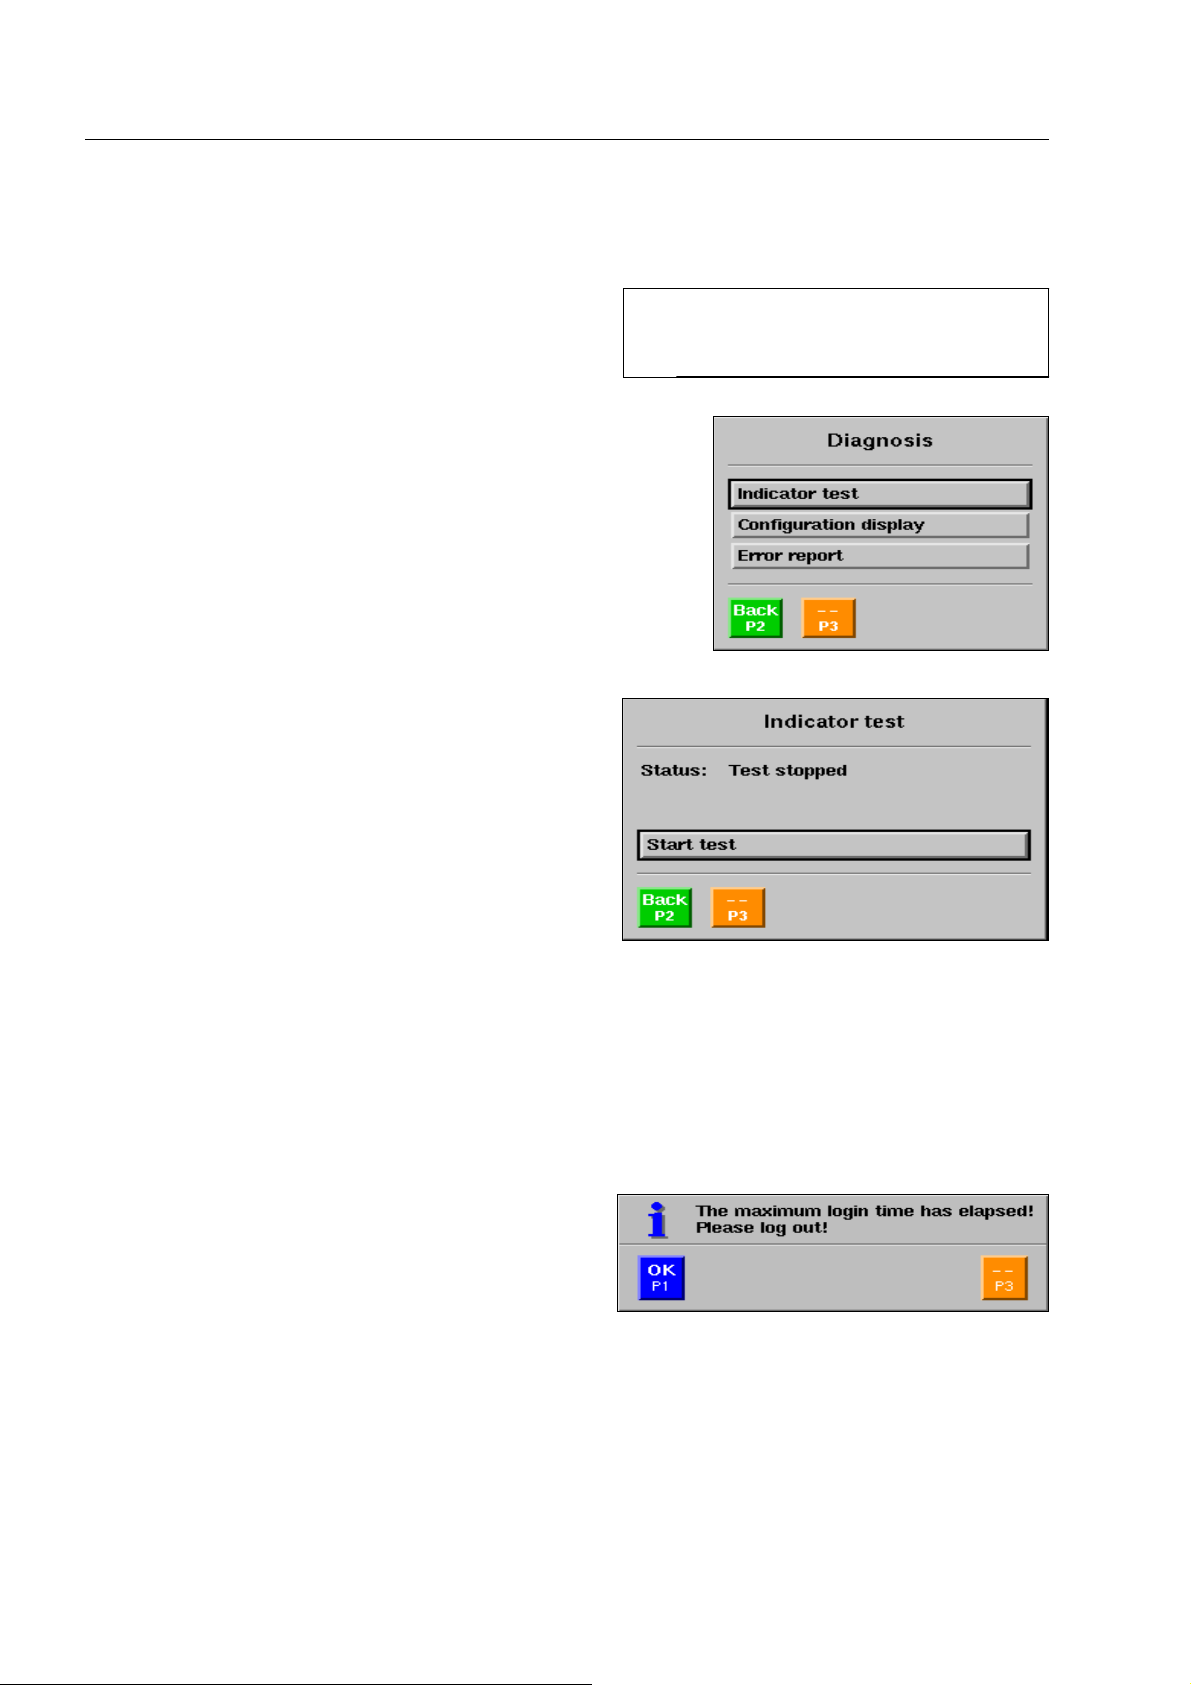
How to start and terminate your work
How to test indicators and audible alarm
You can test the indicators and the audible alarm of the
X-ray unit.
Use the navigator to move to item Diagnosis in the Main menu
and activate this item. The menu illustrated beside is displayed.
Go to item Indicator test and activate it.
Use the navigator to activate the indicators on the key-
board, the radiation indicators and the audible alarm.
After about 1 second the radiation indicators are deactivated again. As soon as you release the navigator the
other indicators and the audible alarm will be deactivated as well.
I
In units with newer software, the access
to this function can be disabled by users
with higher authorisation.
How to log out
To protect the operators from overtiredness, newer software allows to request the operator to log out after a predefined time. Higher authorization users can activate this
function and set the time interval.
Acknowledge the message and then log out (see below).
Logout via ISIS card*
Just withdraw your ISIS card from the card reader and you have logged out.
1-40
95587412 01/01/09 © Smiths Heimann
Page 51
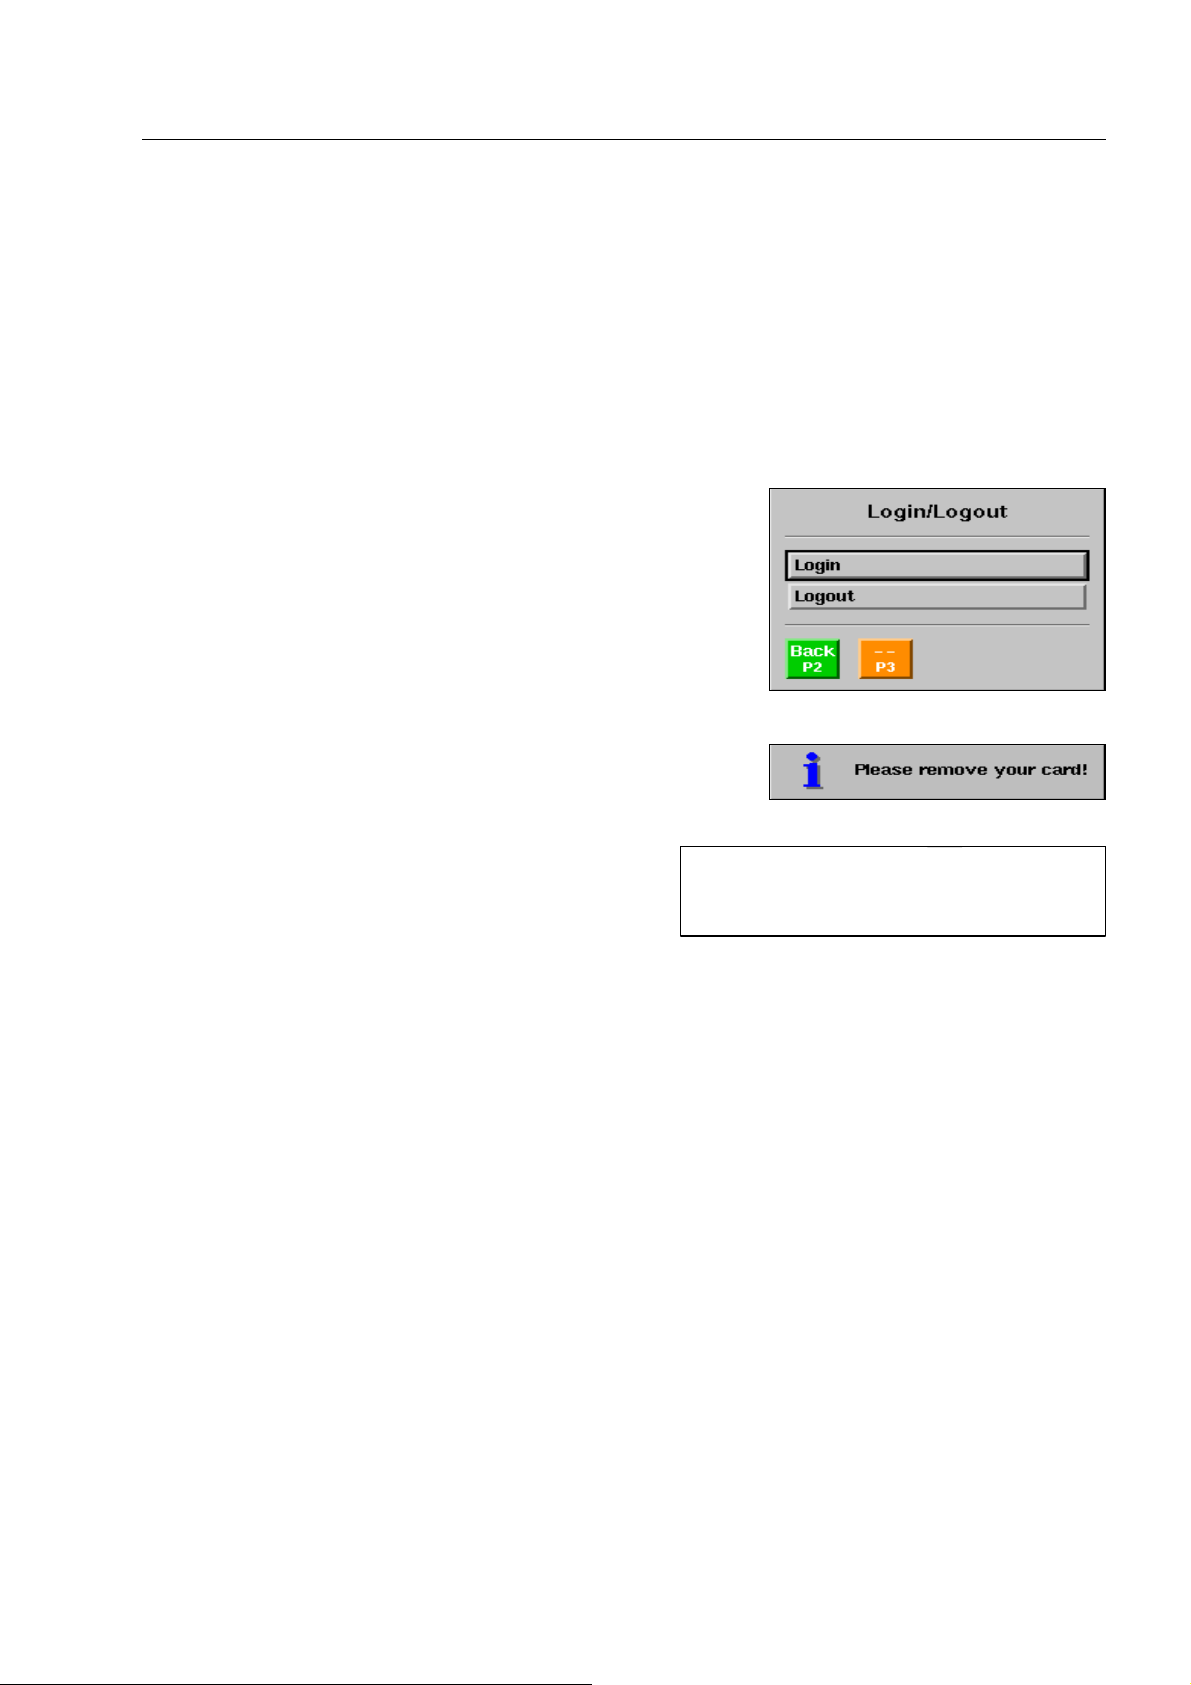
How to start and terminate your work
Logout via keyboard
If a colleague takes over the X-ray unit from you, simply check, whether he/she has logged in correctly
(F 1-34). Thus, you are logged out.
If you want to switch off the X-ray unit, you need not carry out a logout procedure either, since you will be
logged out when switching off.
If nobody takes over the X-ray unit, but, if the X-ray unit is not to be switched off either, you have to log out as
follows:
Use the navigator to activate the first item Login/Logout in the
Main menu. The menu illustrated above appears.
Direct the navigator to the item Logout and activate it.
If you have logged in with your ISIS card*, the message illus-
trated appears reminding you of withdrawing your card.
Afterwards the user ID entry window for the next user
is displayed.
Until you or any other user has logged
I
in, all other X-ray unit functions will be
locked up.
How to switch off
Leave all menus.
Ensure that no baggage item is left on the conveyors. If necessary, have the conveyors move left or right
until the inspection tunnel is empty.
Check, if the recheck of the last baggage or freight item has been finished at the recheck station*.
Withdraw your ISIS card* from the card reader.
Then initiate the automatic shutdown cycle of the X-ray unit by turning the key switch to the left to position
O.
Withdraw the key from the key switch.
95587412 01/01/09 © Smiths Heimann
1-41
Page 52

How to start and terminate your work
Attention!
S
The HI-SCAN X-ray unit is still active for about 1 minute until it will shut down itself. During this
time the power-on indicator is illuminated
If, for some particular reasons, the X-ray unit is to be disconnected completely from the electrical
mains supply, you have to wait until the power-on indicator has extinguished before withdrawing
the mains plug or deactivating the mains supply! The non-compliance with this instruction may
lead to the destruction of the X-ray unit.
If the X-ray inspection unit is equipped with the option power fail buffer*, audible warning signals
will be sounded when you unplug it. These signals will not stop until you connect the unit to the
mains or switch off the incorporated UPS unit, if accessible (F 1-31 - "How to switch on").
Even if you do not use the X-ray unit, you should not disconnect it from the mains since, otherwise, the buffer batteries will not be charged! 780
Fold up the keyboard* and remove the key.
Position the tunnel covers* correctly in front of the tunnel entrances and exits and depress the bolts.
K.
Keep all keys in a safe place.
1-42
95587412 01/01/09 © Smiths Heimann
Page 53
How to carry out inspections
The conveying and scanning functions can be modified by means of accessories* such as contact
I
mat*, attendance detector*, safety switches* at the conveyor ends and/or the tunnel entrances and
exits conveyor end or oversize detectors*) as well as by means of special functions* such as Full-reverse mode*, Reverse scanning*, Continuous scanning* and Second conveyor control*. The same
applies if the unit is integrated into a baggage handling system or line. Observe the appropriate instructions in the following paragraphs (F 1-52).
Warning!
A
Switch off the X-ray unit by means of the key switch and withdraw the key before you manually clear
baggage or freight items that have got stuck or before you correct other malfunctions in the inspec-
R
tion tunnel or on the conveyors! If the unit does not have a key switch, wait until all indicators on the
keyboard have extinguished and separate the unit from the mains by pulling the mains plug! 790
How to carry out inspections
How to place baggage and freight items
Attention!
S
When switching on the unit, first clear the inspection tunnel (F 1-37) before you place objects on the
conveyors! 795
The baggage or freight items must always be placed in
front of the lead curtain!
Larger baggage or freight items must only be placed
on the conveyors when they are stopped.
Place baggage or freight items to be inspected in the
middle of the input roller table* or the conveyor input.
Attention!
S
Keep away open containers with liquids or any other non-solid materials as well as dirty or wet objects from all parts of the X-ray unit and from the feed and discharge conveyors! Closed containers
with liquids or non-solid materials as well as dirty or rain-wet baggage or freight items may only be
scanned after having been put into appropriate plastic containers (see below)! 810
Warning!
R
Putting hands into the inspection tunnel
is prohibited! 800
If the inspection tunnel height of the
I
X-ray unit is bigger than its width, place
the baggage items upright; otherwise,
lay the baggage items flat on the conveyor.
95587412 01/01/09 © Smiths Heimann
1-43
Page 54
How to carry out inspections
Attention!
S
Items with loose belts or loose packaging and objects, which cannot be placed firmly on the conveyors as well as all kinds of clothes must be placed into appropriate plastic containers (see below) to
avoid damages! The objects must not move during the inspection. If required, use plastic containers
with structured foam insert!820
Attention!
S
Short or flat items have to be put into plastic containers (see below) to be sure they will be detected
and scanned even if placed in an unfavourable position! Alternatively, the X-ray unit can be operated
in Continuous scanning mode (F 1-53)! 830
Attention!
S
Keep in mind that the material and structure of the plastic containers mentioned above may affect
the X-ray unit's material detection characteristics! Inappropriate plastic containers may also cause
electrostatic charging! Therefore, contact your sales partner when choosing suitable plastic contain-
ers. 840
In order to be able to assign X-ray images to scanned
baggage or freight items later on, you should keep dis-
tances of 20cm between subsequent items.
Attention!
S
Adhering to the minimum distances is particularly required when using the optional functions to
store, transfer and print X-ray images; the distance is required to separate the images of subsequent bag or freight items from one another!
The X-ray images of baggage or freight items that have been placed too close to one another will
be unintentionally comprised in one single X-ray image!
In the case of an X-ray unit equipped with a radioactivity detector* and if radioactivity is detected,
the X-ray images of all objects adjacent to the one in which radioactivity has been detected will be
also marked by frames, if such objects have been placed too close together on the conveyor belt!
Caution!
A
If the automatic return mode* is used, place a new object for further scanning on the conveyor only if
the previous object has run out again at the input and you have removed it from the conveyor belt!
If you do not comply with this, objects can drop down from the conveyor belt and thus be destroyed,
and also injure you or other persons! 860
When continuously scanning items
I
which have been placed very close to
one another, the image quality is reduced after some time. In this case, it
will be sufficient to keep a distance of at
least 50cm once in order to optimize the
image quality again.
850
1-44
95587412 01/01/09 © Smiths Heimann
Page 55
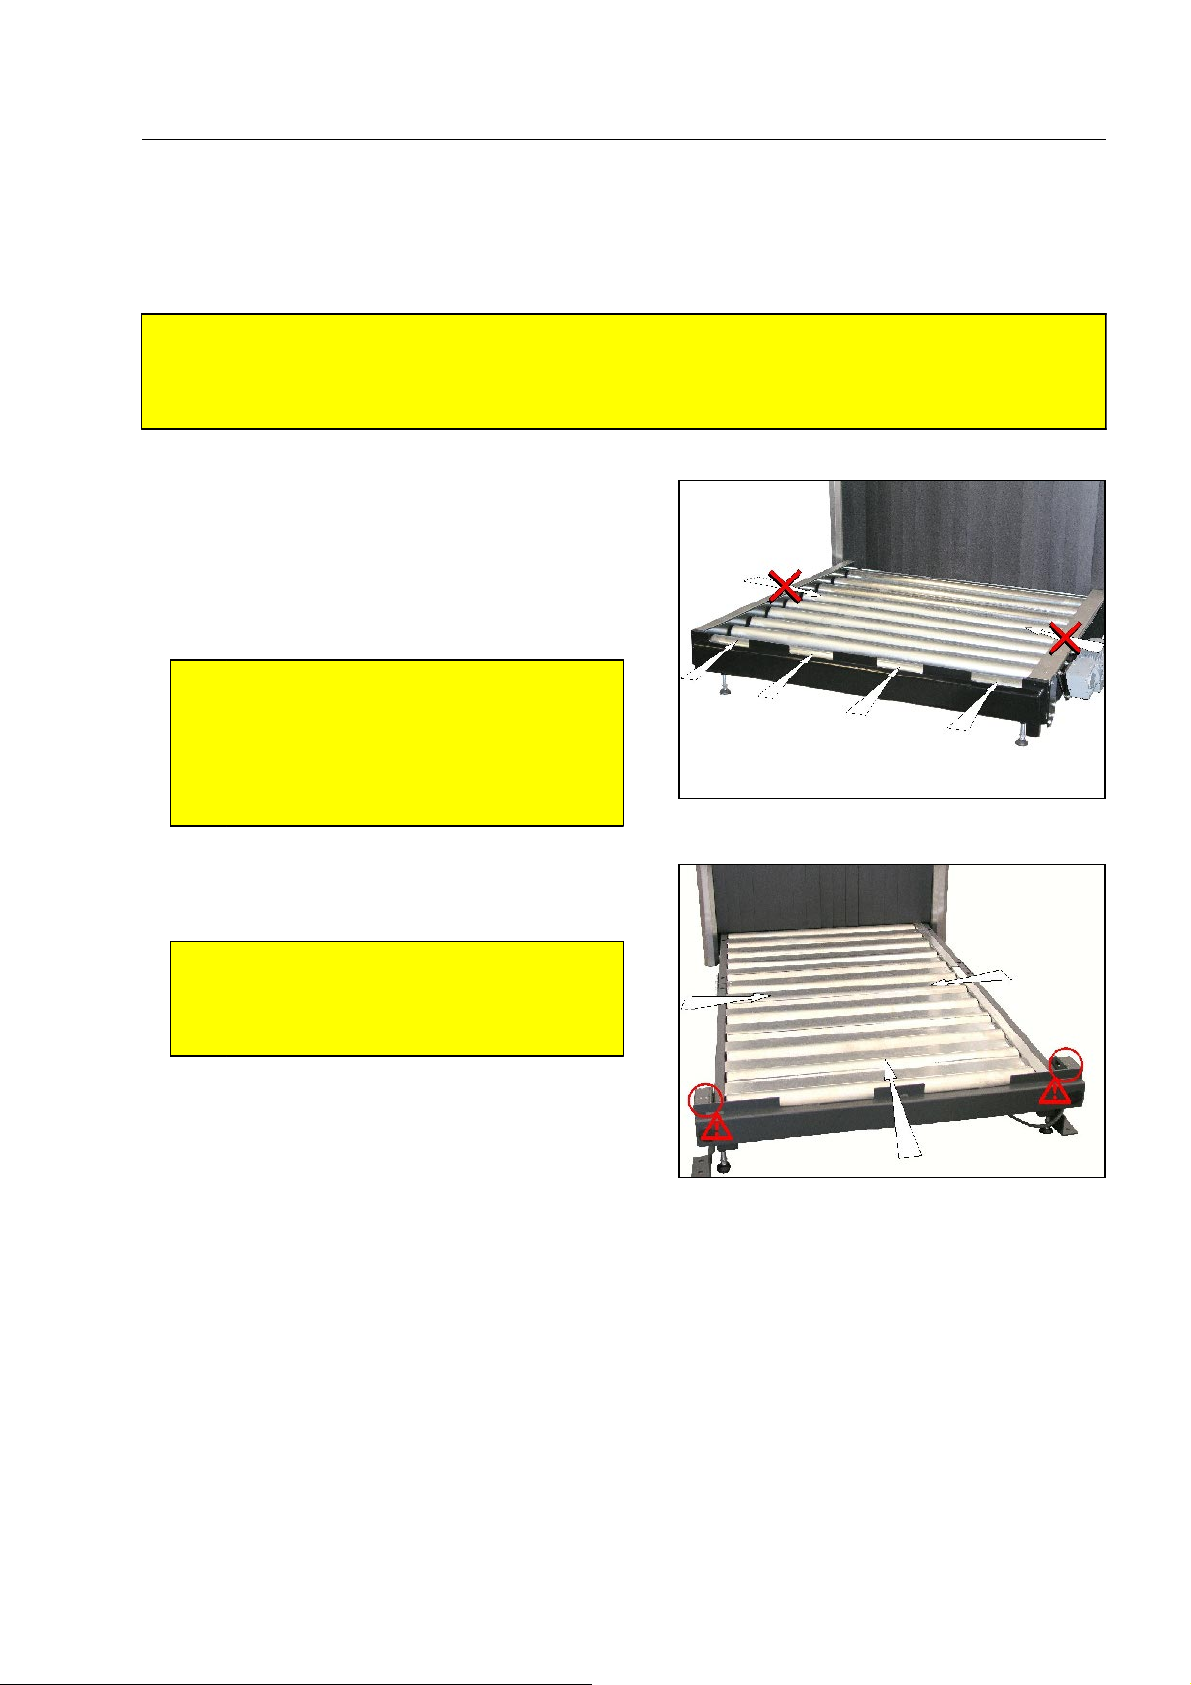
How to carry out inspections
Particularities of units equipped with roller conveyors and modular plastic belt conveyors
Warning!
A
Roller and modular plastic belt conveyors may only be loaded and unloaded by trained staff who are
familiar with the accident prevention regulations! To load and unload, these conveyors have to be
stopped in any case! 870
Standard roller conveyors may only be loaded and un-
loaded from the front side. To be able to use a forklift
truck, recesses have been provided in the unit's end
stops*. The spacing between the forklift truck's fork
arms must be adjusted to match the position of the recesses.
Attention!
S
Lateral loading and unloading of roller conveyors is not permitted!
Avoid any contact between the forklift
truck* and the conveyor and its end stops*!
880
3t heavy duty roller conveyors, however, can be
loaded from all sides.
Attention!
S
Avoid any contact between forklift truck*
and conveyor and light barriers on the conveyor's corners! 885
Objets to be scanned must be placed on standard or 3t heavy duty roller conveyors in a way that they do
not dip into the gaps between the rollers. A wooden board should be put on the roller conveyor if necessary.
95587412 01/01/09 © Smiths Heimann
1-45
Page 56
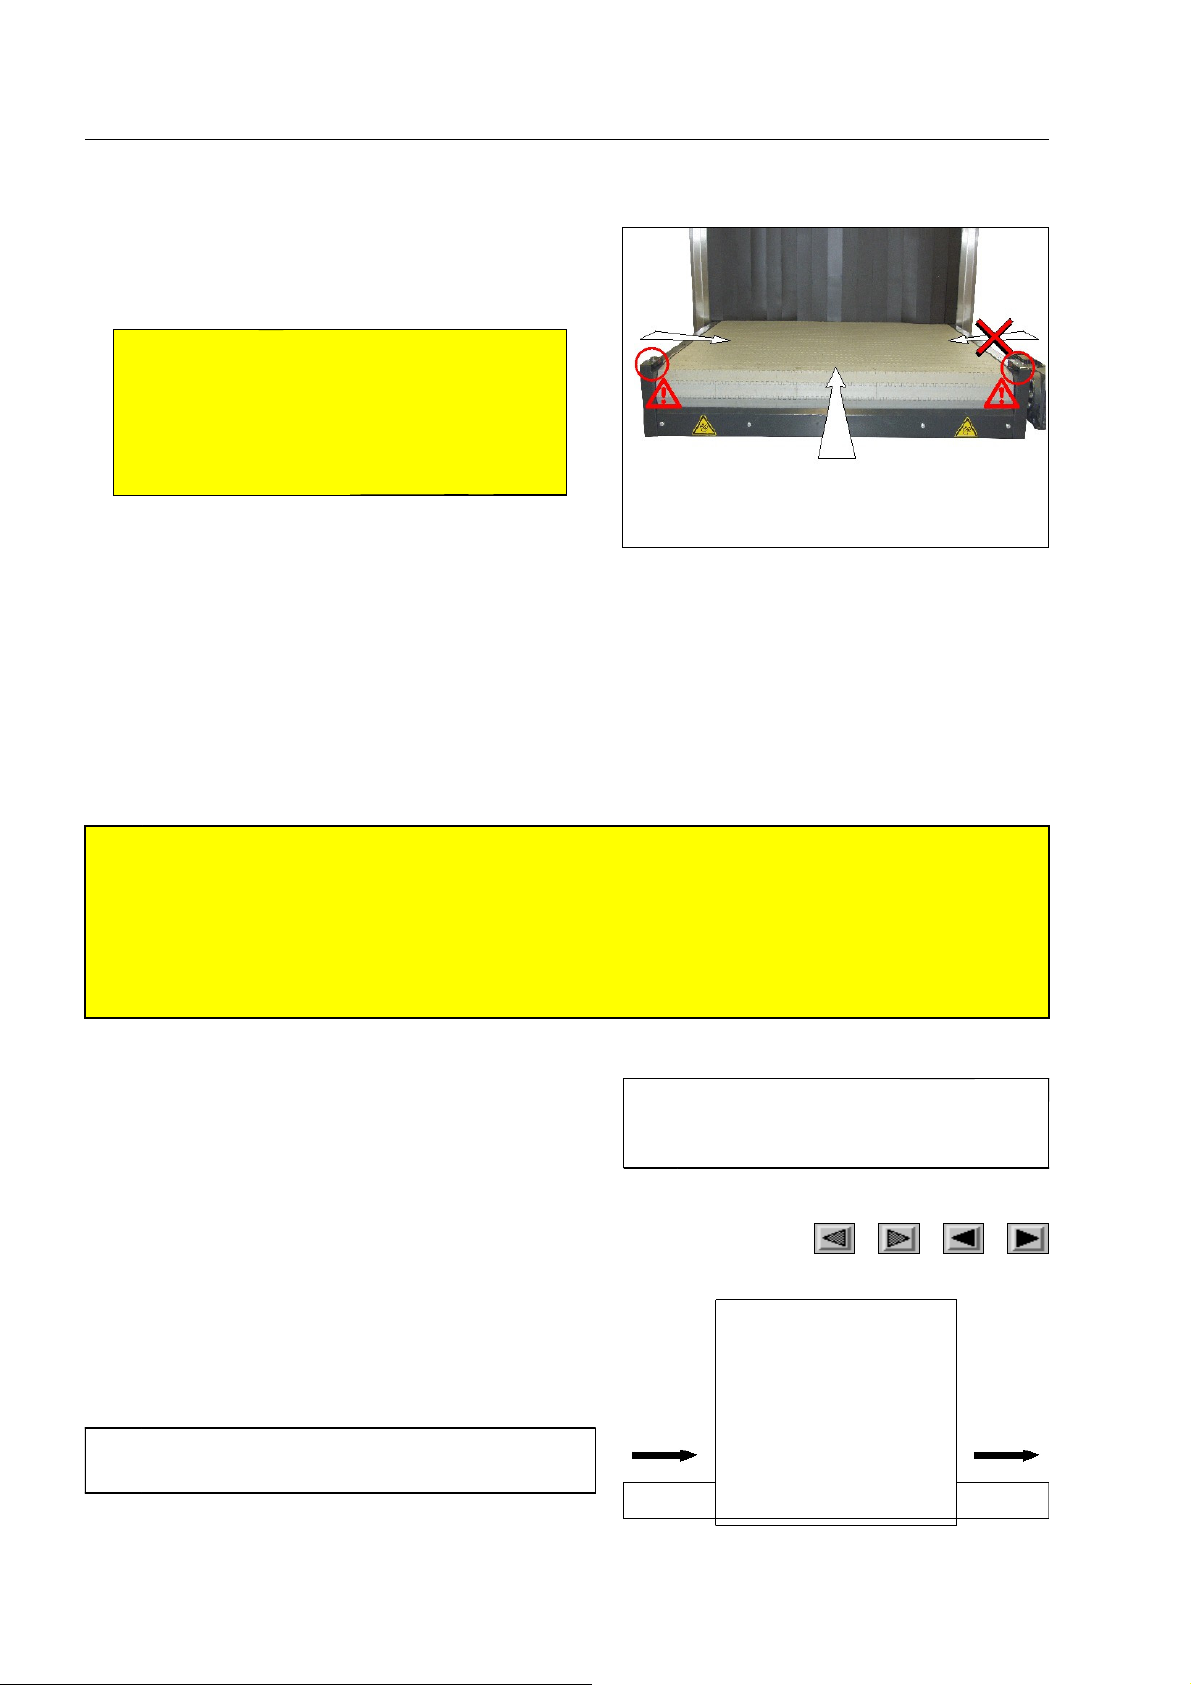
How to carry out inspections
Modular plastic belt conveyors may only be loaded
and unloaded from the front side and from the side on
which no motor is installed.
Attention!
S
Lateral loading and unloading from the motor side is not permitted! Avoid any contact
between forklift truck* and conveyor and
light barriers on the conveyor's corners!
890
How to control the scanning process
Attention!
S
If the HI-SCAN X-ray unit is equipped with one of the options Full-reverse mode*, Reverse
scanning*, Continuous scanning*, Second conveyor control*, contact mat*, attendance detector*,
safety switches* at the conveyor ends and/or the tunnel entrances and exits (conveyor end or over-
size detectors*), or if the X-ray inspection unit is integrated into a baggage handling system, the
X-ray unit works differently from the standard operation described in the following! Read the para-
graphs dealing with the options ( F 1-52) before you carry out a scan! 900
Depending on the setting the X-ray unit works in the one-
way or automatic return mode*.
You recognize the conventional one-way mode by one of the adjacent arrows in
the indication field on the screen (F 1-25).
In the one-way mode the objects to be scanned are placed
on the conveyor at the tunnel entrance, they are then conveyed through the tunnel and scanned. The objects then
run out at the tunnel exit.
Users with higher access level can
I
switch over between the one-way and
automatic return mode.
I
1-46
This operating mode facilitates the fast examination of many objects.
95587412 01/01/09 © Smiths Heimann
Page 57
You reco g nize the automatic return mode* by one of the adjacent arrows in the
indication field on the screen (F 1-25).
In the automatic return mode an object to be scanned is
placed on the conveyor at the tunnel entrance, it is then
conveyed through the tunnel and scanned. The object is
then returned automatically to the tunnel entrance and
the conveyor is stopped.
This operating mode enables the unit to be in-
I
stalled where space is limited.
One-way mode
How to carry out inspections
Press m or n according to the scanning direc-
tion indicated in the screen indication field (F 1-25) to
start the conveyors.
Warning!
A
Stop the conveyors immediately with
somebody puts a hand behind the lead cur-
R
tains!
Also avoid that baggage or freight items fall
down or pile up on the exit side. In case of
such risk, stop the conveyors immediately!920
When the baggage or freight item enters the inspection tunnel, a light barrier is interrupted and the X-ray
generators are activated.
While the baggage or freight item is transported through the inspection tunnel, it is scanned line by line.
Synchronously with the moving item, the corresponding X-ray image scrolls onto the monitor screen.
The image of a subsequent baggage or freight item will remove the display of the previous item from the
screen. Therefore, the time available to evaluate an X-ray image is limited. If a longer period of time is required, you must stop the scroll and thus the conveyors' function with
If the conveyors were stopped though the inspection of a baggage or freight item had not yet been
I
finished, the conveyors will possibly reverse* a short distance automatically. This way, cuts in the
X-ray image are avoided (cutless image processing).
1, if
Attention!
S
Units with newer software* may be set
in a way that the keys
either have to be pressed briefly or have
to be kept depressed (according to the
arrow symbols in the screen indication
field (F 1-25))! In the latter case the unit
can also be set so as to stop the conveyors only after up to 3 seconds after the
key is released! An immediate conveyor
stop is possible with
n and m
1! 910
1.
You can now view the X-ray image in different image display modes (F 1-60) and evaluate it. You can also
memorize the X-ray image (F 1-82).
If the X-ray unit is equipped with an LCD/TFT monitor the X-ray images may appear unclear
I
whilst they are in motion. In this case, stop the conveyors before you evaluate an image.
95587412 01/01/09 © Smiths Heimann
1-47
Page 58
How to carry out inspections
If you have stopped the conveyors too late or if you want to review images of preceding baggage or freight
items, you can recall image parts or complete images with the REVIEW function. This way, you need not
scan the items once more. Select the interesting image with
age, press
I
1 or reach the last image automatically with starting the conveyors.
In order to identify unknown objects, it might be necessary to scan the baggage or freight item
once more from a different angle. For this purpose, turn the baggage or freight item and use
3 and 2. To switch back to the last im-
m or n (opposite to the scanning direction) to have the baggage item transported back to
the inspection tunnel entrance.
Then continue the scanning process in the way described above.
Attention!
S
If the conveyors were stopped during the scanning of an item, and, if no brief reverse movement
was initiated when stopping, an automatic reverse movement can be initiated when continuing
the scanning; this way, no cuts will be caused in the X-ray image (cutless image processing)!
In this case, pay attention to baggage or freight items, which have been placed on the entry side
of the conveyors during the stop. These items might fall down when the conveyors are reversed!
930
Automatic return mode*
Press m or n according to the scanning direc-
tion indicated in the screen indication field (F 1-25) to
start the conveyor.
Warning!
A
Stop the conveyors immediately with
somebody puts a hand behind the lead cur-
R
tains!
Also avoid that baggage or freight items fall
down. In case of such risk, stop the conveyors
immediately!950
When the baggage or freight item enters the inspection tunnel, a light barrier is interrupted and the X-ray
generators are activated.
While the baggage or freight item is transported through the inspection tunnel, it is scanned line by line.
Synchronously with the moving item, the corresponding X-ray image scrolls into the monitor screen.
After scanning is completed the running direction of the conveyor is reversed automatically, the object is
thus returned to the entrance and the conveyor is then stopped.
If the conveyor was stopped though the inspection of a baggage or freight item had not yet been
I
finished, the conveyor will possibly reverse* a short distance automatically. This way, cuts in the
X-ray image are avoided (cutless image processing).
1, if
Attention!
S
The unit may be set in a way that the
keys
n and m either have to be
pressed briefly or have to be kept depressed (according to the arrow symbols
in the screen indication field (F 1-25))! In
the latter case the unit can also be set
so as to stop the conveyors only after up
to 3 seconds after the key is released!
An immediate conveyor stop is possible
with
1!940
1-48
95587412 01/01/09 © Smiths Heimann
Page 59
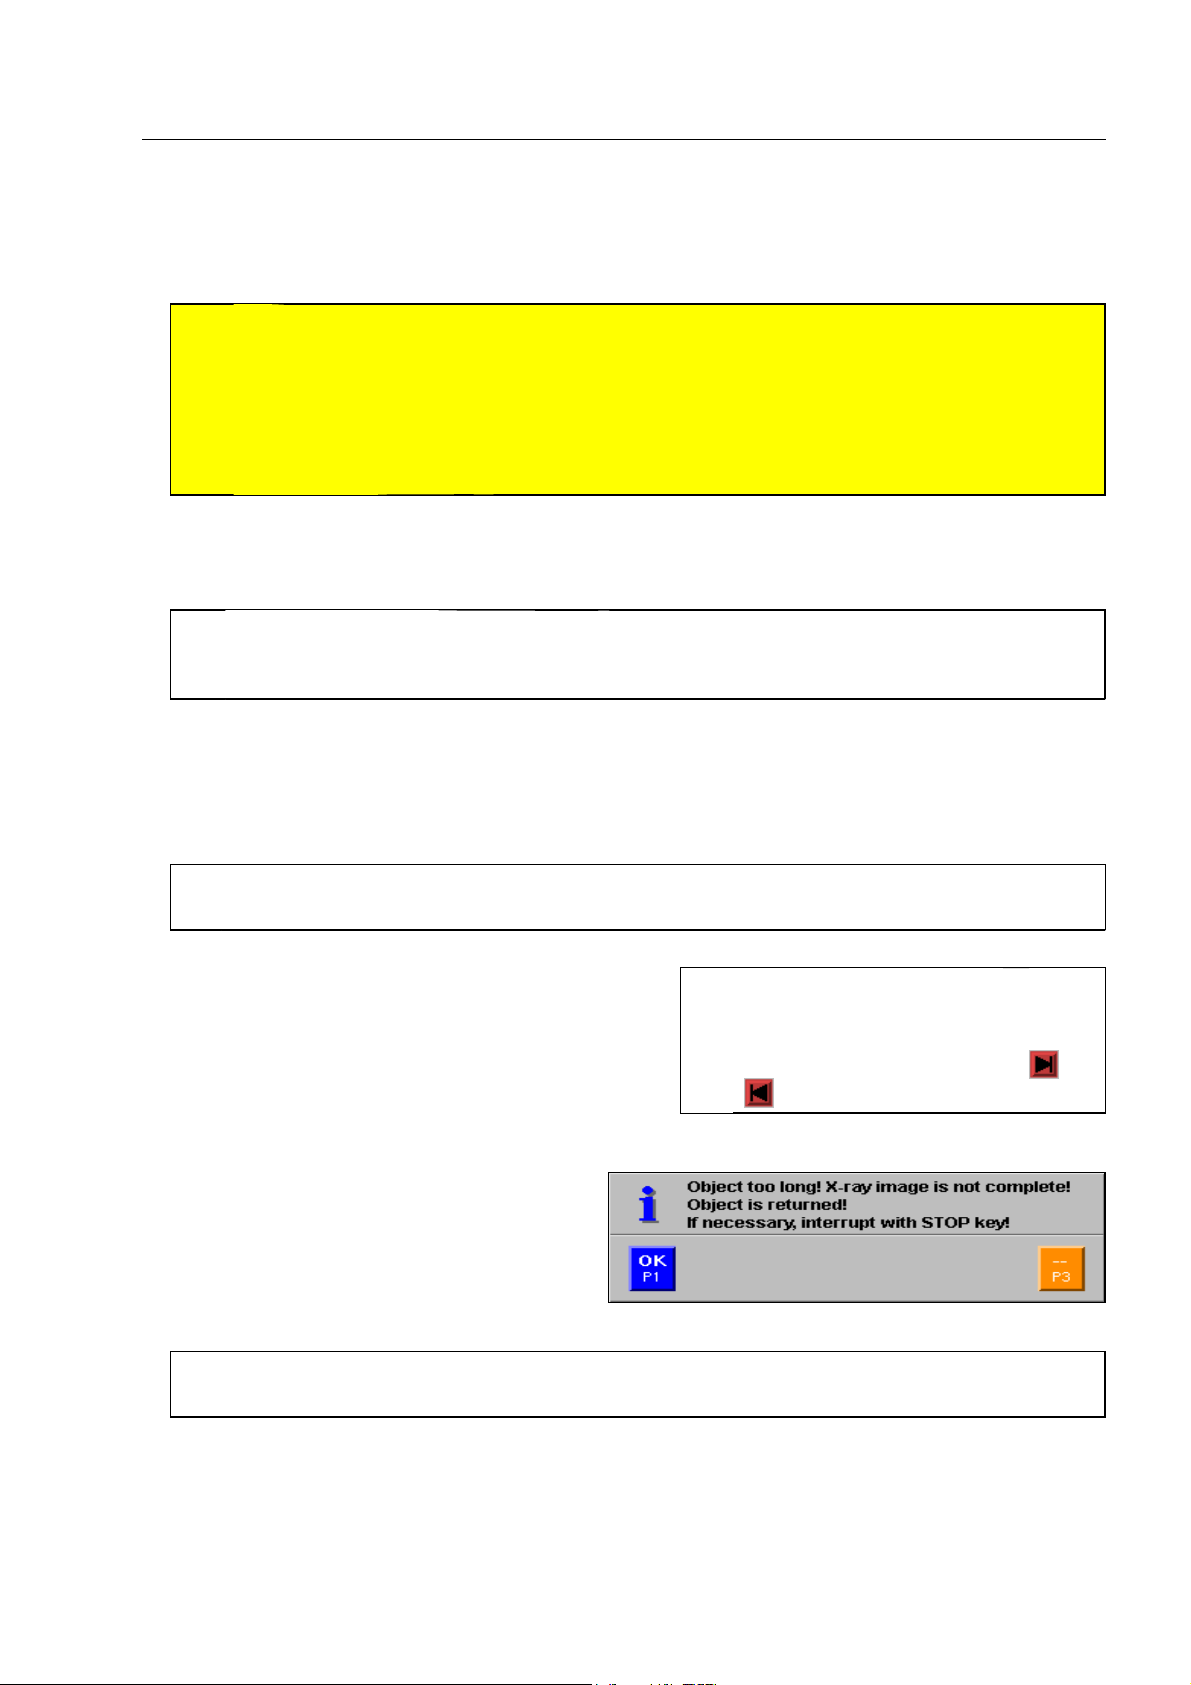
How to carry out inspections
If the conveyor has been stopped during scanning, you can continue it with the corresponding
m or
n key.
Attention!
S
If the conveyors was stopped during the scanning of an item, and, if no brief reverse movement
was initiated when stopping, an automatic reverse movement can be initiated when continuing
the scanning; this way, no cuts will be caused in the X-ray image (cutless image processing)!
In this case, pay attention to baggage or freight items, which have been placed on the entry side
of the conveyor during the stop. These items might fall down when the conveyor is reversed!
960
You can now view the X-ray image in different image display modes (F 1-60) and evaluate it. You can also
memorize the X-ray image (F 1-82).
If the X-ray unit is equipped with an LCD/TFT monitor the X-ray images may appear unclear
I
whilst they are in motion. In this case, wait until the conveyor has stopped before you evaluate an
X-ray image.
If you want to review images of preceding baggage or freight items, you can recall image parts or com-
plete images with the REVIEW function. This way, you need not scan the items once more. Select the interesting image with
automatically with starting the conveyor.
3 and 2. To switch back to the last image, press 1 or reach the last image
In order to identify unknown objects, it might be necessary to scan the baggage or freight item
I
once more from a different angle.
If the conveyor was stopped during the automatic re-
turn movement, then you must continue reversing
manually until this is ended automatically. To continue
reversing, keep the corresponding
depressed (grey arrow in reverse direction) or press
the corresponding key briefly (white arrow in reverse
direction).
If the adjacent message appears during scanning,
then the scanned object is too long for scanning
in the automatic return mode.
In this case run the conveyor and thus also the
object back to the entrance with
If you want to scan objects that are too long for the automatic return operating mode, then you
I
must have the automatic return mode deactivated by a user with higher access level.
m or n key
r.
No further scanning can be started as
I
long as the automatic return is not
ended. This is displayed on the screen by
the correspondingly red colored
arrow in the indication field.
or
95587412 01/01/09 © Smiths Heimann
1-49
Page 60
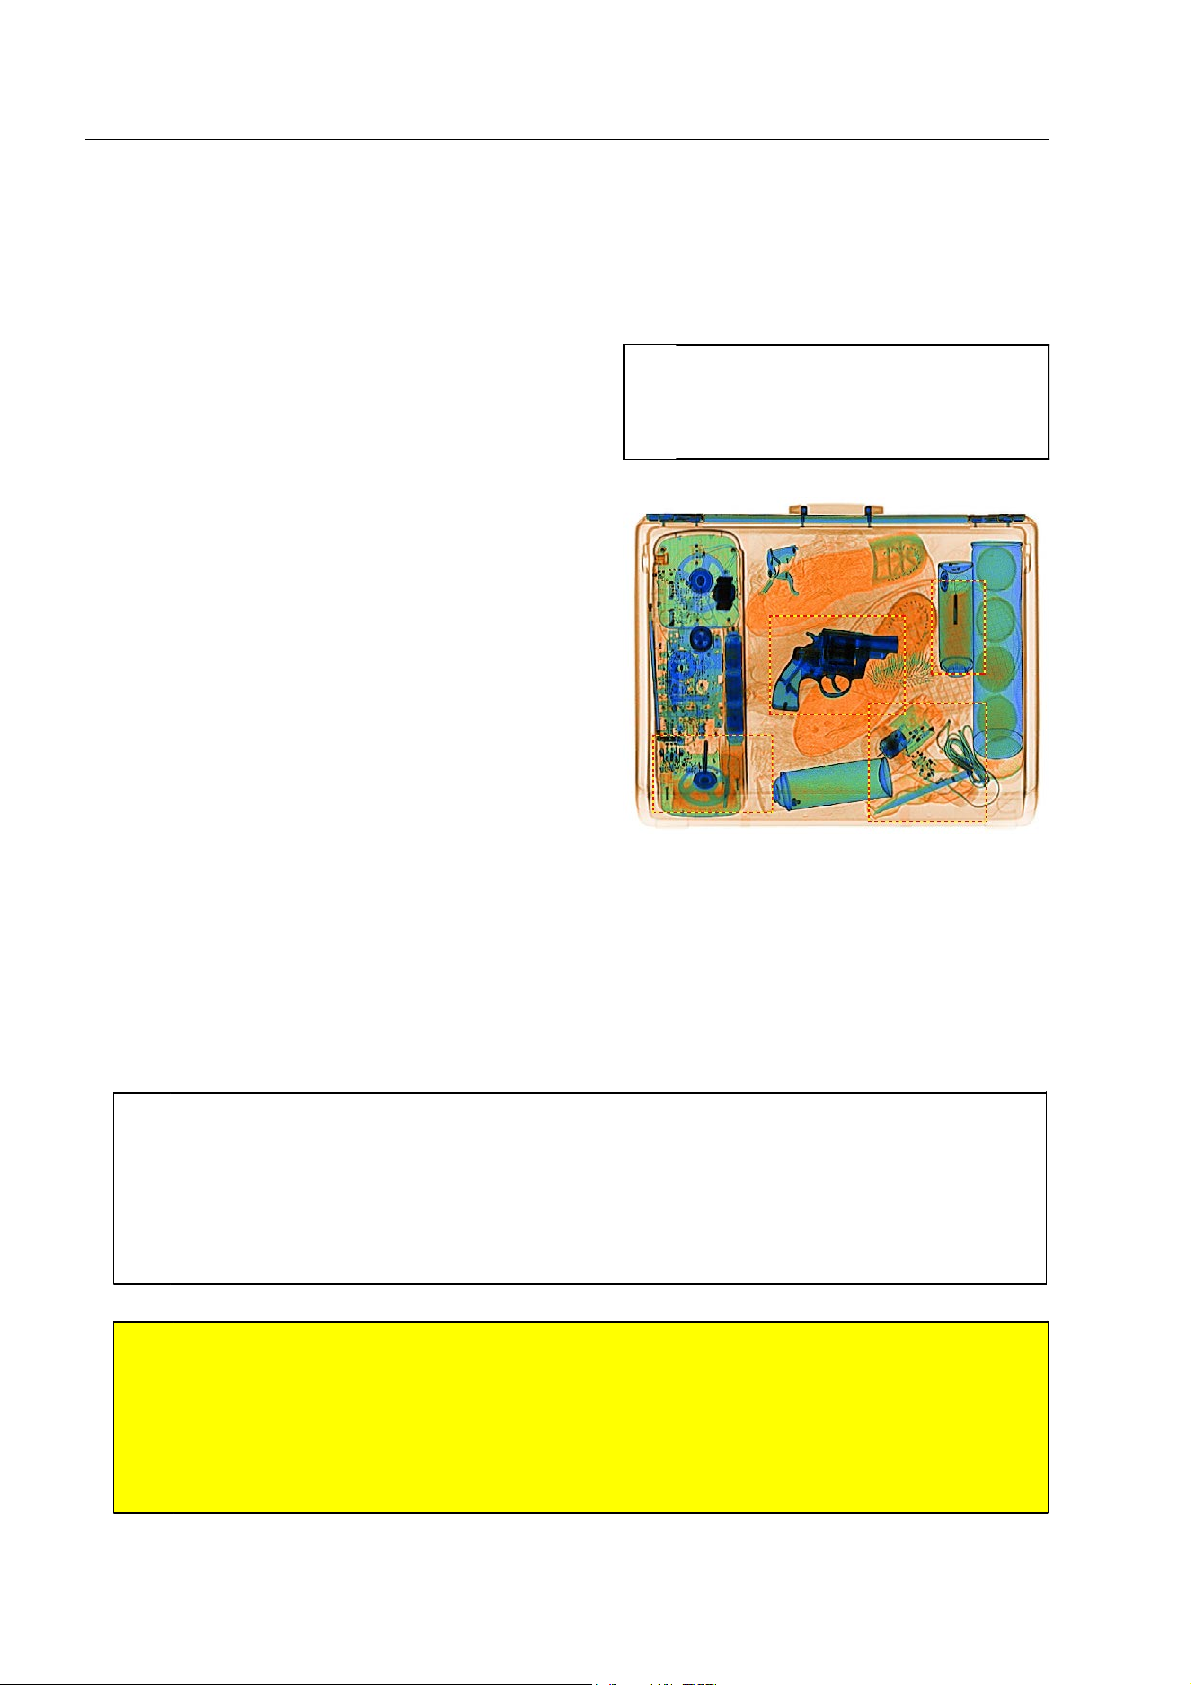
How to carry out inspections
How to lead suspect items to the recheck
Mark suspicious objects in the X-ray image*
If you detect suspect objects in the scanned baggage or
freight item, you can mark them with one or several
red/yellow frames* for the subsequent recheck in units
with newer software*.
Stop the conveyor and use the zoom function (F 1-71)
first to exactly display the section of the X-ray image on
the screen which you want to frame. Then actuate the
priority key assigned to the function FRAME OBJECT.
If you want to delete the set frame actuate the key an-
other time before you change the image section again.
Proceed the same way with further objects. If a larger
image section includes already framed sections completely, the frames will be comprised in one large
frame.
All frames can be removed if you go back to the unmagnified representation (F 1-71), set a frame and de-
lete it again by pressing the priority key two times.
If a TIP* system is activated, you have to
I
delete a possibly fictitious object inserted by the TIP system with
you mark a suspicious object (F 1-73).
H before
Mark scanned baggage or freight item as suspicious
Press H shortly to electronically mark the item for the recheck.
If a TIP system* is activated, a corresponding feedback from the TIP system will be usually
I
triggered upon pressing
be deleted (s F 1-73). For the electronic marking, you therefore have to actuate key
once more.
With newer software*, the TIP system can be adjusted in such a way that the marking for the
recheck takes already place simultaneously with the first depression of
possible in case that no fictitious object was inserted by the TIP* system.
Warning!
A
The suspect baggage item must be marked as soon as it's complete image has been displayed on
the monitor. This means that the empty section you are used to seeing behind the bag image has
been created and the scroll has been stopped for at least a short moment! Otherwise, the preceding bag might unintentionally be marked!
If the conveyor keeps on running, the marking must not be made too late, since, otherwise, the
warning signal will be activated with the corresponding delay! 970
H for the first time and any fictional threat object possibly inserted will
H possibly
H. However, this is only
1-50
95587412 01/01/09 © Smiths Heimann
Page 61
How to carry out inspections
When electronically marked items leave the inspection
tunnel, an audible signal is triggered. This function will
help you or your colleague to separate the suspect
item from the non-suspect items on the tunnel exit side.
If the X-ray inspection unit is not equipped with a sep-
arate recheck station*, the baggage or freight item
should be rechecked manually at a place where you
can have a look at the X-ray unit's monitor. To facilitate
the recheck, you can recall the corresponding X-ray
image on the monitor with the REVIEW function
(
3 and 2) (see above).
Send X-ray image to recheck station(s)*
If one or more recheck station(s)* is/are connected to the
HI-SCAN unit, pressing
or freight item electronically (audible signal, see above)
will, simultaneously, lead to the transfer of the corresponding X-ray image to a free recheck station.
H to mark the suspect baggage
You can set the time the audible signal is
I
sounded (F 1-91).
Warning!
A
When rechecking suspect objects, proceed according to the provisions and
safety instructions given to you! 980
A recheck station can store up to 3 X-ray
I
images. Further images cannot be
transferred until the previously transferred images have been evaluated by
the operators at the stations.
If the image cannot be transmitted to any recheck station, since all of them are occupied, a respective error
message (F 1-95) will appear.
Use
r to repeat the transmission in case of error.
Attention!
S
If you cancel the transmission with
s, the image will be deleted and
cannot be used for the recheck! 990
Send X-ray image to Central Image Data Archive CIDA*
If the HI-SCAN unit is connected to a Central Image Data Archive* (CIDA) via a data network*, the suspect
baggage or freight item will not only be marked with
same time, the corresponding X-ray image will be transferred to the image data archive.
H for being audibly identified (see above) but at the
Particularities of units equipped with the Xport image transfer system*
If the Xport image transfer system is set to automatic transfer all X-ray images will be converted by means of
the Xport image transfer system and then transferred either via a data network* to the Xport target computer* or to a USB memory* that is connected to the X-ray unit as soon as the corresponding baggage or
freight items have been completely scanned.
If the automatic transfer is switched off* (with newer software) you can transfer single X-ray images by
pressing the priority key assigned to the TRANSFER IMAGE* function.
95587412 01/01/09 © Smiths Heimann
1-51
Page 62
How to carry out inspections
Attention!
S
Do not transfer an image until it has been displayed completely on the monitor. This means that
the empty section you are used to seeing behind the bag image has been created and the scroll
has been stopped for at least a short moment! Otherwise, the image of the preceding baggage
item might unintentionally be transferred! 1000
During the conversion and transfer process, no baggage or freight item can be scanned. If a baggage or
freight item enters the inspection tunnel in this time, the conveyors will be stopped and the message
"Last Xport image transfer still in progress!" will be displayed. After having acknowledged the message
r and a short wait period, you can restart the conveyor.
with
If you want to make sure that the conveyors are not automatically stopped, enlarge the distances between
the baggage or freight items accordingly.
Particularities of units equipped with Full-reverse mode*
If the X-ray unit is equipped with Full-reverse mode, you
can change the scanning direction.
If the function Reverse scanning* (see below) is activated and if both direction arrows in
I
the screen indication field appear in black (units with newer software*), no changeover
of the inspection direction is required.
Use the navigator to move to item Scanning functions in the Main
menu and activate this item. The menu beside is displayed.
Switch over item Scanning direction.
Leave the menu with
opted.
r in order to have the new direction ad-
I
In units with newer software, the access
to this function can be disabled by users
with higher authorisation. If a possibly
installed radioactivity detector* is activated the inspection direction cannot be
switched.
1-52
95587412 01/01/09 © Smiths Heimann
Page 63
How to carry out inspections
Particularities of units equipped with Reverse scanning*
With function Reverse scanning, you can scan items once more already during the reverse run. If
this function is available at the X-ray unit, the second arrow in the screen indication field is displayed in dark grey or black.
To scan in reverse direction, hold the corresponding
key
n or m (dark grey arrow) or actuate the
appropriate key (black arrow). Use
veyors.
Attention!
S
Always terminate the inspection of a baggage or freight item completely, before scanning it once
more in reverse direction! Otherwise, there may be areas left in the object that have not yet been
scanned! 1010
1 to stop the con-
Function Reverse scanning* can be re-
I
leased by higher access level users, if
the HI-SCAN X-ray unit is equipped with
the option Full-reverse mode* (see
above).
If the automatic return mode is active on
the X-ray unit (F 1-48), then reverse
scanning* is not possible.
Particularities of units equipped with Continuous scanning*
With the function Continuous scanning, you can scan very
short and very flat objects, such as letters, which are not
detected by the light barriers.
Function Continuous scanning is re-
I
leased by the higher access level users.
As compared to the normal scanning procedure without function Continuous scanning, the X-rays and the
image scroll are permanently activated as long as the conveyor are running. For reasons of safety, you
have to keep
scroll will stop and the emission of X-rays is deactivated.
m or n depressed. As soon as you release the key, the conveyors and the image
Particularities of units equipped with Second, parallel conveyor control*
The conveyors of the X-ray unit cannot only be controlled
via the keyboard but also via a supplementary remote control box* or via remote-control signals.
When switching on the X-ray unit the control of the conveyor is only possible via the keyboard.
95587412 01/01/09 © Smiths Heimann
Warning!
A
To be able to adhere to the safety rules,
it is indispensable that the operator
controlling the second conveyor control
is also able to see the inspection tunnel's entry and exit side! If this is not
possible, arrange for appropriate measures to be taken, i.e. cordons or further
operating personnel so that the safety
rules can nevertheless be adhered to!
1020
1-53
Page 64
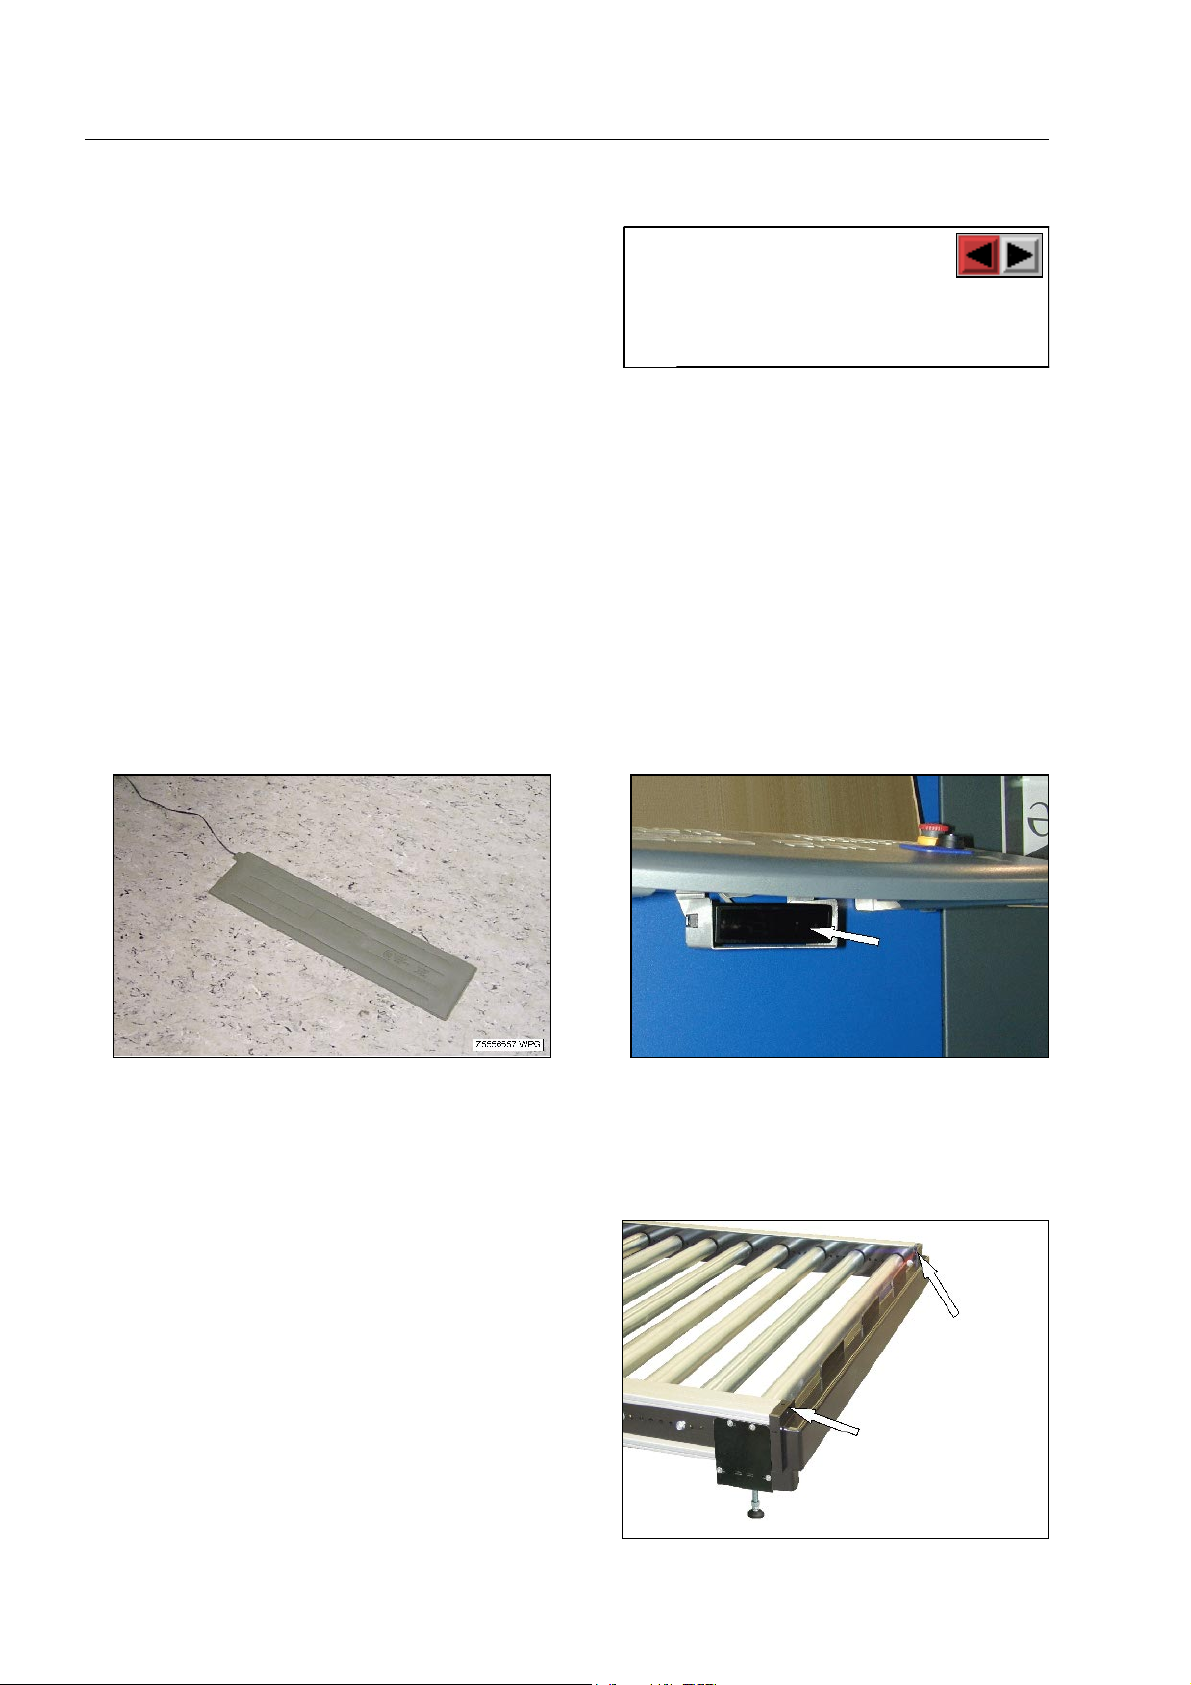
How to carry out inspections
As soon as you have started the conveyors via the key-
board with
(forward or reverse), the operator in charge of the
second control is able to stop the conveyors. He or she
thus gains control of the conveyors, i.e. only the operator in charge of the second control will be able to restart the conveyors.
You regain control of the conveyors by stopping them with
ator controlling the second conveyor control.
m or n (or for clearing the tunnel)
With the arrow in the indica-
I
tion field changing to red
you are notified* that the
conveyors have been stopped by the
second control operator.
1 after their having been started by the oper-
Particularities of units equipped with contact mat* or attendance detector*
For reasons of safety, the HI-SCAN X-ray unit can be equipped with a contact mat or an optical attendance
detector.
Before starting the conveyor and until stopping the conveyors with
you have to stay in front of the attendance detector which is mounted below the keyboard.
1, you have to step on the mat or
Particularities of units equipped with safety switches*
(conveyor end and/or oversize detectors*)
Light barriers installed as safety switches* at the convey-
or ends (conveyor end detectors*) stop the conveyors as
soon as baggage or freight items reach the end of the
conveyors or when reversing, the beginning of the conveyors to prevent them from falling down.
1-54
95587412 01/01/09 © Smiths Heimann
Page 65
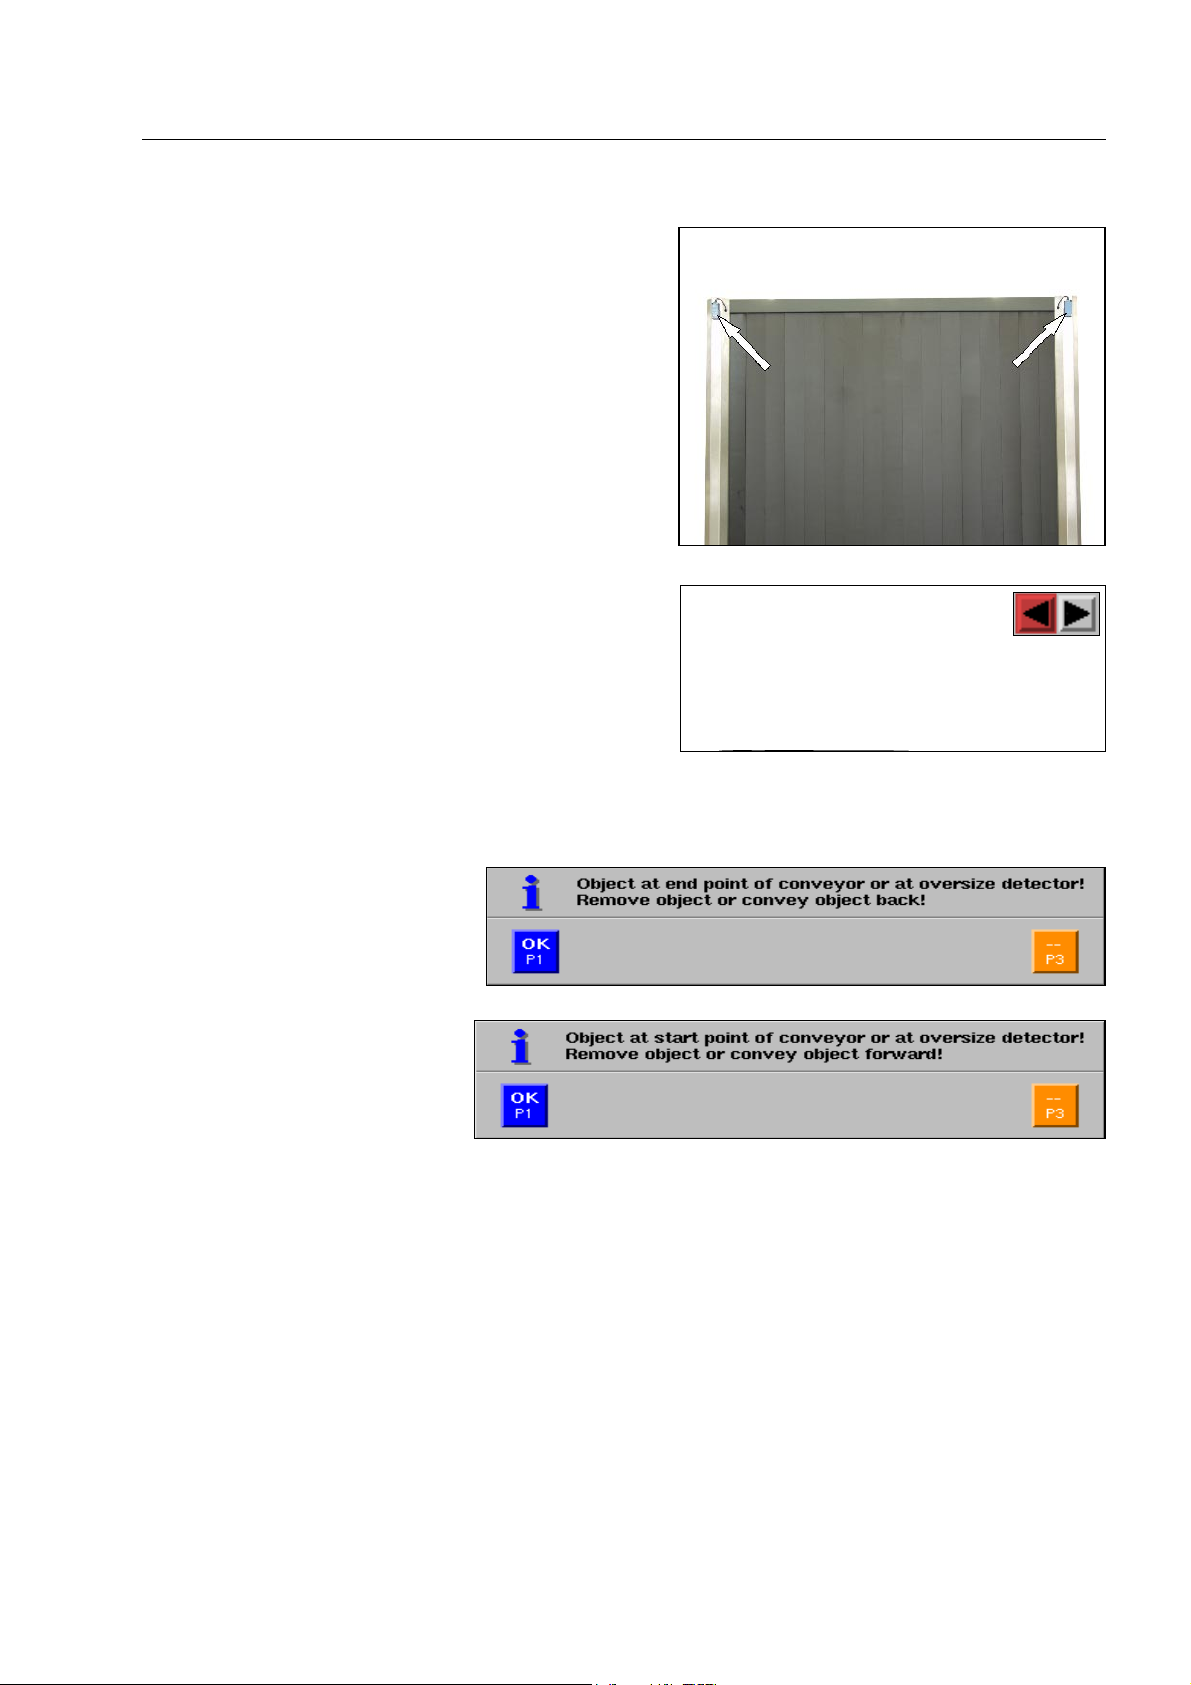
To avoid that too high baggage or freight items abut
against the tunnel entrances and exits and get stuck, the
conveyors are stopped by the light barriers* installed
there (oversize detectors*).
How to carry out inspections
The setting of the X-ray inspection unit may be such as
to allow the conveyors to keep on running as soon as
the baggage or freight item has been removed by hand
(pause mode*). The setting may also be such as to the
conveyors being restarted manually afterwards with
m or n (normal stop mode).
In both cases you can also start the conveyors in the opposite direction without removing the baggage or
freight item in advance.
Together with the conveyors'
stop, corresponding messages*
may additionally appear.
You will be notified by the
I
arrow in the indication field
changing to red that the
conveyors have only been stopped briefly
and will continue to run as soon as you
remove the baggage or freight item.
If the conveyors are in pause mode, the message will be deleted automatically when you remove items.
Otherwise you have to delete the message with
95587412 01/01/09 © Smiths Heimann
r before starting the conveyors again.
1-55
Page 66

How to carry out inspections
Particularities of units integrated into a baggage handling line*
(Units with option InLine - variant Start/Stop)
If the X-ray inspection unit is integrated into a baggage handling line the conveyors cannot be started in forward direction until the discharge baggage conveyors are running and clear of baggage items. In reverse direction the conveyors can only be operated if the feeding conveyors are standing or reversing too.
If you try to start the conveyors into a currently locked direction with
of the arrow will change to red without t conveyors starting.
Warning!
A
Make sure that nobody places items on the conveyors or removes items from them at this moment, since the latter can at any time start automatically if the baggage handling system activ-
ates the feed and/or discharge conveyors! 1030
If the baggage handling line stops feed or discharge conveyors or if the discharge conveyors are occupied
with other baggage items the conveyors of the X-ray inspection unit will also be stopped. The color of the
arrow in the indication field changes to red.
If you want to avoid that the conveyors start automatically after a momentaneous stop, actuate key
m or n the color
1.
Particularities of units integrated into an iLane system*
(also see the iLane system manual)
Operating the conveyor in reverse mode is not possible since the iLane conveyor system can only be operated
in forward direction.
If baggage items pile up on the conveyor line following the unit the conveyor of the X-ray unit is automatically
stopped. Once the baggage items are removed the belt restarts automatically.
If an object was completely scanned it is marked by a
blue-yellow frame. As long as this frame is displayed
you can mark the object with
recheck station* is available the X-ray image will be
transferred to it simultaneously. (F 1-50).
If you pressed
the suspicious baggage item to the recheck station
only via the appropriate key of the iLane conveyor system. However, the X-ray image will not be transferred
in this case.
1-56
H late you can subsequently transfer
H for a recheck. If a
Warning!
A
With running conveyor, the blue-yellow
frame is displayed only a few seconds.
When in doubt, stop the conveyor with
1 to gain time. Otherwise, the
baggage item will be automatically
conveyed on as unsuspicious!
95587412 01/01/09 © Smiths Heimann
Page 67
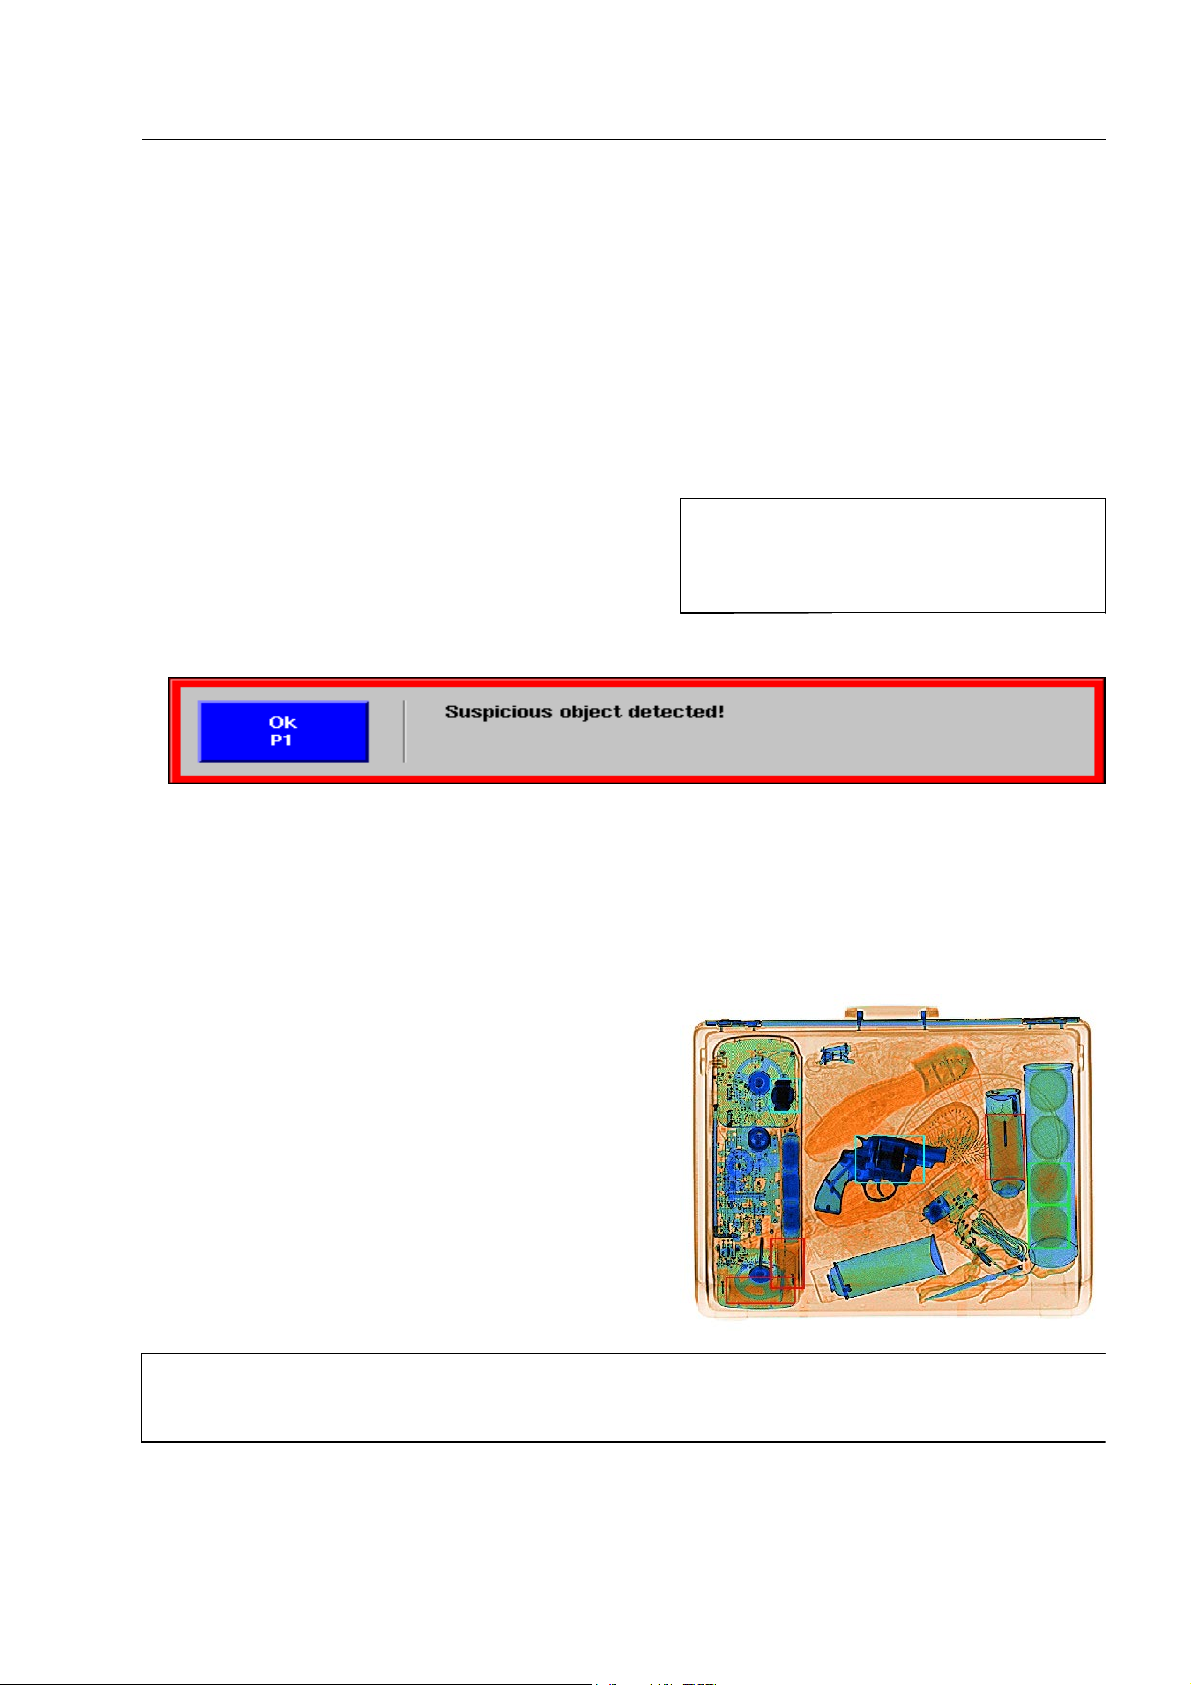
How to use the automatic detection functions*
How to use the automatic detection functions*
If suspect objects are detected by means of the automatic detection functions described in the following, this
will pointed out to you by means of markings which are inserted into the associated X-ray image.
You can switch on and off the markings with
the screen indication field.
The detection functions can be programmed so that, in addition to certain markings, an audible alarm will be
triggered.
Higher access level users can also define that the conveyors stop automatically as soon as a suspect or high-absorbing object has been detected. In this case the message illustrated appears on the screen.
You then have to acknowledge and delete the message with
X. In active status, indication auto appears in field mode in
If one of the priority keys is assigned to
I
function NO STOP, you can avoid the
automatic conveyor stop by pressing the
key in time.
r.
The X-ACT system*
With the X-ACT system, your attention will automatically
be drawn to suspect and higher absorbing objects in the
X-ray image by corresponding markings. Depending on
the setting of the detection class, certain explosives
and/or certain drugs* are recognized.
Objects, which may be explosives are provided with a red
frame in the X-ray image, objects which may be drugs
with a green frame and the higher absorbing objects with
a blue frame. On dual view units frames are inserted only
on the main monitor.
Baggage or freight items with many details following closely behind one another may cause that sec-
I
tions of an object or possibly the complete object are not evaluated. In this case, the corresponding
section or complete object is marked with a red frame.
95587412 01/01/09 © Smiths Heimann
1-57
Page 68
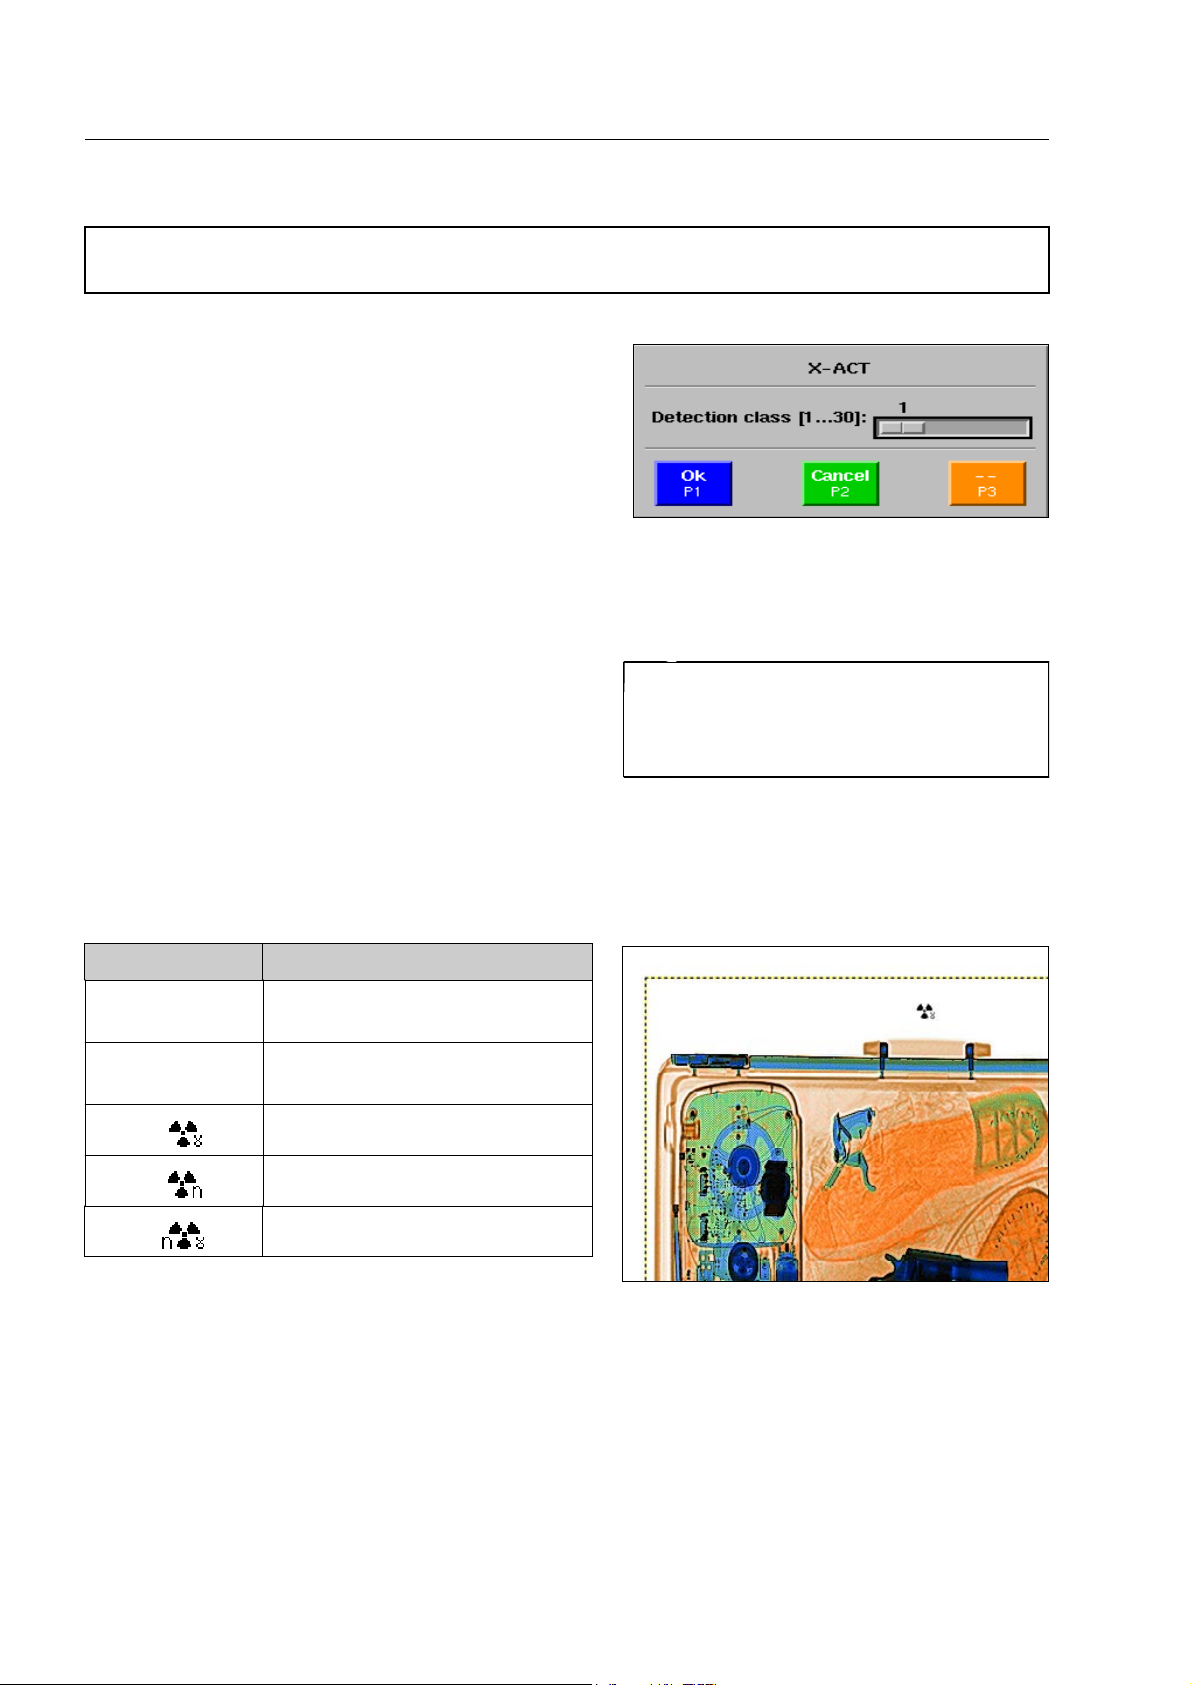
How to use the automatic detection functions*
To ensure that the X-ACT system is functioning without fault, the material detection of the HI-SCAN
I
X-ray unit must be calibrated monthly by a higher access level user.
To define the detection class, call up the X-ACT menu*
M.
with
Set the detection class by means of the navigator.
Then leave the menu with
accepted.
r to have the new class
Radioactivity detector*
The integrated radioactivity detector* detects gamma radiation (γ radiation). In the extended version the detection
of neutron radiation is also included*.
If radiation is detected, the respective baggage or freight item is marked by a frame and a suitable symbol is
displayed.
The kind and intensity of radiation are distinguished as follows:
Display Meaning
Yellow-black
frame
Red-black frame Radiation alarm (see below)
Radiation warning (see below)
Low-intensity radiation
Radiation of higher intensity
Due to the high absorption, shielded
I
containers used for the transport of radiation sources will appear black on the
X-ray image.
Symbol
Symbol
Symbol
Radiation warning
Due to the high sensitivity of the integrated radioactivity detector, even very low intensity radiation sources
will be detected.
To be sure that the detected radiation really comes from the scanned bag or freight item, you should turn
the object round (bottom side on top) and repeat the scanning. If no radiation is detected now, the previously detected radiation source might have been carried by a passenger. A detection of γ radiation may
also occur if persons who have undergone a medical treatment using radioactive nuclides are near the Xray inspection unit.
1-58
γ radiation
Neutron radiation
γ and neutron radiation
95587412 01/01/09 © Smiths Heimann
Page 69
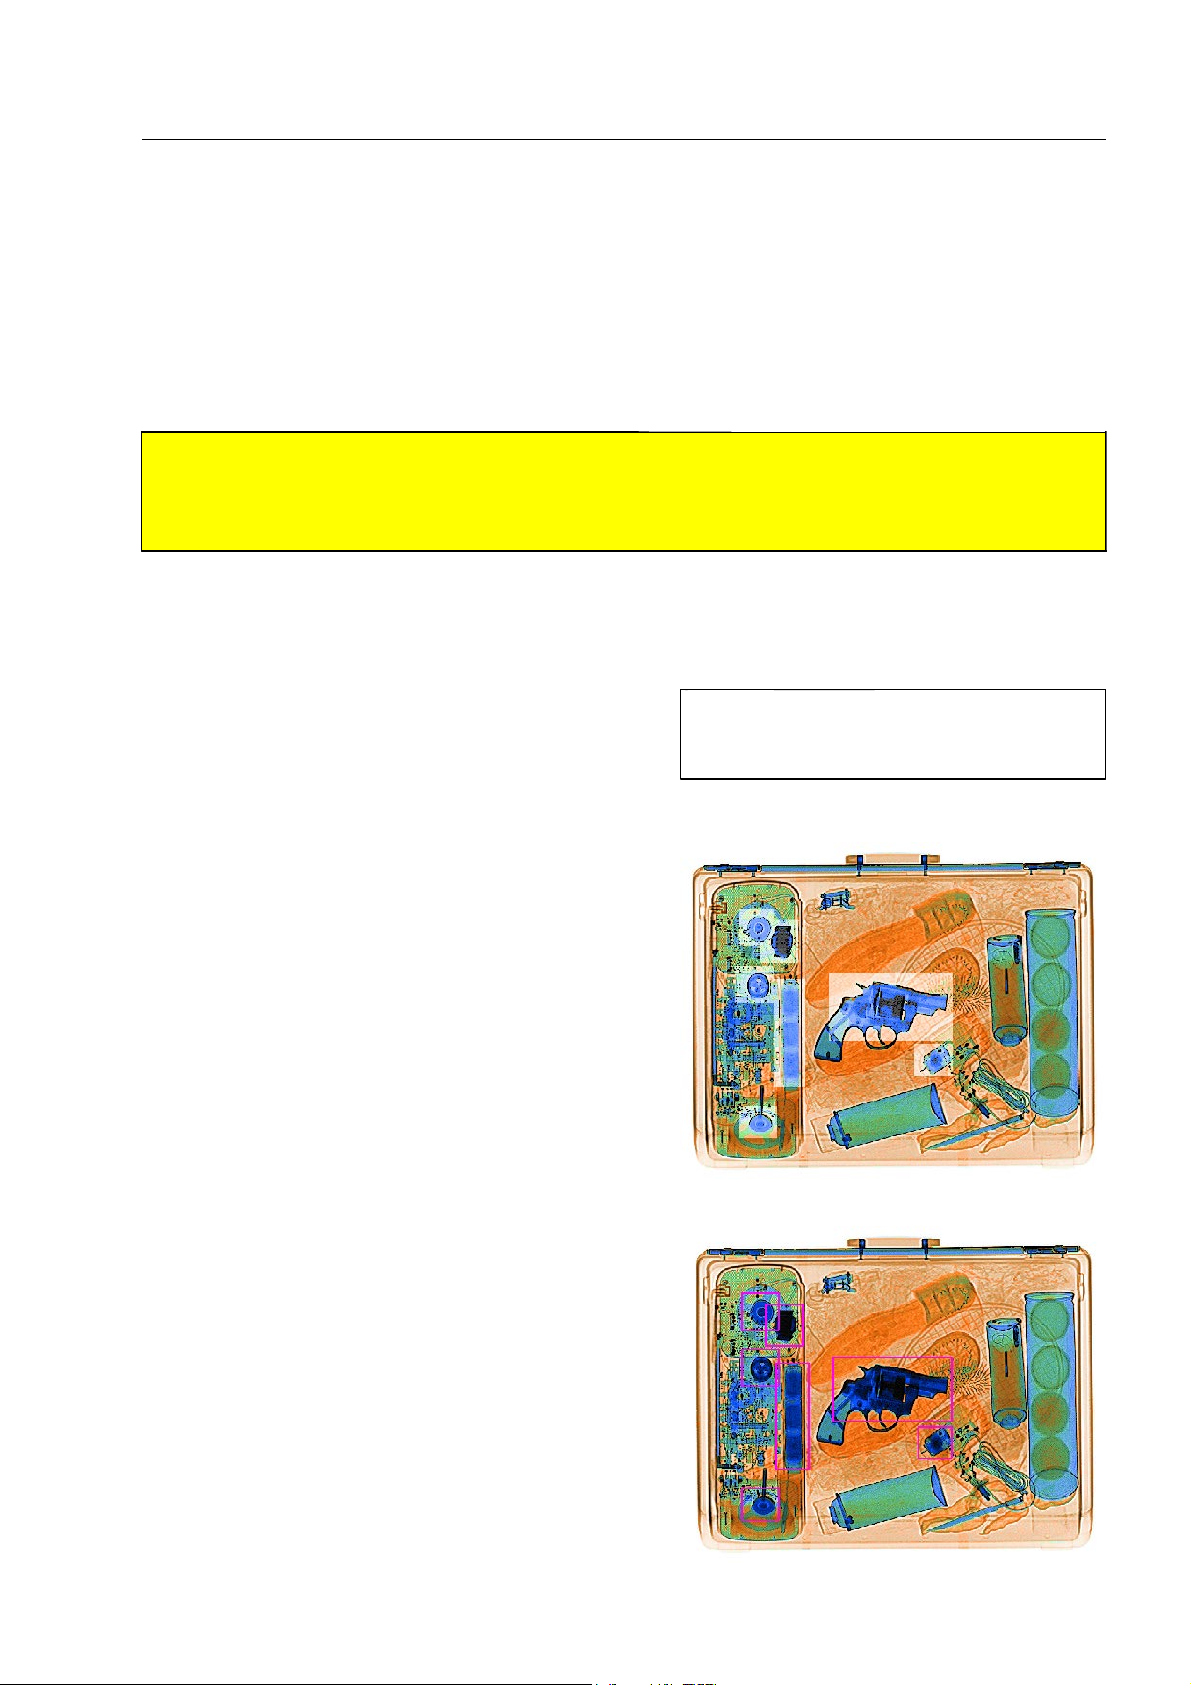
How to use the automatic detection functions*
In case you are in doubt of the location of the γ radiation source you can detect the latter by means of a
hand-held meter suitable for measuring γ radiation.
Radiation alarm
The detected radiation source's intensity is by several times higher than that of the radiation warning.
Warning!
A
When rechecking suspect and possibly contaminated items and individuals, proceed according to the
provisions and safety instructions given to you! Observe that radiation sources may be of microscop-
R
ic quantity so that a detection with the naked eye is not possible! 1120
The functions HI-SPOT* and High Density Alert* - HDA
Using the functions HI-SPOT and High Density Alert your
attention will automatically be drawn to higher absorbing
objects in the X-ray image by corresponding markings, if
the objects have a certain minimum size and absorption
degree.
Function HI-SPOT highlights the image sections containing higher absorbing objects with the display of higher
penetration (HIGH). Higher access level users can select a
constant or a blinking display.
Function High Density Alert provides higher absorbing
objects with a pink frame.
The minimum absorption level and the
I
minimum object size is defined by the
higher access level users.
95587412 01/01/09 © Smiths Heimann
1-59
Page 70

How to display X-ray images
How to display X-ray images
The default image display
After scanning an item it is first shown in the default image display until you select a different image display
mode. In a dual view unit you see a further view of the
scanned object on the second monitor in the same image
display as on the main monitor.
Nearly all of the image display modes referred to in the following can be defined as default image display by
the higher access level users.
You can return to the default image display with
V at any time.
The default image display defined is in-
I
dicated in field Image display in the
screen indication field (F 1-23) after
switching on.
How to select other image display modes
The most important image display modes described in the following can be selected via a proper key described in the following.
All other image display modes as well as combinations of
them can only be selected with a priority key
r,
s, t which has been configured accordingly by
the higher access level users before.
The functions allocated to the priority
I
keys and the image display mode currently selected can be read from the
screen indication field (F 1-23).
The keys to select the different image display modes must either be permanently depressed (non-locking
key) or you have to press the key only briefly (locking key) to switch on and off an image display mode. This is
configured by the higher level users.
Furthermore, higher access level users can determine not to use certain image display modes as long as the
conveyors are running. As a result, the conveyors will stop automatically when selecting such display modes
and such display modes will be switched off when starting the conveyors.
The black and white monitor*
If a HI-SCAN single view unit is equipped with a second monitor*, the black and white image is represented
on this monitor as second default image display.
1-60
95587412 01/01/09 © Smiths Heimann
Page 71
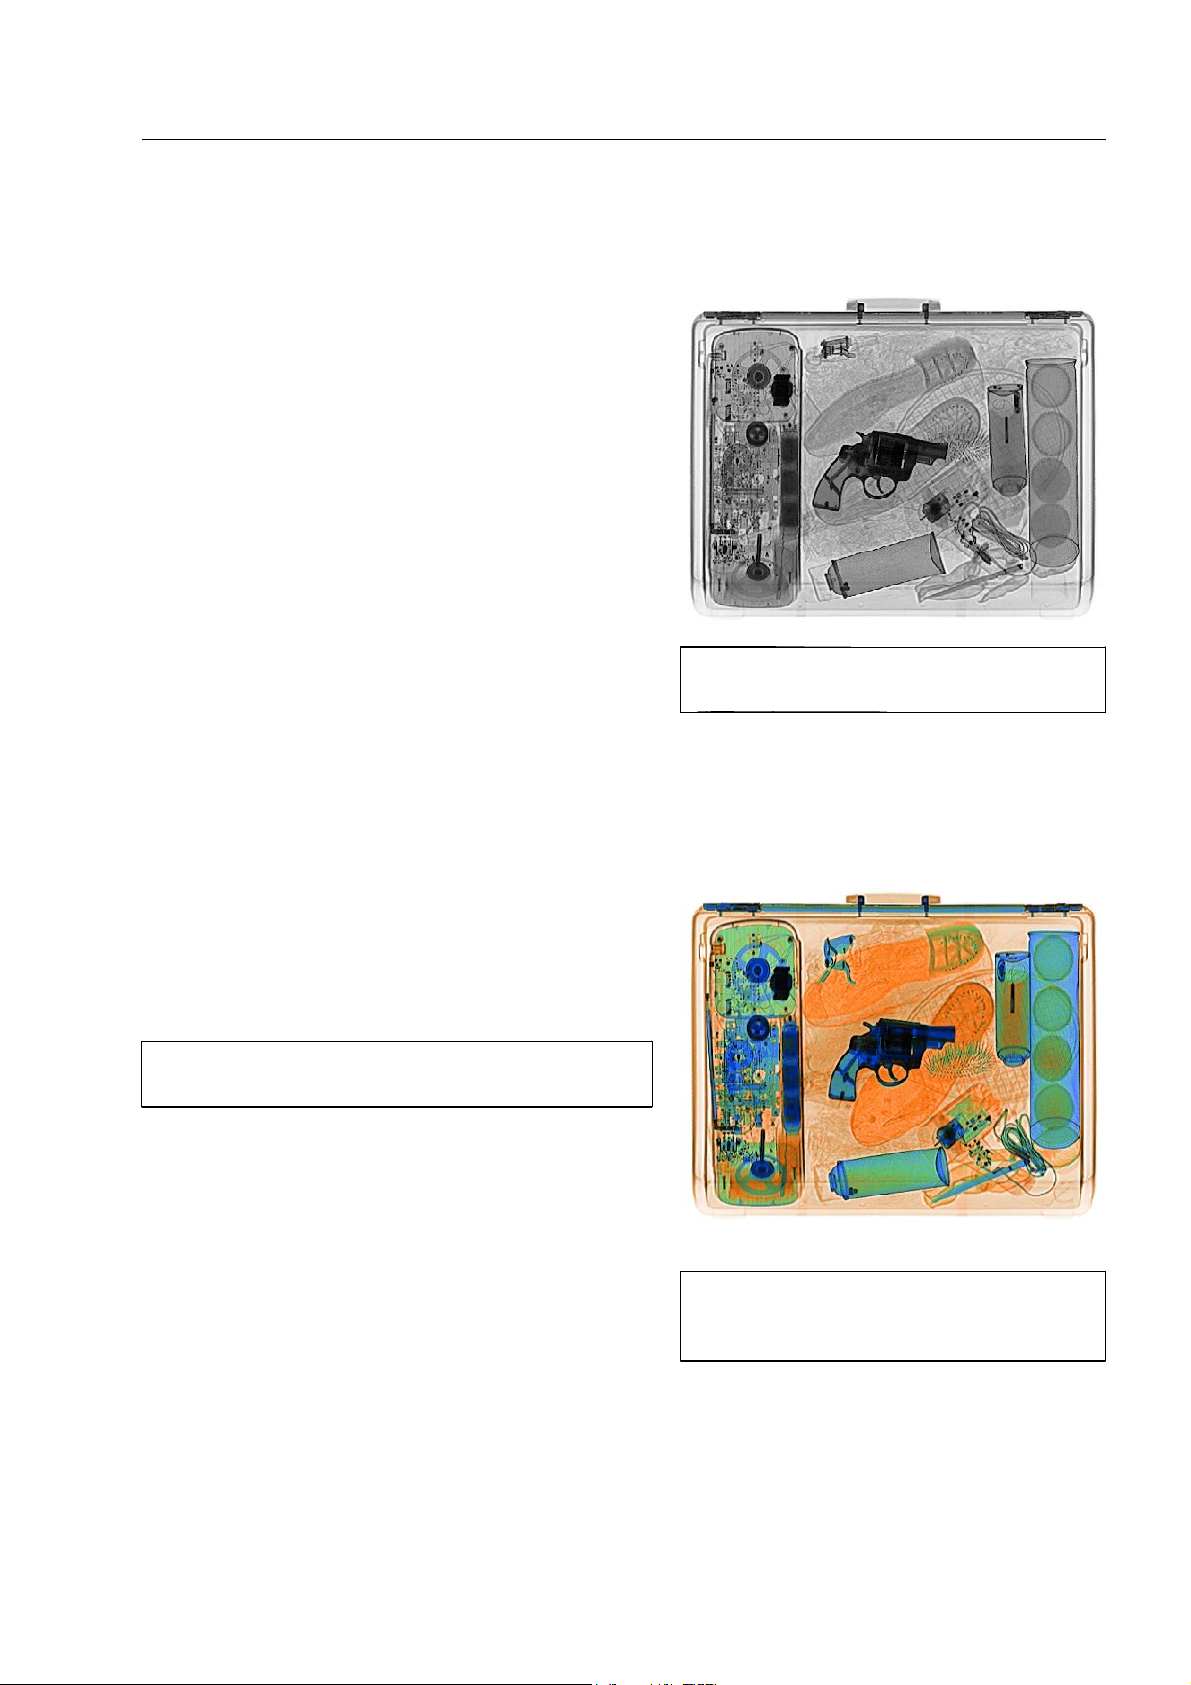
The black and white image - BW
The B/W image obtained with the scan represents the different objects of the baggage or freight item in different
brightness levels (grey levels) ranging from white to
black. The brightness corresponds to the current absorption characteristics of the scanned objects:
– objects of high absorption are represented in dark col-
or or black. These are either objects of higher density
(e.g. steel, lead) or objects of lower density but higher
thickness.
– objects of low absorption appear in bright color or
white. These are objects of lower density and thick-
ness (e.g. paper, textiles),
How to display X-ray images
In an X-ray unit without separate b/w monitor, you ob-
tain the b/w image with
to function BW.
The HI-MAT
Contrary to the b/w image, in addition to the different
brightness levels, the HI-MAT
the material composition of the objects contained in the
scanned item by coloring with three different basic colors
and varying shades.
The image display is improved by a real-time
I
sharpening filter.
PLUS
8 or a priority key assigned
system* - the basic material detection*
PLUS
color image indicates
The image display will be improved by a
I
real-time sharpening filter.
The materials an object is composed of are assigned to
three groups according to the effective atomic weight of
the chemical elements contained; the three groups are
represented in orange, green and blue. This assignment is
effected on the basis of a real time calculation from the
degrees of absorption measured depending on the radiation hardness.
The effective atomic number Z
als. If different materials are overlapping in a baggage or freight item, the effective atomic number Z
ults from the mean values of the involved atoms and molecules.
95587412 01/01/09 © Smiths Heimann
results from the atomic and molecular composition of the inspected materi-
eff
Materials which cannot be defined due
I
to very low or very high absorption, are
represented in white or black.
res-
eff
1-61
Page 72
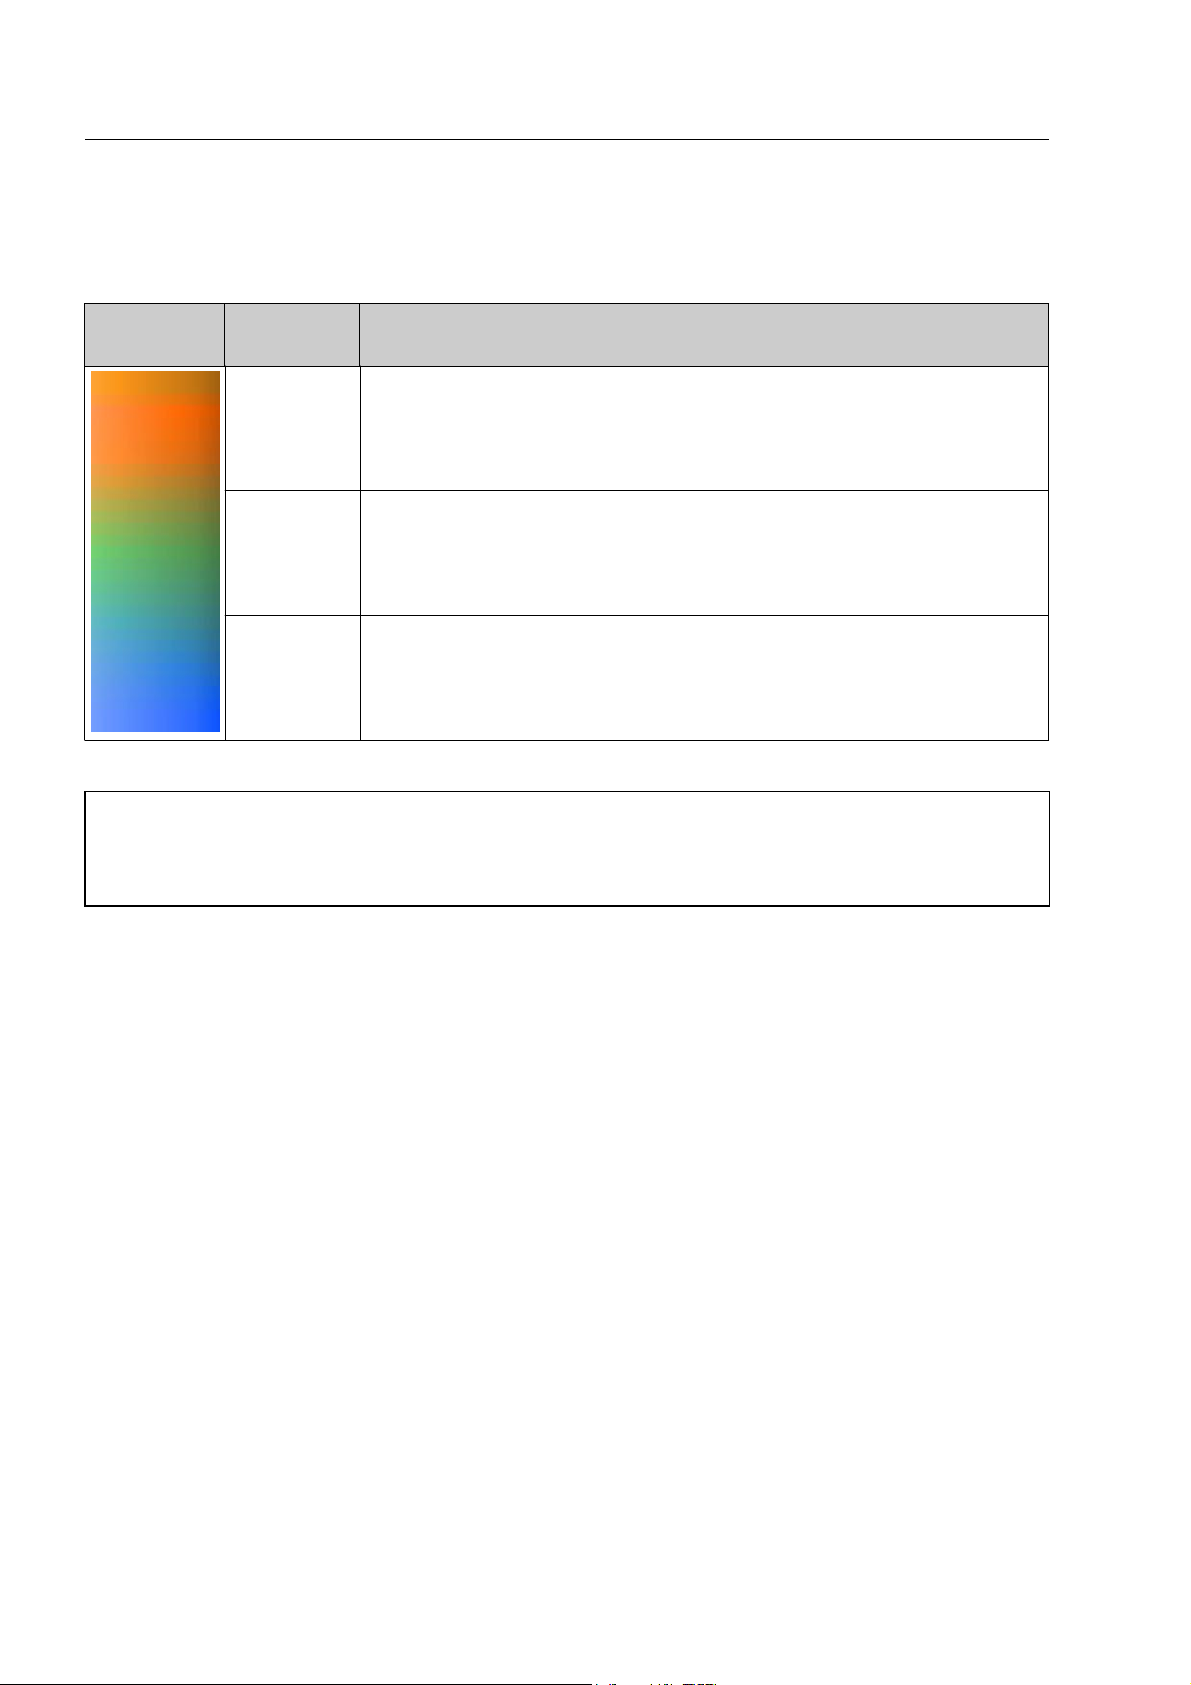
How to display X-ray images
So, the color indicates the kind of material, the brightness (intensity) of the color indicates the material
thickness.
Colour
gradient
Owing to physical reasons, very heavy elements with an effective atomic number over 56, which oc-
I
cur in an extremely thin layer e.g. lead or gold foils, will be displayed in green or orange depending
on the foil thickness. Already starting at a layer thickness of a few millimeters these elements will
be displayed in dark grey to black due to the high absorption.
eff. atomic
number
below 10 lighter elements: hydrogen, carbon, nitrogen, oxygen and the molecular
between 10
and 15
between 15
and 56
pure materials and compounds
compounds of the latter, the organic materials:
many explosives (e.g. C3H5(NO3)3 nitroglycerine), plastics such as acrylic
material, paper, textiles, food, wood, water
medium heavy elements: pure aluminum, sodium, chlorine, cooking salt
heavier elements: the metals titanium, chromium, iron, nickel, copper, zinc,
tin, silver etc.
If different materials are overlying, the colouring shifts towards the material absorbing most of the radiation.
An overlying of light materials with heavy materials can therefore be represented in orange, green or blue
depending on the thickness of the individual material layers. The same applies to metal alloys. If for example
aluminium is alloyed with heavier metals, the colouring shifts from green to blue.
If the HI-MAT
user, it can only be called up via a priority key assigned to function (HI-)MAT+.
PLUS
color image has not been defined as default image display by the higher access level
1-62
95587412 01/01/09 © Smiths Heimann
Page 73

The image displays Organic Only
- O²/O²+/OS/OS+
(
)
PLUS
* and Organic Stripping
How to display X-ray images
(
)
PLUS
*
These four image display modes are available to the HI-MAT
If you apply the first two special functions Organic Only (O²) and Organic Only
PLUS
system*.
PLUS
(O²+) you can limit the dis-
play to organic objects, i.e. objects made of light material.
Depending on the unit's configuration you can select one of the two functions with
tion can only be called up via a priority key assigned to function O² or O²+.
Organic Only image - O² Organic Only
PLUS
image - O²+
0. The second func-
If you apply the other two special functions Organic Stripping (OS) and Organic Stripping
PLUS
(OS+) you can
limit the display to non-organic materials made of denser materials. Organic objects will be merely displayed
in grey shades.
Depending on the unit's configuration you can select one of the two functions with
9. The second func-
tion can only be called up via a priority key assigned to function OS or OS+.
Organic Stripping image - OS Organic Stripping
PLUS
image - OS+
95587412 01/01/09 © Smiths Heimann
1-63
Page 74
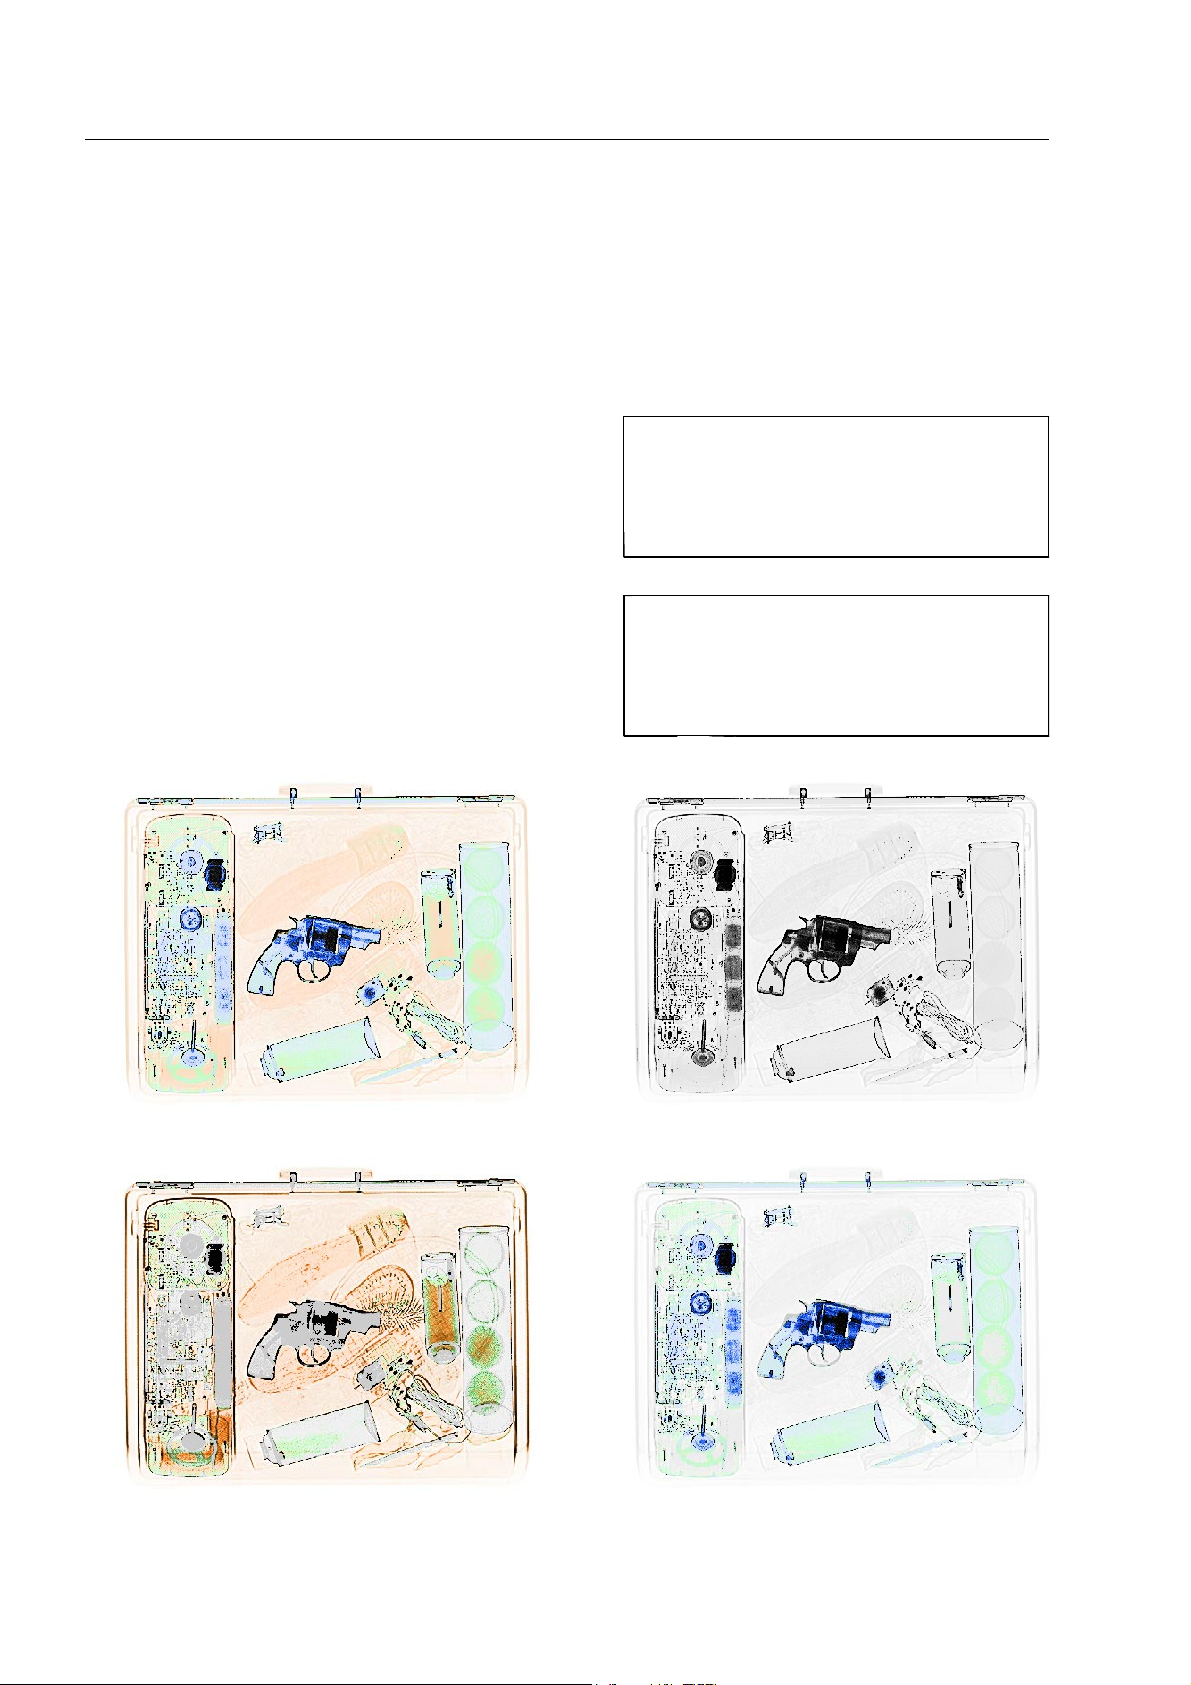
How to display X-ray images
How to vary the absorption range - VARI
If you are interested in detecting objects of a certain absorption degree exclusively, you can intentionally emphasize such objects in the above mentioned image display modes black/white, HI-MAT
(
Only
)
PLUS
* and Organic Stripping
(
)
PLUS
* and, at the same time, filter out objects of a different absorption de-
PLUS
*, Organic
gree.
Only those objects lying within the selected absorption
range will be represented with all the available brightness
levels.
As a result, a considerable contrast enhancement is
achieved, since no brightness levels are required for non-
Objects the absorption of which is below
I
the selected range are displayed in
white, objects the absorption of which is
above the selected range are displayed
in black.
interesting absorption ranges now.
By pressing
the absorption range towards objects of high absorption degrees (e.g. metallic objects).
v to the right repeatedly, you can shift
The higher the absorption range is se-
I
lected, the smaller it is set automatically. In the highest level, you only see
high-absorbing objects with the highest
contrast.
HI-MAT
PLUS
color image - VARI(-MAT+) Black/white image – VARI-BW
Organic only image - VARI-O² Organic Stripping image - VARI-OS
1-64
95587412 01/01/09 © Smiths Heimann
Page 75
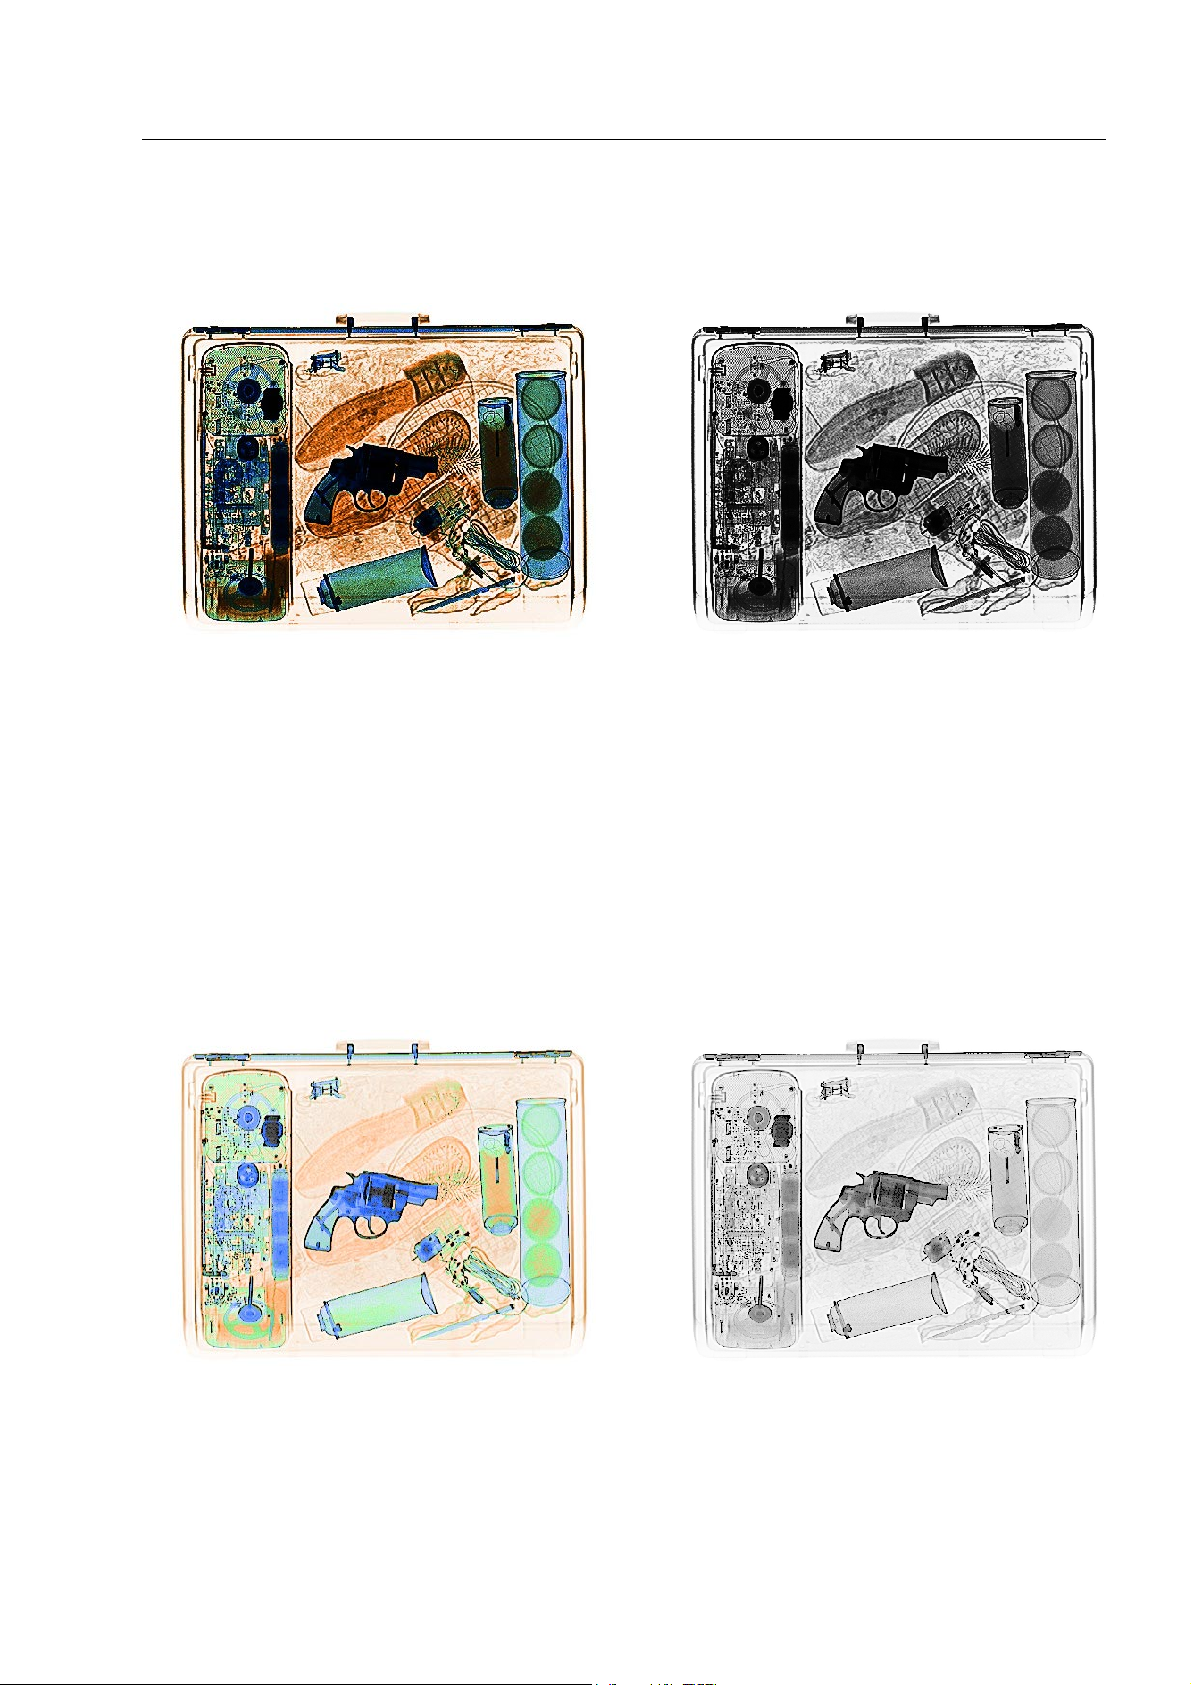
How to display X-ray images
By pressing
v several times to the left, you shift the absorption range towards objects of low absorp-
tion degrees (e.g. textile, paper).
PLUS
HI-MAT
color image - VARI(-MAT+) Black/white image - VARI-BW
If you switch to another image display mode, the absorption range you selected before will be stored. So
you need not select it again when calling up the function once more.
The image display with higher penetration - HIGH
The contrast of the darker image sections, i.e. materials which are difficult to penetrate, will be increased in
the above mentioned image display modes b/w and HI-MAT
higher penetration is generated. This way, you can detect objects hidden behind other high-absorbing objects. Details of high-absorbing objects become more clearly visible. Even thicker layers of light organic material (explosives, drugs) are definitely emphasized. At the same time, low-absorbing objects are filtered out.
PLUS
HI-MAT
color image - (MAT+-)HIGH Black/white image - BW-HIGH
PLUS
* with this function. An image with virtually
Depending on the unit's configuration you can select the function with
for the current image display mode (HI-MAT
PLUS
image* or black and white image).
z for the HI-MAT
It is also possible to use a priority key assigned to the function (MAT+-)HIGH (for the HI-MAT
PLUS
image* or
PLUS
image*),
BW-HIGH (for the black and white image) or HIGH+. The function last mentioned takes effect on the cur-
rent image display (HI-MAT
95587412 01/01/09 © Smiths Heimann
PLUS
image* or black and white image).
1-65
Page 76
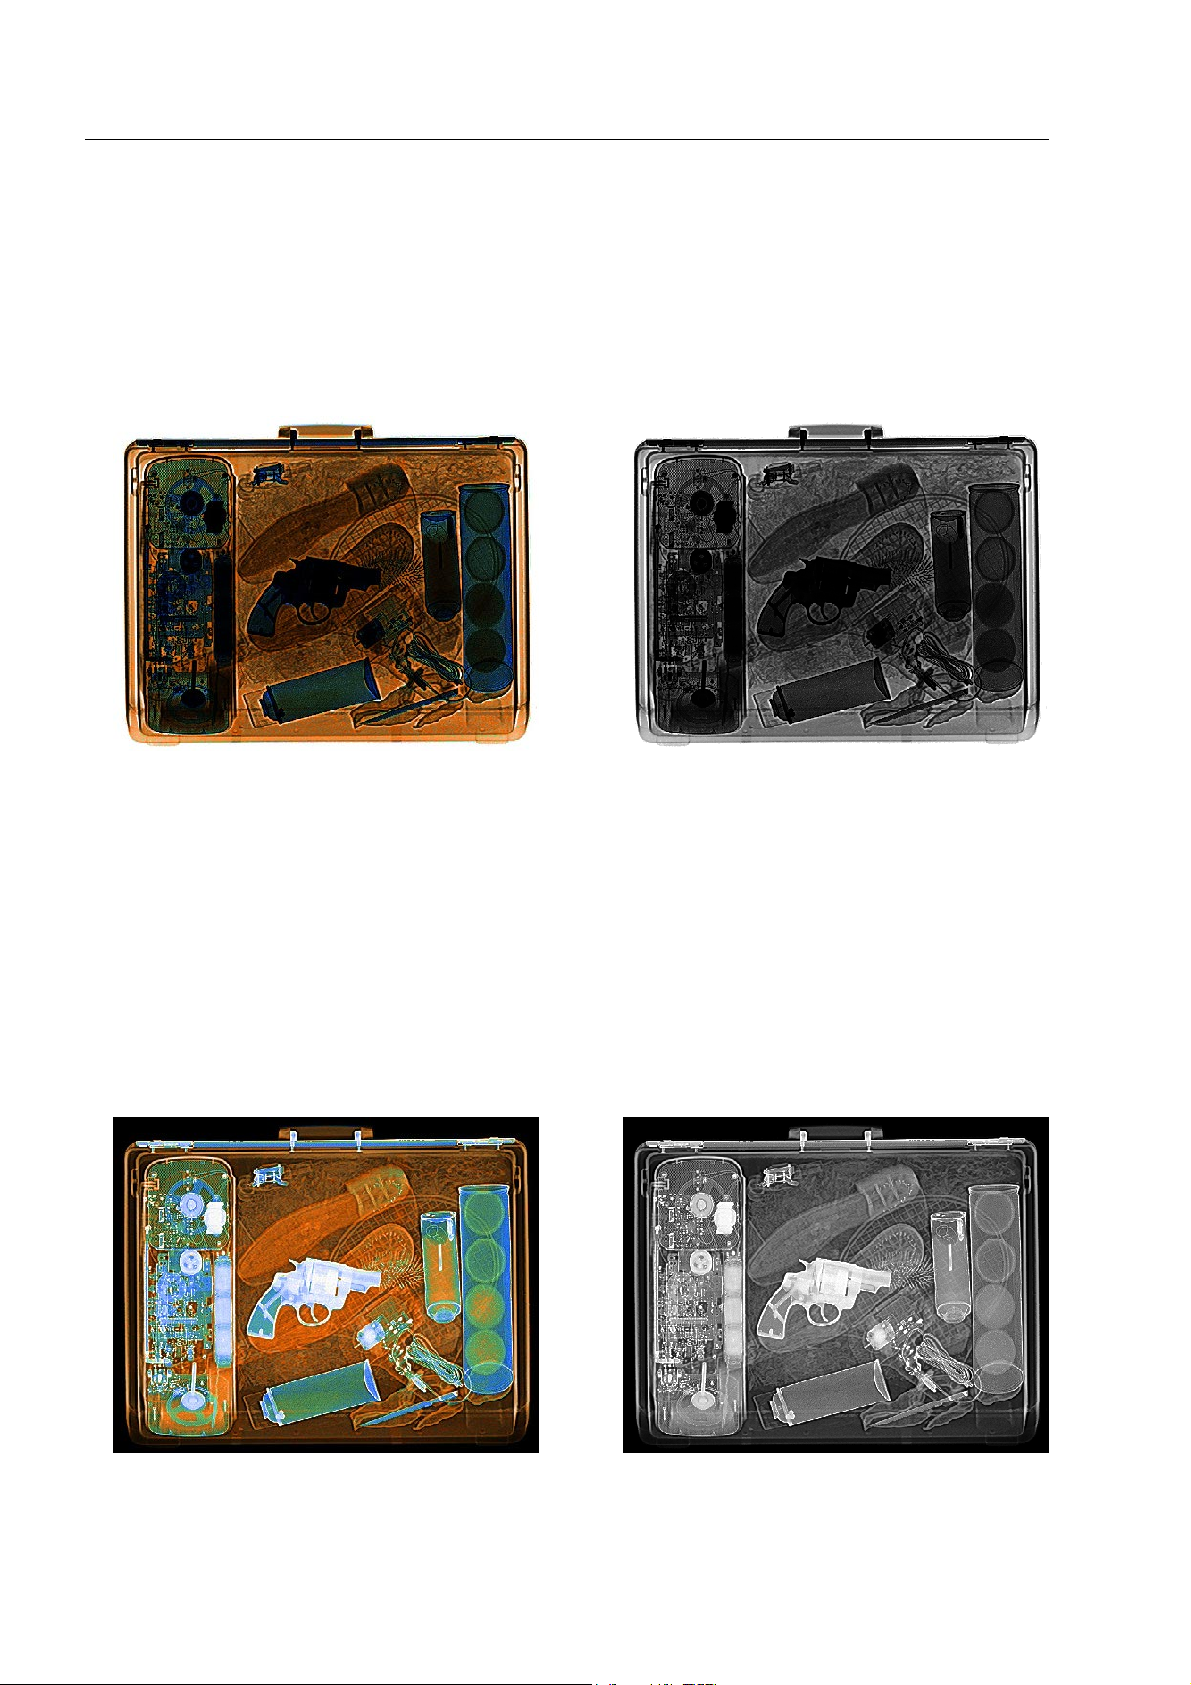
How to display X-ray images
The image display with lower penetration - LOW
The contrast of the brighter image sections, i.e. materials which are easy to penetrate, is increased in the
above mentioned image display modes b/w and HI-MAT
PLUS
* by this function. An image of virtually reduced
penetration is generated. Details of low-absorbing objects become more clearly visible. At the same time,
high-absorbing objects are displayed in black.
PLUS
HI-MAT
You can select the function via a priority key assigned to the functions (MAT+-)LOW (for the HI-MAT
color image - (MAT+-)LOW Black/white image - BW-LOW
PLUS
age*), BW-LOW (for the black and white image) or LOW+. The function last mentioned takes effect on the
PLUS
current image display (HI-MAT
image* or black and white image).
im-
The negative image display - NEG
In the negative image, high-absorbing objects appear bright, low-absorbing objects appear black. This way,
smaller or thinner objects of higher density (e.g. wires) become more clearly visible.
HI-MAT
Depending on the unit's configuration you can select the function via
the current image display (HI-MAT
PLUS
color image - (MAT+-)NEG Black/white image - BW-NEG
4 for the HI-MAT
PLUS
image* or black and white image).
PLUS
image* or for
1-66
95587412 01/01/09 © Smiths Heimann
Page 77
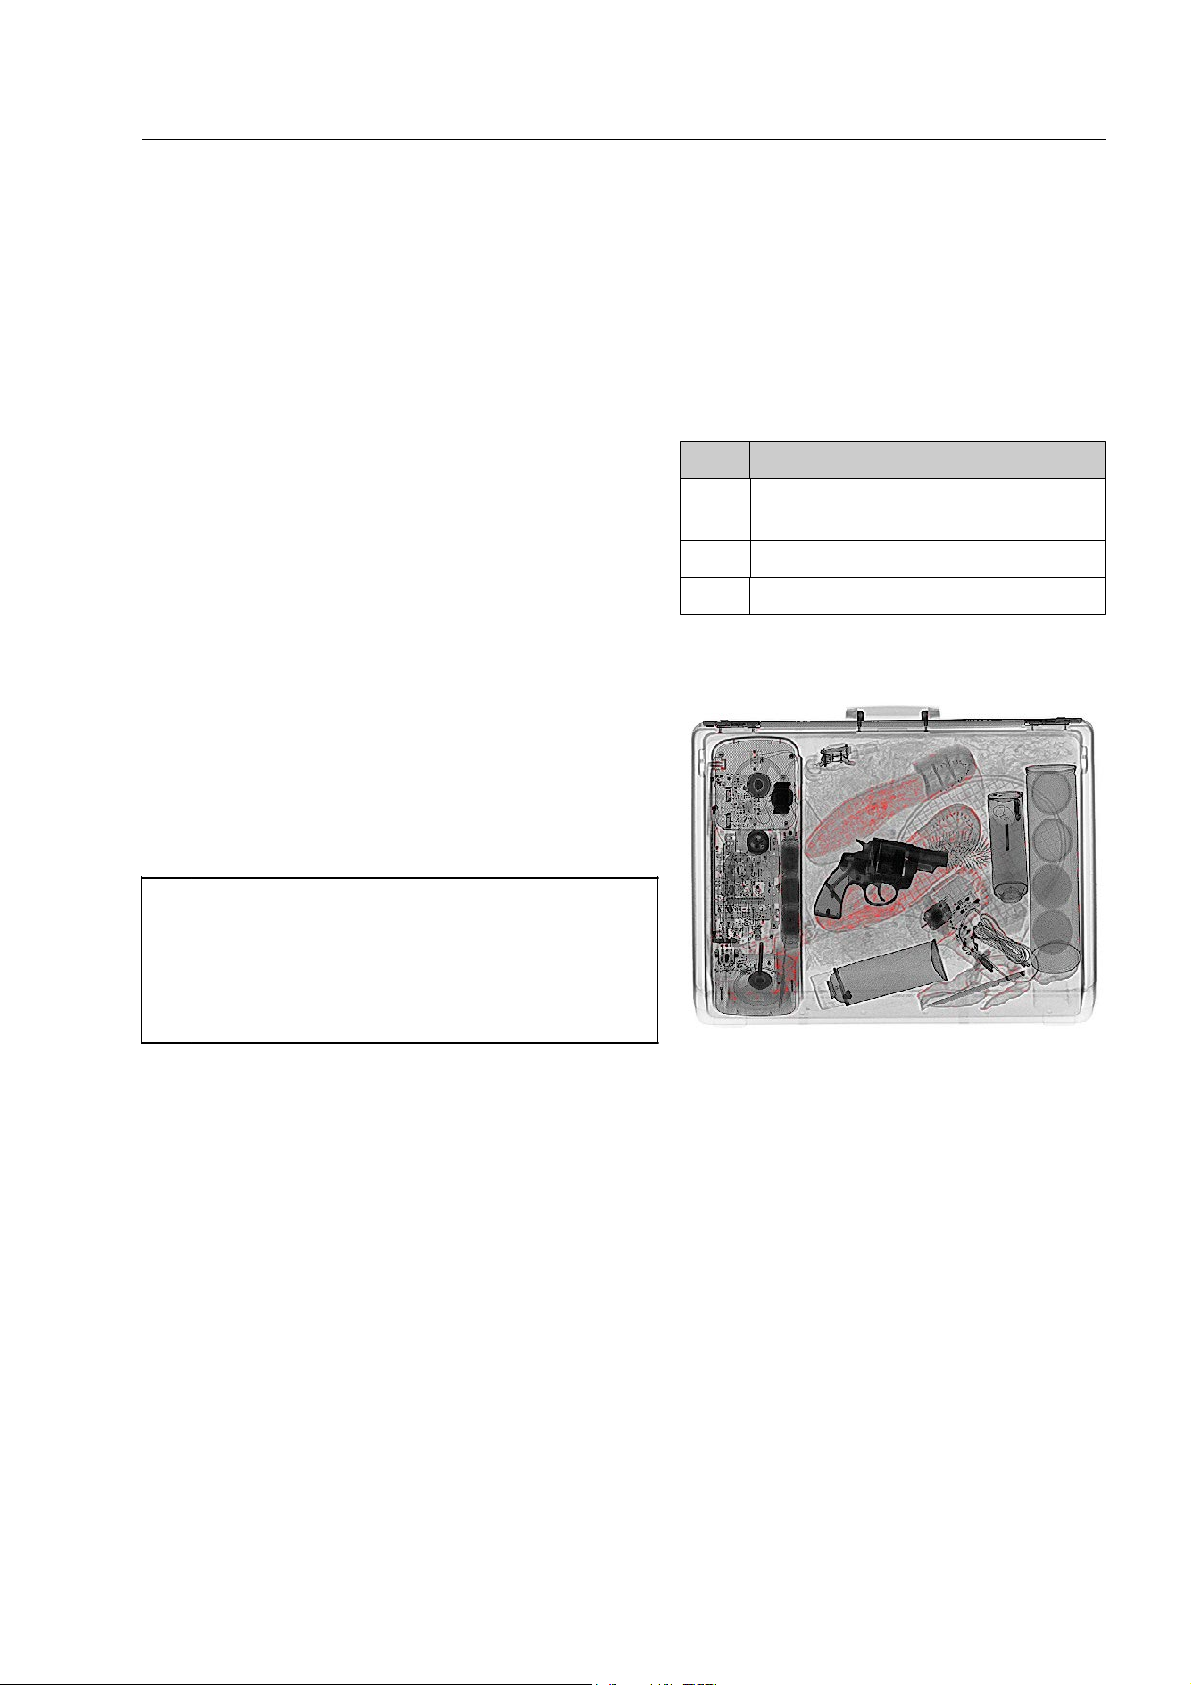
How to display X-ray images
PLUS
It is also possible to use a priority key assigned to the function (MAT+-)NEG (for the HI-MAT
image*),
BW-NEG (for the black and white image) or NEG+. The function last mentioned takes effect on the current
PLUS
image display (HI-MAT
image* or black and white image).
The special function X-PLORE*
By means of the special function X-PLORE you can further
distinguish the organic objects displayed in orange color
in the HI-MAT
PLUS
color image.
You can have displayed the materials with the effective
atomic weight Z
of 7, 8 or 9 (F 1-61) one after another.
eff
The image display becomes a black and white image; only
the image parts representing materials of selected effective atomic weight will be displayed in red.
You select the function with
materials with the effective atomic weight Z
W. The image display of
selected
eff
last time appears.
Press
v to the right or left to obtain the displays of
higher and lower atomic weights.
If materials are covered by materials with different
I
atomic weights, e.g. by the container in which the
material is packed, the effective atomic weight is
changed! When evaluating the image, you should
therefore prefer to regard those parts of the X-ray
image, which do not show overlying objects.
Z
eff
Materials
7water
plastic explosives
8 impure drugs
9 pure drugs
X-PLORE image Z = 8
The image displays with Superenhancement* - SEN*
(
)
For the above mentioned image display modes black/white, HI-MAT
(
)
PLUS
ping
* and X-PLORE* you can obtain an optimum contrast over the whole X-ray image when using Super-
PLUS
*, Organic Only
enhancement. Low-absorbing objects in bright image sections (e.g. clothes) as well as objects in dark image
sections (hidden below high-absorbing objects) are made visible at the same time.
By means of electronic real time image processing, the contrast enhancement is calculated automatically for
every single image section. An X-ray image with highest detail resolution is obtained. The detectability of in-
dividual objects such as plastic arms, explosives and drugs is considerably improved.
Objects of lower density can be easily recognized even if such objects are hidden between metal plates. High
penetration and, at the same time, high resolution are achieved.
Depending on the unit's configuration you can select the Superenhancement display mode via
HI-MAT
95587412 01/01/09 © Smiths Heimann
PLUS
image* or for the current image display (HI-MAT
PLUS
image* or black and white image).
PLUS
*, Organic Strip-
7 for the
1-67
Page 78
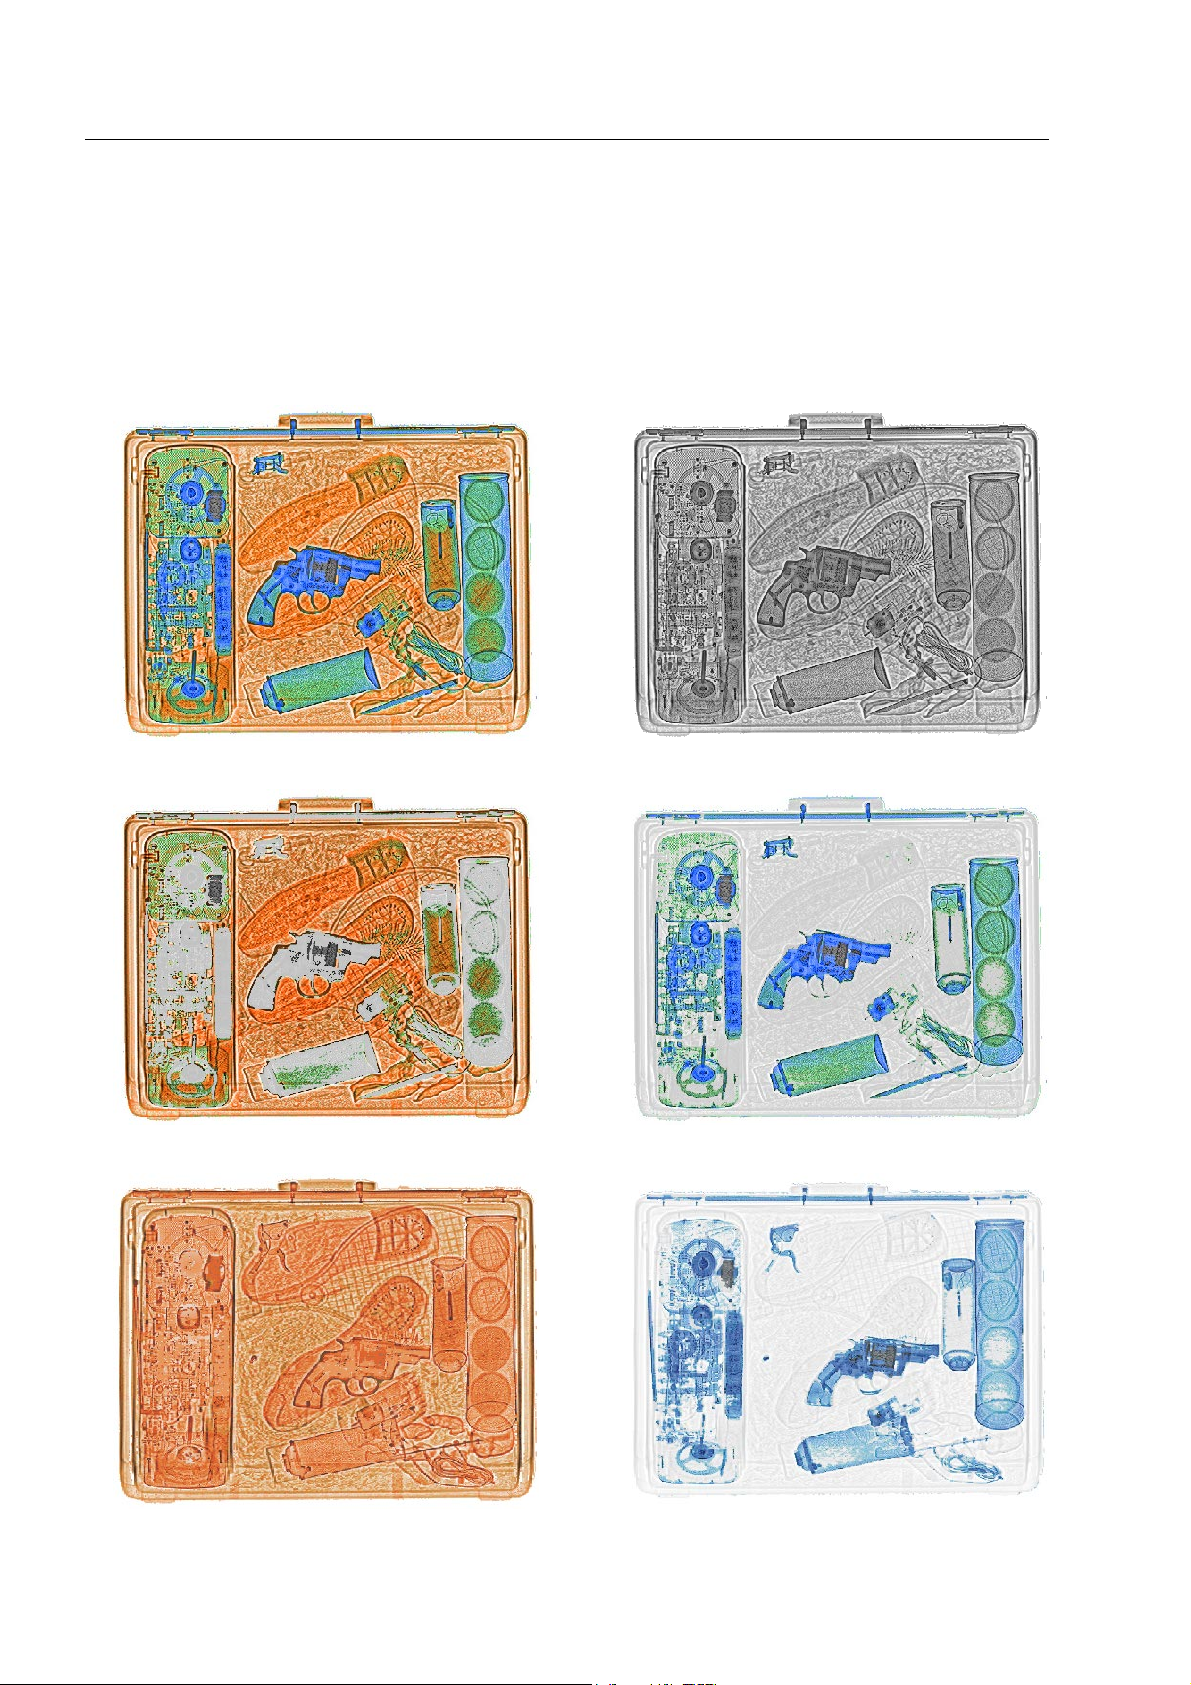
How to display X-ray images
PLUS
It is also possible to use a priority key assigned to the function (MAT+-)SEN (for the HI-MAT
image*),
BW-SEN (for the black and white image) or SEN+. The function last mentioned takes effect on the current
PLUS
image display (HI-MAT
For the Organic Only
image* or black and white image).
(
)
PLUS
* and Organic Stripping
(
)
PLUS
* images the Superenhancement function can only be
selected via the priority key assigned to the functions O²(+)-SEN and OS(+)-SEN.
HI-MAT
PLUS
color image - (MAT+-)SEN Black/white image - BW-SEN
Organic Only image - O²-SEN Organic Stripping image - OS-SEN
1-68
Organic Only
PLUS
image - O²+-SEN Organic Stripping
PLUS
image - OS+-SEN
95587412 01/01/09 © Smiths Heimann
Page 79
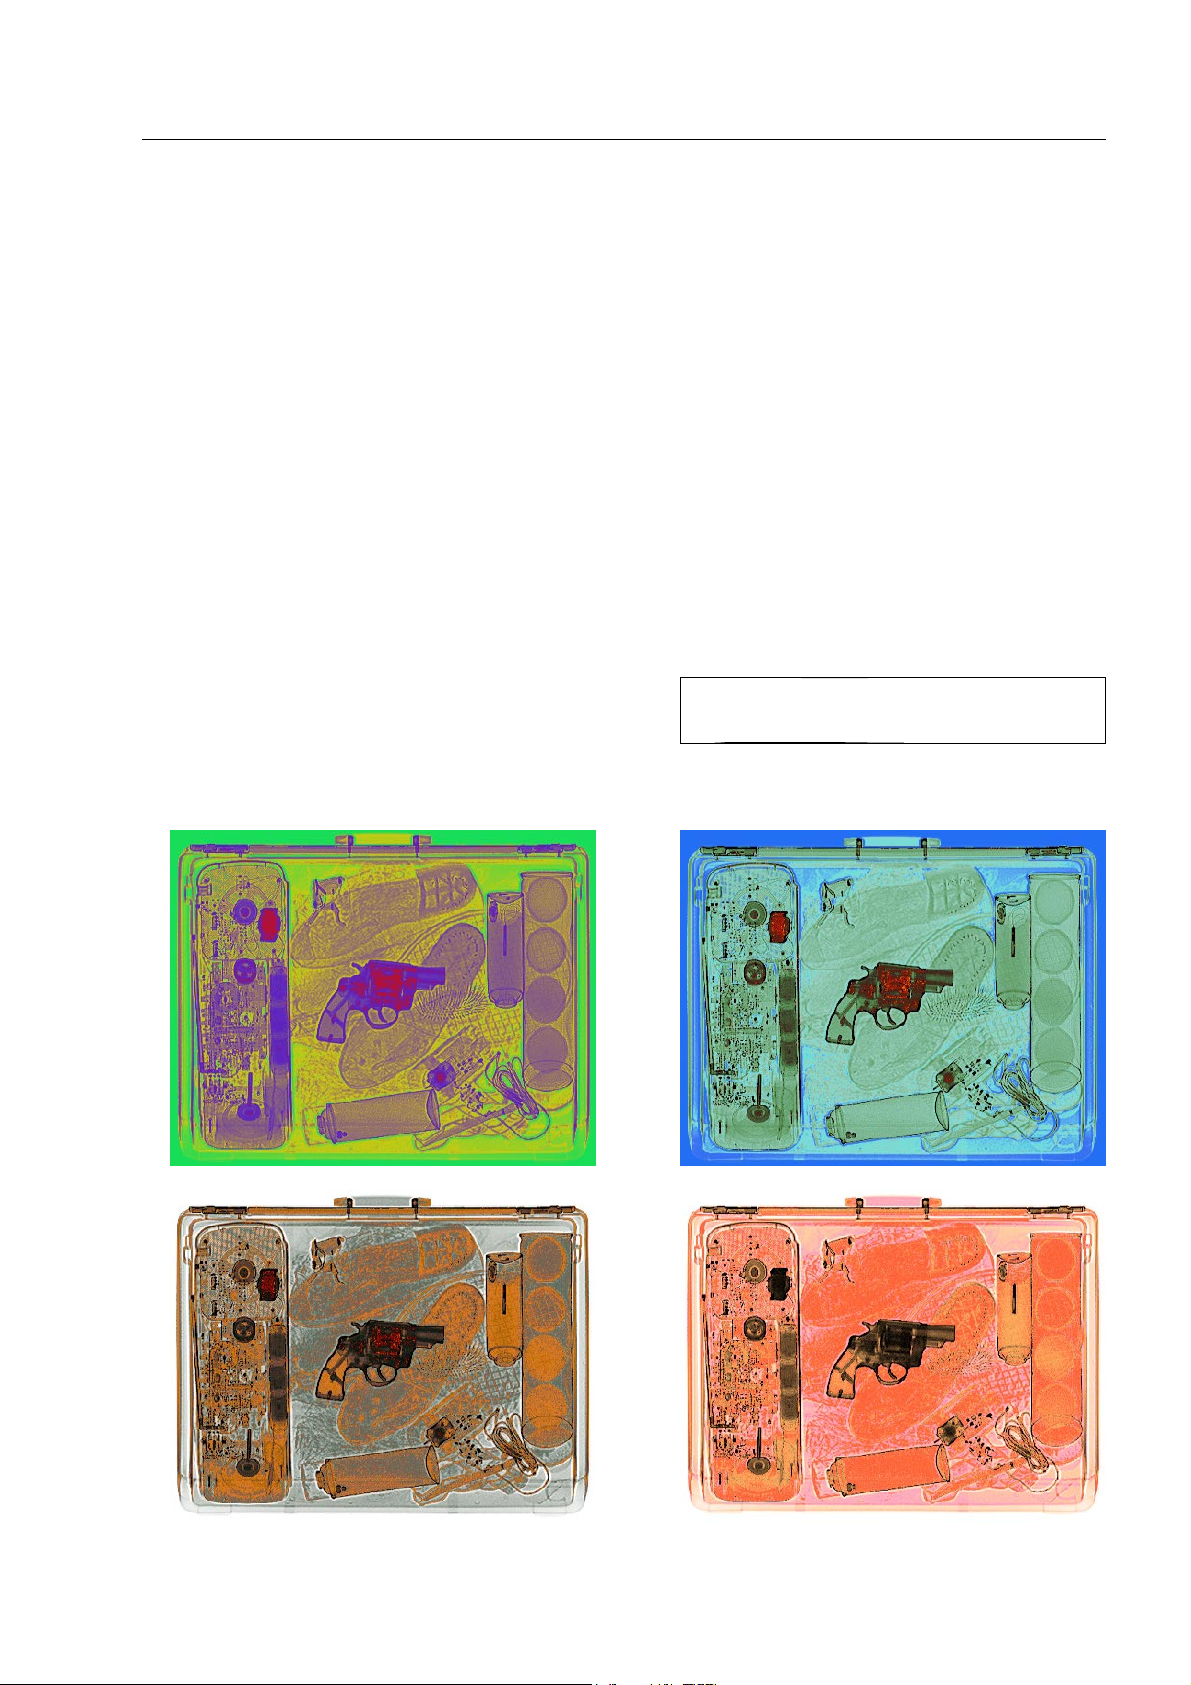
How to display X-ray images
The HI-CAT color- and HI-CAT black and white images
Use the HI-CAT system to generate 6 different color images (HI-CAT 1...6) and 2 different black and white im-
ages (HI-CAT 7 and 8).
HI-CAT color and black and white images can only be selected via priority keys assigned to the functions
HI-CAT1...8, or they must be defined as default image display.
The color images
In the various HI-CAT color images the varying absorption degrees of the scanned object are displayed in
greatly different colors. All color images have one thing in common: there is no direct relation between ab-
sorption and grey levels/brightness and between color and material kind as it is the case in the HI-MAT
color image*.
PLUS
In this case, the contrast of the X-ray image surpasses the
normal B/W and HI-MAT
man eye can much better distinguish different colors than
brightness levels which are proportional to the absorption. Object structures will become much better visible
that way.
HI-CAT color image 1 HI-CAT color image 2
PLUS
image displays since the hu-
The image display is improved by a real-
I
time sharpening filter.
HI-CAT color image 3 HI-CAT color image 4
95587412 01/01/09 © Smiths Heimann
1-69
Page 80
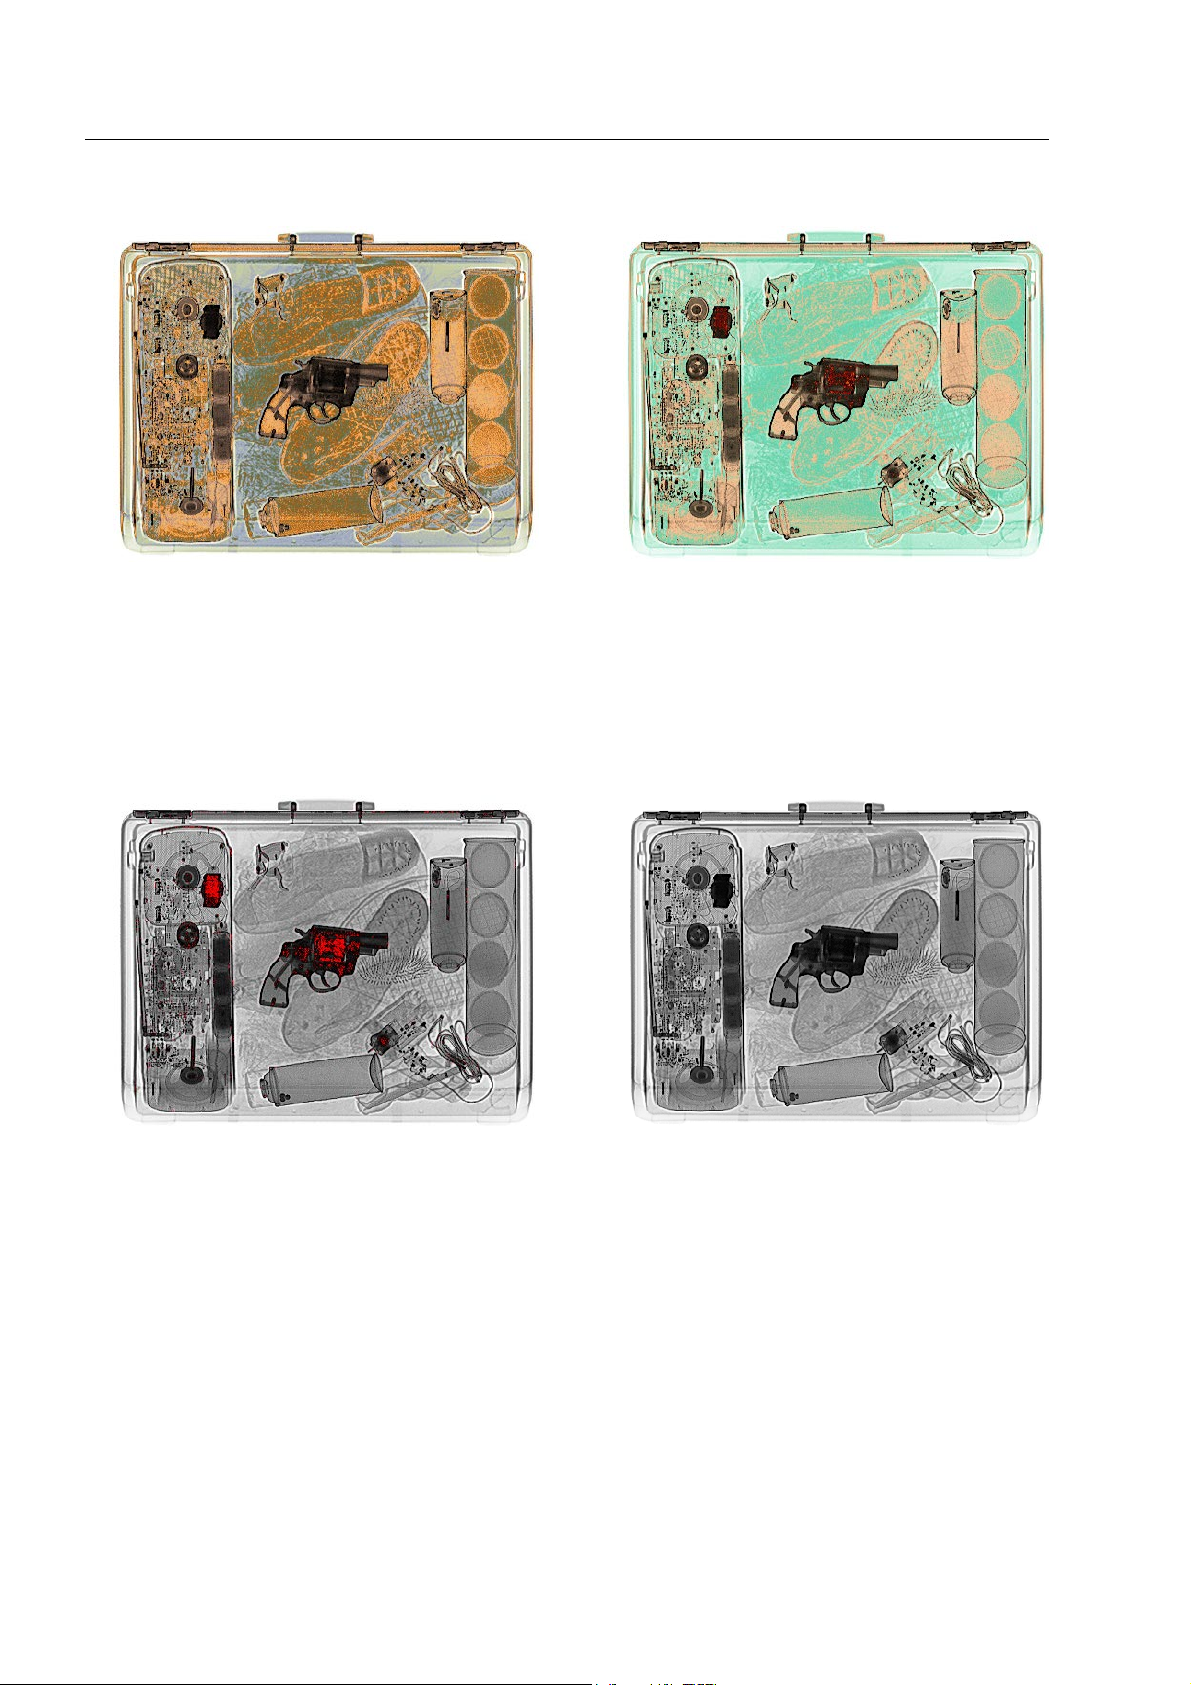
How to display X-ray images
HI-CAT color image 5 HI-CAT color image 6
The black and white images
The HI-CAT black and white image 7 differs from the standard black and white image only in one point: the
highest absorption level is displayed in red. The HI-CAT black and white image 8 does not differ from the
standard black and white image. However, both images can be manipulated with the function VARI-CAT as
described in the following.
HI-CAT black/white image 7 HI-CAT black/white image 8
The function VARI-CAT
For HI-CAT images you can steplessly select different assignments between absorption and colors or grey
levels. The detectability of small details is thus selectively increased, finest object structures become clearly
visible.
For the HI-CAT black and white images the direct relation between absorption and grey levels is canceled.
Very similar absorption degrees are displayed in greatly varying colors or grey levels.
Concentrate on the object detail to be examined. By alternately pressing
can steplessly adapt the image display to the scanned object until the detectability of details has been optimized.
1-70
v to the left and right, you
95587412 01/01/09 © Smiths Heimann
Page 81
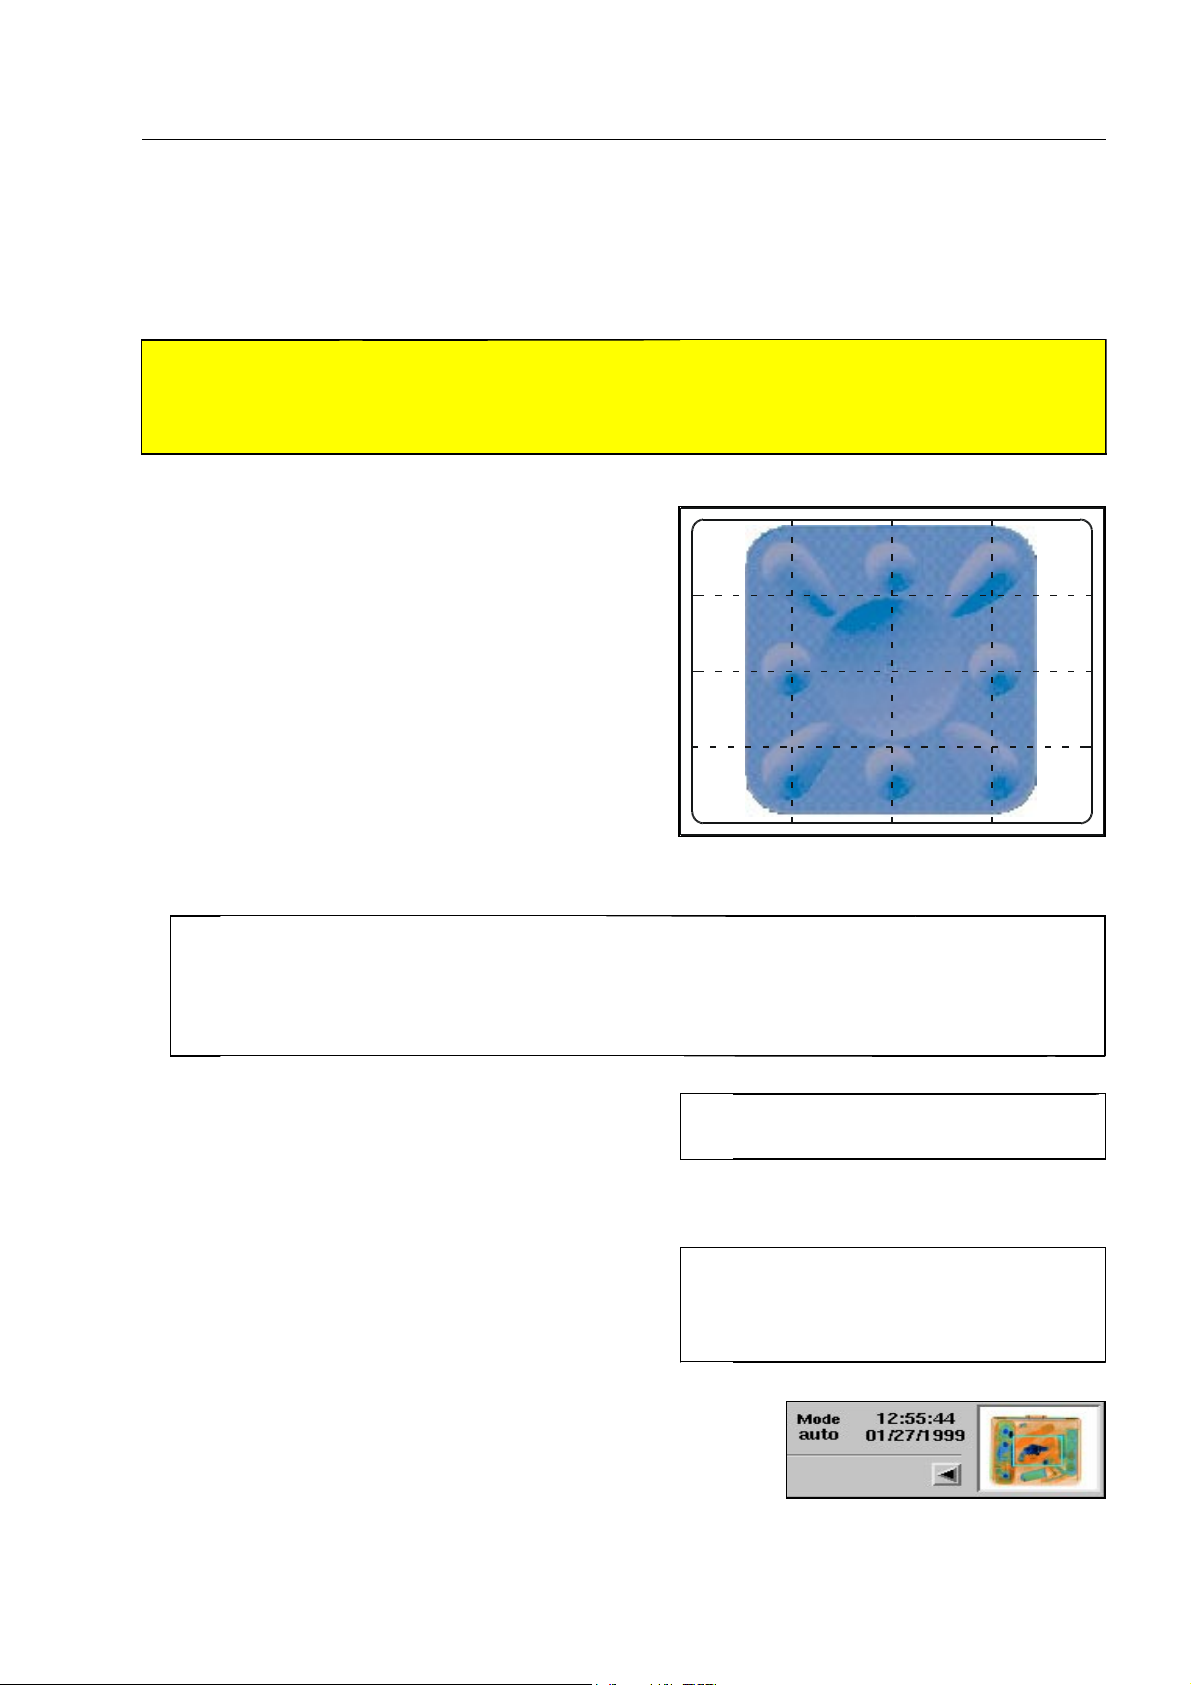
How to display X-ray images
The Zoom function
Use the Zoom function to display image sections enlarged by several magnification factors.
Warning!
A
If higher access level users have released the use of the Zoom function even with running conveyors
on the HI-SCAN X-ray unit, hazardous objects may remain unrecognized in the other, non-visible
parts of the baggage or freight item! 1040
With the navigator, you can have one image section out
of eight possible, overlapping sections, directly magnified twice.
If you want to magnify the middle section of the X-ray
image, press
o to the right.
Afterwards, you can shift the magnified section with
the navigator.
In a dual view unit you shift the image detail on the left-hand/lower monitor up or down by press-
I
ing the navigator to the left and upward or to the left and downward. Pressing to the right and up-
ward or to the right and downward has a corresponding effect on the image of the right-hand/up-
per monitor. Switching the navigator upward, downward, to the right or to the left controls both
monitor images simultaneously.
Use
On newer units you can continuously raise and reduce
o to increase the magnification factor. Every
time you press the key to the right, the middle section
of the currently selected image section is magnified by
one more step. By pressing
left, you return to the non-magnified display.
the magnification factor (if this was not deactivated by
a user with higher access level). Just keep the key
o several times to the
I
I
o depressed until the desired magnification is
reached.
On the miniature display in the indication field you can always re-
cognize the section currently magnified.
The maximum magnification factor is
defined by the higher access level users.
On newer units the Zoom interpolation
can be selected additionally, which
provides an improved representation of
the magnified sections.
95587412 01/01/09 © Smiths Heimann
1-71
Page 82
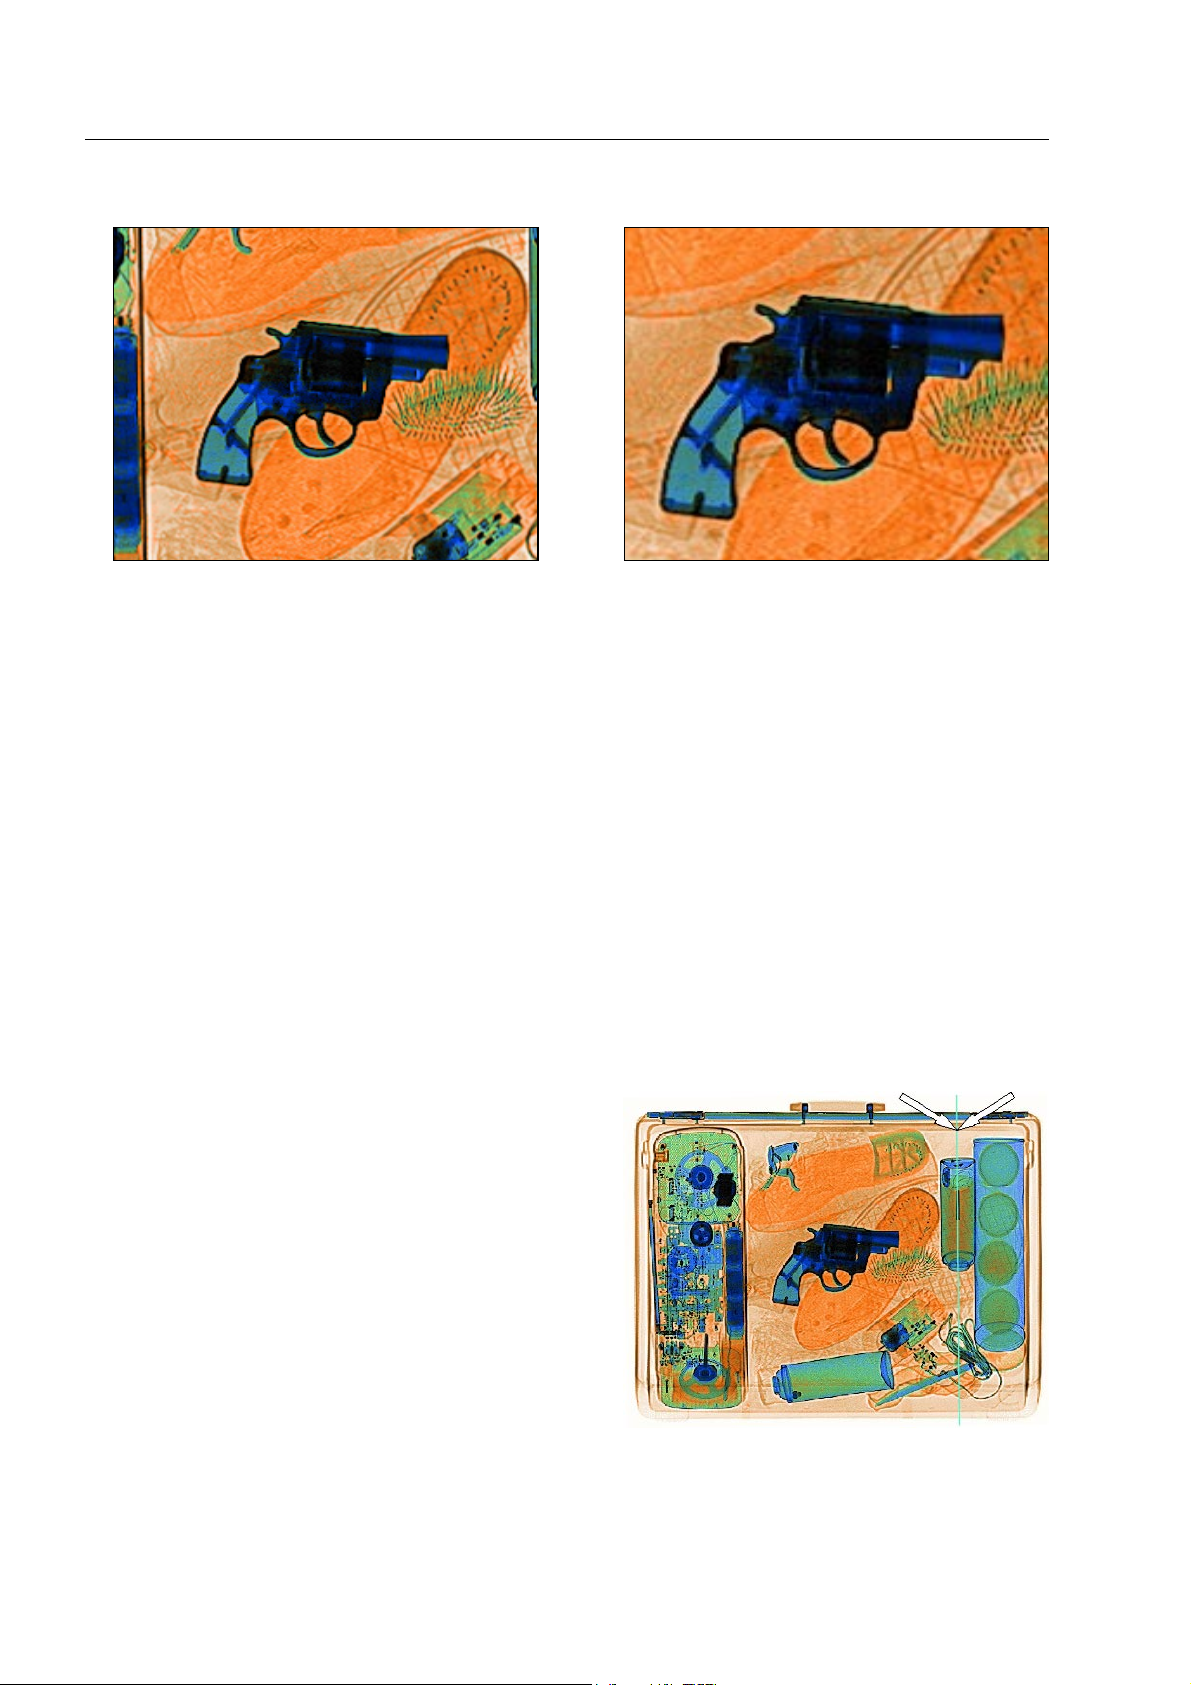
How to display X-ray images
Zoom x 2 Zoom x 3
The function Opti-Zoom*
Opti-Zoom allows to magnify the displayed item optimally by pressing just one key.
With
When pressing
N you magnify the displayed item to screen size.
N a second time you return to the non-magnified display.
The object finder*
(only in dual view units)
If you have discovered a suspicious object in one of the views of the baggage or freight item, the object finder
makes it easier for you to locate the object in the second view.
Activate the finder with the priority button that is as-
signed the OBJECT FINDER function. A thin, vertical,
light blue line appears on both monitors.
Now use
ject in the first view. At the same time the line moves
on the second monitor on the object concerned, which
you can now assess in its second view.
v to steer this line on the discovered ob-
You can deactivate the object finder again with
the corresponding priority key.
1-72
V or
95587412 01/01/09 © Smiths Heimann
Page 83
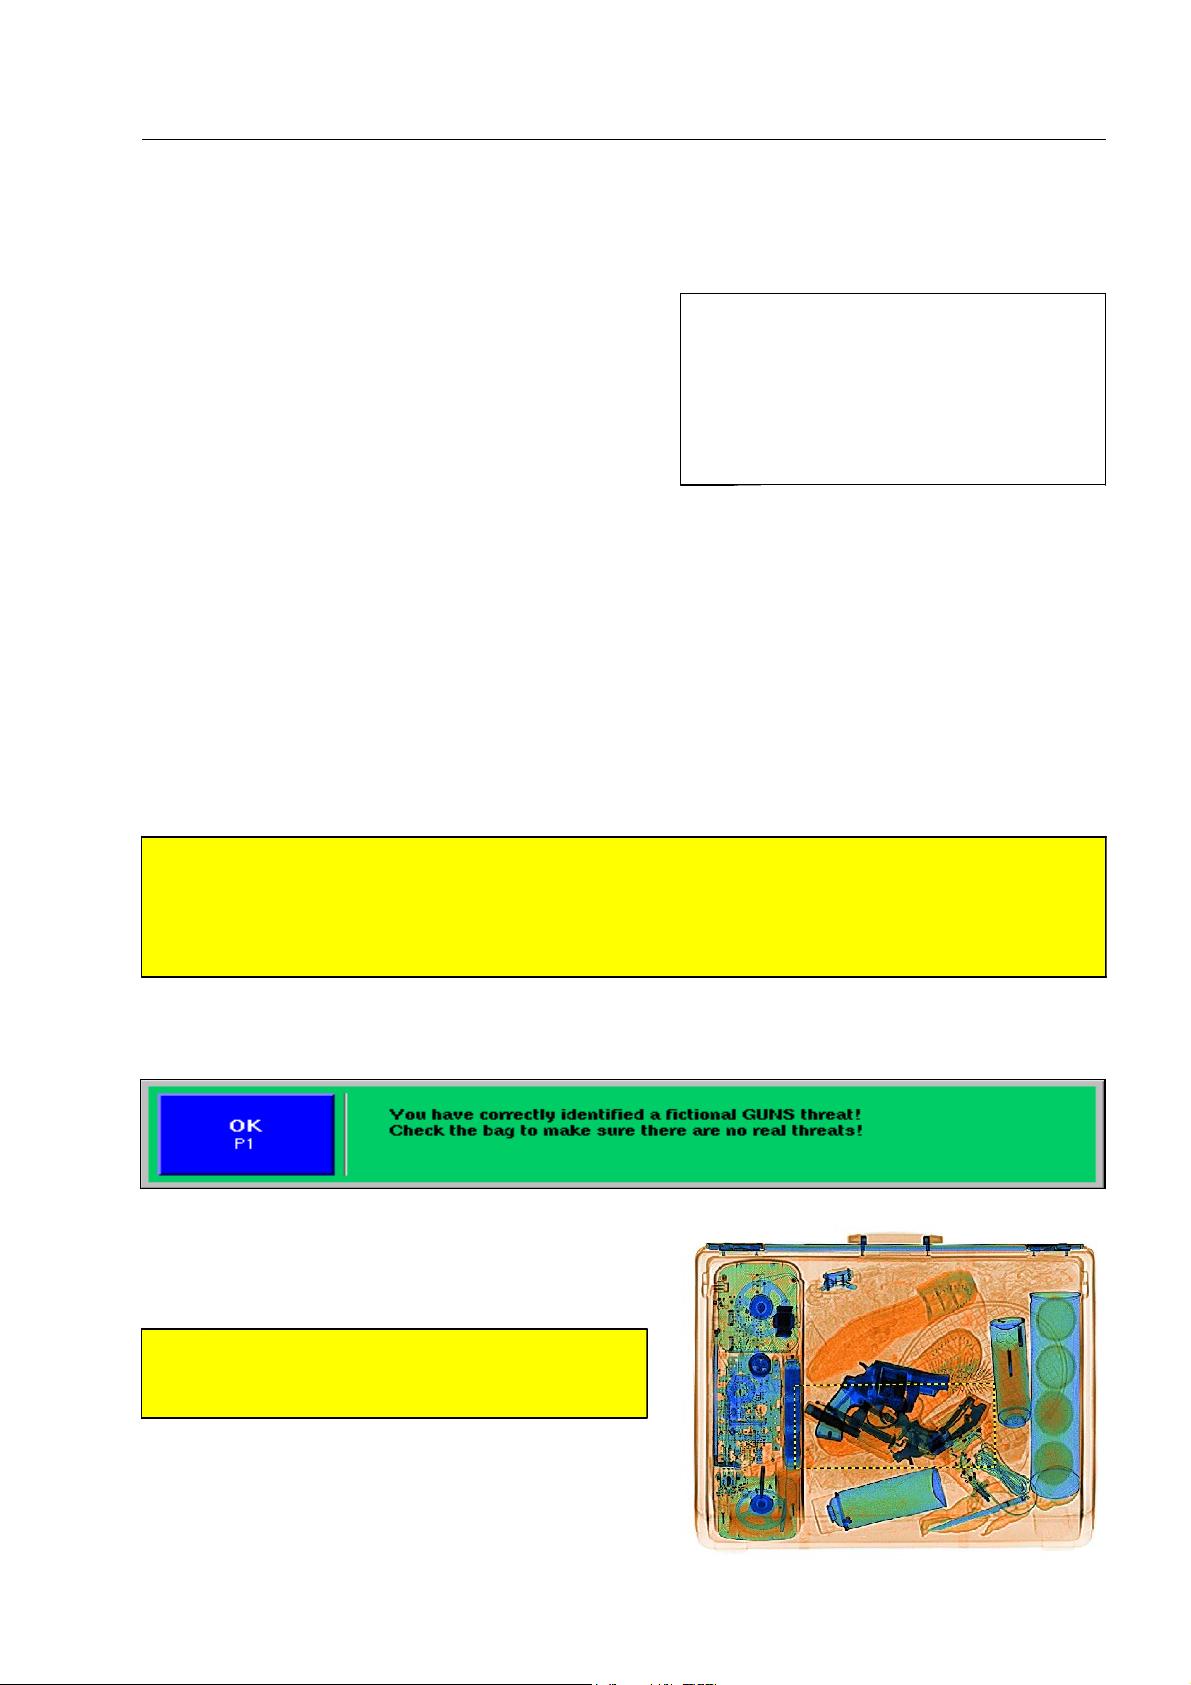
How to work with the HI-TIPPLUS* and aTIP* system*
How to work with the HI-TIP
By means of the HI-TIP systems, complete X-ray images
of fictional baggage items containing threat objects are
automatically projected, at arbitrary intervals, among the
images of real baggage items. Equally, single threat ob-
jects of different kinds are automatically projected on the
real X-ray images of scanned baggage items. You do not
notice the projection process.
Your task is to detect dangerous or suspect objects and mark them with
When the conveyors are running, the time you need to evaluate the image and make a decision is limited
to a few seconds (range 1 to 10 s.). If you need more time, stop the conveyors. Usually, the time is automatically extended then (range 0 to 45 s.).
PLUS
* and aTIP* system*
Statistics referring to every user and his
I
activities on the X-ray unit are created.
From such reports higher level users
can read how many times projected objects and images have been recognized
and how many of them have been
missed by the individual users.
H.
Recognized objects
If you have recognized a suspect object and marked it with H, the conveyors are stopped automatically and
one of the following messages is displayed on the screen.
Warning!
A
Units with newer software* may be set in a way that the conveyors will only be stopped and a message will only appear if the suspect object has been projected by means of the TIP system, i.e. if it is
not a real object! If no message appears when actuating
have detected a real, suspect object which has to be rechecked! 1050
Message 1
One fictional threat object was projected on the image of
a real baggage item by the TIP system. It is now provided
with a black/yellow frame and will be deleted afterwards.
Warning!
A
In any case check if the framed object is actually
the object you recognized! 1060
H and if the conveyors do not stop, you
Delete the message with
95587412 01/01/09 © Smiths Heimann
r.
1-73
Page 84
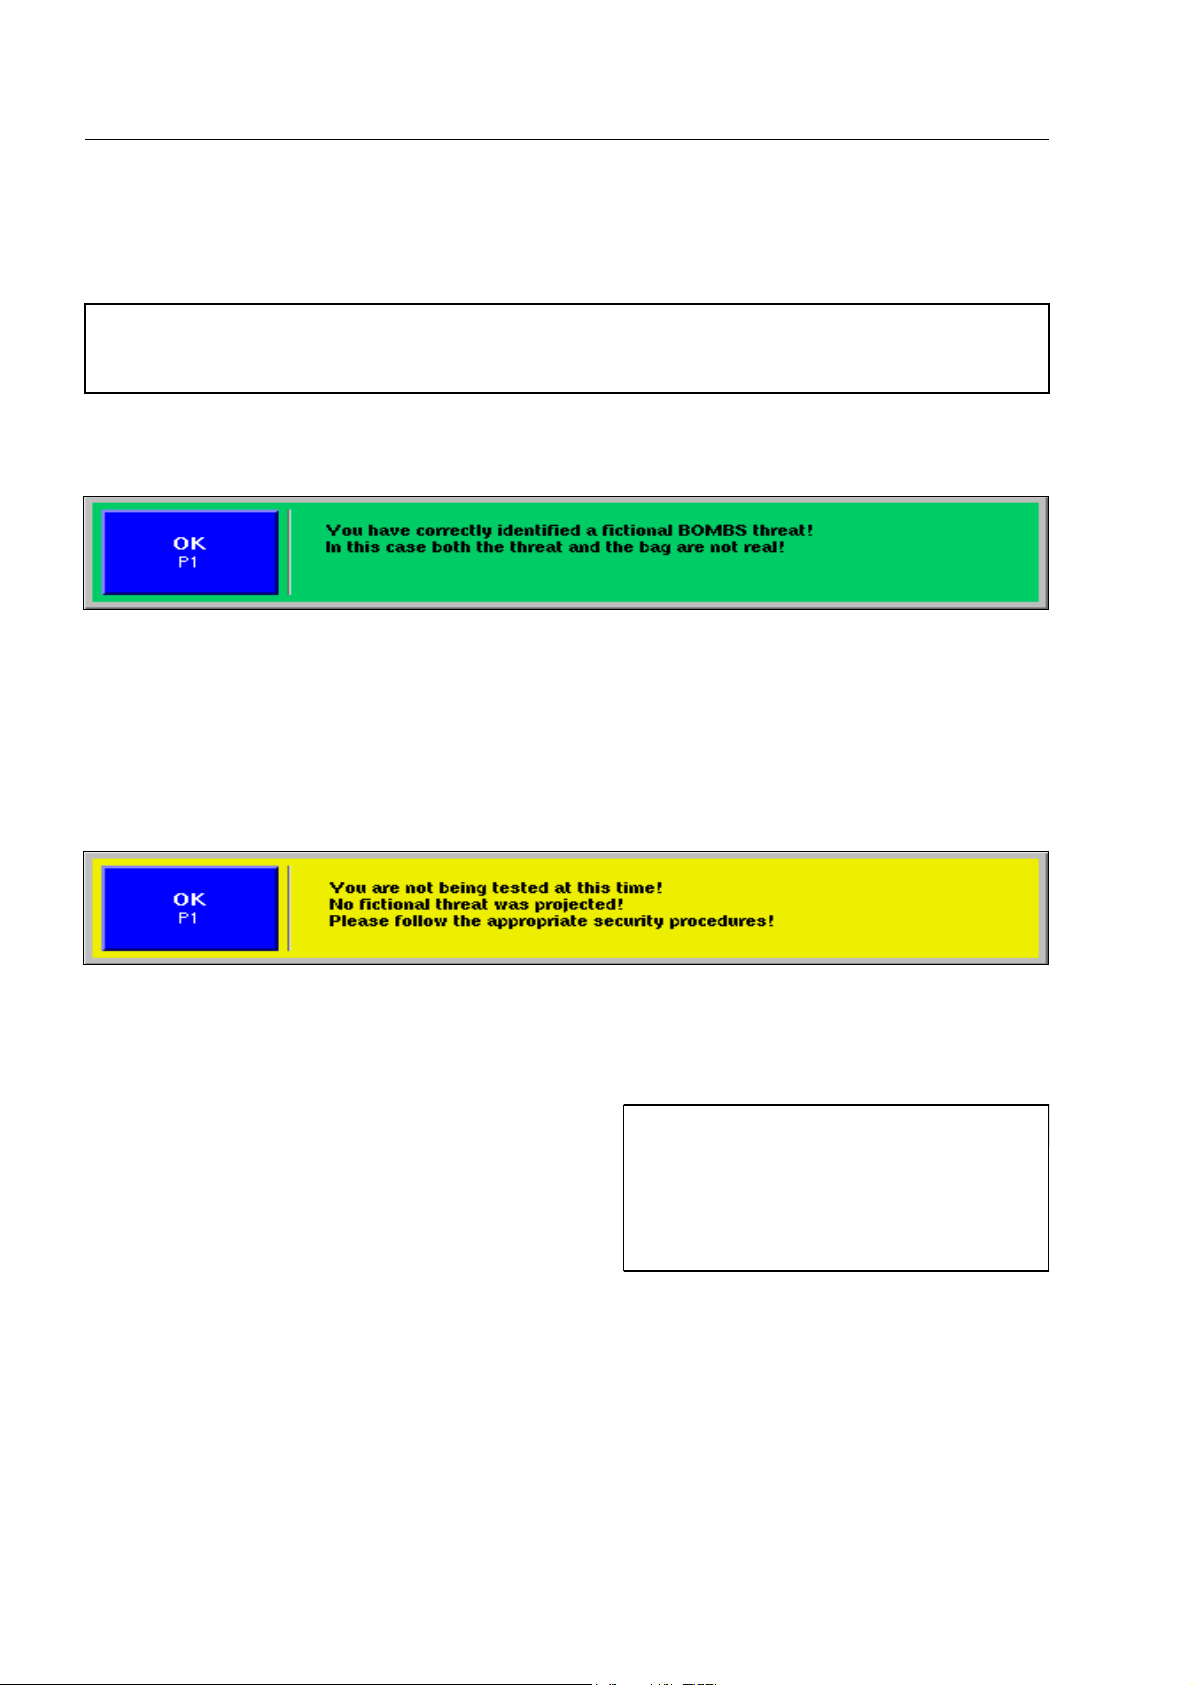
How to work with the HI-TIPPLUS* and aTIP* system*
Now check, if there is any further suspect object in the X-ray image. If so, press
the baggage item to the recheck then.
The real X-ray images together with the recognized objects are automatically stored under category
I
TIP/RECOGN.OBJECTS* by the IMS Image Store System. You can recall these images using the IMS
Image Store System (F 1-82).
Message 2
The complete X-ray image was projected by the TIP system and is now provided with a black/yellow frame.
Afterwards it will be deleted.
Delete the message with
Message 3
r.
H once again and send
No threat object was projected on the image by the TIP system. As a result, no frame is inserted.
Delete the message with
Nevertheless, as you have recognized a suspect ob-
ject, press again
recheck then.
H and send the baggage item to the
r.
Units with newer software* can be ad-
I
justed in such a way that the electronic
baggage marking takes already place
simultaneously with the first depression
of
H. In this case, the H key should
not be pressed for a second time.
1-74
95587412 01/01/09 © Smiths Heimann
Page 85
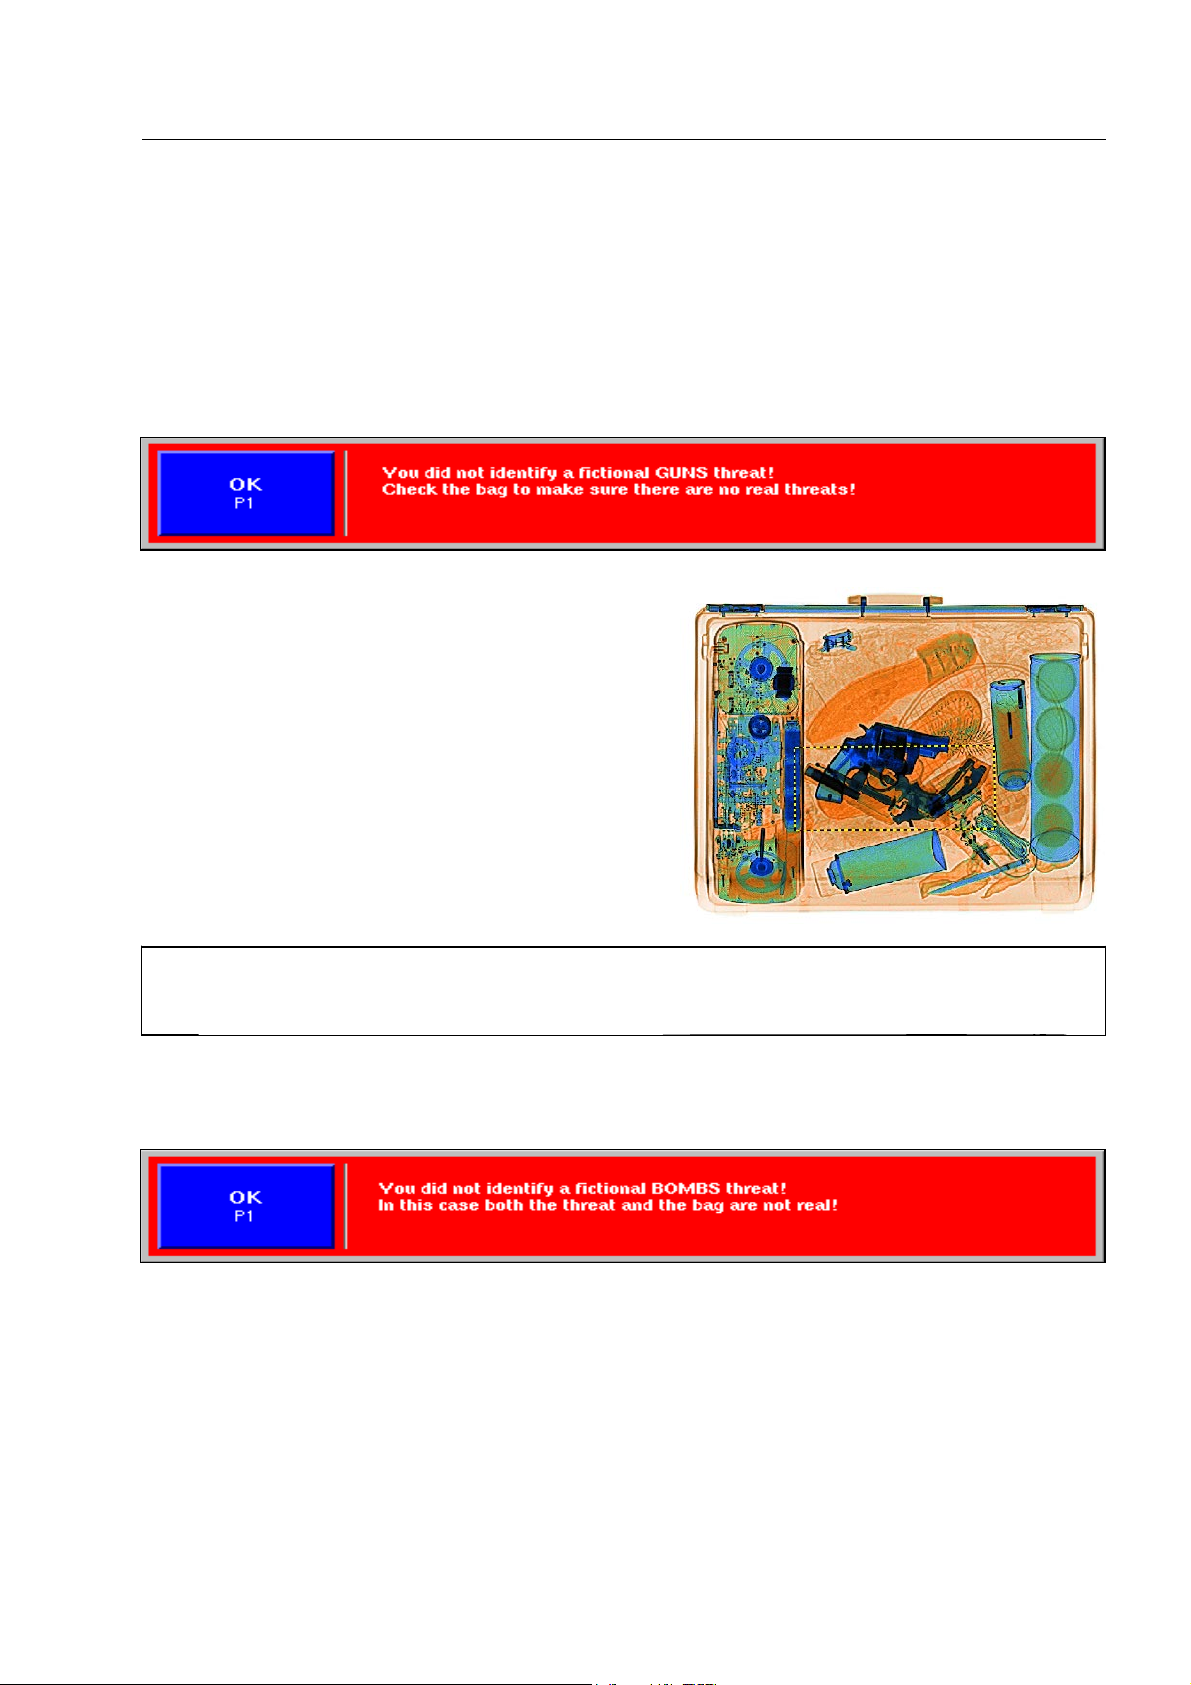
How to work with the HI-TIPPLUS* and aTIP* system*
Missed objects
If you have missed an object projected, the conveyors will be stopped automatically and one of the following
messages is displayed on the screen:
Message 4
One fictional threat object was projected on the image of
a real baggage item by the TIP system. It is now provided
with a black/yellow frame and will be deleted afterwards.
Delete the message with
Now check, if any further suspect object can be found
in the X-ray image. If so, press
gage item to the recheck then.
The real X-ray images together with the missed threat objects are automatically stored under cat-
I
egory TIP/MISSED.OBJECTS by the IMS Image Store System*. You can recall these images using the
IMS Image Store System (F 1-82).
Message 5
r.
H and send the bag-
The complete X-ray image was projected by the TIP system and is now provided with a black/yellow frame.
Afterwards it will be deleted.
Delete the message with
95587412 01/01/09 © Smiths Heimann
r.
1-75
Page 86
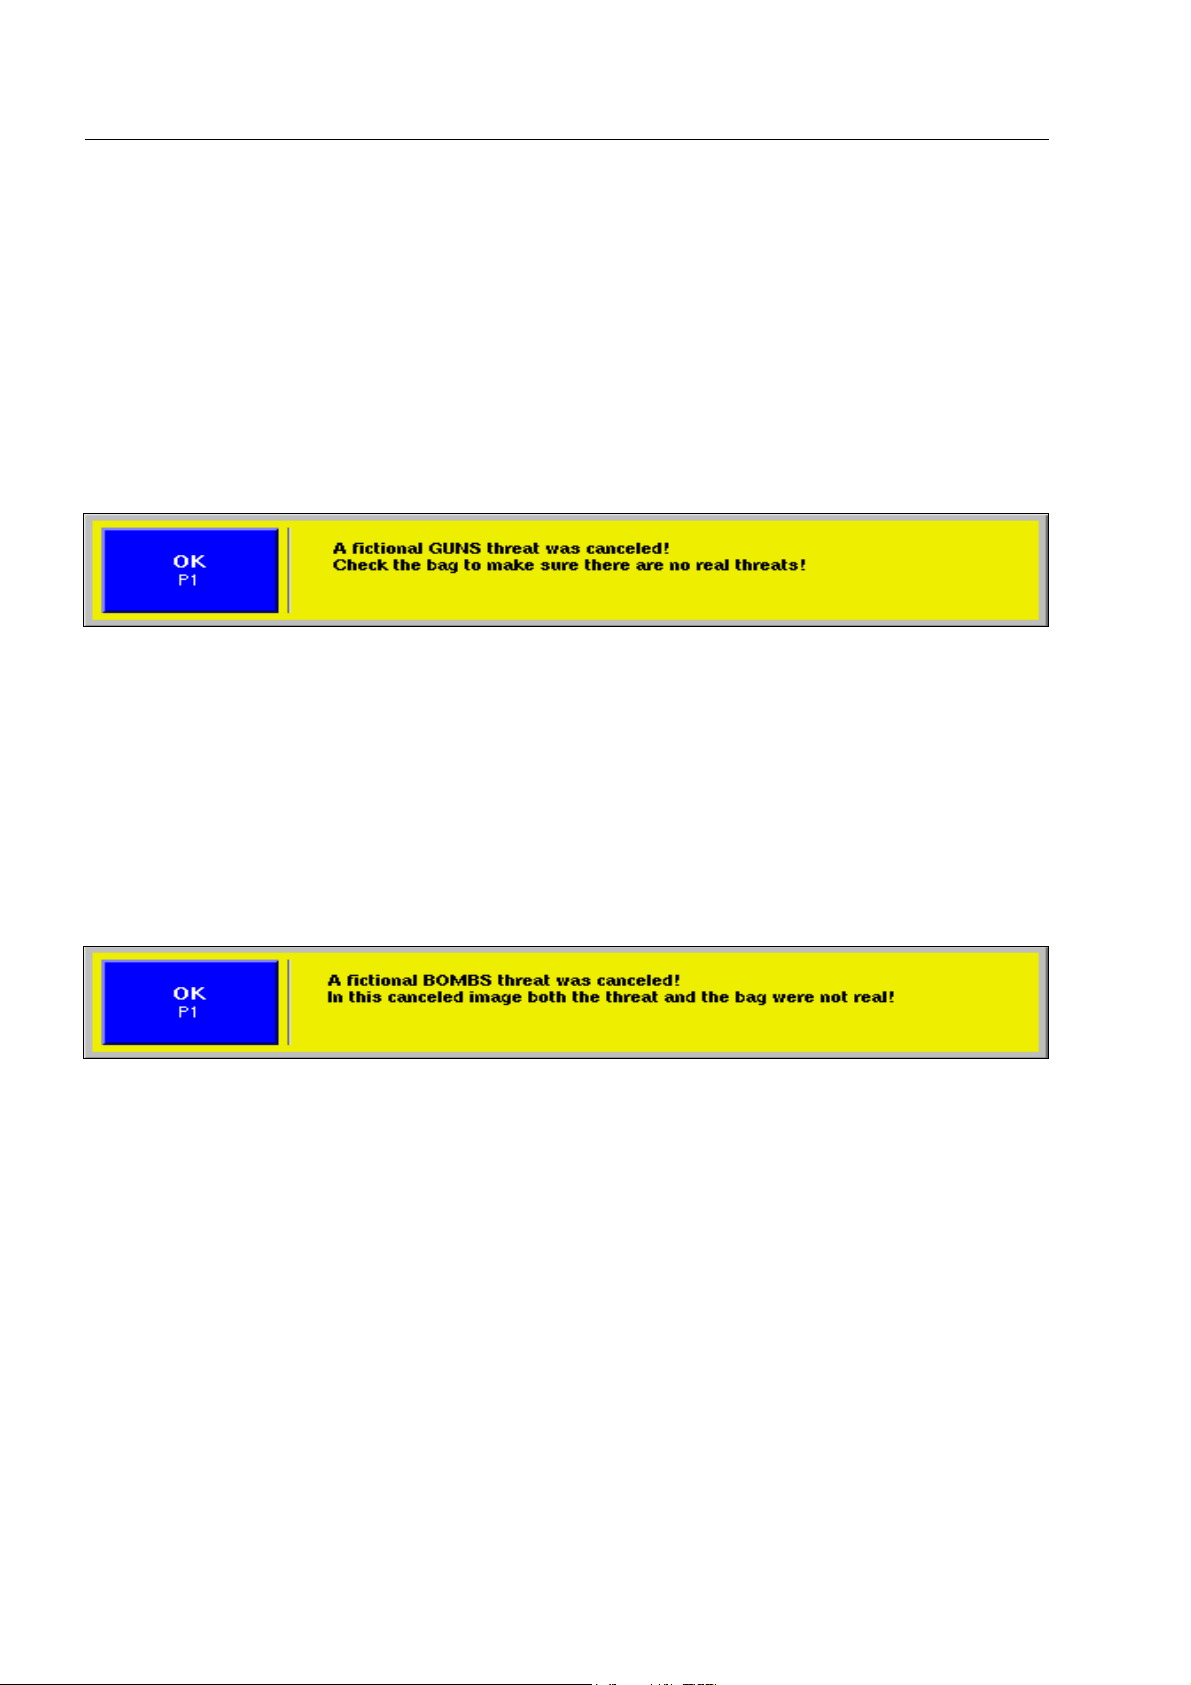
How to work with the HI-TIPPLUS* and aTIP* system*
Aborted projections
It is not always possible for the TIP systems to project a complete fictional X-ray image or a fictional threat
object; for example, if the projected object exceeds the length of the baggage item. In this case, the conveyors
are stopped and the object, which has partly been projected, or the fictional X-ray image, are provided with a
black/yellow frame. Then the object or image is deleted and one of the following messages appears on the
screen (the messages can alternatively appear with blue background colour in units with newer software):
Message 6
The projection of a fictional threat object on the image of a real baggage item has been aborted by the TIP
system.
Delete the message with
Now check, if any further suspect object can be found in the X-ray image. If so, press
send the baggage item to the recheck then.
Message 7
The projection of a fictional X-ray image has been canceled by the TIP system.
Delete the message with
r.
r.
H once more and
1-76
95587412 01/01/09 © Smiths Heimann
Page 87
How to work with the OTS Xtrain system*
How to work with the OTS Xtrain system*
Use the operator training system OTS XTrain* to display
stored X-ray images of various bags which do not
contain
any suspect items. In the following, such images are
called basic images. The operational flow is not different
from that of real baggage screenings.
At arbitrary intervals, complete X-ray images of baggage
items with threat objects are automatically projected
among the basic images. Equally, single threat objects of
different kinds are automatically projected on the basic
images. You do not notice the projection process.
Start and terminate a training session with
Your task is to detect dangerous or suspect objects and
mark them with
When the images are scrolling over the screen, the time you need to evaluate the image and to make a
decision is limited to a few seconds (range 1 to 10 s.). If you need more time, stop the image scroll. Usu-
ally, the time is automatically extended then (range 0 to 45 s.). Restart the image scroll with
H.
I.
Statistics referring to every user and his
I
activities on the X-ray unit are created.
From such reports higher level users
can read how many times projected objects and images have been recognized
and how many of them have been
missed by the individual users.
The OTS Xtrain system can be locked up
I
by users of higher access level.
m or
n.
If you want to review preceding images, you can recall them with the REVIEW function. Select the inter-
esting image with
matically with restarting the image scroll with
3 and 2. To switch back to the last image, press 1 or reach the last image auto-
m or n.
As a general rule, the users of higher access levels define whether or not you receive feedbacks from a train-
ing session.
95587412 01/01/09 © Smiths Heimann
1-77
Page 88
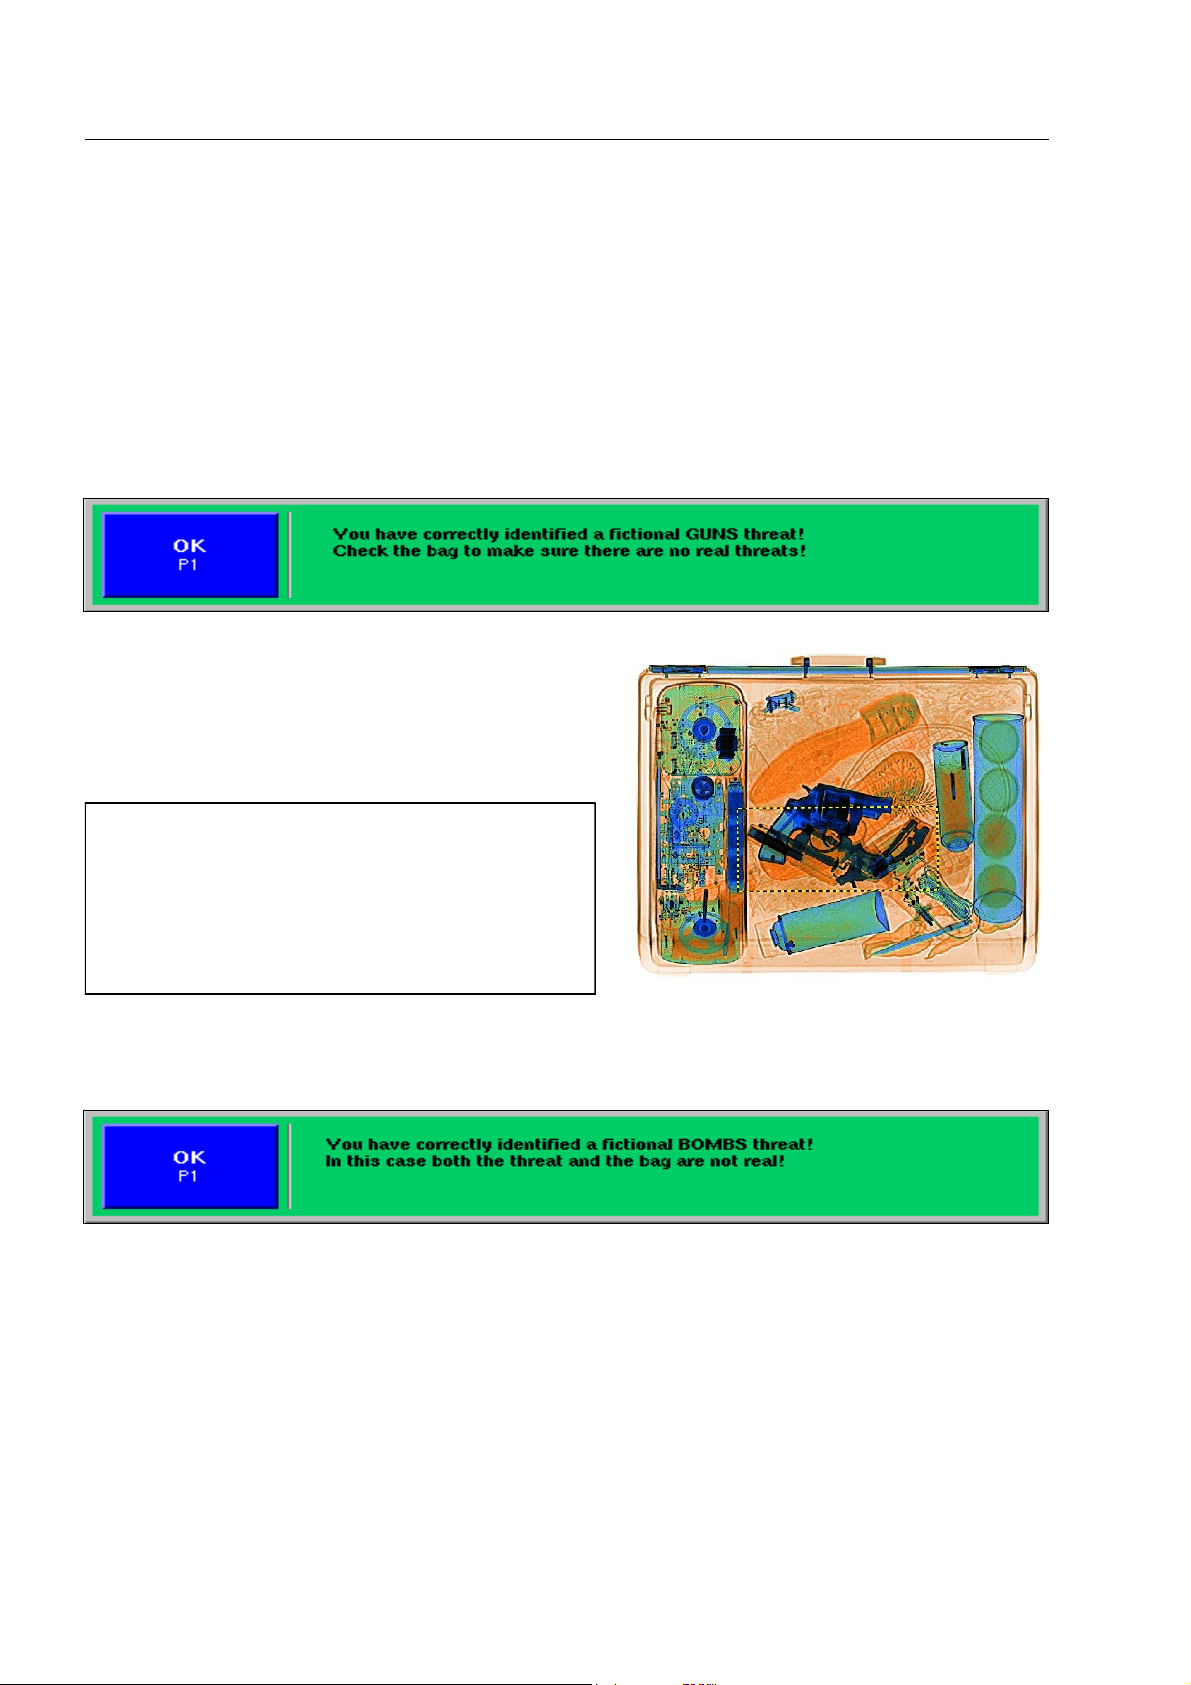
How to work with the OTS Xtrain system*
Training with feedbacks
Recognized objects
If you have recognized a suspect object and marked it with H, the image scroll is stopped automatically and
one of the following messages is displayed on the screen:
Message 1
A fictional threat object was projected on the basic image
of a baggage item. It is now provided with a black/yellow
frame and will be deleted afterwards.
Delete the message with
Threat objects which have been recognized will be
I
stored automatically under category
TRAINING/RECOGN.OBJECTS* by the IMS Image
Store System together with the basic images into
which they were projected. You can recall these
images using the IMS Image Store System
(F 1-82).
Message 2
A complete X-ray image was projected between two basic images. It is now provided with a black/yellow
frame and will be deleted afterwards.
r.
Delete the message with
1-78
r.
95587412 01/01/09 © Smiths Heimann
Page 89
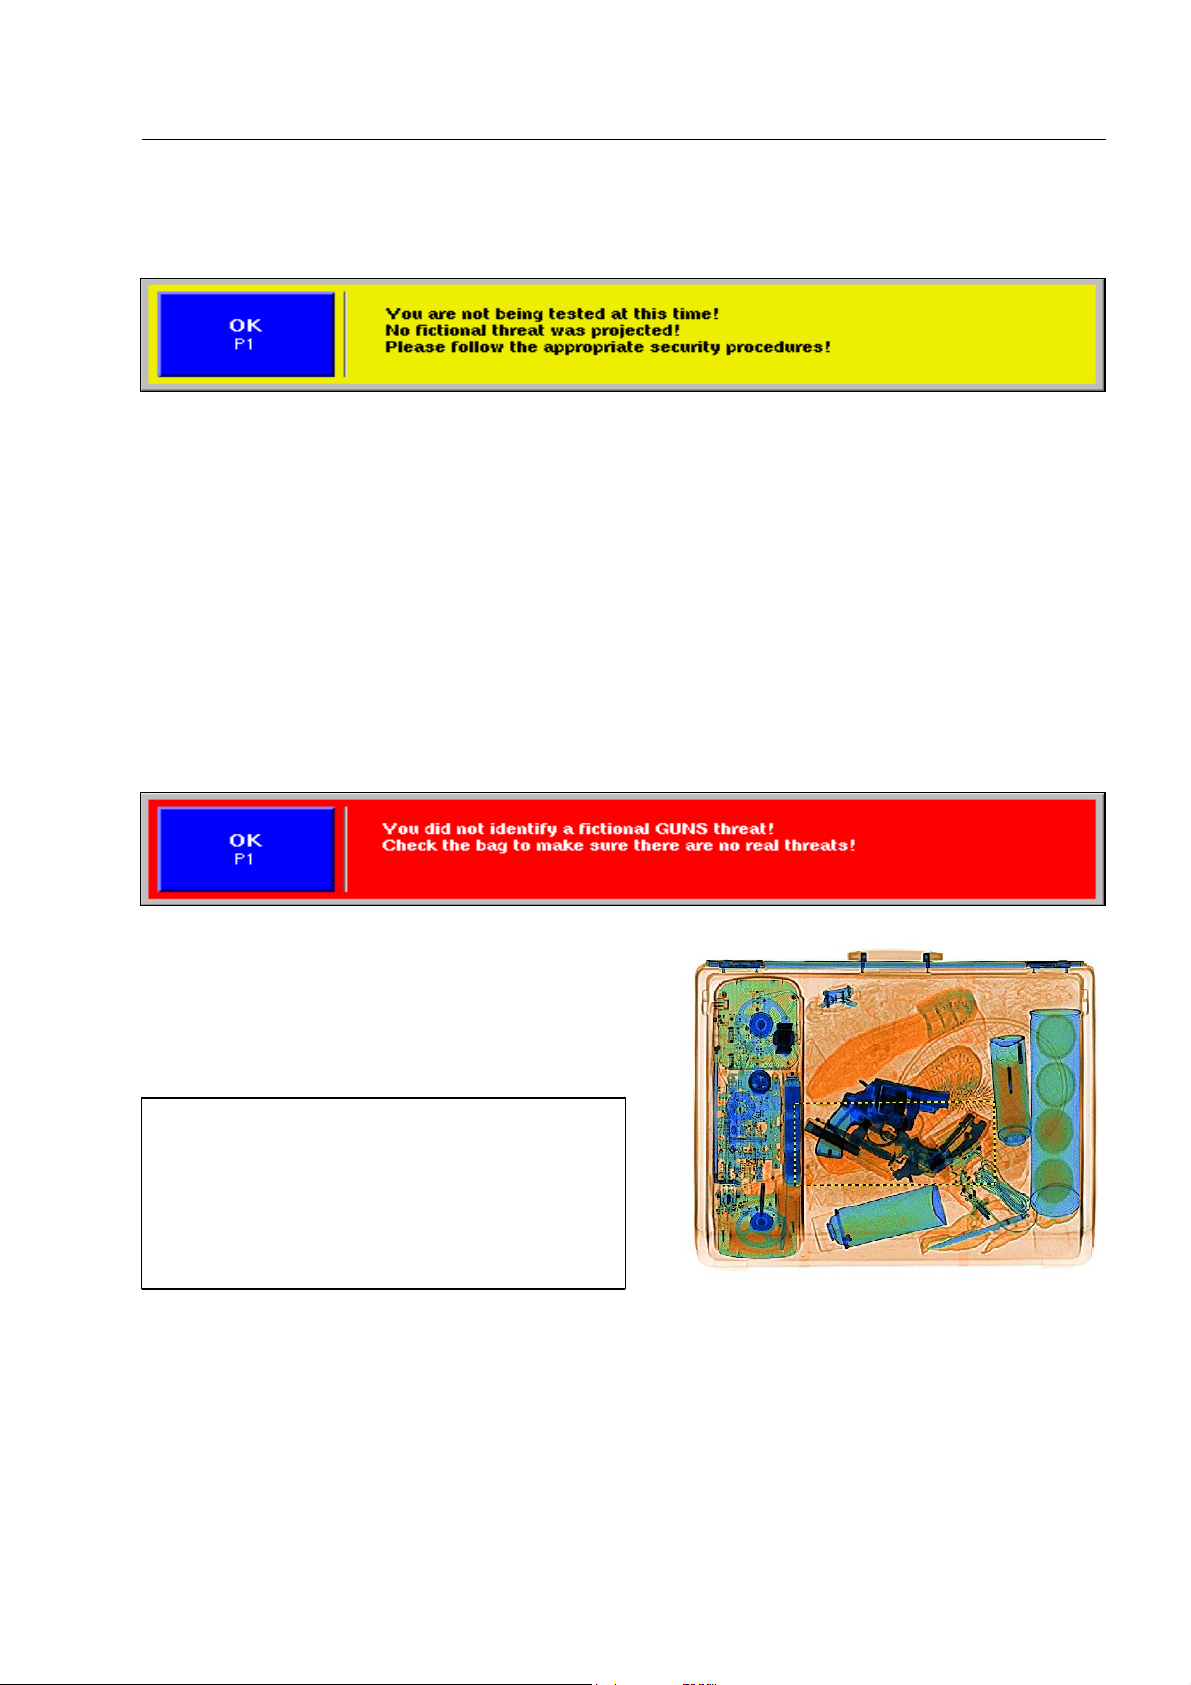
Message 3
Nothing was projected. As a result, no frame is inserted.
How to work with the OTS Xtrain system*
Delete the message with
r.
Missed objects
If you have missed an object projected, the image scroll will be stopped automatically and one of the following messages is displayed on the screen:
Message 4
A fictional threat object was projected on the basic image
of a baggage item. It is now provided with a black/yellow
frame and will be deleted afterwards.
Delete the message with r.
Threat objects which have been missed will be
I
stored automatically under category TRAINING/
MISSED.OBJECTS by the IMS Image Store Sys-
tem together with the basic images into which
they were projected. You can recall these images using the IMS Image Store System
(F 1-82).
95587412 01/01/09 © Smiths Heimann
1-79
Page 90
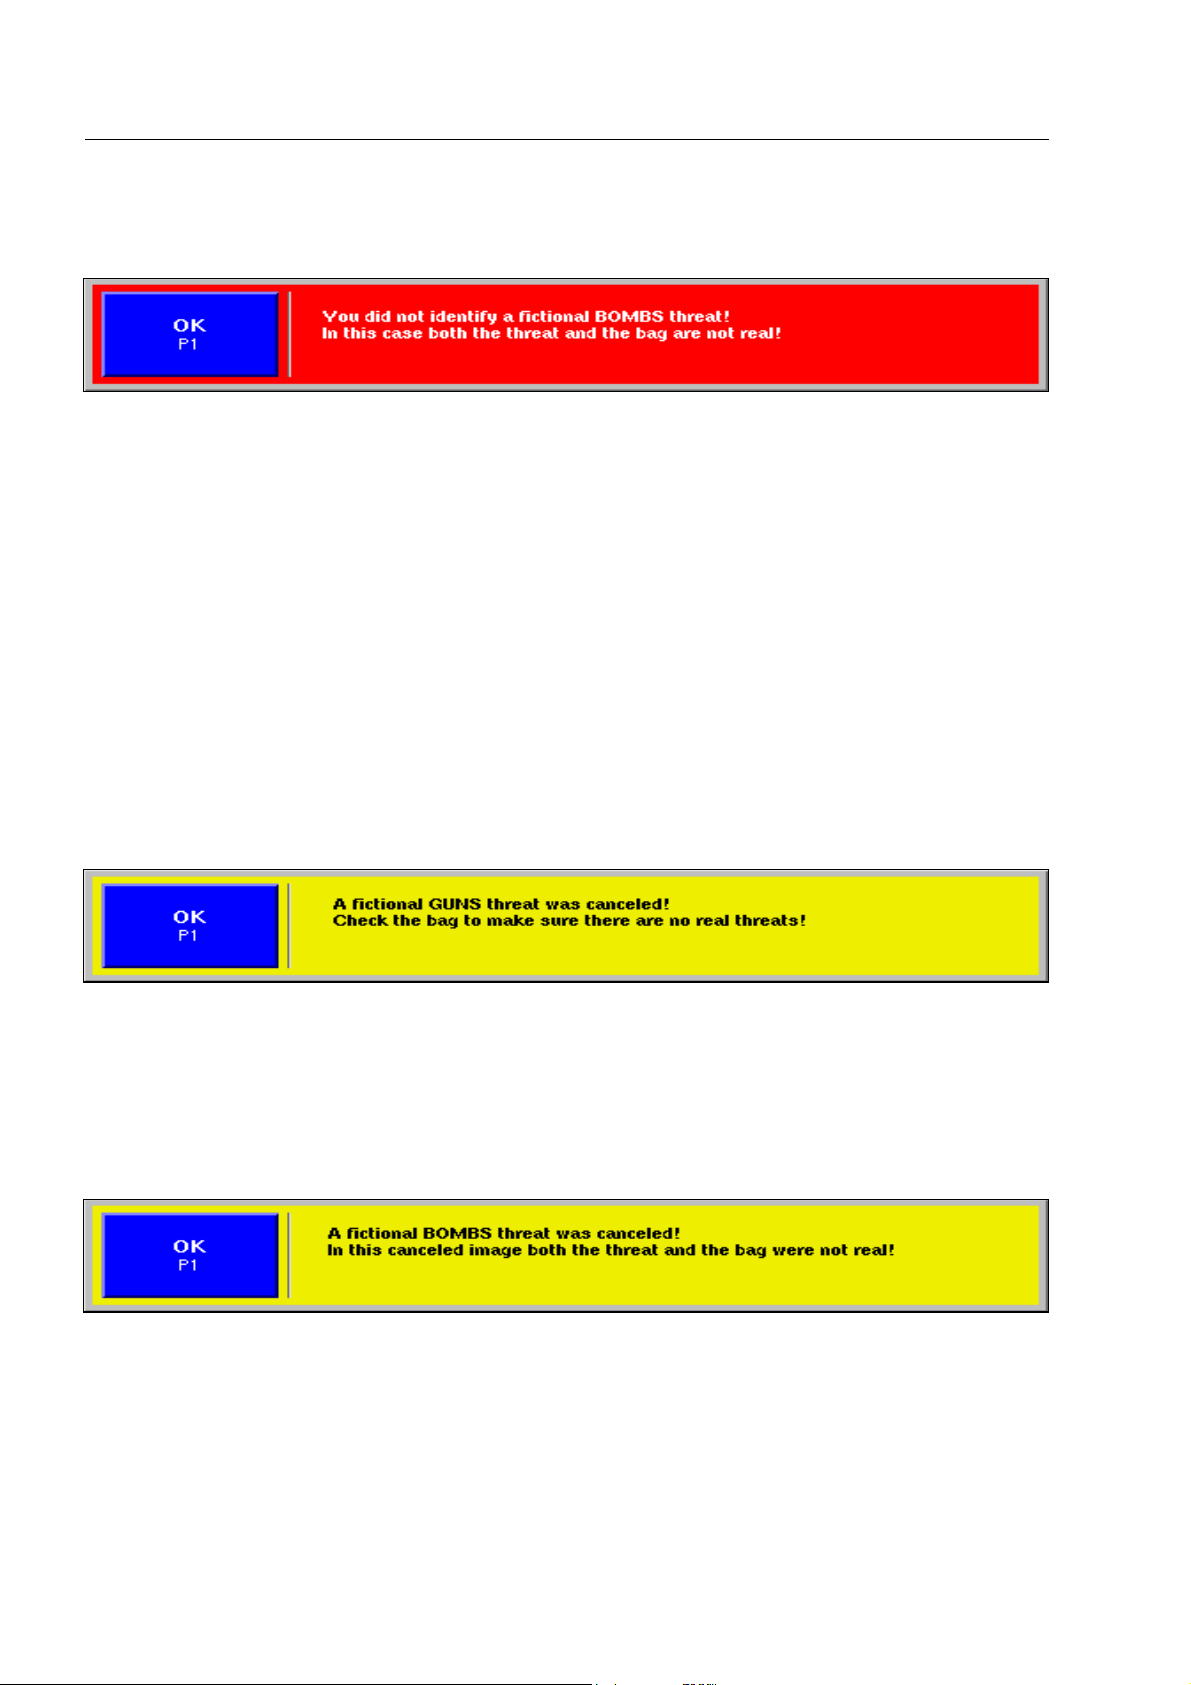
How to work with the OTS Xtrain system*
Message 5
A complete X-ray image was projected between two basic images.
Delete the message with
r.
Aborted projections
It is not always possible for the OTS XTrain system to project a complete threat image or threat object. In this
case, the image scroll is stopped and the object, which has partly been projected or the threat image is
provided with a black/yellow frame and deleted afterwards. Simultaneously one of the following messages
appears on the screen (the messages can alternatively appear with blue background colour in units with
newer software):
Message 6
The projection of a threat object on the basic image of a baggage item has been aborted.
Delete the message with
Message 7
The projection of a threat image between two basic images has been canceled.
Delete the message with
1-80
r.
r.
95587412 01/01/09 © Smiths Heimann
Page 91

Training without feedbacks
How to work with the OTS Xtrain system*
If users of higher access levels have deactivated the feedback function, the projected threat objects and threat images are merely provided with black/yellow frames and
deleted afterwards.
In this case as well, recognized* and
I
missed threat objects are automatically
stored under categories TRAINING/RE-
COGN.OBJECTS* and
TRAINING/MISSED.OBJECTS by the IMS
Image Store System together with the
basic images into which they were projected. You can recall these images using the IMS Image Store System
(F 1-82).
95587412 01/01/09 © Smiths Heimann
1-81
Page 92

How to work with the IMS image store system*
How to work with the IMS image store system*
The IMS Image Store System allows the digital storage of
both single X-ray images of the HI-SCAN X-ray unit and
images of all scanned baggage or freight items (standard
Online recording) on the storage disk (hard disk) of the integrated electronics without any loss of quality.
Additionally, the images of all scanned baggage or freight
items can be stored
– on a supplementary, removable image data archive*
(Online recording RIDA*) as well as
– via network* on a central image data archive (Online
recording CIDA*)
for the purpose of training and archiving.
It is also possible to initiate an automatic storage of the images transmitted by you with
analyst stations* according to the different evaluation results.
X-ray images stored on the X-ray unit can be recalled on the monitor of the X-ray unit. Higher access level
users can copy them to ZIP disks*, CDs* or USB memories* or transfer them digitally to other computer systems via a network*.
The Online recording functions and the
I
storage of the images transmitted to the
recheck or analyst stations* can only be
started and stopped by higher access
level users. The same applies to the recall of these images. Furthermore, the
storage, recall and print* functions for
single images can be deactivated by the
higher access level users so that you
may possibly not be able to use the functions referred to in the following.
H to the recheck or
Store images
The current image, i.e. the image of the object
scanned last is stored in the category Clipboard when
you press
I
S
1-82
S.
If a priority key is assigned to the function FRAME OBJECT* (F 1-50) you can provide suspicious
objects with a red/yellow frame before you store or transfer it.
Attention!
Do not store the image until it has been displayed completely on the monitor. This means that the
empty section you are used to seeing behind the bag image has been created and the scroll has
been stopped for at least a short moment! Otherwise, the image of the preceding baggage item
might unintentionally be stored! 1070
If the HI-SCAN unit is connected to a
I
Central Image Data Archive CIDA* via a
data network, the current image will be
simultaneously transferred to this
archive with
S.
95587412 01/01/09 © Smiths Heimann
Page 93
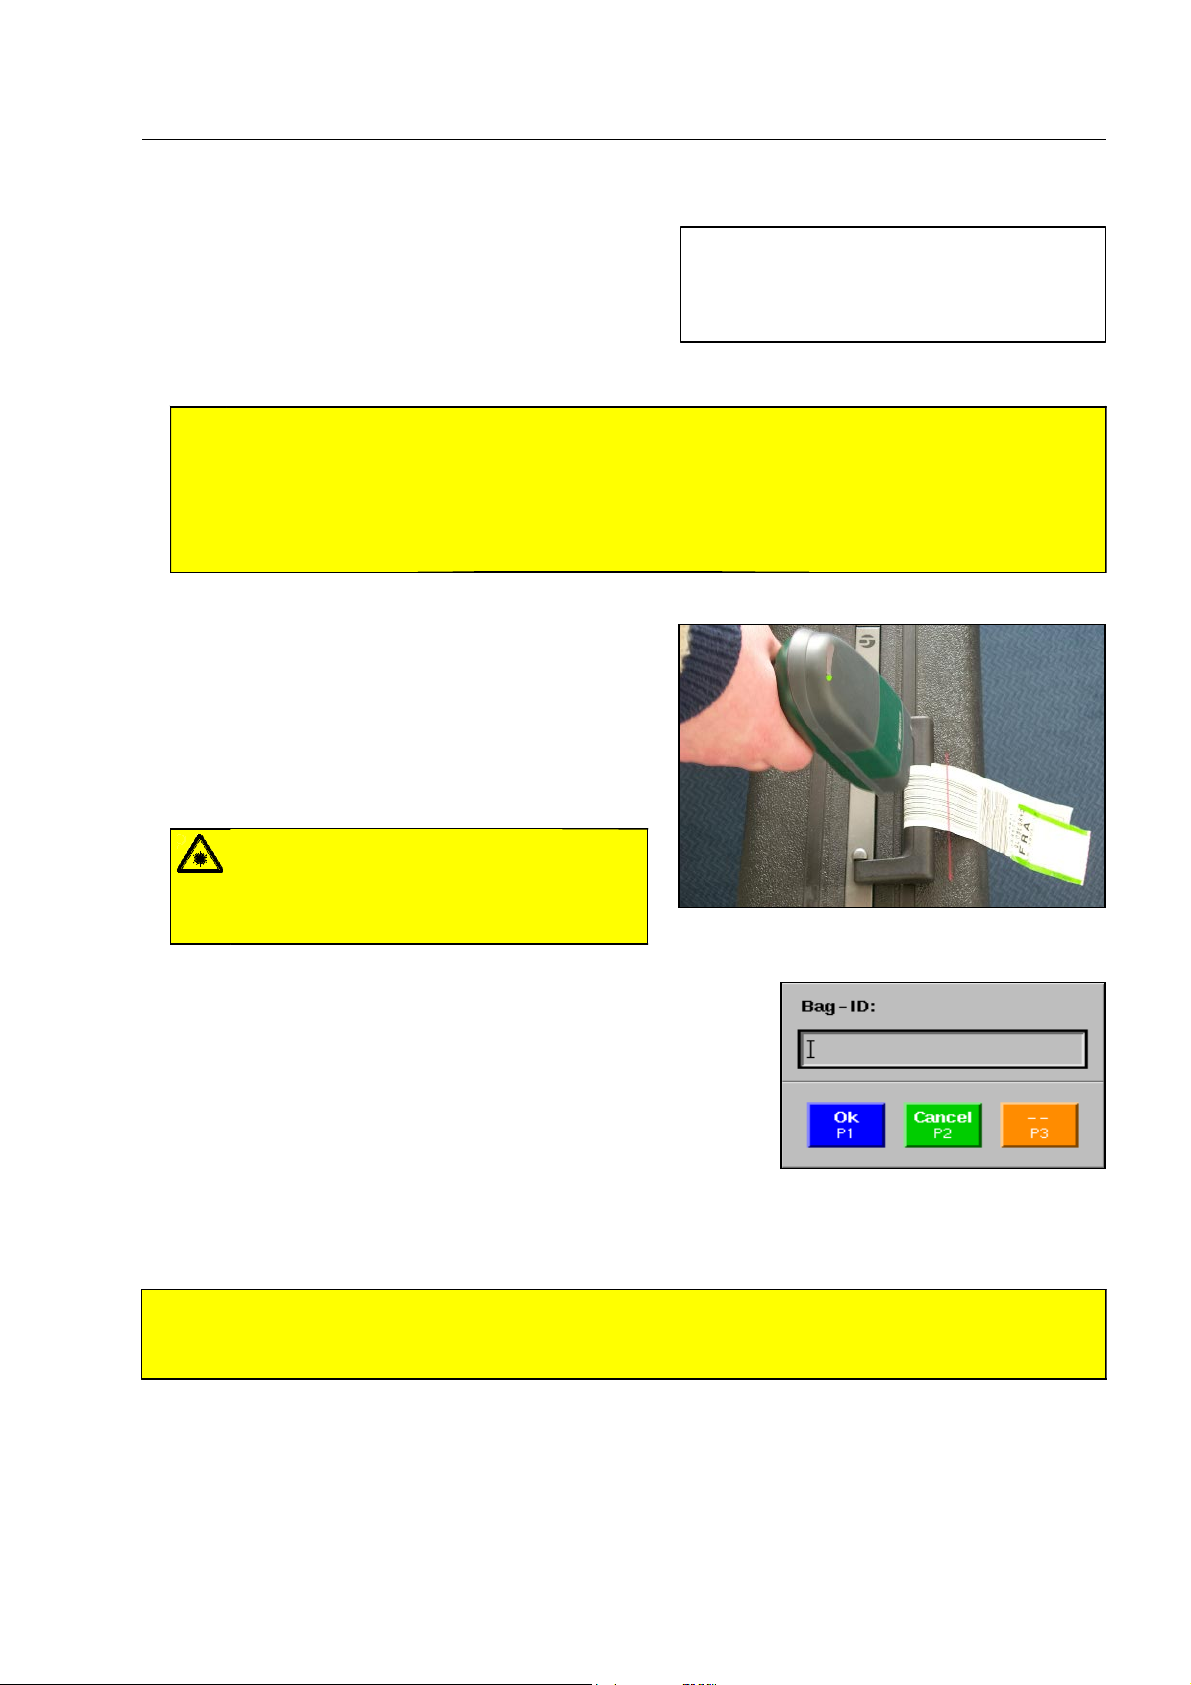
How to work with the IMS image store system*
If the X-ray inspection unit is equipped with a bag code
scanner*, you can store X-ray images together with
the respective bag identification codes of the baggage
or freight items. After scanning the bag code, the next
X-ray image generated by the X-ray unit will be stored
automatically.
Attention!
S
Make sure there are no more other baggage or freight items in the tunnel that have not yet been
inspected, before the baggage or freight item the image of which you want to store has entered
the inspection tunnel! Otherwise, the X-ray image of the other baggage or freight items will be
stored! It is advisable to keep a distance of about half the tunnel length to the preceding baggage
or freight items. 1080
Scan the bag ID from the baggage or freight item's bag
tag, before it enters the inspection tunnel. If required,
stop the conveyors with
bar code and press the button integrated in the handle
until a short audible signal is sounded and the green
LED lights up. Afterwards, have the baggage or freight
item enter the tunnel.
1. Point the scanner at the
The images are stored in the category
I
Online Recording which is only accessible by users with superior access
rights.
Warning!
Do not look into the laser beam of the bar
code scanner* and do not point the beam at
other persons! 1090
If the bag code cannot be read from the baggage or freight item's
tag, you can also enter it manually*. Actuate the priority key* assigned to the function ENTER BAG ID. The window illustrated is
displayed. The entry of letters and digits is carried out as described for the user ID code ( F 1-36). Afterwards, inspect the
baggage or freight item by means of X-rays.
If you actuate
tion code in the category Clipboard.
Attention!
S
If the IMS system has no more free memory, always the oldest image will automatically be overwritten. 1100
S after the inspection, the image will be stored again together with the baggage identifica-
95587412 01/01/09 © Smiths Heimann
1-83
Page 94
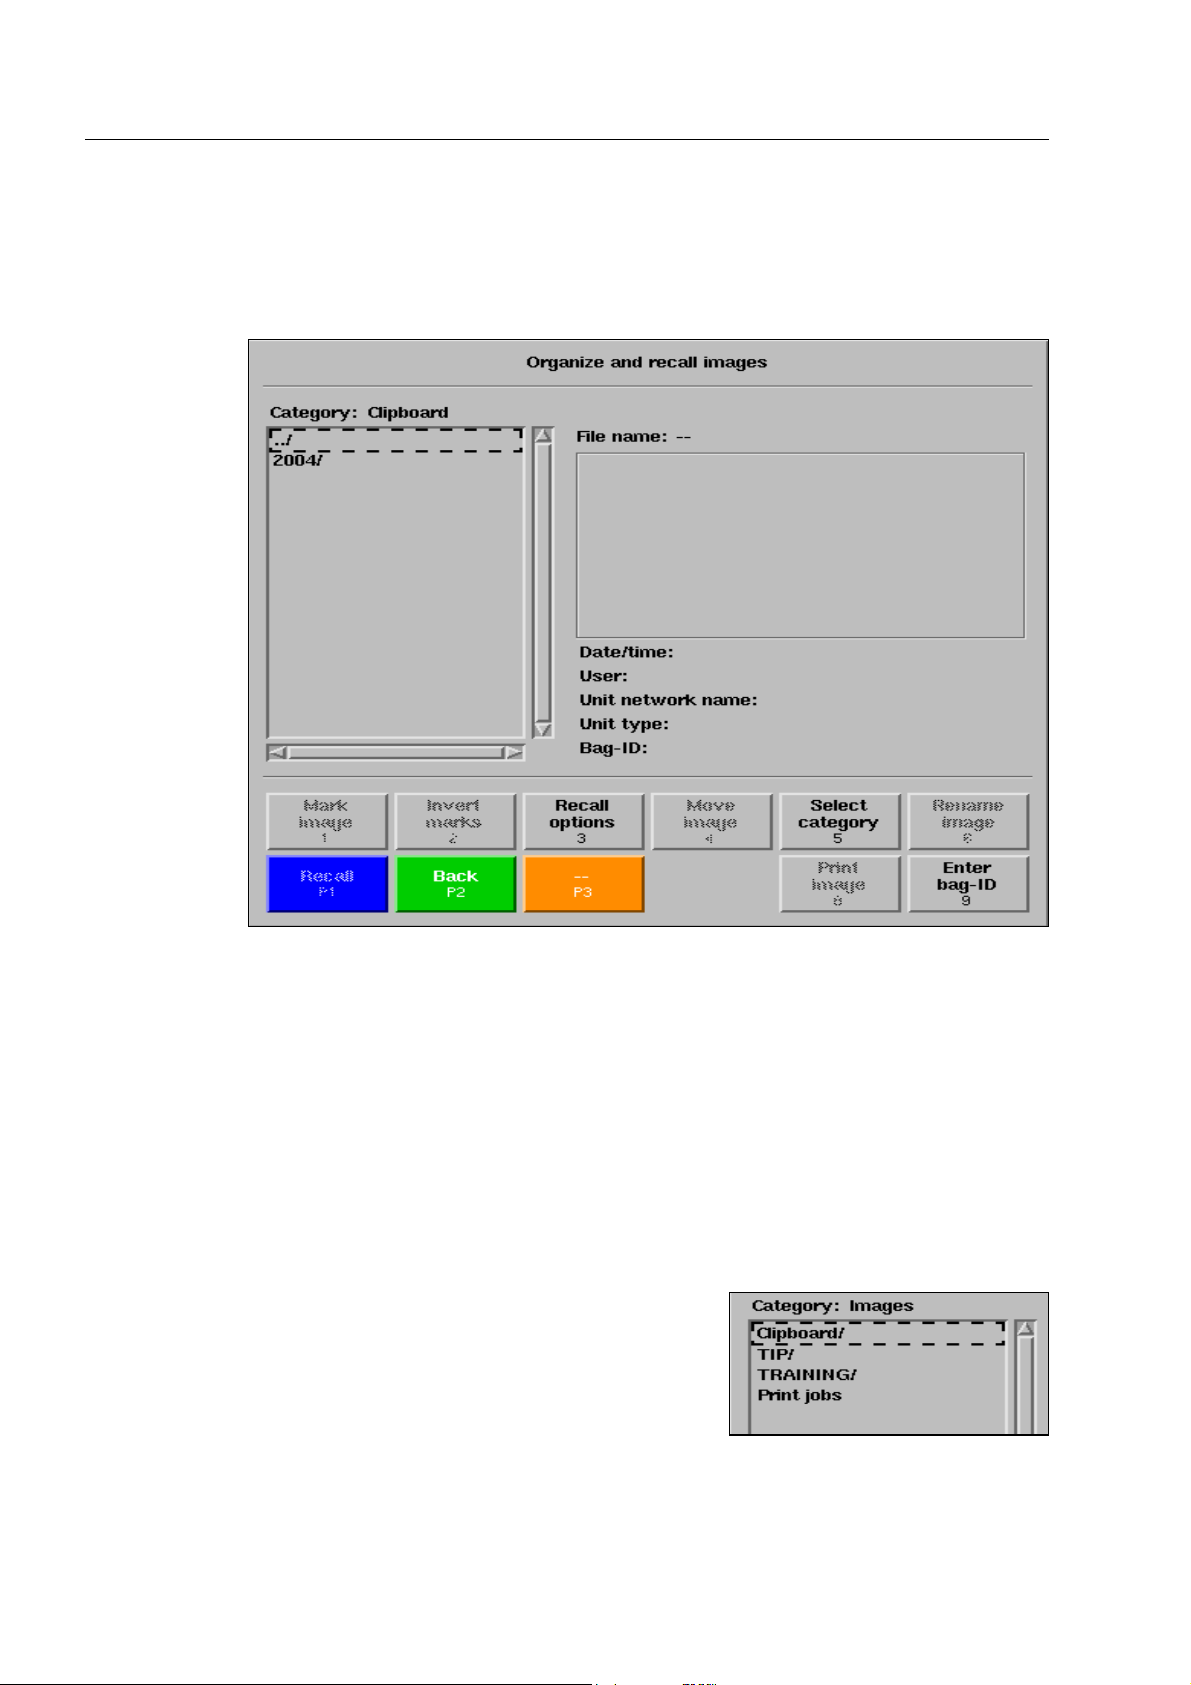
How to work with the IMS image store system*
Recall and print* images
If you want to recall or print* images, press T. The illustrated IMS recall menu appears:
In units with more recent software, the Clipboard category (directory) is displayed on the left side of the menu
including its subcategories* or a list of the X-ray images stored in this category .
Select a category/subcategory
In units equipped with more recent software in the left side of the
menu you can either switch to the left with the navigator on the ../
symbol or to one of the displayed categories*. This way you change
from the current category into the parent one.
To open a category move with the navigator to it and either switch with the navigator to the left or to the
right*. If a category contains subcategories, this is indicated by a slash / after the name of the category.
After the category is activated, the subcategories are listed on the left side of the menu.
1-84
95587412 01/01/09 © Smiths Heimann
Page 95
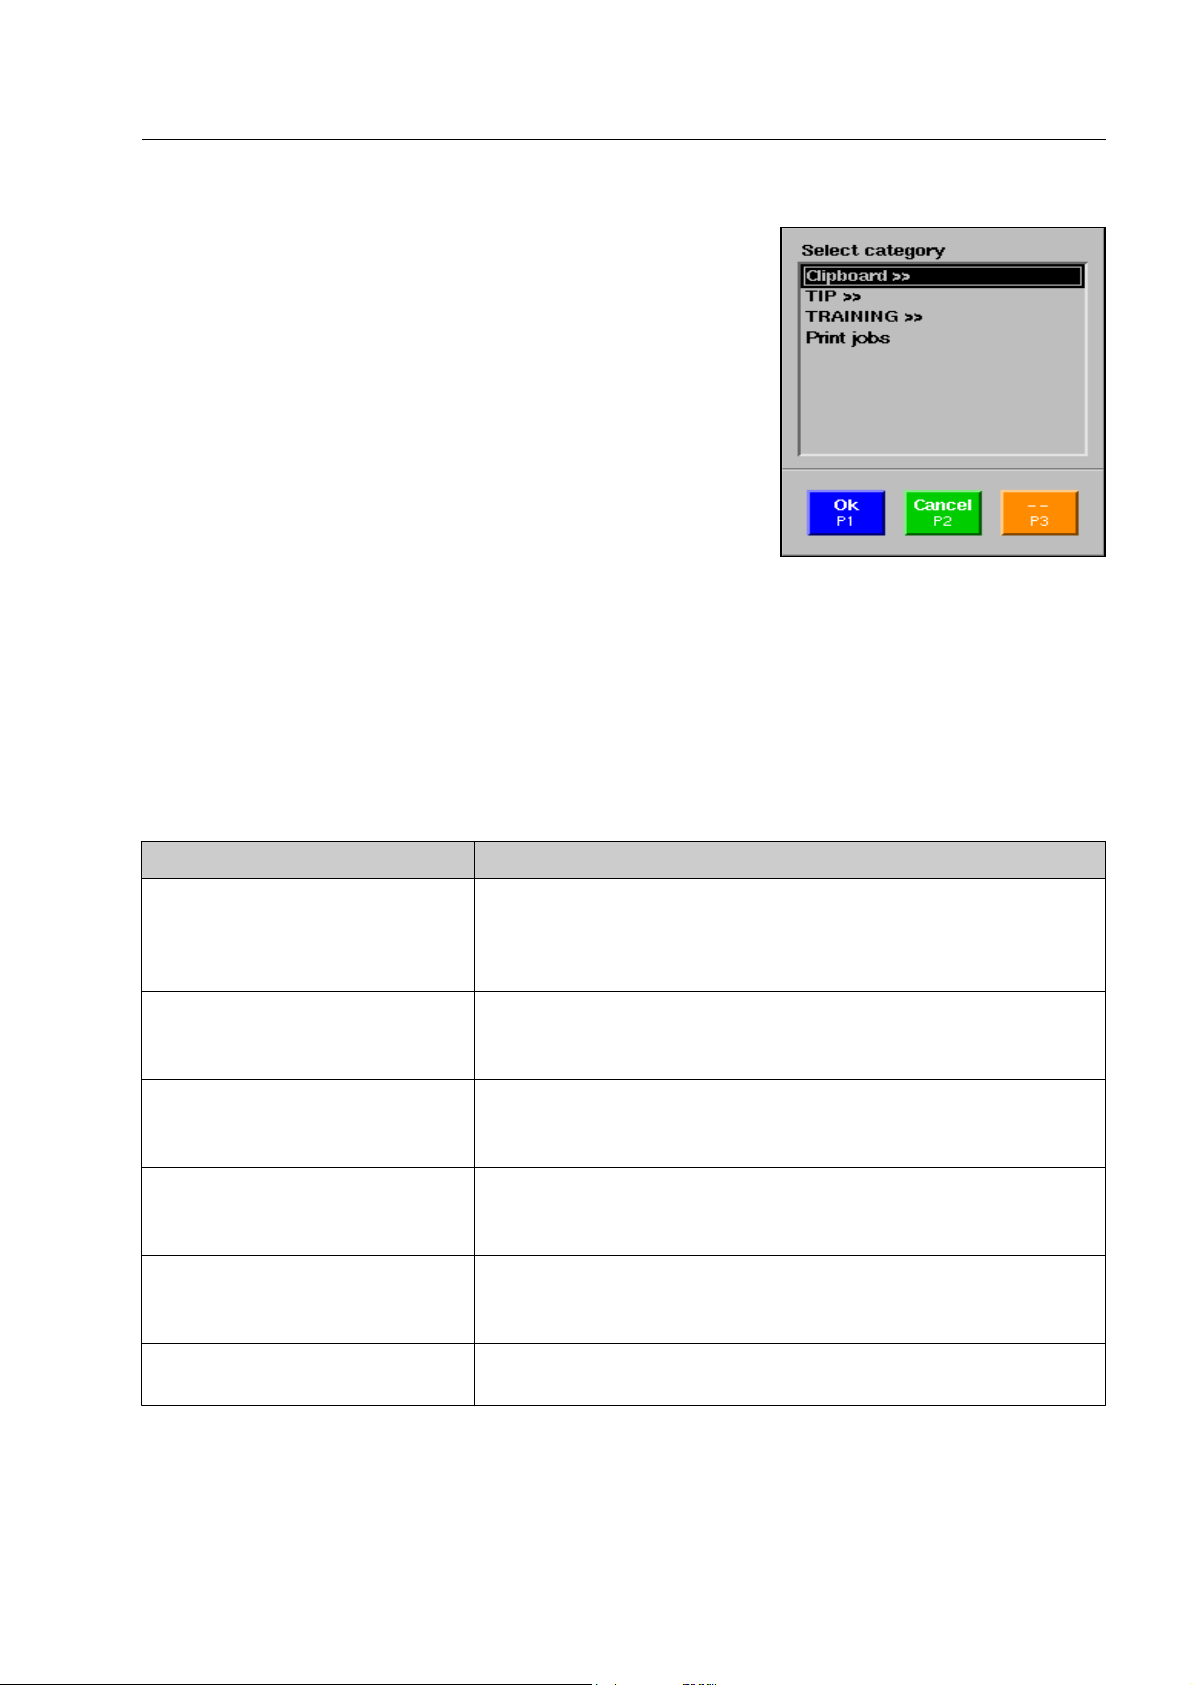
How to work with the IMS image store system*
In units with older software, use key [5 mno] to open the window
for selecting a category (also possible on units with more recent
software).
Select the desired category with the navigator and activate the lat-
ter with
r. Simultaneously, you return to the IMS recall menu.
If a category is divided into subcategories the latter will be listed in units equipped with older software
version together with the names of the parent category (separated by a slash /). However, in units
equipped with newer software the symbol >> behind a category name indicates that there are further subcategories. By means of switching the navigator to the right you can open the category and have the subcategories indicated. With
s or by switching the navigator to the left* you return to the respective
parent list.
The following categories are available:
Category Content
Clipboard with subcategories* X-ray images stored individually with
S. Possibly, this category is
subdivided into subcategories that will be generated automatically
from the calendar years, the months and the days on which the images have been stored.
TIP/RECOGN.OBJECTS* X-ray images of real baggage or freight items with threat objects pro-
jected by the HI-TIP
PLUS
*/aTIP* system which have been recognized
by the user
TIP/MISSED.OBJECTS* X-ray images of real baggage or freight items with threat objects pro-
jected by the HI-TIP
PLUS
*/aTIP* system which have been missed by
the user
TRAINING/RECOGN.OBJECTS* Training images of real baggage or freight items with threat objects
projected by the OTS XTrain-System* which have been recognized by
the user
TRAINING/MISSED.OBJECTS* Training images of real baggage or freight items with threat objects
projected by the OTS XTrain-System* which have been missed by the
user
Print jobs* The last 10 images that could not be printed out because of a printing
problem
95587412 01/01/09 © Smiths Heimann
1-85
Page 96
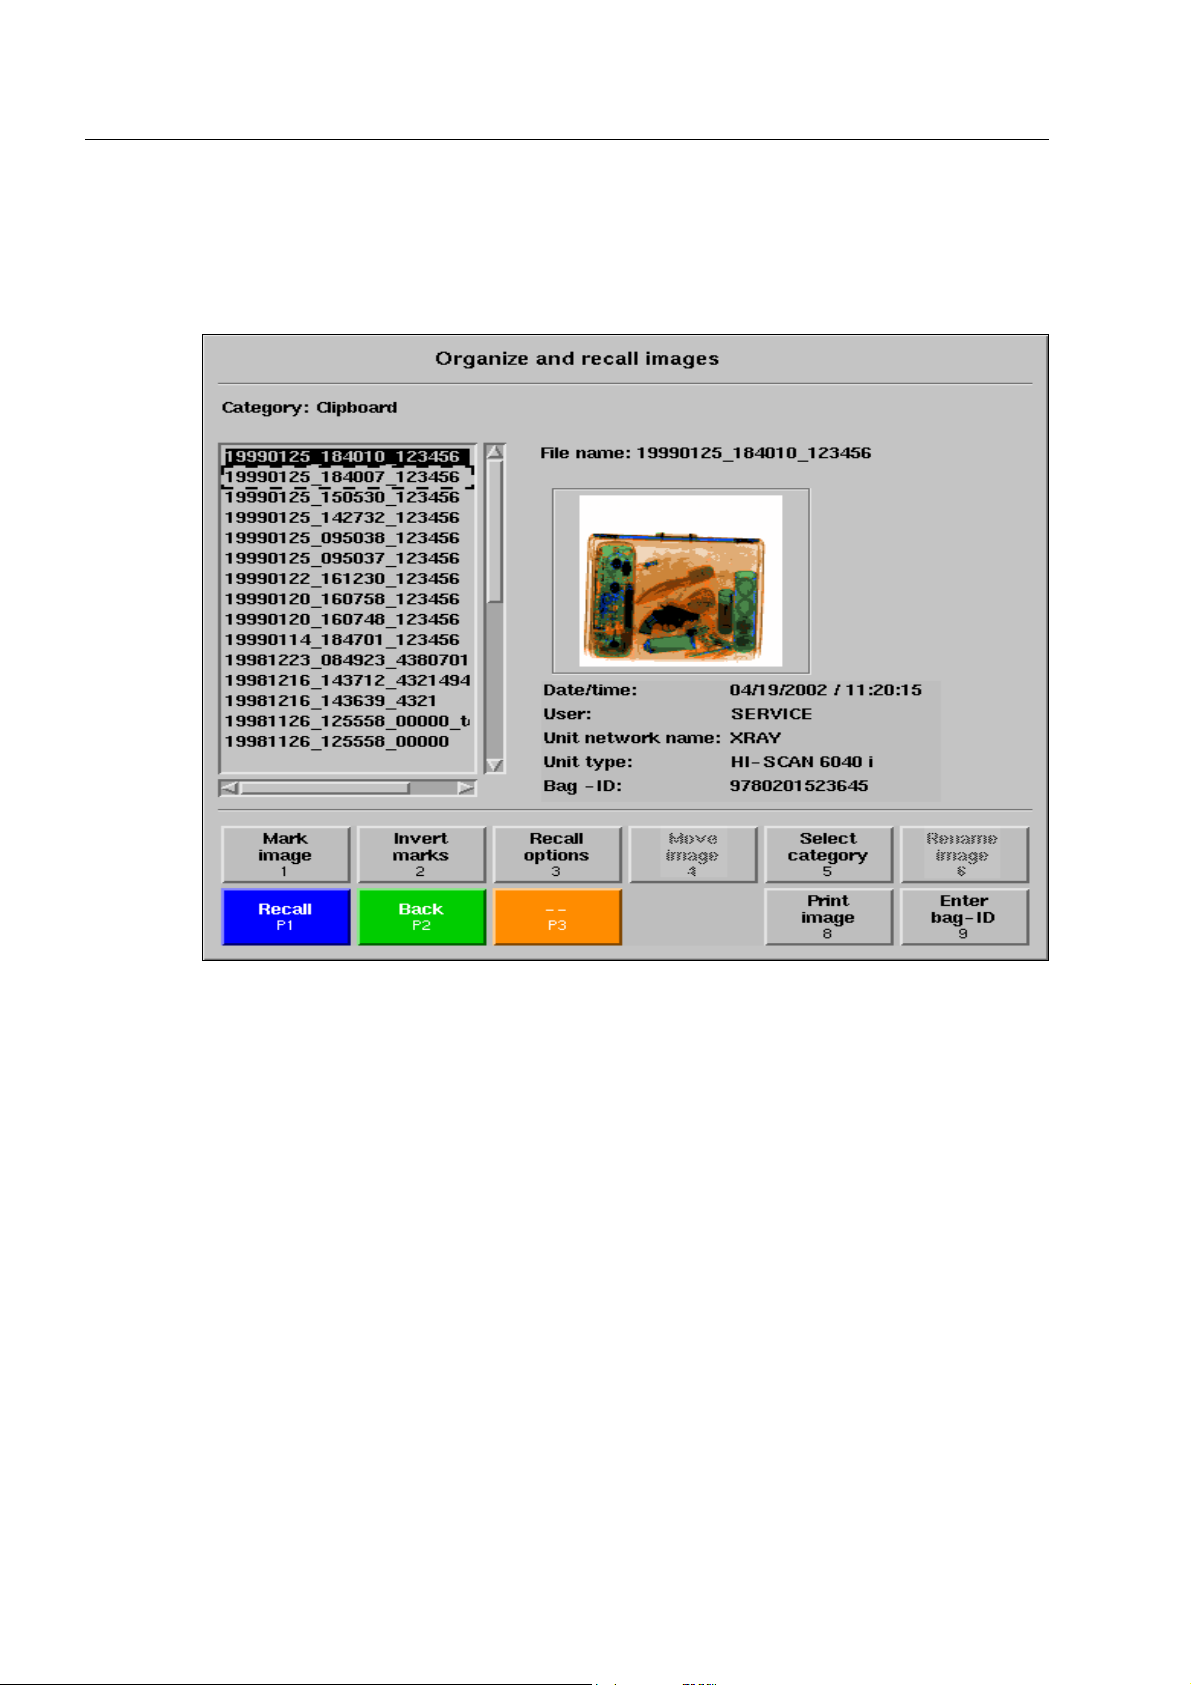
How to work with the IMS image store system*
Select images
After a category is selected, a list of the X-ray images stored in it appears.
As long as higher access level users have not renamed images, the images stored last appear on top of the
list, oldest images appear at the end (listing according to date and time). Otherwise the images are sorted alphabetically.
Use the navigator to select individual images. On the right menu side you see a miniature display of the
selected image as well as some additional information. There are:
File name: Under this name, the image is stored on the hard disk of the integrated elec-
tronics. New images are first named according to the date and time of the storage and the serial number of the X-ray unit. Higher access level users can
change the name.
Date/time: Point of time of the image memorization.
User: Name or ID of the user who stored the image.
Unit network name: Network name of the HI-SCAN X-ray unit where the image was taken.
Unit type: Type of the HI-SCAN X-ray unit where the image was taken.
Bag ID*: Bag identification code of baggage or freight item, if available
1-86
95587412 01/01/09 © Smiths Heimann
Page 97
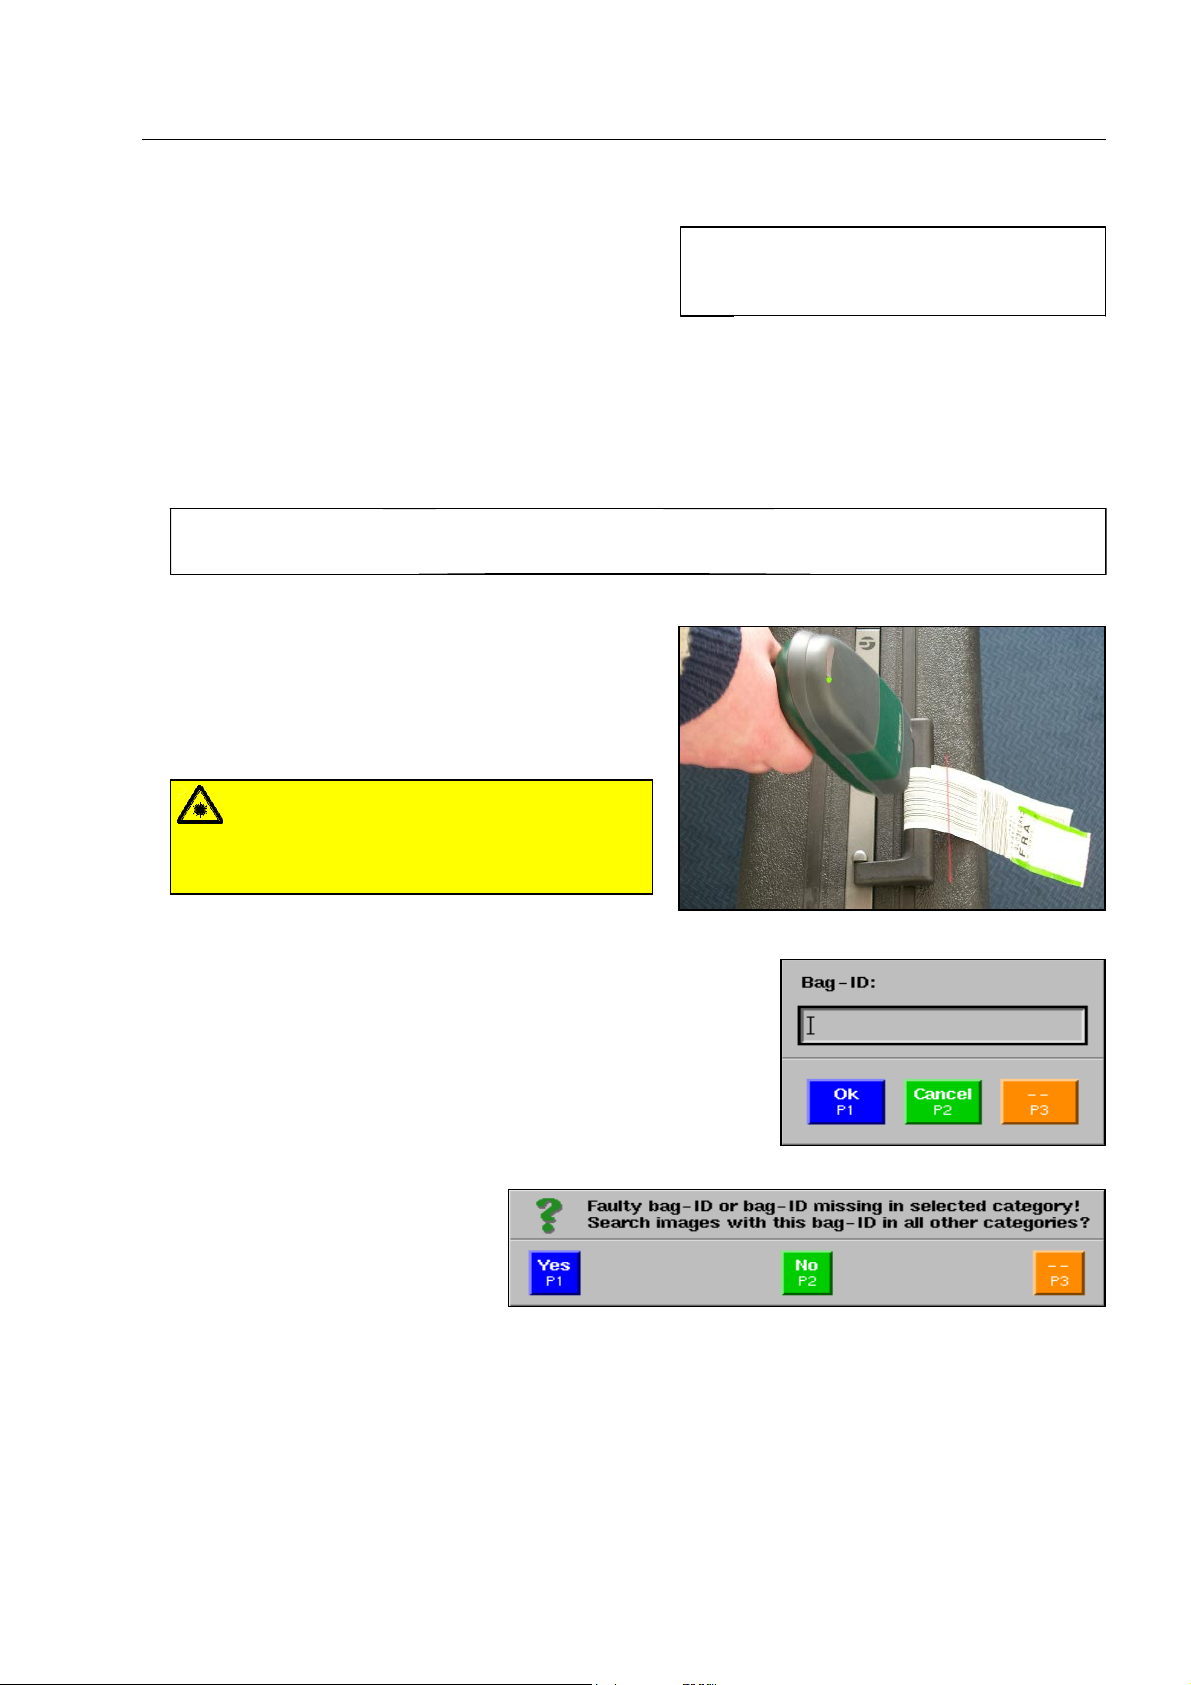
How to work with the IMS image store system*
If you want to recall or print* one or several images in
original size, you first have to mark them with key
[1 abc]. If you want to recall almost all images with the
exception of a few images, only mark those images you
do not intend to recall with key [1 abc] and invert the marks with key [2 def] then.
If the X-ray inspection unit is equipped with a hand-held bar code scanner*, you can select those images
automatically that have been stored with a bag ID code and are filed in the category Clipboard.
First select the category Clipboard (F 1-84).
The bag ID being read in, all the images that have been stored with this bag ID will now be
I
searched for and selected from the category Clipboard and its subcategories*.
Scan the bag ID from the baggage or freight item's tag
by pointing the scanner at the bar code and pressing
the button integrated in the scanner handle until a
short audible signal is sounded and the green LED
lights up.
Warning!
Do not look into the laser beam of the bar
code scanner* and do not point the beam at
other persons! 1110
If you want to select all images, simply
I
press key [2 def] without marking any
images before.
If the bag code cannot be read from the baggage or freight item's
tag (error signal from bag code scanner), you can enter it manu-
ally* instead. Actuate key [9 yz-]. The window illustrated beside
is displayed. The entry of letters and digits via keyboard is carried
out as described for the user ID code (F 1-36).
If the search for an X-ray image is
not successful after having
scanned or entered the bag code,
the message illustrated beside is
displayed.
If you acknowledge the message with
In units with more recent software, a list of all found images together with the information on the category
in which they are located appears on the left side of the menu under Search results.
r, the search will be continued in other categories.
95587412 01/01/09 © Smiths Heimann
1-87
Page 98
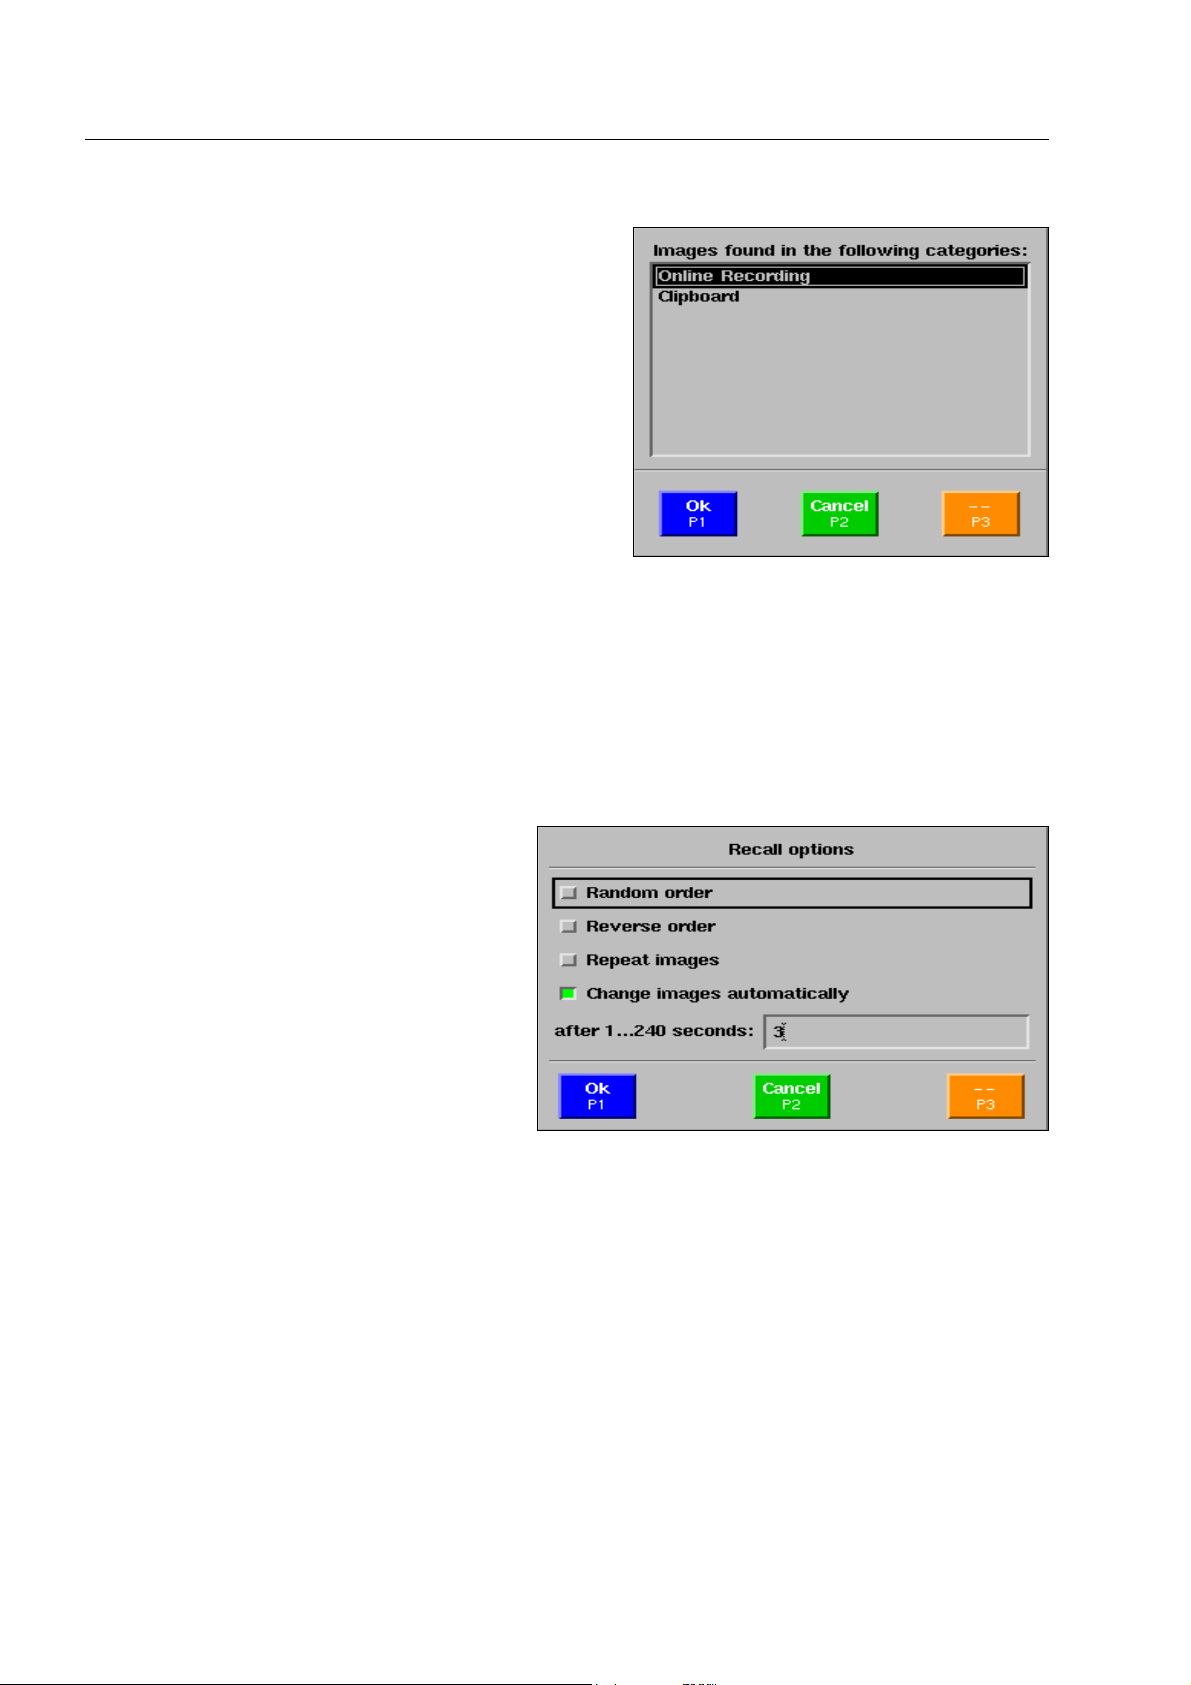
How to work with the IMS image store system*
If images are found in more than one other category,
those categories will be listed in units with older software. You can then choose one out of them.
If, however, images are found in one other category only,
the latter will be automatically selected.
When selecting a category manually or automatically,
all images belonging to the scanned or entered bag ID
will be marked.
Print images*
Marked images can be printed out pressing key [8 vwx] on the network printer.
Set recall options
If you wish to recall images, set the Recall
options first. Press key [3 ghi]. The window
illustrated appears.
Use the navigator to move to the desired option and activate/deactivate it with the navigator, or change the
value. There are the following options:
Random order: the recall of the marked images, for example, for training purposes, is
carried out at random order
Reverse order: the image stored last is displayed first (Random order must be deactivated
(see above)!)
Repeat images: after all marked images were displayed once, the recall starts from the
beginning
Change images automatically:
after 1...240 seconds:
1-88
the image changing is carried out automatically,
alternating interval with automatic image changing
95587412 01/01/09 © Smiths Heimann
Page 99

How to work with the IMS image store system*
Quit the recall options with
r.
Start the recall
Leave the IMS recall menu with r. The X-ray im-
age selected first is moving on the screen now. In field
Mode in the indication field of the screen, IMS is indic-
ated. To have a look at the image and to evaluate, all
image display modes are available (F 1-60ff). You can
also print the images* (F 1-90).
Use
m or n to request the recall of the next
image, if no automatic image change has been defined.
In units with newer software*, in the up-
I
per lines of the screen it is displayed of
which category originates the recalled
image and when it was taken. If you
want to hide this information, press the
priority key assigned with the function
HIDE INFORMATION*.
Interrupt and terminate the recall
Use 1 to interrupt the image changing at any time.
If you want to review preceding images, you can recall them with the REVIEW function once more. Select
the interesting image with
age automatically with restarting the IMS recall with
3 and 2. To switch back to the last image, press 1 or reach the last im-
m or n.
If no image changing is being carried out, you can terminate the recall with
operation of the HI-SCAN X-ray unit. The image remains on the screen until you perform an inspection.
1 and return to the normal
95587412 01/01/09 © Smiths Heimann
1-89
Page 100
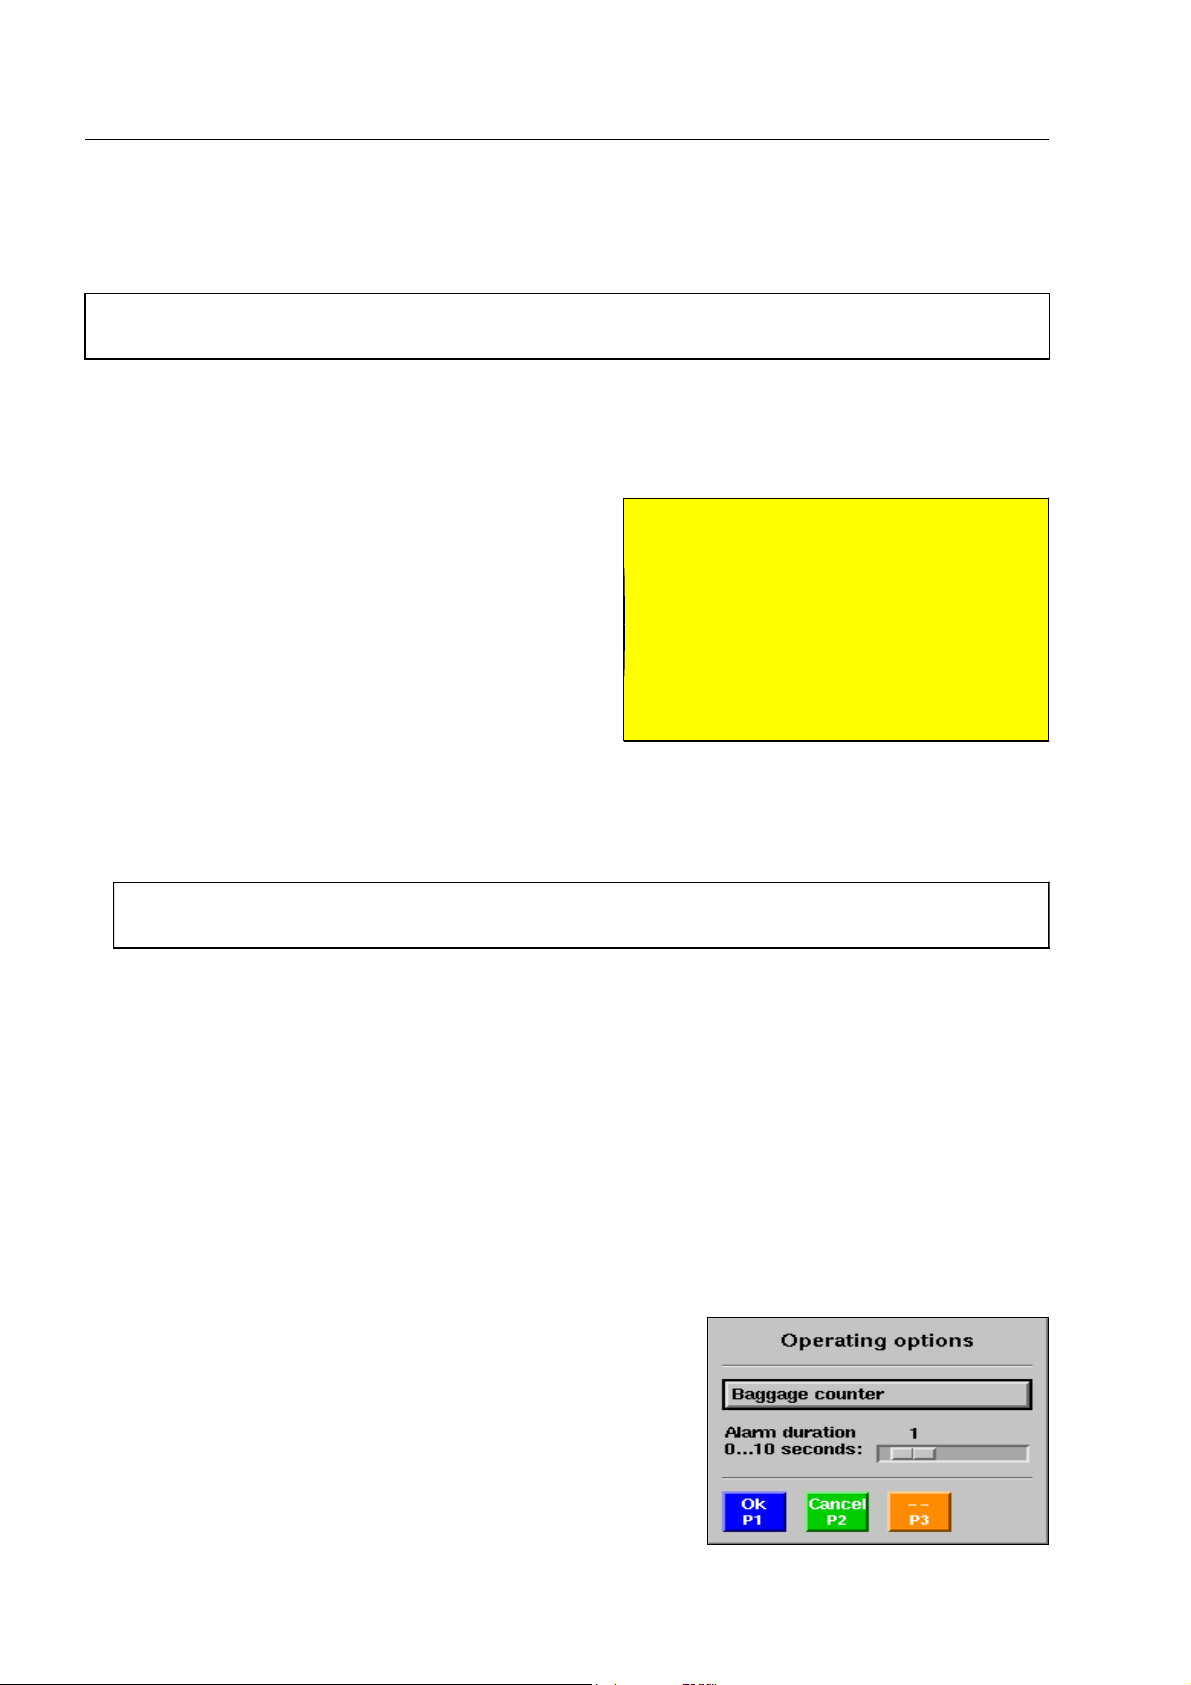
How to work with the other functions
How to work with the other functions
In units with newer software, the access to these functions can be disabled by users with higher au-
I
thorisation.
The print function*
If the X-ray inspection unit is connected to a printer* via
data network*, you can print out the current X-ray image.
Depending on the setting made by a user of higher access
level, either the image of the object scanned last (even if
this image exceeds the screen dimensions) or the current
screen contents including the screen indication field is
printed out.
Start the printout with
ning before starting the printout, they will be stopped.
If a priority key is assigned to the function FRAME OBJECT* (F 1-50) you can provide suspicious
I
objects with a red/yellow frame before you print it.
R or with a priority key assigned to the function PRINT . If the conveyors were run-
Attention!
S
Do not print the image until it has been
displayed completely on the monitor.
This means that the empty section you
are used to seeing behind the bag image
has been created and the scroll has
been stopped for at least a short moment! Otherwise, the preceding image
might unintentionally be printed! 1130
The baggage counters
The HI-SCAN X-ray unit is equipped with a total baggage counter which cannot be reset and a temporary
counter which can be reset for scanned baggage or freight items.
Use the navigator to move to item Operating options in the Main
menu and activate the item. The menu illustrated beside is dis-
played.
1-90
95587412 01/01/09 © Smiths Heimann
 Loading...