

Smeg SA1010X-5 User Manual

Contents
1. Preliminary instructions _____________________________________ 5
ISPOSING OF PACKAGING ___________________________________ 6
1.1 D
1.2 D
ISPOSING OF OLD APPLIANCES _______________________________ 6
1.3 I
NSTALLING THE OVEN ______________________________________ 6
2. Description of controls______________________________________ 7
RONT CONTROL PANEL _____________________________________ 7
2.1 F
2.2 E
LECTRONIC PROGRAMMER __________________________________ 9
3. Using the oven ___________________________________________ 12
3.1 W
3.2 O
3.3 COOLING VENTILATION _____________________________________ 12
4. Available accessories______________________________________ 13
5. Cooking hints ____________________________________________ 15
5.1 T
5.2 HOT-AIR COOKING ________________________________________ 16
5.3 G
5.4 H
5.5 DELICATE COOKING _______________________________________ 17
5.6 DEFROSTING ____________________________________________ 17
5.7 S
ARNINGS AND GENERAL ADVICE _____________________________ 12
VEN LIGHT ____________________________________________ 12
RADITIONAL COOKING_____________________________________ 15
RILL COOKING __________________________________________ 16
OT-AIR GRILLING ________________________________________ 17
PIT ROASTING __________________________________________ 18
6. Recommended cooking table _______________________________ 19
7. Maintenance and cleaning __________________________________ 21
NAMELLED PARTS _______________________________________ 21
7.1 E
OOR GLASS ____________________________________________ 21
7.2 D
7.3 OUTER OVEN STRUCTURE __________________________________ 21
7.4 P
YROLYSIS: AUTOMATIC OVEN CLEANING________________________ 21
8. Extraordinary maintenance _________________________________ 25
EPLACING THE LIGHT BULB _________________________________ 25
8.1 R
8.2 D
ISMANTLING THE DOOR ___________________________________ 25
3

Introduction
Thank you for having preferred our product. From now on we
feel sure you will enjoy creatively using your new oven.
We recommend you carefully read the instructions in this
manual. A lot of room has been given to the best and most
correct way of using the oven. These instructions will also make
it easier for you to become acquainted with each single
component or accessory.
Useful hints are provided on how to use pans and cooking
utensils, on correct guide positions and control settings.
Be sure to follow the cleaning instructions carefully. That way
your oven will give you many long years of reliable service.
The single paragraphs illustrate oven operation, step by step.
The text is easy to understand and completed with pictures and
some of the most commonly used pictograms.
By reading this manual carefully, you will find all the answers to
your oven operation queries.
4
Preliminary instructions
1. Preliminary instructions
WE ADVISE YOU READ THIS INSTRUCTION MANUAL CAREFULLY BEFORE
USING THE OVEN.
THIS APPLIANCE HAS BEEN DESIGNED FOR THE FOLLOWING PURPOSES:
ANY OTHER USE IS TO BE CONSIDERED IMPROPER.
THE MANUFACTURER DECLINES ALL RESPONSIBILITY FOR IMPROPER USE.
NEVER TRY TO REPAIR THE APPLIANCE BY YOURSELF!
IN CASE OF ONGOING FAULTS, TURN THE MAIN SWITCH OFF, DISCONNECT
THE POWER SUPPLY AND CONTACT YOUR NEAREST DEALER.
ALWAYS INSIST ON ORIGINAL SPARE PARTS.
THE MANUFACTURER CANNOT BE HELD RESPONSIBLE FOR ANY INJURIES
TO PERSONS OR DAMAGE TO THINGS CAUSED BY FAILURE TO FOLLOW THE
ABOVE INSTRUCTIONS OR BY TAMPERING WITH ANY APPLIANCE
COMPONENTS.
THE IDENTIFICATION PLATE, WITH TECHNICAL DETAILS, THE SERIAL NUMBER
AND
DO NOT REMOVE THE PLATE.
NEVER LEAVE PACKAGING AROUND THE HOME.
MARK ARE LOCATED ON THE OVEN DOOR FRAME.
- COOKING AND HEATING FOOD -
THIS MANUAL IS AN INTEGRAL PART OF THE APPLIANCE AND SHOULD
THEREFORE BE KEPT INTACT IN A SAFE PLACE FOR THE ENTIRE LIFE CYCLE
OF THE OVEN.
INSTALLATION MUST BE DONE BY QUALIFIED PERSONNEL IN ACCORDANCE
WITH CURRENT REGULATIONS.
THIS APPLIANCE CONFORMS TO ALL CURRENT LEGAL PROVISIONS
CONCERNING RADIO DISTURBANCES.
EARTHING THE APPLIANCE IN COMPLIANCE WITH WIRING SYSTEM SAFETY
REGULATIONS IS MANDATORY.
THE PLUG TO BE CONNECTED TO THE POWER CABLE AND RELEVANT SOCKET
MUST BE OF THE SAME TYPE AND CONFORM WITH REGULATIONS IN FORCE.
THE SOCKET MUST BE ACCESSIBLE AFTER THE APPLIANCE HAS BEEN BUILT IN.
NEVER DISCONNECT THE PLUG BY JERKING THE CABLE.
DO NOT OBSTRUCT OPENINGS OR AIR AND HEATING VENTS.
AFTER USING THE OVEN, ALWAYS MAKE SURE THE CONTROL KNOBS ARE AT
"ZERO" POSITION (OFF).
WHEN THROWING AWAY AN OLD APPLIANCE, ALWAYS MAKE SURE ANY
PARTS WHICH COULD INJURE PERSONS OR DAMAGE THINGS ARE
RENDERED HARMLESS.
THIS APPLIANCE IS DESIGNED FOR COOKING FOOD AND IT SHALL NOT BE
USED AS A SPACE HEATER.
DO NOT SPRAY AEROSOLS IN THE VICINITY OF THIS APPLIANCE WHILE IT IS
IN OPERATION.
5

Preliminary instructions
DURING USE THE APPLIANCE BECOMES VERY HOT. TAKE CARE NOT TO
TOUCH THE HEATING ELEMENTS INSIDE THE OVEN. TO AVOID BURNS AND
SCALDS CHILDREN SHOULD BE KEPT AWAY
NEVER ALLOW THE OVEN TO BE USED BY CHILDREN OR INFIRM PERSONS
WITHOUT ADULT SUPERVISION.
DURING THE AUTOMATIC CLEANING CYCLE (PYROLYSIS) THE OUTER DOOR
WINDOW COULD BECOME HOTTER THAN NORMAL. KEEP CHILDREN AT A
DISTANCE.
NEVER PUT INFLAMMABLE OBJECTS IN THE OVEN. IF THIS WERE
ACCIDENTALLY LIT IT COULD CAUSE A FIRE.
1.1 DISPOSING OF PACKAGING
Always dispose of packaging in a proper manner. The best thing is to
get rid of it through a pre-sorted waste collection centre.
1.2 DISPOSING OF OLD APPLIANCES
Before throwing away an old appliance, make sure this is rendered
harmless and dispose of it through a pre-sorted waste collection centre.
1.3 INSTALLING THE OVEN
If a fixed connection is being used fit cable with an omnipolar circuit
breaker with a contact opening gap equal to or greater than 3 mm in an
easily accessible position near to the oven.
If a plug and socket connection is being used make sure that the plug
and socket are compatible. Avoid use of adapters and shunts as these
could cause overheating and risk of burns.
The power cable must be changed by the manufacturer or by an
authorised service centre to prevent any risks. The new cable must be
FG40R3G type (3 x 1.5 mm2).
The oven is designed for installation into any piece of furniture as long as it
is heat-resistant. Proceed according to the dimensions shown in Figures 1,
2 and 3. For installing under a work top, follow the dimensions given in
Figure 3. For installing under a work top beneath a hob with controls
connected to the oven, ensure a minimum clearance from any side walls of
at least 110 mm as shown in Figure 1.
For installing in a column, follow the dimensions given in Figure 2 allowing
for a clearance of 80 to 90 mm at the top and sides of the column. Tighten
the four screws (ref.A) inside the frame to secure (Fig. 1).
For installing beneath a separate hob, allow for a rear and bottom
clearance as shown in Figure 1 (ref. B). See relevant instructions for fitting
and securing the hob.
6

Using the oven
2. Description of controls
2.1 FRONT CONTROL PANEL
All the oven controls are grouped together on the front panel.
THERMOSTAT INDICATOR LIGHT
When this light comes on, the oven is heating up. When this light goes out,
the preset heating temperature has been reached. When the light flashes,
the temperature inside the oven is steady at the set temperature.
NOTE :
THIS LIGHT ALSO COMES ON DURING THE AUTOMATIC CLEANING CYCLE
(PYROLYSIS) AND GOES OUT WHEN THE SET TIME HAS PASSED.
DOOR LOCK INDICATOR LIGHT
When this light comes on during automatic cleaning (pyrolysis), the door
lock device is operative.
THERMOSTAT KNOB
Cooking temperature is selected by turning the knob
clockwise to the desired setting, between 50 and
280 °C. The set temperature will appear on the display
for a few seconds.
7
Using the oven
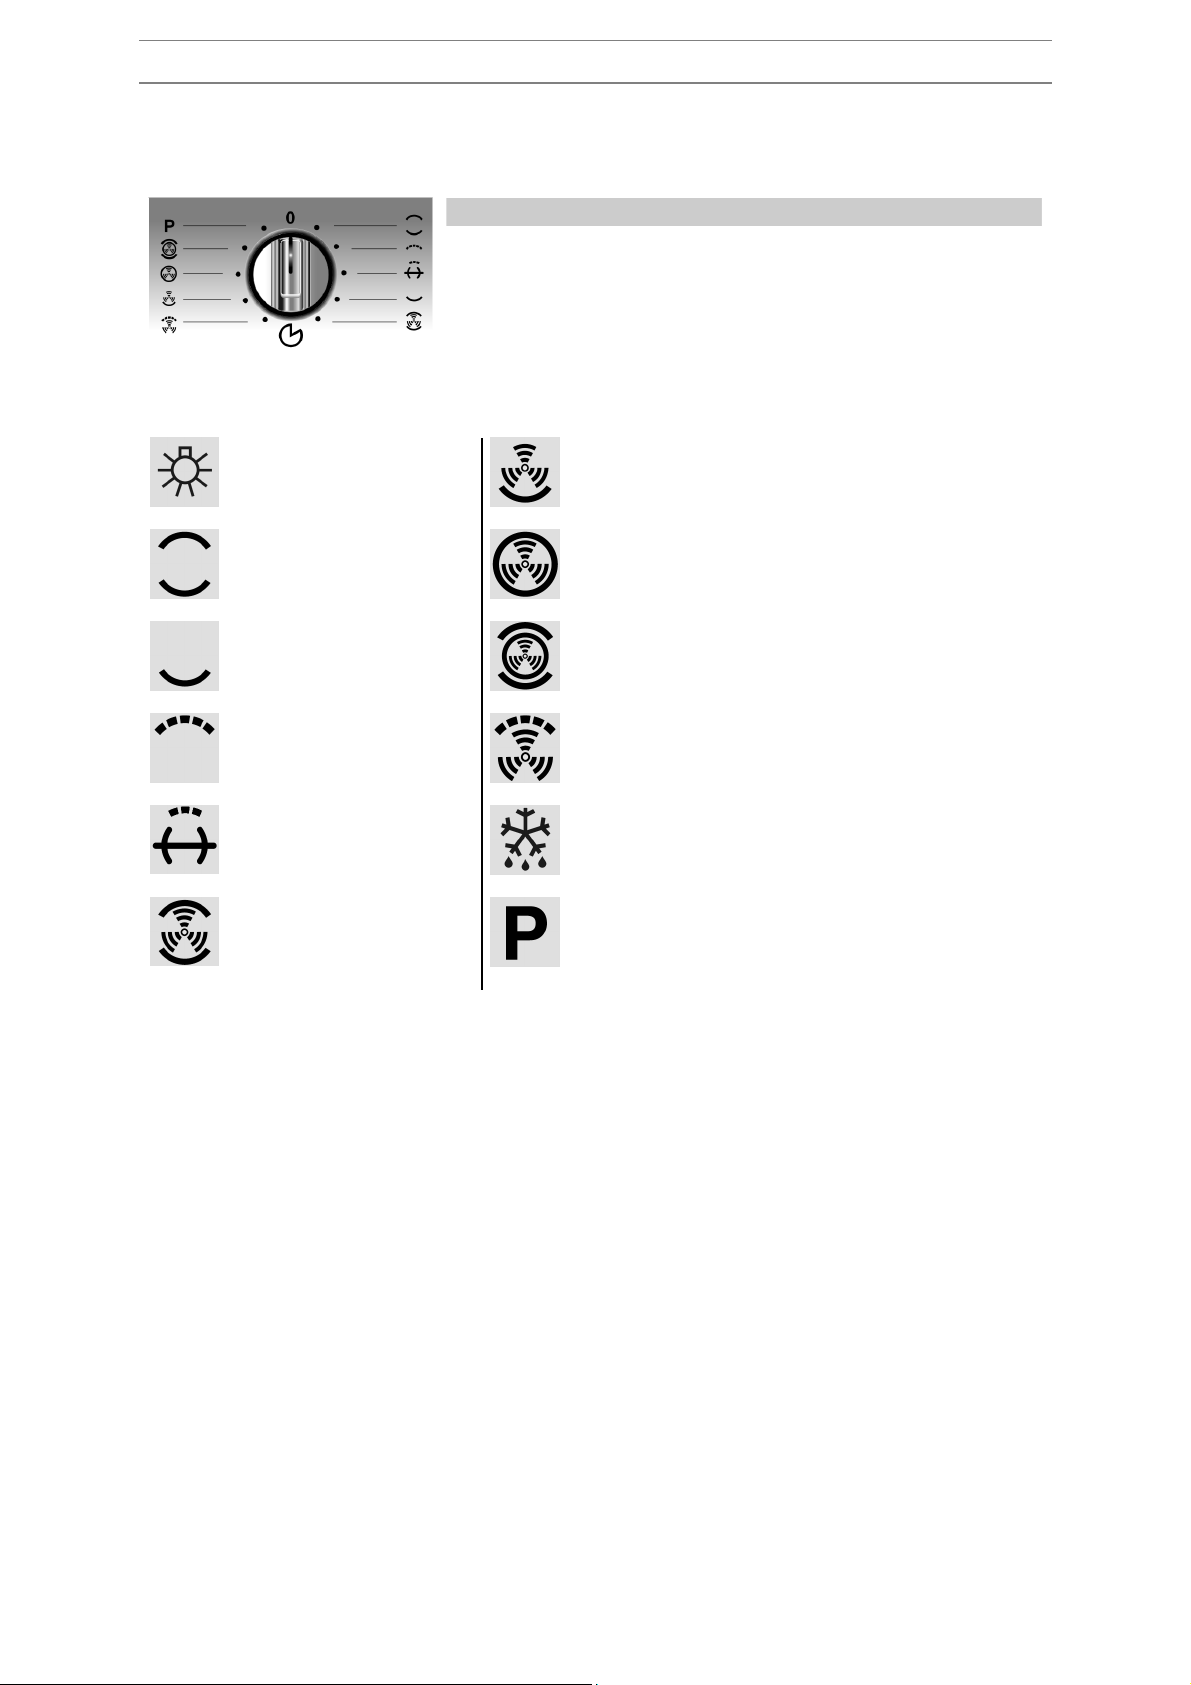
FUNCTION SWITCH
Turn the switch to select one of the following functions:
OVEN LIGHT LOWER HEATING ELEMENT +
VENTILATION
UPPER AND LOWER
HEATING ELEMENT
LOWER HEATING
ELEMENT
GRILL ELEMENT GRILL ELEMENT +
GRILL + SPIT ELEMENT DEFROSTING
VENTILATED HEATING
ELEMENT + VENTILATION
UPPER AND LOWER HEATING
ELEMENT + VENTILATED
HEATING ELEMENT
VENTILATION
UPPER AND LOWER
HEATING ELEMENT +
VENTILATION
AUTOMATIC CLEANING CYCLE
(PYROLYSIS)
8
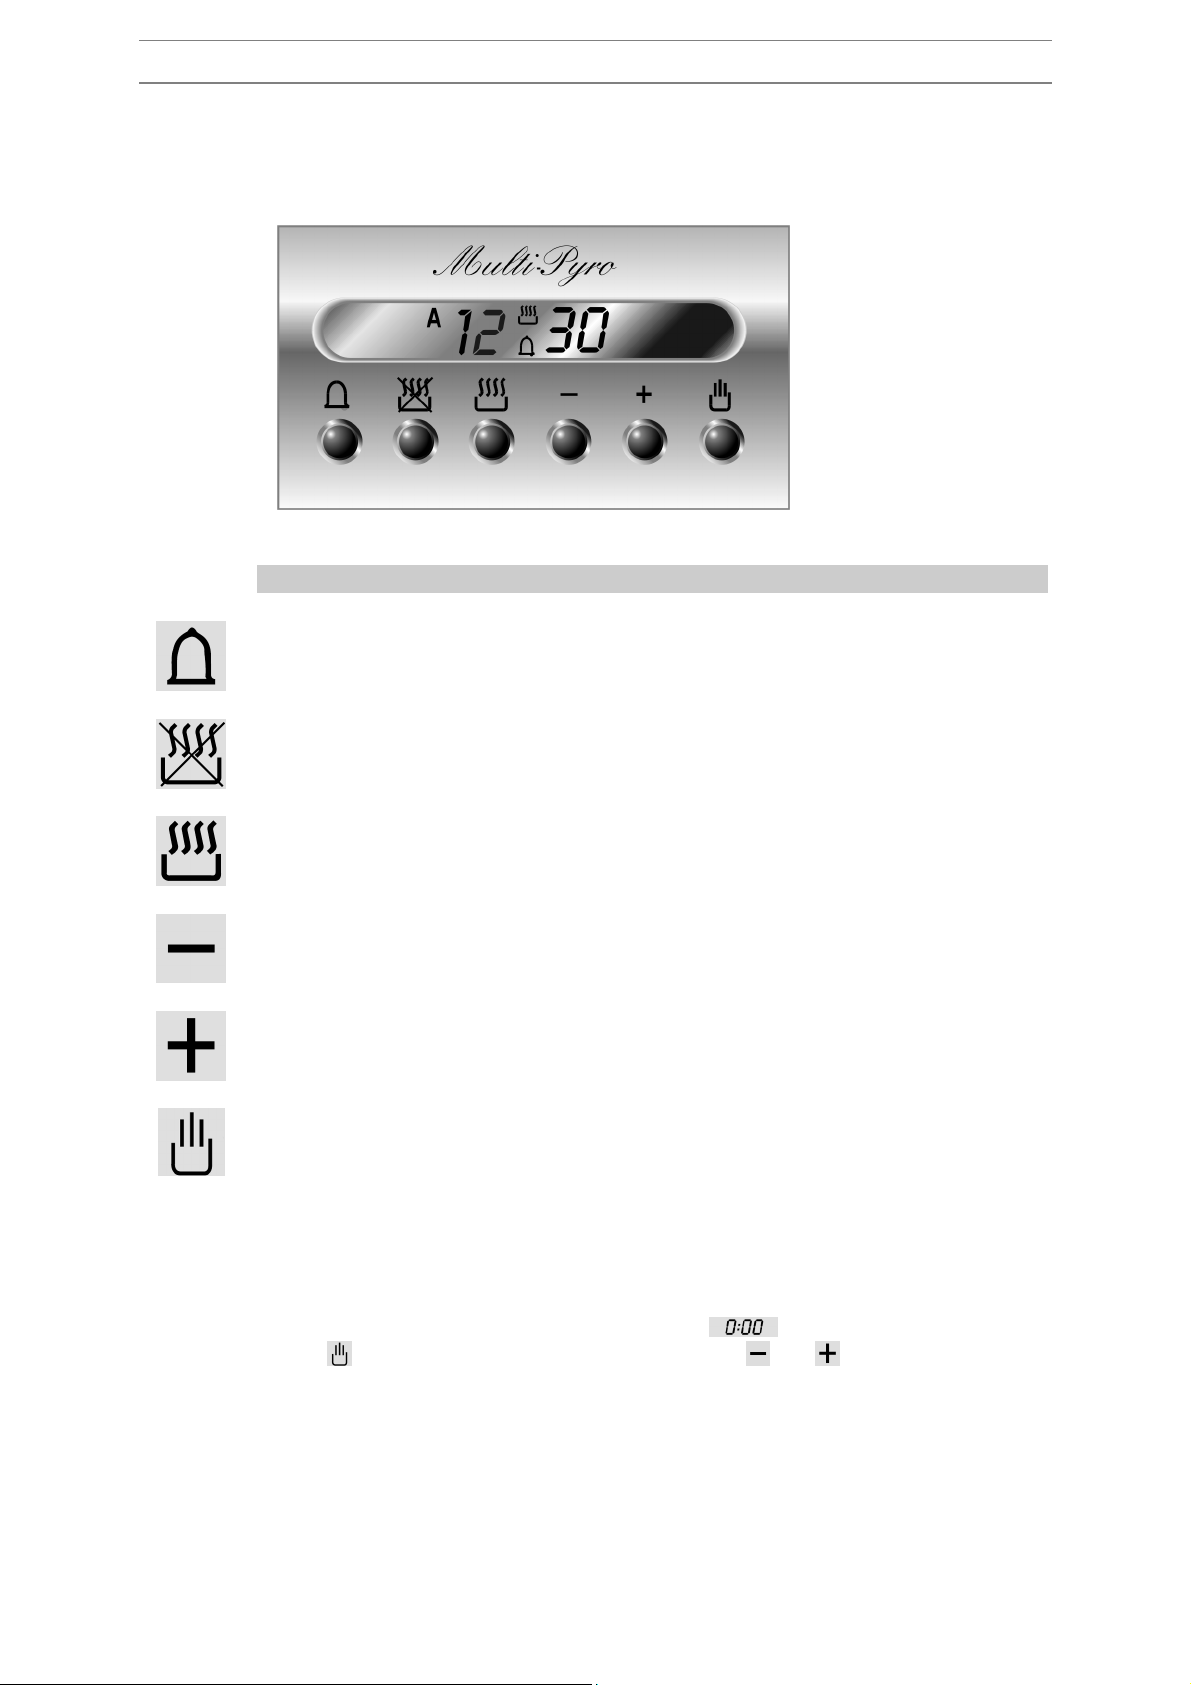
2.2 E
LIST OF FUNCTIONS
MINUTE-COUNTER KEY
END-OF-COOKING KEY
COOKING TIME KEY
TIME BACK KEY
TIME FORWARD KEY
MANUAL OPERATION KEY
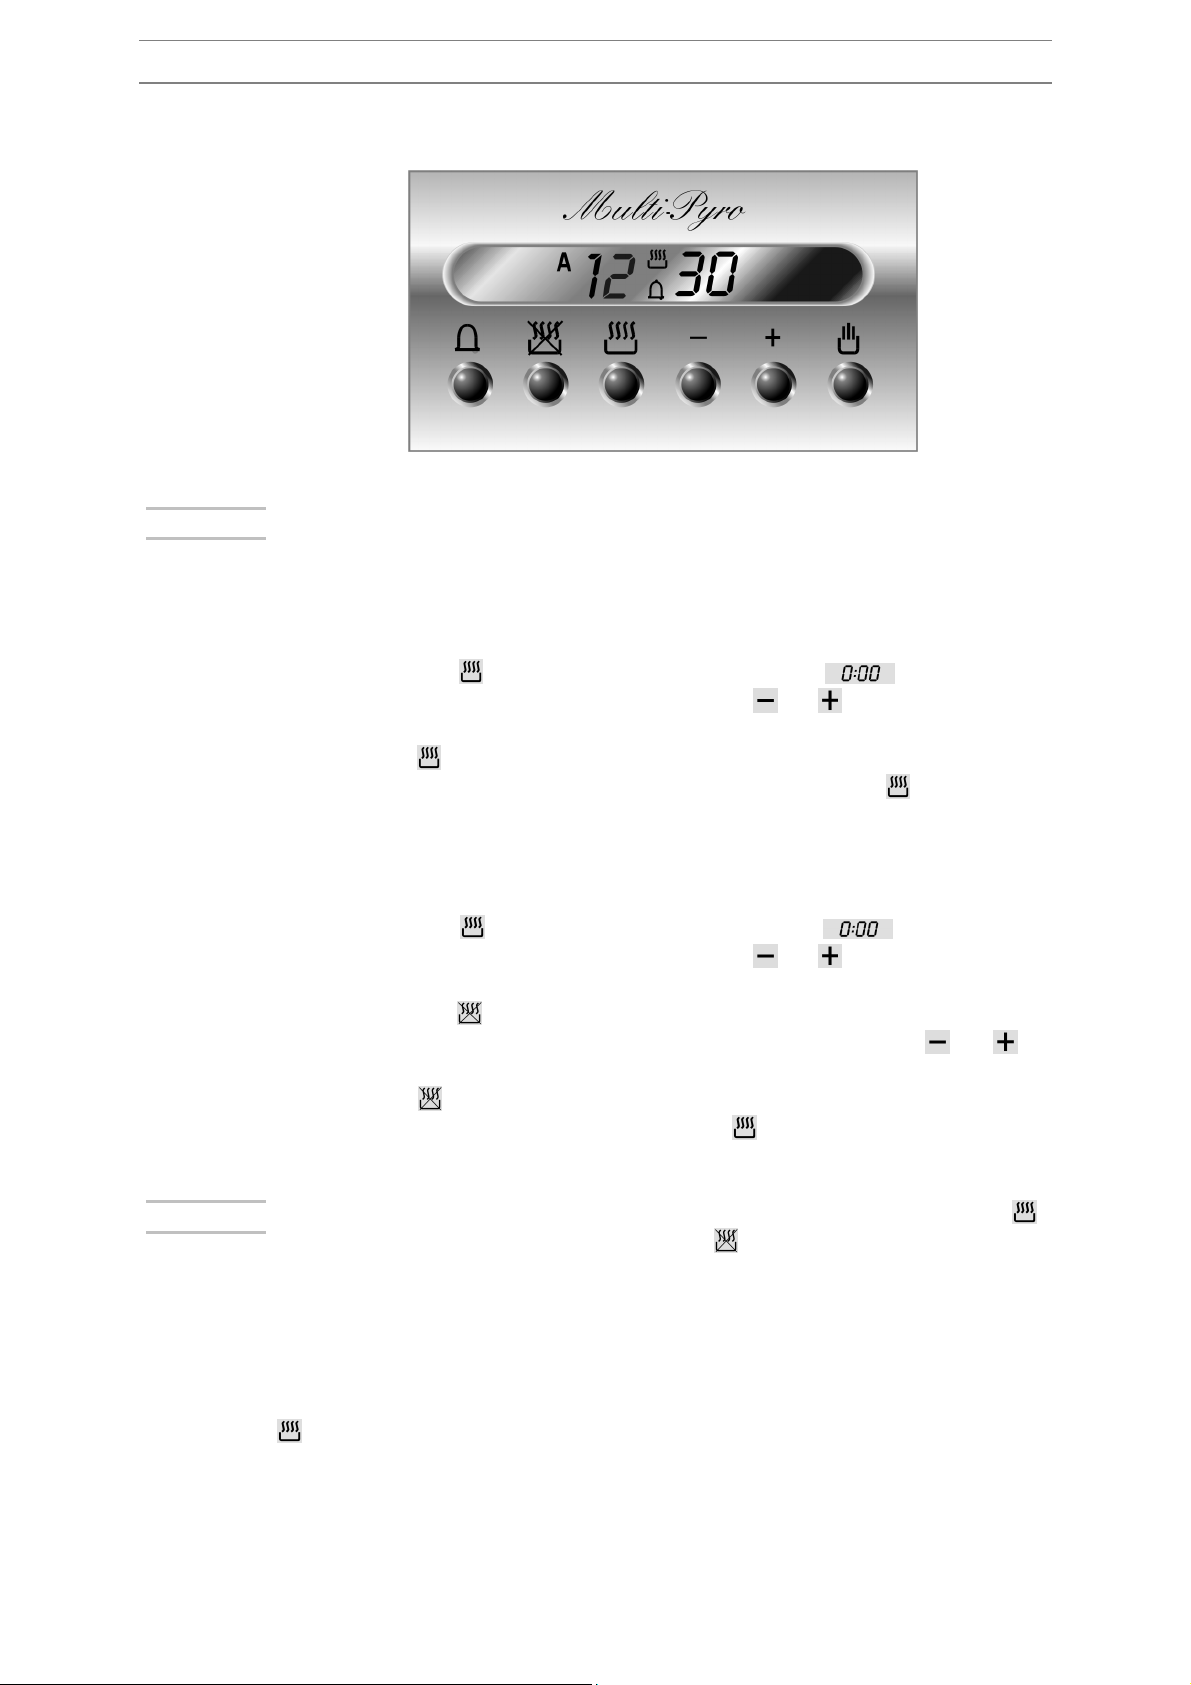
2.2.1 Clock adjustment
When using the oven for the first time, or after a power failure, the
display flashes regularly and indicates
key
changes the time by 1 minute either up or down.
Press one of the two keys until the right time appears.
Using the oven
LECTRONIC PROGRAMMER
. To stop flashing, press
on the display. By pressing keys or each single press
9
Using the oven
NOTE :
NOTE :
BEFORE SETTING THE PROGRAMMER ACTIVATE THE DESIRED FUNCTION
AND TEMPERATURE.
2.2.2 Semiautomatic cooking
Use this setting for automatic oven switch-off at the end of cooking time.
By pressing key , the display lights up, showing ; keep the key
pressed and at the same time, press keys
or to set the cooking
time.
Release key
will now show the right time together with symbols A and
to start the programmed cooking time count. The display
.
2.2.3 Automatic cooking
Use this setting to automatically start and stop the oven.
By pressing key
pressed and at the same time, press keys
, the display lights up showing ; keep the key
or to set the cooking
time.
By pressing key
keep the key pressed and at the same time, press keys
the sum of the right time + cooking time will appear;
or to
regulate the end of cooking time.
Release key
the right time together with symbols A and
to start the programmed count and the display will show
.
AFTER SETTING, TO SEE HOW MUCH COOKING TIME IS LEFT, PRESS KEY ;
TO SEE END OF COOKING TIME, PRESS KEY
.
2.2.4 End of cooking
When cooking is over, the oven will automatically switch off and, at the
same time, an intermittent alarm will sound. After switching off the alarm,
the display will once again show the right time together with the symbol
, indicating that the oven has returned to manual operation mode.
10
 Loading...