

Page 1
Contents
ENENEN
1 Instructions 8
1.1 Introduction 8
1.2 This user’s manual 8
1.3 Intended use 8
1.4 Manufacturer’s liability 9
1.5 Identification plate 9
1.6 Disposal 9
2 Description 10
2.1 Product Description 10
3 Use 11
3.1 Before first use 11
3.2 First use 12
3.3 How to access the settings menu 12
3.4 How to make coffee 14
4 Cleaning and maintenance 19
4.1 Warnings 19
4.2 Cleaning the drip coffee maker 19
4.3 Cleaning the parts of the drip coffee maker 19
4.4 Descaling 20
4.5 What to do if... 22
Important Safeguards
WARNING: If the instructions contained in this manual are not followed
precisely, fire or explosion may result causing property damage, personal
injury or death.
READ AND SAVE THESE INSTRUCTIONS - Your safety and the safety of
others are very important.
We have provided many important safety messages throughout this manual and
on the appliance.
Read all the instructions before using the appliance and always obey all safety
m e s s a g e s .
WARNING
• To reduce the risk of fire or electric shock, do not remove the
cover (or back).
• No user-serviceable parts inside!
• Repair should be done by authorized service personnel only.
3
Page 2
Important Safeguards
RECOGNIZE SAFETY INFORMATION
This is a safety alert symbol. This symbol alerts you to potential hazards that can
result in severe personal injury or death.
UNDERSTAND SIGNAL WORDS
A signal word - DANGER, WARNING or CAUTION - is used with the safety alert
symbol. DANGER denotes the most serious hazards. It means you could be killed
or seriously injured if you do not immediately
WARNING means you could be killed or seriously injured if the instructions are not
followed. CAUTION indicates a potentially hazardous situation, which, if not
avoided, could result in minor to moderate injury.
• This appliance is intended for use in the home only.
• Use this appliance only for its intended purpose. The
manufacturer cannot be held liable for damage caused by
WARNING
improper use of this appliance.
• This appliance complies with current safety regulations.
Improper use of this appliance can result in personal injury
and material damage.
• Read all the instructions before installing or using the
appliance for the first time.
• Keep these operating instructions in a safe place and pass
them on to any future user.
follow the instructions.
The safety messages will inform you of potential hazards, on how to avoid the risk of injury
and what can occur if the instructions are not followed.
IMPORTANT: Observe all codes and ordinances in force.
WARNING: For your safety, the instructions contained in this manual must be
followed to minimize the risk of fire or explosion and to prevent property damage,
personal injury or death.
Do not store or use gasoline or other flammable vapors, liquids or materials near this or any
other appliance.
NOTE: This appliance is NOT designed for installation in manufactured (mobile)
homes or in recreational vehicles (RVs).
DO NOT install this appliance outdoors.
4
Page 3

Important Safeguards
ENENEN
WARNING
When using electrical appliances, basic safety precautions
should always be followed to reduce the risk of fire, electric
shock, and/or injury to persons including the following:
Follow all safety precautions to ensure safe
use of the appliance.
• Before using the appliance, read this
user manual carefully.
• Do not use the appliance outdoors.
• This appliance is for household use only.
• Do not use the appliance for other than
its intended use.
• Do not allow children to use the
appliance.
• Children should not play with the
appliance. Keep the appliance out of the
reach of children.
• Close supervision is necessary when any
appliance is used by or near children.
• Turn off the appliance immediately after
use.
• Do not leave the appliance unattended
while it is running.
• Disconnect the appliance from the wall
outlet before assembly, disassembly,
cleaning and after each use.
• To disconnect, turn any control to the off
position, then remove plug from wall
outlet.
• Unplug from outlet when either the
appliance or display clock is not in use,
and before cleaning. Allow to cool
before putting on or taking off parts, and
before cleaning the appliance.
• Do not use appliance for other than
intended use.
• To protect against fire, electrical shock
and personal injury, do not immerse the
appliance, the power cord or plug in
water or any other liquid.
• Do not touch the appliance or the plug
with wet hands.
• Never try to extinguish a flame/fire with
water: turn off the appliance, unplug it
from the outlet and cover the flame with a
lid or a fire blanket.
• Do not use the appliance if the power
cord or plug is damaged or if the
appliance has been dropped or
damaged in any way.
• Do not let cord hang over edge of table
or counter, or touch hot surfaces.
• Do not operate any appliance with a
damaged cord or plug or after the
appliance malfunctions, or has been
damaged in any manner. Return
appliance to an authorized service
facility for examination, repair or
adjustment.
• Make sure the power cord does not
come in contact with sharp edges.
• Do not pull on the cord to remove the
plug from the socket.
• Do not place the appliance on or near
switched-on gas or electric burners,
inside an oven, or near heat sources.
5
Page 4

Important Safeguards
• Do not touch hot surfaces. Use handles
and knobs.
• Do not place the appliance near faucets
or sinks.
• Never attempt to repair the appliance
yourself or without the help of a qualified
technician. Failing to do this will void the
warranty.
• In case of malfunction, have the
appliance repaired by a qualified
technician.
• Do not make any changes to the
appliance.
For this appliance
• The drip coffee maker shall not be
placed in a cabinet when in use.
• Leave a space of 10 cm around the drip
coffee maker.
• Do not use the drip coffee maker without
water in the tank.
• Use cold and possibly filtered water. Do
not use other liquids.
• Make sure the lid is firmly closed.
• Risk of scalding! Do not open the lid
during the coffee preparation cycle.
• Risk of scalding! Do not touch hot
surfaces with your hands: use the handles
and buttons.
• Risk of scalding! The heating element
surface is subject to residual heat after
use. Do not touch.
• Do not use the drip coffee maker in
combination with parts or accessories
from other manufacturers.
• Use only original spare parts from the
manufacturer. The use of spare parts not
recommended by the manufacturer may
cause fire, electric shock or injury to
persons.
• Place the drip coffee maker on a flat, dry
surface.
• Avoid wetting or spraying liquid on the
drip coffee maker. In case of contact
with liquid, immediately unplug the cord
from the electrical outlet and dry
thoroughly: Risk of electric shock!
• Do not use abrasive cleaners or sharp
objects to clean the drip coffee maker.
• The use of an accessory not evaluated
for use with this appliance may cause
injuries.
• The carafe is designed for use with this
appliance. It must never be used on a
range top.
• Do not use the carafe if damaged or if
the handle has come loose.
• Do not use a cracked carafe or a carafe
having a loose or weakened handle.
• Do not clean carafe with cleansers, steel
wool pads, or other abrasive material.
• Make sure the lid is firmly inserted on the
carafe.
• Do not place the carafe on a burner or in
a microwave oven.
• Do not place the hot carafe on a cold or
wet surface.
• Fill the water tank before connecting the
plug to an electrical outlet.
• Do not install the appliance in
environments with a temperature less
than or equal to 0°C.
SAVE THESE INSTRUCTIONS
6
Page 5

Important Safeguards
ENENEN
Electrical Cord:
a) A short power-supply cord (or
detachable power-supply cord) is provided
to reduce risks resulting from becoming
entangled in or tripping over a longer cord.
b) Longer detachable power-supply
cords or extension cords are available and
may be used if care is exercised in their use.
c) If a long detachable power-supply
cord or extension cord is used:
1. The marked electrical rating of the
detachable power-supply cord or
extension cord should be at least as
great as the electrical rating of the
appliance;
2. If the appliance is of the grounded type,
the extension cord should be a
grounding-type 3-wire cord; and
3. The longer cord should be arranged so
that it will not drape over the counter top
or table top where it can be pulled on by
children or tripped over.
• Plug the cord into a grounded socket of
the correct current.
• Do not tamper with the grounding.
• Do not use an adapter.
• Do not use an extension cord.
• Failure to observe these warnings may
result in death, fire or electric shock.
SAVE THESE INSTRUCTIONS
7
Page 6
Important Safeguards
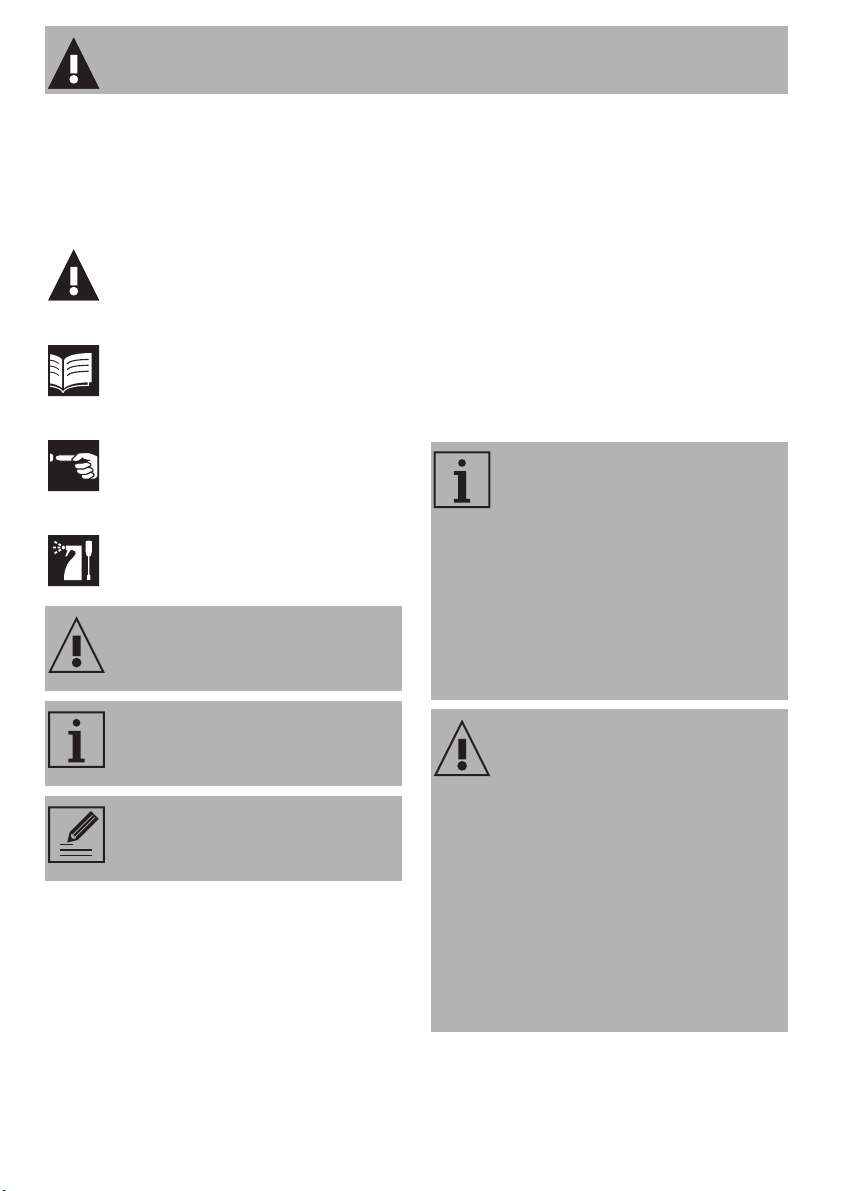
1 Instructions
1.1 Introduction
Key information for the user:
Warni ngs
General information about the user
manual, safety and final disposal.
Description
Description of the appliance.
Use
Information on using the appliance.
Cleaning and maintenance
Information for proper cleaning and
maintenance.
Safety warning
1.2 This user’s manual
This user’s manual is an integral part of the
appliance and must be kept intact and
available to the user throughout its life cycle.
1.3 Intended use
• The appliance is for indoor use only.
• The appliance is intended solely for
household-type use.
• The appliance may be used to prepare
drip coffee. Any other use is
inappropriate. Do not use the appliance
for purposes other than its intended use.
The California Safe Drinking
Water and Toxic Enforcement Act
requires the Governor of
California to publish a list of
substances known to the State of
California to cause cancer, birth
defects or other reproductive harm,
and requires businesses to warn
customers of potential exposure to
such substances.
Information
• This product contains a chemical known
Suggestion
• This appliance can cause low-level
8
Warning
by the State of California to cause
cancer, birth defects or other
reproductive harm.
exposure to some of the substances
listed, including benzene,
formaldehyde, carbon monoxide,
toluene, and soot.
Page 7
Important Safeguards
ENENEN
1.4 Manufacturer’s liability
The manufacturer accepts no liability for
damage to persons and property caused
by:
• using the appliance in ways other than
those provided;
• not reading the user's manual;
• tampering with any part of the
appliance;
• using non-original parts;
• ignoring safety warnings.
1.5 Identification plate
The identification plate lists the technical
data, serial number and brand name. The
identification plate must never be removed.
1.6 Disposal
Power voltage
Risk of electric shock
• Unplug the appliance.
• Unplug the cord from the wall outlet.
• Old electrical equipment must not be
disposed of with household waste! In
accordance with the law in force,
electrical appliances at the end of their
life should be taken to separate
collection facilities for electrical and
electronic waste. This is so that valuable
materials from old appliances can be
recycled and the environment can be
protected. For more information, please
contact your local authorities or recycling
center employees.
Note that non-polluting and recyclable
materials are used for packaging the
appliance.
• Dispose of the packaging materials at
appropriate differentiated waste
collection centers.
Plastic packaging
Risk of suffocation
• Do not leave the packaging or any part
of it unattended.
• Do not allow children to play with the
plastic packaging bags.
9
Page 8

2 Description
2.1 Product Description
Description
Drip coffee maker
1 Lid
2 Water tank (1.4 liters)
3 Filter holder with anti-drip valve system
4 Permanent filter
5 ON/OFF button
6 AROMA setting button
7 Time/settings display
8 4 CUPS function button
9 AUTO START button
10
10 Grouphead
11 Carafe lid
12 Carafe (10 cups)
13 Carafe handle
14 Time/Timer setting lever
15 Base and non-slip feet
16 Measuring scoop
17 Tank water level indicator (maximum 1.4
liters)
18 Keep Warm plate
Page 9

Use
ENENEN
4
3 Use
3.1 Before first use
1. Remove all labels and stickers from the
drip coffee maker.
2. Thoroughly wash and dry the drip coffee
maker’s parts (see “4 Cleaning and
maintenance”).
3. Lift the lid (1) by pulling up on the tab (2).
To make it easier to fill the water
tank, check that the lid is
completely open.
4. Fill the tank (3) with cold and clean
water, taking care not to exceed the
maximum level shown on the level
indicator (4) (1.4 liters).
Risk of damage
• Do not use the drip coffee maker without
water in the tank.
• Use only cold and clean water inside
the tank.
• Do not use any liquids other than water.
The parts that may come into
contact with food are made of
materials that comply with all legal
provisions in force.
11
Page 10

Use
3.2 First use
1. Insert the plug into an electrical socket.
2. Press the ON /OFF button. The
display shows the flashing symbols.
3. Set the time using the lever (1).
4. Set the hour value by moving the lever
up (+) to increase the value or down (-)
to decrease the value.
5. Confirm the value by placing the lever in
the central position and pressing it (OK).
7. After confirming the minute setting, the
appliance activates the CLOCK mode.
The first time the appliance is
powered on, by default the clock
will be in the 12-hour format with
AM/PM indicated.
To change the time format, please
refer to the section “ Clock format
settings menu”.
3.3 How to access the settings menu
Some settings can be customized:
• SE01: Sets the clock format
• SE02: Sets how hard/soft the water is
• SE03: Activates/deactivates audible
signals
Open the settings menu by pressing and
holding buttons and at the same
time for 3 seconds.
To exit the settings menu, press any button.
6. Set the minute value following the same
procedure.
12
Page 11

Use
ENENEN
Clock format settings menu
The clock format can be set after turning the
appliance on for the first time:
1. Open the settings menu and select SE01.
2. Move the lever to select the desired
format (12-hour or 24-hour clock).
3. Move the lever to the central position
and press (OK) to confirm.
The format will blink for 2 seconds and
the setting will then be saved.
The clock format is selected only
once and is then saved from that
moment on.
How to change the time:
1. Make sure that the desired clock format
(12h or 24h) has been set as described
above.
2. Keep the lever pressed in the central
position for 3 seconds: the display will
start to flash.
3. Change the hour and minute as
indicated in section “3.2 First use”.
Water settings menu (hard/soft water)
The type of water being used can be set by
selecting one of the three available levels:
HARD, MEDIUM and SOFT.
1. Open the settings menu and select SE02:
By default, the screen will show HA02
(medium).
2. Move the lever up (+) or down (-) to set
the desired level: HA01(soft), HA02
(medium) and HA03 (hard).
3. Move the lever to the central position
and press (OK) to confirm.
The selection will blink for 2 seconds and
the setting will then be saved.
Audible signal settings
You can disable the audible signals as
follows:
1. Open the settings menu and select SE03.
2. Move the lever up or down until you see
the word OFF on the display.
3. Move the lever to the central position
and press (OK) to confirm.
The selection will blink for 2 seconds and
the setting will then be saved.
13
Page 12

Use
To enable audible signals:
1. Open the settings menu and select SE03.
2. Move the lever up or down until you see
the word ON.
3. Move the lever to the central position
and press (OK) to confirm.
The selection will blink for 2 seconds and
the setting will then be saved.
Rinsing the internal circuits
Rinse the internal circuits once the tank is full:
1. Place the carafe (6) on the Keep Warm
plate (7) WITHOUT adding ground
coffee to the filter.
3.4 How to make coffee
1. Fill the water tank as indicated in the
paragraph “3.1 Before first use”.
2. Keep the water tank lid (1) raised and
insert the permanent filter (2) into the filter
holder (3).
3. Add the desired quantity of coffee
according to the number of cups to be
prepared using the supplied measuring
scoop (4).
2. Press the ON /OFF button.
3. Wait for the cycle to complete and
empty the carafe.
4. Repeat the cycle: the appliance is now
ready for use.
14
The permanent filter allows you to
prepare drip coffee without using
paper filters. However, according
to your own preference, a paper
filter #4 can be used instead.
Place the paper filter inside the
filter holder and add the desired
amount of coffee.
Page 13

ENENEN
• One level scoop of ground
coffee is approximately
equivalent to one cup. However,
the amount of ground coffee to
be used may vary according to
personal taste.
• Use good quality medium
ground coffee.
Use
6. Press the ON/OFF button to
activate BREW mode
ON/OFF
flashes quickly for the entire time that the
coffee brews.
Steam coming out during coffee
brewing is completely normal.
: the LED on the
button lights up and
4. Close the lid (1) by lowering the tab.
5. Place the carafe (5) with the lid (6) on
the special Keep Warm plate (7)
sure that the lid fits perfectly with the antidrip valve (8).
. Make
Risk of scalding
• Do not open the water tank lid during
the coffee brewing cycle.
7. The coffee brewing operation can be
stopped at any time by pressing the
ON/OFF button.
Warning
• Do not open the lid of the drip coffee
machine at the end of the brewing cycle.
Wait at least 3 minutes after the brewing
cycle has finished before opening the lid.
• After 3 minutes, you can remove and
clean the filter and refill the water tank in
order to start a new brewing cycle.
15
Page 14

Use
• Pressing all the buttons except the
ON/OFF button does not
affect the coffee preparation and
brewing operation in any way.
• If the ON/OFF button is not
pressed, the coffee continues to
brew according to the automatic
setting for filling the entire carafe
(10 cups).
• The filter holder and permanent
filter may be hot even after the
coffee has been dispensed. Take
care before removing them.
• The base of the carafe may be
very hot after coffee has been
dispensed. Take care when
removing it and make sure you
do not place the carafe on a
heat-sensitive surface.
KEEP WARM mode
The KEEP WARM mode is activated
automatically after the coffee has been
brewed, keeping the Keep Warm plate on
for 60 minutes.
In this way, the coffee will be hot for 60
minutes after the coffee has been brewed.
In KEEP WARM mode, the LED of the ON/
OFF button flashes slowly, the KEEP
WA R M icon lights up on the display.
The ON/OFF button turns off
automatically when the KEEP WARM mode
ends.
You can manually end the KEEP WARM
mode at any time by pressing the ON/
OFF button: the LED of the ON/
OFF button and the KEEP WARM
icon go out.
The KEEP WARM mode cannot be
activated if the BREW mode is
stopped manually or if the 4 CUPS
mode is active.
Risk of scalding
• The plate remains hot after the coffee
has been brewed: be careful not to
touch it while extracting the carafe.
16
Page 15

Use
ENENEN
AROMA setting
This setting allows you to choose the
intensity of the aroma for your coffee from
two levels: DELICATE AROMA or
INTENSE AROMA.
The appliance is set by default to DELICATE
aroma: the LED of the aroma setting
button is off, and on the display only the
lower bean of the
icon is selected.
To change the setting:
1. Press the AROMA setting button to
select INTENSE aroma: the LED of the
AROMA setting button lights up and
on the display both the beans of the
icon are selected.
2. Press the AROMA setting button
again to select DELICATE aroma: the
LED of the AROMA setting button
goes out and the selection of the upper
bean of the icon disappears from
the display.
4 CUPS function setting
This function allows you to dispense a small
amount of coffee, corresponding to about 4
cups.
The setting is OFF by default.
To select the 4 CUPS function:
1. Press the appropriate button to set it
to ON: the LED of the 4 CUPS
function button lights up.
2. Press the button again to set this
function to OFF: the LED on the button
goes out.
If the 4 CUPS mode has been
selected, the KEEP WARM mode
cannot be activated.
The desired aroma settings are
saved for the next time coffee is
brewed.
17
Page 16

Use
Setting the time for AUTO START mode
Use this setting to program the appliance to
switch on automatically to prepare the drip
coffee at a time selected by the user.
To set the auto start time, proceed as
follows:
1. Check that the displayed time is correct.
If not, set the current time as described in
the paragraph “3.2 First use”.
2. Hold down the button for 3 seconds
to set the time for the AUTO START
mode: the LED of the button and the
time display (HH:MM) start to flash.
3. Use the lever, moving it up (+) or down (-)
to set the desired time.
4. Move the lever to the central position
and press (OK) to confirm.
5. Once the settings are saved, the
programmed AUTO START time will be
automatically saved and maintained until
a new setting is selected to replace it.
AUTO START mode
1. Press the AUTO START button to
activate the AUTO START mode: the LED
of the AUTO START button will light
up and the hours and minutes set for the
coffee preparation will flash on the
display for a few seconds. Then the
current time will be displayed.
2. Press the AROMA button to select
the desired coffee intensity in AUTO
START mode. If necessary, depending
on the quantity to be dispensed in AUTO
START mode, press the 4 CUPS
function button to store the function.
3. The appliance will remain in AUTO
START mode until the programmed time.
The brewing cycle starts automatically.
4. Press the AUTO START button at
any time to exit the AUTO START mode:
the appliance will beep and return to
CLOCK mode.
18
Page 17

Cleaning and maintenance
ENENEN
4 Cleaning and maintenance
4.1 Warnings
Misuse
Risk of electric shock
• Unplug the drip coffee maker before
cleaning.
• Do not immerse the drip coffee maker in
water or other liquids.
• Allow the drip coffee maker to cool
before cleaning.
Misuse
Risk of damage to surfaces
• Do not use steam jets to clean the drip
coffee maker.
• Do not use cleaning products containing
chlorine, ammonia or bleach on parts
with metallic surface finishes (e.g.
anodizing, nickel or chrome plating).
• Do not use abrasive or corrosive
detergents (e.g. powders, stain
removers and metal scouring pads).
• Do not use rough or abrasive materials
or sharp metal scrapers.
4.2 Cleaning the drip coffee maker
To maintain the outer surfaces, you must
clean them regularly after each use after
letting them cool down. Clean with a soft,
damp cloth.
4.3 Cleaning the parts of the drip
coffee maker
Cleaning the permanent filter and the
filter holder
1. Lift the lid flap (1) and pull up on the
permanent filter (2) and then the filter
holder (3).
2. Clean the permanent filter and the filter
holder by removing any coffee residue.
3. Rinse the filter and filter holder under the
faucet and dry thoroughly.
The permanent filter and the filter
holder may be washed in the
dishwasher.
19
Page 18

Cleaning and maintenance
Cleaning the carafe
1. Empty the carafe after each use to avoid
stains caused by coffee residues.
2. Wash the carafe in hot, soapy water with
a soft brush.
3. Rinse and dry thoroughly.
Risk of damage to the carafe
• Do not wash the carafe in the
dishwasher to avoid damaging it
permanently.
4.4 Descaling
Depending on the set water hardness, the
appliance automatically signals when it is
necessary to descale.
The DESCALING icon starts
flashing on the display to warn the user that
the appliance needs to be descaled.
To activate the descaling cycle:
1. Pour water and descaler into the water
tank.
2. Press the ON/OFF and AUTO
START buttons simultaneously for 5
seconds to activate the DESCALING
mode: the LEDs of the ON/OFF
and AUTO START buttons flash and
the DESCALING icon flashes
until the end of the cycle.
3. At the end of the cycle, the display
returns to CLOCK mode and the
20
DESCALING icon
disappears from the display.
Page 19

Cleaning and maintenance
ENENEN
4. Rinse the appliance by running it with
only water for at least 2 times, filling the
tank up to the maximum limit (1.4 liters).
Warning
• Coffee may be brewed even in the
presence of a DESCALING alarm.
• Carry out the clean cycle when signaled
by the appliance.
• Calcium deposits can compromise the
proper functioning of the appliance,
especially if the water being used is
particularly hard.
• Proper descaling to remove
mineral deposits ensures the
aroma of the coffee is maintained
and the appliance will function
properly in the long term.
Danger of chemical burns and
damage to the appliance
• The cleaning solution used to remove
mineral deposits contains acids that may
irritate the skin or eyes.
• Carefully follow the manufacturer's
instructions and the safety warnings
listed on the container should the
solution come into contact with the skin
or eyes.
• Use the cleaning solution recommended
by Smeg to ensure your drip coffee
maker is not damaged in the process.
Any other servicing should be
performed by an authorized
service representative.
21
Page 20

Cleaning and maintenance
4.5 What to do if...
Problem Possible cause Solution
The coffee does not come
out
No water in the tank. Fill the tank.
Presence of limescale. Run the descaling cycle.
Coffee takes a long time
to come out
The coffee has an acidic
taste
The drip coffee maker
overflows
Presence of limescale. Run the descaling cycle.
Possible stagnation of coffee in
the circuits.
The filter is not positioned
correctly.
The carafe is not positioned
correctly on the base.
The lid is not inserted on the
carafe.
Excessive amount of coffee.
Rinse as described in
paragraph “4.4
Descaling”.
Insert the filter correctly into
the filter holder.
Check that the carafe is
positioned correctly under
the grouphead.
Insert the lid on the carafe.
Add to the permanent filter
up to a maximum of 5 level
scoops of ground coffee.
22
Coffee ground too fine.
Use ground coffee for drip
coffee makers.
Page 21

Cleaning and maintenance
ENENEN
Problem Possible cause Solution
Only water comes out of
the drip coffee maker
If the problem has not been
resolved or there are other types of
faults, contact your local
authorized service center.
No ground coffee in the filter.
Add the desired quantity of
coffee to the filter.
23
 Loading...