

Contents
1. INSTRUCTIONS FOR SAFETY AND USE ____________________ 21
2. INSTRUCTIONS FOR DISPOSAL ___________________________ 23
3. OVEN INSTALLATION____________________________________ 24
4. DESCRIPTION OF THE CONTROLS ________________________ 26
5. USING THE OVEN_______________________________________ 28
6. CLEANING AND MAINTENANCE ___________________________ 31
7. EXTRAORDINARY MAINTENANCE _________________________ 33
8. ADDITIONAL INSTRUCTIONS FOR STEAM OVENS______________ 35
INSTRUCTIONS FOR THE INSTALLER: these are intended for the
qualified technician who must install the appliance, set it functioning
and carry out an inspection test.
INSTRUCTIONS FOR THE USER: these contain user advice,
description of the commands and the correct procedures for cleaning
and maintenance of the appliance.
20
Presentation
1. INSTRUCTIONS FOR SAFETY AND USE
THIS MANUAL IS AN INTEGRAL PART OF THE APPLIANCE. IT MUST
BE KEPT IN ITS ENTIRETY AND IN AN ACCESSIBLE PLACE FOR
THE WHOLE WORKING LIFE OF THE OVEN. WE ADVISE READING
CAREFULLY THIS MANUAL AND ALL THE INSTRUCTIONS THEREIN
BEFORE USING THE OVEN. INSTALLATION MUST BE CARRIED
OUT BY QUALIFIED PERSONNEL IN ACCORDANCE WITH THE
REGULATIONS IN FORCE. THIS APPLIANCE IS INTENDED FOR
COMMERCIAL USES AND CONFORMS TO THE EEC DIRECTIVES
CURRENTLY IN FORCE. THE APPLIANCE HAS BEEN BUILT TO
CARRY OUT THE FOLLOWING FUNCTIONS: COOKING AND
HEATING-UP OF FOOD; ALL OTHER USES ARE CONSIDERED
IMPROPER.
THE MANUFACTURER DECLINES ALL RESPONSIBILITY FOR
IMPROPER USE.
DO NOT DISCARD PACKING IN THE HOME ENVIRONMENT.
SEPARATE THE VARIOUS WASTE MATERIALS AND TAKE THEM TO
THE NEAREST SELECTIVE WASTE COLLECTION CENTRE.
THE APPLIANCE MUST BE CONNECTED TO EARTH IN
COMPLIANCE WITH ELECTRICAL SYSTEM SAFETY REGULATIONS.
WHEN CONNECTING TO THE ELECTRICITY SUPPLY USING PLUG
AND SOCKET, MAKE SURE THAT BOTH ARE COMPATIBLE AND
CONNECT THEM TO THE POWER SUPPLY CABLE IN
ACCORDANCE WITH THE REGULATIONS IN FORCE.
NEVER UNPLUG BY PULLING ON THE CABLE.
DO NOT OBSTRUCT VENTILATION OPENINGS AND HEAT
DISPERSAL SLITS.
IMMEDIATELY AFTER INSTALLATION CARRY OUT A BRIEF
INSPECTION TEST OF THE OVEN, FOLLOWING THE
INSTRUCTIONS BELOW. SHOULD THE APPLIANCE NOT WORK,
DISCONNECT IT FROM THE SUPPLY AND CALL THE NEAREST
TECHNICAL ASSISTANCE CENTRE. NEVER ATTEMPT TO REPAIR
THE APPLIANCE.
ALWAYS CHECK THAT THE CONTROL KNOBS ARE IN THE 0 (OFF)
POSITION WHEN YOU FINISH USING THE OVEN.
21
Presentation
NEVER PUT INFLAMMABLE OBJECTS IN THE OVEN: THEY COULD
BE ACCIDENTALLY LIGHTED AND CAUSE FIRES.
THE APPLIANCE BECOMES VERY HOT DURING USE. SUITABLE
HEAT-PROOF GLOVES SHOULD BE WORN FOR ALL OPERATIONS.
THE IDENTIFICATION PLATE, WITH TECHNICAL DATA, SERIAL
NUMBER AND MARK IS IN A VISIBLE POSITION ON THE SIDE OF
THE OVEN.
THIS PLATE MUST NEVER BE REMOVED.
THE APPLIANCE IS INTENDED FOR COMMERCIAL USE BY
APPROPRIATELY TRAINED PERSONNEL. KEEP CHILDREN AT A
SAFE DISTANCE AND NEVER ALLOW THEM TO PLAY WITH IT.
THE USE OF THIS APPLIANCE IS NOT PERMITTED TO PEOPLE
(INCLUDING CHILDREN) OF REDUCED PHYSICAL AND MENTAL
ABILITY, OR LACKING IN EXPERIENCE IN THE USE OF
ELECTRICAL APPLIANCES, UNLESS THEY ARE SUPERVISED OR
INSTRUCTED BY ADULTS OR PEOPLE RESPONSIBLE FOR THEIR
SAFETY.
BEFORE USE, THE OVEN DISHES MUST BE WASHED WITH A
SUITABLE DISHWASHING DETERGENT (DO NOT USE ABRASIVE
PRODUCTS).
THE OVEN DIMENSIONS ARE DESIGNED FOR A MAXIMUM LOAD
OF 3.5 KG.
THIS APPLIANCE IS MARKED ACCORDING TO THE EUROPEAN DIRECTIVE
2002/96/EC ON WASTE ELECTRICAL AND ELECTRONIC EQUIPMENT –
(WEEE).
THIS GUIDELINE IS THE FRAME OF A EUROPEAN-WIDE VALIDITY OF
RETURN AND RECYCLING ON WASTE ELECTRICAL AND ELECTRONIC
EQUIPMENT.
BEFORE THE APPLIANCE IS PUT INTO OPERATION, ALL LABELS AND
PROTECTIVE FILMS APPLIED INSIDE OR OUTSIDE MUST BE REMOVED.
22
The manufacturer declines all responsibility for damage to persons
or things caused by the non-observance of the above prescriptions or
deriving from tampering with any part of the appliance or by the use of
non-original spares.

Presentation
2. INSTRUCTIONS FOR DISPOSAL OUR ENVIRONMENTAL CARE
Our product's packing is made of non-polluting materials, therefore
compatible with the environment and recyclable. Please help by
disposing of the packing correctly. Find the addresses of collection,
recycling and disposal centres from your retailer or from the competent
local organisations.
Do not throw the packing or any part of it away. They can constitute a
suffocation hazard for children, especially the plastic bags.
Your old appliance also needs to be disposed of correctly.
Important: hand over your appliance to the local agency authorised for
the collection of household appliances no longer in use. Correct disposal
means intelligent recycling of valuable materials.
Before disposing of your old appliance remove the door and leave the
racks in their normal working positions so that children cannot get stuck
in the oven compartment whilst playing.
It is also necessary to cut the electric power cord and remove it along
with the plug.
INFORMATION FOR USERS
Pursuant to Directives 2002/95/EC, 2002/96/EC and 2003/108/EC
relating to the reduction of the use of hazardous substances in electrical
and electronic appliances, as well as to the disposal of refuse. The
crossed out bin symbol on the appliance indicates that the product, at
the end of its useful life, must be collected separately from other refuse.
Therefore, the user must consign the product that has reached the end
of its working life to the appropriate selective collection centres for
electrical and electronic refuse, or deliver it back to the retailer when
purchasing an equivalent product, on a one for one basis. Adequate
selective collection for the subsequent forwarding of the
decommissioned product to recycling, treatment and ecologically
compatible disposal contributes to avoiding possible negative effects on
the environment and on health and promotes the recycling of the
materials of which the appliance consists. The illicit disposal of the
product by the user results in the application of administrative sanctions.
23
Instructions for the installer
3. OVEN INSTALLATION
The oven must be set up on a perfectly flat surface and left standing
free. Make sure to allow enough room at the back for easy access to the
terminal strip for connecting the power supply cable. Installation must be
carried out by a qualified technician in compliance with EEC
DIRECTIVES currently in force.
3.1 Electrical connection
Make sure the voltage and the cross-section of the power cord match the
specifications indicated on the identification plate positioned on the side of
the oven. Do not remove this plate for any reason.
The oven is fitted with an H07RN-F three-core cable for operation at
230V∼ and a power supply plug.
The supplied cable is of the three-core 3 x 1.5 mm2 H07RN-F type.
The power supply cable must be replaced by the manufacturer or by an
authorised service centre to prevent any risks.
The terminal marked with this symbol connects parts together that are
normally at zero potential. Connect the appliances appropriately using
this terminal in order to make sure that they are equipotential.
The plug and wall-mounted socket must be of the same type (in
accordance with current regulations). Also check that the power supply
line is provided with adequate earthing. Avoid use of adapters and
shunts.
3.1.1 Safety thermostat
The oven is fitted with a safety device which trips in case of serious
malfunction. To reset, contact the nearest technical assistance centre.
The manufacturer declines all responsibility for damage to persons
or things caused by the non-observance of the above prescriptions or
deriving from tampering with any part of the appliance.
24
Instructions for the installer
3.2 Levelling
Adjust the four feet so as to set the oven on a perfectly level plane. For
this purpose, loosen the lock nut and unscrew the foot. The range of
adjustment of the screw is 10 mm.
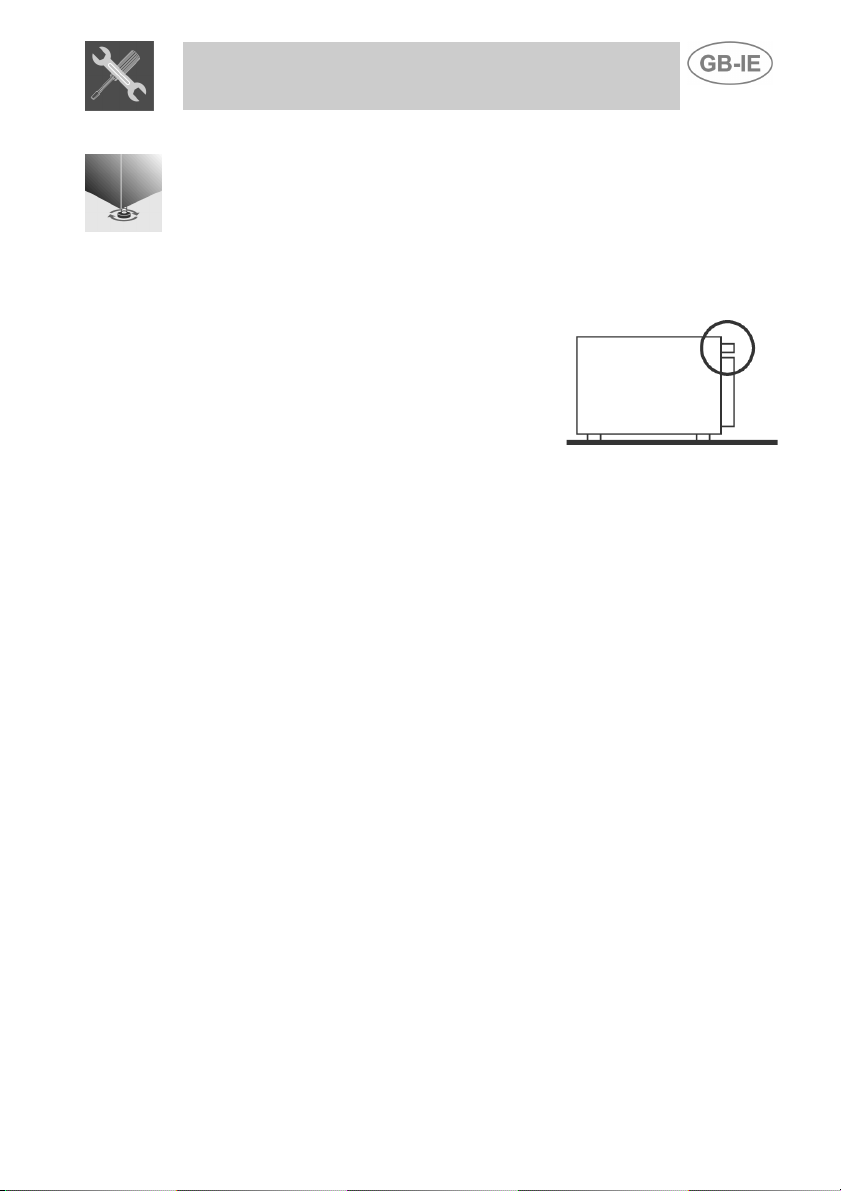
3.3 Steam exhaust pipe
An exhaust pipe is fitted on the back
of the oven to allow the discharge of
steam during cooking. Make sure the
pipe is not obstructed. Take care
not to crush it.
25

Instructions for the user
4. DESCRIPTION OF THE CONTROLS
26
THERMOSTAT KNOB
This knob allows to select the most suitable cooking
temperature for the food to be cooked. Turn the knob
clockwise to the desired temperature. Adjustment is
progressive so that the oven also operates at any
intermediate value.
TIMER KNOB
This knob allows to select manual cooking or the
timer: the oven switches off automatically at the end
of cooking. For manual control of the cooking time,
turn the knob to the symbol . To set the cooking
time, turn the knob clockwise. The numbers from 5
to 60 correspond to minutes. Adjustment is
progressive so that time can also be set to any
intermediate value between these numbers. Upon
completion of the cooking cycle, the knob
automatically returns to 0, the oven turns off and a
buzzer signal is set off.

Instructions for the user
FUNCTIONS SWITCH KNOB
Turn the knob in either direction to select a function among
the following:
NO FUNCTION SET
OVEN LIGHT GRILL ELEMENT +
UPPER AND LOWER
HEATING ELEMENTS
GRILL ELEMENT VENTILATED HEATING
VENTILATION
LOWER HEATING
ELEMENT + VENTILATION
ELEMENT
DELAYED START KNOB
Allows the oven to be switched on at the set temperature
from 1 to 14 hours later. Turn the knob anticlockwise to the
desired time; the intermediate values between each number
can also be used.
ORANGE LIGHT
When on, it indicates that the oven is heating up. When the
set temperature is reached, the light goes off. During the
cooking cycle, the light comes on and goes off various times
signalling that the temperature in the oven is being kept
constant as per the set value.
GREEN LIGHT
When off, it indicates the beginning of timed cooking. When
on, indicates that the timed cooking cycle has been
completed.
27

Instructions for the user
5. USING THE OVEN
5.1 Warnings and general advice
When using for the first time, it is advisable to
heat up the oven to its maximum temperature for
enough time to burn off any possible oily
manufacturing residues.
If the food being cooked needs to be checked, it
is best to leave the door open for as short a time
as possible in order to avoid the temperature
inside the oven from dropping too much and thus
compromising cooking results.
5.2 Internal ventilation (depending on the model)
On some models, the fan rotates in both directions and when the door is
opened it is deactivated automatically, and starts again when the door is
closed.
5.3 Inside light (Depending on model)
The oven light comes on:
- When the oven door is opened.
- When the thermostat knob is turned.
- When the function switch knob is turned to any symbol.
5.4 Thawing
The movement of air at room temperature causes frozen food to quickly
thaw. This type of thawing is ideal as the taste and appearance of the defrozen food, whether previously deep-frozen or frozen in the domestic
freezer, remain unaltered.
TIMER KNOB
SET TO MANUAL
THERMOSTAT KNOB
SET TO VENTILATION
Multi-function models
TIMER KNOB
SET TO MANUAL
THERMOSTAT KNOB
SET TO ‘0’
FUNCTIONS SWITCH KNOB
ON A SYMBOL WITH THE FAN
28

Instructions for the user
5.5 Pre-heating
Before cooking, it is advisable to pre-heat the oven to the desired
temperature for at least 15 minutes.
5.6 Manual cooking
The oven heats up as signalled by the orange light going on. Upon the
set temperature being reached, the light goes off. The orange light comes
on and goes off various times during the cooking cycle indicating that the
temperature in the oven is being kept constant.
2
TIMER KNOB
SET TO MANUAL
THERMOSTAT KNOB
ON ANY POSITION
Multi-function models
TIMER KNOB
SET TO MANUAL
THERMOSTAT KNOB
ON ANY POSITION
FUNCTIONS SWITCH KNOB
ON ANY SYMBOL
Ex.
Ex.
Ex.
29

Instructions for the user
5.7 Timed cooking
The oven heats up as signalled by the orange light going on. Upon the
set temperature being reached, the light goes off. The orange light comes
on and goes off various times during the cooking cycle indicating that the
temperature in the oven is being kept constant. Upon completion of the
cooking cycle, the oven automatically turns off, the green light comes on
and the buzzer sounds for a few seconds. To completely turn off, set the
thermostat knob to 0.
TIMER KNOB
ON A POSITION
THERMOSTAT KNOB
ON ANY POSITION
Multi-function models
TIMER KNOB
ON A POSITION
THERMOSTAT KNOB
ON ANY POSITION
FUNCTIONS SWITCH KNOB
ON ANY SYMBOL
Ex.
Ex.
Ex.
Ex.
Ex.
30

Instructions for the user
6. CLEANING AND MAINTENANCE
Important:
never spray water directly against the oven. Never use pressure nozzles.
Before any intervention, disconnect the power supply of the oven.
6.1 Cleaning stainless steel
To maintain stainless steel parts in perfect condition, clean regularly at
the end of the work day. Allow to cool first.
To clean and preserve the stainless steel surfaces, always use only
specific products that do not contain abrasives or chlorine-based acids.
How to use: pour the product onto a damp cloth and wipe the surface,
rinse thoroughly and dry with a soft cloth or deerskin.
Do not use metallic sponges or sharp scrapers: they will
damage the surface.
Use ordinary non-abrasive products for steel, with the aid of
wooden or plastic utensils if necessary.
Rinse thoroughly and dry with a soft cloth or deerskin.
31

Instructions for the user
6.2 Cleaning the inside of the oven
To maintain the oven in perfect condition, clean it regularly at the end of
the work day. Allow to cool first. Take off all removable parts.
Remove the side guides by unscrewing the ring nut A and sliding them
out of the rear hole B.
32
• Clean the oven racks and side guides with warm water and nonabrasive detergents. Rinse and dry.
6.3 Door glass
The door glass should always be kept clean. Use absorbent kitchen roll;
in case of stubborn dirt remove with a damp sponge and an ordinary
detergent.

Instructions for the user
7. EXTRAORDINARY MAINTENANCE
The oven may require extraordinary maintenance or replacement of parts
subject to wear such as seals, bulbs, and so on. The following
instructions describe how to carry out these minor maintenance
operations.
Before any intervention, disconnect the power supply of the oven.
7.1 Replacement of light bulb
Remove the bulb protector A. Replace bulb B with a similar one. Re-fit
the bulb protector A.
Use only oven bulbs (T 300°C).
33

Instructions for the user
7.2 Removing the door
Hinges with mobile connecting plates
Catch the door at the two sides with both hands in proximity to hinges C
and lift up the small levers D. Raise the door to an angle of about 45° and
remove it. To reassemble, fit the hinges C into their grooves, then lower
the door into place and release the levers D.
Hinges with mobile levers
Open the door completely and take the door in both hands holding it at
the sides close to the hinges. Push the levers A forwards with the thumb
and lift the door upwards at the same time making an angle of about 45°,
then remove the door. To replace, slide the hinges C into their grooves,
and then open the door completely to unhook the sections B. At this
stage the door can be closed normally.
7.3 Oven door seal
To permit thorough cleaning of the oven, the seal may be
removed. Before removing the seal, take off the door as
described above. Once the door has been taken off, lift
the tabs at the corners as shown in the figure.
34

Additional instructions for steam ovens
8. ADDITIONAL INSTRUCTIONS FOR STEAM OVENS
8.1 General instructions
The hardness of the water used in the oven water reservoir for steaming
must not exceed 10-11°F. Use natural mineral water, or tap water that
has been treated with a water purification or softening system.
Connect the water inlet connection
on the rear to a water supply outlet
having ¾ gas threaded connection,
taking care to screw tightly to the
hose.
If the water supply pipe is new or
has not been used for a long time,
before making the connection, let
the water flow to ensure that it is
clear and free from impurities.
Otherwise, the water inlet may
become fouled, damaging the
oven.
The oven must be supplied with
water at a pressure between:
min. 50 kPa and max. 500 kPa.
8.2 Description of the controls
Water line connection
THERMOSTAT KNOB
This knob allows to select the most suitable cooking
temperature for the food to be cooked.
Turn the knob clockwise to the desired temperature.
Adjustment is progressive so that the oven also operates at
any intermediate value.
35

Additional instructions for steam ovens
TIMER KNOB
Allows to select manual cooking or the timer; the oven
switches off automatically at the end of cooking.
For manual control of the cooking time, turn the knob to the
symbol .
To set the cooking time, turn the knob clockwise. The
numbers from 5 to 60 correspond to minutes. Adjustment is
progressive so that time can also be set to any intermediate
value between these numbers.
Upon completion of the cooking cycle, the knob
automatically returns to 0, the oven turns off and a buzzer
signal is set off.
STEAM SUPPLY KNOB
This knob allows to select the most suitable amount of
steam for the food to be cooked.
Turning the knob clockwise, the selection options range
from the 0 setting (no steam is supplied), to the 1 setting
(maximum steam supply). Steam continues to be supplied
until the knob is released; once released the knob
automatically returns to the 0 setting.
NOTE: For steaming the oven thermostat knob must be set
between 150° and 250°C.
ORANGE LIGHT
When on, it indicates that the oven is heating up. When the
set temperature is reached, the light goes off.
During the cooking cycle, the light comes on and goes off
various times signalling that the temperature in the oven is
being kept constant as per the set value.
GREEN LIGHT
When off, it indicates the beginning of timed cooking.
When on, it indicates that the timed cooking cycle has been
completed.
36

Additional instructions for steam ovens
8.3 Use of the oven
To prevent any steam in the oven from creating problems, open the door
in two stages: keep the door ajar (about 5-6 cm) for 4-5 seconds and then
open it fully.
8.3.1 Steaming foods
STEAM REGULATION KNOB
THERMOSTAT KNOB BETWEEN 150° AND
TIMER KNOB
Warnings and general advice
No steam is created at temperatures lower than 150°C: temperatures
below 150°C cause condensation and consequent dripping.
Therefore, turn the thermostat knob to 150°C and wait until the (orange)
thermostat indicator light switches off before beginning the steam supply.
On pos. 1
(max. 2 sec. at a time)
250°C
37

Additional instructions for steam ovens
8.4 If the oven is not working properly
This product meets the current safety regulations in force for
electrical appliances. To prevent safety hazards for users, all
technical inspections or repairs must be carried out by qualified
personnel.
If the appliance is not working properly, before calling Customer Service,
ensure that the procedures listed below have been performed. This will
help to avoid unnecessary expenses.
PROBLEM
The oven is not working
Foods either take too long
or too little to cook
No steam is being supplied
Moisture forms inside the
oven and on the foods
There is water inside the
oven
LIKELY SOLUTION
• The timer knob is positioned on 0.
• The plug is not properly inserted in the socket.
• The electrical system is damaged or not
working properly.
• The fuses have blown or the circuit breakers
have not been activated.
• The temperature setting is incorrect.
• The control knobs are not in a correct position.
• The oven door has not been closed properly.
• The foods are being left in the oven for too long
after cooking. Do not leave them in the oven for
more than 15-20 minutes after the end of the
cooking time.
• The device controlling the supply of water inside
the oven is not working properly.
38
 Loading...