

Page 1
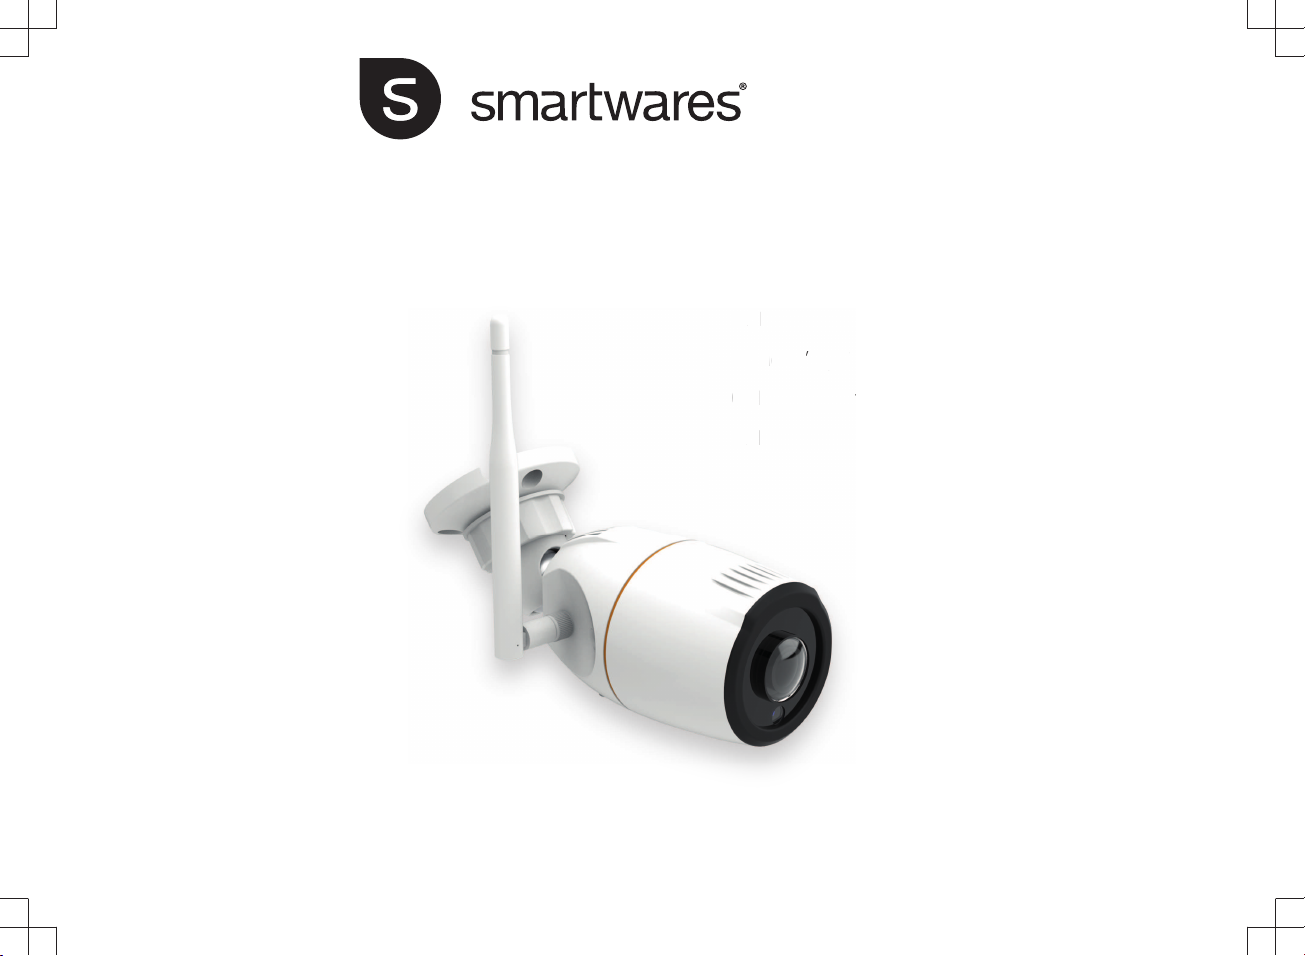
CIP39218AT | OUTDOOR IP-CAMERA
EN
| Instruction manual
NL | Gebruiksaanwijzing
DE | Bedienungsanleitung
FR | Mode d’emploi
CS | Návod na použití
PL | Instrukcja obsługi
it
gi
| |
|
ouži
tí
|
Page 2

Page 3

Instruction manual
PARTS DESCRIPTION
1. Lens
2. MicroSD card slot
3. Antenna
4. LAN connection/Notification LED
5. Power input
6. Reset button
INSTALLATION
• Attach the mount to the wall with the supplied screws and plugs.
Make sure they are suitable for your type of wall.
QUICK START GUIDE
Follow the instructions below to quickly get started with your camera.
For a more detailed description of all functionality, please check the
help function in the app or download the extended user manual from
our website, www.smartwares.eu. Please search for "CIP-39218AT".
Inserting an SD card
• First make sure your camera is not connected to the power
adapter. Insert your MicroSD card all the way in the MicroSD
card slot on the camera. Only use a class 10 MicroSD card (max
128 GB).
• A MicroSD card is required for recording footage.
Download the app
• iOS: Search for "SW360" in the Apple app store.
• Android: Search for "SW360" in the Google play store.
• Download and install the app on your mobile device.
Creating an account
If you're using this app for the first time, you will need to create an
account.
• Open the app.
• Tap on "New User"
• Fill in your email address.
• Enter a new password, and confirm it.
Note: It's not possible to paste the code, you need to type it.
• A verification email will be sent to you. Please click on the link in
the mail to confirm your account. If you don't confirm, you won't
be able to continue using your account.
• Now open the app again and login to the account you just
created.
• If you already have created an account, fill in your login and
password information, and tap on "Sign in".
• If you have forgotten your password, tap on "Forgot password",
and follow the directions in the app.
Connecting a camera
1. On the "my devices" tab, tap on the "plus" (+) sign in the top right
corner. Tap "Add a new device".
2. Tap on the picture that corresponds to your camera.
3. Plug the adapter in the power input. Please wait for 30 seconds for
the device to boot up. Make sure that your camera is in close range
(1m) of your mobile device.
4. Check if the notification LED is flashing, and confirm the prompt in
the app. If the LED is not flashing, please refer to the chapter
"Resetting the camera".
iOS Android
EN
3
Page 4

Instruction manual
5a. Exit the app, and go to the WiFi settings on your mobile device.
The camera transmits it's own
private wireless network.
5b. Connect to the Wi-Fi network
SSID that corresponds to your
Camera-ID. You can find the
camera-ID on the sticker on the
back of the camera. The
password is “11111111”. Wait for
your mobile device to connect to
the camera's Wi-Fi network.
5c. When you have connected
successfully to the camera, return
to the SW360 app.
6. In the SW360 app, choose the SSID of the wireless network you
ultimately want to connect the camera to. Enter the corresponding
password. Note: A 5Ghz WiFi network is not supported.
7. Please give your camera a name (for instance "living room"). Now
you will be able to access your camera. You can watch the live view
from anywhere in the world through the app on your mobile device.
8.Optional: You can also choose to use a wired internet connection.
Please connect a UTP cable from you router to the LAN connection of
the camera.
5. Select your camera-ID from the
list. You can find the camera-ID
on the sticker on the back of the
camera.
APP FUNCTIONS
• On the "My devices" tab, you can see and manage all the
camera's that are linked to your account. If you tap the three dots
next to your camera name, you have the following options:
Setup
• From the setup screen you can change:
– The name of your camera.
– Video quality.
– Motion detection notifications.
– Recording options.
– Formatting your MicroSD card.
– Access the "Help" function.
• You can share your cameras with other accounts by tapping on
the share icon.
• You can remove a camera from your account by tapping "delete".
Live view
• On the "my devices" tab, press the play button to open the live
view of your camera.
• Rotate your mobile device to view the video full-screen in
landscape.
• Tap or pinch to zoom in and out.
• Rotate the view by scrolling with your finger.
• From this screen, you can use the buttons on the bottom to:
– Take a snapshot.
– Record footage directly to your mobile device.
• It's possible to view recorded footage by sliding the timebar at the
bottom, or choosing a date.
Troubleshooting
• I can't see my camera-ID in the list during setup.
4
Page 5

– Please make sure you camera is within 1m of your mobile
device.
– Try to reset the camera. See paragraph "resetting the
camera".
– Attempt to enable the location service on your mobile device
and try again.
– Go to the Wi-Fi settings of your mobile device, and check if
you see the camera-ID in your list of available networks.
Connect to this network. Now go back to the SW360 app,
and check if you can link the camera to your Wi-Fi network.
Resetting the camera
• When do you need to reset the Camera?
– If you have changed your Wi-Fi name or password.
– If you have changed the Wi-Fi router or access point.
– If you want to link the camera to another account.
– If you want to link the camera to a different Wi-Fi network.
• To reset the camera, press and hold the reset button. Keep the
button pressed for at least 10 seconds. Release the button. Wait
for at least 20 seconds to allow the camera to reboot.
More information
• For a more detailed description of all functionality, please check
the help function in the app or download the extended user
manual from our website, www.smartwares.eu. Please search for
"CIP-39218AT".
Instruction manual
EN
5
Page 6

Gebruiksaanwijzing
BESCHRIJVING VAN DE ONDERDELEN
1. LED
2. Microfoon
3. Lens
4. Luidspreker
5. USB-poort
6. Resetknop
7. TF-kaartsleuf
INSTALLATIE
• Bevestig bij montage van de camera aan een wand de houder
met de bijgeleverde schroeven en pluggen aan aan de wand.
Controleer of deze geschikt zijn voor uw type wand.
VERKORTE HANDLEIDING
Volg de onderstaande instructies om snel met uw camera aan het
werk te kunnen. Zie voor een meer gedetailleerde beschrijving van
alle functies de help-functie in de app of download de uitgebreide
gebruikershandleiding op onze website, service.smartwares.eu. Zoek
hiervoor op 'CIP-31786AT'.
Een SD-kaart plaatsen
• Controleer eerst of de camera niet op de voedingsadapter is
aangesloten. Schuif de MicroSD-kaart zo ver mogelijk in de TFkaartsleuf van de camera. Gebruik uitsluitend een klasse 10
MicroSD-kaart (max. 128 GB).
• Een MicroSD-kaart is vereist voor het maken van filmopnames.
De app downloaden
• iOS: Zoek op 'SW360' in the Apple app store.
• Android: Zoek op 'SW360' in the Google play store.
• Download en installeer de app op uw mobiele toestel.
Een account aanmaken
Als u de app voor de eerste keer gebruikt, moet u een account
aanmaken.
• Open de app.
• Tip 'Nieuwe gebruiker' aan.
• Vul uw e-mailadres in.
• Voer een nieuw wachtwoord in en bevestig dit.
Let op: U kunt de code niet kopiëren en plakken. U moet deze
overtypen.
• U ontvangt een e-mail ter bevestiging. Klik de link in de e-mail
aan om uw account te bevestigen. Als u niet bevestigt, zal u uw
account niet langer kunnen gebruiken.
• Open nu nogmaals de app en log in de zojuist aangemaakte
account in.
• Als u al een account heeft aangemaakt, kunt u uw
gebruikersnaam en wachtwoord invullen en "Sign in" aantippen.
• Tip als u uw wachtwoord bent vergeten "Forgot password" aan en
volg de aanwijzingen in de app.
Een camera aansluiten
1. Tip in de tab 'Mijn toestellen' het plusteken (+) in de rechter
bovenhoek aan. Tip 'Een nieuw toestel toevoegen' aan.
2. Sluit de camera met de USB-adapter op het stopcontact aan om
hem op te laden. Wacht 30 seconden tot de led op de camera begint
te knipperen. Zorg dat de camera zich in de buurt (1 m) van uw
mobiele toestel bevindt.
iOS Android
6
Page 7

Gebruiksaanwijzing
3a. Sluit de app af en ga naar de
wifi-instellingen op uw mobiele
toestel. De camera verzendt zijn
eigen privé draadloze netwerk.
3b. Maak verbinding met het wifinetwerk SSID dat met de ID van
uw camera overeenkomt. U vindt
de camera-ID op de sticker aan
de achterzijde van de camera.
Het wachtwoord is “11111111”.
Wacht tot uw mobiele toestel met
het wifi-netwerk van de camera is
verbonden.
3c. Keer nadat de verbinding met
de camera tot stand is gebracht
terug naar de SW360 app.
4. Kies in de SW360 app de SSID van het draadloze netwerk
waarmee u de camera uiteindelijk wilt verbinden. Voer het
bijbehorende wachtwoord in. Let op: Een 5GHz wifi-netwerk wordt
niet ondersteund.
5. Als de verbinding tot stand is gebracht, wordt de led groen en toont
de camera 'Verbinding is gelukt'.
6. Geef uw camera een naam (bijvoorbeeld 'woonkamer'). U heeft nu
toegang tot de camera. U kunt via de app de directe beelden vanuit
iedere plaats ter wereld op uw mobiele toestel bekijken.
3. Selecteer uw camera-ID in de
lijst. U vindt de camera-ID op de
sticker aan de achterzijde van de
camera.
APP-FUNCTIES
• In de tab 'Mijn toestellen' kunt u alle aan uw account gekoppelde
camera's zien en beheren. Als u de drie puntjes naast de naam
van uw camera aantipt, krijgt u de volgende opties:
Installeren
• Vanuit het installatiescherm kunt u de volgende wijzigingen
aanbrengen:
– De naam van de camera.
– Beeldkwaliteit.
– Bewegingsdetectiemeldingen.
– Opnameopties.
– De MicroSD-kaart formatteren.
– De 'Help'-functie openen.
• U kunt uw camera's met andere accounts delen door het
pictogram voor delen aan te tippen.
• U kunt een camera uit uw account verwijderen door 'wissen' aan
te tippen.
Rechtstreeks beeld
• Druk in de tab 'Mijn toestellen' op de afspeelknop om uw camera
rechtstreekse beelden te laten weergeven.
• Draai het mobiele toestel om het beeld op het volledige scherm
of liggend te bekijken.
• Tip aan of maak een knijpbeweging om in of uit te zoomen.
• Draai het beeld door met de vinger te scrollen.
• Vanuit dit scherm kunt u de knoppen onderin het scherm
gebruiken om:
– Het geluid in of uit te schakelen.
– Maak een snapshot.
NL
7
Page 8

Gebruiksaanwijzing
– Via de camera te praten door het microfoonpictogram aan te
tippen en ingedrukt te houden.
– Filmopnames direct in uw mobiele toestel op te slaan.
• De opgenomen filmbeelden kunnen worden bekeken door de
tijdbalk aan de onderzijde te schuiven of een datum te kiezen.
Problemen oplossen
• Ik kan tijdens de installatie mijn camera-ID niet in de lijst vinden.
– Zorg dat de camera zich binnen 1m van uw mobiele toestel
bevindt.
– Probeer de camera te resetten. Zie de paragraaf 'De camera
resetten'.
– Schakel de locatieservice op uw mobiele apparaat in, en
probeer opnieuw.
– Ga naar de wifi-instellingen van uw mobiele toestel en
controleer of u de camera-ID in de lijst van beschikbare
netwerken aantreft. Verbind met dit netwerk. Ga nu terug naar
de SW360 app en controleer of u de camera met uw wifinetwerk kunt verbinden.
De camera resetten
• Wanneer moet u de camera resetten?
– Als u de wifi-naam of het wifi-wachtwoord heeft gewijzigd.
– Als u de wifi-router of het toegangspunt heeft gewijzigd.
– Als u de camera aan een ander account wilt koppelen.
– Als u de camera met een ander wifi-netwerk wilt verbinden.
• Druk om de camera te resetten met het bijgeleverde hulpmiddel
de resetknop van de camera in. Houd de knop minstens 10
seconden ingedrukt. Laat de knop los en de camera laat u weten
dat de fabrieksinstellingen zijn hersteld. Wacht minimaal 20
seconden om de camera opnieuw op te laten starten.
Aanvullende informatie
• Zie voor een meer gedetailleerde beschrijving van alle functies de
help-functie in de app of download de uitgebreide
gebruikershandleiding op onze website, service.smartwares.eu.
Zoek hiervoor op 'CIP-31786AT'.
8
Page 9

Bedienungsanleitung
TEILEBESCHREIBUNG
1. Linse
2. MicroSD-Kartenschlitz
3. Antenne
4. LAN-Anschluss
5. Stromeingang
6. Rückstellschalter
AUFSTELLUNG
• Befestigen Sie die Halterung mit den mitgelieferten Schrauben
und Dübeln an der Wand. Stellen Sie sicher, dass sich diese für
Ihre Wand eignen.
KURZANLEITUNG
Die folgenden Hinweise helfen Ihnen, ihre neue Kamera sofort zu
nutzen. Alle Funktionen werden ausführlich in der Hilfe-Funktion der
App beschrieben. Alternativ haben Sie die Möglichkeit, die
ausführliche Bedienungsanleitung von unserer Homepage
service.smartwares.eu herunterzuladen. Suchen Sie nach dem
Schlüsselwort "CIP-39218KL".
Einlegen einer SD-Karte
• Stellen Sie zuerst sicher, dass Ihre Kamera nicht mit der
Steckdose verbunden ist. Legen Sie Ihre Micro-SD-Karte in den
TF-Kartenschlitz der Kamera ein. Verwenden Sie nur eine MicroSD-Karte der Klasse 10 (max. 128GB).
• Eine Micro-SD-Karte ist notwendig, wenn Sie Aufnahmen
machen wollen.
Herunterladen der App
• iOS: Suchen Sie im App-Store von Apple nach dem
Schlüsselwort "SW360".
• Android: Suchen Sie im Google Play Store nach dem
Schlüsselwort "SW360".
• Laden Sie die App herunter und installieren Sie sie auf Ihrem
mobilen Gerät.
Konto erstellen
Wenn Sie diese App zum ersten Mal benutzen, müssen Sie ein
Konto erstellen.
• Öffnen Sie die App.
• Tippen Sie auf "Neuer Benutzer".
• Geben Sie Ihre E-Mail-Adresse ein.
• Geben Sie ein neues Passwort ein und bestätigen Sie es.
Hinweis: Es ist nicht möglich, den Code einzufügen; er muss von
Hand eingegeben werden.
• Sie erhalten eine Bestätigung per E-Mail. Klicken Sie in dieser
Mail auf den Link zum Bestätigen Ihrer E-Mail-Adresse. Sie
können ihren Account erst nach Bestätigen der angegebenen EMail-Adresse nutzen.
• Öffnen Sie anschließend die App erneut und melden Sie sich mit
den neuen Benutzerdaten an.
• Wenn Sie bereits ein Konto haben, geben Sie Kontoname und
Passwort ein und tippen Sie auf "Sign in".
• Wenn Sie Ihr Passwort vergessen haben, tippen Sie auf "Forgot
password" und folgen Sie den Anweisungen der App.
Anschließen einer Kamera
1. Tippen Sie im Reiter "Meine Geräte" auf das Pluszeichen (+) oben
rechts. Tippen Sie auf "Neues Gerät hinzufügen".
DE
9
Page 10

Bedienungsanleitung
2. Verbinden Sie den Adapter mit dem Stromeingang. Warten Sie 30
Sekunden bis das Gerät hochgefahren ist. Stellen Sie sicher, dass
Ihre Kamera sich in der Reichweite Ihres mobilen Geräts befindet (1
m).
iOS Android
3a. Schließen Sie die App und
gehen Sie auf Ihrem mobilen
Endgerät zu den WiFiEinstellungen. Die Kamera
überträgt die vorprogrammierten
Einstellungen für das private
Drahtlosnetzwerk.
3b. Stellen Sie die Verbindung mit
dem für die Kamera-ID
vorgesehenen WiFi-Netz her. Die
Kamera-ID finden Sie auf dem
Aufkleber auf der
Kamerarückseite. Das Passwort
lautet “11111111”. Warten Sie,
bis Ihr mobiles Endgerät eine
Verbindung zum WiFi-Netz der
Kamera aufgebaut hat.
3c. Wechseln Sie nach einem
erfolgreichen Verbindungsaufbau
zurück in die SW360-App.
3. Wählen Sie die Kamera-ID aus
der Liste. Die Kamera-ID finden
Sie auf dem Aufkleber auf der
Kamerarückseite.
4. In der SW360-App können Sie nun durch die Auswahl des Namens
(SSID) das Drahtlosnetzwerk festlegen, mit dem sich die Kamera
standardmäßig verbindet. Geben Sie das entsprechende Passwort
ein. Hinweis: Ein 5GHz-WiFi-Netzwerk wird nicht unterstützt.
6. Geben Sie eine Kamerabezeichnung ein (z.B. "Wohnzimmer").
Anschließend haben Sie Zugriff auf die Kamera. Über die App auf
Ihrem mobilen Endgerät können Sie das Live-Bild weltweit abrufen.
FUNKTIONEN DER APP
• Im Reiter "Meine Geräte" sehen und verwalten Sie alle Kameras,
die mit Ihrem Konto verknüpft sind. Tippen Sie auf die drei Punkte
neben der Kamerabezeichnung, um eine der folgenden Optionen
aufzurufen:
Einrichtung
• In der Anzeige Einstellungen können Sie Folgendes ändern:
– Den Namen Ihrer Kamera.
– Videoqualität.
– Benachrichtigung bei Bewegungserkennung.
– Aufnahmeoptionen.
– Micro-SD-Karte formatieren.
– Menü "Help" aufrufen.
• Sie können Ihre Kameras mit anderen Konten verknüpfen, indem
Sie auf das Icon Share tippen.
• Sie können eine Kamera aus Ihrem Konto entfernen, indem Sie
auf "Löschen" tippen.
Live-Bild
• Tippen Sie im Reiter "Meine Geräte" ,auf die Wiedergabe-Taste,
um das Live-Bild der Kamera aufzurufen.
10
Page 11

Bedienungsanleitung
• Drehen Sie Ihr mobiles Gerät, um das Video im Querformat in
Vollbild anzuzeigen.
• Tippen Sie oder bewegen Sie Ihre Finger zusammen, um einund auszuzoomen.
• Drehen Sie durch Scrollen mit dem Finger.
• In dieser Anzeige können Sie die Tasten unten verwenden, um:
– den Ton ein oder aus zu schalten.
– einen Schnappschuss aufzunehmen.
– Aufnahmen direkt auf Ihr mobiles Gerät vorzunehmen.
• Um sich die Aufnahmen eines bestimmten Zeitpunkts
anzusehen, können Sie entweder direkt die Zeitschiene am
unteren Rand entsprechend ziehen oder das gewünschte Datum
direkt auswählen.
Fehlersuche
• Beim Einstellen erscheint die ID meiner Kamera nicht in der
Liste.
– Stellen Sie sicher, dass der Abstand zwischen Kamera und
mobilem Endgerät höchstens 1 Meter beträgt.
– Versuchen Sie, die Kamera zurückzusetzen. Siehe Abschnitt
"Kamera zurücksetzen".
– Versuchen Sie, den Standort-Dienst an Ihrem mobilen
Endgerät zu aktivieren und versuchen Sie es erneut.
– Öffnen Sie die WiFi-Einstellungen auf Ihrem mobilen
Endgerät und prüfen Sie, ob die Kamera-ID in der Liste der
verfügbaren Netzwerke angezeigt wird. Stellen Sie eine
Verbindung zu diesem Netzwerk her. Öffnen Sie nun wieder
die SW360-App und prüfen Sie, ob Sie die Kamera in Ihr
WiFi-Netz einbinden können.
Kamera zurücksetzen
• Wann müssen Sie die Kamera zurücksetzen?
– Wenn Sie den Namen oder das Passwort für Ihr WiFi
geändert haben.
– Wenn Sie den WiFi-Router oder Accesspoint gewechselt
haben.
– Wenn Sie die Kamera mit einem anderen Konto verbinden
wollen.
– Wenn Sie die Kamera mit einem anderen WiFi-Netz
verbinden wollen.
• Um die Kamera zurückzusetzen, drücken Sie die Reset-Taste.
Halten Sie die Taste für mindestens 10 Sekunden lang gedrückt.
Lassen Sie die Taste los. Warten Sie mindestens 20 Sekunden,
bis die Wiederherstellung abgeschlossen ist.
Weiter Information
• Alle Funktionen werden ausführlich in der Hilfe-Funktion der App
beschrieben. Alternativ haben Sie die Möglichkeit, die
ausführliche Bedienungsanleitung von unserer Homepage
service.smartwares.eu herunterzuladen. Suchen Sie nach dem
Schlüsselwort "CIP-39218KL".
DE
11
Page 12

Manuel d'instructions
DESCRIPTION DES PIÈCES
1. LED
2. Micro
3. Objectif
4. Haut-parleur
5. Port USB
6. Bouton de réinitialisation
7. Logement de carte TF
INSTALLATION
• Si vous voulez monter la caméra au mur, fixez le support au mur
avec les vis et chevilles fournies. Assurez-vous de leur adaptation
au type de mur.
GUIDE DE DÉMARRAGE RAPIDE
Suivez ces instructions pour prendre rapidement en main votre
caméra. Pour une description détaillée de toutes les fonctionnalités,
reportez-vous à la fonction d'aide de l'app ou téléchargez le manuel
utilisateur complet sur notre site Web : service.smartwares.eu.
Recherchez "CIP-31786AT".
Insertion de carte SD
• Assurez-vous d'abord que votre caméra n'est pas connectée à
l'adaptateur d'alimentation. Insérez votre carte MicroSD à fond
dans le logement de carte TF de la caméra. Utilisez uniquement
une carte MicroSD de classe 10 (maxi. 128 Go).
• Une carte MicroSD est obligatoire pour enregistrer une vidéo.
Téléchargement d'app
• iOS : Recherchez "SW360" sur l'Apple app store.
• Android : Recherchez "SW360" sur Google play store.
• Téléchargez et installez l'app sur votre téléphone portable.
Création de compte
Si vous utilisez cette app pour la première fois, vous devez créer un
compte.
• Ouvrez l'app.
• Touchez "Nouvel utilisateur"
• Renseignez votre adresse e-mail.
• Saisissez un nouveau mot de passe et confirmez-le.
Remarque: Il est impossible de coller le code. Vous devez le saisir.
• Un e-mail de vérification vous est envoyé. Cliquez sur le lien dans
le courrier afin de confirmer votre compte. Si vous ne confirmez
pas, vous ne pouvez pas continuer à utiliser votre compte.
• Ouvrez alors à nouveau l'app et connectez-vous au compte que
vous venez de créer.
• Si vous avez déjà créé un compte, saisissez votre identifiant et
votre mot de passe et touchez "Sign in".
• Si vous avez oublié votre mot de passe, touchez "Forgot
password" et suivez les instructions de l'app.
Connexion d'une caméra
1. Dans l'onglet "mes dispositifs", touchez le signe "plus" (+) en haut à
droite. Touchez "Ajouter nouveau dispositif".
2. Branchez la caméra avec l'adaptateur USB pour la mettre sous
tension. Attendez 30 secondes pour que la LED de la caméra
commence à clignoter. Assurez-vous que la caméra est à portée (1
m) de votre dispositif mobile.
iOS Android
12
Page 13

Manuel d'instructions
3a. Sortez de l'app et rendezvous aux Paramètres Wi-Fi de
votre dispositif mobile. La caméra
transmet son propre réseau sans
fil privé.
3b. Connectez-vous au SSID du
réseau Wi-Fi correspondant à l'ID
de votre caméra. Vous retrouvez
l'ID de la caméra sur l'autocollant
au dos de la caméra. Le mot de
passe est « 11111111 ».
Attendez que votre dispositif
mobile se connecte au réseau
Wi-Fi de la caméra.
3c. Une fois la connexion établie
avec la caméra, revenez à l'app
SW360.
4. Dans l'app SW360, choisissez le SSID du réseau sans fil auquel
vous voulez connecter la caméra. Saisissez le mot de passe
correspondant. Remarque: Un réseau Wi-Fi 5GHz n'est pas pris en
charge.
5. Si la connexion est réussie, la LED devient verte et la caméra
annonce "Connexion réussie".
6. Nommez votre caméra (par ex. "salon"). Vous pouvez alors
accéder à votre caméra. Vous découvrez la vue en direct, depuis
n'importe où dans le monde, grâce à l'app de votre dispositif mobile.
3. Sélectionnez l'ID de votre
caméra dans la liste. Vous
retrouvez l'ID de la caméra sur
l'autocollant au dos de la caméra.
FONCTIONS D'APP
• Dans l'onglet "Mes dispositifs", vous découvrez et gérez toutes
les caméras liées à votre compte. Si vous touchez les trois petits
points du nom de votre caméra, vous disposez des options
suivantes :
Configuration
• Dans l'écran de configuration, vous modifiez :
– Le nom de votre caméra.
– Qualité vidéo.
– Notifications de détection de mouvement.
– Options d'enregistrement.
– Formatage de votre carte MicroSD.
– Accédez à la fonction "Aide".
• Vous pouvez partager vos caméras avec d'autres comptes en
touchant l'icône de partage.
• Retirez une caméra de votre compte en touchant "supprimer".
Vue en direct
• Dans l'onglet "mes dispositifs", appuyez sur le bouton de lecture
pour ouvrir la vue en direct de votre caméra.
• Faites pivoter votre dispositif mobile pour afficher la vidéo en
plein écran au format paysage.
• Touchez ou pincez pour zoomer.
• Faites pivoter l'affichage en faisant défiler avec votre doigt.
• Dans cet écran, vous pouvez utiliser les boutons du bas pour :
– Activer /désactiver le son.
– Prendre un cliché.
– Parler via la caméra en touchant l’icône de microphone sans
le relâcher.
FR
13
Page 14

Manuel d'instructions
– Enregistrer des vidéos directement sur votre dispositif mobile.
• Vous pouvez lire un enregistrement vidéo en faisant coulisser le
curseur de temps en bas ou en choisissant la date.
Dépannage
• Je ne vois pas l'ID de ma caméra dans la liste durant la
configuration.
– Assurez-vous que votre caméra est à moins de 1m de votre
dispositif mobile.
– Tentez de réinitialiser la caméra. Voir le paragraphe
"réinitialisation de caméra".
– Activez le service de géolocalisation de votre téléphone
portable et réessayez.
– Allez aux paramètres Wi-Fi de votre dispositif mobile et
vérifiez si l'ID de caméra est dans votre liste des réseaux
disponibles. Connectez-vous à ce réseau. Revenez alors à
l'app SW360 et vérifiez si vous pouvez relier la caméra à
votre réseau Wi-Fi.
Réinitialisation de caméra
• Quand devez-vous réinitialiser la caméra ?
– Si vous avez changé de nom ou de mot de passe Wi-Fi.
– Si vous avez changé de routeur ou de point d'accès Wi-Fi.
– Si vous voulez associer une autre caméra au compte.
– Si vous voulez associer la caméra à un réseau Wi-Fi différent.
• Pour réinitialiser la caméra, enfoncez le bouton de réinitialisation
sur la caméra avec l'outil fourni. Maintenez le bouton appuyé au
moins 10 secondes. Relâchez le bouton et la caméra vous
indique que les réglages d'usine ont été restaurés. Attendez au
moins 20 secondes afin que la caméra redémarre.
En savoir plus
• Pour une description détaillée de toutes les fonctionnalités,
reportez-vous à la fonction d'aide de l'app ou téléchargez le
manuel utilisateur complet sur notre site Web :
service.smartwares.eu. Recherchez "CIP-31786AT".
14
Page 15

Návod k použití
POPIS SOUČÁSTÍ
1. Čočka
2. Slot na mikroSD kartu
3. Anténa
4. Konektor LAN
5. Napájecí vstup
6. Tlačítko Reset
INSTALACE
• Pomocí dodaných šroubů a hmoždinek upevněte držák na stěnu.
Ujistěte se, že jsou vhodné pro daný typ stěny.
STRUČNÝ NÁVOD
Pro rychlé spuštění kamery postupujte v souladu s níže uvedenými
pokyny. Pro podrobnější popis všech funkcí si prosím prohlédněte
funkci nápovědy v aplikaci nebo si stáhněte rozšířený návod k použití
z našich webových stránek: service.smartwares.eu. Vyhledejte
prosím „CIP-39218KL“.
Vložení karty SD
• Nejdříve se ujistěte, že kamera není připojena k napájecímu
adaptéru. Zasuňte zcela mikroSD kartu do otvoru pro kartu TF v
kameře. Používejte pouze mikroSD kartu třídy 10 (max.128GB).
• MikroSD karta je nezbytná k nahrávání záznamu.
Stažení aplikace
• iOS: V obchodu Apple store vyhledejte „SW360“.
• Android: V obchodu Google play vyhledejte „SW360“.
• Stáhněte si a nainstalujte aplikaci do mobilního zařízení.
Vytvoření účtu
Pokud tuto aplikaci používáte poprvé, musíte si vytvořit účet.
• Otevřete aplikaci.
• Klepněte na volbu „New user“ (Nový uživatel).
• Vyplňte vaši e-mailovou adresu.
• Zadejte nové heslo a potvrďte ho.
Poznámka: Pokud kód nelze vložit, musíte jej napsat.
• Odešle se vám ověřovací e-mail. Na potvrzení vašeho účtu
klepněte na odkaz v mailu. Pokud jej nepotvrdíte, nebudete moci
váš účet dále používat.
• Nyní aplikaci znovu otevřete a přihlaste se k právě založenému
účtu.
• Pokud již máte vytvořen účet, zadejte své přihlašovací jméno a
heslo a klepněte na tlačítko „Sign in“.
• V případě, že jste zapomněli heslo, klepněte na tlačítko „Forgot
password“ a postupujte podle pokynů v aplikaci.
Připojení kamery
1. Na kartě „my devices“ (moje zařízení) klepněte na tlačítko
„plus“ (+) v pravém horním rohu. Klepněte na volbu „Add a new
device“ (Přidat nové zařízení).
2. Adaptér zapněte do napájecího vstupu. Vyčkejte prosím 30
sekund, dokud se zařízení nespustí. Ujistěte se, že kamera se
nachází v blízkosti (1 m) mobilního zařízení.
iOS Android
3a. Ukončete aplikaci a ve svém
mobilním zařízení přejdete do
nastavení Wi-Fi. Kamera vytváří
svou vlastní bezdrátovou síť.
3. V seznamu vyberte ID vaší
kamery. ID kamery najdete na
nálepce na zadní straně kamery.
CS
15
Page 16

Návod k použití
3b. Připojte se k SSID sítě Wi-Fi
odpovídající ID vaší kamery. ID
kamery najdete na nálepce na
zadní straně kamery. Heslo je
„11111111“. Vyčkejte, dokud se
vaše mobilní zařízení nepřipojí k
síti Wi-Fi kamery.
3c. Pokud bylo připojení ke
kameře úspěšné, vraťte se do
aplikace SW360.
4. V aplikaci SW360 vyberte SSID bezdrátové sítě, k níž chcete
kameru připojit. Zadejte odpovídající heslo. Poznámka: Je
podporována 5GHz síť Wi-Fi.
6. Svou kameru pojmenujte (například „obývák“). Nyní budete mít ke
kameře přístup. Nyní můžete sledovat živý obraz odkudkoliv na světě
pomocí aplikace ve svém mobilním zařízení.
FUNKCE APLIKACE
• V kartě „My devices“ (Má zařízení) můžete zobrazit a spravovat
všechny kamery propojené s vaším účtem. Pokud klepnete na tři
tečky vedle názvu vaší kamery, zobrazí se následující možnosti:
Nastavení
• Na obrazovce nastavení lze změnit:
– Název kamery.
– Kvalitu videa.
– Oznámení o detekci pohybu.
– Možnosti nahrávání.
– Formátování mikroSD karty.
– Vstoupit do funkce „Help“ (Nápověda).
• Kamery lze sdílet klepnutím na ikonu sdílení sdílet s dalšími účty.
• Kameru můžete odebrat z účtu klepnutím na volbu
„delete“ (odstranit).
Živý přenos
• Na kartě „my devices“ (má zařízení) stiskněte tlačítko přehrávání
a otevřete tak živý přenos kamery.
• Otočením mobilního zařízení zobrazíte video na šířku na celou
obrazovku.
• Klepnutím nebo stažením prstů zobrazení přiblížíte nebo oddálíte.
• Zobrazení otočíte posunutím prstu.
• Na této obrazovce můžete používat tlačítka ve spodní části k
následujícím činnostem:
– Zapnutí či vypnutí zvuku.
– Pořiďte snímek.
– Nahrávání záznamu přímo do mobilního zařízení.
• Nahranou stopu lze prohlížet posouvání časové lišty v dolní části
nebo volbou data.
Řešení potíží
• Během nastavení nevidím ID mojí kamery.
– Ujistěte se, zda je kamera v dosahu 1 m od mobilního
zařízení.
– Zkuste resetovat kameru. Viz odstavec „Resetování kamery“.
– Ve svém mobilním zařízení povolte službu lokalizace a zkuste
to znovu.
– Přejděte do nastavení Wi-Fi mobilního zařízení a zkontrolujte,
zda v seznamu dostupných sítí vidíte ID kamery. Připojte se k
této síti. Nyní se vraťte do aplikace SW360 a zkontrolujte, zda
můžete kameru připojit k síti Wi-Fi.
16
Page 17

Resetování kamery
• Kdy je třeba kameru resetovat?
– Pokud jste změnili název nebo heslo sítě Wi-Fi.
– Pokud jste změnili směrovač nebo přístupový bod sítě Wi-Fi.
– Pokud chcete propojit kameru s jiným účtem.
– Pokud chcete kameru připojit k jiné síti Wi-Fi.
• Chcete-li resetovat kameru, stiskněte tlačítko reset. Tlačítko
podržte stlačené na minimálně 10 sekund. Uvolněte tlačítko.
Vyčkejte 20 sekund, dokud se kamera nerestartuje.
Podrobnější informace
• Pro podrobnější popis všech funkcí si prosím prohlédněte funkci
nápovědy v aplikaci nebo si stáhněte rozšířený návod k použití z
našich webových stránek: service.smartwares.eu. Vyhledejte
prosím „CIP-39218KL“.
Návod k použití
CS
17
Page 18

Instrukcje użytkowania
OPIS CZĘŚCI
1. Obiektyw
2. Gniazdo karty MicroSD
3. Antena
4. Połączenie LAN
5. Wejście zasilania
6. Przycisk Reset
INSTALACJA
• Zamocuj uchwyt do ściany za pomocą dołączonych śrub i kołków.
Upewnij się, że są one odpowiednie do typu ściany.
INSTRUKCJA SZYBKIEGO STARTU
Aby szybko rozpocząć korzystanie z kamery, należy postępować
zgodnie z podanymi poniżej instrukcjami. Bardziej szczegółowy opis
wszystkich funkcji można uzyskać, przechodząc do funkcji pomocy w
aplikacji lub pobierając rozszerzony podręcznik użytkownika z naszej
witryny internetowej service.smartwares.eu. Należy wyszukać modelu
„CIP-39218KL".
Wkładanie karty SD
• Najpierw upewnij się, że kamera nie jest podłączona do zasilacza
sieciowego. Kartę Micro-SD należy wsunąć całkowicie do gniazda
karty TF znajdującego się wkamerze. Należy używać wyłącznie
kart MicroSD klasy 10 (maks. 128GB).
• Karta MicroSD jest wymagana do nagrywania materiałów
filmowych.
Pobieranie aplikacji
• iOS: Wyszukaj aplikację „SW360” w sklepie App Store firmy
Apple.
• Android: Wyszukaj aplikację „SW360” w sklepie Google Play.
• Pobierz aplikację na urządzenie przenośne izainstaluj ją.
Tworzenie konta
Jeżeli korzystasz zaplikacji po raz pierwszy, konieczne jest
utworzenie konta.
• Otwórz aplikację.
• Dotknij opcji „Nowy użytkownik”
• Podaj swój adres e-mail.
• Wpisz nowe hasło ipotwierdź je.
Uwaga: Nie ma możliwości wklejenia kodu. Należy go wpisać.
• Zostanie wysłana do Ciebie weryfikacyjna wiadomość e-mail.
Kliknij zawarte w niej łącze, aby potwierdzić swoje konto. Bez
potwierdzenia konta korzystanie z niego nie będzie możliwe.
• Teraz otwórz aplikację ponownie i zaloguj się do właśnie
utworzonego konta.
• Jeśli konto zostało już utworzone wcześniej, podaj nazwę
użytkownika ihasło, po czym kliknij przycisk Sign in.
• Jeśli nie pamiętasz hasła, naciśnij przycisk Forgot password,
anastępnie postępuj zgodnie zinstrukcjami wyświetlanymi
waplikacji.
Nawiązywanie połączenia zkamerą
1. Na karcie „moje urządzenia” dotknij znaku „plus” (+) znajdującego
się wprawym górnym rogu. Dotknij przycisku „Dodaj nowe
urządzenie”.
2. Podłącz zasilacz do wejścia zasilania. Odczekaj 30 sekund na
uruchomienie urządzenia. Upewnij się, że kamera znajduje się
wniewielkiej odległości (1m) od urządzenia przenośnego.
18
Page 19

Instrukcje użytkowania
iOS Android
3a. Zamknij aplikację, a
następnie przejdź do ustawień
Wi-Fi na urządzeniu przenośnym.
Kamera pracuje w ramach
własnej prywatnej sieci
bezprzewodowej.
3b. Nawiąż połączenie z siecią
Wi-Fi oznaczoną identyfikatorem
SSID, który odpowiada
identyfikatorowi kamery.
Identyfikator kamery można
znaleźć na naklejce z tyłu
kamery. Hasło to „11111111”.
Poczekaj, aż urządzenie
przenośne nawiąże połączenie z
siecią Wi-Fi kamery.
3c. Po pomyślnym nawiązaniu
połączenia z kamerą należy
powrócić do aplikacji SW360.
4. W aplikacji SW360 wybierz identyfikator SSID sieci
bezprzewodowej, z którą chcesz ostatecznie połączyć kamerę.
Wprowadź odpowiednie hasło. Uwaga: Sieci Wi-Fi 5GHz są
nieobsługiwane.
6. Kamerze należy nadać nazwę (na przykład „pokój dzienny”). Teraz
będzie można uzyskać dostęp do kamery. Za pośrednictwem
aplikacji na urządzeniu przenośnym możesz widzieć podgląd na
żywo z dowolnego miejsca na świecie.
3. Wybierz odpowiedni
identyfikator kamery z listy.
Identyfikator kamery można
znaleźć na naklejce z tyłu
kamery.
FUNKCJE APLIKACJI
• Na karcie „Moje urządzenia” wyświetlane są wszystkie kamery
powiązane zkontem użytkownika. Zpoziomu tej karty można
nimi zarządzać. Po dotknięciu trzech kropek obok nazwy kamery
wyświetlone zostaną następujące opcje:
Konfiguracja
• Zpoziomu ekranu konfiguracji można zmienić następujące
nastawy:
– Nazwa kamery.
– Jakość wideo.
– Powiadomienia o wykryciu ruchu.
– Opcje nagrywania.
– Formatowanie karty MicroSD.
– Uzyskiwanie dostępu do funkcji „Pomoc”.
• Naciśnięcie ikony udostępniania umożliwia udostępnienie kamer
innym użytkownikom.
• Naciśnięcie przycisku „usuń” umożliwia usunięcie kamery
zkonta.
Podgląd na żywo
• Na karcie „moje urządzenia” naciśnij przycisk odtwarzania, aby
otworzyć podgląd na żywo kamery.
• Obrócenie urządzenia przenośnego powoduje wyświetlenie filmu
wwidoku pełnoekranowym worientacji poziomej.
• Naciśnięcie igest uszczypnięcia umożliwiają odpowiednio
zwiększenie lub zmniejszenie powiększenia.
• Aby obrócić widok, wystarczy przesunąć palcem.
• Udołu tego ekranu dostępne są przyciski umożliwiające
wykonanie następujących czynności:
– Włączenie lub wyłączenie dźwięku.
PL
19
Page 20

Instrukcje użytkowania
– Zrobienie zdjęcia.
– Nagrywanie materiału filmowego zapisywanego bezpośrednio
na urządzeniu przenośnym.
• Możliwe jest obejrzenie nagranego materiału filmowego,
przesuwając pasek czasu na dole lub wybierając datę.
Rozwiązywanie problemów
• Podczas konfiguracji nie widzę identyfikatora mojej kamery na
liście.
– Upewnij się, że kamera znajduje się w odległości nie większej
niż 1m od urządzenia przenośnego.
– Spróbuj zresetować kamerę. Patrz ustęp „resetowanie
kamery”.
– Włącz usługę lokalizacji na urządzeniu przenośnym i spróbuj
ponownie.
– Przejdź do ustawień Wi-Fi urządzenia przenośnego i
sprawdź, czy identyfikator kamery jest wyświetlany na liście
dostępnych sieci. Nawiąż połączenie z tą siecią. Teraz wróć
do aplikacji SW360 i sprawdź, czy możesz połączyć kamerę z
siecią Wi-Fi.
Resetowanie kamery
• Kiedy wymagane jest zresetowanie kamery?
– Gdy dokonano zmiany nazwy sieci Wi-Fi lub hasła.
– Wprzypadku zmiany routera lub punktu dostępu do sieci Wi-
Fi.
– Gdy chcesz powiązać kamerę zinnym kontem.
– Gdy chcesz połączyć kamerę zinną siecią Wi-Fi.
• Aby zresetować kamerę, naciśnij przycisk resetowania. Trzymaj
przycisk wciśnięty przez co najmniej 10 sekund. Zwolnij przycisk.
Odczekaj co najmniej 20 sekund, aby umożliwić ponowne
uruchomienie kamery.
Więcej informacji
• Bardziej szczegółowy opis wszystkich funkcji można uzyskać,
przechodząc do funkcji pomocy w aplikacji lub pobierając
rozszerzony podręcznik użytkownika z naszej witryny
internetowej service.smartwares.eu. Należy wyszukać modelu
„CIP-39218KL".
20
Page 21

Page 22
IP65
Informaon for power adapter:
Model: K12S120100G
Input:
100
-240V 50/60Hz 0.35A
Output: DC 12V 1.0A
Supplier: Dongguan Guanjin Electronics Technology Co., Ltd
 Loading...