

Page 1
Repair Parts and Maintenance Guide
Optima® EBF-650/ETF-600 Faucets
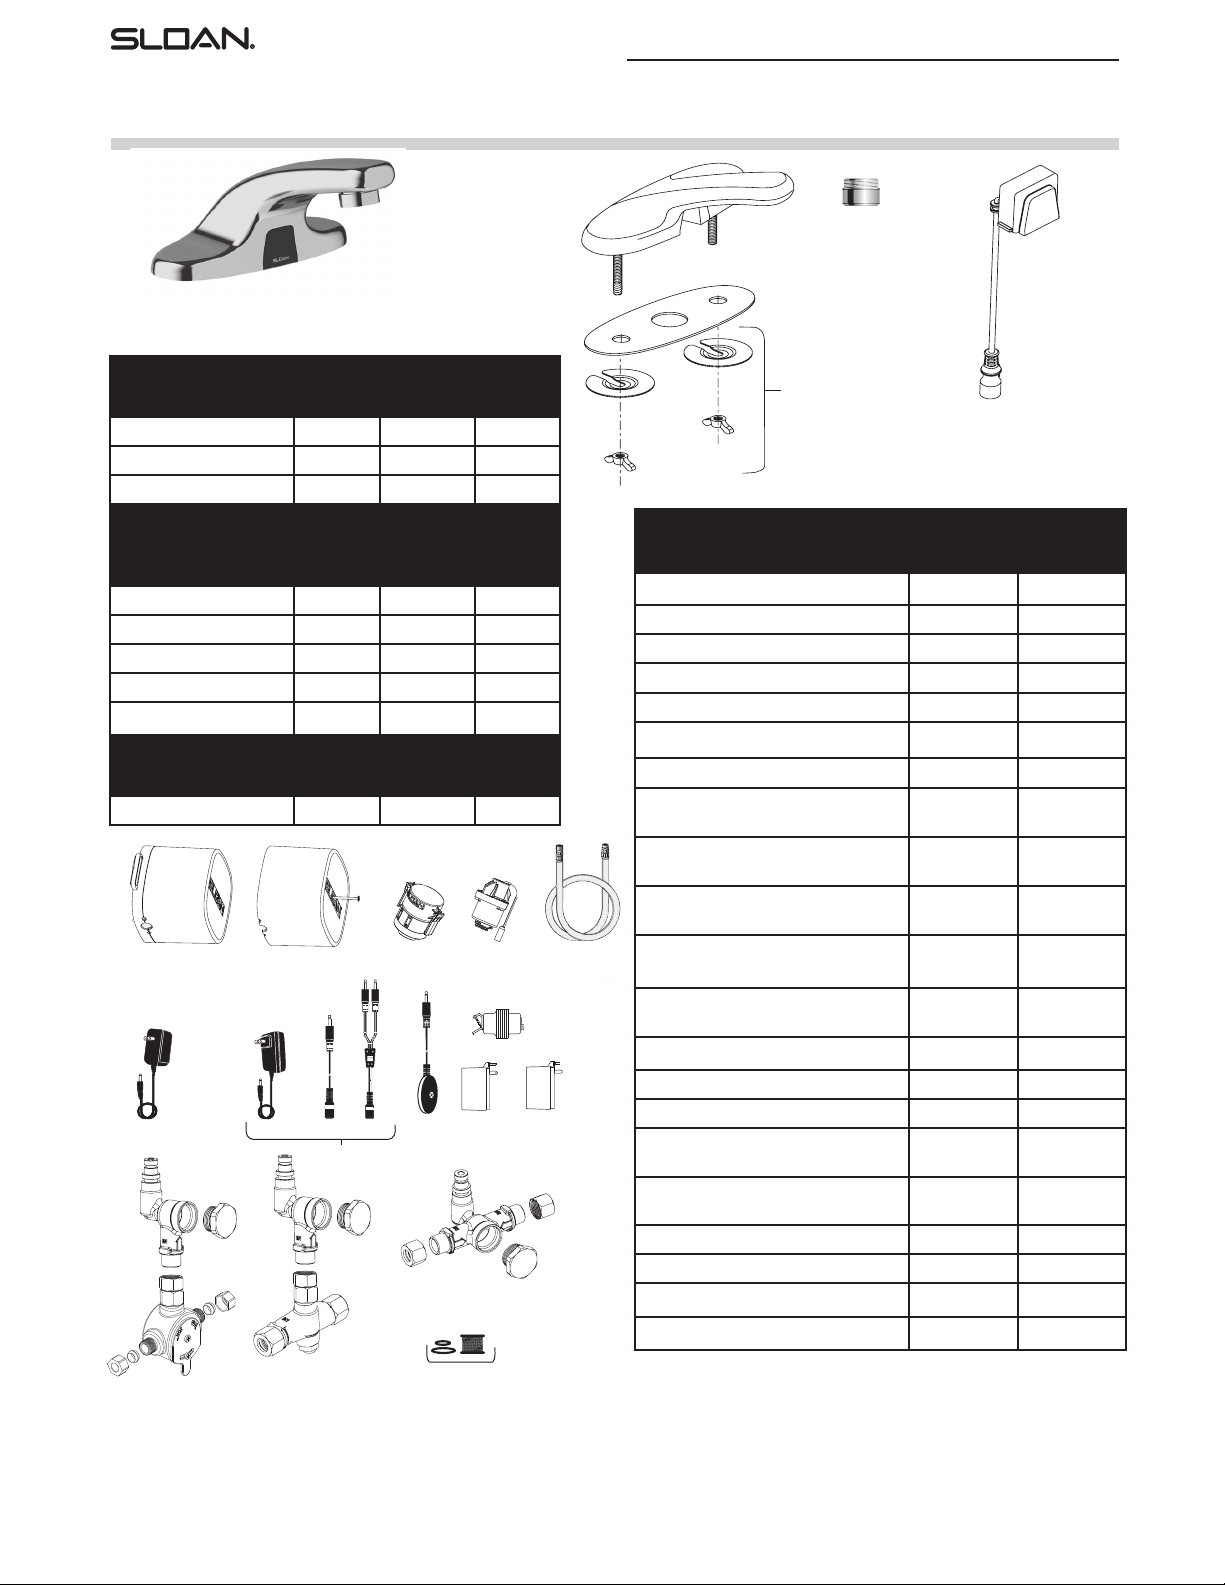
Parts & Accessories
ETF-600 Low-height, hardwired
EBF-650 Low-height, battery
SPOUT ASSEMBLY
Description Code No. Part No.
Spout Assembly 0367002 EFP2A
Sensor & Cable Assembly 0367006 EFP6A
Sensor & Cable Assembly 0367075 EFP75A
SPRAYHEAD
OPTIONS
Description Type Code No. Part No.
0.35 GPM/1.3 Lpm MLM 3365756 ETF1039A
0.5 GPM/1.9 Lpm MLM 3365092 ETF1023A
1.5 GPM/5.7 Lpm LAM 0365395 ETF688
2.2 GPM/8.3 Lpm LAM 3365162 ETF1029A
2.2 GPM/8.3 Lpm AER 3365093 ETF1024A
TRIMPLATE OPTIONS
Description Code No. Part No.
8” 3365114 ETF578A
EFP39A
EFP40A
EFP11A
SFP6
EFP99A
EFP10A
Cover and Screw ONLY
SFP37 SFP38
SFP36
EFP100A
EFX8A
EFP98A
SFP35A
ETF-233
EFP28A
EFP101A
EFP103A
EL-248-40
ETF-416
EFP25
EFP2A
ETF-1039A
ETF1023A
EFP6A
ETF688
ETF1029A
ETF1024A
EFP75A
BELOW DECK ASSEMBLIES
Description Code No. Part No.
Control Box No Turbine 0367039 EFP39A
Control Box Turbine 0.5 gpm 0367040 EFP40A
Control Box Turbine 1.5 gpm 0367011 EFP11A
Quick Connect Spout Hose 24” 0367025 EFP25
Control Box Cover w/Screw 0367010 EFP10A
Solenoid Assembly 0367103 EFP103A
Battery Pack 3324113 EFX8A
Double Inlet
Tee Filter Assembly
BDM & Single Inlet
Tee Filter Assembly Kit
BDT & Single Inlet
Tee Filter Assembly Kit
Replacement Filter Pack-(5) Filter
(5) Large O-rings (5) Small O-rings
24 VAC Power
Harness Assembly
110V/6 VDC Power Supply 0362006 SFP6
100/240VAC/6 VDC Power Supply 0362016 SFP36
120/24 VAC Power Supply 0365534PK ETF-233
120/24 VAC Power Supply (Canada)
Plug-in
120/24 VAC Power Supply
(Box Mount)
Extension Cable 0362017 SFP37
Splitter Cable 0362018 SFP38
Gang Adapter Kit 0362035 SFP35A
Faucet to Module Ext. Cable* 0367113 EFP-113-A
0367028 EFP28A
0367099 EFP99A
0367100 EFP100A
0367101 EFP101A
0367098 EFP98A
0365879 ETF-416
0345370PK EL-248-40
The information contained in this document is subject to change without notice.
NOTE: Some parts and accessories must be ordered separately
* Not shown
175
Page 2

Repair Parts and Maintenance Guide
Optima® EBF-650/ETF-600 Faucets
Parts & Accessories
TROUBLESHOOTING INSTRUCTIONS FOR OPTIMA SENSOR ACTIVATED LAVATORY FAUCETS
WITH THE NEW OPTIMA CONTROL BOXES AND THE SLOAN CONNECT SMARTPHONE APP.
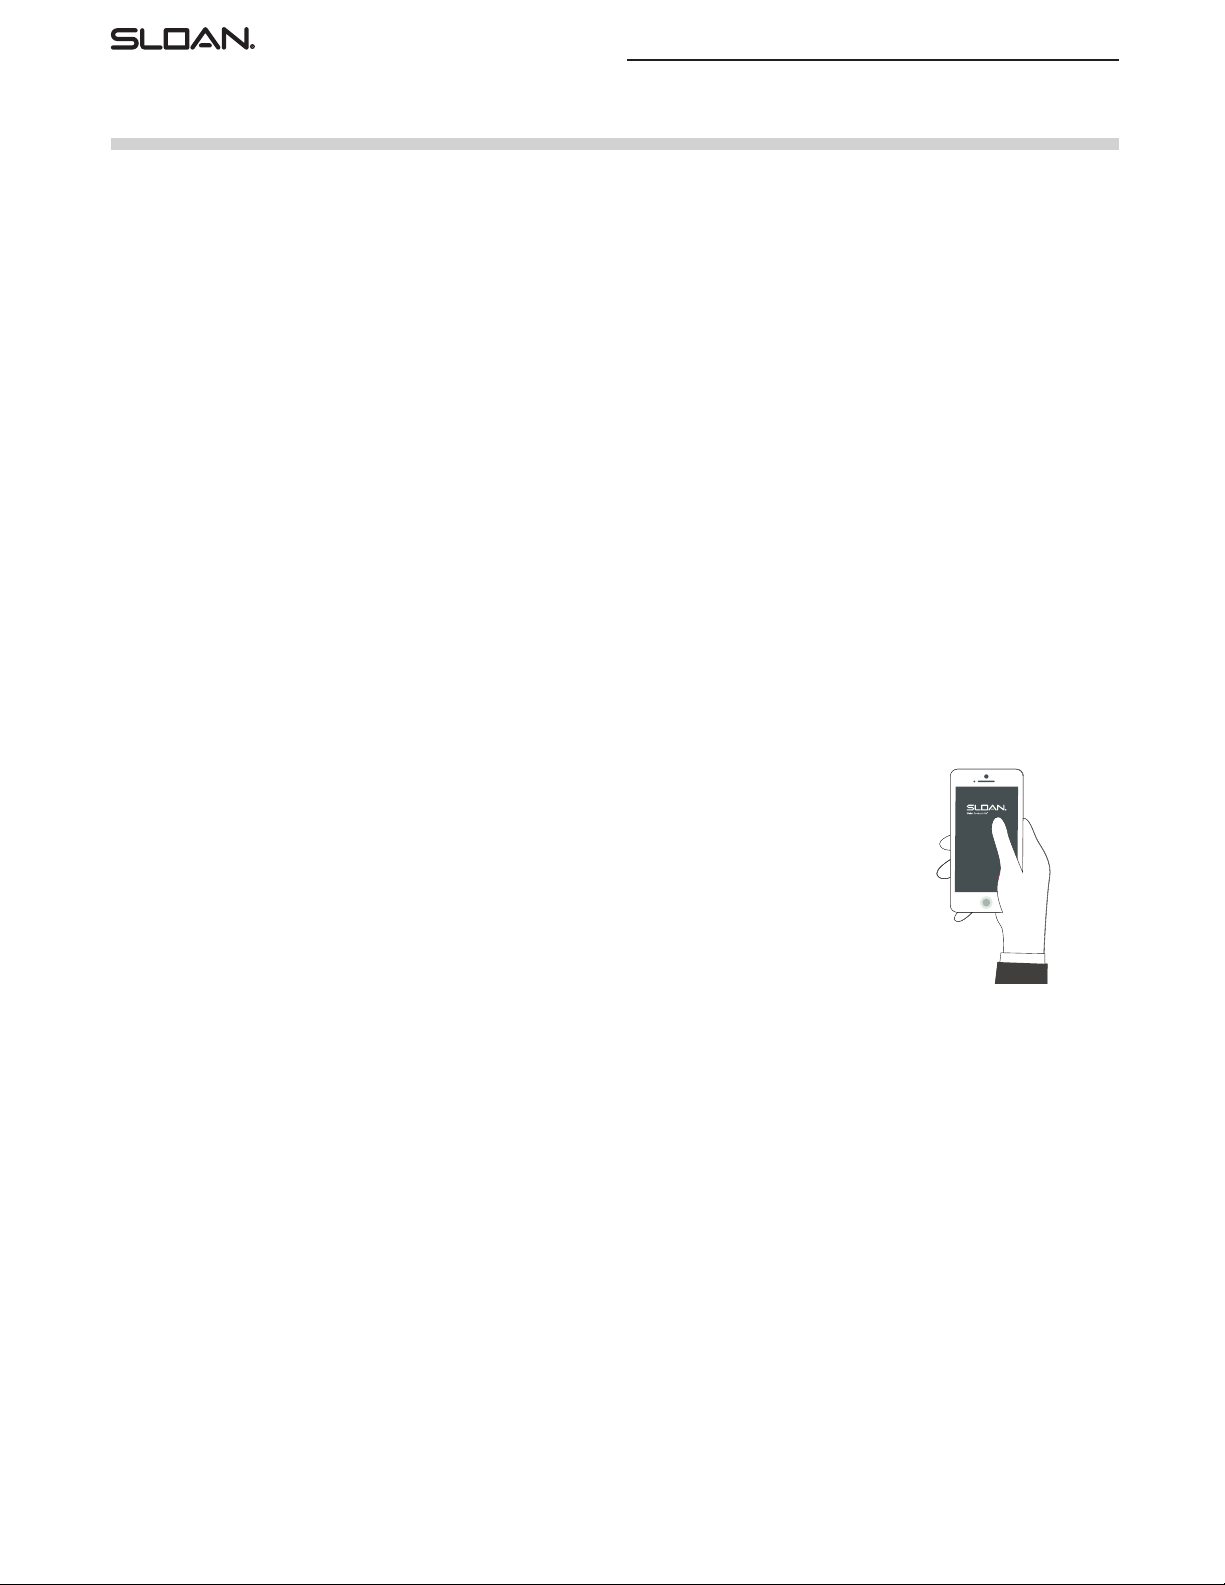
NOTE: To automatically check battery strength, troubleshoot, diagnose and report faucet issues with a
wireless device, use the Sloan SmartPhone APP. The APP is available free-of-charge at the Apple iPhone APP store for iOS devices or the Google Play
APP store for Android devices. For more information about the APP and its capabilities please visit www.Sloan.com.
FAUCET TROUBLESHOOTING GUIDE
LED indicator light in the IR (infrared) sensor is red.
A. Battery power is low.
Install four (4) new AA sized alkaline batteries. Check that the orientation of each battery matches
the positive (+) and negative (–) symbols shown in the bottom of the battery compartment.
Re-attach battery compartment to control module. Green LED will illuminate. If the Green LED does
not illuminate, remove battery compartment for 10 seconds and return into place.
Faucet DOES NOT function.
A. Batteries not installed or are exhausted.
Install four (4) AA sized alkaline batteries. Check that the orientation of each battery matches the positive (+) and negative (–) symbols
shown in the bottom of the battery compartment. Reattach battery compartment to control module. Green LED will illuminate. If the Green
LED does not illuminate, remove battery compartment for 10 seconds and return into place.
B. Power Cable not installed (Hardwire models).
IInstall power cable and check connection.
C. Sensor Cable not installed.
Install sensor cable and check connection. Confirm connection guide markings are aligned.
D. Sensor range is set too short and is not detecting the target.
Increase sensor detection range.
Sensor is activated but faucet DOES NOT deliver water.
A. Faucet has initiated its adaptive sensing calibration program.
Wait 60 seconds before activating faucet.
B. Solenoid Cable not connected.
Check solenoid cable connection. Confirm connection guide markings are aligned.
Sensor Range Requires Manual Adjustment.
Sensor Range is measured in units from 1 to 5, with 1 being closest to the faucet and 5 being farthest from the faucet. The factory default
Sensor Range is 3.
A. To determine what the current Sensor Range setting is, press the red “Sensor” button on the upper right hand corner of the Optima Control
Box for 1 second. Five seconds after pressing the button, the green LED beside it will blink to indicate the Sensor Range setting. For
example, if it is set at 2, the green LED will blink 2 times.
B. To adjust the Sensor Range, press and hold the red “Sensor” button for three seconds and release once the green LED comes on to indicate
that you are in Sensor Range adjustment mode. Then press the “Sensor” button one second at a time for however many times you wish to
increase the range. For example, if the Sensor Range is set at 2 and you wish to increase it to 4, press the “Sensor” button two times for one
second each time..
C. If you wish to decrease the Sensor Range, follow the same procedure to enter into Sensor Range adjustment mode, and then press
the “Sensor” button one second at a time. The button is designed to go up to 5 units and then back down to 1 unit. For example, if the
Sensor Range is set at 4 and you wish to decrease it to 2, press the “Sensor” button three times for one second each time.
D. To conform your changes, wait 5 seconds and then press the red “Sensor” button on the upper right hand corner of the Optima Control Box
for 1 second. Five seconds after pressing the button, the green LED beside it will blink to indicate the Sensor Range setting. For example, if it
is now set at 2, the green LED will blink 2 times.
Solenoid produces an audible “CLICK” when an object is placed in the detection zone of the sensor but
NO water flows.
A. Water supply to faucet is not open.
Open supply stop(s).
B. Inlet fitting filter is clogged.
Remove, clean, and reinsert. Replace with EBF1004 solenoid filter kit if necessary.
C. Aerator or spray head is clogged.
Remove, clean, and reinsert.
The information contained in this document is subject to change without notice.
176
Page 3
Repair Parts and Maintenance Guide
Optima® EBF-650/ETF-600 Faucets
Parts & Accessories
Solenoid valve DOES NOT produce an audible “CLICK” and NO water flows. Green LED illuminates when batteries installed.
A. Replace EFP103A solenoid valve module.
Faucet delivers only a slow flow or dribble when sensor is activated.
A. Water supply valve is partially closed.
Open the supply stop(s) completely.
B. Inlet fitting filter is clogged.
Remove, clean, and reinsert. Replace with EFP101A replacement filter kit if necessary.
C. Aerator or spray head is clogged.
Remove, clean, and reinsert.
Faucet DOES NOT stop delivering water or continues to drip after user is no longer detected (automatic shut-off fails even when batteries are
removed).
A. Solenoid valve seat is dirty.
Remove, clean, and reinsert solenoid filter. Activate faucet several times to flush out dirt.
B. Sensor range is set too long and is detecting the sink or some other object.
Reduce sensor detection range.
C. Solenoid valve module is not working properly.
Replace EFP103A solenoid valve module.
The water temperature is too hot or too cold on a faucet connected to hot and cold supply lines with inlet filter fitting.
A. Supply stops are not adjusted properly.
Adjust supply stops.
NOTE: For some systems, a thermostatic mixing valve may be required
SLOAN CONNECT APP FAQs
How do I connect my faucet to the Sloan mobile app?
To connect your faucet to the Sloan mobile App, you must complete the following steps:
1. Turn on your smartphone’s Bluetooth.
2. Open the Sloan mobile app.
3. Complete all Sign In fields and agree to the End User License Agreement and Terms of Use.
4. Activate your faucets Bluetooth transmitter by slowly waving your hand underneath the faucet three (3) times
within ten (10) seconds. Note: water will run during this process.
5. When your faucet’s Bluetooth transmitter is activated, the Sloan mobile app will display your faucet.
6. Select your faucet to confirm and connect to the Sloan mobile app.
Can I still use my app and faucet if there is no internet connection?
Yes. The Sloan Connect App and faucet are designed to work in offline mode. All connectivity occurs via Bluetooth, which does not require an internet
connection. If your phone is running Android 7, there is a built-in feature to prevent abusive BLE scanning. This change prevents an app from stopping and
starting BLE scans more than 5 times in a window of 30 seconds. If this app does not detect any faucet and your phone is running Android 7, just exit the app
and restart the app 30 seconds later.
My faucet is not showing in advertised devices.
Please be sure your Sloan Optima Control Box has power. To do this, remove the cover with the single screw in the center. Check there are no loose or disconnected wires and ensure the batteries are properly installed. Then repeat the connection process. If you are still experiencing issues, contact Sloan.
How do I save and load settings?
Each time you update settings on a faucet, they are stored in the app. If you would like to load the settings from a previous faucet to a new faucet, connect to
that faucet and select the “Load Previous Settings”. This will display a dialogue box showing the previous settings. Click “Confirm” to load those settings into
the app, then select “Apply Settings To Faucet” button at the bottom of your dashboard.
Why is the dashboard photo of my faucet not correct?
Each Sloan faucet type has several images associated with it. Use the left and right arrows to view the different faucet images.
How can I use the Sloan Connect App to save information about a specific faucet, like its location?
Select the “Notes” option from the main App screen and use this feature to include up to 120 characters worth of information.
When assistance is required, please contact Sloan Technical Support at:
1-888-SLOAN-14 (1-888-756-2614) (USA only) or +1-847-671-4300 (all other locations),
or visit sloan.com
The information contained in this document is subject to change without notice.
177
 Loading...