

Skytronic REMOTE CONTROL 16CH TIMER, REMOTE CONTROLLED DIMMER ADAPTOR User Manual
Remote Control 16ch Timer & Remote Controlled Dimmer Adaptor
i
i
ii
iii
iv
v
vi
vii
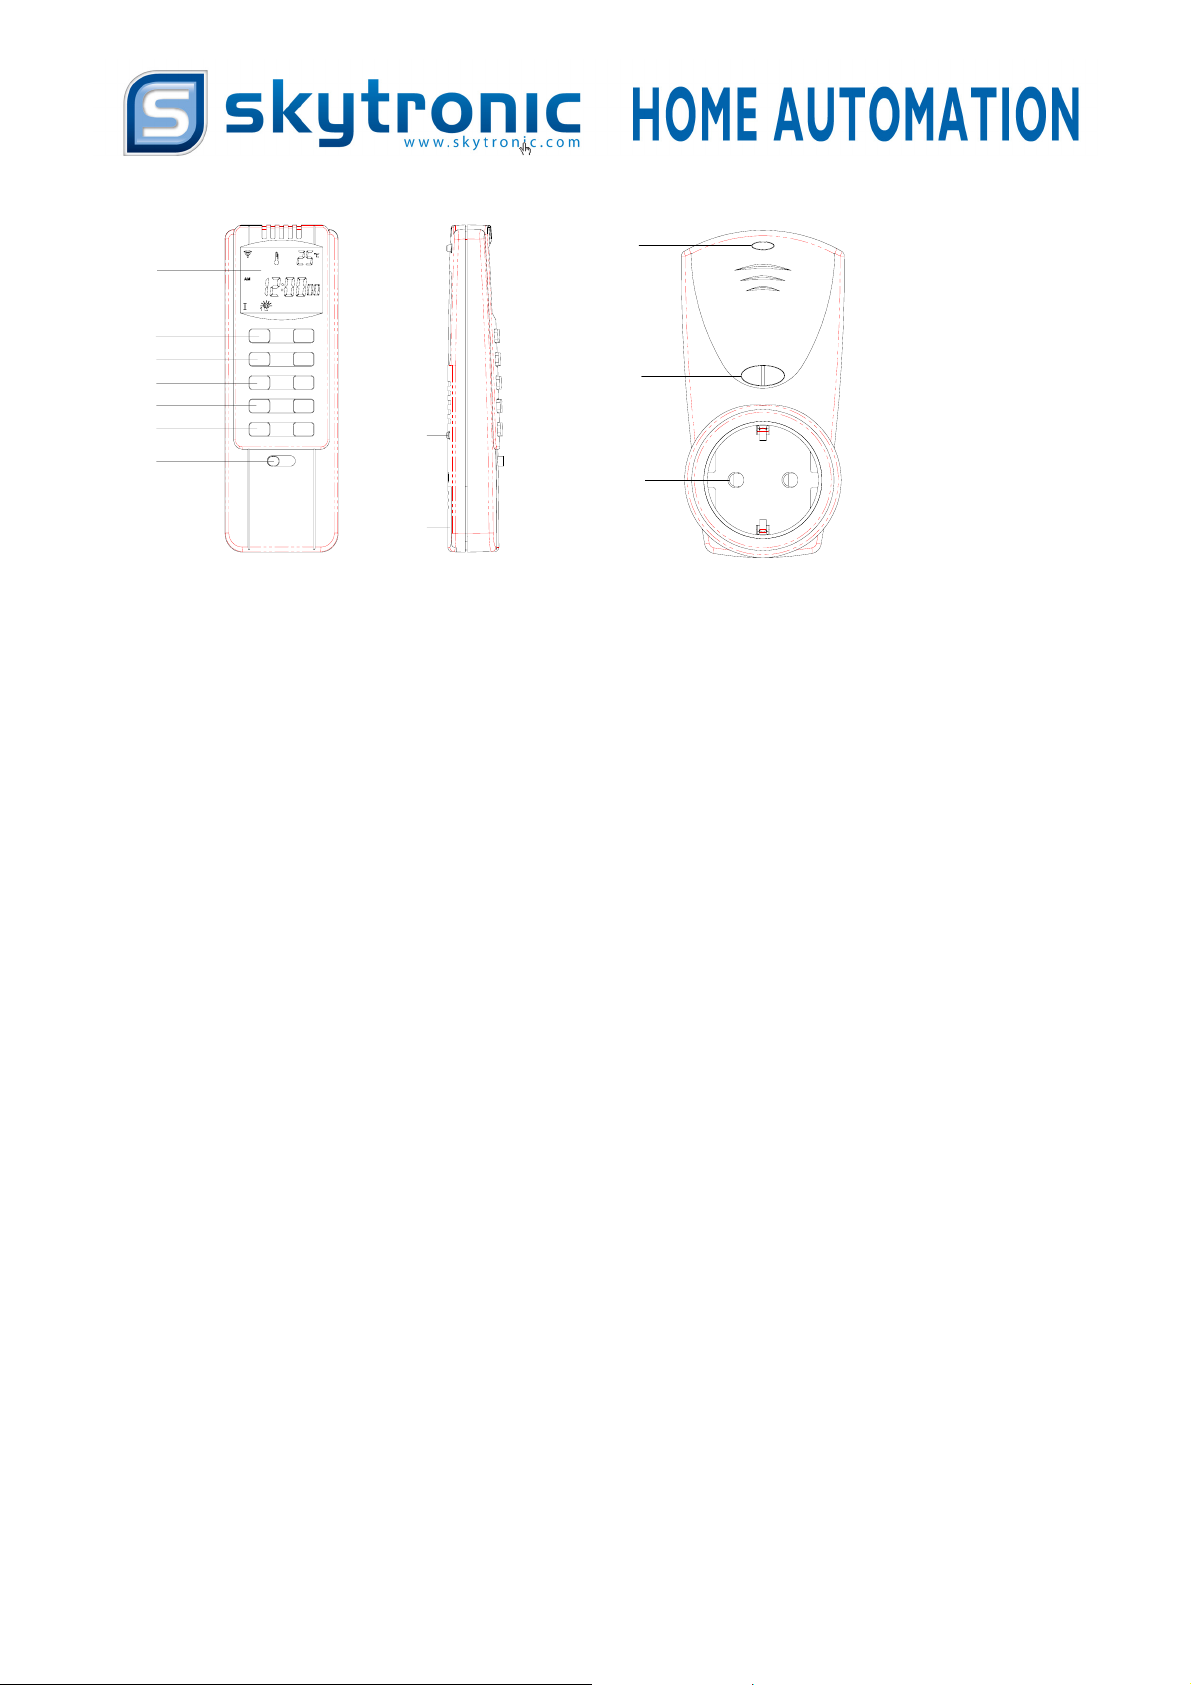
1
RND
CLOCK
2
PROGRAM
P-3*4
3
CD-RUN/STOP
CD
4
MIN
HOUR
ALL
TEMPSET CANCLE
9-12
1-4
13-16
5-8
ii
viii
iii
Indicator
Dimmer
ON/OFF
Learning Code
ix
E
How the remote control systems works
One of the remote controls (transmitters) send a radio signal to one or more switches or dimmers. When the switch or dimmer receive the
signal it will carry out the order (switch on, off or dimming). To carry out the orders the remote control and switch or dimmer need the same
code. You can set the code in the code-learn function. It is also possible to control several switches at the same time by setting the same
code into the switches. Each switch or dimmer can store 10 codes at most. On this way you can link the parts of the SkyTronic remote control
system together.
Function
• The transmitter can be remote controlled by the
transmitter within 40-metre range.
• The transmitter can control up to 16 receivers in the
meantime.
Push “Function” (viii) button to make the “FUN” disappeared in the LCD screen, now the handset can be used as a remote
controller.
*There are 3 ways to code-learn:
1. For 1
st
time ,the receiver will be automatically code-learning after power-on and the LED flashes (i) later.
2. Hold on “ON/OFF/Learning Code” button (ii) for about 2 seconds, it starts to code-learn and the LED flashes.
3. After code-matched, when the receiver is in power-on status, push both the “ON” and “OFF” button in the transmitter ,then the LED
will flashes to indicate the code-learning status.
Notice: Code-learning needs about 15 seconds. After 15 seconds, quit code-learning automatically.
*Storage and Cancellation
Storage: While code-learning, hold on one group’s “ON” or “OFF” button in the transmitter until LED stop flashing. The information is
stored consequently. Cancel one group storage information: While code-learning, hold on the “ON” or “OFF” button in the transmitter
until LED stop flashing. The related group’s stored information is cancelled consequently. Total Cancellation: While code-learning, hold
on one “OFF” button & “All OFF” button in the transmitter until LED stop flashing. All the information stored is cancelled then.
Control
(1) For switch series receivers:
Push either “ON” button, switch on power supply of the relevant receiver( LED lights on). Push either “OFF” button, switch off power
supply of the relevant receiver (LED lights off)
(2)For dimmer series receivers:
• With LCD screen display.
• Timer-, count-down-, random- & temperature control
functions
A. While the receiver is switched off, push either “ON” button, the relevant receiver is switched on and the brightness keep the former
status.
B. While the receiver is switched on:
-Push corresponding “ON” button, adjust the light brightness circularly,
-Push the same “ON” button second time, stop at present position
-Push “ON” button again, adjust the light brightness circularly again
C. While the receiver is switched on, push corresponding “OFF” button to switch off power supply.
(3) All ON/All OFF( 16 Channels)
Push “All-OFF” button to switch off all 16 channels’ power supply. Push “All-ON” button to switch on all 16 channel’s power supply.
Push “Function” (viii) button to make the “FUN” appeared in the LCD screen, now the handset can set up the configure and
automation functions.
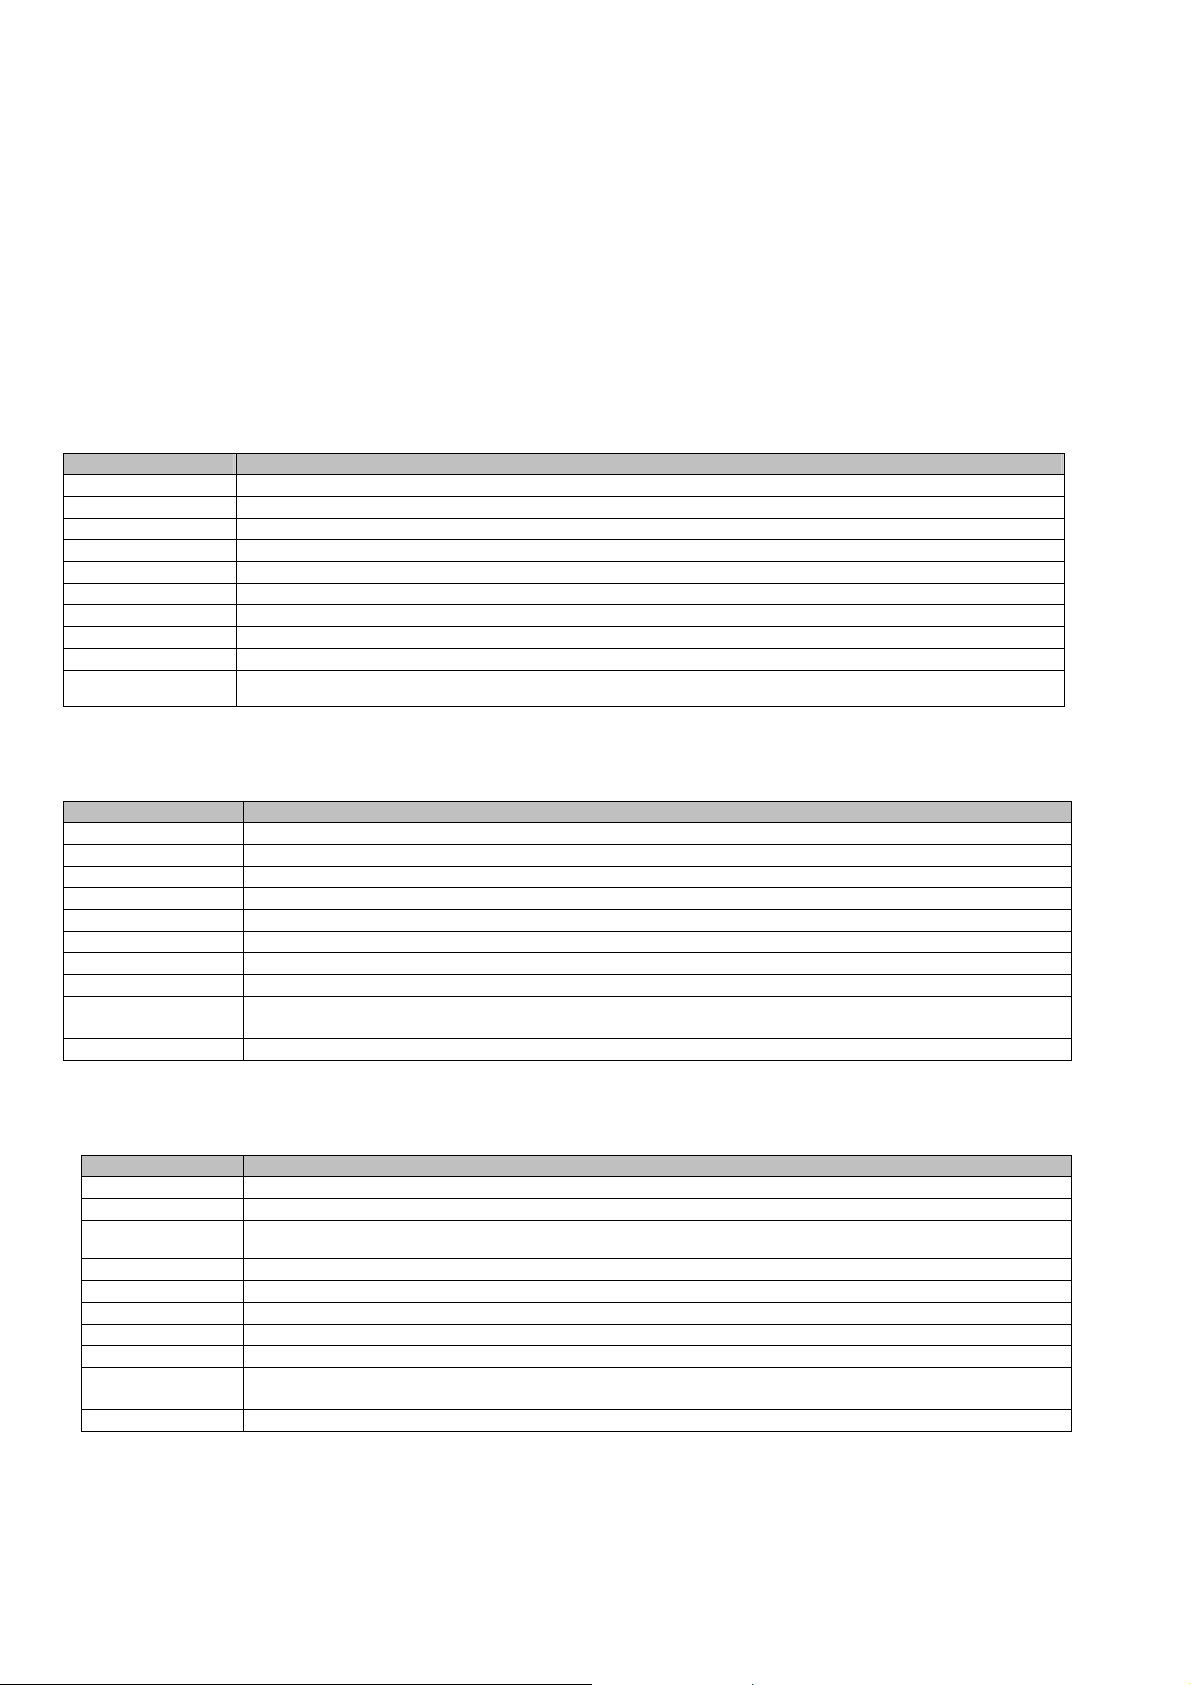
1. Clock setup; Push Clock (ii), “Fun & CLK” appears on the screen.
Button Name Function and display
CLOCK (ii)
RND
Program (iii)
P-3*4
CD (iv)
CD-RUNSTOP
HOUR/TEMP (v)
MIN/TEMP
TEMP-SET (vi)
CANCLE
elect 12/24 Hour mode after holding 3-second push
ush one time to enter RND mode (chapter 4)
ush one time to enter Program mode (chapter 2)
o function
ount-down setup (chapter 3)
fter count-down setup, it works after one-time push and pauses after 2nd time push.
he hours will raise one hour, push longer to auto raise. The second position is zero..
he minutes will raise one minute, push longer to auto raise. The second position is zero.
nter temperature setting mode (chapter 5)
ong-term push to make PROG/CD/TEMP/RND invalid. Push again to resume the function setup.
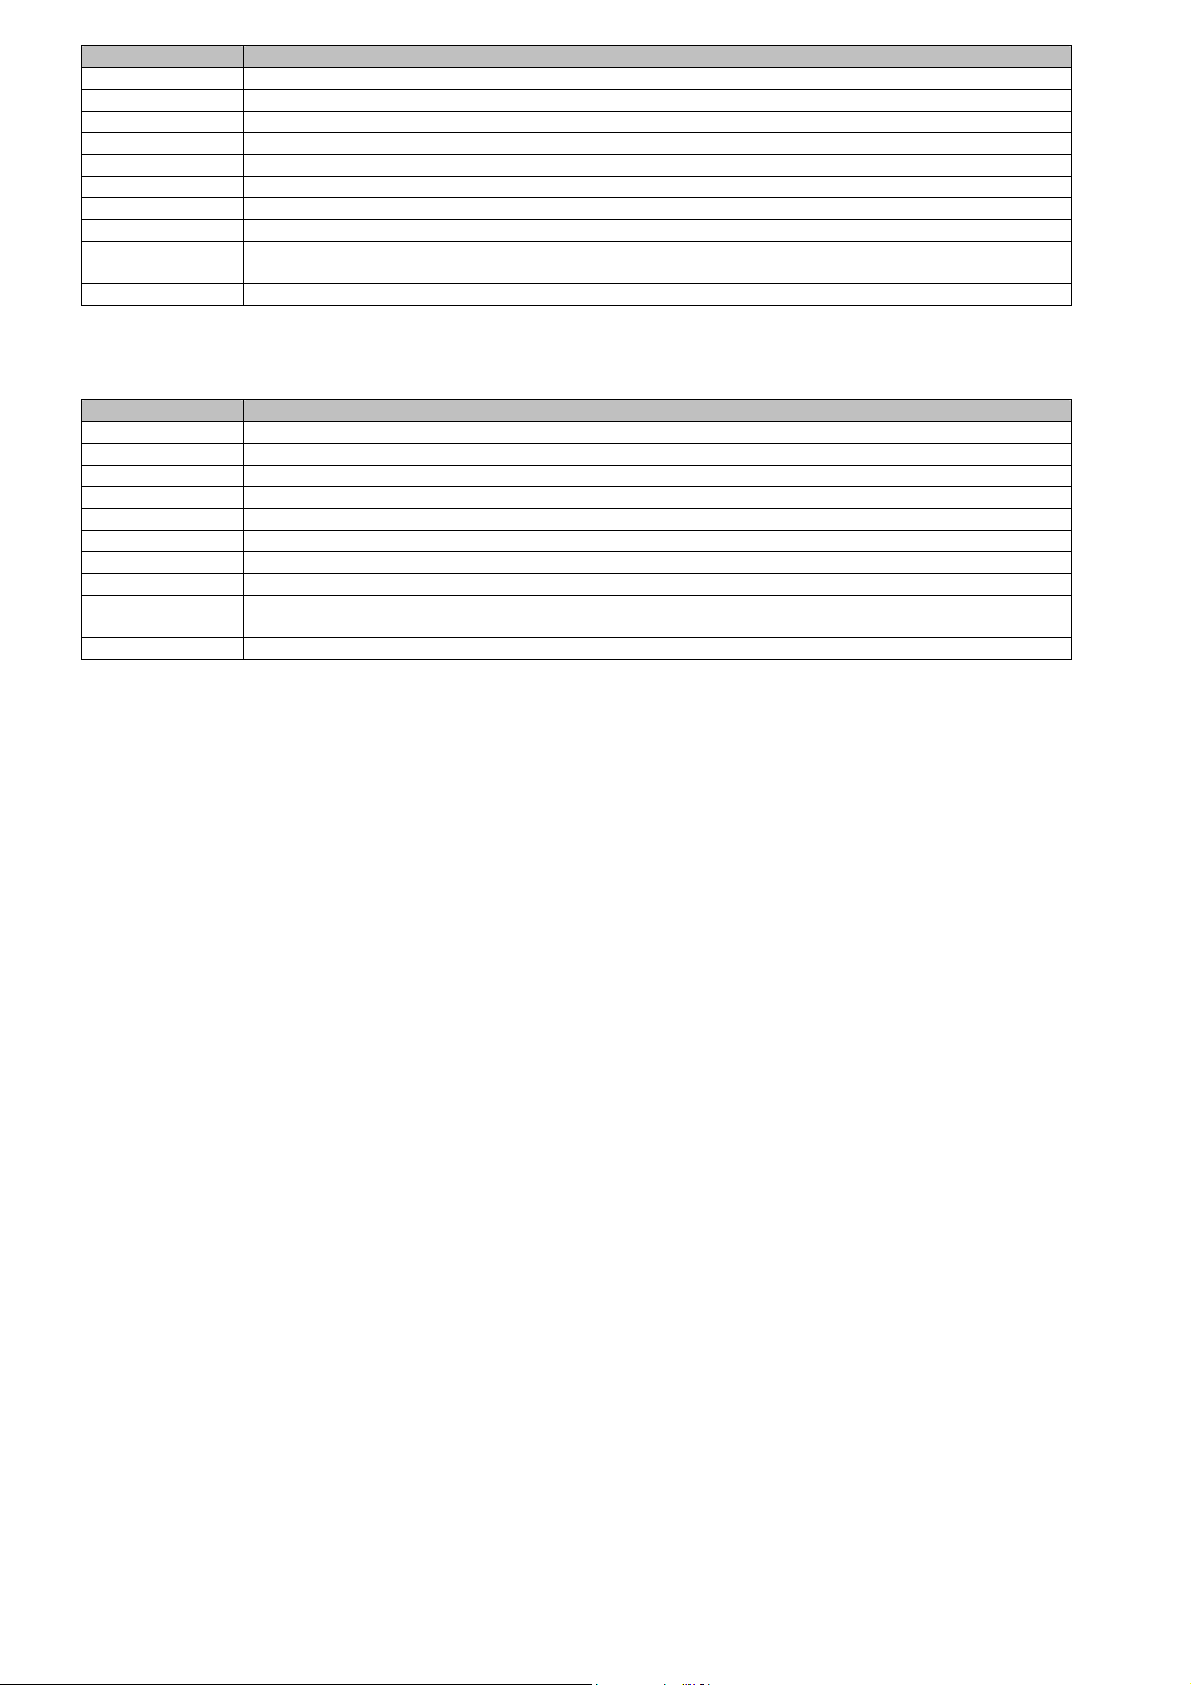
2.Timer Program Setup(18 groups totally); Push “Program” key (iii) to enter timer setup, and “FUN” & “PROG” sign become highlighted. It will
be clock status (chapter 1) after 10-second no touching.
Button Name Function and display
CLOCK
RND
Program
P-3*4
CD
CD-RUNSTOP
HOUR/TEMP+
MIN/TEMP-
CANCLE
TEMP-SET
ack to CLOCK mode (chapter 1)
ack to Random mode (chapter 4)
ush 1 time to enter program mode and follow 1ON-1OFF-2ON- …-16OFF sequence.
elect the different switch and follow I1-I2-I3-I4-II1-II2 - IV2-IV3-IV4-IV1234 sequence.
ack to CD mode. (chapter 3)
D function works after 1st push and pauses afer 2nd push.
he hour will add one hour after pushing 1 time.
he minute will add one figure after pushing 1 time.
he configure will be cancelled after long-term push (“X” sign appears on the screen) and resumed after
nd
push(“X” sign disappears)
ack to Temperature mode (chapter 5)
3 Count down; Enter CD status while push CD button (iv). The “FUN” & “CD” signs will be highlighted. It will return to clock status after
10-second no touching. Count down range: 0—99Hour,1-59Min, when the setup is 0hour & 0min, the CD-Run/Stop button is invalid.
Button Name Function and display
CLOCK
RND
Program
P-3*4
CD
CD-RUNSTOP
HOUR/TEMP+
MIN/TEMP-
CANCLE
TEMP-SET
ack to CLOCK mode (chapter 1)
ack to Random mode (chapter 4)
ush 1 time to enter program (chapter 2)
elect the different switch I1-I2-I3-I4-II1-II2 -- IV2-IV3-IV4-IV1234 sequence.
ack to CD mode.
D function works after 1st push and pauses afer 2nd push.
he hour will add one hour (It is invalid when CD is running)
he minute will add one minute (It is invalid when CD is running)
he configure will be cancelled after long-term push (“X” sign appears on the screen) and resumed after
nd
push(“X” sign disappears)
ack to Temperature mode (chapter 5)
4 Random Setup; Push RND button to enter random status. The “FUN” & “RND” signs will be highlighted. It will return to clock status after
10-second no touching.
Button Name Function and display
CLOCK
RND
Program
P-3*4
CD
CD-RUNSTOP
HOUR/TEMP+
MIN/TEMP-
CANCLE
TEMP-SET
ack to CLOCK mode. (chapter 1)
f the configure is set, it will work run/pause function.
ack to Program mode (chapter 2)
elect the different switch and follow I1-I2-I3-I4-II1-II2 -- IV2-IV3-IV4-IV1234 sequence.
ack to CD mode. (chapter 3)
D function works after 1st push and pauses afer 2nd push.
nvalid
nvalid
he configure will be cancelled after long-term push(“X” sign appears on the screen) and resumed after
nd
push(“X” sign disappears)
ack to Temperature mode (chapter 5)
5.Temperature ; Push TEMP-SET button to enter temperature setup. The “FUN” & “TEMP” signs will be highlighted. It will return to clock
status after 10-second no touching. It measures 4 times per minute and the range is -10--50.
Button Name Function and display
CLOCK
RND
Program
P-3*4
CD
CD-RUNSTOP
HOUR/TEMP+
MIN/TEMP-
CANCLE
TEMP-SET
ack to CLOCK mode . (chapter 1)
ack to Random mode. (chapter 4)
ack to Program mode (chapter 2)
elect the different switch and follow I1-I2-I3-I4-II1-II2 - IV2-IV3-IV4-IV1234 sequence.
ack to CD mode.
D function works after 1st push and pauses afer 2nd push.
he temperature will add one degree after one time push.Long push to add 4 degrees.
he temperature will minus one degree after one time push.Long push to minus 4 degrees.
he configure will be cancelled after long-term push(“X” sign appears on the screen) and resumed after
nd
push(“X” sign disappears)
witch the ON/OFF status after one time push. Long push to change C/F standard.
Notice: The priority sequence is manual remote control> random>CD> program setup>temperature.
If the higher lever function is working, the lower ones can not work.
Specification
Battery: 2 pcs AAA
Radio Frequency 433.92MHz
Range: Typically 40m in open area
Reciever:
Dimmer: 230Vac ~ 50Hz, 300W max.
NL
Zo werkt het draadloos schakelsysteem
Eén van de afstandsbedieningen stuurt een radiosignaal naar één of meer schakelaars of dimmers. Zodra de schakelaar of dimmer het
signaal ontvangt, voert deze de opdracht uit (licht of elektrisch apparaat aan/uit schakelen, dimmen).
Om opdrachten uit te kunnen wisselen, moeten afstandsbediening en schakelaar of dimmer dezelfde taal spreken. Deze stelt u in met de
code-learn functie. Door meerdere schakelaars dezelfde code te geven, worden deze tegelijkertijd in- of uitgeschakeld. Elke schakelaar of
dimmer kan met maximaal 10 verschillende afstandsbedieningen werken.
Op deze manier kunnen alle onderdelen van het SkyTronic draadloos schakelsysteem met elkaar worden gecombineerd.
Functies
• De ontvanger kan op afstand worden bediend door de
verzender op een afstand van maximaal 40 meter.
• De verzender kan maximaal 16 kanalen tegelijk
bedienen.
Druk “Function” (viii) knop om de letters “FUN” te verwijderen van het LCD scherm, nu kan het apparaat als afstandsbediening
worden gebruikt.
*Er zijn 3 manieren om codes te leren:
1. Voor de eerste keer: de ontvanger zal automatisch de code leren als het aan wordt gezet, de LED zal gaan knipperen.
2. Houd de “ON/OFF/Learning Code” knop (ii) ongeveer 2 seconden ingedrukt, het apparaat begint met het leren en de LED zal gaan
knipperen.
3. Als de codes kloppen, als de ontvanger aan is gezet), drukt u de knoppen “ON” en “OFF” allebei in op de verzender. De LED zal
knipperen zodat u weet dat het zich in de leer modus bevindt..
• Met LCD scherm.
• Timer-, aftelling-, random- & temperatuur
bedieningsfuncties.
 Loading...