

Page 1
Garage Door Remote Control
Model G6K
1. INTRODUCTION
Congratulations on your purchase of the Skylink® Garage Door Remote
Control Model G6K. The Model G6K works with the Skylink® Smart
ButtonTM. In this package, you will find a keyless entry transmitter with
3V lithium batteries and screws.
1 pc 2.6 x 6 screw
1 pc 2.6 x 12 screw
1 pc 2.6 x 25 screw
2. PROGRAM A KEYPAD TO THE GTR SMART BUTTON
Garage Door
Remote Control
(Batteries inside)
TM
Refer to the section in the Skylink® model GTR to install the Smart Button
and follow the instructions below to program the keypad transmitter.
Before proceeding, please remove the battery isolator from the keypad
transmitter.
The keypad transmitter can operate up to 4 Smart Button
TM
units, that also
means one keypad transmitter can operate up to 4 garage door openers.
Same PIN will be used for all doors. The factory default password is [0 0 0 0].
To operate door 1, you will enter [0 0 0 0][#][1]
To operate door 2, you will enter [0 0 0 0][#][2]
To operate door 3, you will enter [0 0 0 0][#][3]
To operate door 4, you will enter [0 0 0 0][#][4]
To program the keypad transmitter into the Smart ButtonTM, you must
decide which door you need to operate. If you only have one Smart
ButtonTM, we suggest you to use door 1. i.e. [0 0 0 0][#][1]. Follow the
instructions below to program the keypad transmitter.
1. With the GTR Smart ButtonTM connected on your
existing wall button. The red light on the Smart
ButtonTM should flash after plugging in the power.
If the red light on the Smart ButtonTM is flashing
slowly, that indicates it is in standby mode.
2. Press the learn button on the side of the GTR.
3. Once the learn button is pressed, the red LED will
flash quickly. You may release the learn button.
4. Enter the default PIN [0 0 0 0][#][x] within 5
seconds, where x is the door number.
Learn Button
5. Once the keypad transmitter is programmed,
the red LED will flash slowly, in the same
way as it flashes in standby mode.
(a)
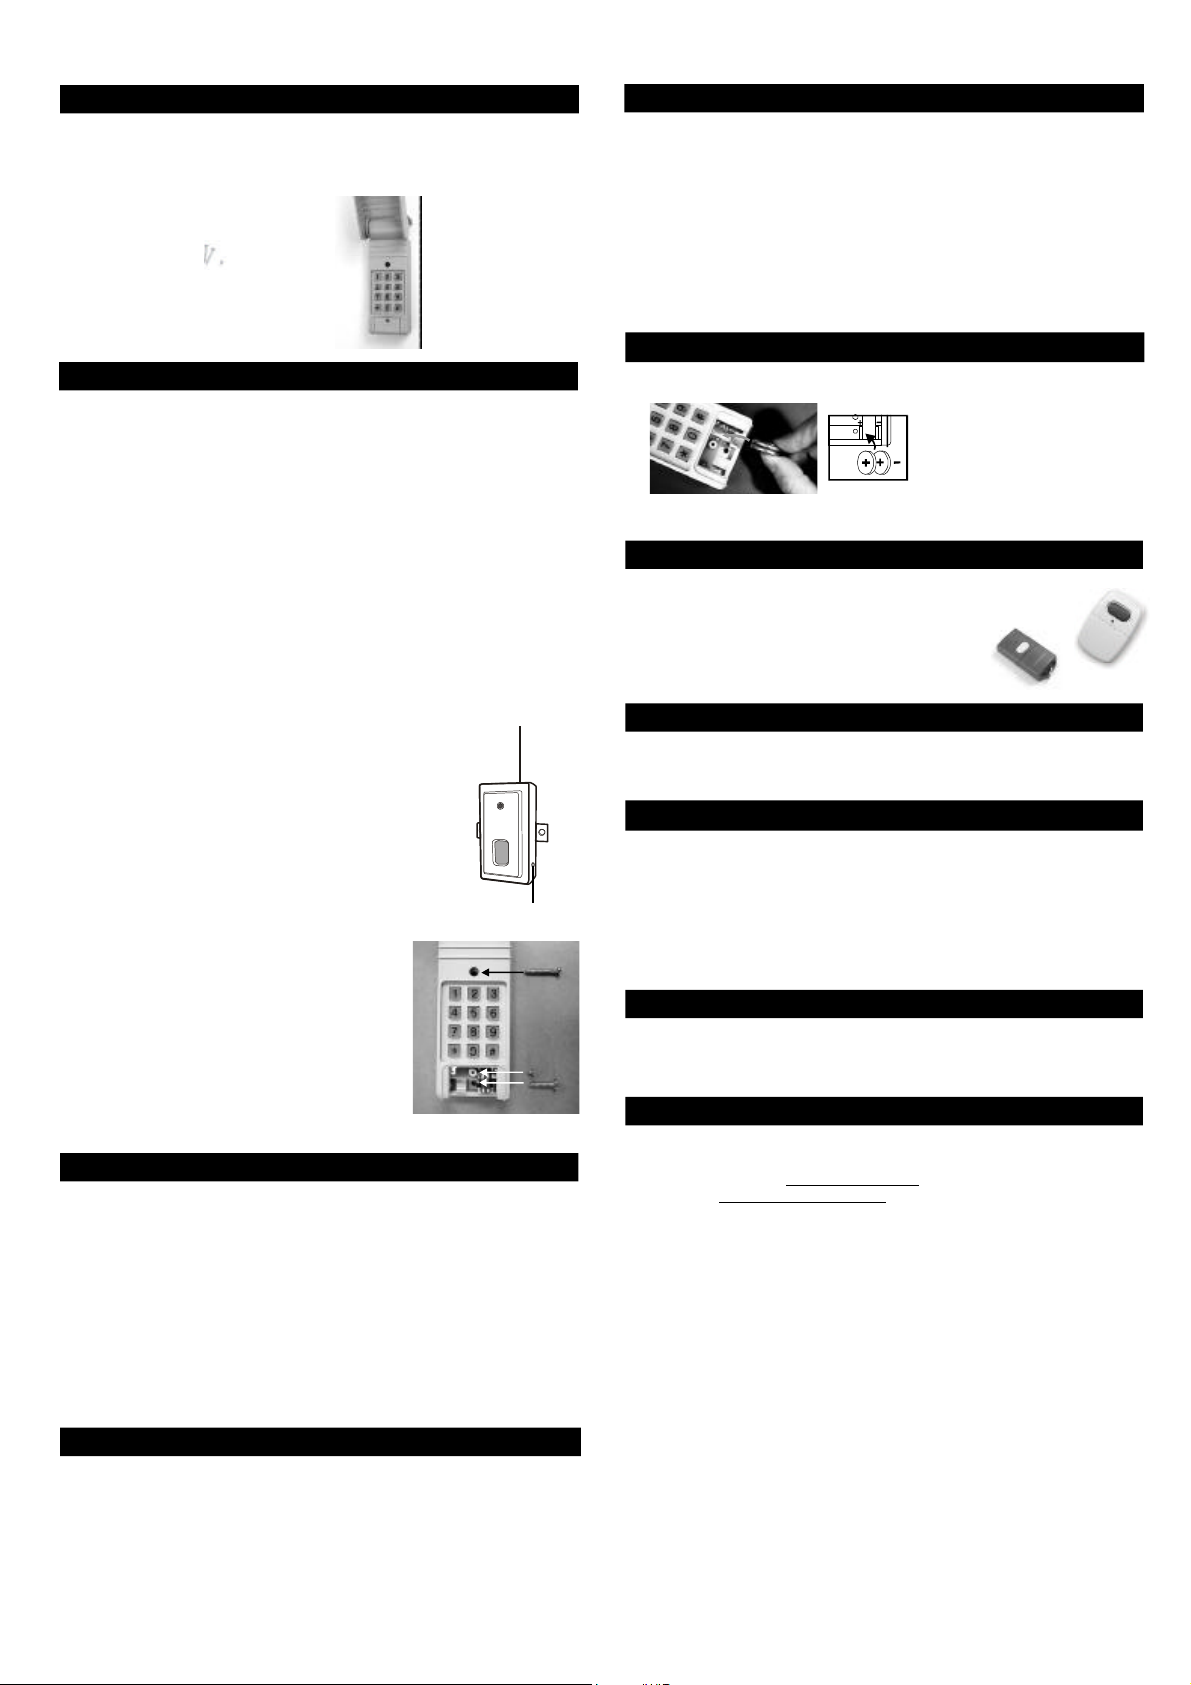
6. You can now mount the keypad transmitter
on a desired location.
Lift up the cover and insert screw above
the keypad in the slot provided (a). Remove
the battery cover and insert the second
screw in the lower slot (b). Tighten all
(c)
(b)
screws. Replace the battery cover, insert
and tighten screw (c).
3. TROUBLE SHOOTING
Q: Door opener does not react after pressing the button on the keypad
transmitter?
A: - Ensure you hear 3 beeps from the keypad transmitter after entering
the default PIN [0 0 0 0][#][x] within 5 seconds, where x is the door
number. If you do not hear 3 beeps, that means the PIN you entered
is incorrect. Re-enter the correct PIN.
- Ensure the wires is successfully connected from the Smart Button
to the wall mounted door control.
- Ensure the keypad transmitter has been programmed to the Smart
ButtonTM. Refer to section 2 for how to program a keypad to the
receiver.
5. CHANGE PIN
Follow the instructions below to change the PIN.
To change your PIN:
1. Enter the current PIN, (factory default PIN 0 0 0 0), press * .
2. Enter new 4 to 6 digit PIN, press * .
3. Enter new PIN again, press * .
For example, if you are changing the PIN number from 0000 to 123456,
enter the following sequence, 0000, *, 123456, * , 123456, * .
If confirmed, the balcklit LED flashes and the unit emits a long beep.
6. BATTERY
Two 3 volt Lithium type (CR2032) batteries (included).
TM
-
Battery
Compartment
+
It is time to change the batteries when the backlight no longer appears.
7. ADDITIONAL TRANSMITTER
You can add up to 15 additional transmitters to control the
same receiver. Skylink® offers Keychain Transmitters and
Visor Transmitters to work with your receiver. For
more information, please visit our website at
www.skylinkhome.com or contact us.
8. WARNING
DO NOT let children use the garage door transmitter without adult supervision.
Children can injure themselves or others by the garage door.
9. FCC
The Garage Door Remote Control is approved by the FCC and it complies with
Part 15 of the FCC Rules. Its operation is subject to the following two conditions :
1. This device may not cause harmful interference.
2. This device must accept any interference that may cause undesired operation.
WARNING:
Changes or modifications to this unit not expressly approved by the party
responsible of compliance could void the user’s authority to operate the equipment.
10. WARRANTY
If, within one year from date of purchase, this product should become defective
(except battery), due to faulty workmanship or materials, it will be repaired or
replaced, without charge. Proof of purchase and a Return Authorization are required.
11. CUSTOMER SER VICE
If you would like to order Skylink’s product or have difficulty getting your Skylink
remote control to work, please :
1. visit our FAQ section at www.skylinkhome.com, or
2. email us at support@skylinkhome.com, or
3. call our toll free at 1-800-304-1187 from Monday to Friday, 9 am to 5 pm EST.
Fax (800) 286-1320
TM
4. REMOVE THE KEYP AD TRANSMITTER FROM THE SMART BUTTON
You can delete the keypad transmitter(s) from the Smart ButtonTM, first
delete all the remote controls, then learn the ones you would like to keep.
1. Press and hold the learn button for approx 10 seconds on the Smart
ButtonTM.
2. The LED will flash rapidly after 10 seconds to indicate all the programmed remote controls have been erased. You may now release
the learn button.
3. You have erased all the remote controls in the Smart ButtonTM.
TM
CUSTOMER SERVICE
17 Sheard Avenue, Brampton, Ontario, Canada L6Y 1J3
Email:support@skylinkhome.com
http://www.skylinkhome.com
P/N. 101Z489
® are registered trademarks of their respective corporations
©2007 SKYLINK GROUP
 Loading...