

Page 1
"Telecommunication Products to solve Telecommunication Problems"
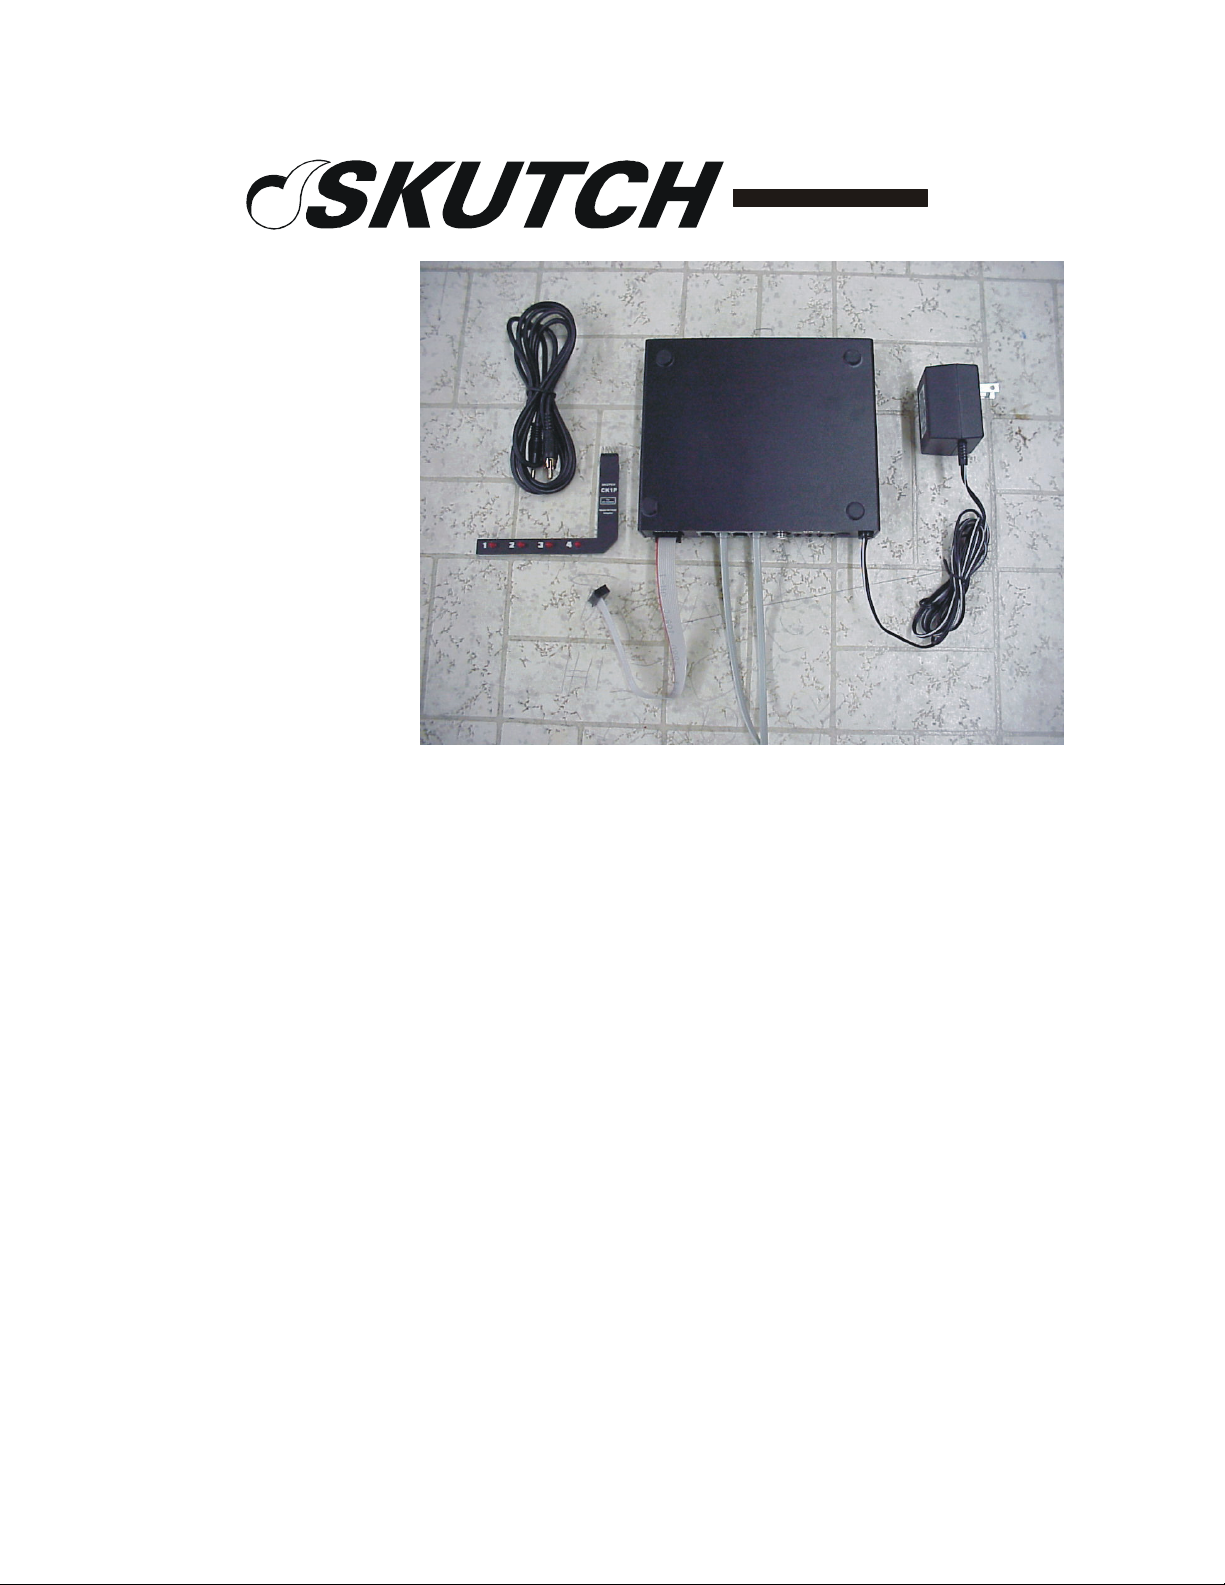
Audio Cable (For CD Players Only)
Power Cube
CK-1P
Promotion-
On-Hold
Adapter
For the KX-TG4500,
KX-TG4000 & KXTG2000 Phones
12/8/04
Introduction
Thank you for purchasing the Skutch CK-1P Promotion-On-Hold Adapter for the
Panasonic KX-TG4500, KX-TG4000 four line, and KX-TG2000 two line cordless phone
systems. The CK-1P is a true plug and play device. The unit does not require any
"Learning" to operate. When a call is placed ON HOLD from any cordless phone or the
base station, the ON HOLD caller will hear the Promotion-On-Hold audio. When the line
is re-answered, the audio automatically stops. It's that simple!
NOTE #1: If you are installing the CK1P on a two line KX-TG2000, see the "KXTG2000 Installation Notes" on page 3 before starting.
NOTE #2: If you transfer a call to a Voice Mail Box after a call has been answered by
a live person, Promotion-On-Hold will play over the message.
Sensor Board
Sensor Board Cable
Installation
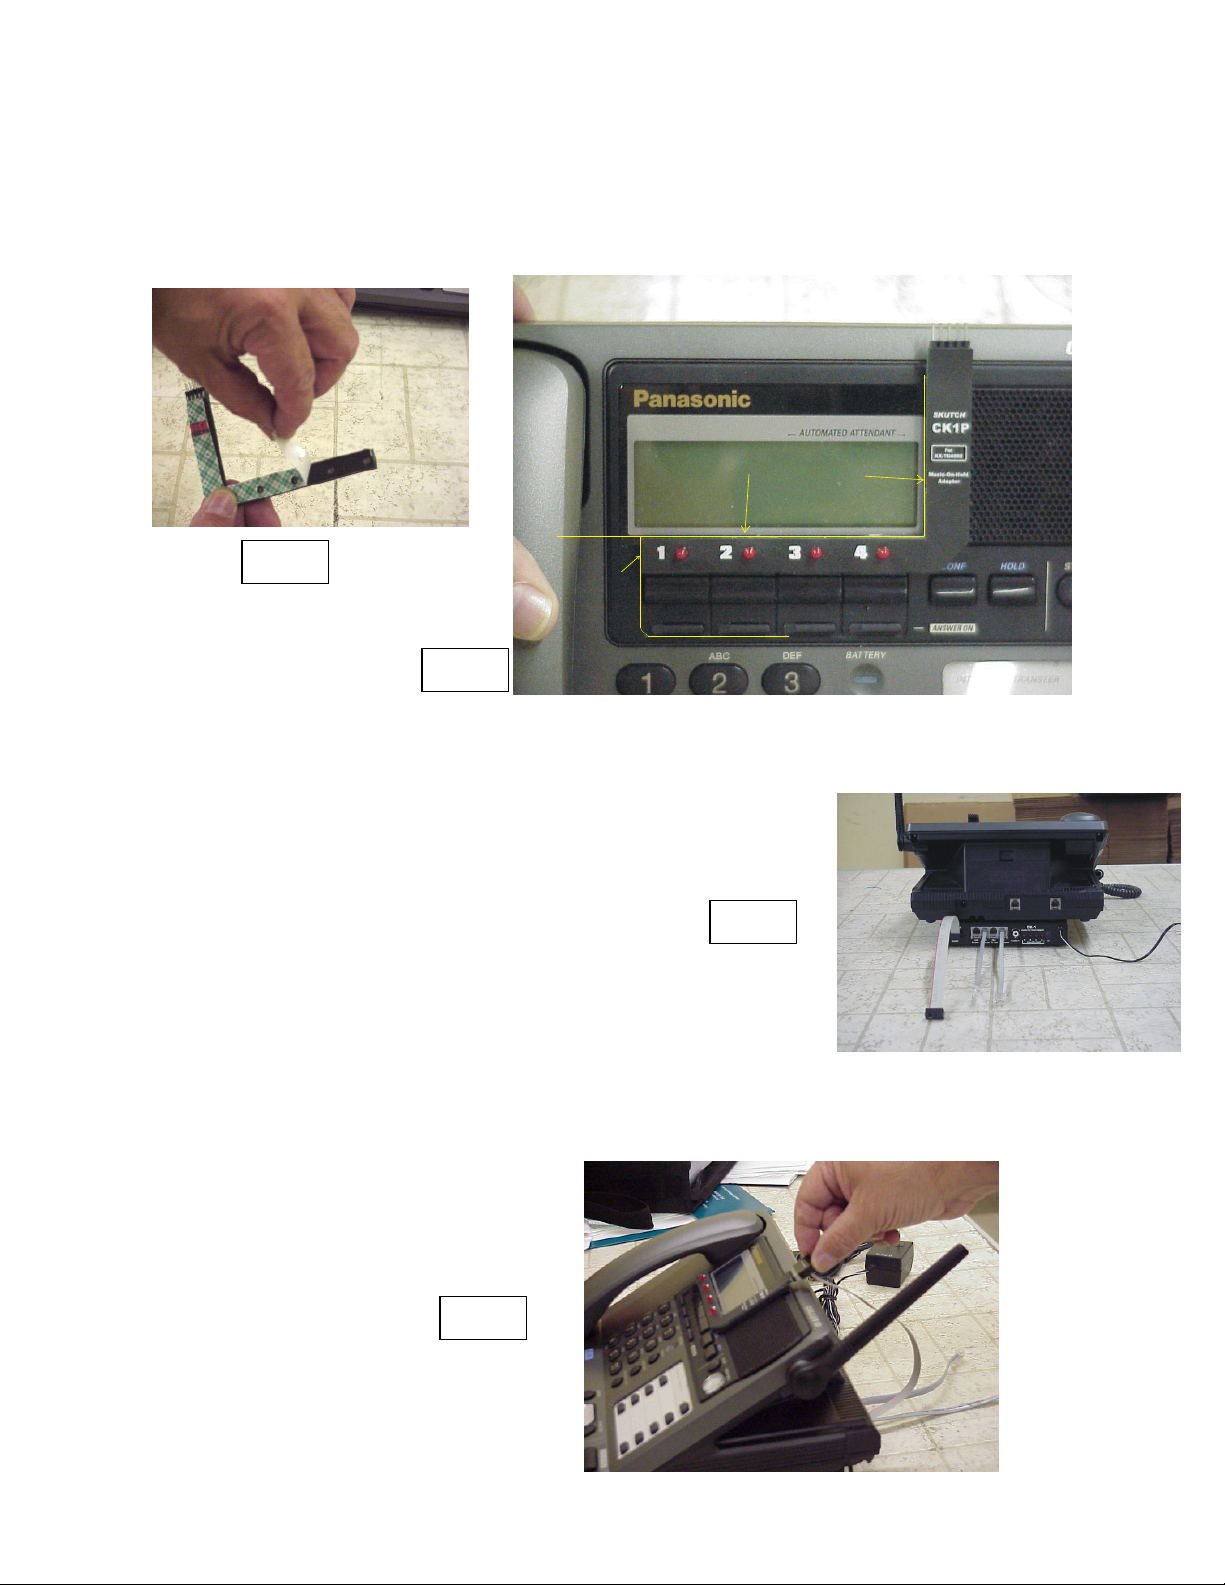
1- Make sure that the surface on the telephone is clean and free of dust and/or oil.
2- Peel the paper protector off back side of the "SENSOR BOARD" . Carefully align as
shown in Fig. 2. On the sticky foam side of the board there are 4 circular cut outs. These
cutouts must be aligned directly over the 1-4 lights on the phone. Once you are SURE it
is aligned, press down to attach to phone. Use the GRAY edges of the phone's display for
alignment.
Page 1 of 5
Page 2
CAUTION: The SENSOR BOARD must be aligned correctly or the unit will not
Sensor Board Alignment
operate properly. If you need to removing the SENSOR BOARD once attached, slowly
lift up on one edge of the SENSOR BOARD. Pulling the SENSOR BOARD off fast
could damage the foam pad.
Align to GRAY edge of DISPLAY on Phone
Here!
Here!
Fig. 1
Align with
Downward Edge
Here!
Fig. 2
3- Position the CK-1P box under the base telephone with the jacks facing towards the
back of the phone. (See Fig. 3).
Fig. 3
4- Connect the SENSOR BOARD CABLE between the CK-1P Box and the SENSOR
BOARD as shown in Fig. 4.
Fig. 4
Page 2 of 5
Page 3

5- Connect the short modular cord from [1&2 to Phone] on CK-1 to [LINE 1&2] on
Phone.
6- Connect the short modular cord from [3&4 to Phone] on CK-1 to [LINE 3&4] on
Phone.
7- The audio cord that comes with the CK-1P is ONLY used for CD Players. If you have
a digital player, then you should be using the audio cord that came with your digital unit.
Connect the proper audio cord from your music source, to the AUDIO IN jack on the
back of the CK-1 box.
Fig. 5
Line 3&4
Connect to Wall Jack 1&2
Connect to Wall Jack 3&4
Line 1&2
To Audio Source
8- Connect a MOD cord from Telephone Wall Jack 1&2 to [1&2 to Line] on CK-1.
9- Connect a MOD cord from Telephone Wall Jack 3&4 to [3&4 to Line] on CK-1.
10- Connect the POWER CUBE from the CK-1 box to 115VAC power.
KX-TG2000 Installation Notes:
The KX-TG2000 and KX-TG4000 are very similar. The following is a list of the
differences in the installation process between the two phones.
1- When you mount the "SENSOR BOARD" on the telephone, the "3" and "4" on the
SENSOR board will represent line 1 and 2 on the telephone.
2-Connect the short modular cord from [3&4 to Phone] on the CK-1 to [LINE 1&2] on
the Phone.
3- Connect a MOD cord from the Telephone Wall Jack 1&2 to [3&4 To Line] on the
CK-1.
Page 3 of 5
Page 4

4- The short modular cord that is attached to [1&2 to Phone] on the CK1 is not used.
Disabling Internal Music-On-Hold on KX-TG4500
1. While the base unit is in standby mode, press [MENU].
2. Press DOWN ARROW repeatedly until "Initial setting" is Highlighted, press
[ENTER].
3. Press DOWN ARROW repeatedly until "Music On Hold" is Highlighted, press
[ENTER], then [Enter] again.
4. Press DOWN ARROW once, display should read "Off". Press [Enter] to save.
5. Press [Exit]
Testing the System:
1- Pickup line 1 on your telephone. The line one LED on the SENSOR BOARD should
light up.
2- Repeat this test for lines 2-4. If all lines light up when picked up, the CK-1 is working
properly. If the lights on the SENSOR BOARD do not light up, then
a) Make sure that the CK-1P and Phone is connected to power.
b) Make sure that the SENSOR BOARD is aligned properly.
Lights on CK-1 Box.
When you place a line on HOLD, the corresponding LED on the rear of the CK-1P box
lights up to confirm the Promotion-On-Hold condition.
Using Other Brand Phones with the KXTG4500/4000/2000 Phone
The CK-1P will ONLY provide Promotion-On-Hold audio when a call is placed ON
HOLD from the KX-TG4000 base set or any one of it's cordless phones. You can use
other brand phones with this system as long as the phone will clear a standard ON HOLD
condition on the KX-TG4500/4000/ 2000 phone.
Tech Support - 916-786-6186
If you have any problems getting the unit to work properly feel free to give us a call.
Technical Support is available between the hours of 7:30 AM and 4:30 PM Pacific Time,
Monday through Friday.
• ONE YEAR LIMITED WARRANTY
This SKUTCH PRODUCT is warranted against defects for a period of one (1) year from the date of the
original invoice. Within this period, we will repair it without charge for parts and labor. To obtain
warranty service the product must be returned, at the customer's expense, to SKUTCH Electronics along
with a copy of the original invoice. After the unit has been repaired, SKUTCH will ship the PRODUCT
Page 4 of 5
Page 5

back via UPS GROUND service at our expense. If any other form of return shipment is requested, the
customer will pay for 100% of the shipping cost.
This Warranty does not apply if in the sole opinion of SKUTCH Electronics, the PRODUCT has been
damaged by lightning or any other Acts of God, or by accident, misuse, neglect, or improper packing,
shipping, modification or servicing by other than an authorized SKUTCH Service Center.
EXCEPT AS SPECIFICALLY PROVIDED IN THIS AGREEMENT, THERE ARE NO OTHER
WARRANTIES, EXPRESSED OR IMPLIED, INCLUDING, BUT NOT LIMITED TO, ANY IMPLIED
WARRANTIES OR MERCHANTABILITIES OR FITNESS FOR A PARTICULAR PURPOSE AND IN
NO EVENT SHALL SKUTCH ELECTRONICS BE LIABLE FOR LOSS OF PROFITS OR BENEFITS,
INDIRECT, SPECIAL, CONSEQUENTIAL OR OTHER SIMILAR DAMAGES ARISING OUT OF
ANY BREACH OF THIS WARRANTY OR OTHERWISE.
ACTA Statement
ACTA. On the bottom side of this equipment is a label that contains, among other information, a
product identifier in the format US: AAAEQ##TXXXX. If requested, this number must be provided
to the telephone company.
must comply with the applicable FCC Part 68 rules and requirements adopted by the ACTA. A compliant
telephone cord and modular plug is provided with this product. It is designed to be connected to a
compatible modular jack that is also compliant. See installation instructions for details.
telephone line. Excessive RENs on a telephone line may result in the devices not ringing in
response to an incoming call. In most but not all areas, the sum of RENs should not exceed five
(5.0). To be certain of the number of devices that may be connected to a line, as determined by
the total RENs, contact the local telephone company. For products approved after July 23, 2001,
the REN for this product is part of the product identifier that has the format US:AAAEQ##TXXXX.
The digits represented by ## are the REN without a decimal point (e.g., 03 is a REN of 0.3). For
earlier products, the REN is separately shown on the label.
notify you in advance that temporary discontinuance of service may be required. But if advance
notice isn't practical, the telephone company will notify the customer as soon as possible. Also,
you will be advised of your right to file a complaint with the FCC if you believe it is necessary.
procedures that could affect the operation of the equipment. If this happens the telephone
company will provide advance notice in order for you to make necessary modifications to
maintain uninterrupted service.
contact our company. If the equipment is causing harm to the telephone network, the telephone
company may request that you disconnect the equipment until the problem is resolved.
commission, public service commission or corporation commission for information.
This equipment complies with Part 68 of FCC rules and the requirements adopted by
A plug and jack used to connect this equipment to the premises wiring and telephone network
The REN is used to determine the number of devices that may be connected to a
If this equipment causes harm to the telephone network, the telephone company will
The telephone company may make changes in its facilities, equipment, operations or
If trouble is experienced with this equipment, for repair or warranty information, please
Connection to party line service is subject to state tariffs. Contact the state public utility
Page 5 of 5
 Loading...