

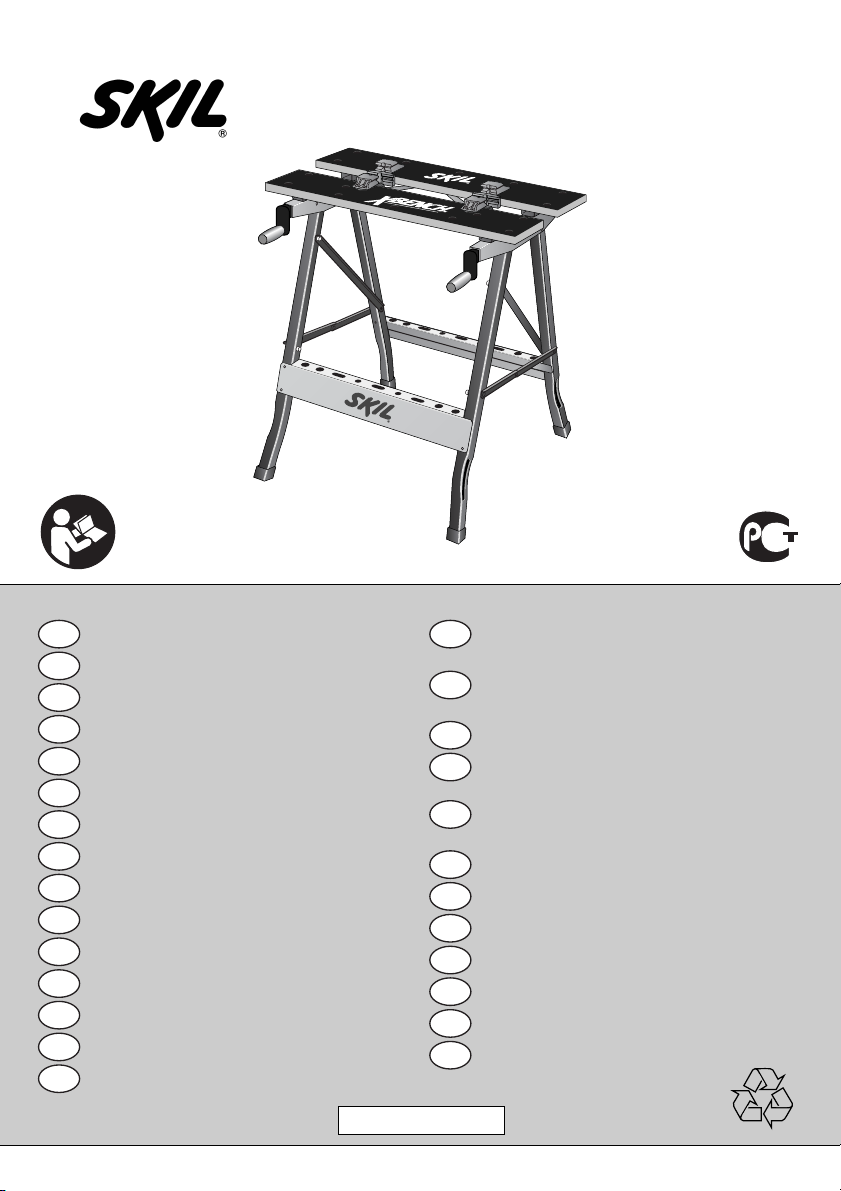
WORKBENCH
0900 (F0150900 . . )
SKIL Europe BV - Konijnenberg 60 03/08 2610398627
4825 BD Breda - The Netherlands
www.skileurope.com
ORIGINAL INSTRUCTIONS. . . . . . . . . . . . 10
NOTICE ORIGINALE . . . . . . . . . . . . . . . . . 10
ORIGINALBETRIEBSANLEITUNG . . . . . .
11
ORIGINELE GEBRUIKSAANWIJZING. . . . 12
BRUKSANVISNING I ORIGINAL . . . . . . . . 13
ORIGINAL BRUGSANVISNING . . . . . . . . . 14
ORIGINAL DRIFTSINSTRUKS. . . . . . . . . .
14
ALKUPERÄISET OHJEET . . . . . . . . . . . . . 15
MANUAL ORIGINAL . . . . . . . . . . . . . . . . . 16
MANUAL ORIGINAL. . . . . . . . . . . . . . . . . . 17
ISTRUZIONI ORIGINALI . . . . . . . . . . . . . . 17
EREDETI HASZNÁLATI UTASÍTÁS. . . . . . 18
PÒVODNÍM NÁVODEM K POUÎÍVÁNÍ . . . 19
OR‹J‹NAL ‹fiLETME TAL‹MATI . . . . . . . . . 20
INSTRUKCJÑ ORYGINALNÑ. . . . . . . . . . . 21
ОДЛИННИК РУКОВОДСТВА
ПО ЭКСПЛУАТАЦИИ . . . . . . . . . . . . . . . .
21
ОРИГІНАЛЬНА ІНСТРУКЦІЯ
З ЕКСПЛУАТАЦІЇ . . . . . . . . . . . . . . . . . . .
22
ΠΡΩΤΟΤΥΠΟ Ο∆ΗΓΙΩΝ ΧΡΗΣΗΣ . . . . . . 23
INSTRUCØIUNI DE FOLOSIRE
ORIGINALE . . . . . . . . . . . . . . . . . . . . . . . .
24
ОРИГИНАЛНО РЪКОВОДСТВО
ЗА ЕКСПЛОАТАЦИЯ . . . . . . . . . . . . . . . .
25
PÔVODN¯ NÁVOD NA POUÎITIE. . . . . . . 26
ORIGINALNE UPUTE ZA RAD . . . . . . . . . 26
ORIGINALNO UPUTSTVO ZA RAD. . . . . . 27
IZVIRNA NAVODILA. . . . . . . . . . . . . . . . . . 28
ALGUPÄRANE KASUTUSJUHEND. . . . . . 28
INSTRUKCIJÅM ORI˛INÅLVALODÅ. . . . . 29
ORIGINALI INSTRUKCIJA . . . . . . . . . . . . . 30
GB
F
D
NL
S
DK
N
FIN
E
P
I
H
CZ
TR
PL
RU
UA
GR
RO
BG
SK
HR
SRB
SLO
EST
LV
LT
ME77
2
1
2
3
a
b
c
d
a 795 mm
b 625 mm
c 370 mm
d 160 mm
e 640 mm
100
e
EBCD
A
3
4
5

4
7a6
87b

5
9a
6x38
8x
mm
6x12
8x
mm
8x
M6
8x45
4x
mm
8x16
4x
mm
4x
M8
8x45
2x
mm
8x16
4x
2x
mm
M8
4x

6
9b
16x
4x15
mm
2x
2x
6x
2x
8x30
mm
8x19,5
mm
M8
4x
4x

7
08!9@
1-6
x
1-6
x


#

GB
Workbench 0900
INTRODUCTION
• The Slide and Lock system works in an entirely different
way from all other conventional clamping systems
• Read this instruction manual carefully before use and
save it for future reference 1
• Only use the parts and accessories supplied; damage
due to the use of non-original parts and accessories will
be excluded from the warranty
• This workbench is not intended to be used for
clamping electrical power tools
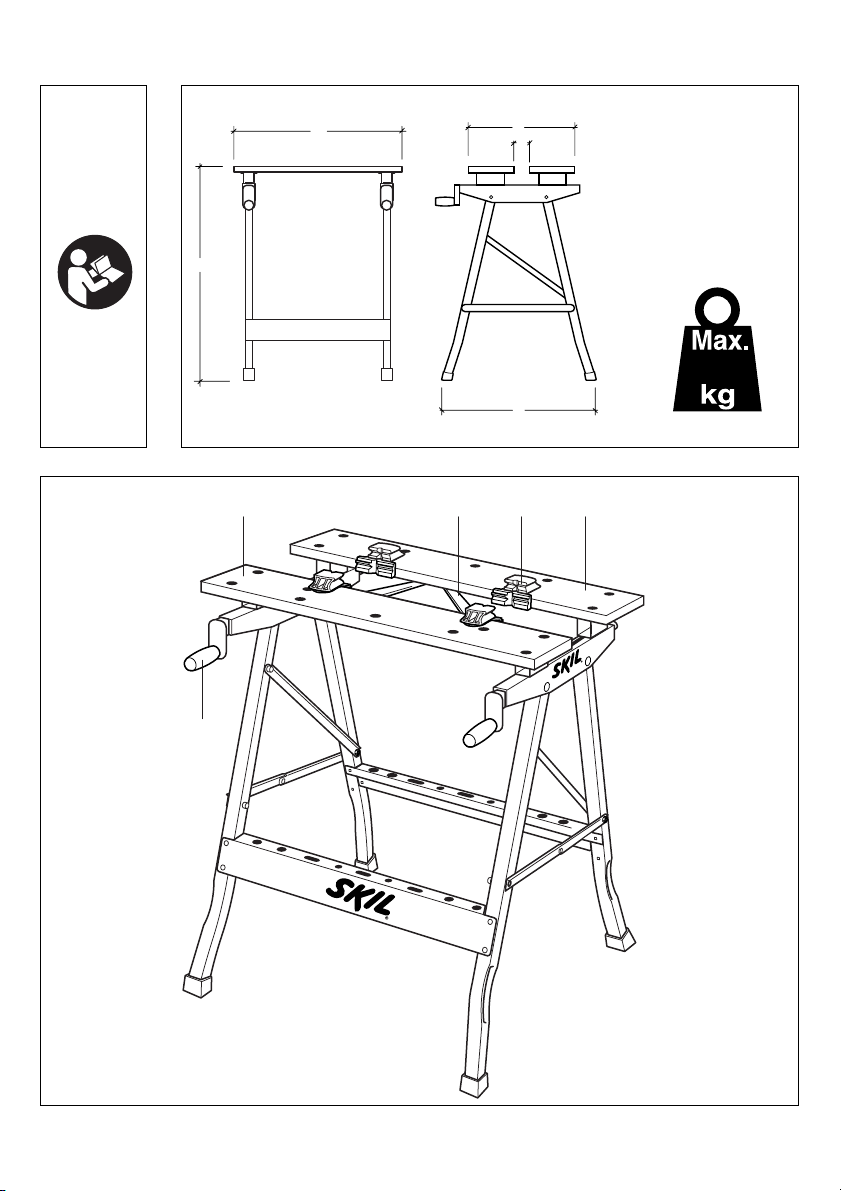
TECHNICAL SPECIFICATIONS 2
WORKBENCH PARTS 3
A Clamping handle
B Adjustable clamping jaw
C Support arm (max. 5 kg)
D Clamping block
E Fixed clamping jaw
SAFETY
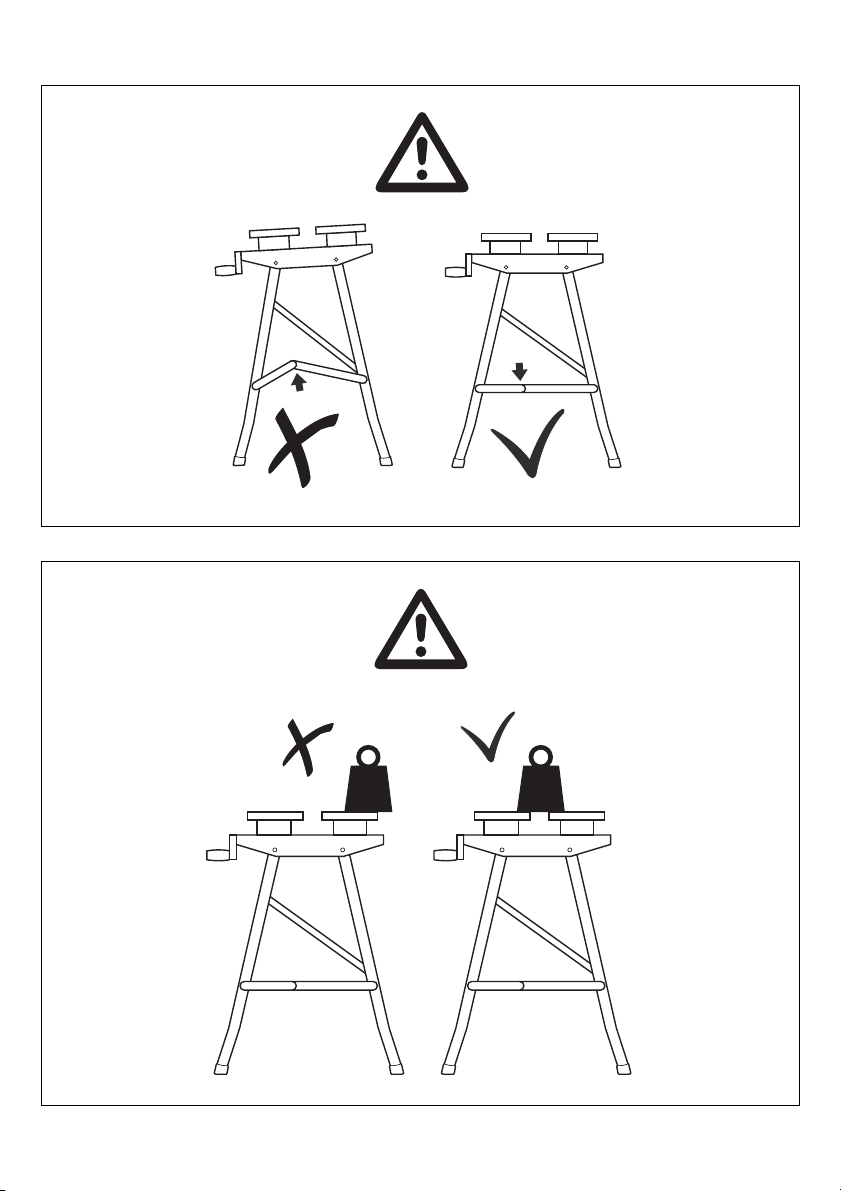
• Ensure that the workbench stands on a fi rm and nonslippery surface
• Do not place heavy objects on the edge to prevent the
workbench from turning over 5
• Do not attempt to climb onto or stand on the
workbench 6
• Never load the worktop with more than 100 kg 7
• Place heavy objects calmly on the workbench; do not
drop them 8
• Keep children away from work area
• Store the workbench indoors in a dry and locked-up
place, out of reach of children
USE
• Assembly instructions 9
- the sequence of the numbers appearing in the
drawing corresponds with the sequence of the steps
to be followed for assembling the workbench
! firmly tighten all screws and nuts
• Operating instructions 0
1
turn both clamping handles A counter-clockwise as
far as they will go (between 1 to 6 turns)
2
push adjustable clamping jaw B back as far as it will
go
3
fold out both support arms C for optimal workpiece
support
4
hold the workpiece with one hand between the jaws
(ensure that the 4 clamping blocks D are correctly
aligned to the workpiece)
5
pull adjustable clamping jaw B with the other hand
towards the workpiece and fi xed clamping jaw E
6
carefully tighten each clamping handle with less than
one turn (mostly less than half a turn)
- for releasing the workpiece simply turn each
clamping handle back into the downward position
! never try to fine-adjust the clamping jaws by
turning the clamping handles counter-clockwise,
because this always results in releasing the
clamping jaws
- repeat steps 1 through 6 for every new clamping
procedure
• Clamping blocks !
! ensure that the workpiece is securely clamped
• Folding out the workbench @
• Collapsing the workbench #
SERVICE
• If the workbench should fail despite the care taken in
manufacturing and testing procedures, repair should be
carried out by an after-sales service centre for SKIL
power tools
- send the workbench undismantled together with
proof of purchase to your dealer or the nearest SKIL
service station (addresses as well as the service
diagram are listed on www.skileurope.com)
F
Etabli 0900
INTRODUCTION
• Le système de glissière et de verrouillage fonctionne
tout à fait différemment des autres systèmes de serrage
conventionnels
• Lisez attentivement ce manuel d’instruction avant
d’utiliser l’appareil et conservez-le pour pouvoir vous y
référer ultérieurement 1
• Utilisez uniquement les pièces et accessoires fournis;
les dommages résultant de l’utilisation de pièces et
accessoires n’étant pas d’origine seront exclus de la
garantie
• Cet établi n’a pas été conçu pour être utilisé pour le
serrage d’outils électriques
SPECIFICATIONS TECHNIQUES 2
PIECES DE L’ETABLI 3
A Poignée de serrage
B Griffe de serrage réglable
C Bras support (max. 5 kg)
D Bloc de serrage
E Griffe de serrage fi xe
10

 Loading...