

Page 1
A
GUIDE TO
S H 0
THE TARGET
r
RT W
RECEIVER
ALAN.
AV
E L I
USING
BY
J.
MULLEY
ST E
HF3
luIQ
N I N G
1
0
Page 2
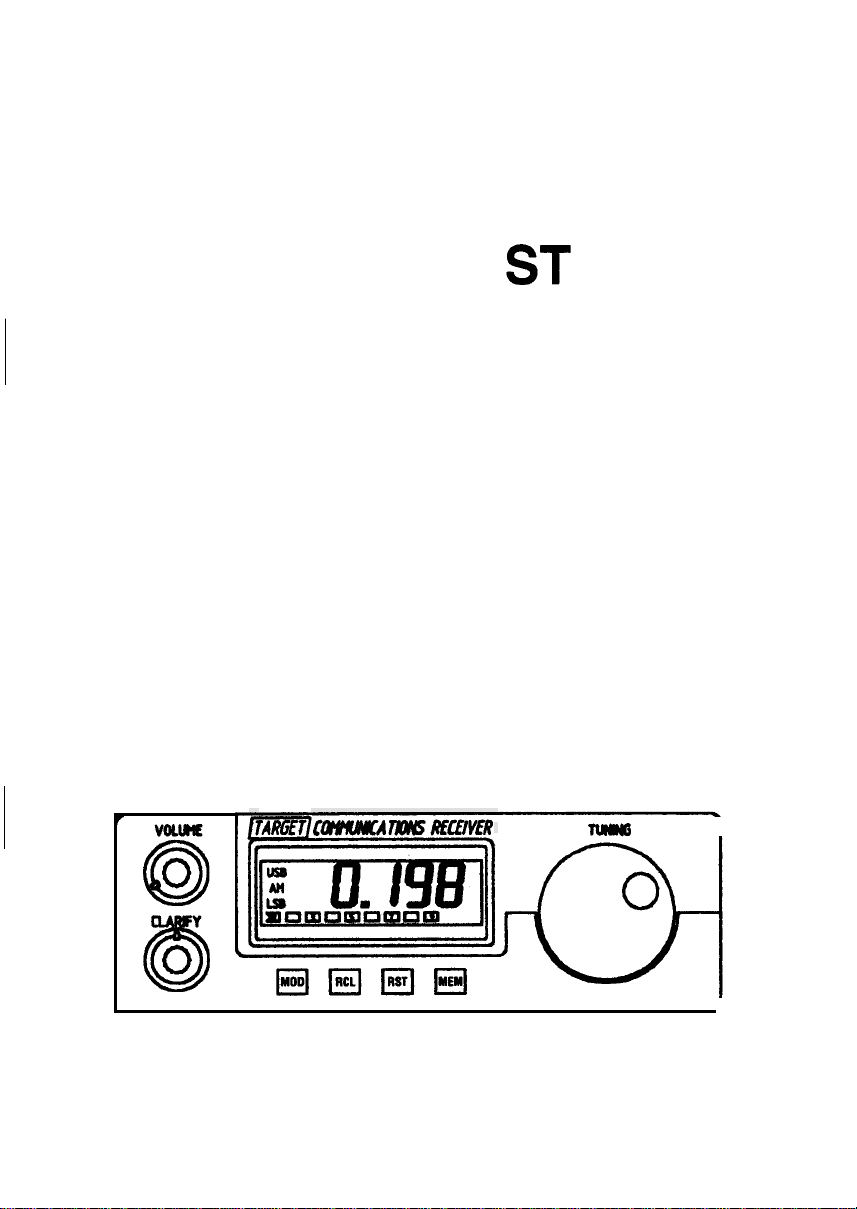
The TARGET
30
MHz.
For the beginner, what
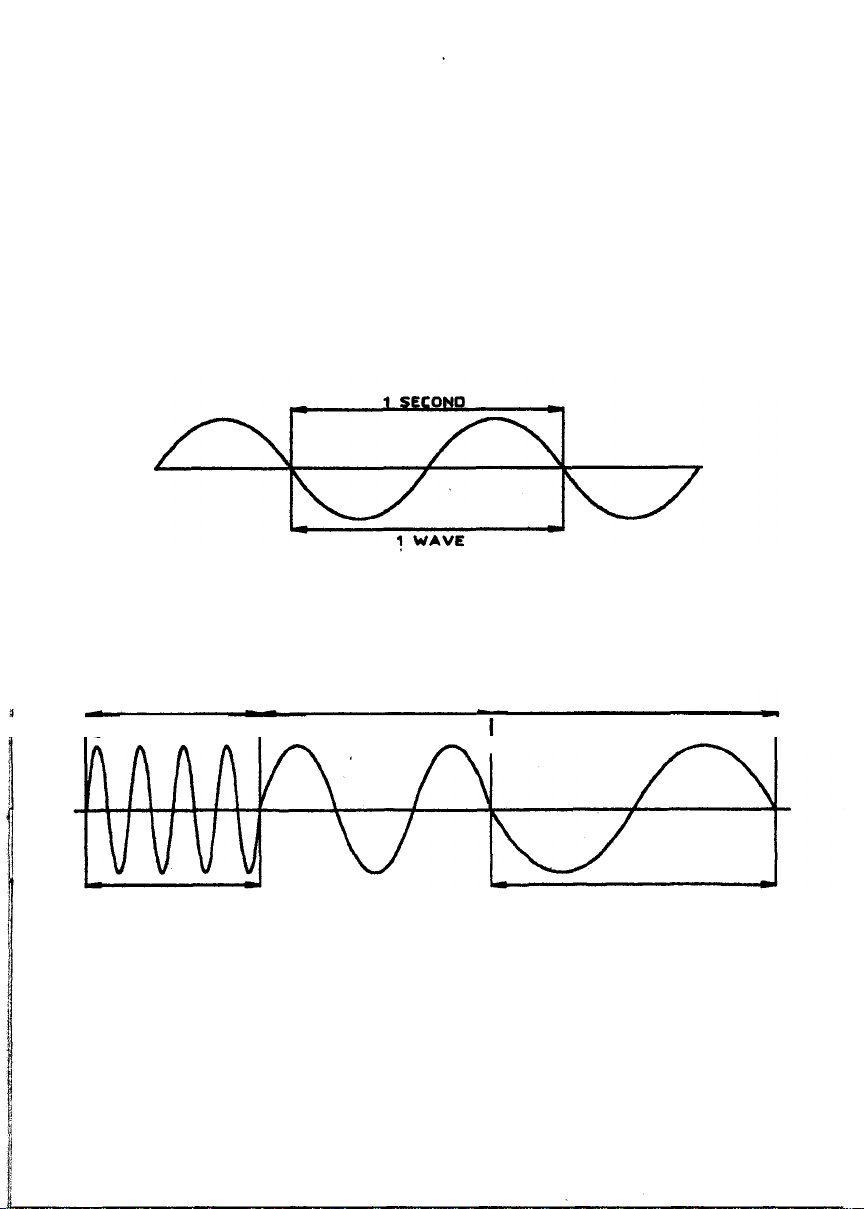
The symbol Hz (pronounced Hertz, and named after a famous radio
pioneer) represents one complete electromagnetic wave in a second.
kilohertz (kHz) is one thousand waves per second, and a Megahertz
(MHz),
called the Frequency.
Often a reference is made to a stations wavelength rather than it’s
frequency. High frequency signals have short wavelengths and low
frequency signals have
kHz is given by dividing
a million waves in a second. The number
HF3
receiver covers the entire spectrum from
does
this mean???
of
1
WAVE
IN
1
SECOND
long
wavelengths. The frequency of a signal in
300,000
by the wavelength in metres.
=
1
HERTZ
30
kHz to
waves per second is
A
WAVE
SHORT
HIGH
FREQUENCY
Why are high frequency waves shorter than low frequency
Imagine that you could see a wave travelling past you at the speed of
light. The wavelength would be the distance between two adjacent
If
waves.
more waves in the same space
you increase the frequency of the waves then you would get
MEDIUM
WAVE
so
the wavelength would be shorter.
1
-
-
LONG
LOW
-
WAVE
FREQUENCY
???
Page 3
Radio waves, light, X rays, are all electromagnetic waves. The only thing
that differentiates them is their frequency.
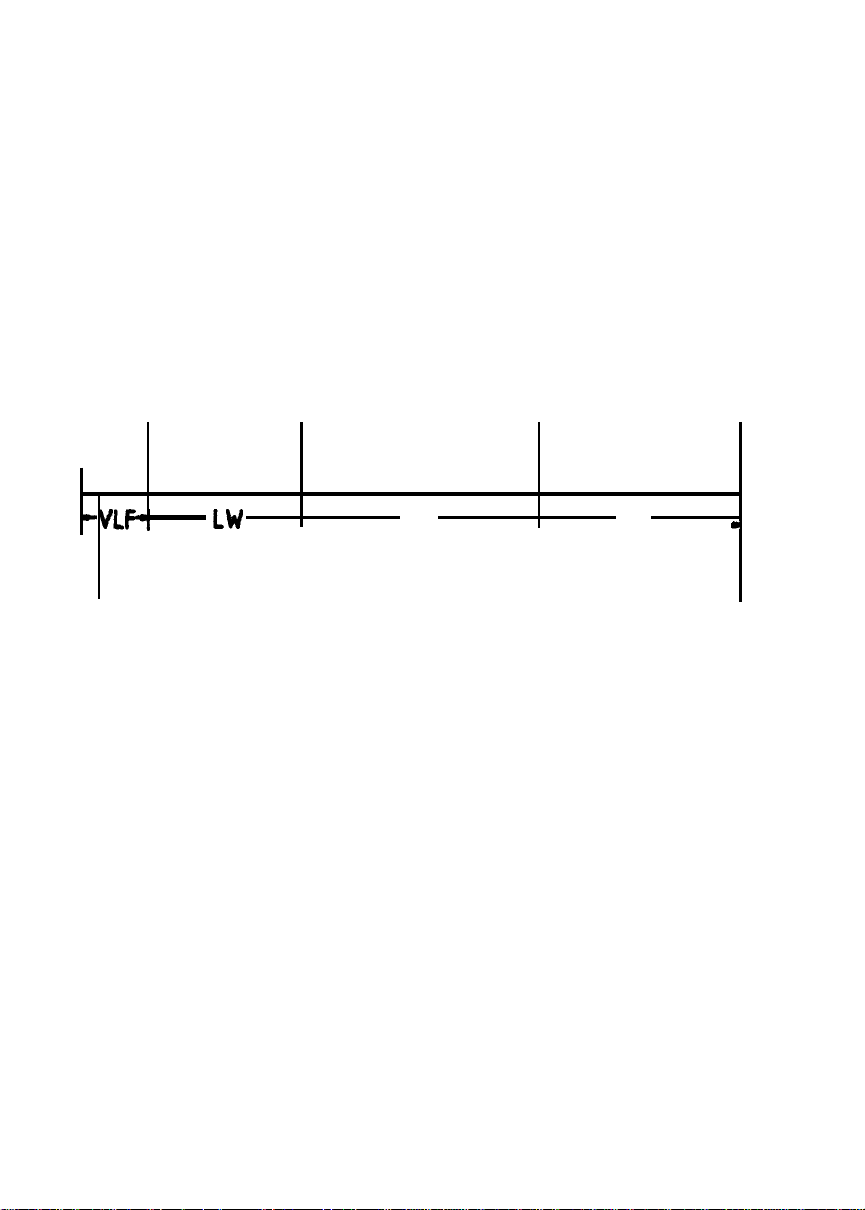
For convenience the range of frequencies used for radio
communications is split into bands. Frequencies below 100 kHz
'
called Very Low Frequencies (VLF). The Long Wave (LW) covers
frequencies between 100 kHz
covers the frequencies between 300 kHz and 1.6 MHz (1 600 kHz).
All
frequencies between 1.6 MHz and 30 MHz are referred to as Short
(S
Waves
I
-
VLFl
W).
LW
and
300
kHz, whilst the Medium Wave (M
MW
are
sw
W)
I
The
HF3
covers all of these bands in one continuous sweep with steps
of 1 kHz.
those to the right are
e.g.
Turning the tuning knob slowly advances the tuning in 1 kHz steps,
turning a little faster the steps change to 10 kHz,
become 100 kHz,
This makes it quick and simple to hop from one end of the spectrum to
the other.
Numbers to the left of the decimal point are in MHt whilst
in
kHz.
0.198 is expressed as 198 kHz or 0.198 MHz
14.386 is expressed as 14386 kHz or 14.386 MHz
faster still the steps
and a really fast spin will make the steps 1 MHz.
2
Page 4

GETTING
The
HF3
phono plug. The wire length is
general coverage.
longer wire may pick up more of the desired signal,
much more undesirable signals in the form of interference. The
antenna wire should be strung up as high as possible and as far away
from mains wiring, striplights, televisions, or any other source of
interference (see Page
is the ground terminal. Connect this to something that is well
grounded.
not connect to anything
*Do
not
aid of a qualified Electrician.
STARTED
is supplied with a simple long wire antenna connected to a
30
feet and is a good compromise for
A
shorter wire will be less sensitive and, whilst a
it
may
also
pick up
9).
The shorter black wire from the phono plug
A
cold water pipe or *mains earth is usually adequate.
you
are not certain is earthed.
attempt to connect directly to any Mains Supply without the
Do
Plug the
the antenna and set the attenuator on the rear of the receiver to it’s
normal position. You are now ready to go.
Switch on the receiver by rotating the volume control clockwise. The
display
select mode
modes. Set the Clarify control to it’s central position. Adjust the volume
to a convenient level and use the tuning knob to move up and down
the spectrum and listen to the
To
Tune to the desired frequency and press
becomes the memory location pointer. Select the memory location
using the tuning knob. When the desired location is selected press
MEM,
returned
12
Volt line from the power supply into the receiver, plug in
will
show the frequency and the mode. Set the mode to AM. To
USB,
AM and
LSB
press
AM stations.
MOD.
This rosters through the
Store a Frequency In memory
MEM.
the desired frequency is stored in that location and the receiver
to
normal operation.
The S meter then
3
Page 5

To
Recall a Frequency from memory
Press
RCL.
The S meter then becomes the memory location pointer.
Select the desired memory location using the tuning knob. When the
desired location is selected press
RCL.
The desired frequency is
recalled and the receiver returned to normal operation.
The
RST
key resets the microprocessor and reverts to memory
position 1.
Tune to 100 kHz
and you will hear a fast ticking noise. These are the
pulses of LORAN C, this is a long range navigation system in use all
over the world.
A
little lower in frequency, between 80 and
90
kHz you
can hear the carriers of the DECCA system. This system was set up in
1944
for the D day landing and has been in continuous maritime use
ever since. Encrypted data is transmitted to military submarines at
VLF.
This covers very great distances. Speech is not transmitted.
The Medium and Long waves are crowded with domestic and foreign
broadcast stations. When tuning a station rotate the tuning knob to
obtain the highest number on the
Tune between
300
and
400
Signal Strength Meter.
kHz for marine and aeronautical beacons.
These are used by shipping and aircraft to get bearings. Each beacon
transmits a Morse code ident of it’s name. The Morse is very
continually repeats,
so
if
you don’t read Morse, you have plenty of time
slow
and
to look it up. The ident letters are often a syllable of the airport or
towns name.
Domestic portable telephones operate at the high frequency end of the
medium wave at about 1.6 MHz.
A
frequencies start.
quick flip round and you’ll find it’s very different
At 1.8 MHz the short wave
than the medium wave band.
The BBC broadcasts it’s World Service on several short
BBC
frequencies. In times of crisis the
World Service has been the
-
wave
source of unbiased news the world over. Most countries have their
own overseas broadcasts. Some follow in the traditions of the BBC,
others simply use the airwaves for blatant propaganda.
4
Page 6

Many overseas broadcast stations welcome contact with listeners.
This helps them to establish their listener profite and assess their
coverage. The station will usually repay the listener with give
-
away
goodies and a QSL card (from the international Q code meaning
“acknowledge receipt”). Many people make a hobby of collecting QSL
cards from
all
over the world.
Some transmissions will not contain speech or music, they
will
just
consist of warbling tones. These contain some form of data. It may be
a weather chart broadcast to shipping, or a fax or telex to a news
agency. Without a special decoder it cannot be read.
Another form of transmission found on short
(SSB).
-
wave is single side band
To understand what this means it helps to see how it developed. In a
conventional signal a carrier is transmitted. The amplitude (height
of
the wave) of the carrier is modulated with speech, hence the name
“amplitude modulation” (AM).
If
the signal is studied carefully then the
result of the modulation produces a carrier, an upper sideband of
frequencies and a lower sideband of frequencies.
All
this takes up space on the radio spectrum. Now, since the upper
and lower sidebands are mirror images of each other it’s not
necessary to transmit both,
so
one is filtered out in the transmitter. As
no information is provided by the carrier that also can be filtered out
leaving only one of the sidebands. This takes up less space in the
spectrum and, because only wanted information is transmitted, makes
better use
This is single sideband or
of
the power available.
SSB.
The downside of this is, firstly, the
quality of reproduction is not usually as good as AM. For this reason it
is only used for communications and not for broadcast. Secondly, it is
more difficult to recover the original speech than in AM.
When recovering an
SSB
signal, the listener must know which
sideband is being transmitted. Fortunately there is a convention.
Frequencies below 10 MHz
those above 10 MHz
use the upper sideband
exceptions to this convention, e.g.
transmit the lower sideband (LSB), and
(USB).
(There are
the R.A.F. VOLMET on 4717 kHz)
5
Page 7

Tuning the Amateur band from
SSB
signals. With the receiver in the AM Mode the speech sounds
3500
to
3800
kHz you
will
always find
severely distorted and, as there is no carrier the tuning meter rises
LSB,
and falls with the voice peaks. Switch to
set the clarify control to
it's centre position (pointer uppermost). Tune the receiver until the
speech becomes as clear as possible, finally turn the clarify control
a
until the speech seems as near normal as possible. Only
small
adjustment of the clarify control will change the voice characteristic
SSB
from high to low pitch. With a little patience, tuning in
stations
becomes quite natural. Most people find it easier with the volume set
at a low level.
,
When using the tuning knob to tune through a band of frequencies,
as
if
place a finger in the dimple and turn the knob
1
tea. This will move gently in
kHz steps. Holding the knob and twisting
stirring a cup of
may accelerate it too fast and cause larger increment steps.
If
a very strong station is encountered which causes overload and
distortion then switch the attenuator to the
ATTEN
to switch it back to normal for weaker stations. The
designed to handle comparatively large signals at the antenna.
position. Remember
HF3
has been
A
powerful local transmitter could still cause severe overload. This would
usually manifest itself as that station breaking through all over the
spectrum. In such cases a filter can be incorporated in line with the
antenna plug, talk to your dealer for further details.
When is the best time to listen
???
Early evening is usually a good time to listen with ever distant stations
being received as the night progresses. Daylight conditions are less
"
favourable. During a period of exceptional activity (
a lift"), the
spectrum is crowded both day and night. Conditions can swing to the
other extreme with only the more local stations available.
Over short distances, signals follow the contour of the earth (ground
waves), however, long distance propagation relies on the signal
off
bouncing
the ionosphere (sky waves). Often the skywave from a
distant station is stronger than the groundwave from a local station.
will
With experience the listener
soon learn the best time and
conditions to receive the stations he wants.
6
Page 8

What
can
I
receive
???
There are thousands
of
stations available on short wave when the
conditions are right. Many will beam English programs into North
America at certain times
of
the day. On an evening
in
August, English
broadcasts were received from the following stations.
All
Voice of Vietnam
Norwegian Radio
Radio Kuwait
BBC World Service
Brazil Radio
Radio Netherlands
Voice
of
Russia
Radio Thailand
Voice
of
Israel (Jerusalem)
Voice of America
Romania Radio
frequencies in
15009 & 9840
71 20
11990
6180,6195,9410,12095,15070
15265
1 3700
11630&11677
721
0
7465,9435,15615
9760
11810 &11940
kHz
RAI International (Italy)
Radio Argentina
Islamic Republic
of
Iran
Polish Radio (Warsaw)
China Radio International
Christian Science Monitor
9670
15345
9022
7285
9920
1 3770
7
Page 9

Radio Amateurs, from all over the world, were heard on the
following bands:
160
Metre Band
80
Metre Band
40
Metre Band
20
Metre Band
Dozens of other stations were received but not identified as their
language was unfamiliar.
Most broadcasts beamed into Europe have programs in English,
German and French, as these are the most commonly used languages.
Few groups, however are left out.
-
1800
to
3500
7000
1400
to
to
to
2000
3800
7100
1435
(LSB)
(LSB)
(LSB)
(USB)
From Bulgarian to Serbian, From Kinyarwanda to Swahili,
speaks it, then usually, someone broadcasts it.
For those interested in languages, the BBC broadcasts regular language
courses. (Details on World Service broadcasts).
There are many Comprehensive guides available giving Frequencies
and scheduled transmission times. Make sure that you get an up to date
copy as schedules are often changed.
There are plenty of good books for the short
topics from antenna construction to eavesdropping on clandestine
broadcasts.
For the listener with an interest in Amateur Radio there are local radio
clubs. Details are usually available from the local library or from the
Radio Society
of
Great Britain.
-
wave listener covering
if
someone
Note
It is good practice to unplug the antenna when not in use. This
protect the receiver from damage during Electrical Storms.
It is also good practice to switch
Supply from the mains when the Receiver is not in use.
off
the unit and unplug the Power
will
8
Page 10

ANTENNA
Tie
the end
to
a
tall object.
IDEAL ANTENNA POSITION
If
the antenna is to be some distance from the receiver, then use
ohm co-ax
outside antenna is not practical, then the antenna can be fitted as high
as possible in the
indoor antenna, though interference from other electrical equipment may
cause problems. For serious
listening
of
the antenna wire to a piece
(TV
Aerial cable) between the receiver and the antenna.
loft.
Reasonable results can be obtained with an
a
good antenna
is
worth the effort.
of
string which in turn
is
70
tied
If
an
9
Page 11

Troubleshooting
UNIT WON’T TURN ON
0
Check the power unit is plugged into the mains.
Check the Power lead (DC) is plugged into the receiver and the
receiver
If
the unit is connected to an alternative power supply, check the
voltage, polarity and fuse.
is
switched on.
DISPLAY
0
Check antenna and ground connections.
THERE
0
IS
ON BUT UNIT WILL NOT RECEIVE
IS
A HUM
OR
BUZZ PARTICULARLY ON STRONG
LOCAL STATIONS
Check ground connection.
alternative ground.
CAN RECEIVE LOCAL STATIONS BUT CANNOT RECEIVE
0
If
necessary, try connecting to an
DISTANT STATIONS
Atmospheric conditions may be poor, wait until conditions improve.
Check the antenna wire, re site the antenna
HIGH LEVELS OF INTERFERENCE ARE EXPERIENCED
0
Locate the source of interference
especially
is found. Try to site the antenna as far from the source of interference
as possible. Turn
A LOCAL MEDIUM WAVE BROADCAST TRANSMITTER
0
TV’s,
computers etc. sequentially, until the offending item
off
items that cause problems.
if
possible. Turn off all other items,
if
necessary.
OVERLOADING THE RECEIVER CAUSING INTERFERENCE IN
DIFFERENT PARTS OF THE SPECTRUM
I
Switch in the attenuator. In extreme conditions a low cost tuneable
notch filter is available, which plugs in series with the antenna.
A LOCAL VHF STATION BREAKS THROUGH
0
A low cost low pass filter is available which plugs in series with the
antenna.
10
Page 12

FREQUENCY MOVES IN GREATER THAN 1 kHz STEPS WHEN
0
FINE TUNING
Tuning knob is being turned too fast. Use the finger dimple in the
tuning knob when fine tuning.
CANNOT PROPERLY RESOLVE SSB SIGNALS
0
Check that correct sideband is selected. Adjust the clarifier control
If
for best sound.
there is insufficient adjustment on the clarifier
control, return the clarifier to the central position and retune the
main tuning knob.
SOME SIGNALS PARTICULARLY AROUND
0
DIFFICULT TO HEAR
27
MHz ARE
That is because they are frequency modulated (FM). The receiver
FM
does not have an
will
signal
allow these signals to be heard. This is commonly called
facility, however, tuning off the centre of the
“slope detection”.
DISPLAY SHOWS RANDOM CHARACTERS
0
A
supply transient could upset the internal processor.
If
turning the
tuning knob does not clear the problem then press RST. This
performs a reset then returns to stored frequency display.
NB. The HF3 receiver is optimised for speech communications. When
will
listening to music, the audio response
HF3 receiver has no facility for external audio
The
be restricted.
output. The internal speaker is referenced to the positive rail. Any
connection made to the speaker other than through a capacitor
will damage the audio amplifier.
IS
THIS UNIT
PACKED WITH
INCORPORATING A
1
AMP FUSE. CONNECT RED LEAD TO
A
12
VOLT D.C POWER CABLE
POSITIVE AND THE LEAD WITH THE BLACK STRIP TO
NEGATIVE (SUPPLY REVERSAL WILL BLOW THE FUSE).
A
12
CONNECT TO
VOLT BATTERY
POWER SUPPLY. DO NOT EXCEED
OR A REGULATED D.C
13.8
VOLTS.
11
Page 13

FUNCTIONS
2
1
2
3
4
5
6
7
8
9
10
11
12
13
4-
On/Off &
Clarify Control
Mode Display USB AM LSB
Signal Strength Meter
Rosters through Modes
Recall from Memory
Reset
Install into Memory
Frequency Display
Tuning Knob
Attenuator Switch
Antenna Socket
Power Socket
Volume Control
58
Clockwise on. Continue for volume
increase.
Set at centre (blue mark up) tune
either side
Displays selected Mode only.
'
Bar Graph increases with received
Signal Strength.
Rosters LSB AM USB.
Recalls Freq. in Memory.
Reset and return
Installs Freq. displayed into Memory.
to
MHz
kHz
Turn
Set
Plug Aerial in here.
Plug
left
To right
to
alter Frequency.
to
Normal or Attenuate.
12v
of
centre.
to
Memory Position 1
of
Point.
of
Point.
Dc Supply here.
Page 14

RECEIVING WEATHER FAX USING THE
TARGET HF3/M
MINIMUM REQUIREMENT
386 processor or better, minimum of 640k of RAM, 1.5MB free on hard
disk,
VGA
monitor and spare COM port. (Must be COM 1 or 2)
INSTALLING WE-FAX SOFTWARE ONTO HARD DISK
Ensure the computer is in Dos (not in a windows environment) and the
C\: prompt displayed. Insert Disk and type
(Note A represents the floppy drive letter)
B : INSTALL.
WEATHER
CONNECTING RECEIVER TO PC
Plug the data lead into the data socket at the rear of the receiver. Plug the
9
-
pin connector into the spare serial port of the PC. (If the PC has a 25 pin
serial port then a
SETTING UP RECEIVER
Connect antenna and ground as shown in the user guide. With the computer
and its peripherals turned off tune the receiver to a
For the UK the most useful stations are:
BRACKNELL on 4610, 8040, 14436 KHZ
NORTHWOOD on 2374, 3652, 4307 KHZ
OFFENBACH on 3855,
After installation the software will reside in directory
on the hard drive.) Remove the floppy disk.
9
to 25 pin adaptor is available at most computer stores.)
OF
PC
7880,
A : INSTALL
If
the 3.5 Drive is B then type
local
-
13882.5 KHZ
press RETURN
facsimile station.
C:\
A
full list of stations, frequencies, transmission times area coverage and
chart symbols is available in the Admiralty list of radio signals volume three
published by the hydrographer of the navy. See back page for stockists
TUNING
Set the receiver to the exact frequency shown, ignore any figures after the
decimal point. (there is no need for an offset.) Select
clarify control with the pointer centred. When no picture is being transmitted
a constant note
change to a rhythmic chirp. To get good quality pictures a good interference
free signal is necessary. Atmospheric interference
the hiss
as that from
of
will
frying
bacon
TV
and computers
be heard. During picture transmission this note will
superimposed on the
will
usually be more of a rasping noise.
13
signal.
USB
and set the
will
usually sound like
Other
interference
such
Page 15

Each station has several frequencies, select the one which gives the
will
best results. It
the strongest station gives the best results.
less background noise and give a clearer picture.
Make sure you are satisfied with the quality of signal you’re receiving on
the computer. Ideally there should be no change in the quality of the
signal being received. Many computers however (particularly models
built before the introduction of regulations to limit emissions of radio
interference) will emit radio interference which will degrade the signal.
To solve this problem it is necessary to locate the antenna as far from
the computer as possible. Use a
antenna to the receiver. It may also be helpful to locate the receiver
some distance from the computer.
unplugging the data lead, the noise is being conducted along the shield
of the cable.
supply stores.
RECEIVING PICTURES
vary according to the time of day. Note: Not always
A
weaker station may have
70
ohm coaxial cable to connect the
If
the interference is reduced by
A
data lead with an inline filter is available at most radio
With the computer in
RETURN,
user may modify the auto exec. bat file to add the directory
WEATHER to the default path, allowing the software to be run from
anywhere). After selecting TARFAX software select either
WEATHERFAX and refer to Wefax
(Radioteletype) and refer to
WEFAX (WEATHERFAX)
The menu page
you are using
The zoom factor defaults to
section on zoom.)
Press the
and printing will commence.
write from the top of the screen.
white background will start to print.
black
CD WEATHER
-
S
key to move to the display screen. Press the S key again
then the wrong
DOS
and the C prompt displayed type
RETURN,
RTTY
will
be displayed. Press the C key. Select the serial port
1
or 2. (If you are not sure then try
1.2
If
a picture is being transmitted it
TARFAX
instructions or R for
instructions.
and need not be adjusted. (Refer to
If
no picture is being transmitted then a
RETURN. (Note:
1)
followed by
CD
C
F
for
RTTY
:
will
(If the picture remains totally
com
port
is
selected.)
14
\
Also
\
ESC.
start to
the
Page 16

Pressing the S key will alternately start and stop the picture. Wait for a
picture and start printing. Adjust the clarify control for best contrast, only
a small movement is necessary. Turning clockwise will increase the
pitch of the note from the receiver and make the picture lighter. Adjust
is
until the background
picture builds up (and this can take several minutes)
about its centre axis and may be slanted to one side. To correct the
slant press the keys
vertical. (Once this is set the result
You are now set to receive weather charts. Turn the volume control of
the receiver to a convenient level to hear the signal.
At the beginning of a chart you will hear a loud buzzing noise, this is
followed by a continuous blip
to get the edge of the chart aligned with the end of the screen.
S
Press
a vertical line somewhere at the top of the screen. Using the
key, move this line until it is off the screen either to the left or right.
When the blips stop the chart will start to print. Press
blips and return the chart to the top of the screen. The volume can be
turned down
end of the chart a buzz will be heard. Press the
recording. The chart can be viewed by pressing the page up or page
down keys. Move the chart to the area you require. This chart can be
saved in memory for future reference or to be manipulated or printed.
when the buzz is heard to start the picture. The blips will create
if
necessary. (Its setting does not affect the chart.) At the
peak white and the dark areas are black. As the
it
may be split
\
or / whilst a picture is printing to make the edges
is
stored and need not be altered.
-
blip - blip
-.
This
is
a synchronising signal
c
or
R
to delete the
S
key to end the
+
Q
Press the
copied to hard disk. The program returns to the main menu. Press the
SPACE bar. Enter the name you want to give the chart followed by
.BMP
recover a map select the menu page. Press the R key and then the
SPACE bar. Enter the name of the map followed by
The maps are stored as bitmap files and can be manipulated by any
software which can handle bitmap files
Paint (Windows 95).
key. A bar to the right of the screen indicates the data being
(e.9.
-
WEFAX.BMP).
Press return and the map will be saved.
.BMP
then press return.
e.g. Paintbrush (Windows 3.1) or
15
To
Page 17

Select C to set up the serial port and also select the Baud rate of the
transmission. Command E is included to allow the invocation of an
external text editor to view and manipulate received text. As a default it
is assumed that a copy of the DOS editor (EDIT.COM)
WEATHER directory. To change the default path simply edit the string in
file EDIT.PTH in the WEATHER directory.
Press
S
to start reception. Tune the receiver to the desired station and
press H. This will display a spectrum of the received signal. Tune the
clarify control until two distinct peaks are received. (This corresponds to
the upper and lower frequency tones of the signal). Using the
keys move the red line until
to return to the display page. (Some stations transmit
change the logic sense press key
Most marine stations transmit at 50baud, news agencies transmit on either
50 or 75 baud.
The German weatherservice in Hamburg transmit comprehensive weather
forecasts on the following frequencies:
it
is central between the peaks. Press H again
I).
4583
khz, 7646 khz and
resides
in
invert mode. To
in
101
the
+
01 khz.
ADMIRALTY CHART AGENTS
The book "Admiralty list of radio signals volume three" which is a
comprehensive guide to Radio weather services is available from:
Kelvin Hughes Captain O.M. Watts
7
145 Minories
London EC3 1NH
Tal: 0207 709 9076 London
Dover Street
Piccadilly
Tel: 0207 493 4633
16
 Loading...