

Page 1
DSC-900
UIC
OWNER’S
HANDBOOK
Page 2

TABLE OF CONTENTS
LICENSE IN FORMA TION...........................................................................................................3
FCC Radio Lise nce....................................................................................................................3
Radio Call Sig n...........................................................................................................................3
MMSI Number I nformat ion...................................................................................................3
FCC NOTICE.....................................................................................................................................3
FCC Digital D evise C ompli ance............................................................................................3
FCC Radio Frequency Compliance Re quirement s and Wa rnings...............................4
1. INTRODUCT ION........................................................................................................................5
1.1 Equipment Required..........................................................................................................5
1.2 Equipment Supplie d..........................................................................................................5
1.3 Optional Equipmen t...........................................................................................................5
2. BASIC RADI O COMMU NICATIO N PROCE DURES...................................................6
2.1 Using Channel 16................................................................................................................6
2.2 Calling Another Vessel......................................................................................................7
2.3 Prohibited Commu nicati on..............................................................................................7
3. INSTALLATION..........................................................................................................................8
3.1 Transceiver............................................................................................................................8
3.2 Antenna..................................................................................................................................8
3.3 Power Conn ection...............................................................................................................8
3.4 Rear Panel Cable s................................................................................................................9
3.5 Optional FM-02 Flush Mount K it Installat ion............................................................10
4. OPERATION...............................................................................................................................11
4.1 Power On/Off....................................................................................................................11
4.2 Volume and Squelc h........................................................................................................11
4.3 Keypad.................................................................................................................................12
4.4 Channel Selecti on..............................................................................................................12
4.5 Channel Banks...................................................................................................................13
4.6 Wx Channels......................................................................................................................13
4.7 Wx Alert..............................................................................................................................13
4.8 Priority Channel (16/09)..................................................................................................14
4.9 PTT........................................................................................................................................14
4.10 H/L.....................................................................................................................................14
DSC-900 1
Page 3

4.11 Channel Scanning...........................................................................................................14
Priority Scan.................................................................................................................14
All Scan..........................................................................................................................15
Memory Scan...............................................................................................................15
4.12 MMSI Set...........................................................................................................................17
4.13 Directory............................................................................................................................18
5. DSC OPERATI ON.....................................................................................................................21
5.1 DSC Monitor......................................................................................................................21
5.2 GPS Operat ion...................................................................................................................21
5.3 Sending a Distres s Call.....................................................................................................22
5.4 Receiving a Distres s Call..................................................................................................23
5.5 Normal DSC Calls.............................................................................................................24
All Ship's C all...................................................................................................................24
Directory C all...................................................................................................................25
New Call...........................................................................................................................26
Last Call.............................................................................................................................28
Po s i t i o n S e nd (P1)...........................................................................................................29
Position Reques t ( P 2)......................................................................................................29
5.6 Receiving DSC Call s..........................................................................................................31
All Ship's Ca ll Receiv ed.................................................................................................31
Individual Call Receiv ed...............................................................................................32
Geographic Call Recei ved.............................................................................................32
Position Send Receive d..................................................................................................32
Position Request Receive d............................................................................................33
6. SPECIFICATIONS.....................................................................................................................34
7. CHANNEL AS SIGNME NT....................................................................................................36
CERTIFICATE OF LIMITED WARRANTY..........................................................................39
2 DSC-900
Page 4

LICENSE INFORMATION
FCC Radio License
In U.S. waters, vessels which are not required to carry radio equipment are not
required to have an FCC (Federal Communications Commission) ship station license
for a VHF marine radio.
However, any vessel required to carry a marine radio on an international voyage,
carrying a HF single side band radio telephone or marine satellite terminal must have
an FCC license.
License application forms for ship and land stations can be downloaded free from the
FCC web site at this address: www.fcc.gov/formpage.html. You may also order
copies of these forms by calling the FCC Forms Distribution Center at 1-800-418-3676.
Radio Call Sign
At this time, the FCC does not require recreational boaters to have a ship radio station
call sign. The U.S. Coast Guard recommends using the boat's registration number and
state.
MMSI Number Information
The BoatU.S. MMSI Program has been certified by both the Federal Communications
Commission (FCC) and the U.S. Coast Guard to assign MMSI numbers to vessels with
DSC capable radios. To obtain and register your free MMSI number, the Coast Guard
recommends logging onto http://www.boatus.com/mmsi/ and following the
instructions.
FCC NOTICE
FCC Digital Device Compliance
This device complies with Part 15 of the U.S. Federal Communications
Commission (FCC) Rules. Operation is subject to the following two conditions:
(1) this device may not cause harmful interference, and (2) this device must
accept any interference received, including interference that may cause
undesired operation.
Changes or modifications not expressly approved by the manufacturer could
void the user's authority to operate the equipment.
NOTE: This equipment has been tested and complies with Part 15 of the FCC
Rules. This specification provides reasonable protection against harmful
DSC-900 3
Page 5

interference in a residential installation. This equipment generates, uses and
can radiate radio frequency energy and, if not installed and used in accordance
with the instructions, may cause harmful interference to radio communications.
However, there is no guarantee that interference will not occur in a particular
installation. If this equipment does cause harmful interference to radio or
television reception, which can be determined by turning the equipment off
and on, the user is encouraged to try to correct the interference by one or more
of the following measures:
• Reorient or relocate the receiving antenna.
• Increase the separation between the equipment and receiver.
• Connect the equipment into an outlet on a circuit different from that to
which the receiver is connected.
• Consult your dealer or an experienced technician for help.
FCC Radio Frequency Compliance Requirements and Warnings
When operating your marine radio transceiver, you should know that the
antenna radiates radio frequency (RF) energy. This radio was designed to meet
the FCC’s rules and regulations for the maximum permissible exposure to
radio frequency energy. This design was tested and found to be compliant
with the strict requirements established by the FCC.
DO NOT operate the radio without a proper antenna attached, because this
may damage the radio and may also cause you to exceed FCC RF exposure
limits. Antenna types suited for this radio are described in the installation
section.
DO NOT transmit for more than 50% of the total radio use time. Transmitting
more than 50% of the time can cause FCC RF exposure compliance
requirements to be exceeded. The radio is transmitting when the “TX
indicator” is displayed on the screen. You can cause the radio to transmit by
pressing the "PTT" (Push To Talk) switch.
IMPORTANT: The antenna(s) used for this transmitter must be installed to
provide a separation distance of at least 91 cm (37 inches) from all persons
(including passengers). The antenna(s) must not exceed an antenna gain of 3
decibels (dB) and must not be co-located or operating in conjunction with any
other antenna or transmitter.
4 DSC-900
Page 6

1. INTRODUCTION
Congratulations on your purchase of the DSC-900. It is an advanced marine VHF
communication transceiver offering Digital Selective Calling. It is designed for
operation in the marine VHF FM frequency band. The operating frequency range is
156.025 to 163.275MHz which includes all USA, Int’l, Canada and Wx channels.
The transceiver has Digital Selective Calling (DSC) capabilities. Distress, All Ship’s and
Individual DSC call formats are supported.
Other features include Position Send/Request, all channel scanning, priority channel
scanning, memory channel scanning, one button instance access to channel 16/09,
large selector knob and microphone with UP/DOWN keys.
1.1 Equipment Required
The minimum equipment required for two way voice and DSC VHF radio
communication with vessels and shore stations includes:
• VHF radio communication transmitter and receiver designed and approved for
marine VHF communication use.
• VHF antenna and connecting cable. Use a good quality unity gain antenna for
best range performance.
• Power source suitable for the VHF transmitter and receiver.
• For Digital Selective Calling (DSC) VHF communication radios, connection to a
GPS receiver that provides latitude and longitude coordinates and UT C time for
distress messages.
1.2 Equipment Supplied
• DSC-900 Marine VHF Transceiver
• Microphone with UP/DOWN keys
• Mounting Bracket with knobs
• Microphone Hanger
• Power Cable with in-line fuse (6.3 Amp)
• Owner’s Handbook
1.3 Optional Equipment
• FM-02 Flush Mount Kit
DSC-900 5
Page 7

2. BASIC RADIO COMMUNICATION PROCEDURES
Distress or emergency calls may be made either manually or automatically. Sending
distress calls automatically uses the Digital Selective Calling (DSC) functions of your
transceiver and requires as operating and properly connected navigation receiver. The
following procedures are for sending voice distress messages manually. Sending an
automatic distress call is described in the DSC section of this manual.
2.1 Using Channel 16
Channel 16 is the Calling and Distress channel. An emergency may be defined as a
situation that threatens human life or property. In such situations, make sure your
transceiver is turned On and set the channel selector to Channel 16. Then use the
following procedure to make a distress call. The total transmission should not exceed 1
minute.
1. Press the microphone Push To Talk button. Speak slowly and clearly into the
microphone: “Mayday, Mayday, Mayday, this is [your vessel’s name], [your
vessel’s name], [your vessel’s name]”.
2. Then repeat once: “Mayday, [your vessel’s name]”.
3. Continue by reporting your position in latitude and longitude or by reporting
your bearing (true or magnetic, specify which) and distance from a prominent or
well known landmark, geographic feature or aid to navigation.
4. Explain the nature of your emergency (fire, sinking, collision, grounding, health
condition, injury, etc.).
5. Report the kind of assistance you require (fire, medical aid, pumps, etc.).
6. State the number of people aboard and the condition of any injured.
7. Estimate the seaworthiness and condition of your vessel.
8. Describe your vessel: length, type, color and any distinguishing feature.
9. End the message by saying “Over”. Release the Push To Talk button and listen for
a reply.
10. If there is no reply, repeat the above message procedure. If there is still no
response, try another channel.
6 DSC-900
Page 8

2.2 Calling Another Vessel
Channel 16 may be used to establish initial contact with another vessel. Ho wever, its
most important use is for voice emergency messages. Channel 16 must be monitored
at all times except when engaged in actual communication on another channel.
Channel 16 is monitored by international search and rescue (SAR) authorities,
National Coast Guards and by other vessels. Use of Channel 16 for calling or hailing
must be limited to initial contact only. Calling should not exceed 30 seconds and may
be repeated 3 times at 2 minute intervals.
Prior to making contact with another vessel, determine which channel will be used for
continued communication after the initial contact. Monitor the desired channel for
traffic and, when clear, switch to Channel 16 to make initial contact.
Listen for traffic on the Calling Channel (16). If clear, press the Push To Talk (PTT)
button on the microphone. Speak the name of the vessel you are calling followed by
“this is” and the name of your vessel and your call sign. Release the PTT and listen for
a reply. When the other vessel returns your call, acknowledge the call with “go to”, the
number of the new channel and “over”. Switch to the new channel and listen for traffic.
If necessary, wait for traffic to clear, and then call the other vessel. As communication
proceeds, end each transmission with “over”. When communication with the other
vessel is completed, end the last transmission with your call sign and the word “out”.
It is not necessary to end each transmission with your call sign, just give your call sign
at the beginning and end of each contact.
Remember to switch to Channel 16 when not actively communicating on another
channel.
2.3 Prohibited Communication
The following communications are prohibited by regulations and violators are subject
to penalties.
• False distress or emergency messages (including false DSC distress).
• Messages to “any vessel” except in emergencies and radio tests.
• Messages to or from a vessel on land.
• Transmission while on land.
• Obscene, indecent, or profane language.
DSC-900 7
Page 9

3. INSTALLATION
3.1 Transceiver
Your DSC-900 transceiver is designed to withstand the rigors of the marine
environment. However, selecting a mounting location affording some protection from
the elements will prolong the life of connectors, controls and the liquid crystal display
(LCD).
Select a location within easy reach and view of the operator and away from your
vessel’s compass. Locate the microphone to avoid entanglement with steering or
engine controls, both when in use and when stowed. Also, consider routing of antenna,
power and NMEA interface cables. Mount the transceiver securely to a solid surface.
3.2 Antenna
Proper installation of a quality VHF antenna is very important to reliable radio
communication. A good quality unity gain a ntenna is recommended for maximum
range performance. In general, antennas should be located as high as practical and
separated as much as possible from other antennas and structures. The minimum
distance to other objects is 1 meter. Route the antenna cable away from other electronic
equipment and do not bundle the antenna or power cable with other wiring,
especially transducer cables for depth sounders and fish finders. For cables longer than
10 meters, RG-8/U coaxial cable must be used. Mount the antenna and install the
connector(s) in accordance with manufactures instructions. Connect the antenna cable
to the RF output connector on the rear panel of the transceiver.
3.3 Power Connection
CAUTION
Reverse polarity connections can damage your transceiver
The power cable for your transceiver must be connected to the ship’s main power buss.
Connect the Red wire to the positive (+) terminal and the Black wire to the negative (-)
terminal. Connect the barrel terminals on the power cable to the matching color wires
and terminals extending from the rear panel of the transceiver.
8 DSC-900
Page 10

3.4 Rear Panel Cables
The white and black cables on the rear panel are provided for connecting an external
speaker. Use an 8 Ohm speaker rated for at least 3 Watts and suitable for the
environment at the chosen location.
Other cables are provided for connecting an operating GPS navigation receiver, in
order for the position reporting/transferring features of your transceiver to function.
Refer to your GPS navigation receiver manual for information about its NMEA
output/input settings and connectio ns.
Wire Color Description Connection
White External speaker (+) Connect to external 8 Ohm audio speaker
Black External speaker (-) Connect to external 8 Ohm audio speaker
Brown NMEA Rx (+) Connect to NMEA Tx (+) of GPS
Red NMEA Rx (-) Connect to Ground/NMEA Tx (-) of GPS
Orange NMEA Tx (+) Connect to NMEA Rx (+) of GPS
Yellow Ground/NMEA Tx (-) Connect to Ground/NMEA Rx (-) of GPS
DSC-900 9
Page 11
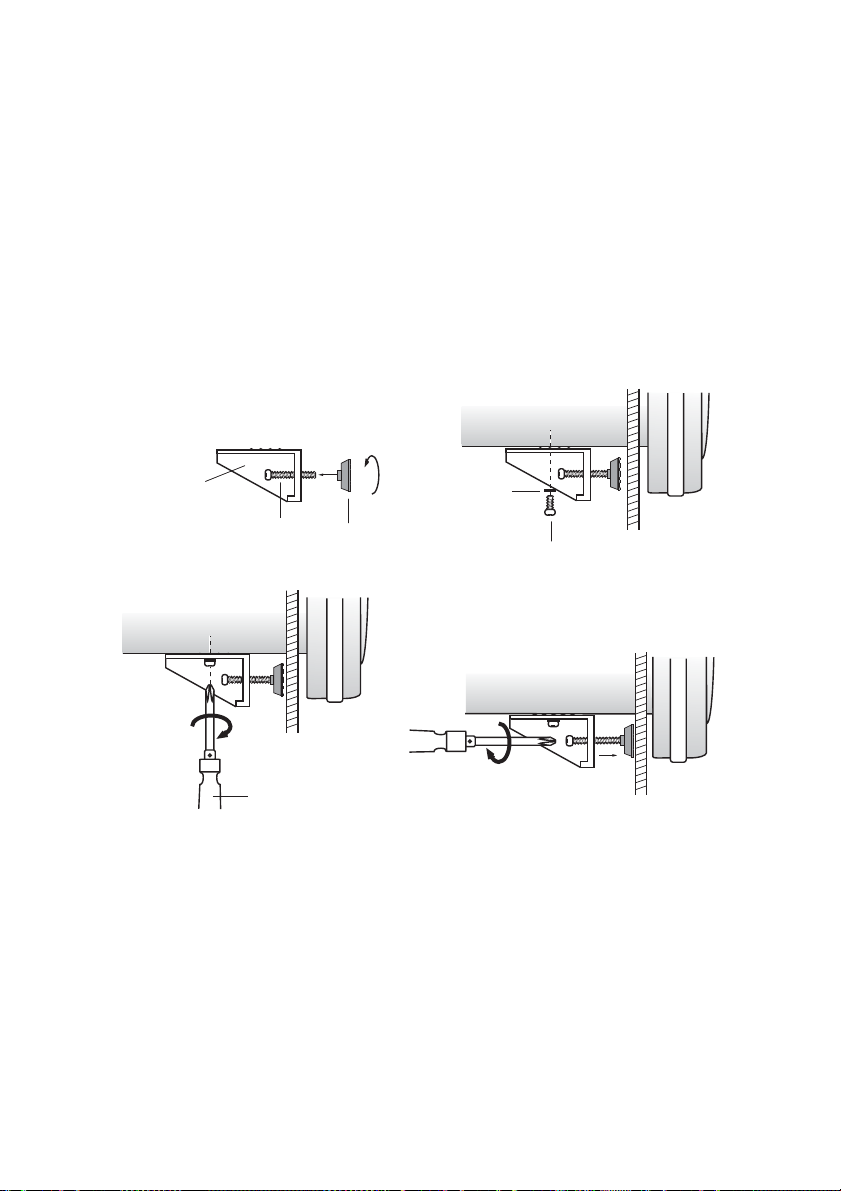
3.5 Optional FM-02 Flush Mount Kit Installation
1. Cut the dash board using a template sheet included in the kit.
2. Set the radio in the cut dash board.
3. Rotating the longer screw and set it to the hole of the plastic mount block. Firmly
attach the bolt foot rotating to the top of the screw. (See Fig. 1)
4. Firmly fix the plastic mount block on the either side of the radio using shorter
screw. Don’t forget to attach the washer. (See Fig. 2 and Fig. 3)
5. Fasten the longer screw to fix the radio to the dash board firmly. (Fig. 4)
6. The same works should be done to the other side too.
Plastic mount block
Fig.1
Fig.3
Longer screw
(+) screw driver
Bolt foot
Washer
Fig.2
Fig.4
Shorter screw
10 DSC-900
Page 12
4. OPERATION
4.1 Power On/Off
Power to the transceiver is controlled with the VOLume knob. When the VOL knob is
the full CCW position, the unit is turned Off.
To turn the transceiver On:
• Rotate the VOLume knob CW until it clicks over the detent. The LCD backlight
illuminates and the Power-On screen appears.
After approximately two seconds, the Normal Communication screen appears in
the display.
The default Priority channel (CH16 or 09) is displayed in the LCD. For the first
time Turn On, it is CH16. The radio’s Orange lighting is always On. There is no
contrast control.
DSC
MON
PRI
MEM
GPS
USA
To turn the transceiver Off:
• Rotate the VOL knob CCW until it clicks over the detent to the OFF position.
4.2 Volume and Squelch
The VOLume and SQuelch controls have each knob. They are independent controls
but work together to control audio output from th e speaker. The volume control set
the loudness of sound from the speaker and the squelch control is used to mute
background noise when no received signals are present.
To properly set the VOL and SQ controls:
• Rotate the SQ knob fully CCW.
• Rotate the VOL knob CW until background noise is plainly heard.
DSC-900 11
Page 13

• Slowly rotate the SQ knob CW until the noise is muted (squelched). Then adjust
the control slightly more CW (approximately 1/8 turn). Use ca re not set to the
SQ control more CW than necessary or weak signals may be heard.
Some channels exhibit more background noise than others, so it may be necessary to
readjust the squelch setting when changing channels or when scanning.
4.3 Keypad
A tone is emitted when any of the 6 k eys are pr esse d. A 3-b eep err or to ne is emitt ed if
the key press is not allowed. Some functions require a holding down of a key. A single
beep is emitted, then after the hold down timeout, a second beep will be heard and the
mode entered. The basic purpose for each key is as follows:
Used for selecting channel and menu.
H/L Use to toggle transmitter power between 25 watts and 1 watt output.
Certain channels are restricted to 1 watt maximum power and will cause the
error beep if the HI/LO key is pressed.
WX Switches to the Wx channel mode. Also toggle Off/On the Wx Alert
function by pressing in Priority or Memory Scan modes.
16/9 Selects the Primary Calling 16/09 or the last channel used. Also cancels DSC
and Emergency /Distress calls.
SCAN Can be used alone or with the MEM key to select Priority Scan, Memory
Scan or All Scan.
MEM Stores MMSI numbers. Also stores channels in the scan memory bank, and
when used with the SCAN key, starts Memory Scan.
CALL Initiates DSC operation screens by pressing.
4.4 Channel Selection
There are two ways to change channels:
• Rotate the SELECTOR, or press the UP/DOWN keys on the MIC. The
UP/DOWN keys on the MIC will always change channels except when being
used in sub-modes.
Refer to the enclosed channel chart f or proper usage and understanding. In USA and
Canada, the Wx channels are available. Wx channels are not available for the
International Channel Bank.
12 DSC-900
Page 14

The A annunciator in the Radio’s LCD indicates an “ALTERNATE” Channel usage
and usually indicates a SIMPLEX channel is tuned and normal voice ship-to-ship
communication is appropriate. If the A annunciator is OFF, the radio is sometimes
operating in the DUPLEX Mode - the Transmit and Receive frequencies are different.
4.5 Channel Banks
To switch channel banks – USA, Int’l and Canada:
• Press the H/L key and WX key at the same time. The selected USA, I or C
annunciator will come On.
4.6 Wx Channels
To switch to Wx m ode:
• Press the WX key. Wx annunciator appears in the LCD and now you are in the
Wx mode. The last used Wx channel always appears first.
• Rotate the SELECTOR to change the Wx channels.
To exit from Wx mode:
• Press the WX key. The radio returns to the previous working channel.
4.7 Wx Alert
The Wx Alert is a 1050Hz tone burst that is transmitted from the NOAA Weather
station. A special circuit in the radio detects this tone and during scanning modes
(except ALL SCAN) a loud 2-tone warning will sound. Select the Wx channel before
starting a Priority Scan or Memory Scan.
The alarm is cancelled by pressing any key. The radio stops scanning and switches to
the Wx channel to hear the warnings. You know the radio is scanning the Wx channel,
if you see the Wx annunciator flash On/Off in the LCD during the scanning process.
To toggle Off/On Wx Alert function:
• Press the WX key in Priority Scan or Memory Scan modes
Wx
ALERT
GPS
PSCN
USA
DSC
MON
PRI
.
DSC-900 13
Page 15

4.8 Priority Channel (16/09)
The Priority channel can be set as channel 16 or channel 09. Default priority channel is
channel 16.
To switch the priority channel:
• Press and hold the 16/9 key until priority channel is switched to other channel.
The new priority channel is remembered, even if turning Off the radio.
MEM
GPS
USA
DSC
MON
PRI
GPS
USA
DSC
MON
PRI
A quick press of the 16/9 Key immediately selects the priority channel (16 or 09) with
high (25W) Tx power. Pressing again the 16/9 key selects the last used channel.
4.9 PTT
This Key is on the M IC. Press and hold it down t o activat e RF radio t ransmis sion at th e
selected RF power level. There is a 5-minute maximum Tx timer, per FCC regulations.
4.10 H/L
This key toggles between 25W and 1W. If the Lo annunciator is OFF, the radio will
transmit at 25Watts. Some channels are restricted to 1 W maximum power and will
cause the error beep if the H/L key is pressed.
ALo
GPS
USA
DSC
MON
PRI
4.11 Channel Scanning
There are three channel scanning modes; Priority Scan, All Scan and Memory Scan.
Priority Scan
The Priority Scan function scans the Priority channel, Wx channel and the last selected
working channel.
To activate the Priority Scan:
• Press the SCAN key. P SCN appears and three scanned channel numbers appear
14 DSC-900
Page 16

alternately in the display. Wx Alert is On and can be toggled Off/On by pressing
the WX key.
A
GPS
PSCN
USA
DSC
MON
PRI
To exit Priority Scan:
• Press the SCAN key or press the 16/9 key.
All Scan
The All Scan function scans all channels except channel 70. (Channel 70 is the Digital
Selective Calling (DSC) channel. Voice traffic is not permitted.) If noisy or busy
channels interfere with scanning, the interfering channels may be temporarily
removed from the scan sequence.
To activate the All Scan:
• Press and hold the SCAN key. ALL SCN appears and the scanned channel
numbers appear in sequence in the channel number display.
GPS
ALL SCN
USA
DSC
MON
PRI
To Exit All Scan:
• Press the SCAN key or press the 16/9 key.
To delete channels from the scan sequence:
• Press and hold the MEM key while the scan is halted on the offending channel.
The symbol above the MEM key means DELETE. Turning the radio Off and
On restores all channels to the scan sequence.
Memory Scan
Memory Scan allows the user to create and scan a bank of preferred channels.
Channels may be added to or removed from the memory channel bank as desired.
Memory channels are stored individually and may be deleted individually, or the
enti r e ba n k m a y b e d e l et e d . I f th e PTT button is pressed, the transceiver exits scanning
DSC-900 15
Page 17

and normal communication is resumed.
To add channels to the memory channel bank:
• Use the SELECTOR or UP/DOWN keys on MIC to choose a desired channel.
• Press and hold the MEM key until the MEM annunciator appears. The new
channel is now added to the memory channel bank. The Priority Channel is
automatically stored in the memory channel bank and does not need to be
added.
To remove channels from the memory channel bank:
• Use the SELECTOR or UP/DOWN keys on MIC to choose a channel.
• Press and hold the MEM key. This channel is now removed from the memory
channel bank and MEM annunciator is gone.
To remove all channels from the memory channel bank:
• Press and hold the MEM key while turning On the radio. This clears out the
memory channels.
To activate Memory Scan:
• Press the MEM key. And then press the SCAN key. MEM SCN appears and the
scanned channel numbers appear in sequence in the channel number display.
Scanning starts with Wx Alert On. To toggle the Wx Alert Off/On, press the WX
key while in the scan mode.
DSC
MON
PRI
MEM
GPS
SCN
USA
To exit Memory Scan:
• Press the SCAN key or press the 16/9 key. PTT exi ts the scan mode at the last
channel displayed.
16 DSC-900
Page 18

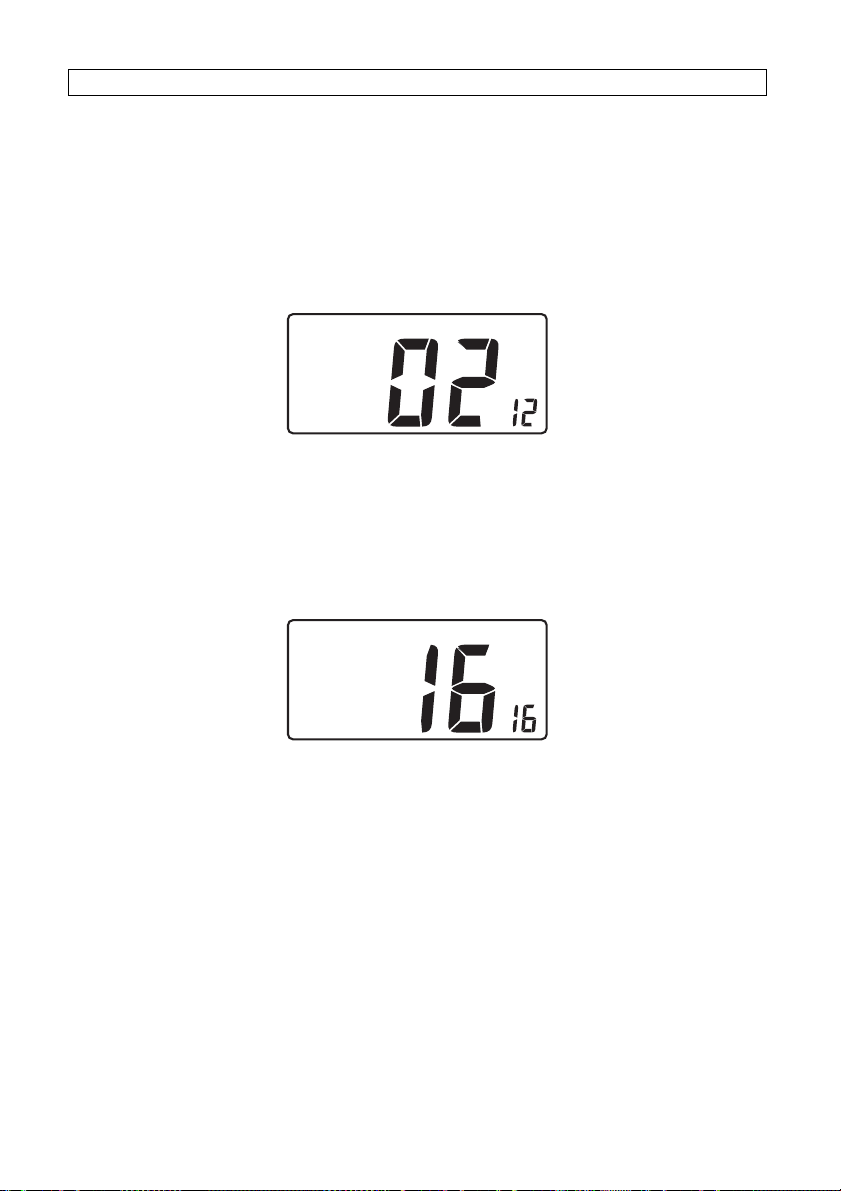
4.12 MMSI Set
MMSI Set provides the entry of the 9 digit MMSI for your vessel which must be
entered in order to make DSC calls. MMSI must be obtained from government
communication authority or authorized agents.
CAUTION
If a 9-digit MMSI number has not been entered, no DSC calls are allowed.
Only one entry attempt is permitted. Please study this section and do it
properly.
To enter your MMSI number:
• Press and hold the CALL key for 5 seconds. The ID annunciator will blink and
the number “0” is in the Big Digit and the number “16” is in the small digit.
NOTE
The Big Digit is the MMSI number that you are setting and the small digit is the
MMSI’s character field position. For example – “2” in the small digit represents the
2nd number from the left in y our assig ned MMS I, a “4” is the 4th number from the left,
etc.
• Use the SELECTOR or UP/DOWN keys on MIC to select the 1st digit of your
MMSI.
• Press the MEM key to advance to the 2nd digit. The small digit now displays the
2nd character position with a “2” and the Big Digit displays “0”.
• Use the SELECTOR or UP/DOWN keys on MIC to select the 2nd digit of your
MMSI and Press the MEM key to advance to the next digit. Repeat this operation
until all 9 digits have been entered and verified by you.
• If there is an error in the entry procedure, press the 16/9 Key to exit this
procedure or simply turn the radio Off. No MMSI number will be stored.
• After you completely entered your MMSI number, hold down the CALL key for
5 seconds to store the number. The radio reverts to the Normal communica tion
screen and the blinking ID annunciator is gone. DSC calls can now be made.
DSC-900 17
Page 19

ID ID ID
"START"
ID ID ID
"2"
ID ID ID
"4" "5" "1"
ID
"3"
(Shows the first digit 9 automatically)
"9"
"3" "4"
ID
MMSID = "992344513"
"9"
4.13 Directory
The DSC Calling Directory is a list of location numbers and corresponding MMSI’s
that you enter and store for making DSC calls (10 MMSI’s maximum).
To store a new MMSI in an unused number location:
• Press the CALL key. The LAST annunciator is blinking.
• Use the SELECTOR or UP/DOWN keys on MIC to select DIR.
• Press the CALL key. The ID annunciator is blinking. This indicates the Directory
edit mode is activated.
• Use the SELECTOR or UP/DOWN keys on MIC to select an unused location
number. If the number location is full, “FL” appears. If the number location is
empty and available, “CL” appears.
DSC
MON
ID
No. 3 is full
DIR and blinking
ID show Edit mode
GPS
DIR
USA
18 DSC-900
Page 20

GPS
USA
DSC
MON
DIR
ID
No. 4 is empty
and usable
• Press the MEM key. The Big Digit is the MMSI number that you are setting and
the small digit is the MMSI’s character field position.
• Use the SELECTOR or UP/DOWN keys on MIC to select the 1st digit of your
MMSI.
• Press the MEM key to advance to the 2nd digit. The small digit now displays the
2nd character position with a “2” and the Big Digit displays “0”.
• Use the SELECTOR or UP/DOWN keys on MIC to select the 2nd digit of your
MMSI and Press the MEM key to advance to the next digit. Repeat this operation
until all 9 digits have been entered and verified by you.
• If there is an error in the entry procedure, press the 16/9 Key to exit this
procedure or simply turn the radio Off. No MMSI number will be stored.
• After you completely entered your MMSI number, press and hold the CALL key
for 5 seconds to store the number. Now FL appears in the Big Digit and MMSI is
stored.
DSC
ID
ID
DSC
DSC
ID
MMSI Number
MMSI's character
field position
DSC
ID
"7" "7" "6"
DSC
ID
"5" "1" "0"
"8" "7"
DSC
ID
DSC
ID
DSC
ID
DSC
ID
The example shows the MMSI “987776510” being entered.
DSC-900 19
Page 21

To edit an existing MMSI data:
• Select the location number which displays “FL”.
• Press the MEM key and change the data.
• After editing 9 digits, hold down the CALL key for 5 seconds to store.
20 DSC-900
Page 22

5. DSC OPERATION
The Digital Selective Calling (DSC) functions of your DSC-900 transceiver add
convenience and safety to your VHF communication capability. DSC allows you to
contact other DSC equipped vessels and shore stations by selecting their MMSI from
your directory, choosing a call type, and pressing a key. In an emergency, pressing one
button will send your MMSI and current position to search and rescue (SAR)
authorities and other DSC equipped vessels. Distress calls are covered first. Then,
normal calling procedures are described.
5.1 DSC Monitor
Be sure that the DSC Monitor mode is On (Default setting is On). Since there is no
independent channel 70 receiver, the radio normally monitors channel 70 and checks
other channels on a regular basis to detect a Squelch Break. This control method
assures the radio will acquire the DSC calls possible.
To toggle the DSC Monitor mode On/Off:
• Press and hold the CALL key for about 4 seconds. The DSC MON annunciator
will be On in the display, if channel 70 is being accessed.
DSC Monitor must be
DSC
On for radio to receive
MON
calls
PRI
MEM
GPS
USA
5.2 GPS Operation
To transmit your location automatically during a Distress Call, connection to an
operating GPS navigation receiver is required. Make sure your GPS navigation
receiver is On and operational at all times. GPS data is sent over channel 70 to the
Coast Guard and is the primary starting point of any search and rescue mission. Be
sure the GPS annunciator is On steady and not blinking. If blinking, the GPS data is
not valid.
GPS annunciator
MEM
GPS
USA
DSC
MON
PRI
DSC-900 21
Page 23

5.3 Sending a Distress Call
To make a Distress Call:
• Lift the red protective cover, then press and hold the red button. A c ountdown
timer is displayed in the bottom right corner of the LCD.
• To reset the countdown timer before the distress is sent, release the red button.
DSC
MON
PRI
3 sec
countdown
timer
MEM
DISTRESS
GPS
USA
• If the red button is held down until the timer expires, the DSC distress message is
automatically sent on channel 70 and the radio is automatically set to channel 16.
The DSC message contains your MMSI, LL position and UTC time acquired
from your GPS navigation receiver. The DISTRESS annunciator is displayed
during the transmission.
Distress
message
being sent
TX
DISTRESS
GPS
USA
DSC
MON
PRI
Timer
expired
• A loud 2-tone alarm sounds. This alarm cannot be stopped unless the mode is
cancelled. Pressing the 16/9 or PTT key cancels the Distress Waiting mode. With
no mode cancellation, the radio transmits the Distress message again in 3.5 to 4.5
minutes. A DISTRESS WAIT message is displayed.
DSC
MON
PRI
Waiting for ACK
GPS
MEM
DISTRESS WAIT
USA
• When an ACK is received, the distress mode is automatically cancelled and voice
communication will be on channel 16.
NOTE
The Coast Guard is the only agency allowed to acknowledge (ACK) a Distress Call.
An individual vessel’s DSC radio will not respond automatically with an ACK.
22 DSC-900
Page 24

DSC
MON
ACK
PRI
ACK received
MEM
DISTRESS
GPS
USA
5.4 Receiving a Distress Call
A reception of a Distress Call automatically establishes a Voice Communication on
channel 16. If the calling vessel is listed in your DSC calling Directory, the number of
Directory location will be displayed below the ID annunciator. If the calling vessel is
not listed in your Directory, the NEW annunciator will appear and the ID annunciator
blinks.
LL position of the vessel in Distress can be transferred to your DSC eq uipped chart
plotter, if it is connected. Otherwise, get it by voice communications with the vessel in
Distress.
Press the 16/9 Key to cancel the loud alarm. If you wish to contact the vessel in
Distress, press the PTT button on the Mike.
USA
MEM
DISTRESS
DSC
MON
PRI
MEM
GPS
DIR
USA
MON
ID
DSC
PRI
ID match
NOTE
The Radio does not respond to two types of DSC Distress calls:
1. Distress Relay from an intermediary vessel.
2. Distress Relay ACK messages from a coast station.
DSC-900 23
Page 25

5.5 Normal DSC Calls
In addition to Distress Call, your DSC-900 can transmit the following types of DSC
calls;
1. All Ship’s Call – sends a Routine DSC Call to any vessel in range of you.
2. Directory Call – sends a Routine Individual Call to any of 10 stored MMSI.
3. New Call – sends a Routine Individual Call by manually entering MMSI of a new
vessel not in the directory.
4. Last Call – sends back a Routine Individual Call to the last incoming DSC call.
Also DSC-900 can transmit the calls of advanced Routine Individual Call; Position
Send, and Position Request. LL position from another vessel can be tra nsferred to th e
DSC equipped chart plotter, if it is connected.
A normal DSC call may be originated from your vessel to another DSC equipped
vessel, or you may reply to a DSC call sent by another vessel. Outgoing calls are made
either by selecting a vessel MMSI from your Directory or by manually entering
(Position Send and Position Request are made from your Directory only).
To access to the above DSC calls:
• Press the CALL key.
• Use the SELECTOR or UP/DOWN keys on MIC to scroll through the four
choices. The LAST always appears first.
DSC
MON
PRI
Four call sources
to use
GPS
LAST DIR
NEW ALLSHIP
USA
All Ship’s Call
The All Ship’s call allows you to send a Routine DSC call to nearby vessels without
having to know their MMSI numbers. The All Ship’s call may be used in situations
that are serious but do not warrant a distress call, and voice communication attempts
have failed. All Ship’s Urgency or Safety calls are not supported in this radio.
To send an All Ship’s call:
• Press the CALL key. The LAST annunciator is blinking.
• Use the SELECTOR or UP/DOWN keys on MIC to select ALLSHIP.
24 DSC-900
Page 26

MEM
GPS
USA
DSC
MON
PRI
ALLSHIP
• Press the CALL key to transmit.
• Your transceiver is automaticall y set to channel 16. Listen for voice replies from
vessels which have received your call. There is no DSC ACK reply to confirm
that your call was received.
• Use the PTT button to continue voice communication.
Directory Call
Directory call sends a Routine Individual call by selecting a vessel MMSI from the
calling Directory. Calling Directory holds 10 of your previously entered MMSI
numbers that you routinely contact during normal boating activities.
To make a Directory call:
• Use the SELECTOR or UP/DOWN keys on MIC to select a working channel to
be used for the call.
• Press the CALL key. The LAST annunciator is blinking.
• Use the SELECTOR or UP/DOWN keys on MIC to select DIR.
GPS
DIR
USA
DSC
MON
PRI
• Press the CALL key.
• Use the SELECTOR or UP/DOWN keys on MIC to select a MMSID location
number (1-10). Default number is the MMSI of the last used call.
• Press the CALL key.
• Use the SELECTOR or UP/DOWN keys on MIC to select the d in the bottom
right corner of the LCD (Default display is always d).
DSC-900 25
Page 27

GPS
USA
DSC
MON
DIR
ID
• Press the CALL key. The channel number in the Big Digit is blinking. Confirm
the channel to be used for the call.
• Press the CALL key to transmit. Radio switches to channel 70.
TX
GPS
DIR
USA
DSC
MON
ID
• While waiting for acknowledgement from the called vessel, WAIT annunciator is
displayed.
DSC
MON
IDWAIT
Waiting for ACK
GPS
DIR
USA
• Then channel reverts to the selected working channel. When the called vessel
acknowledges your call, an alert sounds and ACK annunciator is displayed.
DSC
MON
ACK
ID
ACK received
MEM
GPS
DIR
USA
• Press the PTT key to silence the alert and begin voice communication with the
called vessel.
• The 16/9 key may be used to exit the DSC calling procedure at any time prior to
sending the call.
New Call
The New call procedure is used to make a Routine Individual call to a vessel that is not
listed in your calling Directory. However, you must know the MMSI for the vessel.
26 DSC-900
Page 28

To make a New call:
• Use the SELECTOR or UP/DOWN keys on MIC to select a working channel to
be used for the call.
• Press the CALL key. The LAST annunciator is blinking.
• Use the SELECTOR or UP/DOWN keys on MIC to select NEW.
DSC
MON
PRI
NEW
GPS
USA
• Press the CALL key. The 1st digit of the last entered MMSI is displayed.
ID
DSC
MON
MMSI digit
Digit number
NEW
GPS
USA
• Use the SELECTOR or UP/DOWN keys on MIC to select the 1st digit of MMSI.
• Press the MEM key to advance to the 2nd digit.
• Use the SELECTOR or UP/DOWN keys on MIC to select the 2nd digit of MMSI
and press the MEM key to advance to the next digit. Repeat this opera tion until
all 9 digits have been entered and verified by you.
• If you make mistake, press the 16/9 Key to exit this procedure and try again.
• After you completely entered the MMSI, press the CALL key to transmit. Radio
switches to channel 70.
TX
GPS
USA
DSC
MON
ID
• While waiting for acknowledgement from the called vessel, WAIT annunciator is
displayed.
DSC-900 27
Page 29

GPS
USA
DSC
MON
Waiting for ACK
IDWAIT
• Then channel reverts to the selected working channel. When the called vessel
acknowledges your call, an alert sounds and ACK annunciator is displayed.
GPS
USA
DSC
MON
ACK
ID
ACK received
• Press the PTT key to silence the alert and begin voice communication with the
called vessel.
• The 16/9 key may be used to exit the DSC calling procedure at any time prior to
sending the call.
Last Call
Only the Last received call can be called back with the Routine Individual Call.
To reply to the Last incoming call:
• Use the SELECTOR or UP/DOWN keys on MIC to select a working channel to
be used for the call.
• Press the CALL key. The LAST annunciator is blinking.
DSC
MON
PRI
LAST
GPS
USA
• Press the CALL key. The channel number in the Big Digit is blinking. Confirm
the channel to be used for the call.
• Press the CALL key to transmit. A Routine Individual call is transmitted
regardless of the type of the Last incoming call.
• If there is no Last call information stored, the transmission is blocked and an error
beeps.
28 DSC-900
Page 30

• When the called vessel acknowledges your call, press the PTT key and establish
the voice communication.
Position Send (P1)
Position Send can send your LL position to another vessel that is listed in your calling
Directory.
To make a Position Send:
• Press the CALL key. The LAST annunciator is blinking.
• Use the SELECTOR or UP/DOWN keys on MIC to select DIR.
DSC
MON
PRI
MEM
GPS
DIR
USA
• Press the CALL key.
• Use the SELECTOR or UP/DOWN keys on MIC to select a MMSID location
number (1-10). Default number is the MMSI of the last used call.
• Press the CALL key.
• Use the SELECTOR or UP/DOWN keys on MIC to select the P1 in the bottom
right corner of the LCD.
GPS
DIR
USA
DSC
MON
• Press the CALL key to transmit. Radio switches to channel 70 momentarily and
then reverts to the previous working channel.
• Press the 16/9 key to return to the Normal Communication screen.
Position Request (P2)
Position Request can request the LL posi ti on fr om ano ther v essel tha t is l is ted i n your
calling Directory.
To make a Position Request:
• Press the CALL key. The LAST annunciator is blinking.
DSC-900 29
Page 31

• Use the SELECTOR or UP/DOWN keys on MIC to select DIR.
USA
MEM
DIR
DSC
MON
PRI
• Press the CALL key.
• Use the SELECTOR or UP/DOWN keys on MIC to select a MMSID location
number (1-10). Default number is the MMSI of the last used call.
• Press the CALL key.
• Use the SELECTOR or UP/DOWN keys on MIC to select the P2 in the bottom
right corner of the LCD.
GPS
DIR
USA
DSC
MON
• Press the CALL key to transmit. Radio switches to channel 70.
TX
GPS
USA
DSC
MON
DIR
ID
• While waiting for acknowledgement from the called vessel, WAIT annunciator is
displayed.
DSC
MON
IDWAIT
Waiting for ACK
GPS
DIR
USA
• Then channel revert to the previous working channel. When the called vessel
acknowledges your call, an alert sounds and ACK annunciator is displayed.
30 DSC-900
Page 32

DSC
MON
ACK
ID
ACK received
MEM
GPS
DIR
USA
• Press the 16/9 key to silence the alert. The LL position of called vessel will be
displayed on the DSC equipped chart plotter, if it is connected.
5.6 Receiving DSC Calls
Your transceiver can receive the following types of DSC calls;
1. All Ship’s Call – receives Routine, Urgent or Safety All Ship’s Calls from other
vessels in range of you.
2. Individual Call – receives a Routine Individual Call from other vessel.
3. Geographic Call – receives calls from specially equipped radios if you are in a
particular geographical area.
Also DSC-900 can receive the calls of advanced Routine Individual Call; Position Send,
and Position Request. LL position from another vessel can be transferred to the DSC
equipped chart plotter, if it is connected.
All Ship’s Call Received
An All Ship’s call is received from other vessels within VHF range of the transmitter.
Your transceiver can receive the All Ship’s call with Routine, Urgent or Safety
priorities.
When an All Ship’s call is received, an alert sounds and the following screen appears
in the display.
DSC
MON
ID
ID Match
MEM
ALLSHIP
GPS
DIR
USA
If the calling vessel is listed in your DSC calling Directory, the number of Directory
location will be displayed below the ID annunciator. If the calling vessel is not listed in
your Directory, the NEW annunciator will appear and the ID annunciator blinks. Also,
your transceiver is set to channel 16 by the caller.
• Press the 16/9 key to silence the alert sound and listen for a voice announcement.
DSC-900 31
Page 33

There is no DSC ACK for All Ship’s calls.
• Press the PTT button if it is necessary to answer the call with voice
communication. Use the channel selected by the caller.
Individual Call Received
When you receive the Individual call from another vessel, your transceiver
automatically sends an ACK message to the caller. Also, your transceiver is set to a
working channel selected by the caller.
If the calling vessel is listed in your DSC calling Directory, the DIR annunciator will
appear and the number of Directory location is displayed below the ID annunciator. If
the calling vessel is not listed in your Directory, the NEW annunciator will appear and
the ID annunciator blinks.
DSC
MON
ID
ID match
Channel
selected by caller
GPS
DIR
USA
• Press the 16/9 key to silence the alert. The caller should respond to your ACK
with voice communication. If not, you may initiate voice communication.
Geographic Call Received
Your transceiver can receive a Geographic call. An alert sounds and it is set to a
working channel selected by the caller. There is no ACK required from your radio. If
the calling vessel is listed in your DSC calling Directory, the number of Directory
location will be displayed below the ID annunciator.
DSC
MON
ID
ID match
GEO
GPS
DIR
USA
• Press the 16/9 key to silence the alert and listen for a voice announcement.
Position Send Received
When you receive the Position Send from another vessel, an alert sounds and ACK
annunciator appears in the display.
If the calling vessel is listed in your DSC calling Directory, the DIR annunciator will
32 DSC-900
Page 34

appear and the number of Directory location is displayed below the ID annunciator. If
the calling vessel is not listed in your Directory, the NEW annunciator will appears
and the ID annunciator blinks.
DSC
MON
ACK
ID
ACK annunciator
ID match
MEM
GPS
DIR
USA
• Press the 16/9 key to silence the alert. LL position from another vessel is
transferred to the DSC equipped chart plotter, if it is connected.
Position Request Received
When you receive the Position Request from another vessel, an alert sounds and P1 is
displayed in the Big Digits. It shows tha t you are requested to transmit the Positio n
Send call (P1).
If the calling vessel is listed in your DSC calling Directory, the DIR annunciator will
appear and the number of Directory location is displayed below the ID annunciator. If
the calling vessel is not listed in your Directory, the NEW annunciator will appear and
the ID annunciator blinks.
DSC
MON
ID
ID match
You are requested
to make a
Position Send (P1)
GPS
DIR
USA
• Press the CALL key to send your position.
• To silence the alert without replying, press the 16/9 key. Then press it again to
return to the Normal communication screen.
DSC-900 33
Page 35

6. SPECIFICATIONS
General
Channel All USA, International and Canadian,
plus 10 Weather channels
Input Voltage 12 V DC, Negative ground
Dimensions 6.3 (W) x 2.7 (H) x 6.5 (D) inches
Heat sink is included. Not bracket.
Weight 2.2 lbs. with MIC
Waterproof ness JIS-7
FCC Approval Part 80 / Part 15
DSC Call Format RTCM SC-101
Transmitter
Channels 54
Frequency range 156.025 MHz – 157.425 MHz
Frequency stability 0.001 %
Channel spacing 25 KHz
Temperature range
Antenna impedance 50 ohms
Spurious and harmonics Emission -70 dB
Transmit power Low 1 Watt / High 25 Watts
Modulation 16K0F3E/16K0G2B
Current drain Low power : 1.2 amps
Microphone type ECM
-20˚C to +50˚C
High power : 5.0 amps
34 DSC-900
Page 36

Receiver
Channels 80 Marine / 10 Weather
Frequency range 156.050 MHz – 163.275 MHz
Sensitivity 0.5 microvolt at 12 dB SINAD
Squelch sensitivity Threshold 0.35 microvolt
Tight 1.0 microvolt
Spurious and Image rejection -70 dB
Intermodulation rejection -68 dB
Audio output 2.8 Watts into 8 ohms
Receiver current 1.0 amps at 12V DC
* Specifications subject to change without notice.
DSC-900 35
Page 37

7. CHANNEL ASSIGNMENT
y
p
y
CH U I C S/D TX RX CH USAGE
01A X S Poer operation and commercial. VTS is selected areas.
01 X X D 156.050 160.650 Public correspondence (Marine operator).
02 X X D 156.100 160.700 Public correspondence (Marine operator).
03A X S U.S. Government only, Coast Guard.
03 X X D 156.150 160.750 Public correspondence (Marine operator).
04A X S Pacific coast: Coast Guard, East coast: Commercial fishing.
04 X D 156.200 160.800 Public correspondence (Marine operator), Port operation, Ship movement.
05A X X S Port operation. VTS in Seattle.
05 X D 156.250 160.850 Public correspondence (Marine operator), Port operation, Ship movement.
06XXXS Intership Safety.
07A X X S Commercial.
07 X D 156.350 160.950 Public correspondence (Marine operator), Port operation, Ship movement.
08XXXS Commercial (Intership only).
09XXXS Boater calling channel, Commercial and noncommercial (Recreational).
10XXXS Commercial.
11XXXS Commercial. VTS in selected areas.
12XXXS Port operation. VTS in selected areas.
13XXXS Intership navigation safety (bridge to bridge). *1
14XXXS Por operation. VTS in selected areas.
15 X S --- 156.750 Environmental (Receive only).
15 X X Commercial, noncommercial, Ship movement. *2
16XXXS International Distress, Safety and Caling.
17XXXS State controlled. *2
18A X X S Commercial.
18 X D 156.900 161.500 Port operation, Ship movement.
19A X S U.S. Commercial.
19A X S Coast guard.
19 X D 156.950 161.550 Port operation, Ship movement.
20A X S Port operation.
20 X X D 157.000 161.600
21A X X S U.S. Government only. Canada: Coast Guard.
21 X D 157.050 161.650 Port operation, Ship movement.
22A X X S
22 X D 157.100 161.700 Port operation, Ship movement.
23A X S U.S. Government only.
23 X X D 157.150 161.750 Public correspondence (Marine operator).
24 X X X D 157.200 161.800 Public correspondence (Marine operator).
25 X X X D 157.250 161.850 Public correspondence (Marine operator).
26 X X X D 157.300 161.900 Public correspondence (Marine operator).
27 X X X D 157.350 161.950 Public correspondence (Marine operator).
28 X X X D 157.400 162.000 Public correspondence (Marine operator).
*1: 1 Watt in USA mode. Hold down HI/LO key while pressing PTT for full transmit power. *2: 1 Watt only.
MARINE VHF CHANNELS
156.050
156.150
156.200
156.250
156.300
156.350
156.400
156.450
156.500
156.550
156.600
156.650
156.700
156.750
156.800
156.850
156.900
156.950
156.950
157.000
157.050
157.100
157.150
Canada: Coast Guard onl
International: Port o
U.S. and Canadian Coast Guard Liaison and Maritime Safet
Broadcasts announced on channel 16.
.
erations and Ship movement.
Information
36 DSC-900
Page 38

y
g
g
r
(
p
(
p
g
p,
g
p,
CH U I C S/D TX RX CH USAGE
60 X X D 156.025 160.625 Public correspondence (Marine operator).
61A X X S
61 X D 156.075 160.675 Public correspondence (Marine operator), Port operation, Ship movement.
62A X S Pacific coast: Coast Guard, East coast: Commercial fishing only.
62 X D 156.125 160.725 Public correspondence (Marine operator), Port operation, Ship movement.
63A X X S Port operation and commercial. VTS in selected areas.
63 X D 156.175 160.775 Public correspondence (Marine operator), Port operation, Ship movement.
64A X X S U.S. Government only, Canada: Commercial fishing.
64 X D 156.225 160.825 Public correspondence (Marine operator), Port operation, Ship movement.
65A X X S Port operations.
65 X D 156.275 160.875 Public correspondence (Marine operator), Port operation, Ship movement.
66A X X S Port operations.
66 X D 156.325 160.925 Public correspondence (Marine operator), Port operation, Ship movement.
67XXXS
68XXXS Noncommercial (Recreational).
69XXXS
70XXXS Digital Selective Calling (DSC). Voice communication not allowed.
71XXXS
72XXXS Noncommercial (Intership only).
73XXXS
74XXXS
77XXXS Port operations (Intership only). *2
78A X X S Noncommercial (Recreational).
78 X D 156.925 161.525 Public correspondence (Marine operator), Port operation, Ship movement.
79A X X S Commercial.
79 X D 156.975 161.575 Port operations and ship movement
80A X X S Commercial.
80 X D 157.025 161.625 Port operations and ship movement
81A X X S U.S. Government only, Environmental protection operations.
81 X D 157.075 161.675 Port operations and ship movement
82A X X S U.S. Government only. Canada: Coast Guard only.
82 X D 157.125 161.725 Public correspondende (Marine operator), Port operation, Ship movement.
83A X X S U.S. Government only. Canada: Coast Guard only.
83 X D 157.175 161.775 Public correspondence (Marine operator).
84 X X X D 157.225 161.825 Public correspondence (Marine operator).
85 X X X D 157.275 161.875 Public correspondence (Marine operator).
86 X X X D 157.325 161.925 Public correspondence (Marine operator).
87 X X X D 157.375 161.975 Public correspondence (Marine operator).
88A X S Commercial, Intership only.
88 X X D 157.425 162.025 Public correspondende (Ship to coast).
*1: 1 Watt in USA mode. Hold down HI/LO key while pressing PTT for full transmit power. *2: 1 Watt only.
MARINE VHF CHANNELS
156.075
156.125
156.175
156.225
156.275
156.325
156.375
156.425
156.475
156.525
156.575
156.625
156.675
156.725
156.875
156.925
156.975
157.025
157.075
157.125
157.175
157.425
U.S. Government onl
East coast.
fishin
U.S. Commercial. Used for brid
Mississippi River, Intership only. Canada: Commercial fishing. *1
Noncommercial
International: Port o
U.S. & Canada: Noncommercial
International: Port o
U.S. Port operations. Canada: Commercial fishin
International: Intershi
U.S. Port operations. Canada: Commercial fishin
International: Intershi
, Canada: Coast Guard Pacific coast, Commercial
e to bridge communications in lowe
Recreational). Canada: Commercial fishing only.
erations and ship movement.
Recreational).
erations and ship movement.
Port operations and ship movement.
Port operations and ship movement.
only.
only.
DSC-900 37
Page 39

NOAA WEATHER CHANNELS (NORTH AMERICA ONLY)
CH U I C S/D TX RX CH USAGE
WX01 X X X --- --- 162.550 Weather (Receive only).
WX02 X X X --- --- 162.440 Weather (Receive only).
WX03 X X X --- --- 162.475 Weather (Receive only).
WX04 X X X --- --- 162.425 Weather (Receive only).
WX05 X X X --- --- 162.450 Weather (Receive only).
WX06 X X X --- --- 162.500 Weather (Receive only).
WX07 X X X --- --- 162.525 Weather (Receive only).
WX08 X X X --- --- 161.650 Weather (Receive only).
WX09 X X X --- --- 161.775 Weather (Receive only).
WX10 X X X --- --- 163.275 Weather (Receive only).
38 DSC-900
Page 40

CERTIFICATE OF LIMITED WARRANTY
Providing you present a valid proof of purchase, SI-TEX Marine Electronics, Inc. warrants all
parts of each new product against defects in material and workmanship under nor mal use and
will repair or exchange any parts proven to be defective at no charge for a period of two years for
parts and one year for lab or from the date of purchase, except as provided below under Limited
Warranty Exceptions. Defects will be corrected during normal working hours by an authorized
SI-TEX Marine Electronics, Inc. dealer, service center or at the SI-TEX office in St. Petersburg,
Florida. There will be no charge for labor for a period of one year from the date of purchase,
except as provided below under Limited Warranty Exceptions.
This warranty and proof of Purchase must be made available to the authorized SI-TEX Marine
Electronics, Inc. service location or dealer at the time of service.
LIMITED WARRANTY EXCEPTIONS
SI-TEX Marine Electronics, Inc. will not be responsible for equipment which has been subjected
to water or lightning dama ge, acc ide nt, abus e or mi suse no r an y equi pment on whi ch the s erial
number label has been removed, altered or mutilated. SI-TEX Marine Electronics, Inc. assumes
no responsibility for damage incurred during installation. This Limited Warranty is effective only
with respect to the original purchaser. Travel cost incurred will not be accepted for SI-TEX
Marine Electronics, Inc. products.
THERE ARE NO WARRANTIES WHICH EXTEND BEYOND THE DESCRIPTION ON THE
FACE HEREOF.
SPECIFIC EXCLUSIONS
Charges for overtime, stand-by, holiday, and per diem are specifically excluded from the Limited
Warranty. Consumable items like fuse, etc. are not covered by this Limited Warranty. Installation
workmanship or materials except as pr ovided directly by SI-TEX Marine Electron ics, Inc. ar e not
covered by this Limited Warranty. SI-TEX Marine Electronics, Inc. equipment or parts there of
which have been repaired or altered except by an authorized SI-TEX Marine Electronics, Inc.
dealer or service center are not warranted in any respect. Software update, battery, microphone
and water damage on water resistant VHF radio are items excluded from the two-year warranty
and are covered by warranty for a period of one year for both parts and labor. SI-TE X Marine
Electronics, Inc. will not, at any time, assume any costs or labor charges for checkout or external
line fuse replacement or problems not found to be at fault in the equipment itself.
THERE ARE NO WARRANTIES OR GUARATEES EXPRESSED OR IMPLIED WHICH
EXTEND BEYOND THE DESCRIPTION ON THE FACE HEREOF, INCLUDING
WARRANTIES OF FITNESS FOR A PARTICULAR PURPOSE AND MERCHANT ABILITY.
DSC-900 39
Page 41

SI-TEX MARINE ELECTRONICS, INC. HAS NO OTHER LIABILITY TO PURCHASE FOR
DERECT OR CONSEQUENTIAL DAMAGE OR ANY THEORY INCLUDING ABSOLUTE
LIABILITY, TORT, OR CONTRACT. THIS LIMITED WARRANTY CANNOT BE ALTERED
OR MODIFIED IN ANY WAY AND SHALL BE INTERPRETED IN ACCORDANCE WITH
THE LAWS OF THE STATE OF FLORIDA. THIS WARRANTY IS LIMITED TO THE
CONTINENTAL USA, ALASKA, HAWAII, AND CANADA.
HOW TO OBTAIN SERVICE UNDER THIS WARRANTY
To provide greater flexibility, SI-TEX Marine Electronics, Inc. gives you the option of obtaining
service under this warranty by either:
a) Contacting an au th or iz ed SI -T EX Mar i ne E le ct ro nics, Inc. service station (the closest service
station may be found by contacting your dealer of purchase).
OR
b) Shipping your equipment prepaid UPS or truck with insurance prepaid to SI-TEX Marine
Electronics, Inc. at the address provided below. SI-TEX Marine Electronics, Inc. will,
whenever possible, make all repairs covered by the Limited Warranty within two weeks of
receiving the equipment in Florida and return same to you, freight prepaid.
c) You must present a copy of your Purchase Sales Slip at the time you request warranty
service.
Shipping/Mailing Address:
40 DSC-900
SI-TEX Marine Electronics, Inc.
11001 Roosevelt Blvd., Suite 800
St. Petersburg, FL 33716
(727) 576-5734
Page 42

Marine Electronics, Inc.
11001 Roosevelt Blvd., Suite 800
St. Petersburg, FL 33716
Phone: (727) 576-5734
Fax: (727) 570-8646
Web Site: www.si-tex.com
K33081A
 Loading...