

SINGER W612 User Manual

MOOiL 612

You are now the owner or a new ^ ^
of its kind you can possess. «titching overcasting and creative embroidery
Buttonholes, monogrammmg, stretch stitcm g
are done with ease and speed. WHITE this book
3ld you . care.uU, as a
LrlugrundTrstanLg of you, machino »ill rewa.d you vdth many hours of trouble
"^Tlr^'etllngirtachments such as rufflers, binders,
others to complement the accessories furnished with your WHITE are available fro
the store where you purchased your machine.
nf a new zigzag sewing machine .the most versatile type
WHITE SEWING MACHINE COMPANY
Cleveland, Ohio 441 I I
WHITE CONSOLIDATED INDUSTRIES, LTD.
Toronto, Ontario, Canada

Pages
Accessories-
How to Use
Hemmers
...............................
............................
...........................
Seam Gauge or Cbth Guide
Quilting Guide
Attachments
Adiustable Cord and Zipper Foot 40
' -jjt
Attachment Foot.........................
Binder
............
Edgestitcher
......................
..........................................
....................................
...................
.........................
........
Hemmers.......................................
.
.............................
Blind Stitching
.............................................
Bobbin ^
Pbcing in Shuttle ................................... '
Threading.............................................. ^
Winding...............................................
Buttonholes..................................
Buttons Sew-On
Charts . . I ■ A
N eed le-T h read-Fab ric-S t itc h ing •• •
................................
INDEX
23
25
26
.
18
Pages
Stitch Length
Trouble
Darning and Mending
Elastic or Multiple Zigzag
........................................
......................................30-31-32
.................................
Stitches
...........
Embroidery
Creative
Hoop
Features and Parts (Front View)
..................................................
..............
^
~ ~ (Back View)
...........
............
Instalbtion-Head in Cabinet....................50
Head in Portable Case
..........
Maintenance and Care.................................27
Cleaning and Oiling the Shuttle •••28
Needle Setting ................................ ^
Pressure and Feeding of Fabric 11
Thin and Light weight Fabrics
Reverse Sewing
Sewing Preparation
_ . ,»•••••••••••••
Sewing Tips
Straight Stitching-
.
.......................
.....................................
.........
..................
........
............
.................
•••••••••
^3
Tension Adjustment-.................................... °
Thread ing-Upper-
.....................
®
^
H
19
..
2
3
48
11
9
^
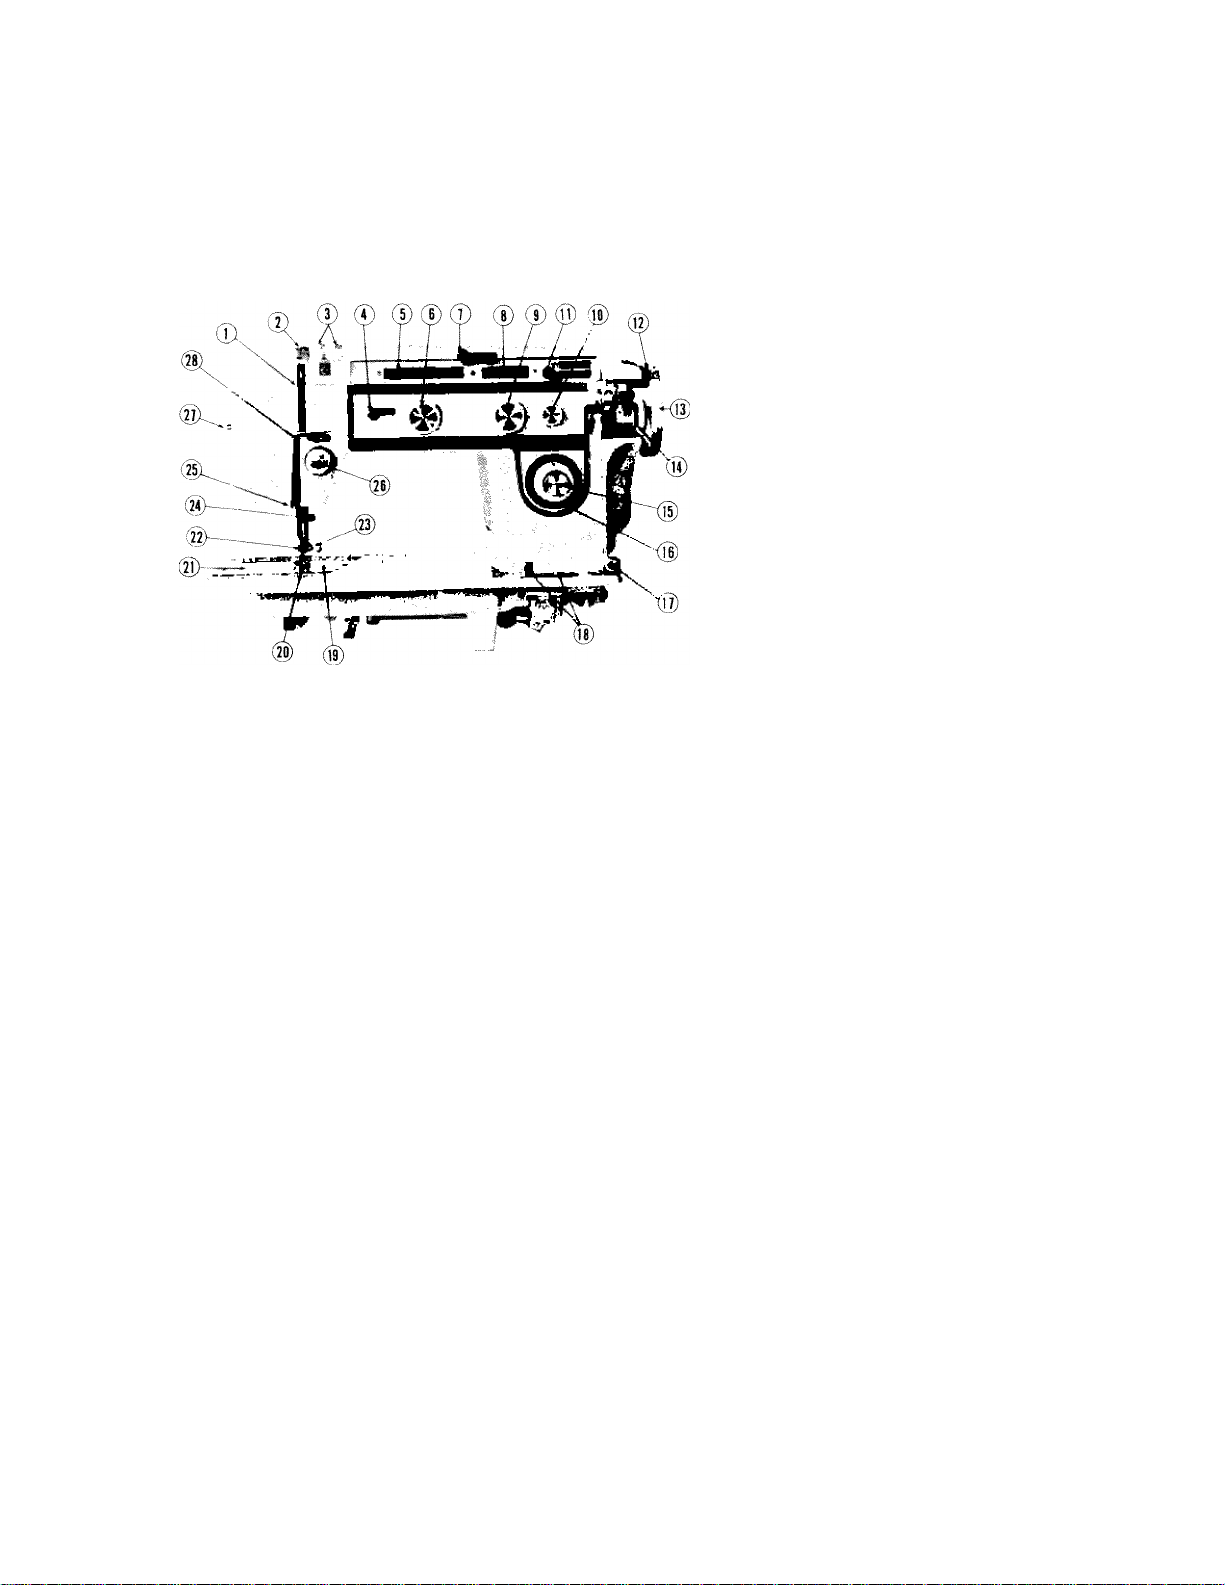
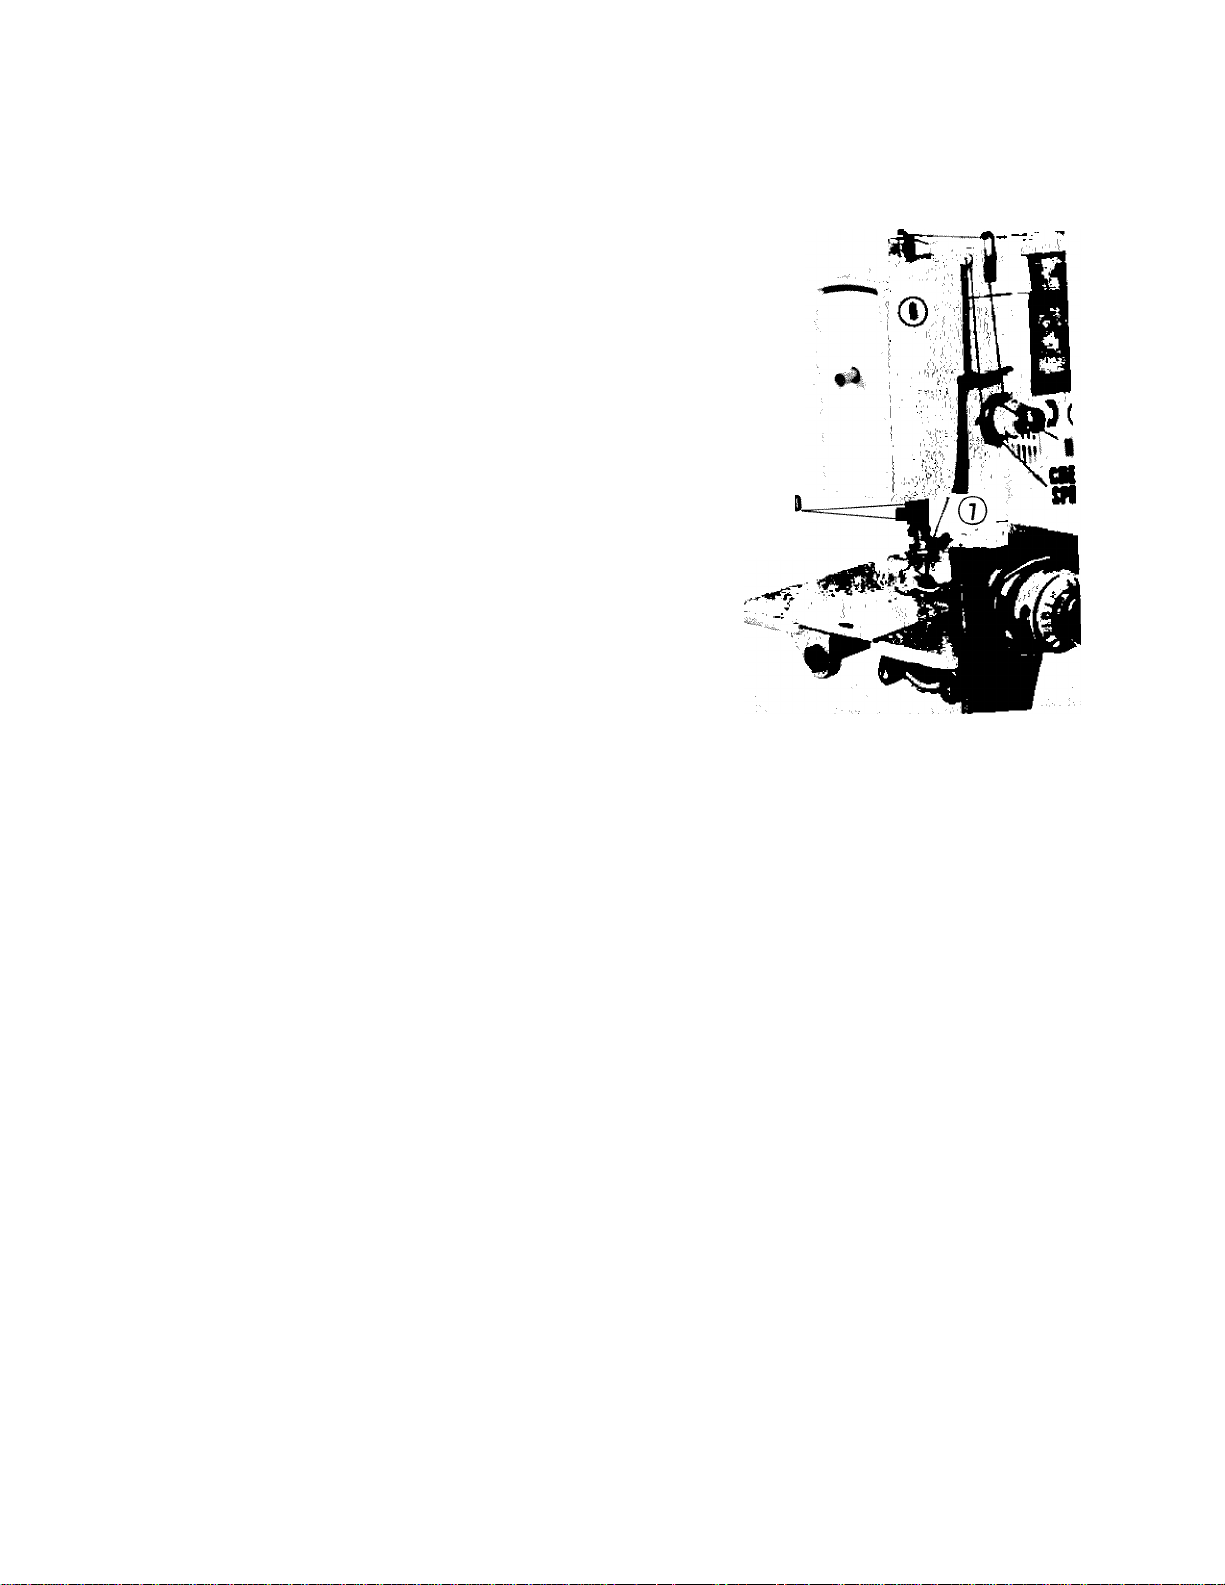
FEATURES AND PARTS
(Front View)
Fig. 1
1. Take up
2. Pressure release (darning)
3. Arm thread guides
4. Release for changing decorative
stitch designs
5. Decorative stitch dial -
6. Decorative stitch selector contro
7. Needle position lever
8. Zigzag width dial
9. Zigzag width control
10. Zigzag stitch width lock
11. Buttonhole control
12. Hand wheel
13. Clutch nut
14. Bobbin winder
15. Reverse button
16. Stitch length control
17. Bobbin winder tension
18. Drop feed buttons
19. Needle plate
20. Presser foot
21. Cover plate
22. Presser foot cbmp screw
23. Needle clamp screw
24. Needle clamp thread guide
25. Thread guide
26. Tension
27. Light switch
28. Thread bar and face latch
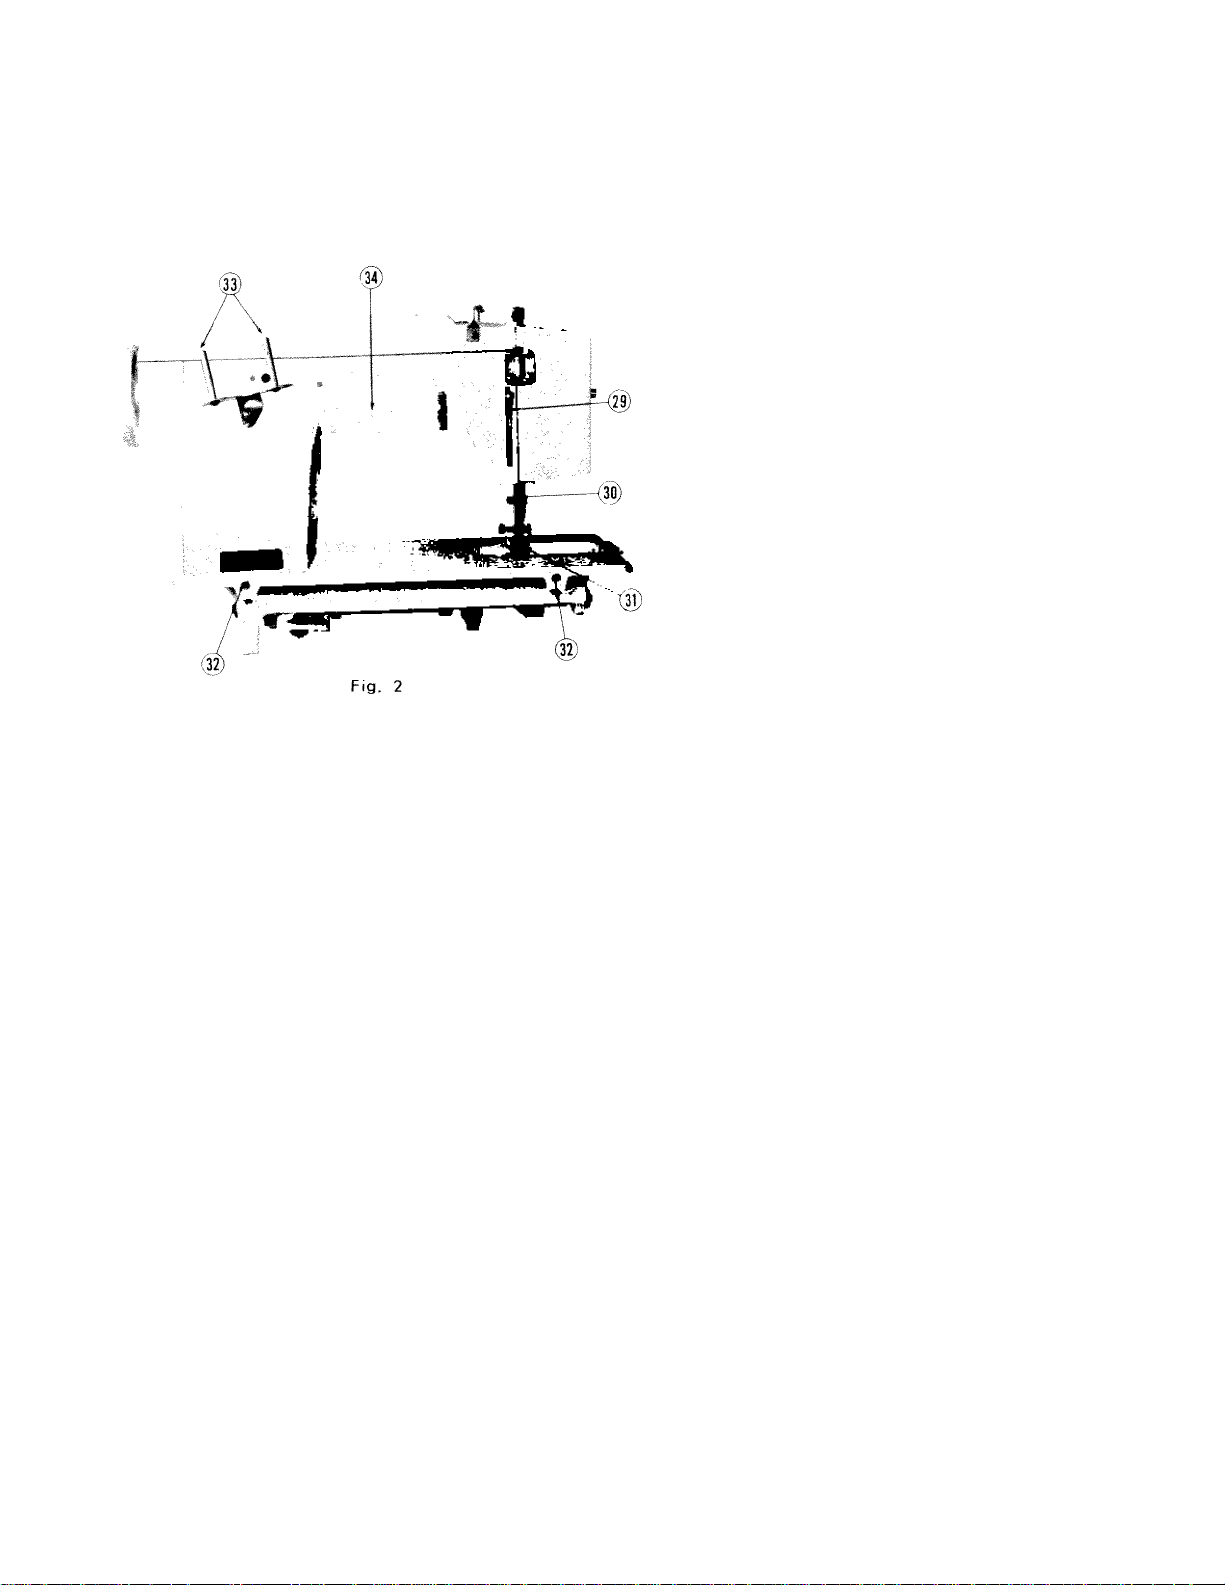
FEATURES AND PARTS
(Back View)
29. Presser Bar Lifter
30. Thread Cutter
31. Feed
32. Head Hinge Mounting Holes
33. Spool Pins
34. Handle

needle-thread-fabric-stitching guide
Extremely heavy
tarpaulin, sacking,
canvas, duck, etc.
Heavy upholstery
fabric, ticking,
denim, leatherette
Medium heavy drapery
fabric, velveteen,
suiting, felt, terry, etc.
Medium broadcbth,
percale, gingham, linen,
chintz, taffeta, sheer
wool, shantung,
sheer voile, lawn,
dimity, crepe,
handkerchief linen,
plastic film, etc.
Very sheer chiffon,
batiste, bee, organdy, 00
ninon, net, mgrquisett, etc.
Needle
No.
3 (18)
2 (16)
1 (14)
0 (11)
Machine
Stitches
Per Inch
6
to
8
8
to
10
10
to
12
12
to
14
14
to
16
(Pbstic film)
8 to 10
16
to
20
Cotton
Thread
10
to
30
30
to
40
40
to
60
60
to
80
80
to
100
100
to
150
Silk
Mercerized or
Thread Nylon
Heavy Duty
Heavy Duty
Heavy Duty
50
50
50
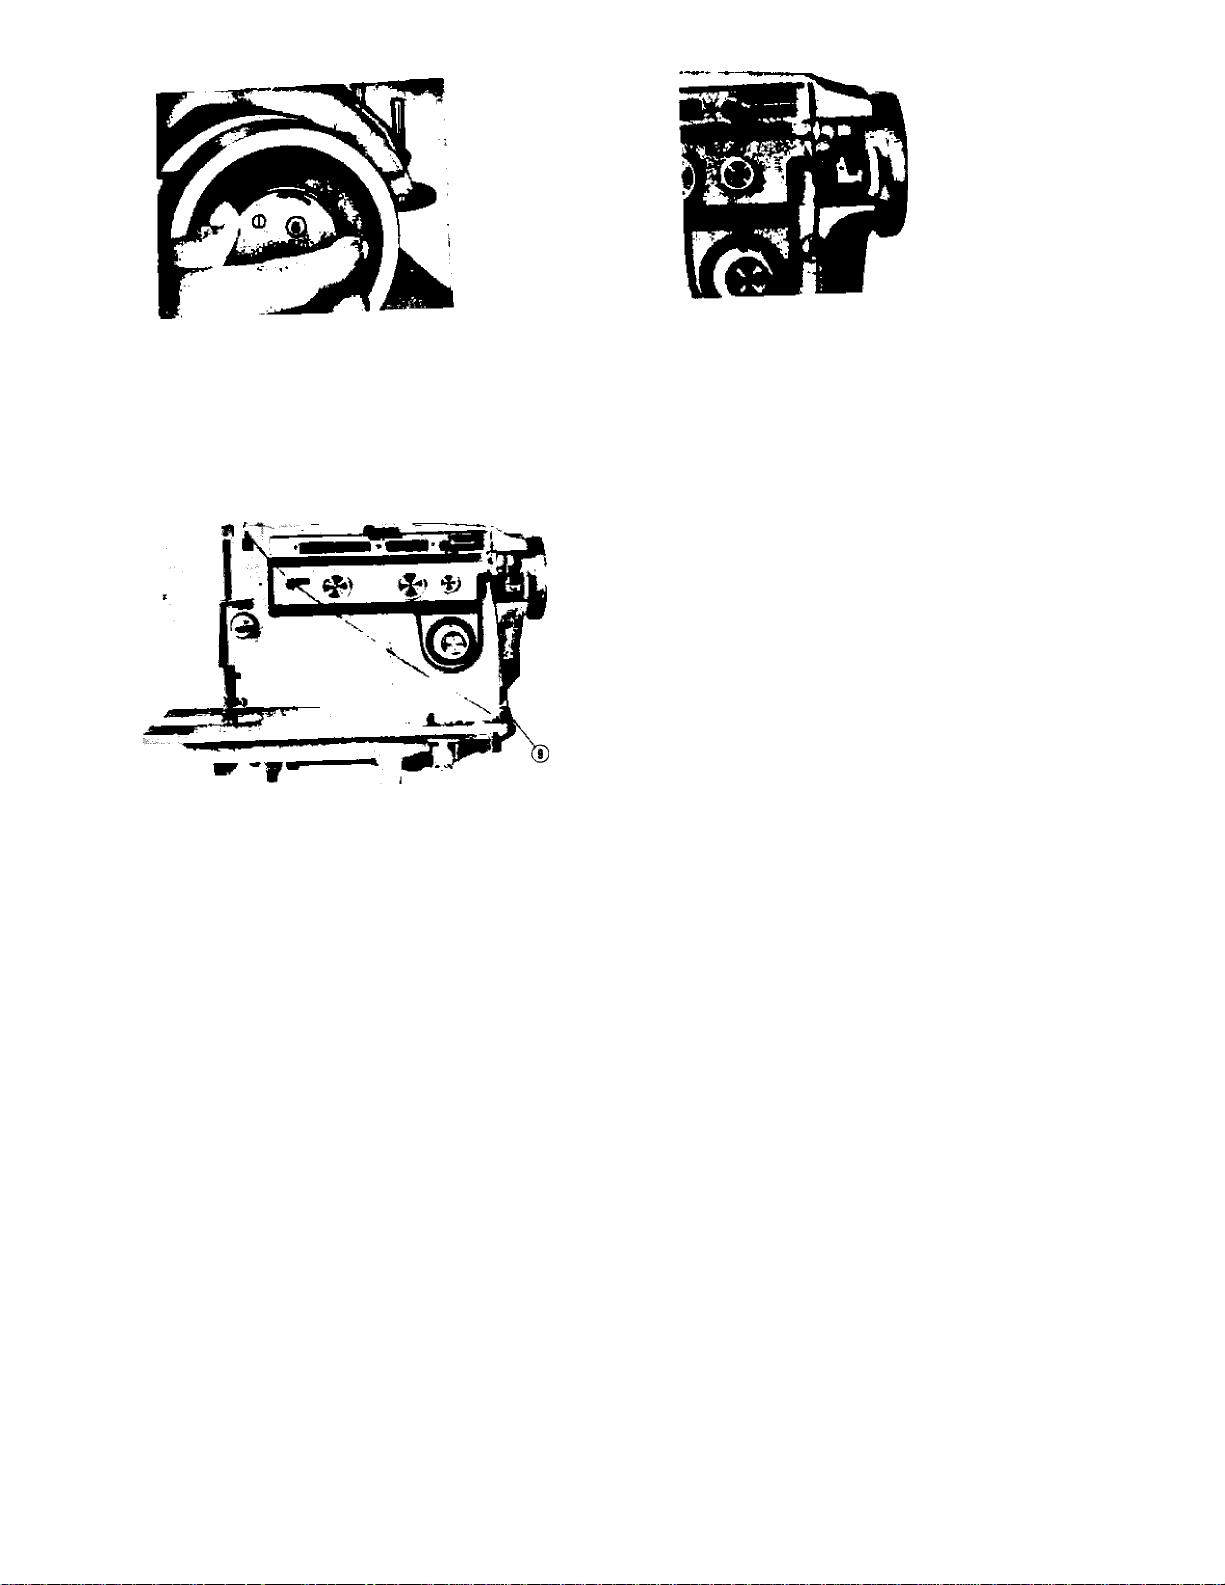
Fig. 3
Di>.ng=,s t,ond whe.l (5, F«. 3), fro^ -h. -.i.ching n^.chonl.g. by H,.n,n, clg,ch (6, Fs.3)
,gy,„^ yog or coontT olockw..». gppor ,h,.od
Place a spool of thread on one of the P' . . machine. Run end of thread
guide on arm and down through tension disc (9, F«. 5,)^^ ^ edge (left fbnge
Fig. 5 clutch away from you until sewing
WINDING THE BOBBIN
and from inside out) and pbce bobbin B-on
spindle of bobbin winder (7 Fig. 4.) fiHi^
the notch bobbin over small pm on spindle.
Push bobbin winder against hand wheel.
Hob thread end bosely and start machine
Bobbin will stop winding when it is filled.
mechanism is again engaged so that needle
moves when you turn the hand wheel.
Break off loose thread end used to start
the winding and thread bobbin as stated on
Page 6.
Fig. ^
SETTING THE NEEDLE
See Fig. 6. Raise the needle bar A to its highest
point, turning wheel toward you by hand.
Then loosen the needle clamp screw B and the
needle can be inserted into clamp C. Pbce needle
(flat side to right) in the needle cbmp
upward as for as it will go into the needle clomp
hole, tightening the needle clamp screw securely w.th
a screw driver.
After changing the needle make one com^
píete revolution of the balance wheel by hand
to be sure the needle is m the corree
position.
Fig. 6
THREADING THE BOBBIN CASE
. C- Hob bobbin case between thumb and forefinger of left he
S,.p ' J bobbin 00» is on ,op. Tok. ih. bobbin between thomb ,
LX:-;':;: "Г,:: ::Г .. ьоьь. оо.
Flat sur
of needl
shank
/
Fig.
as shown in Fig. Ю-
Se"r,ensTon "spring end into the fork-.hoped opening of the spi

SLOT
Fig. 8
Fig. 9
PLACING BOBBIN CASE IN SHUTTLE
Raise needle bar to h'^hest position and slide
L 1 f. 19 Fia. 1) Hold the bobbin cose latch, (D,
F°g '»'botieen the themb aed forefinger of the '
LTth o legs, three inehe. of thread rennlng f^m .he top <^f
the bobbin cor. to the r«ht. ,nse. ond center he obbn
c„„ on the stud of the shuttle Wy K>-
bobbin cos. finger. (E). is opposite the shuttle toce "°tob A)^
Press the bobbin cos. (B) into the shuttle os tor os poss,
e l 1 rntches on the center post of the shuttle. THEN
until latch ca i . l Press bobbin case again
release the bobbin case btch, (D). Press bobbin y
nfter latch hos been rel.osed to ntok, sure the bobb.n cose
is locked securely in pk.ce. Close the cover plate.
Fig. TO
UPPER THREADING
, T^rn .he hand wheel .owand you la rois. .he
’ . Uo ,in lever to its highesf position,
fake-up lever to
2. place a spool of upper arm thread
3. Lead the thread through the upper
u yt throuah the thread guide bar to
t" tt^ion^'c: the^n around and between them
from right to left. , ^^eck spring
= ■ “TwllT o :S. .U, 10.0 .he hook, (see In.er.,
the eye P through the face
rbltS’estTthei through the needle bar
S. Thtd redt%|t RIGHT, drawing^
it through about ^ j turn the hand
of the upper thread l^sely an
v.heel towanl you until the needle^g
way down and comes uoper thread which
then can be pu , oresser foot
thread ends ? ® ¿^k of the machine, leav-
and d-- toward the bock of t ^^^
ing both threads three or rour
t‘°oLu:d ::rvXhT Piece bo.h
nm \
lUlllS
Fig. 12
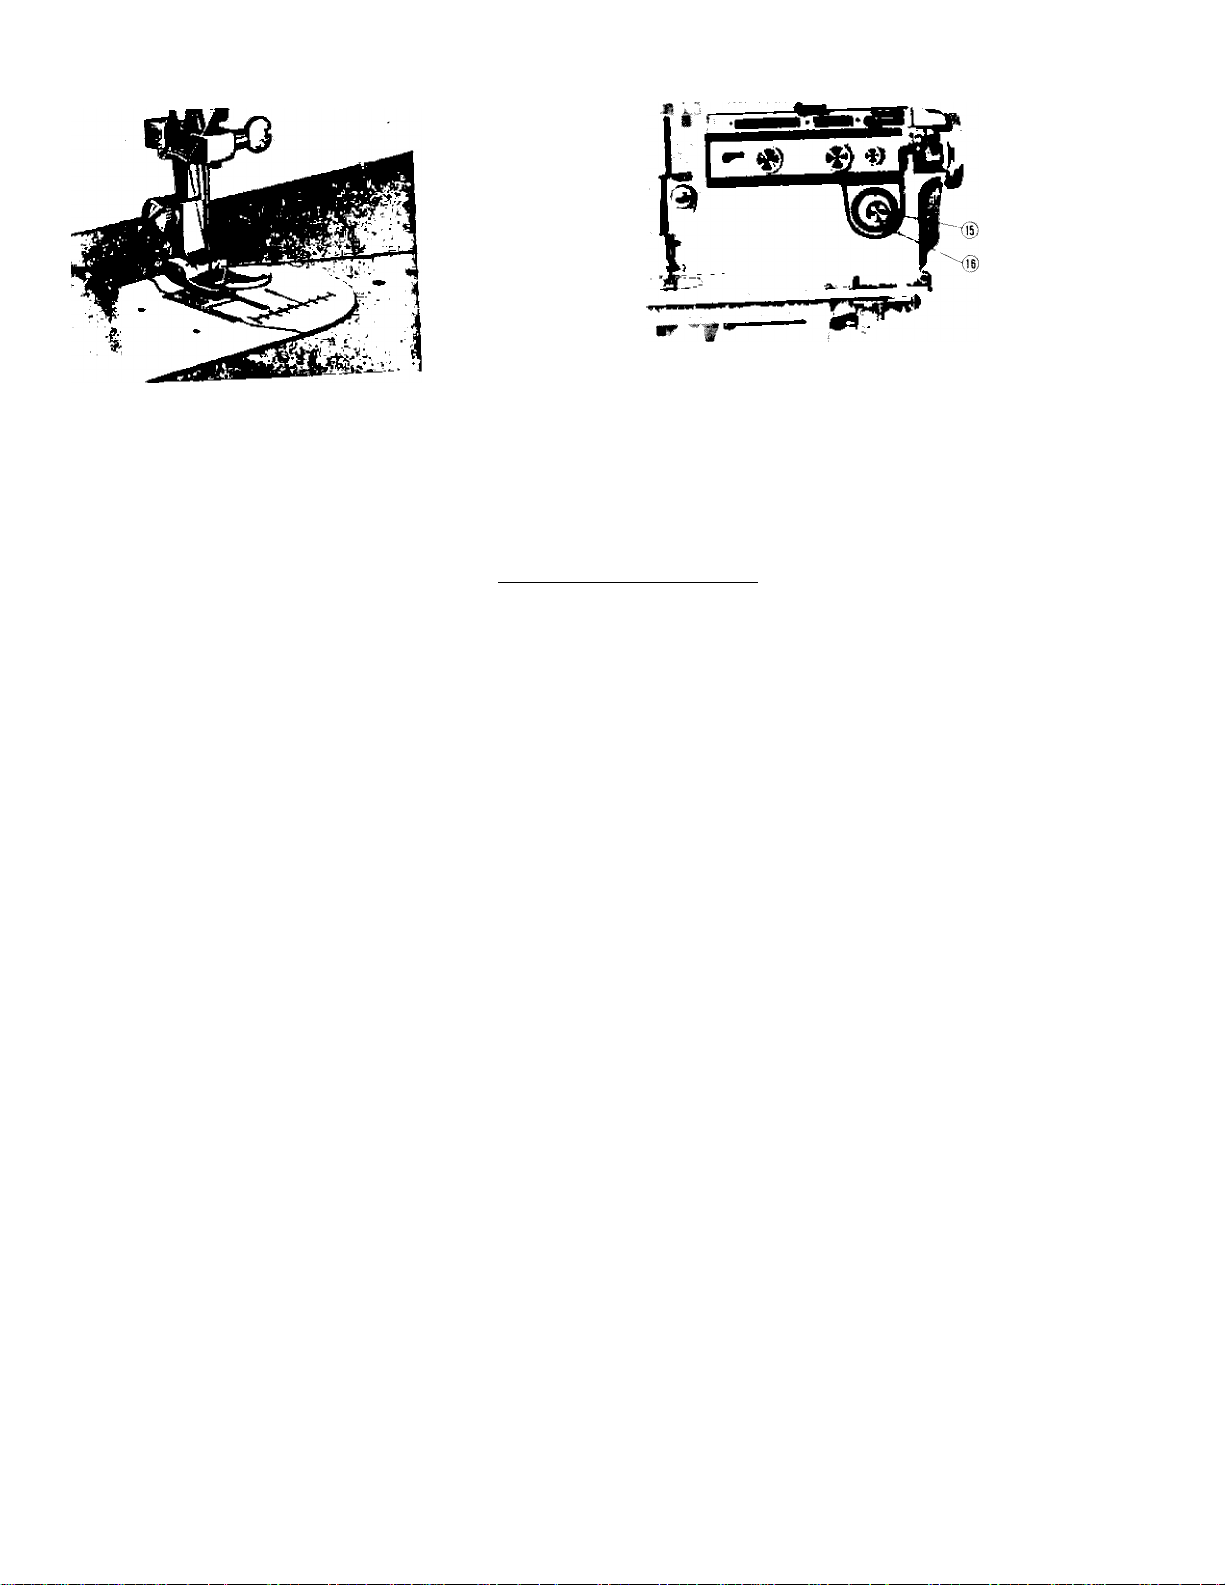
Fig. 14
Fig. 13
SETTING THE STITCH LENGTH
.
...................
— ■ . , , c r, ^ A Near 0 is the shortest
..:s: o'u-i r - ---- - •
le choc, is ty '>>= P-"«''
length you cnoose ...
---------------
-
Figures on indicator
Kl.^mber of stitches pej_i^
button is held in.
STITCH LENGTH CHART (APPROXIMATE
__________—-------------------------
.................
.........
1 ~2 ‘
No Feeding
1
30
SEWING IN REVERSE
25
2
3
15
4
8
5
6
10
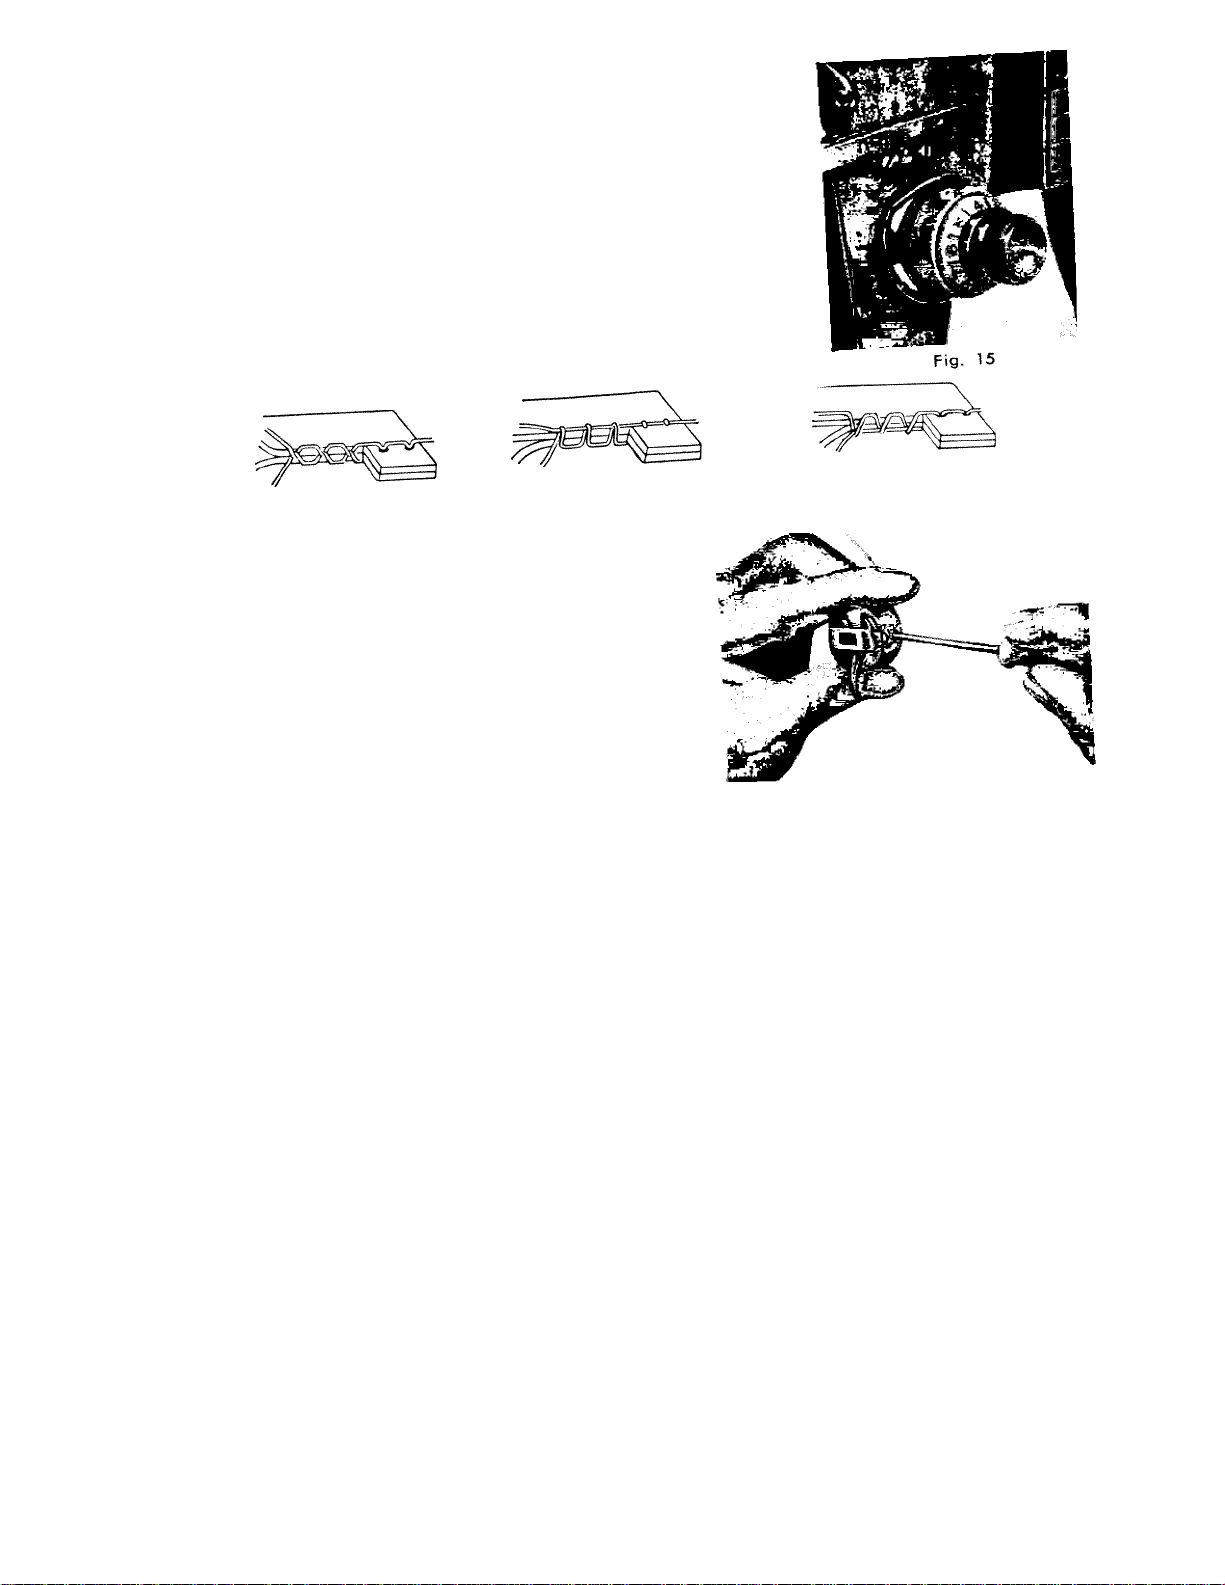
adjusting the tensions
Always adiust the upper increase the
as the tension is release w the right, or
tension on the upper thread u number
^'°^t^’7^*;i";htrr\rte:s,on. Before adiust,ng lower tens,on
Te ‘su^e That the J tens,on, turn the
3.r::re: 'V,r^7rr si of the bobb,n case cloc.w,se tot,ghten.
counterclockwise to loosen.
pig. 16 B
Fig, 16-A
,s, ^pp-, '"To"
balanced, a perfect st,tcn w,
threads interlocking ,n a r,c 9 lower
thread forms loops over the
on the fabric (Fig. 16-C).
Fig. 16-C
Fig. 17
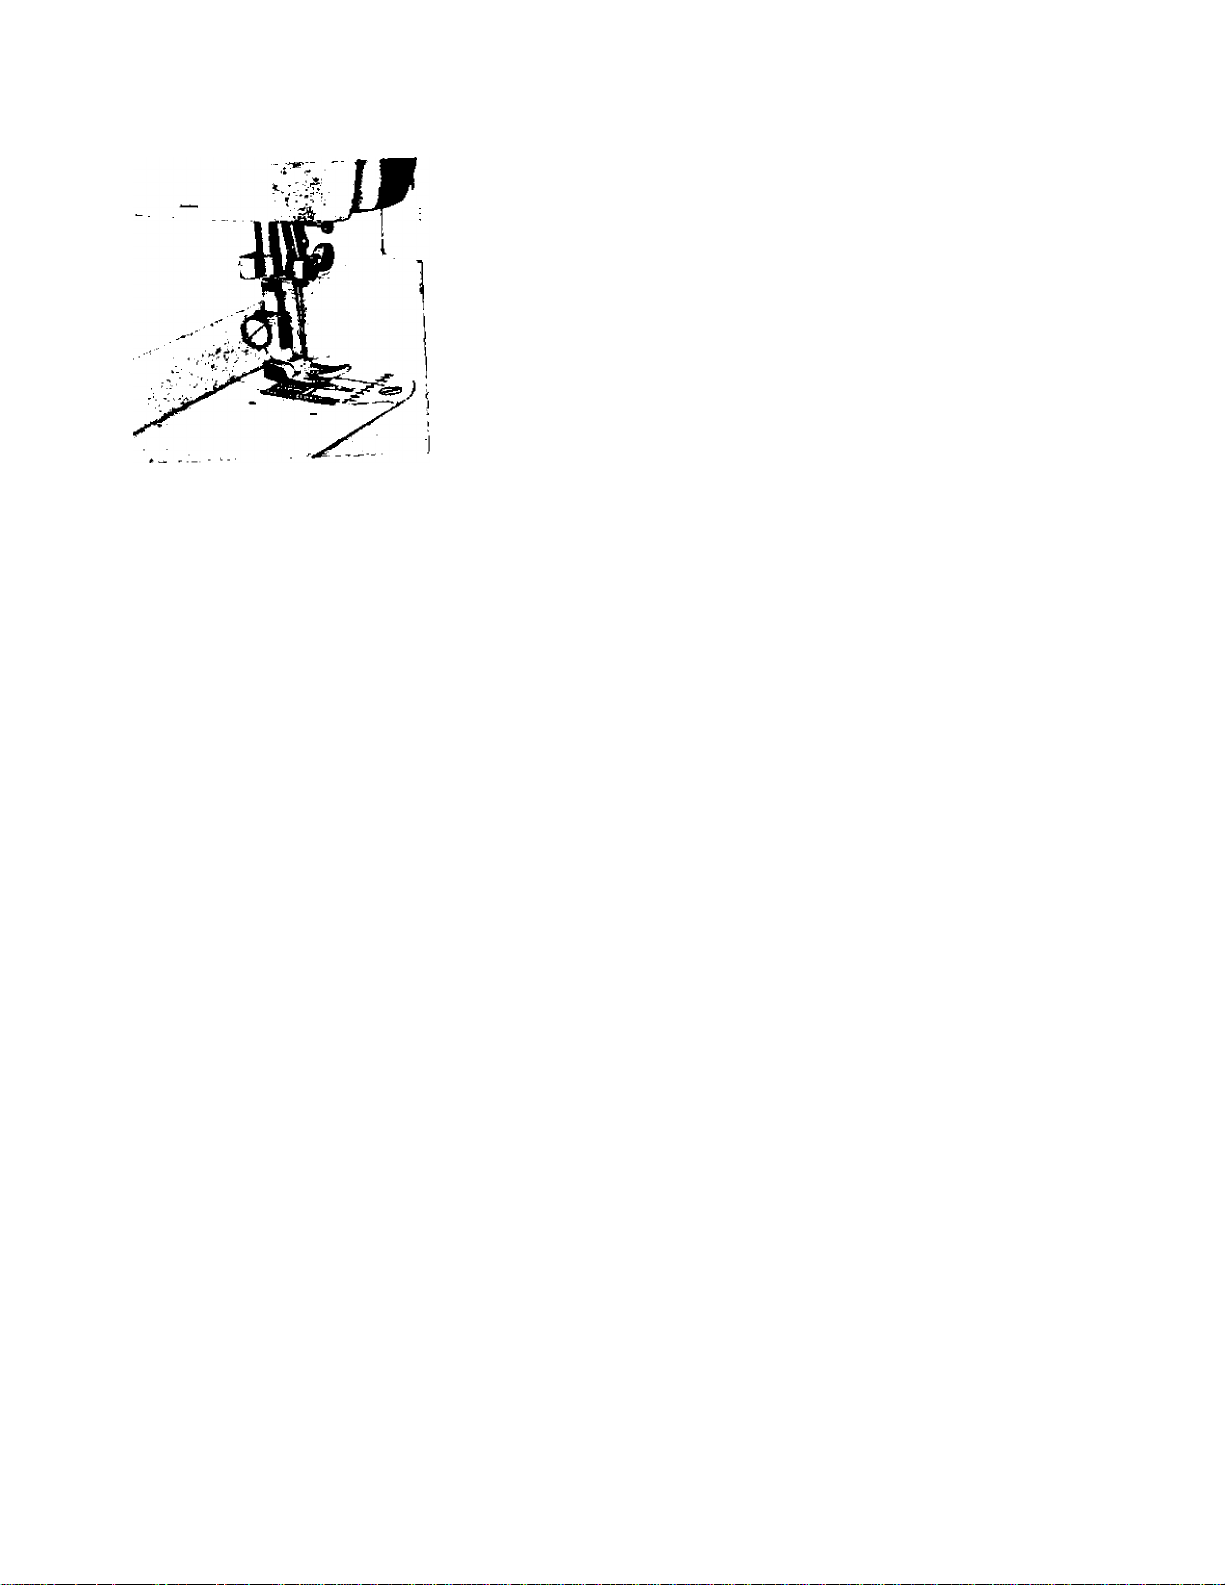
adjusting pressure and feeding of fabric
general sewing. Usually I'''''-'“'"'
-aV.:edT:,o;t::Ju":„d »i,»»y da.„. <e,,. ..
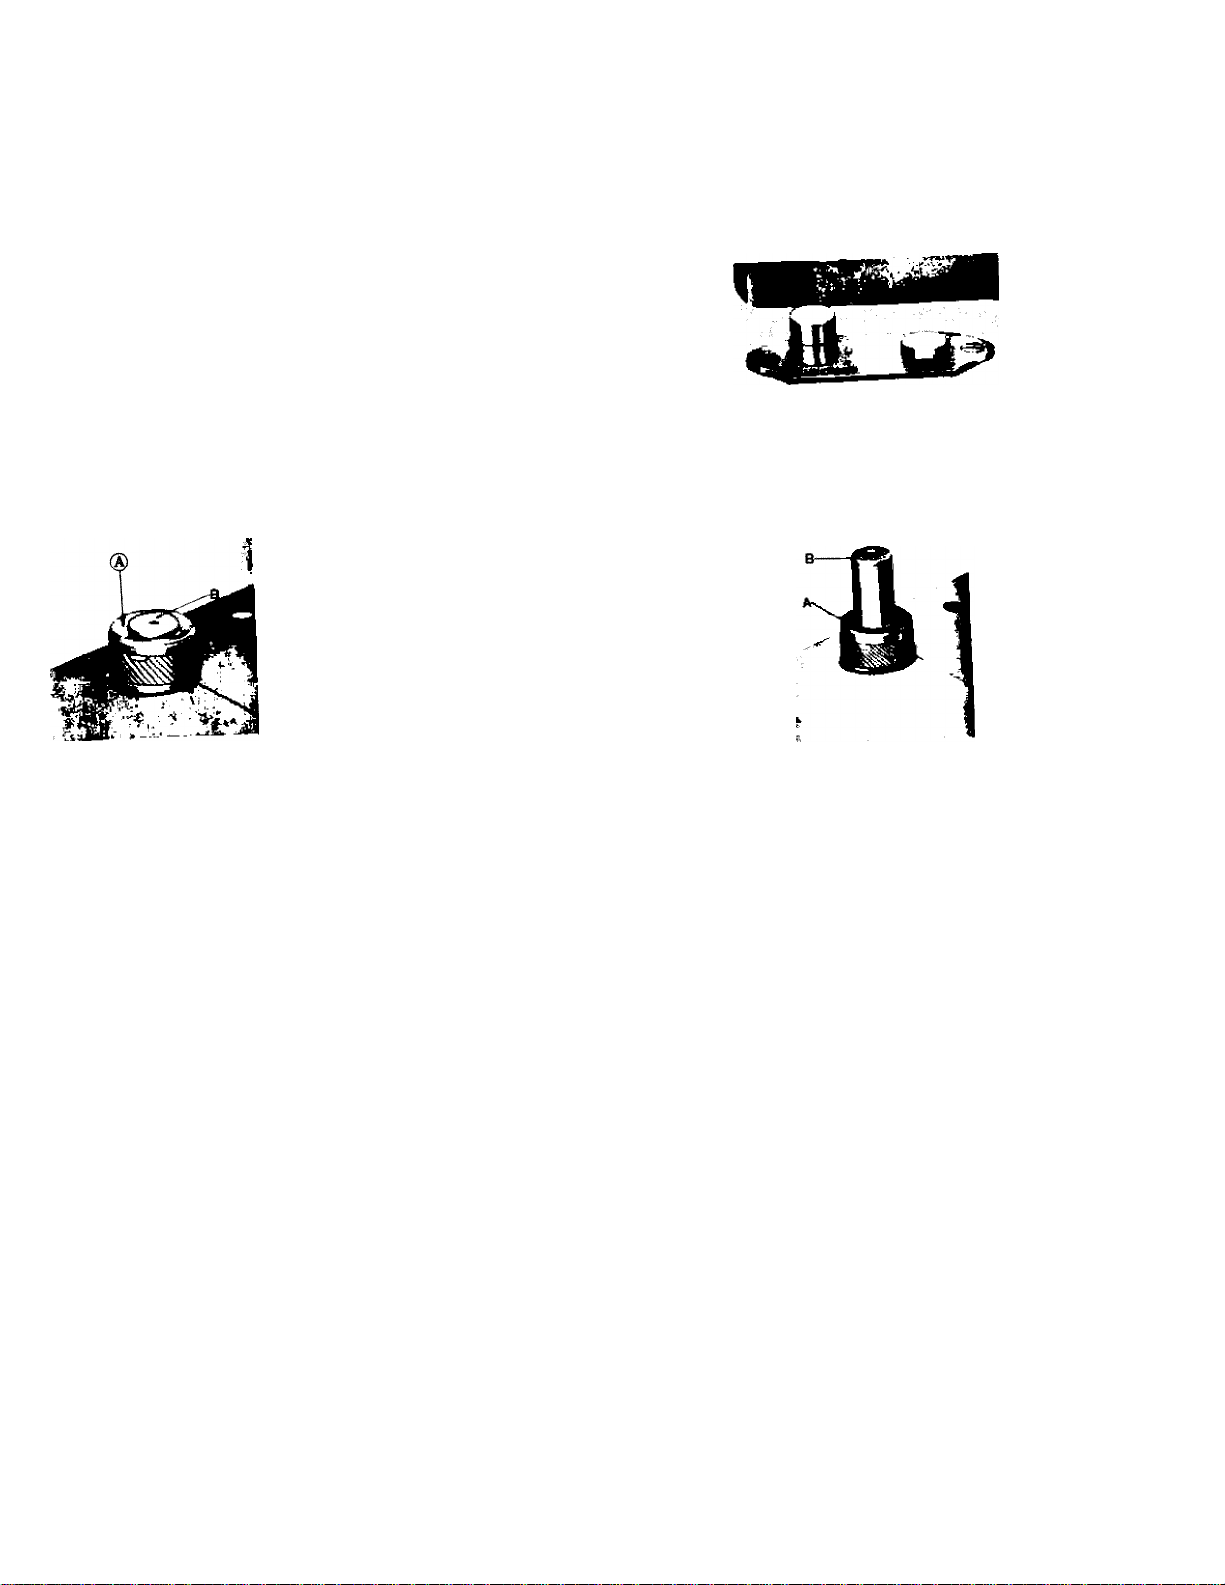
SEWING THIN OR LIGHT WEIGHT FABRICS
When lighter pressure ,s reputred ,= “'■“'“Xtr hritlTy
S,lk or flimsy matenol, the pressure cap should be about y
in Release all the way by pressing the snap lock (A^Fig.
20) and then press cap B down ogam to half-way sp L
le feed slightly by pressing the DOWN button (F,g. 18) to the
red line.
darning and mending
In order to move the fabric freely in any
direction for darning and mending, release
the pressure cap B completely by pressing
down on the snap lock (A, Fig. 20). Press
down button (Fig. 18) all the way down,
which drops the feed well below the needle
Fig. 19
plate. To return feed to normal, press the
UP button all the way down.
Fig. 18
Fig. 20
11
12
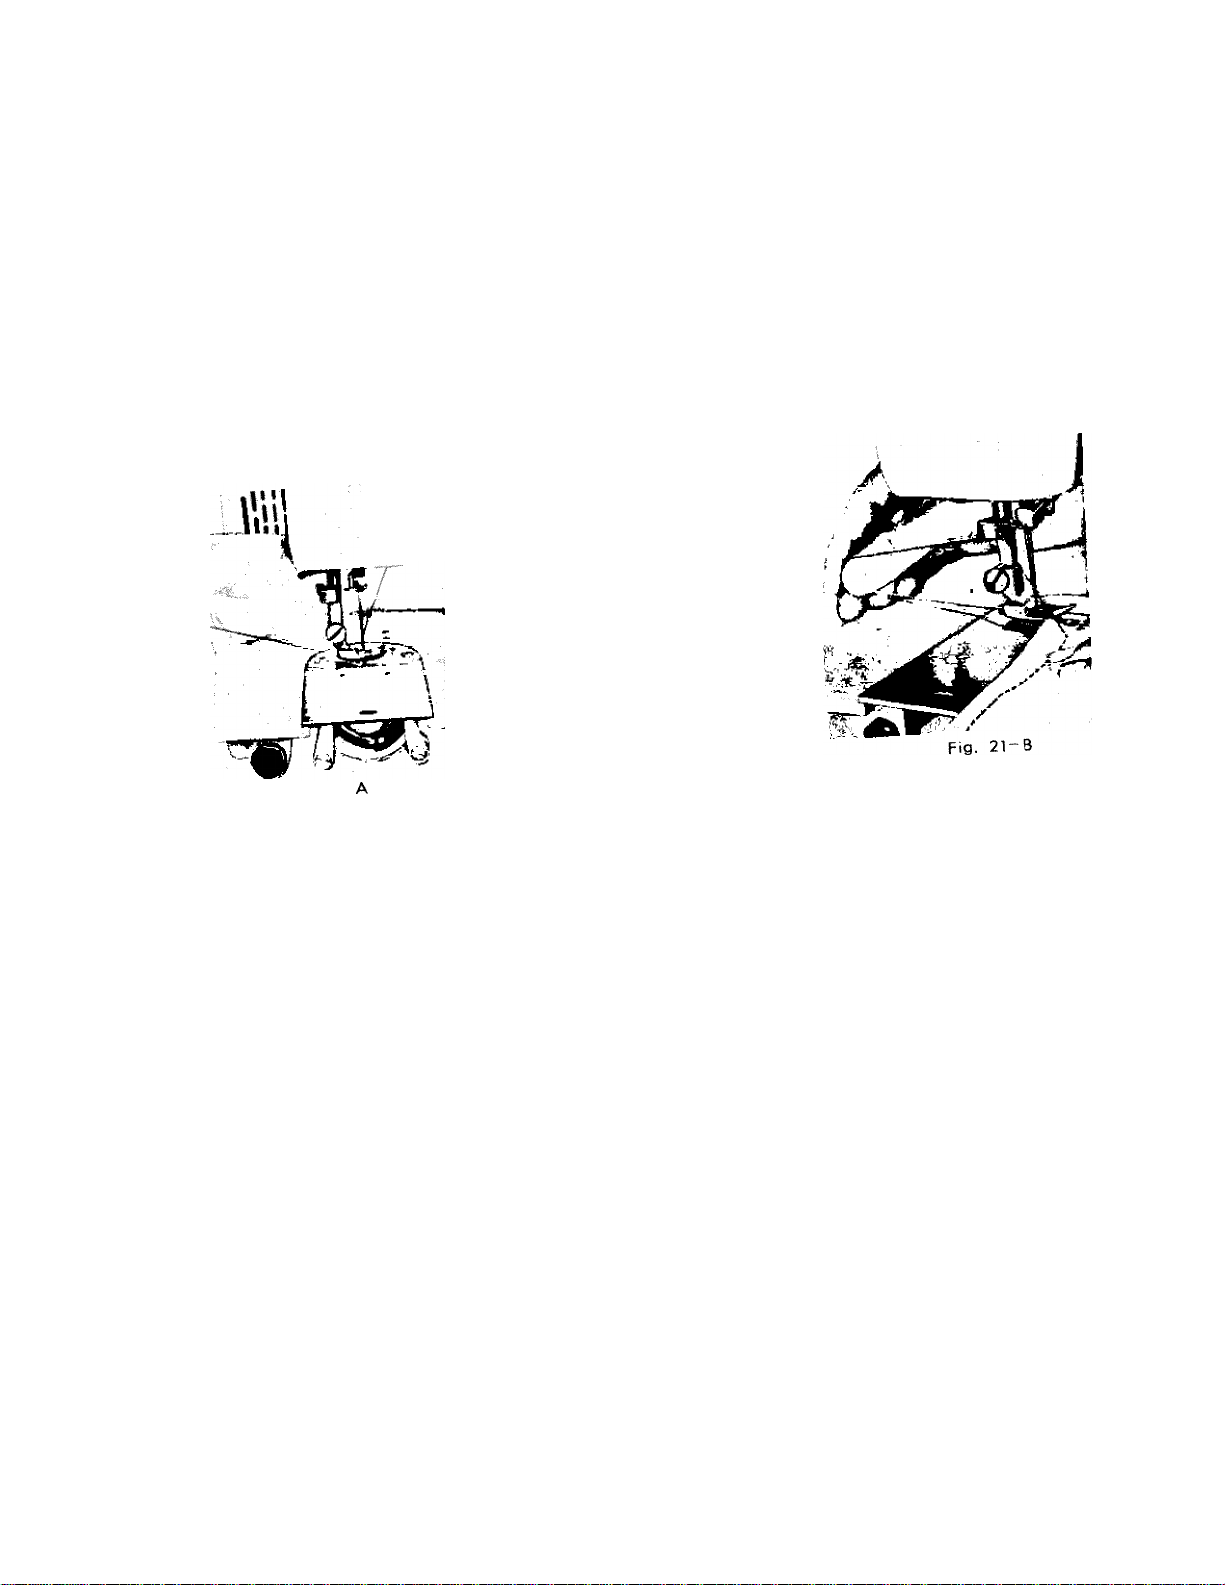
prepabing to sew
r „ to sew. Do not try to help the fee
Have take-up lever at « needle and cau
by pulling the mater.a o under presser foot. ioo».
1 1 f>r at highest point before ¡t to break.
r- 5,EH-
machine is regulated by mcr
Fio- 21-
removing the work
Re sure to stop i ,
r when the thread take-uP ever and
^ needle bar are at the h.ghest po
' '"now raise the presser foot and
the fabric back ond to the
left (Fig. Gutter
,he threads over the thread cutter^
Pull down slightly, hoUmg thread
in both hands, so as not to bend
Uate'^'le ends of thread under
the presser foot.
c*nn the machine
13
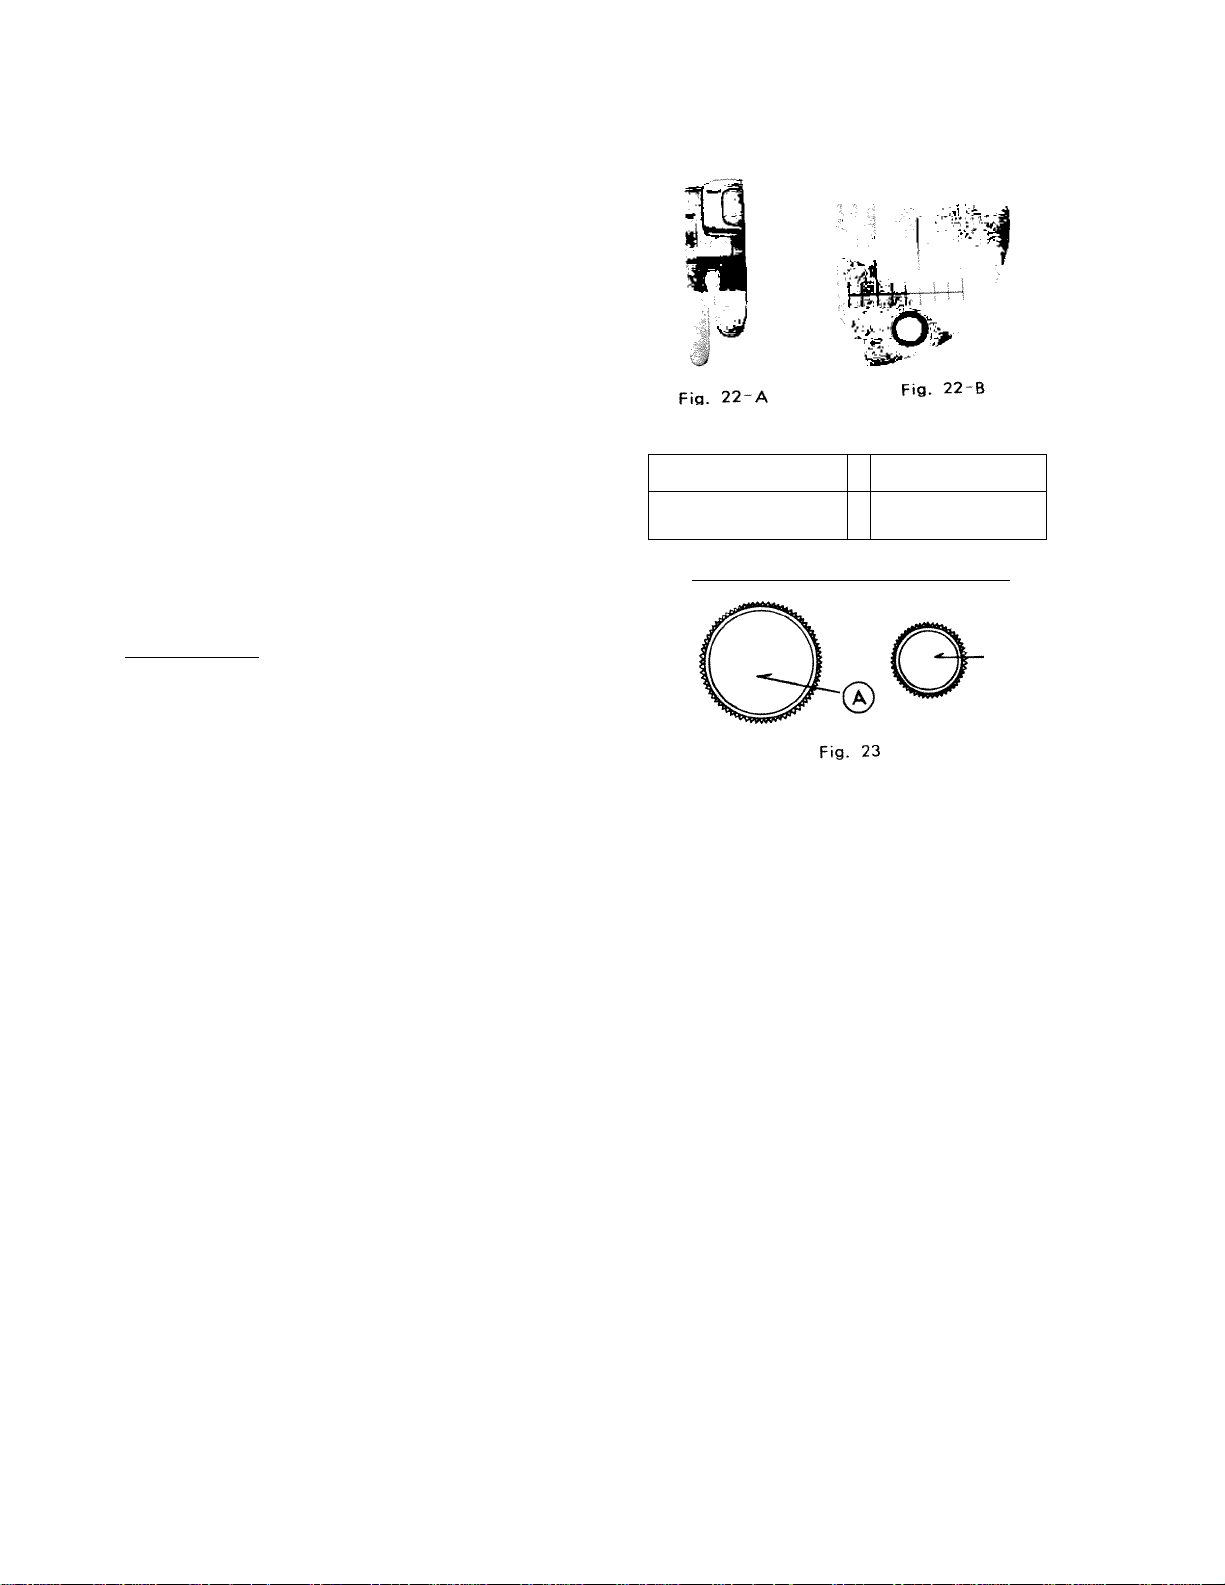
STRAIGHT STITCHING
, ,Haight sewing on fine fabric or very soft material,
„«y wont to use the straight stitch presser foot and
i.aight stitch needle plate which are included in your
.tory box. ■ Both have narrow needle slots.
„nging the Presser Foot and Needle Plate:
) Presser Foot
(A) Loosen thumb screw (22. Fig. D and remove
ZiQZQCI pr©SS©r foot.
(B) Rephce with straight stitch presser foot (Fig.
22-A)
5 Needle Plate l i r* fnr
(A) Slide cover plate (21. Fig. D to the left as far,^
as possible.
(B) Remove screws holding needle plate (19. Fig. )
to bed plate.
(C) Remove zigzag needle plate.
(D) Replace with straight stitch needle plate (Fig.
22 “B)
. .ure to ..t the stitch width_and_butio^^
.1,
o
mzRj
^•1 *2*3*4‘5
^ZIGZ^NDICATOR BUTTONHOLE
~o—i 3 T~T
1 rsB Ei
knob “B” (F.g. 23) to .b= ¡eft a, for os .. will go
, ..il se, zigzag wrilb control "a' o. 0 posil.on.

14
CREATIVE EMBROIDERY
The satin stitch (Fig. 24) which is
short iigzag stitch and the basis (or mos embroid.ry,
sRorT ziy^uy efitfh lenath control (see page 9)
i'“™r^^Vsr::^,r:i.h::r'stopp,ng th« F=ed,„g a=,io„
(;rh®ca;tl!;oo::iy ot‘one ^w1d,h of zigzag s,,tchi„g set Fig. 24
vltU ctrsnfR Fia 23) to chosen stitch width number.
"‘"whh'h. ntac'hin. S?,' for o short stitch '•"9-';^^ ‘“f';-;;',
designs con be erode by torning ¿‘'»^zigzog^ wdth conj^rol
knob bock the stop (B, Fig. 23)
combination or wiains. i r
ZZ: tryZtra^J then proceed. After
„ Shile you will become quite skillful, varying your design,
by thf speed of the machine, stitch length, and monipulotian
of the zigzag control knob.
SAMPLES OF CREATIVE EMBROIDERY
Fig. 25
A Sew a few stitches at 5 width, then allow knob
toipnng back to 0 for a short period. Count, if necessary.
to establish a rhythm. eUwlv back and forth between numbers 2 and 5
B. Set stop at 2 then move knob 5_ ¡t to snap back quickly.
C. Set stop at 1. Gradually move ^ 1^. Do a few zigzag stitches, drop
D. Set zigzag stitch wdth stop a , operating the feed knob rhythmically it is not
feed for 3 or 4 stitches, then raiser it again. By operating
necessary to count stitches.
Fig. 25
 Loading...