

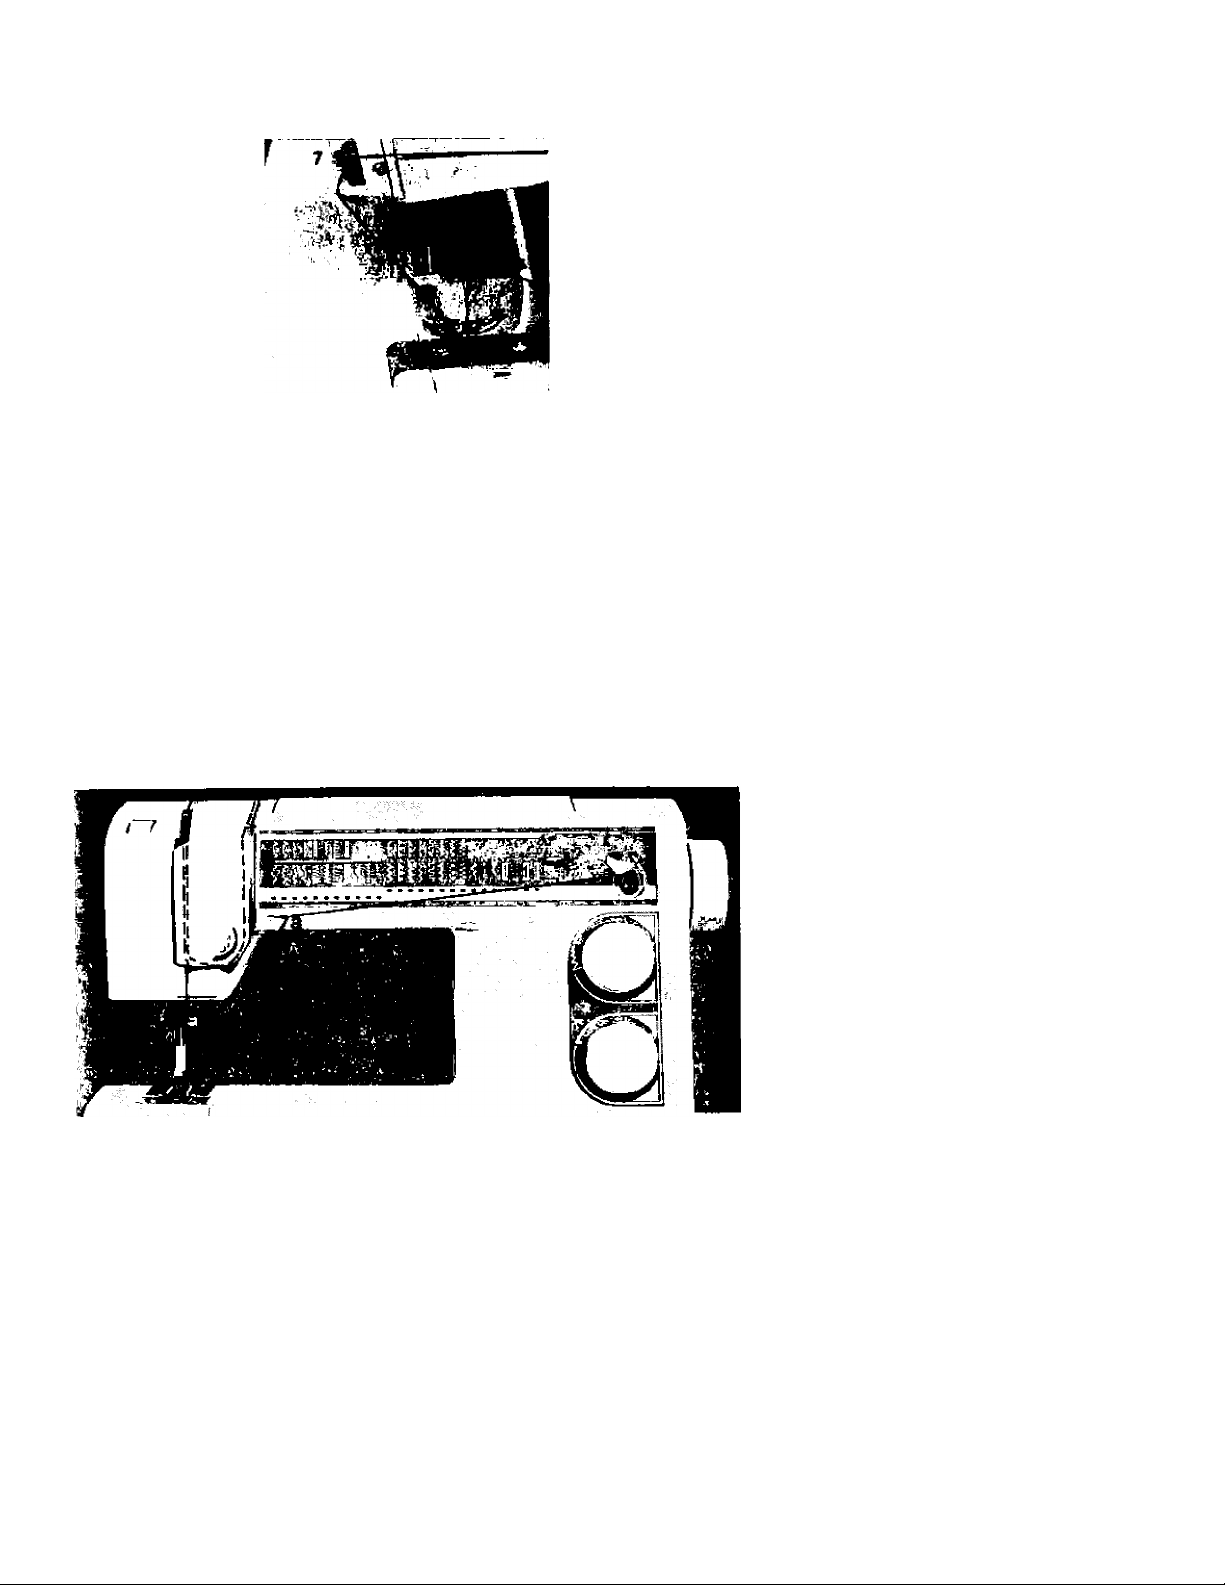
Page 1
Page 2

IMPORTANT SAFETY INSTRUCTIONS
When using an electrical appliance, basic safety precautions should always be
followed, including the following;
Read all instructions before using this household sewing machine
DANGER
To reduce the risk of electric shock;
• Do not leave sewing machine when plugged in, Turn off the switch and unplug from
electric outlet the electric cord when not in use or before servicing.
• Always unplug before relamping. Replace bulb with same type rated 15 Watts,
WARNING
To reduce the risk of burns, fire, electric shock, or injury to person;
• Do not use outdoors or on wet surfaces.
• Do not allow to used as a toy. Close attention is necessary when used by or near
children,
• Use only as described in this manual, Use only manufacturer's recommended attach
ments,
• Do not use with damaged cord or plug. If sewing machine Is not working as it should,
has been dropped or damaged, left outdoors, or dropped in water, return it to the
nearest authorized delaer or service center before using.
• Never operate the sewing machine with any air openings blocked. Keep ventilation
openings of sewing machine and foot controller free from the accumulation of lint,
dust, and loose cloth.
• Never drop or insert any objects into any opening,
• To disconnect, turn the switch off, then remove plug from outlet,
• Do not unplug by pulling on cord. To unplug, grasp the plug, not the cord,
• Do not operate where aerosol (spray) products are being used or where oxygen is
being administered,
• Keep fingers away from all moving parts. Special care is required around the sewing
machine needle,
• Always use the proper needle plate. The wrong plate can cause the needle to break.
• Do not use bent needles.
• Do not pull or push the fabric while stitching. It may deflectthe needle causing to break,
• Switch the sewing machine off when making any adjustments in the needle area, such
as threading needle, changing needle, threading bobbin, or changing presser foot,
and the like.
• Always unplug the sewing machine from electrical outlet when removing covers, or
when making other user servicing adjustments mentioned in the instruction manual. No
lubrication by customer is recommended.
• Keep your work area well lighted.
SAVE THESE INSTRUCTIONS
Page 3

Instrucciones de seguridad
1. Leer el manual de instrucciones,
2. No hacer uso inapropiado de la
máquina,
3. La máquina de coser siempre debe
estar desconectada antes de en
chufarla a la toma de corriente.
Nunca estirar con fuerza del cable
de alimentación para desconec
tarla de la toma de corriente,
4. No instalar o guardar la máquina
en lugares expuestos a la lluvia,
5. Mantener la zona alrededor y de
bajo de la máquina de coser y cer
cana al pedal libre de polvo,
6. Tener siempre desconectada la
máquina de la corriente cuando no
se utilice,
7. No utilizar la máquina de coser si
tiene un cable dañado o si resultara
dañada después de sacarla del
embalaje. Si hubiera piezas rotas
coger la máquina y llevarla al cen
tro de asistencia más próximo sin
sacar las piezas rotas,
8. Prestar mucha atención cuando se
utilice la máquina cerca de niños,
9. Mantener lejos los dedos de las pie
zas en movimiento, especialmente
en la zona de la aguja,
10. Utilizar la plaquita de costura idó
nea,
11. Utilizar las bombillas adecuadas de
220 V, (tensión) y 15 W, (potencia).
Seguir estas instrucciones
Page 4
Connecting the toot control
Conexión del pedal
Among the accessories you will find the foot
control cord and the main cord.
1. Remove the foot control cord.
2. Place the foot control on its narrow side,
Fit the plug into the socket Inside the foot
control compartment, push the plug.
3. Push it firmly to make sure it is properly
connected.
This operation is only neccessary the very
first time you are going to use the ma
chine.
4. To correctly turn away the cord, place it
into the slot, see picture.
Connecting to the power
supply
1. When you press the power switch, both
the machine and the light are switched
on,
2. Connect the foot control cord to the
socket to the left on the bottom right side
of the machine.
3. Connect the main cord to the back sock
et on the bottom right side of the ma
chine.
On the underside of the machine you will
find information about the power supply (V)
and the frequency (Hz). Check the power
supply setting in the machine to ensure that
this agrees with the main supply before you
connect the machine,
El cable del pedal está entre los accessorios. Este cable ha de conectarse al mando
de pie.
1. Sacar el cable del pedal.
2. Ponga de canto el pedal. Introducir la
clavija pequeña en el zócalo dentro del
mando de pie.
3. Controlar que la clavija de contacto está
bien fija.
Esto solo ha de hacerse la primera vez,
cuando se desembala la máquina.
4. Para poder desenrollar correctamente
el cable, colóquelo en la ranura según la
figura.
Conexión eléctrica
1. Al pulsar el interruptor principal, se co
necta la máquina y la iluminación,
2. Conectar el cable del pedal en la enta
lladura izquierda abajo en el lado dere
cho de la máquina.
3. Conectar el cable de la red en el enchu
fe trasero, debajo del lado derecho de
la máquina.
Debajo del zócalo están Indicadas la ten
sión (voltaje) y la frecuencia (Hz), Antes de
conectar la máquina a red, asegurarse de
que los valores indicados coincidan con los
de la red.
Page 5
Accessory tray
Caja de accesorios
Open the Accessory Tray by placing your
finger in the space on the top and lift up
ward.
In the Accessory Tray there are special
spaces for presser feet and bobbins plus
space for other accessories. Store the ac
cessories in the tray from the beginning so
they are always easily accessible (refer to
the figure),
Extended sewing surface
Slide the Accessory Tray onto the machine
to provide a larger flat bed work surface.
Slide the Accessory Tray to the left when you
wish to remove it and use the free arm. To
facilitate sewing trouser legs and sleeve
hems use the free arm. The free arm also
allows you to darn socks.
Abra la caja de accesorios poniendo el
dedo en la entalladura de la tapa levan
tándola hacia arriba.
En la caja de accesorios hay compartimen
tos especiales para los pies de prénsatelas,
canillas y otros accesorios. Poner los acce
sorios en la caja de manera que siempre
sean accesibles (ver foto).
▼
0: f
Superficie de trabajo
Dejar la caja de accesorios en la máquina,
cuando se necesite una mayor superficie
de trabajo.
Cuando se utiliza el brazo libre, sacar la
caja de accesorios hacia la izquierda. El
brazo libre permite coser fácilmente man
gas o perneras, así como coser cuellos, pu
ños y zurcir calcetines y medias.
Page 6
Threading the upper thread Enhebrado del hilo superior
Make sure the presser foot is raised and the
needle is in the up positon.
1. Place the thread on one of the spool pins.
2. Bring the thread under the thread guide,
3. Bring the thread straight ahead down to
the left between the thread tension discs.
4. Continue threading by drawing the
thread from the right into the slot on the
take-up lever,
5. Thread last guide just above needle,
6. The needle Is threaded from front to
back. The white on the presser foot ankle
makes it easy to see the eye of the nee
dle.
Asegurarse de que el prénsatelas y la aguja
se encuentran levantados,
1. Poner el carrete del hilo sobre uno de los
porta-carretes,
2. Pasar el hilo debajo el guía-hilo.
3. Luego pasar el hilo derecho hacia abajo
a la izquierda entre los dos discos de
tensión.
4. Pasar el hilo desde la derecha en la ra
nura del tira-hilo.
5. Continuar pasando el hilo hacia abajo
por el guía-hilo.
6. Enhebrar la aguja de adelante hacia
atrás. Gracias a la superficie blanca de
contraste del cuerpo del prénsatelas, se
observa facilmente el agujero de la agu
ja,
r
\l
Page 7
7. Place thread under the presser foot and
into the thread knife where it is cut,
7. Finalmente tirar el hilo hacia atrás por
debajo del prénsatelas y luego hacia
arriba a través del corta-hilo, donde el
hilo es cortado.
Bobbin winding with the
machine threaded
Place your empty bobbin with the small
mark outwards on the bobbin spindle on the
front of the machine.
Pull the thread from the needle under the
presser foot and to the right over the thread
guide (a).
Start from above and wind a few turns of
thread around the bobbin,
Bring the bobbin spindle down.
Press the foot control. When the bobbin
winding is finished, remove the bobbin, cut
off the thread and bring the bobbin spindle
up.
Devanado de la canilla
Colocar la canilla vacia en el eje del cani
llero, en el frente de la máquina con la
marca circular hacia fuera.
Pasar el hilo de la aguja, por debajo del pie
del prénsatelas y hacia la derecha hacién
dolo pasar por encima del guía-hilo (a).
Después, comenzar por arriba y dar unas
cuantas vueltas al hilo en la canilla,
Conduzca el eje del canillero hacia abajo.
Presionar sobre el pedal.
Al terminar el bobinaje saque la canilla, cor
ta los hilos y conduzca el eje del canillero
hacia arriba.
Page 8
Placing the bobbin in the
machine
Open the cover by pulling it towards you
and take it away. Place the bobbin in the
bobbin case with the logo facing upward
and the thread to the left of the bobbin. The
bobbin will then rotate counter-clockwise
when pulling out the thread.
Enhebrado del hilo inferior
Abrir la tapa tirándolo hacia Vd. Saque la
tapa. Poner la canilla en la cápsula con la
marka hacia arriba y el hilo a la izquierda
de la canilla. La canilla se enrollará en el
sentido contrario de las agujas del reloj al
sacar el hilo.
Push down on the bobbin with your index
finger to keep it from turning while drawing
the thread with your other hand to the right
passing (a), then to the left, the thread follo
wing the edge and clicks into correct posi
tion between the tension spring. Be sure the
thread has clicked into the tension spring.
Continue threading around (b) and cut off
the thread in the thread knife (c),
Place the cover over the bobbin and slide it
into position.
Changing the needle
1. Loosen the screw in the needle
clamp.
2. Remove the needle.
3. Push up the new needle with the flat
side away from you until it will go no
further.
4. Tighten the screw properly.
Always use needles of system
130/705H.
10
Sujete la canilla con el dedo índice y estire
el hilo con la otra mano alrededor del punto
(a), después hacia la izquierda de manera
que el hilo acompañe el borde y se colo
que en posición correcta entre los muelles
de tensión.
Continúe estirando el hilo alrededor del
punto (b) y corte el hilo con el corta-hilos
(c). Devuelva la tapa y colóquela en su
posición.
Cambio de la aguja
1. Aflojar el tornillo del soporte-agujas
con el destornillador.
2. Sacar la aguja.
3. Introducir la aguja de abajo a arri
ba (la superficie redondeada ha
cia adelante) empujándola hasta
su tope.
4. Apretar fuertemente el tornillo.
Utilice siempre agujas del sistema
130/705H.
Page 9
Correct and incorrect
thread tension
To understand the correct thread tension,
sew a few sample stitches at different set
tings.
1. Begin with a tension that is too loose, i.e.
the dial set at "1 The lower thread will He
straight and the upper thread will be
drawn down on the underside.
2. If you set the dial at the highest number,
the opposite will occur, and the seam may
pucker.
3. The correct thread tension is provided
when the threads interlock in the middle of
both layers of material or, in the case of
decorative stitches, on the underside.
Make a few tests on a scrap piece of the
material you are going to use and check the
tension.
Tensión de los hilos correcta
o incorrecta
Para comprobar cual debe ser la tensión correc
ta del hilo, lo mds simple es realizar varias costu
ras, modificando en cada una la tensión.
1. Comenzar con una tensión muy floja, o seo,
girar el mondo de regulación de lo tensión
aproximándolo ai "V'. Examinar ta costura: el
hilo inferior está tenso mientras el hilo superior
arruga el tejido en la porte Inferior.
2. Si se sitúa el mondo de regulación en el núme
ro más alto se obtendrá un efecto contrario, es
decir, el tejido se arrugará.
3. La tensión correcta de los hilos se obtiene
cuando lo unión de los mismos se produce en
la mitad de las dos capas de tejido, o bien en
lo porte inferior al coser costuras decorativas.
Siempre hacer uno prueba en un trozo del género
igual al que se desee coser y controlar la tensión
de los hilos.
Thread tension
You can adjust the thread ten
sion by turning the dial which is
numbered. The higher the
number the tighter the tension.
Normal thread tension is num
ber 4,
When sewing buttonholes and decorative
stitches set thread tension to number 3.
When topstitching with a coarse thread in
thick fabrics, Increase the tension to 7-9,
Tensión del hilo
También se puede modificar la
tensión del hilo girando el
mando de regulación de la
tensión graduado, Cuanto
más alto la cifra, más fuerte la
tensión.
La cifra 4 corresponde a la tensión normal
del hilo. Para ojales y otras costuras espesas
se obtiene una buena tensión del hilo en la
cifra 3. SI va a pespuntear con hilo grueso
sobre material grueso, aumentar la tensión
del hilo hasta la posición 7 a 9.
n
Page 10

Changing the presser foot
. Make surethatthe needle is in the highest
position. Pull the presser foot towards you,
Line up the cross pin on the foot between
the spring and the presser foot ankle.
Press back until the foot snaps into place.
Cambio del prénsatelas
1, Poner primero ia aguja en su posición
más alta.
Empujar el prénsatelas ligeramente ha
cia adelante.
2. Introducir el pasador transversal del
prénsatelas entre el cuerpo de éste y el
muelle. Empujar oblicuamente hada
atrás hasta que el pie encaje.
Presser foot pressure
The presser foot pressure is adjusted with
the dial on the front of the machine. The
higher the number the more pressure on
the fabric. Soft fabrics should be sewn at
low pressure.
Presser foot lever
The presser foot is raised and lowered with
the presser foot lever. The presser foot must
be lowered when sewing.
Presión del pie del
prénsatelas
La presión del pie del prénsatelas se
efectúa mediante una rueda graduada
de ajuste situada en el lado izquierdo de
la máquina. Cuando mayor sea el núme
ro de regulación, mayor será la presión
en el prénsatelas. Telas finas se cosen
con una presión baja del prénsatelas.
Palanca de elevación del
prénsatelas
Por medio de la palanca se sube o baja el
prénsatelas, Al coser el prénsatelas debe
estar en su posición inferior.
12
Page 11

Reverse
Marcha atrás
Your machine sews backwards when the
stitch length dial is pressed. The machine
sews forward when the dial is released, For
permanent reverse, turn the stitch length
dial to position 0 .
Lowering the feed teeth
La máquina cose hada atrás cuando se
presiona el volante para la longitud de pun
tadas. La móqina cose de nuevo hacia
adelante al soltar el volante.La máquina se
puede bloquear en la posición marcha
atrás al girar el volante para la longitud de
puntadas hasta la posición T .
Bajada del transporte de
dientes
The feed teeth are lowered when you turn
the stitch length dial to the right to . Turn
the dial to the left if you wish to raise the feed
teeth. The feed teeth will not come up until
you begin to sew.
The feed teeth are lowered when sewing
buttons and for free-hand work.
Se baja el transporte de dientes, girando el
regulador desde la derecha en us: y se
sube girando el regulador desde la izquier
da, Los dientes del transporte se alzan auto
máticamente al empezar a coser.
La bajado del transporte de dientes se re
quiere para coser botones y para opera
ciones de remendar.
13
Page 12

stitch width
Amplitud de puntada
When you select a stitch the machine auto
matically sets the best stitch width. By turning
the stitch width dial (placed inside the stitch
selector) you can change the stitch width.
The width Is numbered 0-5,5.
By setting the stitch width dial at 2.5 you can
halve the width of the stitches. The stitches
will then get a different look.
Stitch length
Cuando se elige una costura, la máquina
seleccionará automáticamente la ampli
tud de puntada adecuada.
Lo amplitud de puntado se puede cambiar
mediante el selector de puntada, gradua
do en medio milímetros entre 0-5,5 mm (si
tuado al interior del selector de puntada).
Al poner el selector de puntada en 2,5 se
parte a medias la amplitud de las punta
das. Las puntadas obtienen un aspecto
nuevo.
Longitud de puntada
Recommendations for the suitable setting
are given for the forward motion stitches.
Always use the recommended setting to
start with but experiment until you arrive at
the exact setting for the actual work you will
be doing.
14
Cuando uno puntado ho sido selecciona
do se muestra la información sobre la longi
tud más adecuados o la costura en telas
normales.
Empiece siempre por la longitud de punta
da recomendado; después podrá ir bus
cando la longitud de puntada que consi
dera más perfecta paro la labor en cues
tión.
Page 13

cnmii u\nm
‘ •• ■ • u 0# 04 04 oa \i oa t ü 2.5
C3 03 o
9 B 8 B A A
rvíí IN SVrtDCN
Stitch selection
Your machine will sew all the stitches pic
tured on the front. The stitch is set by turning
the stitch selector - the upper dial. A colored
marker lines up while turning the stitch se
lector, showing which stitch is set.
Check that the needle is in its highest posi
tion before you turn the stitch selector.
The lower dial is to adjust the stitch length.
When you wish to use one of the stitches
within the orange area, the trimotion stitch
es, you turn the stitch length dial to the left
until it reaches the orange area
stitch length is set for these stitches. Recom
mendations for the suggested stitch length
are given in the extension of the orange line.
There are letters below the stitch pictures
which indicate the most suitable presser
foot for each stitch. The letter is also marked
on the presser foot.
If there, on your machine, are stitches shown
on on upper group, see page 26 "Stitch
Variation".
-------
■■. The
DJ^AAACCCC
Selección de puntada
En lo parte frontal de la máquina se en
cuentra el selector de los costuras que Vd,
puede realizar con ella. La costura desea
da se obtiene girando el selector de punta
da, Un cursor de color se mueve simultáne
amente al girar el selector de puntada y
muestra lo que ha sido seleccionada. Con
trolar que la agujo esté en su posición más
alta al girar el selector de puntada.
Con el volante inferior se cambia lo longitud
de puntados,
Cuando quiera realizar alguna de las cos
turas de la zona anaranjada debe girar el
regulador de longitud de puntada a lo iz
quierda, hasta la zona anaranjada---------™.
Esto significa que esos costuras tendrán
ahora una longitud incorporada fijo.
En lo prolongación de la línea anaranjada
se presenta la información sobre la regula
ción más conveniente al tipo de costura
seleccionada,
Debajo los símbolos de costuras hay letras
que Indican el prénsatelas más apropiado
para cada costura. La misma letra se en
cuentra en el prénsatelas.
Si la máquina presenta las costuras más,
véase la póg 26 "Variación de puntada".
15
Page 14

Buttonholes
Ojales
Mark the buttonhole location on your fabric. II
Use presser foot C. ' '|=n
There is a small finger at the front of the riJHJ
presser foot. For a corded buttonhole loop
your cord around the finger as Illustrated.
Decrease the thread tension to 2-4. Always
test sew a buttonhole on a scrap of the
fabric you are going to use.
1. Set the stitch length dial the buttonhole
symbol. Set the stitch selector to button-
hole.
sired length,
2. Turn to symbol
will sew a straight stitch in reverse. Stop
when you have reached the same length
as the first column.
3. Turn to I . Now the machine will stitch
the bar tack, Sew three or four stitches.
4. Turn to |I . Sew the other column over
the straight stitch the same length as the
first one.
5. Turnbackto I .The machine will stitch the
final bar tack. Sew three or four stitches,
. Sew the first column to the de
_ , Now the machine
6. Turn to J and lock the threads with a
few stitctos, Hold the fabric white locking.
16
Marcar sobre el tejido el sitio del ojal.,
Utilizar el prénsatelas C.
En la parte delante del prénsatelas hay un
talón. Cuando se utiliza un hilo de refuerzo,
debe ser enganchado en el talón como
indica la figura.
Afloje la tensión del hilo hasta 2-4. Haga un
ojal de prueba sobre un retal del mismo
tejido.
1. Gire el regulador de longitud de punta
da hacia el símbolo para ojales. Gire el
selector de puntada hacia ojales, l| ,
Cosa el primer borde. Pare al alcanzar el
largo deseado,
2. Gire al | . La máquina cose una costu
ra recta en marcha atrás. Pare al alcan
zar la misma largura que el primero.
3. Gire al | .La máquina cose la primera
presilla. Haga unas 3-4 puntadas,
4. Gire al |l . Cosa el otro borde del ojal
sobre la costura recta de la misma largu
ra que el primero,
5. Gire otra vez al | , La máquina cose la
segunda presilla. Haga 3-4 puntadas.
6. Gire, finalmente, al j y haga una pun
tadas de remate. Sujete el tejido.
Page 15

Sewing buttons
Costura de botones
ower the feed teeth sz*: . Snap off the
oresser foot, place the button and lower the
oresser bar ankle to hold the button in
place.
Turn the stitch selector to zig-zag,
Check to be sure that the needle .
goes into the right hole of the but- :
ton. Use the stitch width dial to set
the zig-zag width. Turn the hand
wheel towards you and check to
be sure that the needle goes into
the holes of the button. Sew 5-6
Set the stitch width dial to 0 and
lock the threads with a few stitch
es.
Use the clearance plate to sew
button with a shank. Use the thin
end when sewing buttons on light
fabrics, the thick end for heavier
fabrics.
Push in the plate between the but
ton and the fabric. Lower the
presser bar and sew on the but
ton. Pull the threads between the
button and the fabric.
Wind the threads a few times
around the shank and tie the
ends.
Bajar el transporte zzt , Sacar el prénsate
las, , , ,
Colocar el botón en la tela y bajar la barra
prénsatelas. Girar en zig-zag.
Asegúre de que la aguja coinci
da con el agujera derecho del
botón. Utilizar el selector de am
plitud de puntada para cambiar
la amplitud de zig-zag. Girar el
volante manual y asegurarse de
que la aguja coincida con los
agujeros del botón.
Coser 5-6 puntadas. Gira el regu
lador de amplitud de puntada al
0 y haga una puntadas de rema
te.
A menudo se necesita coser un
botón con "cuello". Para ello, se
emplea el suplemento para bo
tones. La parte delgada para te
la mediana y la parte más grue
sa, para géneros pesados.
Colocar el suplemento entre el
botón y el género y coser el botón
como se indicó anteriormente.
Retirar el suplemento, meter los
hilos entre el botón y el género,
dándoles unas cuantas vueltas
alrededor del "cuello" y final
mente hacer un nudo, cortando
los hilos sobrantes.
Buttonhole knite
The knife is used to cut buttonholes. It is also
useful for removing stitches sewn in error.
Abridor de o|ales
El abridor de ojales se utiliza para abrir los
ojales. Sirve también para abrir costuras
erróneamente cosidas.
17
Page 16

straight stitch
Costura recta
straight stitching ; is used to join fabric
which does not stretch and for seams which
wiil not be subjected to great strain,
Turn the stitch length dial to the recom
mended setting 2,5 to start with but experi
ment until you arrive at the exact setting for
the actual work you will be doing,
Example: Increase the stitch length when
basting and when topstitching,
Clearance plate
The clearance plate is used when sewing
over thick seams.
One side of the plate is thicker than the
other. Use the side that suits the thickness of
the seam best.
Costura recta ¡ se utiliza para unir partes
de tela no extensibles y para costuras que
no están expuestas a mayores esfuerzos.
El regulador de la longitud de puntada se
pone en la posición base recomendada
de 2,5 mm. Repite hasta obtenir la mejor
posición para su trabajo.
Aumentar la longitud de puntada al hilva
nar y al realizar pespuntes decorativos,
Placa para costuras tupidas
La placa para costuras tupidas se utiliza
para coser sobre costuras muy gruesas.
Una parte de la placa es más gruesa que la
otra. Usar la parte que tenga un grosor más
o menos parecido al de la costura.
18
-tm.
Page 17

Re-inforced straight
stitch
Costura recta I
reforzada [
urn the stitch length dial to the orange area
-----
m to sew re-inforced straight stitch
: . This stitch is stronger than ordinary
traight stitch, due to the fact that it is a triple
2nd elastic stitch.
^he re-inforced straight stitch can be used
or heavy stretch fabrics, for crotch seams
which are subject to considerable strain
3nd for topstitching,
Needle positions
You can select straight stitch and re-in
forced straight stitch, with the needle in left
position. The needle position can be ad
justed in steps. Use the stitch width dial, turn
to the right to reach the right position,
To edge stitch, you should take advantage
of the possibility to set the needle to the left
or the right position.
Fit presser foot A when sewing light fabrics
and presser foot D when sewing other fab
rics.
Place the fabric and sew
so that the edge follows
the inside right edge of
the presser foot D or the
first mark of the left edge
of the presser foot A,
Gire el regulador de longitud de puntada
hacia la zona anaranjada
den coserla costura recta reforzada ; .
La costura es más fuerte que la costura fecta normal porque es triple y elástica.
La costura recta reforzada es adecuada
para coser en materiales gruesos, elásticos
y para costuras que están expuestas a ma
yores esfuerzos.
----------
" se pue
Posición de la aguja
En costura recta y costura recta resforzada
se puede cambiar la posición izquierda de
la aguja. Esto se efectúa con el regulador
del ancho de puntada, girar a la derecha
para llegar la posición derecha.
Cuando quiera coser un pespunte cerca
de un borde exterior, es más fácil coser con
la aguja en posición de izquierda o dere
cha.
Para géneros muy ligeros se emplea el
prénsatelas A y para los demás el prénsate
las D.
Ponga el género con su
borde exterior contra el
lado interior del "dedo"
derecho del prénsatelas
D o contra la primera en
talladura del "dedo" iz
quierdo del prénsatelas
A y cosa el pespunte.
If you wish to sew about 5 mm from the
edge or sew a narrow hem, use presser
foot A and set the needle to the right
position.
Place the edge of the fabric so that it
follows the outside right edge of the
presser foot to sew a hem.
Cuando quiera pespuntear aprox. 5mm
del borde o hacer un dobladillo estre
cho, se hace con la aguja en posición
derecha.
Utilizar el prénsatelas A. Poner el borde
del tejido debajo del borde exterior de
recho del prénsatelas y coser un pes
punte o un dobladillo.
19
Page 18

Sewing zippers El: J
The zipper foot E can be attached so that it is
located either to the right or to the left of the
needle, making it easy to sew both sides of
the zipper. To sew the other side of the zipper,
re-position the zipper foot.
Cosido de cremoileras tiJ
Aplique el prénsatelas E de tal manera que
el mismo quede a la derecha o a la iz
quierda de la aguja, y de esta forma resulte
fácil coser ambos lados de la cremallera,
Para coser el otro lado de la cremallera
retirar el prénsatelas y colocarlo de nuevo,
de manera que éste quede al otro lado.
Lopped zipper
1. Sew the seam together to the bottom of
the zipper placket. Baste the rest of the
seam. Leave about 2 cm open at the top.
Press seam open. Use right needle posi
tion,
2. Place presser foot E to the
left of the needle. From the
wrong side fold the fabric to
one side so both seam al
lowances are free. Fold
and press the left allow
ance under approximately
0.5 cm from the basted
seam.
3. Place the zipper under the folded seam
allowance with the teeth as near to the
fold as possible and stitch zipper to fabric
close to fold. Begin sewing at the bottom
of the zipper.
Before reaching the zipper pull, lift the
presser foot ond slide the zipper pu I
down past the zipper foot. Lower the foot
and sew to the top of the zipper.
Cremaiiera oculta
Una las costuras hasta la marfcación de
la cremallera.
Hilvanar la abertura. Dejar aprox, 2 cm
abiertos al comienzo de la abertura.
Planchar la costura. Emplear la posición
derecha de la aguja.
2. Colocar el prénsatelas E a la
izquierda de la aguja. Dar la
vuelta a la prenda de tal forma
que el revés quede por enci
ma y doblar la prenda al lado
hasta que se vean las dos cos
turas.
Doblar el aumento de la costu
ra del lado izquierdo, como un
pliegue, a unos 5 mm del hilva
Colocar la cremallera con alfileres de
bajo de la costura doblada con los dien
tes lo más cerca posible del doblado y
coser el lado izquierdo. Empezar a coser
desde abajo.
Unos centímetros antes de llegar al final de
la costura, levantar el prénsatelas y abrir la
cremallera, deslizando el cierre de la mis
ma por detrás del prénsatelas. Bajar el
prénsatelas y terminar la costura,
nado.
20
Page 19

Use left needle position, Snap on the zip
per foot so it is to the right of the needle.
Turn the garment to the right side. It is
important that the seam on the right side
is sewn straight. Before you begin to sew,
mark the seam line. _
Sew the other side of the zipper, Begin
stitching across the bottom and continue
upwards.
Remove the basting.
4. Emplear la posición izquierda de la agu
jal' -, -,
Retire el prénsatelas y coloquelo de nue
vo, de manera que éste quede a la dere
cha de la aguja, Es importante que la
costura del derecho quede recta y boni
ta, Es muy fácil efectuar eso marcando la
línea de la costura.
Fijar con alfileres y coser el otro lado de la
cremallera dentro de lo lineo morcodo.
Coser uno costura transversal al final de
la cremallera y continuar hacia arriba,
If you want to sew a "gentleman's zip
per", follow the instructions but insert in
the other direction.
Zig-zag
he zig-zag 1 is utilized for sewing on
ice, bound edging and appliqués,
he zig-zag width will be decreased
•om the left 5,5 mm width, steplessly to
le right to 0 mm. In this position the ma
rine sews straight stitch in the right nee-
il© position. Experiment until you reach
le best setting for your actual work.
Si se quiere coser una cremallera de "ca
ballero" se hace todo según la descrip
ción, pero invertido,
Zig-zag
La costura zig-zag \ se usa, p.e].,
para aplicar encajes, ribetear con cin
tas y también para hacer aplicaciones.
La amplitud de zig-zag es progresiva
mente regulable hada la izquierda 5,5
mm amplitud a la derecha a 0 mm. Aho
ra la máquina cose una costura recta
con la aguja en posición derecha. Des
de allí puede modificar hasta encontrar
las regulaciones más apropiadas a su
labor,
21
Page 20

Three-Step zig-zag
Zig-zag de tres pasos
Overcasting ‘>
Three-step zig-zag !> is suitable for over
casting most fabrics. Trim the edges of the
fabric before overcasting. Make sure that
the needle sews over the edge of the fabric.
Place the fabric according to the presser
foot (see picture),
Stitch width 5,5,
Vífeívíi -A'
Mending and darning
Three-step zig-zag , can be utilized for
mending and darning. A threadbare spot is
mended by sewing back and forth with
three-step zig-zag. Use reverse and for ev
ery row of stitching, guide the fabric slightly
to the side. If the fabric is very worn, a piece
of fabric or lining may be attached to the
reverse side of the material as reinforce
ment.
22
Sobrehilado )>
La costura zig-zag de tres pasos -> es
conveniente para sobrehilar en la mayoría
de los tejidos.
Recorte los bordes antes de sobrehilar. Pro
cure al coser que las puntadas cojan bien
el borde tomando los hilos. Coloque la tela
seguir la referencia del prénsatelas (ver
illustración). Amplitud de puntada 5,5.
Remendar y zurcir
El zig-zag de tres puntadas, , es la cos
tura de utilidad más versátil para remendar
y zurzir, Para remendar otros desperfectos,
bastan unas cuantas pasadas con el zig
zag de tres puntadas hacia adelante y
atrás. Utilice marcha atrás y desplace la
tela lateralmente al coser. Cuando el des
perfecto así lo requiera, suplemento el lado
inferior con un trozo de tela de refuerzo.
Page 21

Sewing terry cloth
Tejidos esponjosos
Terry doth is a rather loosely woven fabric in
which seams easily break,
Sew the garment together with straight
stitch. Trim the seams and press the seam
allowance flat and sew the edges down
against the garment on the wrong side with
three-step zig-zag, Even though the stitch
ing goes right through to the "righf side of
the garment, it is nearly invisible and even
the wrong side looks neat.
Seam and overcast
Some stitches can be used for seaming and
overcasting in one sewing step directly on
the edge where a 5 mm (1/4") seam is al
lowed. „
Place the fabric so that the inside right toe ”
of the presser foot follows the edge of the ,,j
fabric.
Presser foot J is used to overlook and over
cast many different fabrics with the excep
tion of heavy, firm fabrics. The pin fitted on
the presser foot should follow the edge of
the fabric and will in this way prevent the
fabric from puckering. Stitch width 5,5 mm.
-ollow the recommended setting, given for
stitch length.
El tejido esponjoso suele tener una textura
bastante floja, que ceda fàcilmente en las
costuras. Cosa y una la prenda con costura
recta, ^
Después, corte los aumentos limpiamente y
planche ambos bordes de la costura.
Después, cosa al borde de los cantos, por el
revés, con el zig-zag de tres puntadas. Aun
que la costura traspase el tejido, es casi
invisible y el revés tiene buena presenta
ción.
Unión y sobrehilado
Ciertas costuras se utilizan para unir y so
brehilar directamente sobre el borde en
una operación con 5 mm de costura.
Ponga el género de manera que el borde
interior del "dedo" derecho del prénsatelas
guíe el canto del tejido.
El prénsatelas J se utiliza para el sobrehilado
y para costuras al canto en todos tipos de
tela, con excepción de telas muy gruesas y
duras. ^
La punta del pie debe estar canto a canto
con la tela e impedir así que se contraiga el
borde de ia tela.
«gìj
Ancho de puntada 5,5 mm,
Por lo demás siga los recomendaciones so
bre la longitud de puntado,
Overcast stitch, may be used to sew light
and medium non-stretch fobric and light
stretch fabric. Use presser foot J.
Overlook, is chiefly used for sewing heavy
stretch fabric. Use presser foot B,
Puntada semi-overlock, se emplea para te
las finas V corrientes, para géneros no elásti
cos y para telas finas elásticas. Utilizar el
prénsatelas J.
Puntada de overlock se emplea para telas
gruesas y elásticas.
l%5
Utilizar el prénsatelas B.
23
Page 22

Flatlock -
Double-Action stitch
Puntado overlock triple
- Puntada de tricot
Flatlock or Double-Action stitch 5 : -
is suitable for sewing overlapped seams
and decorative hems.
You can produce a decorative hem by fold
ing a single hem to the wrong side and
sewing the flatlock from the right side. Trim
excess hem to stitching from the wrong side.
Puntada overlook triple o puntada de tricot
I t , es una costura que se emplea
para costuras montadas y bastillas.
Para obtener una bastilla decorativa, doble
la tela sobre su revés, formando así una
bastilla, y cosa con overlock triple sobre el
lado derecho.
To sew an overlapped seam, lap one piece
of fabric 1 cm over the other piece and sew
flatlock stitch over the fabric edge on the
right side. Trim from the wrong side or sew
another seam from the right side.
When gathering with narrow, flat elastic or
elastic cord, stitch it with the double-action
stitch. To be sure the elastic does not get
stitched in by mistake but can run freely un
der the stitching, use presser foot A or B and
slip narrow elastic between the toes of the
foot.
24
Para confeccionar una costura montada,
coloque una parte del género sobre la otra
y cosa con overlock triple sobre el lado de
recho del borde del género y recorte el
aumento de la costura limpiamente en el
revés.
AI fruncir con cordoncillo estrecho, redorado
o llano, utilice la puntada de tricot. Asegúre
se de que el cordoncillo se desliza libre
mente, sin estar cogido por las puntadas.
Utilice el prénsatelas A o B.
Page 23

Blind hem
Presser foot D is used for blind hem. Fold the
material as shown,
Dobladillo
El prénsatelos D se utiliza para el dobladillo
a puntada invisible.
Make sure that the fold line of the fabnc
rides in the groove underthe right side of the
presser foot. Practice using a scrap of mate
rial and compare with the illustrations.
1. If the stitch does not catch the folded
edge, increase the stitch width.
TVv V VVv'Vy'^^'v^'^
2. If the stitch catches too much of the fold,
decrease the stitch width.
Doblar el género como muestra la figura.
Hacer una prueza y comparar con las figu
ras.
1. Cuando las puntadas no alcanzan e
borde doblado del género, aumentar el
ancho de puntada.
2. Cuando las puntadas sobrepasan de
masiado el borde doblado, reducir el
ancho de puntadas.
3. For an invisible hem the needle catches
a single thread of the folded edge.
3. Un dobladillo a puntada invisible correc
ta: la aguja debe caer de forma tangen
cial sobre el borde de la doblez del género.
25
Page 24

Decorative Stitches i
Costuras decorativas
In addition to the stitches already de
scribed, there are a number of beautiful
decorative stitches,
Set the desired stitch with the stitch selector
dial. At first try the recommended stitch
length then adjust as needed, Always make
a test first on a scrap of the fabric you are
going to use. Start sewing slightly in from the
©dQ©.
When sewing light-weight material you will
get a better result if you place a stabilizer
under the fabric.
■................... ,1- -V
Stitch variation
Select one of the stitches from the upper row
and decrease the stitch width according to
recommendation above the stitches. This
gives you a number of additional stitches,
Además de ias costuras ya descritas hay
algunos tipos de puntada que permiten
ejecutar costuras decorativas.
Gire el selector sobre la puntada deseada y
siga ias recomendaciones en longitud de
puntada.
Pruebe primero sobre un trozo de ia tela
que vaya usar.
Comience su costura a algunos mm. dei
borde de la tela.
Las telas finas tienen tendencia a fruncirse
con costuras decorativas. Para evitarlo pue
de coser junto con papel de seda o viiselina.
’’Stitch variation" - Variación
de puntada”
Seleccionar una de las costuras en la línea
de arriba y reducir la amplitud según ias
recomendaciones sobre las costuras. Se
pueden todavía elegir un número de costu
ras más.
26
w_,..
X m
'!■
r
t W. - '
"
y
r
\
-A p *
>
■
tí». =
-W
r
>
..
, t; ^ T:
■ f. . ..A-
•¿U ^.11
1 -
í**
1
r
>
?
I
i
Page 25

Maintenance
Mantenimiento
Changing the light bulb
The light bulb is placed to the left of the
needle, Place the rubber sheath found in
the accessory bag around the bulb, turn a
quarter of a turn in the direction of the arrow
and remove the bulb.
When inserting, place the rubber sheath
around the new bulb, insert the bulb and
turn a quarter of a turn in the direction of the
arrow.
Use light bulb designed as indicated on the
front of the machine.
Cambio de la bombilla
La bombilla está situada a la izquierda de la
aguja. Empuje el soporte de goma hada
arriba y alrededor de la bombilla y gire un
cuarto de una vuelta en dirección a la fle
cha sacando la bombilla.
AI colocar la bombilla ponga el soporte de
goma alrededor de la bombilla colocán
dola en el soporte de bombilla, empuje y
gire un cuarto de una vuelta en dirección
de la flecha. La potencia de la bombilla
está indicada en vatios en la parte delante
ra de la máquina.
Core of the machine
To keep your sewing machine operating
satisfactorily it requires, like other precision
machines, regular cleaning.
It need not, however, be lubricated.
Mantenimiento de la máquina
Para que la máquina siempre trabaje a su
plena satisfacción, necesita una limpieza y
regulación adecuada como cualquier má
quina de precisión. Sin embargo, no se de
be lubrificar nunca.
27
Page 26

Maintenance
Mantenimiento
Removing the stitch piate
Remove the presser foot and the boDDin
cover. Lower the feed teeth. Ptace the stitch
plate opener on the brush. There is a recess
at the rear of the stitch plate. Insert the stitch
plate opener at the recess and turn.
When necessary, the feed teeth and the
bottom of the bobbin area must be cleaned
with the brush, which you will find with the
accessories,
Replacing the stitch plate
Replace the stitch plate about 5 mm in front
of the rear edge and push it badwvard.
Replace the bobbin cover.
Sacar la placa de aguja
Retirar el prénsatelas y la tapa de bobina,
bajar el transporte de dientes. Coloque el
abridor de la placa de aguja en el estillo de
la brocha. En la parte de atrás de la placa
de aguja hay una entalladura. Ponga el
abridor en la entalladura y gire.
Limpiar debajo del cesto de bobina
A veces es necesario limpiar también de
bajo del cesto de bobina.
Se limpian mediante el pincel de la caja de
accesorios.
Sacar la placa de aguja
Coloque en su sitio la placa de aguja aprox.
5 mm delante del borde posterior empuján
dolo hacia atrás. Coloque la tapa de bobi
na.
28
Page 27

Fault-finding
Always start by checking the needle
An important part which needs to be
changed from time to time is the needle.
Always start with a new needle as soon as
you discover that a seam is not what you
expected. Test sew on a scrap of the fabric
you are sewing.
Check that you have chosen the correct
needle and see that it is correctly inserted,
see page 10.
Unattracfive stitches
The thread tension is not correct. See page
11. . .
Make sure that the thread is not catching.
Certain thread spools are unsuitable for
spooling from a horizontal spool pin. Tty in
stead with the vertical spool pin,
The machine may be incorrectly threaded.
The correct threading is shown on page 8,
Wrong lower thread. It should be of the
same thickness as the upper thread.
The needle breaks
You may have helped the machine to feed
by pulling the fabric. The needle can strike
against the stitch plate and break.
The upper thread breaks
Check the thread spool to see that it has not
caught in any way.
The needle eye may have sharp edges
which cut the thread. If so, change the nee
dle, See page 10. ^ ^ m
The upper thread is incorrectly threaded.
See page 8.
The upper thread may have too much ten
sion. Refer to page 11.
The thread is knotted.
The hole in the stitch plate may be chipped
and hav© sharp edg©s. Slight damags to
the stitch plat© can possibly be polished or
filed but we recommend that you replace \t
The lower thread breaks
The lower thread may be incorrectly thread
ed. See page 10.
The stitch plate hole is damaged. See up
per thread breaks".
Irregular bobbin winding
This may be due to poor quality thread.
When sewing with cotton thread, increase
the thread tension.
The machine is not correctly threaded tor
bobbin winding. See page 9.
Posibles averías
Controlar la aguja
La parte más importe que hay que cambiar
de vez en cuando es la aguja. Por lo tanto,
cuando alguna vez una costura no sea sa
tisfactoria, comprobar con uno aguja nue
va en un trozo de tela. Controlar que se
haya elegido la agujo correcta y asegurar
se de que ia oguja sea introducido hasto su
tope y que el tornillo está apretado correc
tamente, véase la pág 10.
Puntadas talsas
La tensión del hilo no es correcta, vease la
pág. 11, , , , ,
Asegurarse que el hilo no está bloqueado.
Ciertos porto-carretes no son adecuados
pora el devanado desde porta-carretes
horizontales.
Po lo tanto, comprobar con un porto-carre
te vertical, ,
El enhebrado no es correcto, verificar según
la pág, 8, ,
Hilo inferior inadecuado. Este debe ser igual
que el superior.
Rotura de la aguja
Nunca se debe tirar de lo telo durante el
cosido, porque lo agujo se puede romper
al tropezar contra la placa de aguja.
Rotura del hilo superior
Examinar el carrete del hilo y verificar si ei
hilo se ha enganchado en alguna porte,
Podría ser que el agujero de lo agujo no
©stuviero lo suficiente bien pulido.
Cambiar la agujo, véase la pág. 10. _
El hilo superior está mol enhebrado, véase
la pág, 8. ,
La tensión del hilo superior es demasiado
fuerte. Ver la "Tensión del hilo", póg, 11.
il hilo tiene nudos.
El agujero de la placa de la agujo se ha
dañado por los continuos pinchazos de la
aguja. Hay que pulir el agujero, pero lo me
jor es cambiar la placa de aguja.
Rotura del hilo inferior
El hilo inferior está mal enhebrado, ver la
pág. 10, , ,
Se ha dañado el agujero de la placa de
agujo, ver arriba,
Bobinado Irregular del hilo
Puede ser a causa de la difidente calidad
del hilo,
29
Page 28

The fabric puckers
The upper thread tension is too tight. See
page 11 for correct thread tension.
The machine does not feed the fabric
The stitch length is too short. Increase stitch
length, ,
jhe feed teeth may be lowered. Raise them
by turning the stitch length dial to the left,
jhe feed teeth are full of dust and dirt. Clean
with the brush. See page 28.
The seam is too ioose - fabric iayers not
held together
The thread tension is far too loose. Page 11
shows how to adjust the thread tension.
Machine runs sluggishly
Dirt or lint has packed under the needle
plate. Loosen the plate and brush clean
between the feed teeth. See page 28,
Dirt or lint has packed in the hook. Remove
the bobbin and clean with the brush. See
page 28.
Expert assistance
Have your machine "tuned up" regularly by
your dealer.
If you have followed the preceding points
and still do not get satisfactory results, you
should contact the dealer where you
bought the machine. Your dealer will always
be pleased to help you solve your sewing
problems. , ,
When the machine is being checked, it is a
great help if it can be test sewn under as
similar conditions as possible as when you
used it,
Remember to take a sewing sample along
with you, preferably on the fabric and with
the thread you intend to use.
A sewing sample will often give much better
information than words.
A1 coser con un hilo de algodón, aumentar
la tensión del hilo.
La máquina no está correctamente enhe
brada para el bobinado, ver la póg, 9,
La tela se frunce
La tensión del hilo superior es demasiado
fuerte. Tensión correcta del hilo, ver la póg.
n.
No hay avance del tejido
La longitud de la puntada es demasiado
corto. Aumentar, _
Puede ser que el transporte esté bajado, ver
la póg. 13,
El transporte está lleno de pelusilla y apres
to. -o
Limpiarlo con un pincel, ver la pág. 28.
La costura resulta demasiado tloja - las
capas del tejido no están fuertemente
unidas
La tensión del hilo es demasiado floja. Ten
sión correcta del hilo, ver la pág, 11,
La máquina marcha con dificultad
Puede ser que haya acumulado demasia
da pelusilla y apresto por debajo de la pla
ca de aguja. Quitar la placa de aguja y
limpiar el dentado del transporte con una
brocha, ver la pág. 28.
Puede ser que haya acumulado pelusilla y
apresto en el garfio.
Retirar la cápsula y limpiarla con una bro
cha, ver la pág. 28.
Asistencia técnico
Cuando se hayan seguido todas las instruc
ciones mencionadas, y, a pesar de ello, no
se consigan resultados satisfactorios, po
nerse en contacto con el establecimiento
que le vendió la máquina.
Allí, le atenderán gustosamente con los
consejos e instrucciones correspondientes.
También le aconsejerón donde puede
mandar la máquina para un servicio. Sería
de mucha utilidad y ayuda para el personal
técnico acompañar a la máquina unas
muestras del tejido e hilos utilizados, como,
asimismo, una muestra del cosido defec
tuoso.
Muchas veces una muestra del cosido de
mejor información que un informe oral.
30
Page 29

We reserve the right to change the machine
equipment and the assortment ot accesso
ries without prior notice, or make moditications to the performance or design.
Such modifications however will always be
to the benefit of the user and the product.
Nos reservamos el derecha a modificar la
máquina, el equipo ó los accesorios extras
sin previo aviso. Tales modificaciones se
rán siempre para beneficio del consumi
dor y del producto.
31
Page 30

Deckaolion dl Confoimily to EC-dwective
Herewith we cotiflnn that this Sewing Machines in its
essential paite. fulBIs the LVD Directhre 73^EC,
EMC dire«^ 88/336/EEC and the CE MaiWng
Directive 93/ea^EC.
Tliis conBnnation is based upcwi or Technical
Construction Files, performed by SEMKO.
The complete archive file is drawn up and mamtained by.
HVAB
Ftesearch & DerelqM»«"»
[;^i;^utotient HC-TX
S-561 84 Hudcvama
Telephwre; lrrt+463614^72
Telete; lnt+46»141ire
FebruEuy 13 HVAB
Ingmstf Sven^cm
Certific^ion Engineer
«12M4MS
412 40 17-45 Prlnled In Sweden
Fauns Tryckert, varnamo t»»4
 Loading...