

Page 1
Page 2
Certificate of Registration
INTER NAT IO NAL SEW ING MA CH INE CO RP
LIFE-TIME GUARANTEE
Each New Sewing Machine is warranted to be tree from defects , in materials and
workmanship entering into the manufacture and assembly for the life of the machine. Any part,
when returned transportation charges prepaid, will be repaired or replaced if proved to be
defective.
Parts and accessories, such as belts, needles, bobbins, pulleys, attachments, etc., which
normally require replacement, are not covered by this warranty. Electrical equipment as
supplied by the manufacturer is warranted for one (I) year against defects in materials and
workmanship.
This warranty does not cover any machine which, in our opinion, has been altered
or damaged so as to affect its performance, nor any machine not used under normal household
conditions, nor any machine not given reasonable care in accordance with the printed instructions.
Date of Purchase ;
Dealer’s Name:
Signed By :
___________________
Sewing Machine
Serial No.
Model No.
Purchaser
Address
City
Date of Purchase
Dealer’s Name
Detach and Mail—No postage necessary
Page 3
rPostage Stamp]
No
Necessary
[If Mailed in thej
kUnited Stales/
BUSINESS REPLY CARD
INTERNATIONAL SEWIN8 MACHINE CORP
1001 KIRKEBY CENTER,
10889 WILSHIRE BOULEVARD,
LOS ANGELES 24, CALIFORNIA
Page 4
Page 5

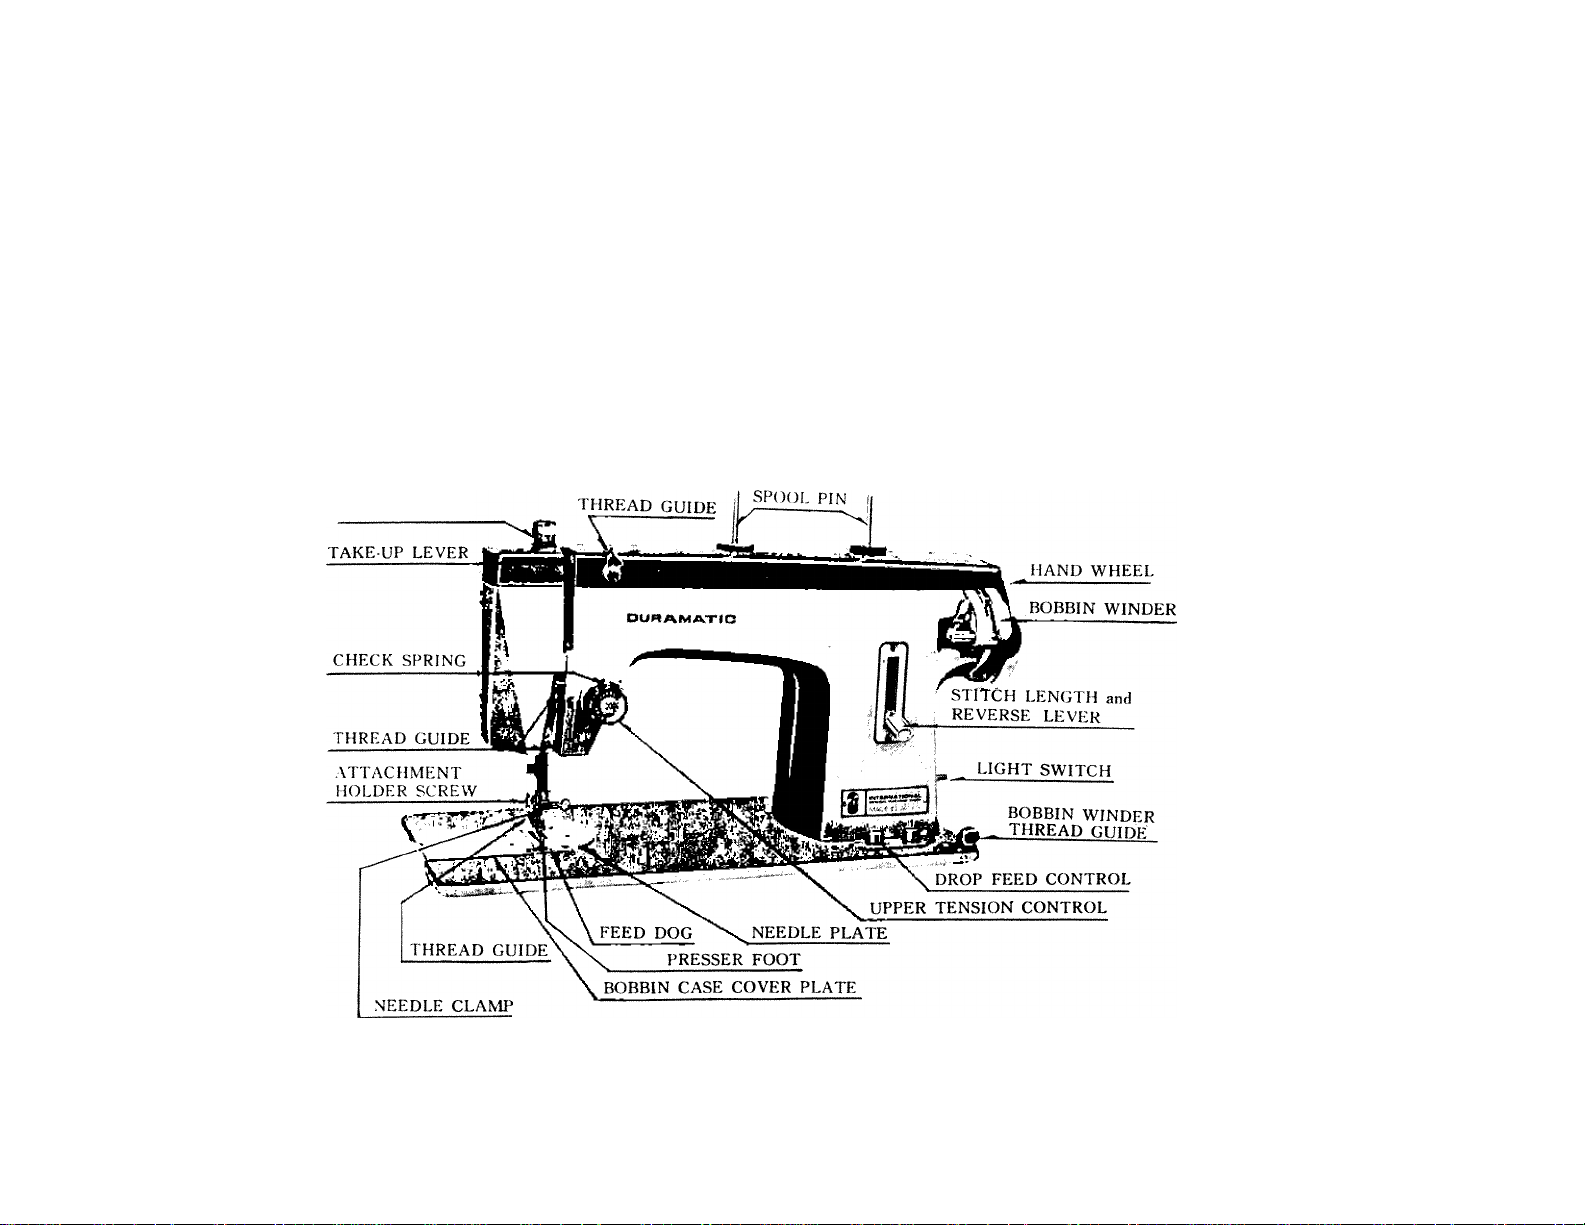
FEATURES OF THE DURAMATIC 102
1. De luxe two-tone color.
2. Clean simple lines. . . acclaimed by everyone as the most beautiful
sewing machine in the world.
3. Controls are grouped on a panel. They are well placed from
both the esthetic and practical standpoint providing an unusual
ease of control.
4. The large hinged bobbin case cover plate provides easy access to
the bobbin case.
5. Exclusive hinged face plate cover swings open to provide easy
access to sewing light. . . and easy oiling of the face plate mec
hanism.
6. Sew-light over needle spotlights your work eliminating any possi
bility of eye strain.
7. New exclusive upper tension control-esthetic and practical-adds
to the simplicity and beauty of styling.
8. Pressomatic calibrated pressure control is faster, more accurate
and instantly adjustable to the proper and correct presser foot
pressure.
9. Lifetime, dustless, slipless, tooth-type motor belt provides positive
control at all sewing speeds.
10. Cast "no-twist” motor bracket eliminates torque and vibration.
Page 6

DE LUXE SEWING MACHINE
11. Specially designed all-in-one stitch length and reverse lever prov
ides positive control both forward and backward.
12. Drop feed control designed to permit feed dog to be at proper
height for heavy materials and for thin materials. .. to be comp
letely disengaged for darning or embroidery work. . . is plunger
designed for quick positive return action.
Page 7

GENERAL CARE AND OILING
To obtain full and complete efficiency ^rom your sewing machine,
study these instructions carefully to become familiar with its operati
on and the controls and devices which are new to you.
Your sewing machine was carefully adjusted, tested on every kind of
sewing and was passed by the Chief Inspector after it was found to
be perfect in every respect.
Keep your machine cleaned and oiled. . . use thread of good quality
and of proper size and weight tor the material. . . use needles ot good
quality and of the proper size for the weight of thread you are using.
Be sure that the bobbin is evenly wound... and that the machine
is threaded correctly.
Practice sew'ing on your machine so that you will operate it easily
and naturally when you are making a garment.
Practice bobbin winding by taking the thread from one bobbin to
another.
Remove and replace the needle several times. . . thread and unthread
the machine a number of times until you can do it easily and natu
rally.
These little practice sessions will make you expert in the handling
of your machine and will pay dividends in finish and appearance
when you are dressmaking in earnest.
Page 8

ii£!E by pulling on the cloth, for your seam will be uneven...
the seam will pucker. . . the thread may break. . . and the needle will
bend.
Change needles often
The average dress has upwards of 10,000 stitches...and a needle, if
new when starting, has pierced the material this many times and the
point has become dulled. If you see lint fuzz at the eye of the
needle, replace it for it indicates that the needle eye is rough.
Proper stitch length is important, too, and a practice session for a
few minutes on a piece of the material to be sewn will tell you if
you have (a) the proper thread, (b) the right needle, (c) the correct
stitch length and (d) the right tension setting.
— 5
Page 9
PRESS-O-MATIC
Page 10
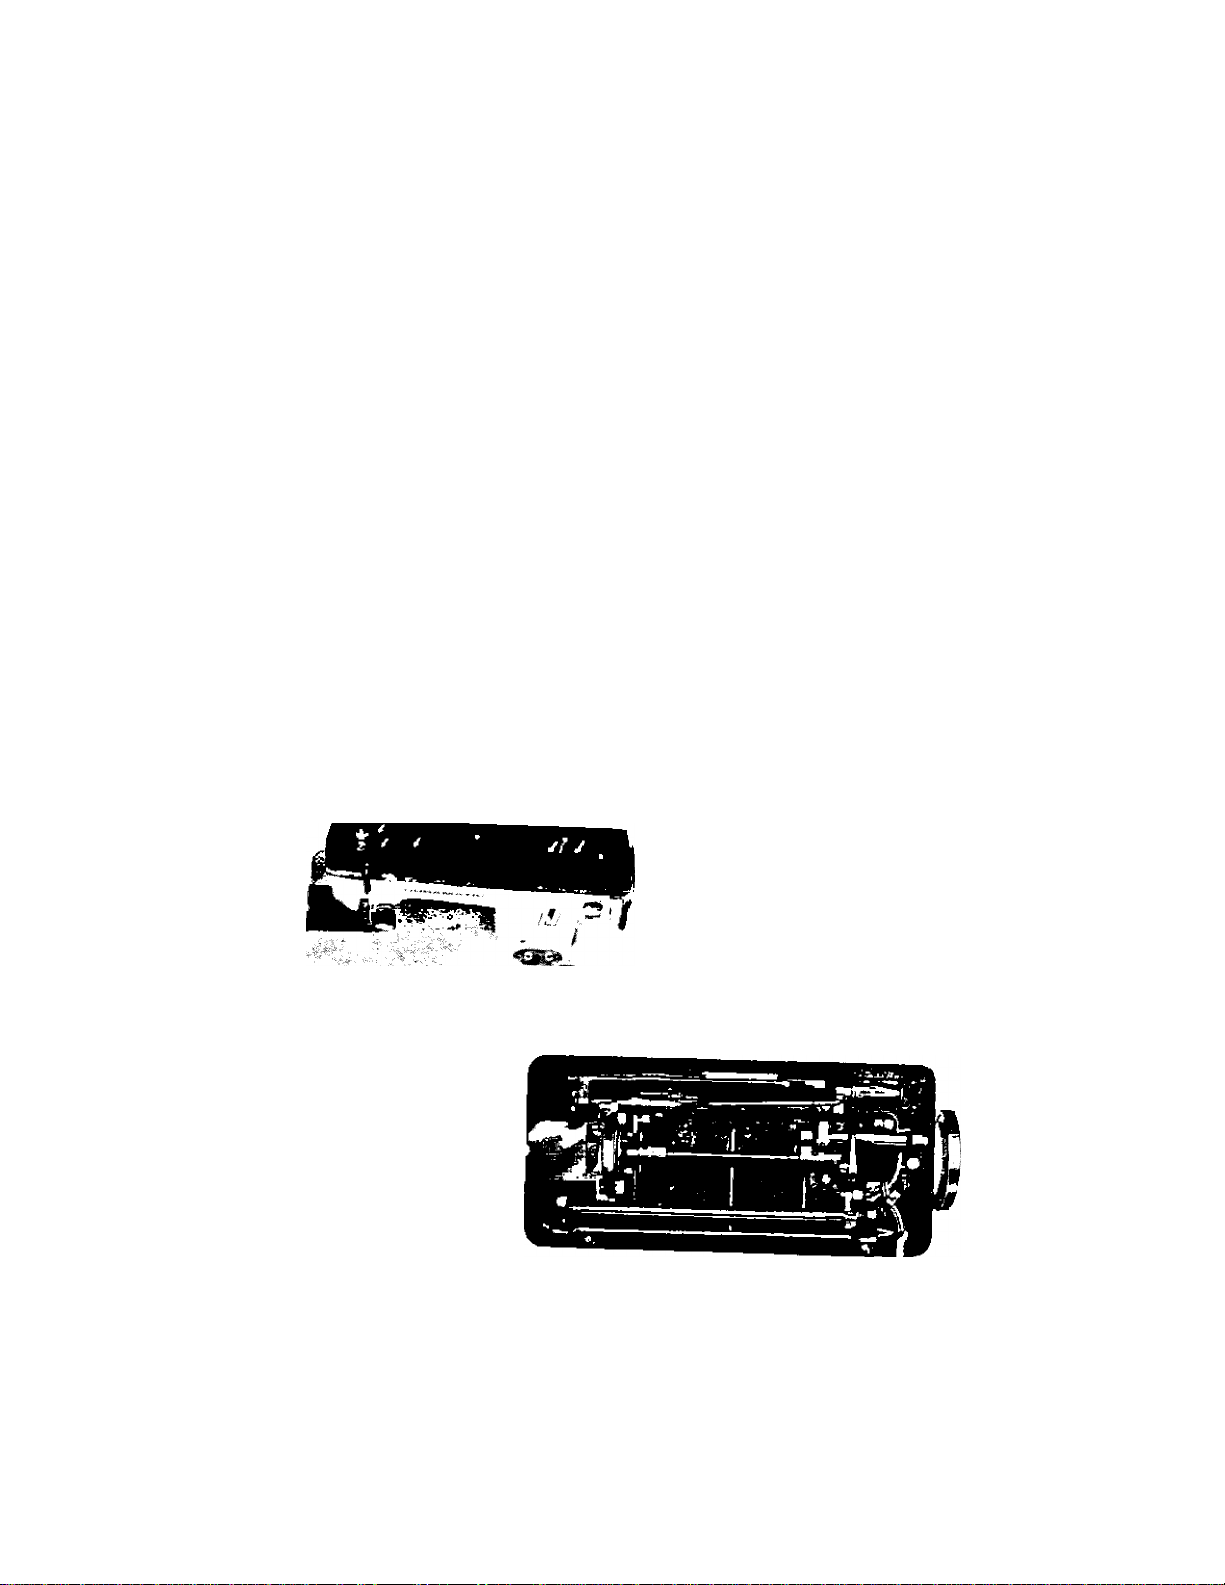
OILING INSTRUCTIONS
££k refined and prepared for sewing machines.
2. Put a drop at a time at the points shown in the illustration if
the machine is used frequently.
3. If the sewing machine is used infrequently, use several drops;
however, before sewing, practice stitching on some material scraps
until the oil has penetrated or reached all bearing surfaces and
excess oil has been wiped off.
4. Use extreme care when oiling the motor to be sure that oil does
not reach the armature, coils, etc.
Page 11

IMPORTANT NOTES
The rotation of the machine must always
be in the direction shown by the arrowy
(See illustration with the arrow curving
and pointing over the hand wheel towards
the user) and never in the opposite
direction.
The machine should never be run except
when there is material under the presser foot and when the presser
foot is dowm to avoid thread tangling and breaking.
At the end of the seam, to remove the work from machine, bring
the needle to the highest position by turning the wheel in the direc
tion of the user (never in the other direction).
Raise the presser foot (this, also releases the upper tension discs,
allowing the thread to pull out freely).
Remove the work by pulling it gently in the direction of sewing, in
sert the threads and cut them on the blade of the thread cutter.
NOTE: Raise the presser foot only when the needle is at the top
position except when you have to continue sewing in a different
direction to that of the preceding seam; in this case, take care not
to pull or bend the needle, and raise the foot a little with the
needle still piercing the material. The work can be turned around the
Fig- 1
needle, lowering the presser foot afterwards.
Page 12

UPPER THREADING
Turn the handwheel until the needle reaches its highest position.
For correct threading pass the thread through the guides and tension
regulator as follows:
Place thread on spool pin and hold spool lightly, allowing it to slip
as the thread is pulled. Bring the thread through thread guide A
down to the tension regulator B and under and between the tension
discs C from right to left and up.
Continue by placing in loop of check spring D and under retaining
bar E.
Continue up and thread
through the take-up lever
F from right to left and
down through thread
guides (2) H.
Be sure to slip thread
into the needle clamp
thread guide I and then
thread the needle from
left to right.
Page 13

WtNDING THE BOBBIN
Disengage the wheel, (Fig. 3.)
Place thread on spool pin A
(Fig. 4)and draw thread through
thread guide on top cover B
(Fig. 4.) Bring thread across the
Fig. 3
machine to bobbin winder thread guide on bed plate C.
Pull thread under and up left to right.
Wind a few turns of thread by hand around the bobbin and place
bobbin on bobbin winder spindle.
Press on lever marked PUSH and bobbin winder will engage the hand
wheel.
Start to fill bobbin by running the machine at normal speed to allow
the bobbin to wind evenly and firmly. The bobbin winder will stop
and disengage itself, when the bobbin is about eighty percent filled.
NOTE; Do not fail to
tighten the brake button
on the hand wheel
iclock-wise) to re-engage
the sewing mechanism.
Fig. 4
10
Page 14

THREADING THE BOBBIN CASE
Hold bobbin in right hand with thread running to the right from the
top. ^
Insert bobbin and pull the thread into the slot under the spring and
up into the eye.
NOTE; The tension adjustment of
the bobbin case is regulated by
partial turns of the adjustment
screw. It has been carefully and
scientifically preset and will
seldom-if ever-
need to be
changed or
Fig. «
re-set.
11
Page 15

REGULATING THREAD TENSION
NOTE: The upper tension is always released when the presser foot
is raised. Do not attempt to change or regulate upper tension until
presser foot is lowered all the way to the feed dog.
Fig. 9
To have a perfect stitch the threads must
be equally tightened from above and below
so that they join in the middle of the
material being sewn. Sheer material
requires a loose tension, while heavy
material requires more tension.
TO TIGHTEN the tension, turn the thread
tension regulator to the right.
TO LOOSEN the tension, turn the thread
tension regulator to the left.
Lower tension regulator
As all machines are
correctly adjusted before
leaving the factory and
readjusted before delivered to you, the lower tension
seldom requires changing; but if this becomes
necessary, tighten the screw in the tension spring
on the outside of the bobbin case for more tension,
or loosen the screw slightly for less tension.
12
Page 16

PRiSS-O-MATIC REGULATOR
The Press-o-matic controls the pressure of the presser foot on the
material and can be regulated to exert normal pressure when pressed
down all of the way. . .or regulated to eliminate all pressure if the
outside ring (Fig. 12) is pressed to permit the presser bar (Fig. 13)
to raise about three-quarters of an inch. If you attempt to sew
without pressure, the material must be moved by hand.
When sewing on thin or sheer materials set the presser bar to
number 2 or number 3 position. . .all the way down for normal or
heavy material.
Fig. 12
Fig. 13
13
Page 17

DROP FEED CONTROL
Fig, 1-}
1. For regular sewing press the button on the right down (See
A Fig. 14) as far as it will go.
2. For light or sheer materials press the left button (See B Fig, 14)
down until the red line is about even with the plate. (If the left
button is too far, press the right button to force the left one up
and repeat the procedure).
3. For darning or free-hand embroidery, press the left button down
¡See B Fig. 14) as far as it will go. (Best results are obtained
when the darning spring is attached to the needle clamp).
Page 18

STARTING TO SEW
When starting to sew, the
thread take-up lever must be
at its highest position to
prevent the needle from
becoming unthreaded.
Hold the free end of the
upper thread lightly and turn p¡g/ ~ ^ ’
the hand wheel towards you until the lower thread comes up.
Pull the ends to the back, being sure that the upper thread goes
down, through and under the presser foot. Place material under the
presser foot.
Lower the presser foot.
Start the machine and guide the material by letting the machine feed
itself.
Do not pull on the material.
Do not run the machine unless there is material under the presser
foot.
Do no, run the machine with
the presser foot raised.
Fig. l(i
15
Page 19

REGULATING THE STITCH LENGTH
The stitch length regulator adjusts the stitch length
from very long (about 6 stitches per inch for
very heavy material) to very short (about 30
stitches per inch for very sheer material).
Normal seaming or stitching requires a setting of
12 to 14 stitches per inch (#3).
The stitch length regulator, when raised above the center of the stitch
length panel, reverses the direction of the material and causes it to
move back to you.
Reversing the movement of the material is excellent for reinforcing
a seam by double, triple or quadruple seaming. .. excellent for backtacking the start or the end of a seam. Simply flick the lever up for
4 or 5 stitches and then bring it down again and the seam is securely
locked. (Fig. 18)
For basting, use the longest stitch by pressing the stitch length lever
all the way down and set the tension indicator to loose. (,The
expert will use a slightly heavier bobbin thread). The threads
can be easily pulled out after the permanent seam has been sewn.
NOTE: Do not neglect to return all settings to normal when basting
has been completed.
16
Page 20

Excellent darning or reinforcing can be done by adjusting the knob
on the stitch length lever to limit or stop its downward or upward
movement.
Set the stitch length to ¡ ¡^4, use a mercerized thread, and when the
machine is running move the lever Up and down in a rhythmic
movement and gently guide the
material to the side as it moves
backwards and forwards.
END OF SEAM
Stop the machine with the take-up lever and needle at their highest
positions.
Raise the presser foot (This also releases the upper tension, allow
ing the thread to pull easily.)
Remove the work by pulling it gently toward the back and to the side.
NOTE: If the material does not pull easily, rock the hand wheel
gently back and forth to release the under thread from the hook
or shuttle mechanism.
17
Page 21

CLEANING THE SHUTTLE MECHANISM
From time to time thread ends and lint may accumulate in the shuttle
mechanism. (This problem can be noted if the sewing machine
becomes noisy and is operadng under s.rain). The removal of lint
and thread ends does not require the services of a mechanic.
It can be quickly, simply and easily done as follows;
1. Remove bobbin case.
2. Push spring loaded knobs A away from the center.
3. Lift off hook or shuttle cover ring.
4. Remove the shuttle and clean it and the inside race carefully,
removing all dirt, lint and thread ends.
5. Replace the shuttle and shuttle cover ring in reverse order.
6. Push spring loaded knobs back into their holding position.
7. Replace bobbin case.
Fig. 19
18
Page 22

REPLACING BOBBIN CASE
Hold bobbin case by grasping latch with thumb and forefinger of left
hand. Fig. 21.
Place bobbin case on hook or shuttle pin. Close latch by pushing it
until it clicks into place.
Fig. 21
STRAIGHT SEWING
Use long stitches for heavier materials-increasing in length as weight
of material increases.
Use shorter stitches for lighter weight materials-very short for thin
or sheer materials to avoid seam puckering.
NOTE: Do not pull or hold back on the material, but guide it only.
(Pulling or holding back on the material-in addition to
forming uneven stitches-will break or bend the needle).
19
Page 23

QUILTING
The quilting attachment will enable
you to sew parallel lines on padded
fabrics without the necessity of
marking them in advance.
Attach the quilter by pulling long
wire hook out of horse-shoe shaped
clamp.
Attach the clamp on the presser
bar from behind and over the presser
foot and push the wire hook into place. Adjust the curved hook to
the desired distance from the needle and adjust it to press into the
fabric. When sewing, the hook should follow the preceding line of
stitching.
The quilting attachment is available at all sewing machine stores.
NARROW HEMMER
With the needle in its highest posi
tion, replace the presser foot with
the narrow hemmer (Fig. 23).
For a plain narrow' hem make a
1/8 inch double fold for about 2
inches along the edge of fabric.
Hold each end of the 2-inch fold,
Fig. 23
hemmer, draw forward to end and fasten with point of the needle
Lower the presser foot. Gently pull the end of thread as you start
stitching. Guide the material slightly to right, and it will automatically
take a double turn through scroll. ’
NOTE: Do not crowd the material into scroll and do not leave
scroll only partly filled by the material. Feed just enough
material into the hemmer foot to fill out the scroll.
and slip underneath the hemmer.
Bring fold up into the scroll of
20
Page 24

FRENCH SEAM (FELLING)
Proceed in the following manner;
1- Lay two pieces of cloth one on top of the other with their
RIGHT sides facing each other. The right edge of the bottom
piece must extend about 1/8 inch beyond the right edge of the
top piece. See (Fig. 24).
1 Sew both pieces of cloth together. Use the right edge of long
toe of hemmer foot to guide the botton, piece of „ateri.l. while
the left edge of the same toe serves
as a guide for the top piece of
material. (Fig. 25).
3.
Open and spread out material and
put back on machine right sides
down-ward. Make sewn edges of
material stand up.
4.
Fold over the edges to the left and
insert them into the scroll of the
hemmer foot. Sew as you would
do ordinary hemming. Use left edge
of long toe of hemmer foot as guide,
having orgmal seam run alongside
of it.
TOP PIECE
BOTTOM PIECE
1ST STEP
«'IDTH OK lOF
2ND STEP
21
Page 25

FLAT FELLED SEAM
Fig. 26
TOP PIECE I ST STEP
.....
Ч
Open out French seam and ins
ert rolled edge in scroll of heni-
mer. Edge stitch to lay seam flat
(Fig. 26).
2ND STEP
SND ROW TOP PIK
/
ЮТТО.М PIECE/
BOTTOM PIECE/ /1ST ROW
LACE TRIMMED HEM
To attach the lace to the hem, insert
the lace in the slot next to needle.
Sew hem as above, guiding lace un
der needle and hem into scroll.
Fig. 27 (Fig. 27).
LACE EDGE WITH INVISIBLE STITCHING
Hold the lace % inch from raw
edge on right side of fabric. Insert
both in scroll as for plain narrow
hem. Let hem roll over and sew in
Fig. 28 lace. Press lace out flat along edge
with hem turned up. For a little fullness in lace, feed it freely under
scroll (Fig. 28).
Page 26

ATTACHING THi ZIPPER FASTENER
This adjustable zipper foot can be
moved to the left or right side of
the needle. It is used for sewing
zippers and cords.
Fig. 29
CLOTH GUIDE
This is an attachment
designed as a guide for
stitching when making
wide hems, deep tucks or
seam width which are
greater than presser foot
allows. (Fig. 30).
It IS attached to machine as illustrated
Fig. 30
Page 27

TYPES OF NEEDLES: use only 15X1 needles
RECOMMENDED NEEDLES AND THREAD SIZES
TYPES OF FABRICS
CLASSES OF WORK
Y^rZ fabrics like Muslin, Georgette
Chiffon, Batiste, fine Linens, Cambrics,
I
etc, For lingerie, infants’ wear and del
icate lace work.
Light-weight Shirting and summertime
Fabrics, Linens, fine Silk Goods and
Calicoes. For children’s and house dre
I sses, washable cottoin. dresses, aprons
and curtains.
Shirtings Sheetings, Calicoes, Dress Si^s and Cottons, light weight woollens,
Draperies, etc. For general household
sewing and all classes of general work.
Heavy CalicoeT^nd^^SEkTlighr’ii;;^^
Woollens, heavy Cretonnes, Madras, Mu- !
slin Brocades and Quilts. For men’s i
work shirts, smocks and aprons, quilting
and tabric mraishings. j
&d Tickii^s, U5hoIst5i7^iid~^^^rd^
Materials, Slip Cover Fabrics, Woolleh i
u “Cavy woven Coating, light wei- i
ght Canvas. For trousers, boys’clothing, ^
work uniforms, awnings, slip covers and '
mattresses.
I Hei i ^f^i c Fn i s ^a ^ ^W o hT i etis T ^i^^ ^ r
woven Suiting and Coating. Canvas and
backing. For heavy clothing in general i
such as heavy uniforms, coats, trousers,’ i
For heavy goods, coarse cloths. Canvas ! Very
Bags, etc. ■
supplies, bags, etc. ■
I
^ Coarse
SIZE OF THREAD
Cotton
100
: (X) and 000 :
to
; Twist =
150
80
to
100
60
to
80
40
to
60
30
to
40
24
to
3D
: E ■
■ I
A&B
Twist
Twist
Twist
Twist
Silk
0
Twist
c
D
00
and
000
50
to
00
50
: SIZES OF
NEEDLES I
8 to 10
(fine)
11
(medium fine)!
14
(medium)
16
(light-heavy)
18
:(medium-
heavy)!
19
(heavy)
21
(extra-heavy) I
--
------------
Mercerized Singer (Grade)l
Heavy
Duty
Heavy
Duty
40
to
60
40
to
60
24
Page 28

INCREASE YOUR SEWING PLEASURE
THREAD
1- Select the correct size of thread for the material you are sewing.
NOTE; The right size and weight can quickly be determined by
pulling a thread from the material and matching the spool
of thread with it.
2. Use the same kind and weight of thread for both upper and
bobbin thread.
3.
Avoid winding new thread over a partially wound bobbin.
4.
Use silk thread on woolens •••mercerized thread on fine cottons
and synthetics
........
cotton thread on heavy materials, such as
denims, work shirts, canvas, ticking, strong linens, slip covers, etc.
NOTE: Most cotton materials are preshrunk and it is wise to use
preshrunk thread when sewing on preshrunk materials for
the thread may shrink when laundered, causing the seam
to pucker.
5.
Bright colored thread is weaker than white or neutral colors.
Allow for this and use slightly larger thread size.
Proper attention to the selection of proper thread weight or size will
cause the stitches to "blend” into the material.
25
Page 29

NEEDLE
Always use highly polished chrome finished needles. The cost is
approximately the same and the workmanship is better.
Change needles often, for the point becomes dull and blunt due to
the many thousands of times that the needle pierces the material
when a dress or suit is being made. If you have a magnifying glass,
examine each new needle before putting it into your machine and
look for (1) sharp edges around the eye, > 2) blunted or broken point,
and (3) a bent or "fish-hook” point.^ Lay the needle on a flat
surface to be sure it is not bent or curved.
Choose the correct needle for the size of thread. If the needle is too
large the seam will appear to be a row of perforations.
..............
or if the
needle is too small the thread will lay on top of the material and
the tension settings will appear to be incorrect. Consult the needle
and thread guide for the correct needle and thread sizes.
26
Page 30

STITCH LENGTH
There are correct needle and thread stees for materials ...and there
IS also a correct stitch length.
A simple rule to follow is (1) short stitches for light or sheer
materials, (2) medium stitch length for medium materials, and (3)
long stitches for heavy materials.
For best results-after selecting the correct thread and installing the
right needle^practice stitching on a sample oi the material by experi
menting with the stitch length until you have found the length that
causes the thread to "blend” into the material.
The stitch length governs or controls the pace at which the material
moves under the presser foot, and when the correct length is longer
than average, more satisfactory work will be performed by operating
the machine at slower speeds.
Do not pull on the material, for it will cause uneven stitch lengths
-bend or break the needle-break the thread.
The sewing „.chine is des.gned the correc, an.„„n. of
thread in relation to the movement of the feed mechanism.
Page 31

SEWING SPEED . ■
Do not operate the machine at a speed faster than you can correctly
and properly assemble the material and properly align it tor feeding
under the presser foot.
Sew for a few inches and stop •■•assemble the material and again sew
for a few inches and stop and continue this way. You will avoid
mistakes and eliminate ripping out imperfect seams and resewing.
avoid minor troubles -
It is advisable to have periodic inspections by a competent mechanic
in order to insure perfect operation and long life of the machine.
If you are buying a new part or device take-or send-the old one
and request that it be duplicated exactly.
If you are buying a new attachment or accessory take-or send-a
sample from your box to be sure that the new one is manufactured
for and can be attached to vour machine.
28
Page 32

MEMO
 Loading...