

Page 1
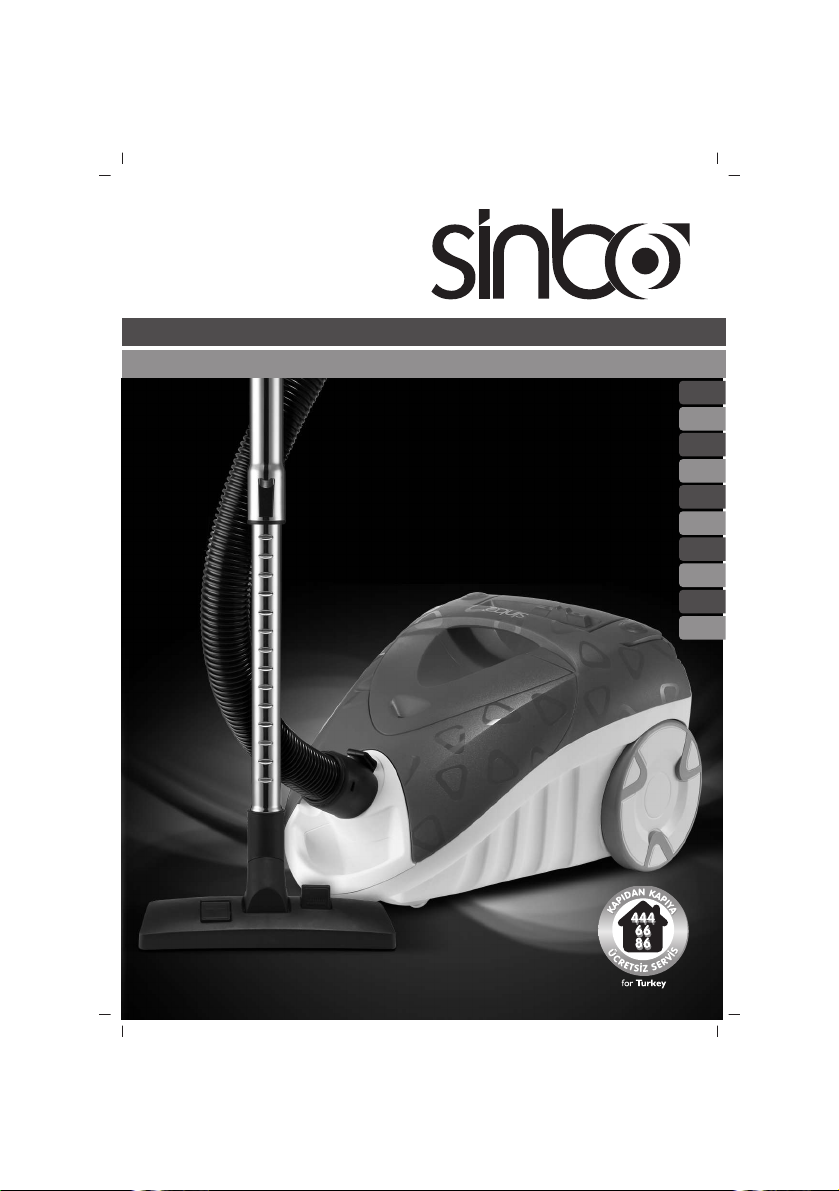
SVC 3469 ELEKTR‹KL‹ SÜPÜRGE
KULLANMA KILAVUZU
TR
EN
FR
NL
DE
ES
RU
UA
HR
AR
Page 2
1
2
3
4
12
13
11
14
5
6
7
10
9
8
- 1 -
Page 3

TÜRKÇE
De¤erli Müflterimiz,
Ürün seçiminde S‹NBO'yu tercih etti¤iniz için teflekkür ederiz.
Uzun ve verimli bir kullan›m için cihaz› kullanmadan önce bu k›lavuzu özellikle güvenlik
talimatlar›na dikkat ederek okuman›z› ve devaml› suretle saklaman›z› tavsiye ederiz.
Sayg›lar›m›zla
Sinbo Küçük Ev Aletleri
Children being supervised not to play with the appliance.
This appliance is not intended for use by persons (including children) with reduced physical, sensory
or mental capabilities, or lack of experience and knowledge, unless they have been given supervision
or instruction concerning use of the appliances by a person responsible for their safety. Children
should be supervised to ensure that they do not play with the appliance.
Cihazla oynamamalarını güvenceye almak için çocuklar gözetim altında tutulmalıdır.
Bu ürün (çocuklar dahil ) fiziksel hassasiyeti az, zihinsel olarak yetersiz, deneyimsiz ve yeterli bilgiye
sahip olmadan yada kendilerinin güvenli¤inden sorumlu olan kifliler tarafından bu ürünü kullanmak
için gerekli talimatlar verilmemifl kiflilerin kullanımına uygun de¤ildir.
- 2 -
Page 4

SINBO SVC 3469 ELEKTR‹KL‹ SÜPÜRGE
KULANIM KILAVUZU
ÖNEML‹ GÜVENL‹K UYARILARI
• Bakım, Onarım ve Kullanımda Uyulması Gereken Kurallar
Cihaz›n›z› kullanmadan önce afla¤›da belirtilen temel güvenlik önlemlerine mutlaka uyunuz:
1. Talimatlar›n hepsini okuyunuz.
2. Kullanmaya bafllamadan önce, cihaz›n anma plakas› üzerinde belirtilen voltaj ile prizinizdeki voltaj›n
birbirine uyup uymad›¤›n› kontrol ediniz.
3. Elektrikli süpürge prize tak›l›yken bafl›ndan ayr›lmay›n›z. Elektrikli süpürge kullan›lmad›¤› zaman
ya da bak›m yap›lmadan önce prizden ç›kar›lmal›d›r.
4. Elektrik floku riskini azaltmak için cihaz›n›z› aç›k alanlarda ya da ›slak zeminler üzerinde kullanmay›n›z.
5. Çocuklar›n cihazla oynamas›na engel olmak için yeterli gözetim yap›lmal›d›r.
6. Cihaz›n›z› sadece bu talimatta tarif edildi¤i flekilde ve sadece sat›c›n›n tavsiye etti¤i aksesuarlarla
kullan›n›z.
7. Elektrikli süpürge normal flekilde çal›flm›yorsa, düflürüldüyse, hasar gördüyse, d›fl mekanda b›rak›ld›ysa,
cihaz suya girdiyse derhal yetkili servis merkezine götürünüz.
8. Elektrikli süpürgeyi kablosundan tutarak çekmeyiniz ya da kabloyu tutacak olarak kullanmay›n›z,
üzerine kap› kapatmay›n›z, keskin kenar ve köflelere s›k›flt›rmay›n›z. Elektrikli süpürgeyi kablosunun
üzerinden sürüklemeyiniz. Kabloyu s›cak yüzeylerden uzak tutunuz.
9. Elektrikli süpürgeyi prizden ç›kar›rken kablosundan çekmeyiniz. Cihaz› prizden ç›karmak için kabloyu
de¤il fifli kavray›n›z.
10. Fifle ya da elektrikli süpürgeye ›slak ellerle dokunmay›n›z.
11. Cihaz›n üstündeki deliklerden içeri herhangi bir fley sokmay›n›z. Deliklerin üzeri örtülüyken ya da
ç›k›fl› t›kal›yken cihaz› kullanmaya kalk›flmay›n›z. Tüm delikleri hava ak›fl›n› zorlaflt›racak toz, tüy, saç
ve di¤er maddelerden koruyunuz.
12. Cihaz›n fiflini çekmeden önce tüm kumandalar› kapal› konuma getiriniz.
13. Basamaklar› temizlerken özellikle dikkatli olunuz.
14. Kabloyu sararken fifli tutunuz. Kablo sar›l›yorken fiflin savrularak çarpmas›na izin vermeyiniz.
15. Hortumu takmadan önce cihaz›n fiflini çekiniz.
16. Sigara, kibrit ya da s›cak kül gibi yanan, tüten nesneleri elektrikli süpürgeyle çekmeyiniz.
17. Filtreler tak›l› olmadan cihaz› kullanmay›n›z.
18. Hasar görmüfl güç kablosunu ya da fifli kullanmay›n›z. Güç kablosunun ar›zalanmas› durumunda
tehlikelerin önlenmesi için kablo üretici, servis yetkilisi ya da benzer bir ehliyetli kifli taraf›ndan
de¤ifltirilmelidir.
19. Elektrikli cihazlar› s›cak gazlar›n yak›n›nda bulundurmay›n›z veya ›s›t›lm›fl f›r›nlar›n üzerine veya
içine yerlefltirmeyiniz.
20. Is› yay›l›m›n› etkileyece¤inden cihaz›n›z›n havaland›rma deliklerinin üzerlerinin örtülü veya t›kal›
olmad›klar›ndan emin olunuz.
21. Saç›n›z›, bol k›yafetlerinizi, parmaklar›n›z› ve bedeninizin tüm parçalar›n› deliklerden ve hareketli
parçalardan uzak tutunuz.
22. Mazot gibi yan›c› ya da parlay›c› s›v›lar› elektrikli süpürgeyle çekmeyiniz ya da cihaz› bunlar›n
bulundu¤u yerlerde kullanmay›n›z.
23. Yaralanmalara neden olabilece¤inden üreticinin tavsiye etmedi¤i hiçbir aksesuar› kullanmay›n›z.
24. Bu cihaz, cihazlar›n kullan›lmas›nda güvenlik aç›s›ndan sorumluluk üstlenebilecek bir kiflinin
gözetimi ve yönlendirmesi olmadan fiziksel, duyusal ya da zihinsel engeli olan kifliler (8 yafl›n alt›ndaki
çocuklar dahil), bu konuda bilgi ya da deneyim sahibi olmayan kifliler taraf›ndan kullan›lmamal›d›r.
25. Cihaz› ve kablosunu 8 yafl›ndan küçük çocuklar›n eriflemeyece¤i yerlerde saklay›n›z.
26. Bu cihaz ev içinde veya afla¤›da belirtilen ortamlarda kullan›lmal›d›r
– Personel yemekhanelerinde, ofis veya benzeri çal›flma ortamlar›nda;
- 3 -
Page 5
– Çiftlik evlerinde;
– Otel, motel veya benzeri konaklama ortamlar›nda
– Yatak ve kahvalt› ortamlar›nda.
27. Cihaz›n›z› kullan›m amaçlar› d›fl›ndaki amaçlarla kullanmay›n›z.
28. Bu talimatlar› saklay›n›z.
SADECE EVSEL KULLANIM ‹Ç‹ND‹R
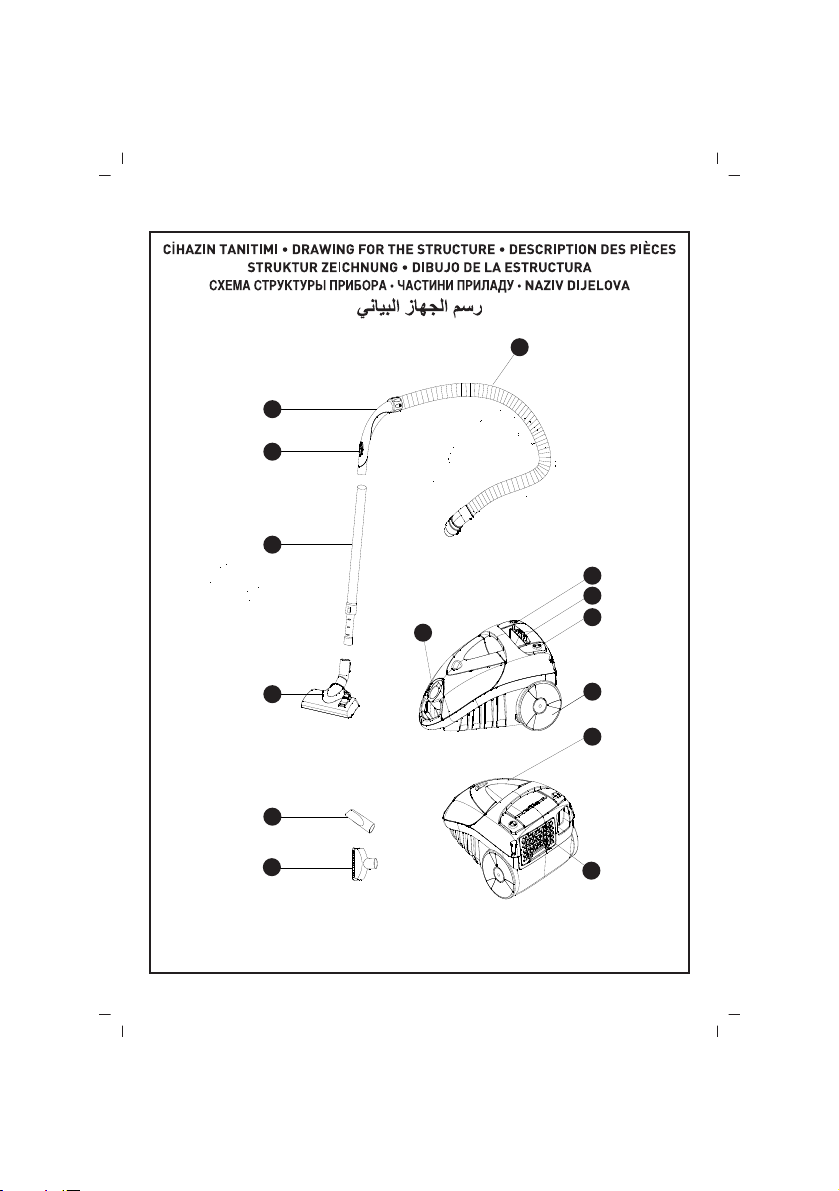
ELEKTR‹K SÜPÜRGEN‹Z‹ TANIYIN
1. Hortum, 2. Hortum Tutaca¤›, 3. Kayd›r›labilir Dü¤me, 4. Uzatma Tüpü, 5. Yer F›rças›, 6. Düz Emme
Ucu, 7. Dikdörtgen Emme Ucu , 8. Filtre (kapak içinde), 9. Ön Kapak, 10. Büyük Tekerlek, 11. Hava Girifli
12. Al›c› Dü¤mesi, 13. Açma/Kapama Dü¤mesi, 14. Çal›flt›rma Dü¤mesi
C‹HAZIN ÖZELL‹KLER‹
• Özel gövde tasar›m›
• Otomatik kablo sarma özelli¤i
• H›z kontrol dü¤mesi
• Hava ç›k›fl›nda HEPA filtresi
• 4.5m güç kablosu
• Toz torbas› hacmi: 2L
• Çekifl gücü: ≥300W
• Gürültü seviyesi: ≤ 84dBA
• Metal teleskopik boru, 1 adet plastik yer f›rças›, 1 adet dar uç aparat›, 1 adet koltuk f›rças›, 1 adet
kumafl toz torbası, 1 adet ka¤›t toz torbas›,
• AC230V, 50Hz, 2200W max
C‹HAZIN KULLANIMI
• Ba¤lantı veya Montajın Nasıl Yapılaca¤ını Gösterir fiema ile Ba¤lantı veya Montajın Kimin Tarafından
Yapılaca¤ına (tüketici, yetkili servis) iliflkin bilgiler
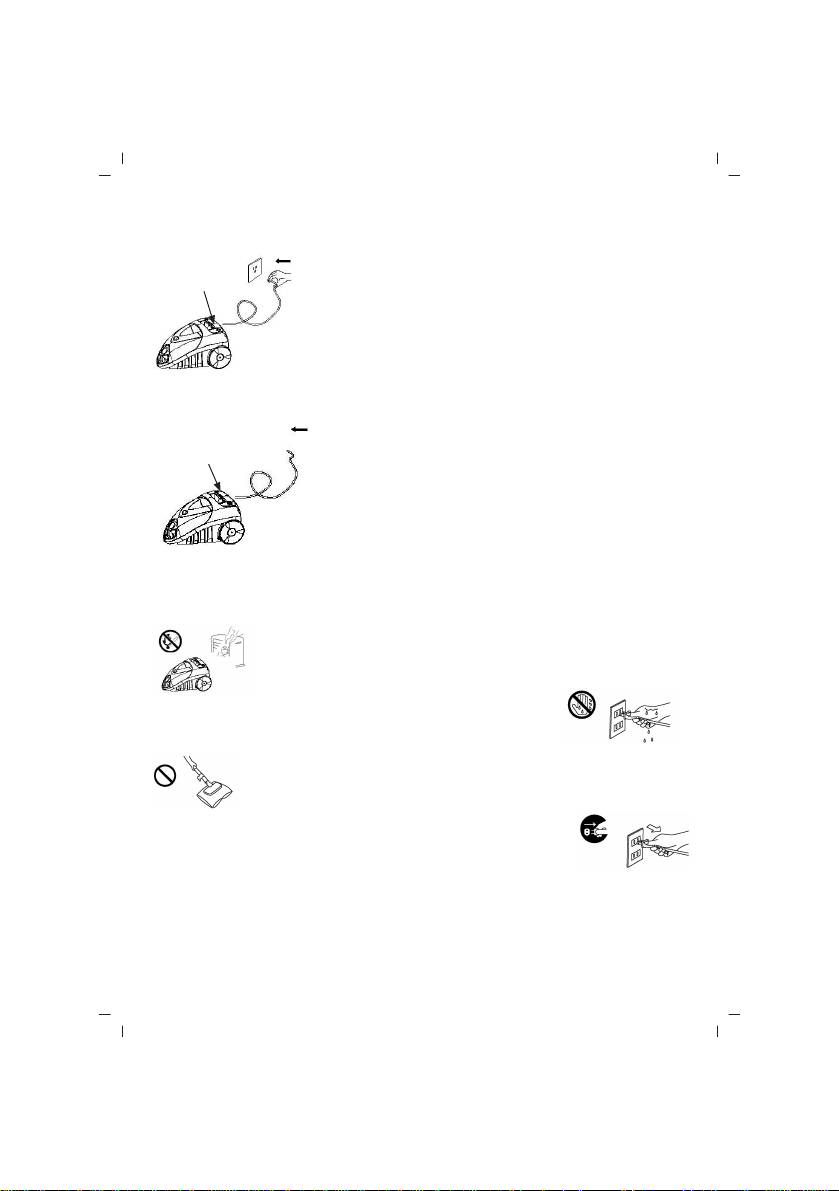
Elektrik süpürgenizin aksesuarlar›n› tak›p ç›kar›rken cihaz›n›z›n fiflini daima prizden çekiniz!
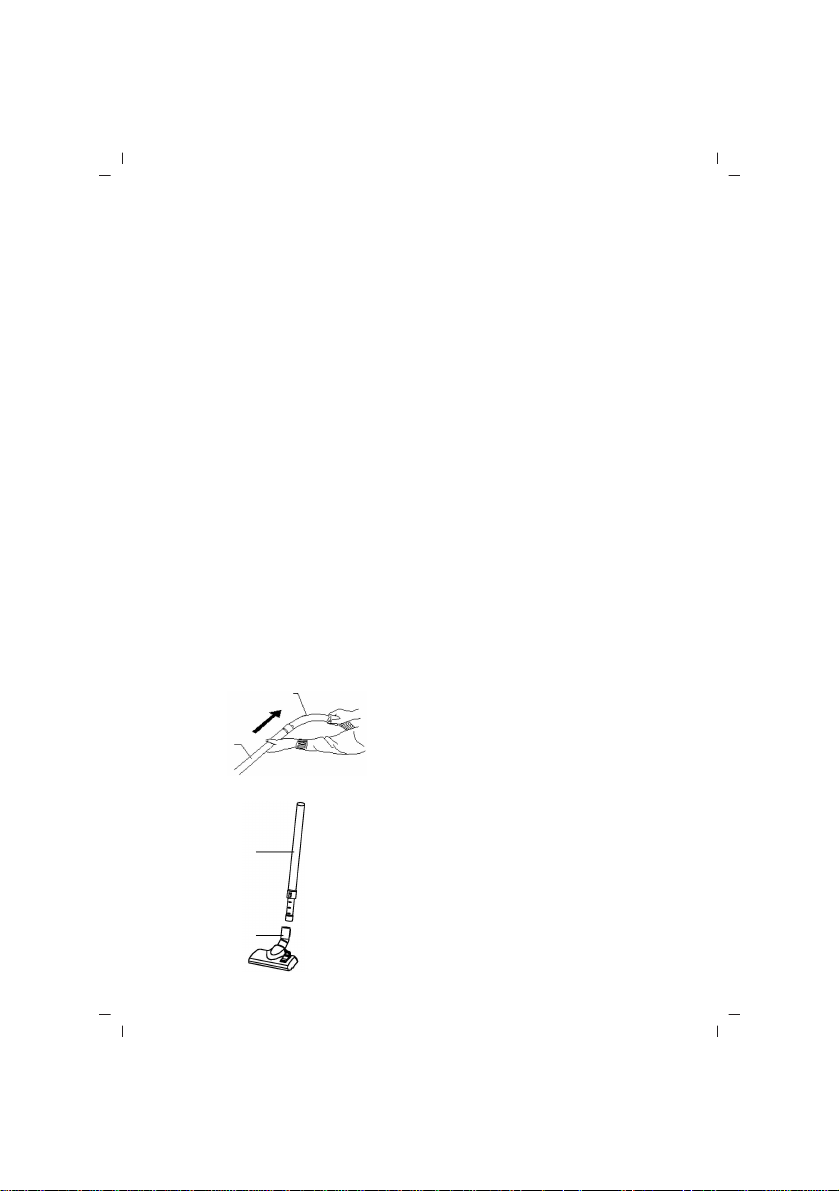
1. Uzatma borusunu kablo tutaca¤›na tak›n›z. (Bkz. fiekil 1).
Tutacak
Uzatma borusu
fiekil 1
2. Yer f›rças›n› uzatma borusuna tak›n›z. (Bkz. fiekil 2).
Uzatma borusu
Yer f›rças›
fiekil 2
- 4 -
Page 6
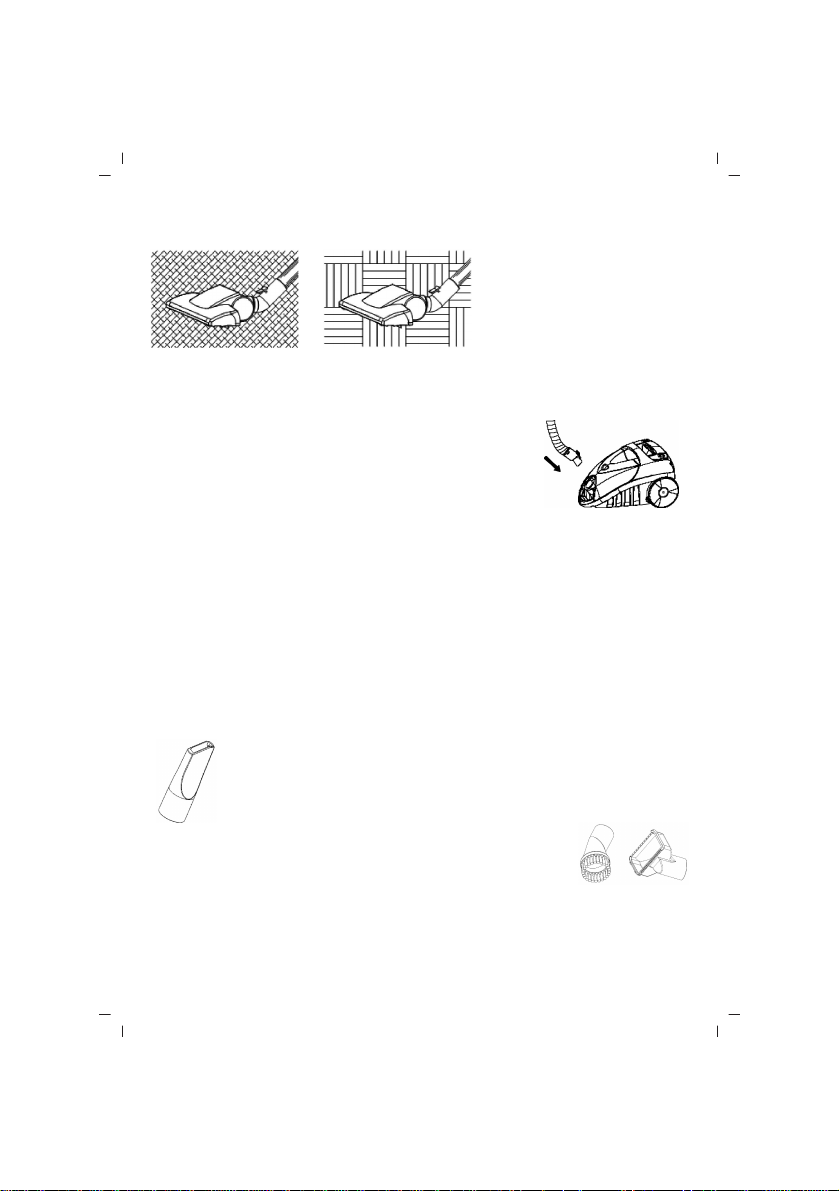
NOT: Yer f›rças› hal› ve sert zeminlerin günlük temizli¤i için idealdir. (Bkz. fiekil 3).
fiekil 3
Hal› temizli¤i Sert zeminlerin temizli¤i
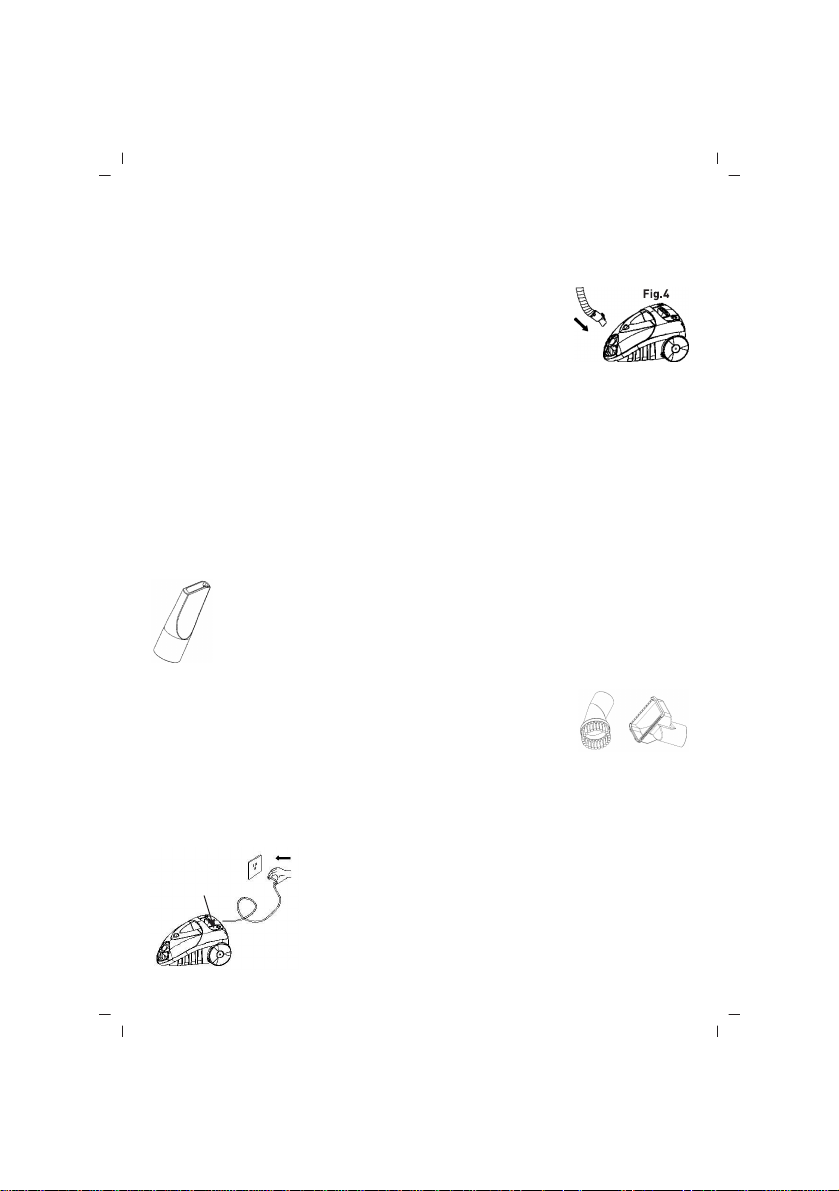
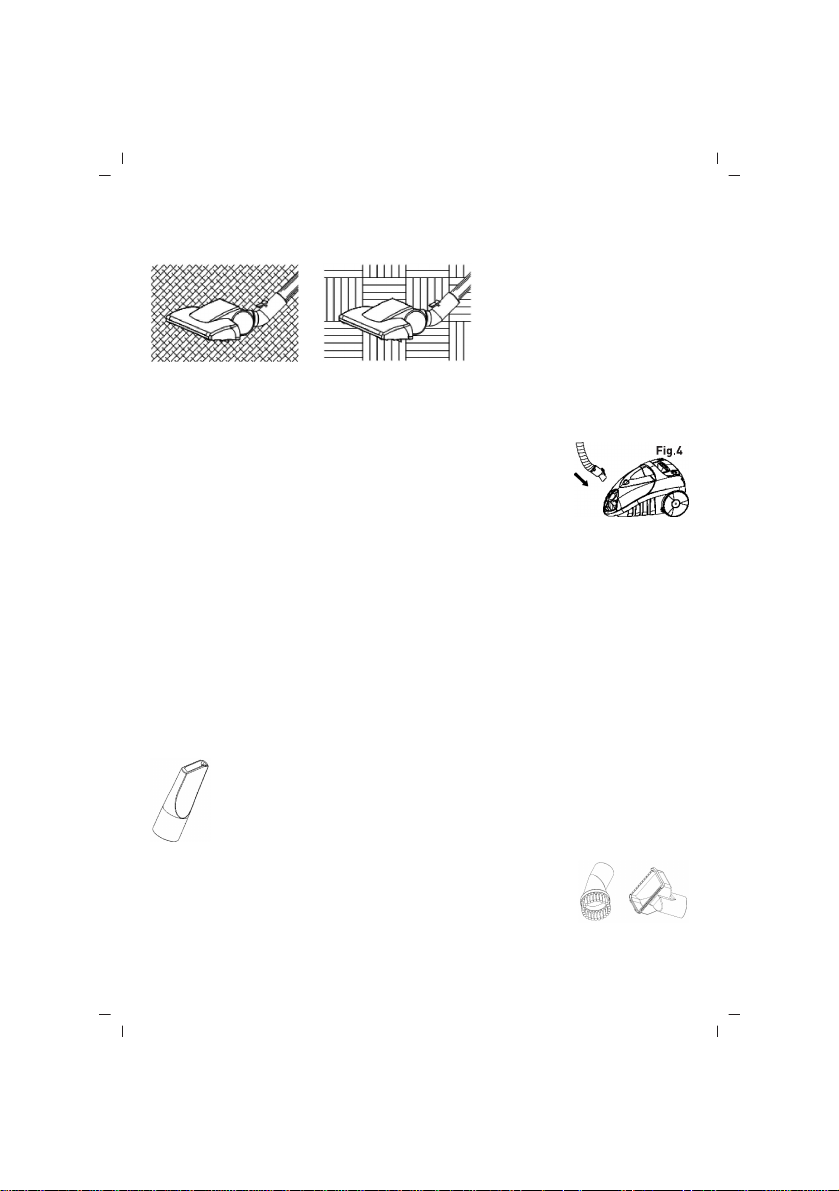
3. Hortumu cihaz›n üst k›sm›nda bulunan hava girifl kanal›na tak›n›z. Yerine ‘klik’ sesi ç›kartarak oturana
kadar bast›r›n›z. (Bkz. fiekil 4).
NOT:
1) Fifli prizden ç›kar›n›z. Hortumu hava girifl kanal›ndan ç›kar›n›z.
Hortumu su çekmek için kullanmay›n›z.
3) Temizlemek amac›yla hortumu suya bat›rmay›n›z.
4) Hortum düzenli olarak kontrol edilmeli ve e¤er hasarl›ysa
kullan›lmamal›d›r.
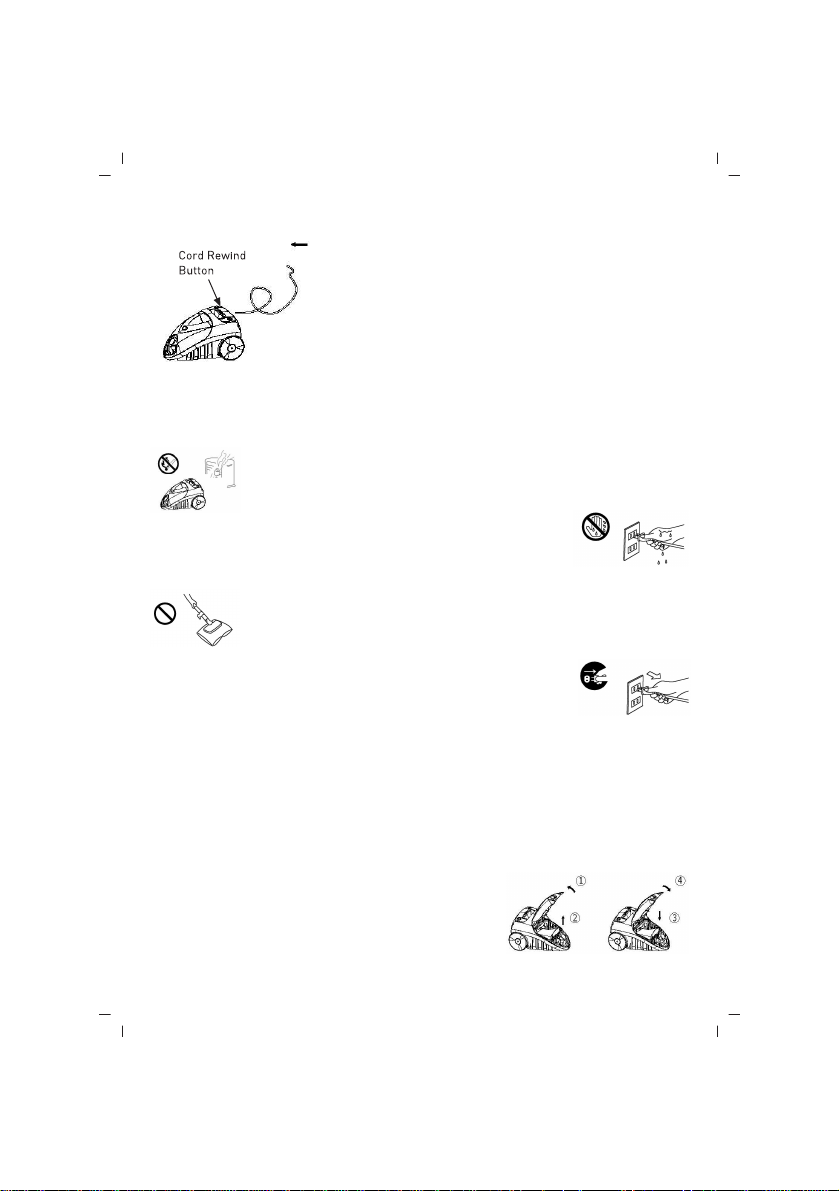
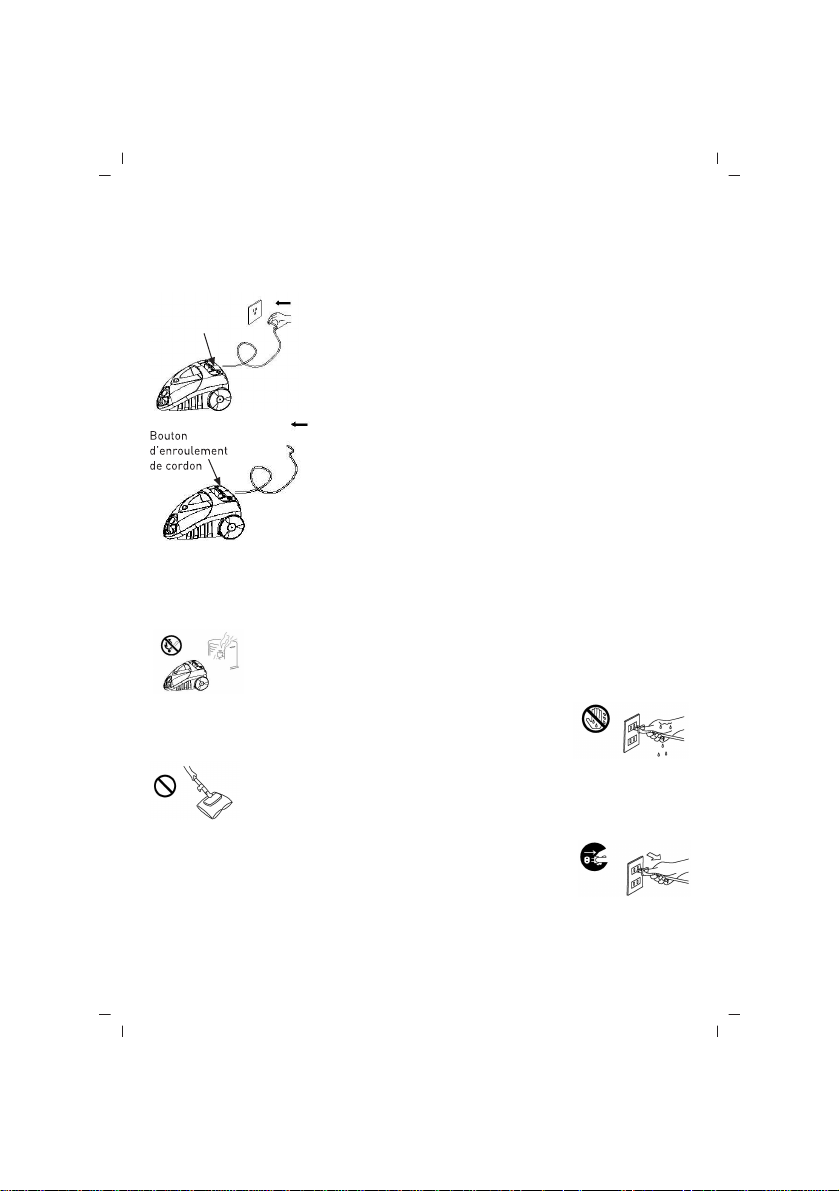
4. Cihaz› kullanmaya bafllamadan önce yeterli uzunlukta kabloyu d›flar› ç›kar›p fifli prize tak›n›z. Güç
kablosu üzerinde bulunan sar› iflaret ideal kablo uzunlu¤unu göstermektedir. Kablonun üzerinde k›rm›z›
iflareti gördükten sonra kabloyu daha fazla çekmeyiniz.
NOT:
1) Güç kablosunu geri sarmak için bir elinizle gövde tutaca¤›n›n alt›nda bulunan kablo sarma dü¤mesine
basarken di¤er elinizle sar›lan kabloyu kontrol edip kablonun savrulmas›n› ve etrafa çarp›p hasar
vermesini engelleyiniz.
2) Gövde tutma sap› kapal›yken sarma dü¤mesinin bas›l› kalmas›na neden olacak bu da kablonun
otomatik olarak geri sar›lmas›na neden olacakt›r.
5. Cihaz› çal›flt›rmak için açma dü¤mesine bas›n›z ve toz çekiflini kontrol ediniz..
6. Süpürme ifllemini kolaylaflt›rmak için kayar dü¤me ile uzatma borusunun uzunlu¤unu ayarlay›n›z.
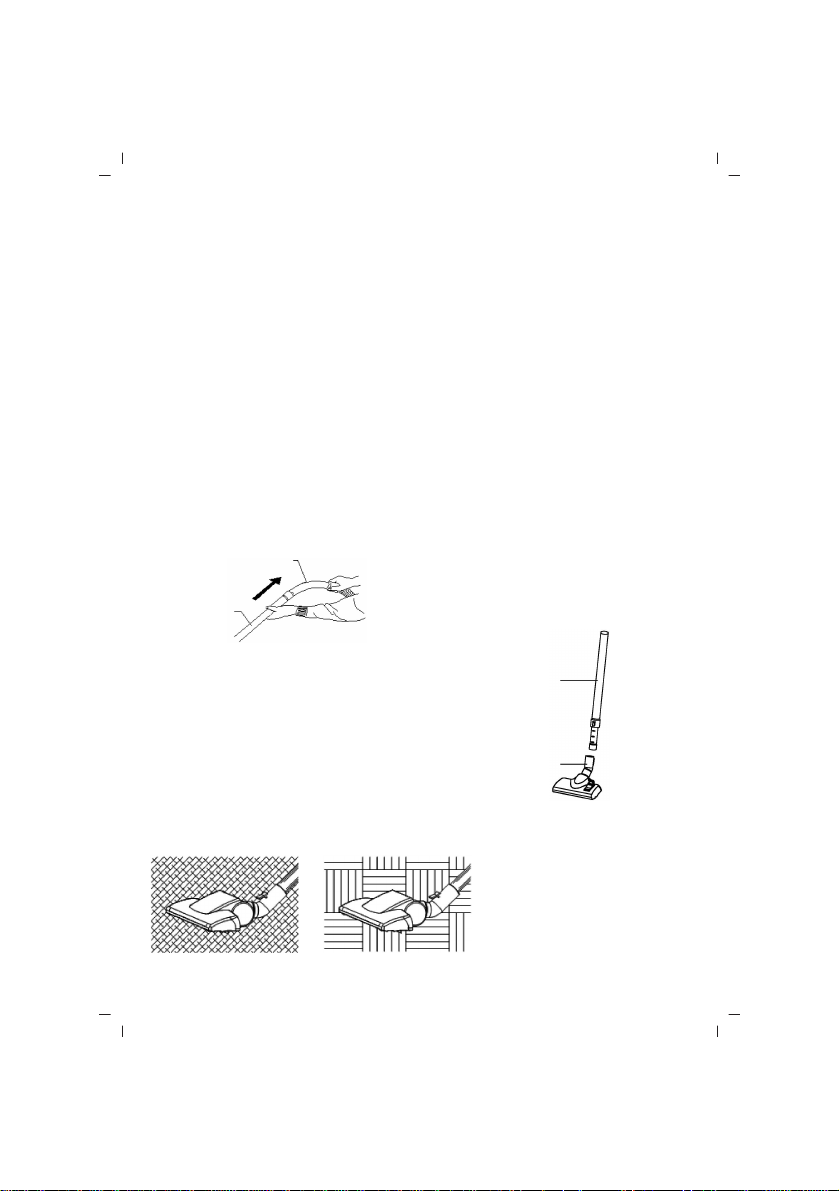
AKSESUARLARIN KULLANIMI
1. Dar uç aparat› ile radyatörler, gedikler, köfleler, süpürgelikler ve yast›k aralar›n›
temizleyebilirsiniz. (Bkz. fiekil.5)
fiekil 4
fiekil.5
2. Döner f›rça ve düz uç aparatlar› ile mobilyalar, havaland›rmalar, eriflilmesi
zor noktalar, kitaplar, avizeler ve raflar› temizleyebilirsiniz (Bkz. fiekil. 6).
KULLANIM TAL‹MATLARI
Cihaz›n›z› kullanmaya bafllamadan önce yeteri kadar kablo ç›kar›n›z kablonun fiflini prize tak›n›z.
Kablonun üzerindeki sar› iflaret kablo için ideal uzunlu¤u k›rm›z› iflaret ise kablonun çekilebilece¤i son
uzunlu¤u belirtir. Kabloyu k›rm›z› iflareti gördükten sonra daha fazla çekmeyiniz.
fiekil 6
- 5 -
Page 7
1.Cihaz› çal›flt›rmak için açma/kapama dü¤mesine bas›n›z.
Açma/Kapama
Dü¤mesi
2. Güç kablosunu geri toplamak için bir elinizle kablo sarma dü¤mesine basarken di¤er elinizle sar›lan
kabloyu kontrol edip kablonun savrularak etrafa hasar vermesini engelleyiniz
Kablo sarma
dü¤mesi
‹HT‹YAT‹ TEDB‹RLER
Hortum girifli, hortum, teleskopik boru ya da uç aparatlar›nda t›kanma oldu¤u takdirde elektrikli
süpürgeyi derhal kapat›n›z. T›kan›kl›¤› ortadan kald›rd›ktan sonra elektrikli süpürgeyi yeniden
çal›flt›rabilirsiniz.
1. Elektrikli süpürgeyi ›s›t›c›lar, aç›k atefl, sigara izmaritleri gibi ›s› kaynaklar›n›n
çok yak›n›nda kullanmay›n›z. (Bkz. fiekil.7).
fiekil 7
2. Fifli prize takarken ellerinizin kuru oldu¤undan emin olunuz. (Bkz. fiekil.8).
3. Cihaz›n ka¤›t filtresinin hasar görmesini önlemek için elektrikli süpürgeyi
fiekil9
çal›flt›rmadan önce büyük ve keskin nesneleri yerden kald›r›n›z. (Bkz. fiekil.9).
fiekil 8
4. Elektrikli süpürgeyi prizden ç›kar›rken kablosundan çekmeyiniz. Cihaz› prizden
ç›karmak için kabloyu de¤il fifli kavray›n›z. (Bkz. fiekil.10).
NOT: Güç kablosunun ar›zalanmas› durumunda tehlikelerin önlenmesi için kablo üretici, servis yetkilisi
ya da benzer bir ehliyetli kifli taraf›ndan de¤ifltirilmelidir
fiekil 10
- 6 -
Page 8
KULLANIM HATALARINA ‹L‹fiK‹N B‹LG‹LER
Cihazınızı, beyan edilen voltaj ile çal›flt›r›n›z. Bulundu¤unuz yerin voltaj›n›n uygun olup olmad›¤›n› kontrol
ediniz.
Güç kablosunun ar›zalanmas› durumunda tehlikelerin önlenmesi için kablo üretici, servis merkezi ya
da benzer bir ehliyetli kifli taraf›ndan de¤ifltirilmelidir. Ar›za durumunda cihaz› kendiniz sökmeye
kalk›flmay›n›z, bak›m merkezimiz ya da sat›fl sonras› hizmet merkezimiz ile ba¤lant›ya geçiniz.
Cihaz› kendiniz onarmaya kalk›flmay›n›z. Meydana gelebilecek ar›zalardan firmam›z kesinlikle sorumlu
de¤ildir, ve cihaz›n›z garanti kapsam› d›fl›nda ifllem görecektir.
TAfiIMA VE NAKL‹YE ESNASINDA
• Ürünü düflürmeyiniz,
• Darbelere maruz kalmamas›na özen gösteriniz,
• S›k›flmamas›na, ezilmemesine özen gösteriniz,
• Ambalaj üzerindeki iflaretlemelere uyunuz.
• Orjinal ambalajıyla taflımaya özen gösteriniz.
ÇEVRE VE ‹NSAN SA⁄LI⁄I
Çevre korumas›na siz de katk›da bulunabilirsiniz!
Lütfen yerel düzenlemelere uymay› unutmay›n: Çal›flmayan elektrikli cihazlar›, uygun elden
ç›karma merkezlerine götürün.
Kullanım sırasında insan ve çevre sa¤lı¤ına tehlikeli veya zararlı olabilecek bir durum söz konusu
de¤ildir.
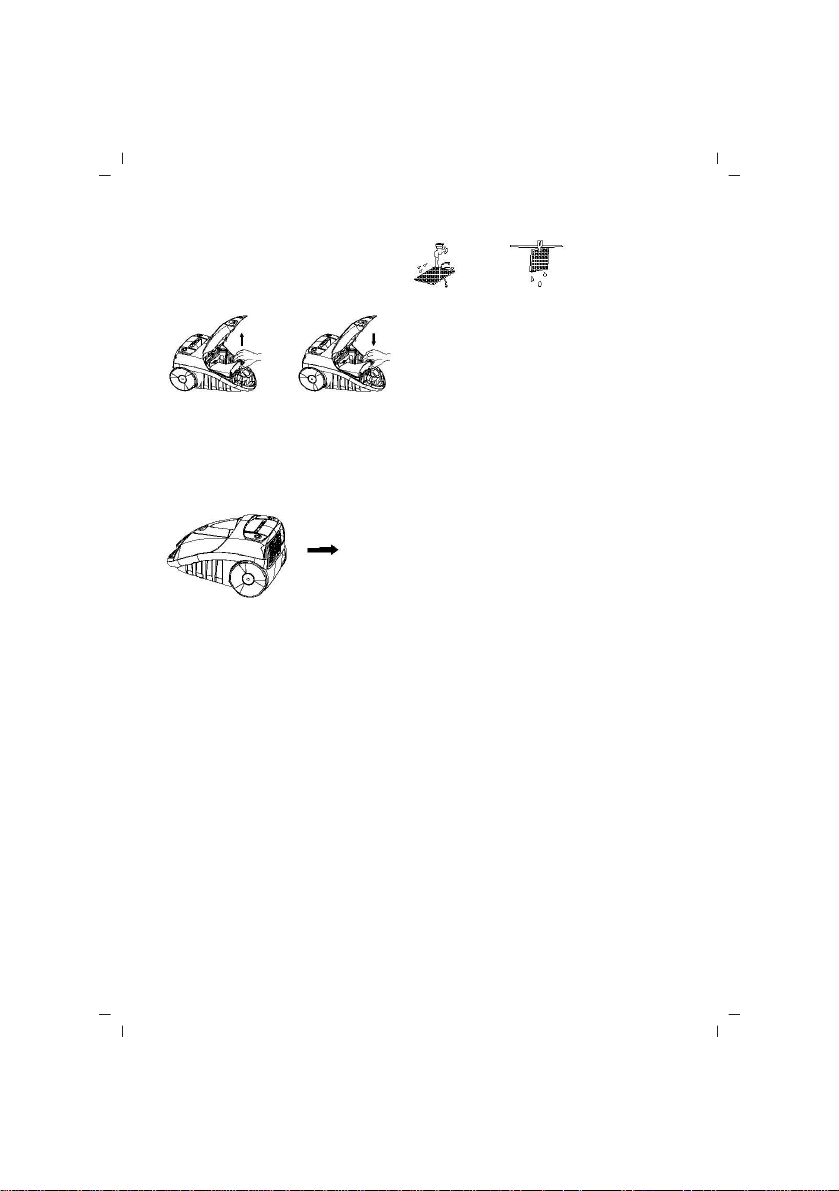
BAKIM ve TEM‹ZL‹K
• Tüketicinin Kendi Yapabilece¤i Bakım, Onarım veya Ürünün Temizli¤ine ‹liflkin Bilgiler
Toz Torbas›n› De¤itirmek ‹çin
NOT:
1) Cihaz›n›z› daima toz torbas› tak›l›yken kullan›n›z.
2) Toz torbas›n› yerine takmay› unutman›z veya yanl›fl takman›z halinde üst kapak tamamen
kapanmayabilir..
Detaylar afla¤›da belirtilmifltir: (Bkz. fiekil.11):
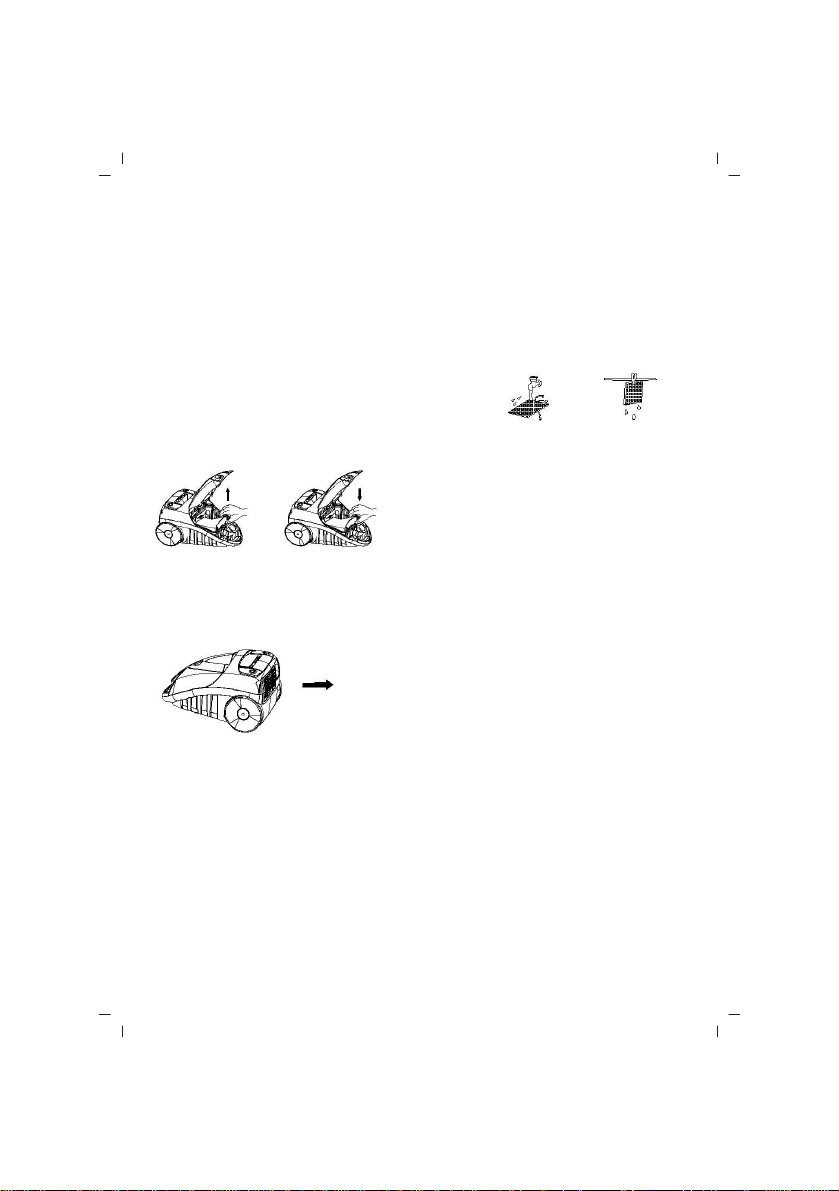
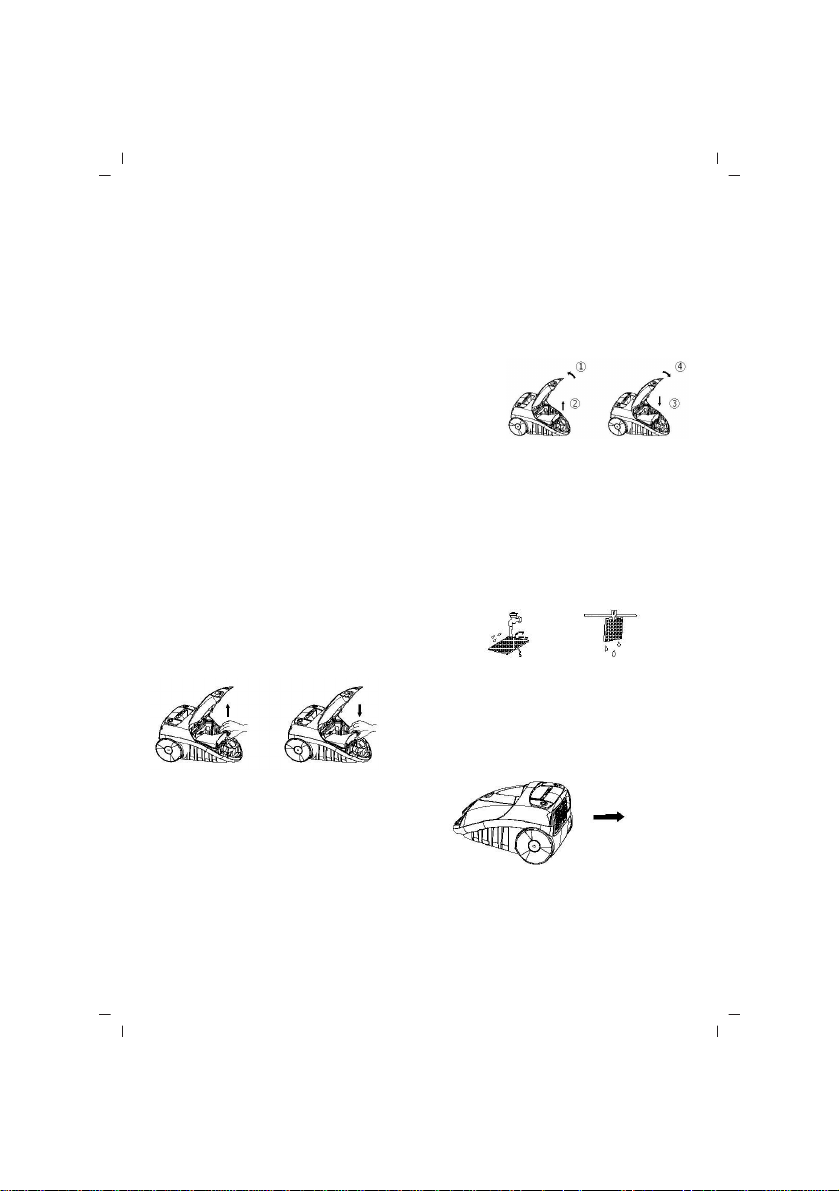
• Uzatma borusunu ç›kard›ktan sonra kilitleme mandal›n›
yukar› iterek üst kapa¤› aç›n›z.
• Toz torbas›n› yerinden ç›kar›n›z.
• Tamamen doldu¤unda ka¤›t torbay› yenisiyle de¤ifltiriniz.
• Yeni ka¤›t torbay› yerine yerlefltiriniz..
• Kapan›p yerine kilitleninceye kadar kapa¤› afla¤› yönde
itiniz.
Filtreyi Temizlemek ‹çin
NOT:
1) Filtre en az y›lda iki kez veya gözle görülür flekilde kirlendi¤inde temizlenmelidir.
2) Cihaz›n›z› daima filtresi yerine tak›l›yken kullan›n›z.
3) Aksi takdirde çekifl gücünde azalma veya motor hasar› meydana gelebilir.
4) Filtreyi temizleme ifllemine bafllamadan önce cihaz›n fiflini prizden çekiniz.
5) Filtreyi çamafl›r makinas›nda y›kamay›n›z.
6) Filtreyi kurutma makinas› kullanarak kurutmay›n›z.
fiekil 11
- 7 -
Page 9
Detaylar Afla¤›daki Gibidir (Bkz. fiekil.12):
• Toz torbas›n› ç›kar›n›z.
• Filtreyi yerinden ç›kar›n›z.
• Filtreyi ›l›k suyla y›kay›p kurutunuz.
• Filtreyi yerine tak›n›z.
fiekil 12
Mikro Hava Ç›k›fl Filtresinin De¤ifltirilmesi
Detaylar aflap›daki gibidir (Bkz. fiekil.13):
• Hava ç›k›fl kapa¤›n› aç›n›z.
• Filtreyi yerinden ç›kar›n›z ve yerine temiz bir tanesini tak›n›z.
• Hava ç›k›fl kapa¤›n› kapat›n›z.
fiekil 13
ÇEVRE VE ‹NSAN SA⁄LI⁄I
Çevre korumas›na siz de katk›da bulunabilirsiniz.!
Lütfen yerel düzenlemelere uymay› unutmay›n›z: Çal›flmayan elektrikli cihazlar› uygun at›k toplama
merkezlerine götürünüz.
- 8 -
Page 10

ENGLISH
SINBO SVC 3469 VACUUM CLEANER
INSTRUCTION MANUAL
IMPORTANT SAFEGUARDS
Before using the electrical appliance, the following basic precautions should always be followed:
1. Read all instructions.
2. Make sure that your outlet voltage corresponds to the voltage stated on the rating label of the vacuum
cleaner.
3. Do not leave vacuum cleaner when plugged in. Unplug from outlet when no use and before servicing.
4. To reduce the risk of electric shock, do not use outdoors or on wet surfaces.
5. Do not allow to be used as a toy. Close attention is necessary when used by near children.
6. Use only as described in this manual. Use only manufacture’s recommended attachments.
7. Do not use with damaged cord or plug. If vacuum cleaner is not working as it should, has been
dropped, damaged, left outdoors, or dropped into water, enter it to a service center.
8. Do not pull or carry on cord, use cord as a handle, close door on cord, or pull cord around sharp
edges or corners. Do not run vacuum cleaner over cord. Keep cord away from heated surfaces.
9. Do not unplug by pulling on cord. To unplug, grasp the plug, not the cord.
10. Do not handle plug or vacuum cleaner with wet hands.
11. Do not put any object into openings. Do not use with any opening blocked. Keep free of dust, lint,
hair and anything that may reduce airflow.
12. Turn off all controls before unplugging.
13. Use extra care when cleaning on stairs.
14. Hold plug when rewinding onto cord reel. Do not allow plug to whip when rewinding.
15. Unplug before connecting the hose.
16. Do not pick up anything that is burning or smoking, such as cigarettes, matches, or hot ashes.
17. Do not use without dust bag and/or filter in place.
18. If the supply cord is damaged, it must be replaced by the manufacturer or its service agent or a
similarly qualified person in order to avoid a hazard.
19. Do not place an appliance on or near a hot gas or on a heated oven.
20. Make certain that the ventilation slits of the appliance are not covered in case affect radiating heat.
21. Keep hair, loose clothing, fingers and all parts of body away from openings and moving parts.
22. Do not use to pick up flammable or combustible liquids, such as gasoline, or use in areas where
they may be present.
23. The use of accessories not recommended by the manufacturer may cause injuries to persons.
24. This appliance can be used by children aged from 8 years and above and persons with reduced
physical, sensory or mental capabilities or lack of experience and knowledge if they have been given
supervision or instruction concerning use of the appliance in a safe way and understand the hazards
involved. Children shall not play with the appliance. Cleaning and user maintenance shall not be made
by children unless they are older than 8 and supervised.
25. Keep the appliance and its cord out of reach of children less than 8 years.
26. This appliance is intended to be used in household and similar applications such as:
– Staff kitchen areas in shops, offices and other working environments;
– Farm houses;
– By clients in hotels, motels and other residential type environments;
– Bed and breakfast type environments.
27. Do not operate the appliance for other than its intended use.
28. Save these instructions.
HOUSEHOLD USE ONLY
- 9 -
Page 11
KNOW YOUR VACUUM CLEANER
1. Hose, 2. Hose Handle, 3. Slidable Button, 4. Extension Tube, 5. Floor Brush, 6. Flat Suction Spout,
7. Rectangular Suction Spout, 8. Filter(within cover), 9. Front Cover, 10. Big Wheel, 11. Air Intake
12. Receive Button, 13. Power Button, 14. Switch Button
FEATURES
• Special pattern on the body
• Automatic cord rewinder
• With speed control on body
• Air outlet HEPA filter
• 4.5m power cord
• Dust capacity: 2L
• Suction power: ≥300W
• Noise Level: ≤ 84dBA
• With metal telescopic tube, plastic floor brush x 1pc, crevice nozzle x 1pc, sofa brush x 1 pcs, dust
textile bag x 1 pcs, dust paper bag x1pcs
• AC230V, 50Hz, 2200W max
USING YOUR VACUUM CLEANER
Always remove the plug from the power socket before fitting or removing accessories!
1. Attach the extension tube to the hose handle (see the fig.1).
Handle
Extension Tube
Fig.1
2. Fit the floor brush to the extension tube (see the fig.2).
Extension Tube
Floor Brush
NOTE: With Fitting floor brush, being ideal for the daily cleaning on carpets and hard floors (see the
fig.3).
Fig.3
Clean on the carpet
Clean on the hard floor
Fig.2
- 10 -
Page 12
3. To fit the extension hose, insert extension hose into the air intake on the top of appliance. Press until
it clicks into position (see the fig.4).
NOTE:
1) To remove the extension hose, unplug from the power socket, then release
the extension hose from the air intake.
2) Do not use the hose to suck up water.
3) Do not immerse the hose in water for cleaning.
4) The hose should be checked regularly and must not be used if damaged.
4. Before using appliance, pull a sufficient length of cable from the appliance and insert the plug into
the power socket. A yellow mark on the power cable shows the ideal cable length. Don’t expend the
cable beyond the red mark.
NOTE:
1) To rewind the power cable, press the rewind button beneath the body handle with one hand and guide
the cable with the other hand to ensure that it does not whip causing damage.
2) While the body handle is closed, causing the rewind button closed, the power cable will be rewound
automatically.
5. Turn the power switch to start the appliance and control the dust suction.
6. Adjust the length of extension tube by sliding the slidable button to facilitate cleaning.
THE USE OF ACCESSORY
1. The flat suction spout can be used for radiators, crevices, corners, baseboards and
between cushions (see the fig.5).
Fig.5
2. The rotating brush and rectangular suction spout can be used for furniture,
vent, blinds, book, lamp shades and shelves (see the fig.6).
Fig.6
INSTRUCTIONS FOR USE
Before using appliance, unwind a sufficient length of cable and insert the plug into the power socket.
A yellow mark on the power cable shows the ideal cable length. Don’t expend the cable beyond the red
mark.
1. Press the ON/OFF button to switch the appliance on.
On/Off Button
- 11 -
Page 13
2. To rewind the power cable, press the rewind button with one hand
and guide the cable with the other hand to ensure that it does not
whip causing damage.
PRECAUTIONARY MEASUREMENT
If the opening that sucks in the air, the suction pipe or the telescopic wand stick on pipe is blocked, you
should switch off the vacuum cleaner at once. First clear the blocked substance before you attempt
to start the vacuum cleaner again.
1. Do not operate the vacuum cleaner too close to heaters and like radiators, cigarette
butts etc (see the fig.7).
Fig.7
2. Before you insert the plug into the wall contact, make sure your hand is dry
(see the fig.8).
3. Before you start using the vacuum cleaner, please remove large or sharp objects
Fig.9
4. When you want to pull the plug from the wall contact, please do this at the
plug itself and not by means of the electrical cable (see the fig.10).
NOTE: If anything gets damaged, both the plug and the cable must be repaired by a qualified repairman
or electrician.
CLEANING AND MAINTENANCE
To change the dust bag
NOTE:
1) Always operate the cleaner with dust bag installed.
2) If you forget to attach the dust bag or attach it in the incorrect manner, the front cover may not close
completely.
The details as following (see the fig.11):
• After removing the extension tube assembly, open the front cover
by pushing the lock block upward.
the bag support.
• Replace the paper bag when it is full of dirt.
• Place a new paper bag into the unit.
• Close the cover by pushing down until it is locked.
from the floor in order to prevent that the paper filter is damaged (see the fig.9).
Fig.8
Fig.10
Fig.11
- 12 -
Page 14
To clean filter
NOTE:
1) Filter should be cleaned at least twice a year or when it becomes visible solid.
2) Always operate the cleaner with filter installed.
3) Otherwise, reduced suction or motor damage may be result.
4) Disconnect from electrical outlet, before cleaning filter.
5) Do not use a washing machine to rinse filter.
6) Do not use hair drier to dry it.
The details as following (see the fig.12):
• Pull dust bag upward.
• Remove filter.
• Rinse filter in lukewarm water and dry the filter completely.
• Put the filter back.
Fig.12
To change the micro-exhaust filter
The details as following (see the fig.13):
• Open the Air-Outlet Cover.
• Take the filter out and change a clean one.
• Close the Air-Outlet Cover.
Fig.13
ENVIRONMENT-FRIENDLY DIPOSAL
You can help protect the environment!
Please remember to respect the local regulations:
Hand in the non-working electrical equipments to an appropriate waste disposal centre.
- 13 -
Page 15

FRANÇAIS
SINBO SVC 3469 ASPIRATEUR
GUIDE D’UTILISATION
CONSIGNES DE SECURITE IMPORTANTES
Veillez à respecter les consignes de sécurité élémentaires suivantes avant d'utiliser votre appareil:
1. Lisez toutes les instructions.
2. Avant de commencer à utiliser votre appareil, vérifiez si le voltage déterminé sur la plaque nominale
de l’appareil et le voltage de votre prise sont conformes l’un à l’autre.
3. Lorsque l’aspirateur est branché, ne vous éloignez pas de l’appareil. Lorsque l’aspirateur n’est pas
utilisé ou avant l’entretien, il doit être absolument débranché.
4. Pour diminuer le risque de choc électrique, n’utilisez pas votre appareil dans les espaces ouvertes
ou sur les surfaces humides.
5. On doit exercer la surveillance nécessaire afin d’éviter que les enfants jouent avec l’appareil.
6. Utilisez votre appareil tel qu’il est décrit dans cette instruction et utilisez uniquement avec les
accessoires recommandés par le vendeur.
7. Si l’aspirateur ne fonctionne pas normalement, s’il est tombé, endommagé, laissé à l’extérieur,
plongé dans l’eau, emmenez-le immédiatement au centre de service agréé.
8. Ne tirez pas l’aspirateur par son cordon ou n’utilisez pas le cordon comme une poignée, ne fermez
pas la porte au-dessus, ne l’insérez pas aux arêtes et aux coins pointus. Ne trainez pas l’aspirateur
par-dessus de son cordon. Tenez le cordon à l’écart des surfaces chaudes.
9. Ne tirez pas l’aspirateur par son cordon en débranchant. Pour débranchez l’appareil, saisissez la
fiche et non pas le cordon.
10. Ne touchez pas la fiche ou l’aspirateur avec les mains humides.
11. N’insérez aucun objet par des trous au-dessus de l’appareil. Ne tentez pas d’utiliser l’appareil
lorsque le dessus des trous est couvert ou la sortie est bloquée. Protégez tous les trous de poussière,
de poils, de cheveux et d’autres matières qui vont compliquer l’écoulement de l’air.
12. Avant de débranchez l’appareil, éteignez toutes les commandes.
13. Soyez particulièrement prudent lorsque vous nettoyez les marches.
14. En enroulant le cordon, saisissez la fiche. Ne laissez pas la fiche à heurter en bandoulière lorsque
l’on enroule le cordon.
15. Avant d’insérer le tuyau, débranchez l’appareil.
16. N’aspirez pas les objets comme la cigarette, les allumettes ou bien de cendre brûlant qui brûle,
qui fume avec l’aspirateur.
17. N’utilisez pas l’appareil sans que les filtres soient équipés.
18. N’utilisez pas le cordon d’alimentation ou la fiche endommagée. Lorsque le cordon d’alimentation
est endommagé, pour empêcher les dangers, il doit être changé par le fabricant, l’autorisé de service
ou par une autre personne qualifiée similaire.
19. Ne gardez pas les appareils électriques à proximité des gaz chauds ou ne les installez pas dans
ou sur les fours chauffés.
20. Puisqu’il peut affecter la propagation de la chaleur, assurez-vous que le dessus des trous de
ventilation de votre appareil ne soient couverts ou bloqués.
21. Tenez vos cheveux, vos vêtements larges, vos doigts et toutes les parties de votre corps à l’écart
des parties mobiles et des trous.
22. N’aspirez pas les liquides inflammables ou combustibles comme le fioul avec l’aspirateur ou
n’utilisez pas l’appareil dans les lieux où elles se trouvent.
23. Puisqu’ils peuvent causer à des blessures, n’utilisez aucun accessoire non recommandé par le
fabricant.
24. Cet appareil ne doit pas être utilisé par des personnes ayant un handicap physique, sentimental ou
mental sans la surveillance ou l’orientation d’une personne qui peut prendre la responsabilité en terme
- 14 -
Page 16
de sécurité pour l’utilisation des appareil (y compris les enfants moins de 8 ans) et par des personnes
n’ayant pas une information et une expérience sur ce sujet.
25. Gardez l’appareil et son cordon à l’écart des enfants moins de 8 ans.
26. Cet appareil doit être utilisé dans la maison ou dans des milieux déterminés ci-dessous.
– Salles à manger du personnel, dans des milieux de travail ou de bureau similaire ;
– Dans des maisons de ferme;
– Dans des milieux d’hébergement comme l’hôtel ou motel similaire,
– Dans les milieux de lit et de petit-déjeuner.
27. N'utilisez pas l'appareil à des fins autres que leur usage prévu.
28. Gardez ces instructions.
SEULEMENT POUR DES UTILISATION MENAGERE.
CONNAISSEZ VOTRE ASPIRATEUR.
1. Tuyau, 2. Poignée du tuyau, 3. Bouton glissant, 4. Tube prolongateur, 5. Brosse, 6. Suceur Plat
7. Suceur rectangulaire, 8. Filtre (dans le couvercle), 9. Couvercle avant, 10. Grande roue, 11. Entrée
d'air, 12. Bouton du récepteur, 13. Interrupteur marche / arrêt , 14. Bouton marche / arrêt
CARACTERISTIQUES
• Extérieur avec design spécial
• Enrouleur de câble automatique
• Réglage de vitesse
• Filtre HEPA
• Câble 4.5m
• Capacité de poussière: 2L
• Pussance: ≥300W
• Niveau sonore: ≤ 84dBA
• Avec un tuyaux téléscopique en métal, x 1 brosse de surface en plastique, 1 dispositif de kravice, x
1 brosse de fauteuil , 1 sac à poussière en tissus, 1 sac à poussière en papier
• AC230V, 50Hz, 2200W max
UTILISATION DE L’ASPIRATEUR
Débranchez toujours votre appareil en connectant ou déconnectant les accessoires de votre aspirateur !
1. Insérez le tube d’extension à la poignée de cordon. (Voir Figure 1).
Poignée
Tube d’Extension
Fig.1
Tube d’Extension
2. Insérez la brosse de surface au tube d’extension (Voir Figure 2).
- 15 -
Brosse de surface
Fig.2
Page 17
NOTE: La brosse de surface est idéale pour le nettoyage quotidien des tapis et des surfaces dures.
(Voir Figure 3).
Fig. 3
Nettoyage de Tapis Nettoyage des surfaces dures
3. Insérez le tuyau au canal d’entrée d’air se trouvant au-dessus de l’appareil. Appuyez jusqu’à ce que
vous entendiez « clic ». (Voir Figure 4).
NOTE:
1) Débranchez la fiche. Retirez le tuyau du canal d’entrée d’air.
2) N’utilisez pas le tuyau pour retirer de l’eau.
3) Ne plongez pas le tuyau dans de l’eau pour nettoyer.
4) Le tuyau doit être contrôlé régulièrement et ne doit pas être utilisé s’il est
endommagé.
4. Avant de commencer à utiliser l’appareil, brancher la fiche à la prise en retirant le cordon à longueur
suffisante. Le signe jaune se trouvant sur le cordon d’alimentation montre la longueur idéale du cordon.
Ne retirez pas de plus le cordon lorsque vous voyez le signe rouge sur le câble.
NOTE:
1) Pour enrouler le cordon d’alimentation, évitez l’endommagement en heurtant l’environnement et
le dérapage du cordon en contrôlant le cordon enroulé avec l’une main et en appuyant sur le bouton
d’enroulement de cordon se trouvant au-dessous de la poignée de corps avec l’autre main.
2) Si la poignée de corps est fermée, cela causera que le bouton d’enroulement de cordon soit appuyé
et causera à l’enroulement automatique du cordon.
5. Pour marcher l’appareil, appuyez sur le bouton de marche et contrôlez l’aspiration de poussière.
6. Pour faciliter le balayage, réglez la longueur du tuyau d’extension avec le bouton glissant.
UTILISATION DES ACCESSOIRES
1. Vous pouvez nettoyer les pauses de radiateur, des percées, des coins, des socles et
d’oreiller avec le dispositif d’extrémité étroite (Voir Figure.5).
Fig. 5
2. Vous pouvez nettoyer les meubles, les ventilateurs, les points difficiles à
atteindre, les livres, les lustres et les étagères avec la brosse rotative et les
dispositifs d’extrémité plate. (Voir Figure. 6).
MODE D’EMPLOI
Avant de commencer votre appareil, retirez suffisamment de cordon et branchez la fiche du cordon à
Fig. 6
- 16 -
Page 18
la prise. Le signe jaune sur le cordon détermine la longueur idéale et le digne rouge la longueur finale
que l’on peut retirer pour le cordon. Ne retirez plus le cordon lorsque vous voyez le signe rouge.
1. Pour fonctionner l’appareil, appuyez sur le bouton marche/arrêt.
Bouton marche/
arrêt.
2. Pour enrouler le cordon d’alimentation, évitez l’endommagement
en heurtant l’environnement et le dérapage du cordon en contrôlant
le cordon enroulé avec l’une main et en appuyant sur le bouton
d’enroulement de cordon se trouvant au-dessous de la poignée de
corps avec l’autre main.
MESURES RESERVEES
S’il y a un blocage à l’entrée de tuyau, au tuyau, au tube télescopique ou aux dispositifs d’extrémité,
éteignez immédiatement l’aspirateur. Après avoir éliminé le blocage, vous pouvez fonctionner de
nouveau l’aspirateur.
1. N’utilisez pas l’aspirateur à l’extrémité des ressources de chaleurs telles que
les chauffants, le feu ouvert et les mégots de cigarettes. (Voir Figure.7).
Fig.7
2. Assurez-vous que votre main est sèche lorsque vous branchez la prise à la
fiche. (Voir Figure.8).
Fig.9
3. Pour empêcher que le filtre en feuille de votre appareil soit endommagé, enlevez
par terre les objets grands et pointus avant de fonctionner l’aspirateur. (Voir Figure.9).
Fig.8
4. En débranchant l’aspirateur de la prise, ne tirez pas par son cordon. Saisissez
le cordon et non le cordon pour retirer l’appareil de la prise. (Voir Figure.10).
NOTE: Lorsque le cordon d’alimentation est endommagé, pour éviter les dangers, le cordon doit être
changé par le fabricant, l’autorisé de service ou par une personne qualifiée similaire.
Fig.10
- 17 -
Page 19
NETTOYAGE ET ENTRETIEN
Pour changer le sac de poussière
NOTE:
1) Utilisez toujours votre appareil quand le sac de poussière est inséré.
2) N’oubliez pas à insérer le sac de poussière à sa place ou si vous l’avez mal installé, le couvercle ne
sera pas fermé correctement.
Les détails sont détermines ci-dessous: (Voir Figure.11):
• Après avoir retiré le tube d’extension, ouvrez le couvercle supérieur en poussant le loquet de
verrouillage vers le haut.
• Retirez le sac de poussière de sa place.
• Lorsqu’il est rempli entièrement, changez le sac de poussière
avec le nouveau.
• Installez le nouveau sac à poussière à sa place.
• Poussez vers le bas le couvercle jusqu’à ce qu’il soit fermé et
verrouillé.
Pour nettoyer le filtre
NOTE:
1) Le filtre doit être nettoyé au moins deux fois par an ou bien lorsqu’il est visiblement sale.
2) Utilisez toujours votre appareil lorsque le filtre est inséré.
3) Sinon il y aura une réduction à la puissance d’aspiration et des dommages de moteur.
4) Avant de commencer à nettoyer le filtre, débranchez toujours l’appareil.
5) Ne lavez pas le filtre dans la machine à laver.
6) Ne séchez pas le filtre dans la machine à sécher.
Les détails sont comme les suivants (Voir Figure.12):
• Retirez le sac à poussière.
• Retirez le filtre.
• Lavez le filtre dans de l’eau tiède et séchez.
• Insérez le filtre à sa place.
Fig.12
Changement du Filtre Micro de Sortie d’air
Les détails sont comme les suivants (Voir Figure.13):
• Ouvrez le couvercle de sortie d’air.
• Retirez le filtre et insérez le nouveau propre.
• Fermez le couvercle de sortie d’air.
Fig.11
Fig.13
SANTE ENVIRONNEMENTALE ET HUMAINE
Vous aussi, vous pouvez contribuer à la protection environnementale ! S’il vous plait, n’oubliez pas de
vous conformer aux règlementations locales : Emmenez les appareils électriques qui ne marchent pas
aux centres appropriés pour la collecte des déchets.
- 18 -
Page 20

NEDERLANDS
SINBO SVC 3469 ELEKTR‹SCHE STOFZU‹GER
GEBRU‹KERSHANDLE‹D‹NG
BELANGRIJKE VEILIGHEIDSVOORSCHR‹FTEN
Bij het gebruik van uw apparaat dient u altijd de volgende essentiële veiligheidsvoorschriften in acht
te nemen:
1. Lees alle gebruiksinstructies.
2.Controleer of de voedingsspanning, vermeld op het typeplaatje van het apparaat, overeenkomt met
de netspanning.
3. Laat de elektrische stofzuiger nooit onbeheerd achter met de stekker in het stopcontact. Haal altijd
de stekker uit de stopcontact als de stofzuiger niet gebruikt wordt en voor onderhoudswerkzaamheden.
4. Gebruik het apparaat niet buitenshuis of op natte oppervlakken om het risico op elektrische schokken
te beperken.
5. Houdt voldoende toezicht om te beletten dat kinderen met het apparaat gaan spelen.
6. Gebruik uw apparaat uitsluitend zoals in de handleiding wordt uiteengezet en gebruik alleen door
de verkoper aanbevolen onderdelen.
7. Breng de stofzuiger onmiddellijk naar een erkend servicedienst, indien de stofzuiger niet normaal
werkt, gevallen en beschadigd is, buiten gestaan heeft en het apparaat in het water gevallen is.
8. Gebruik het snoer niet om de elektrische stofzuiger te trekken of gebruik het snoer niet als handvat,
zorg dat het niet geklemd raakt tussen deuren, scherpe hoeken en randen. Sleep de stofzuiger niet
over het snoer heen. Houd het snoer uit de buurt van hete oppervlakken.
9. Trek nooit aan het snoer om de stekker uit het stopcontact te halen. Grijp altijd de stekker en niet
het snoer vast om het apparaat los te koppelen van het stopcontact.
10. Raak de stekker of de stofzuiger niet aan met natte handen.
11. Steek geen voorwerpen in de ventilatieopeningen aan de bovenkant van het apparaat. Gebruik het
apparaat niet wanneer de ventilatieopeningen bedekt zijn of de uitvoer verstopt is. Zorg dat de luchtstroom
niet wordt gehinderd door stof, pluisjes, haren en andere materialen, die de luchtstroom kunnen
hinderen.
12. Schakel alle controleknoppen uit voordat u de stekker van het apparaat uit het stopcontact haalt.
13. Wees vooral voorzichtig bij het schoonmaken van de treden.
14. Houd de stekker vast bij het opwinden van het snoer, zodat deze niet in het rond slingert en overal
tegenaan botst.
15. Haal de stekker uit het stopcontact voordat u de zuigslang monteert.
16. Gebruik de stofzuiger niet voor het opzuigen van warme, smeulende of gloeiende materialen zoals
sigaretten, lucifers, as e.d.
17. Gebruik het apparaat nooit zonder filters.
18. Gebruik nooit een apparaat waarvan het netsnoer of de stekker beschadigd is. Ingeval het netsnoer
defect is moet het om alle gevaar te vermijden vervangen worden door de kabelfabrikant, een erkend
Servicedienst of geschoolde vakman.
19. Houd elektrische apparaten uit de buurt van hete gas of plaats deze niet op of in verwarmde ovens.
20. Zorg ervoor dat de ventilatieopeningen van het apparaat niet bedekt of verstopt zijn, omdat het van
invloed is op de warmteverspreiding.
21. Houd uw haar, losse kleding, vingers en alle lichaamsdelen uit de buurt van openingen en
beweeglijke onderdelen.
22. Zuig met de stofzuiger geen ontvlambare of ontplofbare vloeistoffen op, bijvoorbeeld dieselolie en
gebruik het apparaat niet in de nabijheid van dergelijke stoffen.
23. Gebruik geen onderdelen die door de fabrikant niet aanbevolen worden, omdat het letsel kan
veroorzaken.
24. Dit apparaat mag niet gebruikt worden door personen met lichamelijke, zintuiglijke of geestelijke
- 19 -
Page 21

handicap (kinderen jonger dan 8 jaar vallen er ook onder) of gebrek aan kennis en ervaring, tenzij het
gebruik onder toezicht en leiding van een persoon die verantwoordelijk is voor het veilig gebruik
plaatsvindt.
25. Houd het apparaat en snoer buiten het bereik van kinderen jonger dan 8 jaar.
26. Gebruik dit apparaat binnenshuis of in de hieronder aangegeven omgevingen:
– Personeelkantines,kantoor of andere werkomgevingen;
–Woonboerderijen;
– Hotel, motel of dergelijke accommodatie omgevingen;
– Bed and Breakfast omgevingen.
27. Gebruik het apparaat niet voor andere doeleinden dan het beoogde gebruik.
28. Bewaar deze voorschriften.
U‹TSLU‹TEND BEDOELD VOOR HU‹SHOUDEL‹JK GEBRU‹K
LEER UW ELEKTR‹SCHE STOFZU‹GER KENNEN
1. Zuigslang, 2. Slanghandgreep, 3. Verschuifbare knop, 4. Verlengbuis, 5. Vloerborstel, 6. Vlakke
zuigmond, 7. Rechthoekige zuigmond, 8. Filter (bedekt), 9. Voorpaneel, 10. Grote wiel, 11. Luchtinlaat
12. Ontvangknop, 13. Aan/Uitknop, 14. Schakelknop
E‹GENSCHAPPEN
• Speciaal patroon op behuizing
• Automatische snoeroproller
• Snelheidregelaar
• HEPA filter
• 4.5m Kabel
• Stof capaciteit: 2L
• Zuigkracht: ≥300W
• Geluidsniveau: ≤ 84dBA
• Samen met een metalen telescopische buis, x1 stuk kunststof vloerborstel, x 1 stuk vacuumpomp,
x 1 stuk zitbankborstel, 1 stuk stoffen stofzak , 1 stuk papieren stofzak.
• AC230V, 50Hz, 2200W max
HET GEBRU‹K VAN DE ELEKTR‹SCHE STOFZU‹GER
Haal altijd de stekker van het apparaat uit het stopcontact voordat u de onderdelen van uw elektrische
stofzuiger monteert of demonteert!
1. Monteer de verlengbuis aan de slanghandgreep (Zie Tekening 1).
Handgreep
Verlengbuis
Tek. 1
2. Koppel de vloerborstel vast aan de verlengbuis (Zie Tekening 2).
- 20 -
Verlengbuis
Grondborstel
Tek.2
Page 22

Opmerking: De Grondborstel is ideaal voor de dagelijkse reiniging van tapijten en harde vloeren
(Zie Tekening 3)
Tek.3
Het reinigen van tapijten Het reinigen van harde vloeren
3. Steek de Slang in de zuigingang aan de bovenzijde van het apparaat en duw tot u een “klikje” hoort,
zodat u weet dat deze goed bevestigd is. (Zie Tekening 4).
OPMERK‹NG:
1) Haal de stekker uit het stopcontact. Haal de slang uit de zuigingang.
2) Gebruik de slang niet om water op te zuigen.
3) Dompel de slang ter reiniging.niet in water.
4) Controleer de slang regelmatig en gebruik de slang niet indien deze beschadigd
is.
4. Trek het snoer uit tot op de gewenste lengte en steek vervolgens de stekker in het stopcontact, voor
het gebruik van het apparaat. Het gele teken op het netsnoer toont de ideale kabellengte aan. Trek het
snoer nooit verder uit als het rode teken op het snoer zichtbaar wordt.
OPMERK‹NG:
1) Om het netsnoer op te winden drukt u met een hand op de opwindknop terwijl u met de ander hand
het snoer in de gaten houdt, zodat deze niet gaat rondslingeren, overal tegenaan gaat botsen en
beschadigingen gaat veroorzaken.
2) Het dichtklappen van de framehandgreep heeft tot gevolg dat de opwindknop ingedrukt blijft en
waardoor het snoer automatisch opgewonden wordt.
5. Druk op de “Aan/Uit” schakelknop om de stofzuiger in te schakelen en controleer vervolgens de
stofopzuiging.
6. Vestel met behulp van de verstelknop de lengte van de verlengbuis ter vergemakkelijking van het
opzuigen.
HET GEBRU‹K VAN DE ONDERDELEN (HULPSTUKKEN)
1. Met de spleet zuigmond kunt u radiatoren, openingen, hoeken, plinten en tussen de
kussens schoonmaken (Zie Tekening 5)
Tek.5
2. Met de ronde borstel en de rechte zuigmonden kunt u meubels, airconditioners,
moeilijk te bereiken punten, boeken, kroonluchters en planken schoonmaken.
(Zie Tekening 6)
- 21 -
Tek. 6
Page 23

GEBRU‹KS‹NSTRUCT‹ES
Trek het snoer uit tot op de gewenste lengte en steek vervolgens de stekker in het
stopcontact, voor het gebruik van het apparaat. Het gele teken op het netsnoer toont de
ideale kabellengte aan. Trek het snoer nooit verder uit als het rode teken op het snoer zichtbaar wordt.
1. Druk op de “Aan/Uit”schakelknop om de stofzuiger in te schakelen.
Aan/Uit
schakelknop
2. Om het netsnoer op te winden drukt u met een hand op de snoer
opwindknop terwijl u met de ander hand het snoer in de gaten houdt,
zodat deze niet gaat rondslingeren, overal tegenaan gaat botsen en
beschadigingen gaat veroorzaken.
VOORZORGSMAATREGELEN
Schakel de elektrische stofzuiger onmiddellijk uit ingeval de zuigingang, slang, Telescopische buis
en/of zuigmonden verstopt zijn. Gebruik de stofzuiger pas opnieuw nadat de oorzaak van de verstopping
verwijderd is.
1. Gebruik de elektrische stofzuiger niet in de nabijheid van hitte bronnen zoals
verwarmingselementen, open vuur, sigarettenpeukjes e.d. (Zie Tekening 7).
Tek.7
2. Zorg ervoor dat uw handen droog zijn bij het steken van de stekker in het
stopcontact (Zie Tekening 8).
3. Raap alle grote en scherpe voorwerpen op voordat u de elektrische stofzuiger
gaat inschakelen om beschadiging van het papierenfilter te voorkomen(Zie Tekening
Tek.9
4. Trek nooit aan het snoer om de stekker van de elektrische stofzuiger uit het
stopcontact te halen. Grijp altijd de stekker en niet het snoer vast om het
apparaat los te koppelen van het stopcontact (Zie Tekening10).
OPMERK‹NG: Ingeval het netsnoer defect is, moet het om alle gevaar te vermijden vervangen worden
door de kabelfabrikant, een erkend Servicedienst of geschoolde vakman.
RE‹N‹G‹NG EN ONDERHOUD
Voor de vervanging van de stofzak
OPMERK‹NG:
1) Gebruik het apparaat altijd met een stofzak
9).
Tek.8
Tek.10
- 22 -
Page 24

2) ‹n het geval u bent vergeten om een stofzak in te zetten of verkeerd hebt ingezet, zal de bovenklep
niet sluiten.
Details zijn hieronder aangegeven: (Zie Tekening 11):
• Nadat u de verlengbuis heeft verwijderd, kunt u de bovenklep openen door de vergendelingsblok naar
boven te schuiven.
• Haal de stofzak eruit.
• Vervang de stofzak met een nieuwe stofzak, wanneer deze volledig
vol is,
• Zet de nieuwe stofzak in zijn plaats.
• Duw de klep naar beneden totdat deze dicht is.
Het reinigen van het filter
OPMERK‹NG:
1) Het filter dient tweemaal per jaar of wanneer het zichtbaar vuil is, schoongemaakt te worden.
2) Gebruik alleen het apparaat wanneer het filter is ingezet.
3) Anders kan daling van de trekkracht, of schade aan de motor ontstaan??.
4) Haal de stekker van het apparaat uit het stopcontact voordat u het filter schoonmaakt.
5) Was het filter niet in de wasmachine.
6) Droog het filter niet in de droogtrommel.
Details zijn zoals hieronder aangegeven (Zie Tekening 12):
• Haal de stofzak uit zijn plaats.
• Haal het filter uit zijn plaats.
• Was het filter met lauw water en droog het.
• Zet het filter op zijn plaats.
Tek.12
Vervanging van het Mikro Luchtuitblaasfilter
Details zijn zoals hieronder aangegeven (Zie Tekening13):
• Open de luchtuitblaasklep.
• Haal het filter eruit om het te vervangen met een nieuwe filter.
• Sluit vervolgens de luchtuitblaasklep.
Tek.11
Tek.13
M‹L‹EU EN DE GEZONDHE‹D VAN MENSEN
U kunt ook bijdrage leveren aan de bescherming van het milieu!
Houd alstublieft rekening met de plaatselijke wettelijke voorschriften: Breng elektrische apparaten,
die niet meer werken naar een erkend inzamelplek of verwerkingscentrum.
- 23 -
Page 25

DEUTSCH
SINBO SVC 3469 ELEKTRISCHER STAUBSAUGER
GEBRAUCHSANWEISUNG
WICHTIGE SICHERHEITSHINWEISE
Passen Sie an die unten geschriebenen grundlegenden Sicherheitshinweise bevor Sie Ihr Gerät benutzen:
1. Lesen Sie alle Hinweise durch.
2. Bevor Sie Ihr Gerät benutzen, kontrollieren Sie ob die Spannung auf der Nennkarte des Gerätes
angemessen der Spannung auf der Steckdose ist.
3. Lassen Sie den elektrischen Staubsauger nie frei, wenn er an der Steckdose gesteckt wurde. Ziehen
Sie den Staubsauger aus der Steckdose wenn Sie ihn pflegen oder bevor Sie Ihr Gerät benutzen.
4. Benutzen Sie Ihr Gerät nicht auf offenen Plätzen oder auf nassen Flächen damit Sie den elektrischen
Schock verhindern können.
5. Beobachten Sie das Gerät damit die Kinder nicht mit dem Gerät spielen.
6. Benutzen Sie Ihr Gerät nur wie es in dieser Gebrauchsanweisung geschrieben wird und mit den
empfohlenen Zubehörteilen.
7. Bringen Sie Ihr Gerät direkt zu einem qualifizierten Servicepunkt wenn es nicht normal arbeitet oder
beschädigt wird.
8. Ziehen Sie den elektrischen Staubsauger nicht von dem Kabel. Benutzen Sie das Kabel nicht als
Halter. Schließen Sie Tür nicht auf das Kabel oder drücken Sie es nicht zu den scharfen Seiten oder
Ecken. Ziehen Sie das Gerät nicht mit dem Kabel. Halten Sie das Kabel weg von den warmen Flächen.
9. Ziehen Sie nicht das Kabel wenn Sie den elektrischen Staubsauger aus der Steckdose nehmen.
Nehmen Sie zuerst den Stecker in die Hand wenn Sie das Gerät aus der Steckdose ziehen.
10. Halten Sie den Stecker oder den elektrischen Staubsauger nicht mit nassen Händen.
11. Stecken Sie durch die Löcher des Gerätes keine fremden Dinge. Versuchen Sie das Gerät nicht in
Betrieb zu setzen wenn die Löcher auf dem Gerät verstopft oder geschlossen sind. Schützen Sie das
Gerät vor die fremden Dinge wie Staub und Haar, die die Luft Umlauf verhindern können.
12. Schließen Sie alle Tasten bevor Sie den Stecker aus der Steckdose ziehen.
13. Seien Sie besonders vorsichtig wenn Sie die Treppen reinigen.
14. Halten Sie den Stecker wenn Sie das Kabel wickeln. Vermeiden Sie dass der Stecker gegen etwas
stößt wenn das Kabel gewickelt wurde.
15. Ziehen Sie den Stecker aus der Steckdose bevor Sie den Schlauch einsetzen.
16. Saugen Sie die rauchenden Dinge wie Zigarren, Zündholz oder warme Asche nicht mit dem
Staubsauger.
17. Benutzen Sie das Gerät nicht ohne Filter.
18. Benutzen Sie beschädigte Leistung Kabel oder beschädigten Stecker nicht. Wenn die Leistung
Kabel beschädigt wird bringen sie es zu einem Kabel Hersteller oder qualifiziertem Servicemann damit
Sie die Gefahren verhindern können.
19. Halten sie die elektrischen Geräte nicht neben warmen Gasen oder gewärmten Ofen.
20. Seien Sie sicher, dass die Luft Löcher des Gerätes nicht verstopft sind weil es auf die Wärme
Verbreitung negativ wirkt.
21. Halten Sie Ihr Haar, Ihre geräumigen Kleider, Ihre Finger oder Teile Ihres Körpers weg von den
Löchern oder bewegende Teile.
22. Saugen Sie brennbare oder entflammbare Flüssigkeiten wie Heizöl nicht mit dem elektrischen
Staubsauger. Halten Sie das Gerät nicht neben diesen Dingen.
23. Benutzen Sie die Zubehörteile, die nicht von dem Hersteller empfohlen werden, nicht weil es
Verletzungen verfolgen können.
24. Personen, die physikalisch, mental oder sensorisch behindert sind, dürfen dieses Gerät ohne
Beobachtung von Personen, die bei der Benutzung des Gerätes Verantwortung nehmen können, nicht
benutzen. (auch Kinder jünger als 8 Jahre)
25. Bewahren Sie das Gerät und das Kabel weg von den Kindern auf.
- 24 -
Page 26

26. Dieses Gerät darf zu Hause oder in den unten geschriebenen Plätzen gebraucht werden.
– Mitarbeiter-Restaurant, Büros oder ähnliche Arbeitsorte;
– Bauernhäuser;
– Hotels und ähnliche Unterbringungszentren
– Bett und Frühstückorte
27. Benutzen Sie Ihr Gerät nicht für andere Zwecke.
28. Bewahren Sie diese Gebrauchsanweisung auf.
NUR FÜR HAUSHALTVERWENDUNG MÖGLICH
KENNEN SIE IHREN ELEKTRISCHEN STAUBSAUGER
1. Schlauch, 2. Schlauchgriff, 3. Scrolltaste, 4. Verlängerungsrohr, 5. Bodenbürste, 6. Hartbodendüse
7. Fugendüse, 8. Filter (im Deckel), 9. Vorderer Deckel, 10. Großes Rad, 11. Belüftung, 12. Empfängerknopf
13. An/Aus Taste, 14. Starttaste
EIGENSCHAFTEN
• Spezielles Design
• Automatische Kabelaufwicklung
• Regelbare Geschwindigkeit
• HEPA Filter
• 4.5M Kabel
• Staub Kapazität: 2L
• Saugkraft: ≥300W
• Lärm: ≤ 84dBA
• Teleskoprohr aus Metal, x 1 Bürstenaufsatz aus plastik, x1 craviceapparat, x 1 textilbürste, 1 stoffbeutel
mit , x 1 satubbeutel aus papier.
• AC 230V, 50Hz, 2200W max
VERWENDUNG VON DEM ELEKTRISCHEN STAUBSAUGER
Wenn Sie die Zubehörteile von dem Staubsauger ein oder aussetzen, ziehen Sie den Stecker immer
aus der Steckdose!
1. Stecken Sie die Verlängerung Schlauch zu dem Kabel Halter. (Schauen Sie Zeichnung 1).
Halter
Verlängerung
Schlauch
2. Stecken Sie den Boden Bürste zu der Verlängerung Schlauch
(Schauen Sie Zeichnung 1).
Zeich. 1
Verlängerung
Schlauch
Boden Bürste
ANMERKUNG: Der Boden Bürste ist ideal für die Reinigung von harten Boden und Teppichen(Schauen
Sie Zeichnung 1).
Zeich.2
- 25 -
Page 27

Zeich. 3
Reinigung von Teppichen Reinigung von hartem Boden
3. Setzen Sie das Schlauch in die Luft Eingang auf dem oberen Teil von dem Gerät ein. Drücken Sie es
bis Sie das Geräusch ‘klick‘ hören.(Schauen Sie Zeichnung 4).
ANMERKUNG:
1) Ziehen Sie den Stecker aus der Steckdose. Ziehen Sie das Schlauch aus der
Luft Eingang.
2) Niemals benutzen Sie den Schlauch für das Saugen vom Wasser.
3) Niemals stecken Sie den Schlauch für Reinigung ins Wasser.
4) Kontrollieren Sie den Schlauch regelmäßig und benutzen Sie ihn nicht mehr
wenn er beschädigt wurde.
4. Bevor Sie Ihr Gerät benutzen ziehen Sie ausreichende Länge von dem Kabel heraus. Stecken Sie den
Stecker aus der Steckdose. Das gelbe Zeichen auf der Leistung Kabel zeigt die ideale Länge von dem
Kabel. Nachdem Sie das rote Zeichen gesehen haben, ziehen Sie das Kabel nicht mehr.
ANMERKUNG:
1) Wenn Sie die Leistung Kabel rückwärts wickeln, drücken Sie die Taste für das Wickeln vom Kabel
unter dem Körper Halter mit einer Hand und mit der anderen Hand verhindern Sie, dass das Kabel
entfaltet und andere Dinge schädigt indem Sie das gewickelte Kabel kontrollieren.
2) Wenn der Körper Halter geschlossen ist, wirkt es, dass das Wickeln Taste gedrückt bleibt und das
Kabel automatisch rückwärts gewickelt wird.
5. Das Gerät in Betrieb zu setzen, drücken Sie das Öffnen Taste und kontrollieren Sie das Saugen vom
Staub.
6. Regeln Sie die Länge von der Verlängerung Schlauch mit der drehenden Taste um das Saugen
Operation zu leichtern.
BENUTZUNG VON DEN ZUBEHÖRTE‹LEN
1. Mit dem schmalen Ende von dem Apparat können Sie Heizkörper, Ecken, Fußleisten,
Kissenbrüchen reinigen. (Schauen Sie Zeichnung 5)
Zeich. 5
2. Mit drehender Bürste und flachen Ende Apparaten können Sie Möbel,
Lüftungen, nicht leicht erreichte Punkte, Bücher, Lüster oder Regale reinigen.
(Schauen Sie Zeichnung 6).
Zeich. 6
- 26 -
Page 28

GEBRAUCHSANWEISUNGEN
Bevor Sie anfangen, das Gerät zu benutzen, ziehen Sie ausreichende Menge vom Kabel heraus und
stecken Sie den Stecker in die Steckdose. Das gelbe Zeichen auf dem Kabel zeigt die ideale Länge vom
Kabel und das rote Zeichen die maximale Länge vom Kabel. Nachdem Sie das rote Zeichen gesehen
haben, ziehen Sie das Kabel nicht mehr.
1. Um das Gerät zu arbeiten, drücken Sie das Öffnen/Schließen Taste.
Öffnen/Schließen
Taste
2. Wenn Sie die Leistung Kabel rückwärts wickeln, drücken Sie die
Taste für das Wickeln vom Kabel unter dem Körper Halter mit einer
Hand und mit der anderen Hand verhindern Sie, dass das Kabel
entfaltet und andere Dinge schädigt indem Sie das gewickelte Kabel
kontrollieren.
VORSICHTSMASSNAHMEN
Wenn es Verstopfungen in dem Schlauch Eingang, Schlauch, in dem teleskopischen Rohr oder Ende
Apparat gibt, schließen Sie den Staubsauger gleich. Nachdem Sie die Verstopfung entfernt haben,
können Sie das Gerät wieder arbeiten.
1. Benutzen Sie den Staubsauger nicht neben Heizungen, offenem Feuer oder
Zigaretten. (Schauen Sie Zeichnung.7).
Zeich.7
2. Seien Sie sicher, dass Ihre Hände trocken sind wenn Sie den Stecker in die
Steckdose stecken. (Schauen Sie Zeichnung 8).
3. Bevor Sie den Staubsauger arbeiten, entfernen Sie große und scharfe Dinge damit
Zeich.9
4. Ziehen Sie den Staubsauger nicht vom Kabel wenn Sie ihn aus der Steckdose
nehmen. (Schauen Sie Zeichnung 10).
ANMERKUNG: Wenn die Leistung Kabel beschädigt wird, muss diese von einem Hersteller, Servicemann
oder qualifiziertem Mann gewechselt werden.
PFLEGE UND REINIGUNG
Um den Staubbeutel zu wechseln:
ANMERKUNG:
1) Benutzen Sie Ihr Gerät nur wenn der Staubbeutel gesteckt wurde.
der Filter von dem Gerät nicht beschädigt wird. (Schauen Sie Zeichnung 9).
Zeich.8
Zeich.10
- 27 -
Page 29

2) Wenn Sie den Staubbeutel nicht eingesetzt haben oder ihn falsch einsetzen, kann der obere Deckel
nicht geschlossen werden.
Die Einzelheiten sind unten beschrieben:( Schauen Sie Zeichnung 11):
• Öffnen Sie den oberen Deckel wenn Sie das Verschlussriegel nach oben drücken und nachdem Sie
die Verlängerung Kabel herausnehmen.
• Nehmen Sie den Staubbeutel heraus.
• Wenn das Papier Beutel voll ist, wechseln Sie ihn mit einem
neuen.
• Setzen Sie den neuen Beutel in Ihre Stelle.
• Drücken Sie den Deckel nach unten bis er geschlossen wird.
Um den Filter zu reinigen:
ANMERKUNG:
1) Der Filter soll mindestens zwei Mal im Jahr oder wenn er Merkmal schmutzig wird gereinigt werden.
2) Benutzen Sie Ihr Gerät nur wenn der Filter eingesetzt wurde.
3) Sonst kann die Saugkraft weniger oder der Motor beschädigt werden.
4) Bevor Sie den Filter reinigen, ziehen Sie den Stecker aus der Steckdose.
5) Waschen Sie den Filter nicht in der Waschmaschine.
6) Trocknen Sie den Filter nicht in einem Trockner.
Die Einzelheiten sind unten beschrieben: (Schauen Sie Zeichnung12):
• Nehmen Sie den Staubbeutel heraus.
• Nehmen Sie den Filter heraus.
• Waschen Sie den Filter mit feuchtem Wasser und trocknen Sie ihn.
• Setzen Sie den Filter ein.
Zeich.12
Wechseln von der Mikroluft Ausgang Filter:
Die Einzelheiten sind unten beschrieben: (Schauen Sie Zeichnung 13):
• Öffnen Sie die Luft Ausgang Deckel.
• Nehmen Sie den Filter von seinem Platz und setzen Sie einen sauberen.
• Schließen Sie die Luft Ausgang Deckel.
Zeich.11
Zeich.13
UMGEBUNG UND MENSCHEN GESUNDHEIT
Sie können auch den Schutz von der Umgebung beitragen!
Niemals vergessen Sie den lokalen Anordnungen anzupassen: Bringen Sie nicht arbeitende Geräte zu
einem angemessenen Sammlungsservice.
- 28 -
Page 30

ESPANOL
SINBO SVC 3469 ASPIRADORA
MANUAL DEL USO
PRECAUCIONES IMPORTANTES DE LA SEGURIDAD
Antés de usar su moaparato, cumplir definitivamente con las precauciones básicas de la seguridad
expresados en escrito como los siguientes:
1. Leer todas las instrucciones.
2. Antés iniciar a usar el moaparato, controlar que el votaje expresado sobre la placa calificada del
moaparato sea igual al voltaje de su enchufe.
3. No dejar a solas la aspiradora durante es enchufado. La aspiradora debe ser desenchufado durante
no está usado ú antés de relizarse el mantenimiento.
4. No usar su moaparato sobre los superficies mojados o afuera para reducir el riesgo del shock
eléctrico.
5. Debe ser vigilado suficientemente el moaparato para evitar que los niños se juegan con el moaparato.
6. Solamente usar su moaparato con asesorios recomendados del/de la vendedor/a y en forma de ser
definido en esta instrucción.
7. En caso de ser funcionado la aspiradora en forma normal, caído, dañado, dejado a fuera, suöergido
en agua, llevarlo inmediatamente al servicio técnico autorizado.
8. No tirar la aspiradora cogiendo de su cable o no usar el cable como mango no cerrar puerta sobre
el cable, moapretar el cable a los bordes afilados y esquinas. No arrastrar la aspiradora sobre el cable.
Conservar la distancia entre el cable y los superficies calurosos.
9. No tirar la aspiradora mientras desenchufándola de su cable. Coger el enchufe para desenchufar
el moaparato, sino el cable.
10. No tocar al enchufe o a la aspiradora con manos mojados.
11. No meter cualquier cosa en los agujeros sobre el moaparato. No intentar a usar el moaparato
mientrás estaban cubiertos los agujeros o la salida. Proteger ante las sustancias como polvo, pelusa,
pelo y otras.
12. Antés de denchufar el moaparato, apagar todas unidades de control remoltos.
13. Particularmente tener cuidado mientrás limpiaba usted las escaleras.
14. Coger el enchufe mientrás enrollaba el cable de la energía. No permitir que choque el enchufe
mientrás enrollaba el cable de la energía.
15. Desenchufar el moaparato antés de fijar la manguera.
16. No aspirar objetos quemados, sacados el humo como cigarrillo, cerilla o ceniza caliente.
17. Nu usar el moaparato sin los filtros fijados.
18. No usar el cable de la energía o enchufe que sean dañados. En caso deser averíado el cable de la
energía, el cable debe ser recambiado por el/la fabricante, el/la autorizado/a técnico/a ú/o por una
persona similar legalmente capacitado.
19. No poner los moaparatos eléctricos cerca de los gases calurosos o no poner sobre o meter en los
hornos calentados.
20. Estar seguro que los agujeros de la ventilación sobre su moaparato no están cubiertos o bloqueados
por motivo de influir la circulación del calor.
21. Conservar la distancia de su pelo, su ropa grande, sus dedos y todas las partes de su cuerpo entre
los agujeros y las piezas móviles.
22. No usar el moaparato cerca de estos líquidos.
23. No usar ningún acesorio no recomendado por el/la fabricante por motivo de que podrá causar
sufrimientos de heridas.
24. Este moaparato no s edebe usar por las personas físicamente, sentimentalmente o mentalmente
minusválidas incluso los niños menos 8 (ocho) años de edad, por las personas no tenían experiencia
o conocimiento en este tema.
- 29 -
Page 31

25. Conservar el moaparato y su cable en lugares no alcanzados por los niños menos 8 (ocho) años de
adad.
26. Este moaparato debe ser usado doméstico ú en lugares expresados como los siguientes:
- En comedores del personal, en las oficinas o en los lugares similares de trabajo;
- En los hoteles, moteles o lugares similares de alojamiento;
- En lugares con camas y en el desayuno.
27. No usar su moaparato fuera de sus objetivos de usarlo.
28. Conservar estas instrucciones.
SOLAMENTE ES PARA USO DOMÉSTICO
CONOCER SU ASPIRADORA
1. Manguera, 2. Mango para Manguera, 3. Botón deslizado, 4. Tubo para la extensión, 5. Cepillo para
el suelo, 6. Punto liso aspirador, 7. Punto cuadrado aspirador, 8. Filtro (dentro de la tapa), 9. Tapa
delantera, 10. Rueda grande, 11. Entrada para el aire, 12. Botón receptor, 13. Botón para funcionar/apagar
14. Botón para funcionar
CARACTERÍSTICAS
• El diseño particular para el cuerpo
• Característica automática para enrollar el cable de la energía
• Botón para controlar el nivel de la velocidad
• Filtro HEPA a la salida del aire
• Cable de la energía con 4.5mts de longitud
• Volumen para la bolsa del polvo: 2Lts
• Poder para la aspiración: ≥300W
• Nivel del ruido: ≤84dBA
• Con tubo telescópico de metálico ,1 unidad de cepillo de plástico del suelo,1 unidad del aparato para
kraviche,1 unidad del aparato para sillones,1 unidad de bolsa de tela para el polvo,1 unidad de bolsa
de papel para el polvo.
• AC 230V, 50Hz, 2200W máx
USO DE LA ASPIRADORA
Siempre desenchufar su aspiradora mientrás montaba y desmontaba usted los acesorios de su
aspiradora!.
1. Fijar el tubo para la extensión al mango del cable de la energía (consultar a la Figura 1).
Mango
Tubo para la extensión
Fig.1
2. Fijar el cepillo para el suelo al tubo para la extensión.
(consultar a la Figura 2).
Tubo para la extensión
Cepillo para el suelo
Fig.2
- 30 -
Page 32

NOTA: Cepillo para el suelo es ideal para la limpieza diaria de las alfombras y de los suelos duros.
Fig. 3
Limpieza de la alfombra Limpieza de los suelos duros
3. Fijar la manguera en el canal para la entrada del aire ubicado en la parte superior del moaparato.
Presionar hasta que se coloque en su lugar oyendo la voz “clic”. (Consultar a la Figura. 4).
NOTA:
1) Desenchufar el apataro. Quitar la manguera del canal para la entrada del
aire.
2) No usar la manguera para aspirar agua.
3) N o sumergir la manguera en agua para limpiarla.
4) La manguera debe ser controlado regularmente y en caso de ser dañado,
no debe ser usado.
4. Antés de iniciar a usar el moaparato. Enchufarlo sacando el cable suficientemente. La marca amarilla
ubicada sobre el cable muestra el longitud ideal para el cable de la energía. No tirar más el cable de
la energía después de observar la marca roja.
NOTA:
1) Para enrollar otra vez el cable de la energía, evitar que se dañara chocando alrededor y echar al
viento el cable conrolándolo con otrá mano pulsando al botón para enrollar el cable de la energía
ubicado debajo del mango para el cuerpo con una mano.
2) El mango para el cuerpo causará que se quede pulsado el botón para enrollar el cable de la energía
mientrás estaba cerrado.
5. Para funcionar el moaparato, pulsar al botón para funcionarlo y controlar la aspiración del polvo.
6. Ajustar el longitud del tubo para la extensión por medio del botón movible para que sea más fácil
el proceso de la aspiración.
USO DE LOS ACESORIOS
1. Usted puede limpiar los radiadores, aberturas, esquinas, rodapiés y aberturas entre
los cojines. (consultar a la Figura. 5).
Fig.5
2. Usted puede limpiar los muebles, las ventiladores, puntos difíciles para
alcanzar, libros, arañas de luces y mostradores por medio del cepillo giratorio
y de los moaparatos llanos de punto. (consultar a la Figura. 6).
INSTRUCCIONES DEL USO
Antés de iniciar a usar su moaparato, sacar el cable de la energía suficientemente tirándolo y enchufar
- 31 -
Fig.6
Page 33

el cable de la energía. La marca amarilla sobre el cable de la energía expresa el longitud ideal para
el cable de la energía, la marca roja expresa longitud máximo para poder tirar del cable de la energía.
No tirar más el cable después de observar la marca roja.
1. Pulsar al botón de on/off (funcionado/apagado) para funcionar el moaparato.
Botón de on/off
Botón para
enrollar el cable
de la energía.
2. Para enrollar otra vez el cable de la energía con una mano ested,
evitar que se dañará alrededor siendo lanzado al aire el cabel de la
energía controlando el cable de la energía enrollado con su otra mano
pulsando al botón para enrollar con una mano.
MEDIDAS CAUTELARES
En caso de ser bloqueado la entrada de la manguera, la manguera, tubo telescópico ú los moaparatos
del punto, inmediatamente apagar la aspiradora. Después de eliminar el bloqueo usted puede funcionar
otra vez la aspiradora eléctrica.
1. No usar la aspiradora muy cerca de las fuentes calentadoras como calentadores,
fuego libre, colillas de cigarrillo. (consultar a la figura. 7).
Fig.7
2. Estar seguro que sean secos las manos mientrás estaba enchufado la ficha.
3. Para evitar que el filtro de papel en el moaparato se dañará, recoger los objetos
Fig.9
4. No tirar el cable de la energía mientrás desenchufaba el cable de la energía.
(consultar a la Figura. 10).
NOTA: En caso de ser averíado el cable de la energía, debe ser recambiado el cable de la energía por
el/la fabricante, autorizado técnico de servicio ú por una persona similar calificado para evitar los
peligros.
LIMPIEZA Y MANTENIMIENTO
Para recambiar la bolsa para el polvo.
NOTA:
1. Usar siempre su moaparato con la bolsa para el polvo fijado.
2. No olvidara fijar la bolsa para el polvo en su lugar o en caso de fijar erróneo, la tapa superior no
grandes y afilados antés de funcionar la aspiradora del suelo. (consultar a la Figura.
9).
Fig.8
Fig.10
- 32 -
Page 34

puede cerrar completamente.
Están expresado los detalles como lo siguiente: (consultar a la Figura. 11) :
• Abrir la tapa superior empujando arriba el clip para cerradura después de quitar el tubo para la
extensión.
• Quitar la bolsa para el polvo de su lugar.
• Recambiar la bolsa de papel con una nueva al llenar
completamente.
• Colocar la bolsa nueva en su lugar.Yeni ka¤›t torbay› yerine
yerlefltiriniz..
• Empujar la tapa hacia abajo hasta que se cierre cerrándose en
su lugar.
Para limpiar el Filtro
NOTA:
1. El filtro debe ser limpiado mínimo dos veces al año y en caso de ser ensuciado en forma clara.
2. Usar siempre su moaparato con su filtro fijado en su lugar.
3. En caso contrario se puede ocurrir un daño en el motor o observar reducción en el poder de la
aspiración.
4. Desenchufar el moaparato antés de empezar al proceso de la limpieza del filtro.
5. No lavar el filtro en la lavadora.
6. No secar el filtro en la máquina para secar.
Los detalles son como los siguientes: (consultar a la Figura. 12).
• Quitar la bolsa para el polvo.
• Quitar el filtro de su lugar.
• Lavar el filtro con agua tibia y secarlo.
• Fijar el filtro en su lugar.
Fig.12
Recambio de filtro micro para la salida del aire.
Los detalles son como los siguientes: (consultar a la Figura. 13).
• Abrir la tapa para la salida del aire.
• Quitar el filtro de su lugar y fijar un filtro limpio en su lugar.
• Cerrar la tapa para la salida del aire.
Fig.11
Fig.13
SALUD HUMANA Y MEDIOAMBIENTE
¡Usted puede ayudar a la protección mediomabiental!.
Por favor no olvidar cumplir con las reglamentaciones locales: llevar los centros convenientes para
recolección de los residuos.
- 33 -
Page 35

Page 36

Page 37

Page 38

Page 39

Page 40

No: 1-3469-20022013
- 39 -
Page 41

- 40 -
Page 42

Page 43

Page 44

Page 45

Page 46

Page 47

1-3469-20022013
- 46 -
Page 48

- 47 -
Page 49

HRVATSKI
SINBO SVC 3469 USISAVAˇC
UPUTSTVO ZA UPORABU
BITNA SIGURNOSNA UPOZORENJA
Prije poˇcetka uporabe ured¯aja molimo vas da se pridrˇzavate osnovnih mjera predostroˇznosti:
1. Proˇcitajte sve upute za uporabu.
2. Prije poˇcetka uporabe, provjerite da li napon naznaˇcen na informacijskoj naljepnici proizvoda odgovara
naponu u vaˇsoj strujnoj mreˇzi.
3. Ne odvajajte se od usisavaˇca ukljuˇcenog u izvor za napajanje. Kada usisavaˇc ne rabite, prije odrˇzavanja
ili ˇciˇs´cenja obavezno izvucite utikaˇc iz utiˇcnice.
4. Za smanjenje rizika od strujnog udara ured¯aj ne rabite na otvorenim povrˇsinama ili na vlaˇznim
podovima.
5. Djecu drˇzite pod briˇznim nadzorom i zabranite im da se igraju s djecom.
6. Ured¯aj rabite samo na naˇcin opisan u ovom uputstvu za uporabu i koristite samo dijelove koje
preporuˇcuje proizvod¯aˇc.
7. Ako usisavaˇc ne radi uredno, ukoliko je pao na pod, ako je oˇste´cen, ako je duˇze vremena drˇzan vani
ili je upao u vodu odmah ga odnesite na pregled i kontrolu u ovlaˇsteni servisni centar.
8. Usisavaˇc ne vucite uhvativˇsi za kabel i kabel ne rabite kao ruˇcku. Ne zatvarajte vrata preko kabela i
ne dozvolite da se kabel zaglavi u oˇstre kutove i rubove. Ne prelazite usisavaˇcem preko kabela za
napajanje. Kabel zaˇstite od kontakta sa vru´cim povrˇsinama.
9. Kada iskljuˇcujete iz utiˇcnice ne vucite za kabel ve´c uzmite za glavu utikaˇca i izvucite.
10. Vlaˇznom rukom ne dodirujte utikaˇc ili ured¯aj.
11. Ne ubacujte nikakve objekte kroz otvore na ured¯aju. Ne rabite ured¯aj sa prekrivenim ili zaˇcepljenim
otvorima za izlaz zraka. Sve otvore za zrak zaˇstite od praˇsine, kose, dlaka i drugih tvari koje ometaju i
oteˇzavaju strujanje zraka.
12. Prije nego izvuˇcete utikaˇc iz utiˇcnice sve komande na ured¯aju podesite u poziciju iskljuˇceno.
13. Budite jako oprezni kada usisavate stepeniˇste.
14. Kada vrˇsite namatanje kabela jednom rukom drˇzite utikaˇc. Ne dozvolite da tijekom namatanja kabel
slobodno udara naokolo i nanosi ˇstetu stvarima.
15. Prije postavljanja fleksibilnog crijeva izvucite utikaˇc iz utiˇcnice.
16. Usisavaˇc ne rabite za usisavanje cigareta, ˇsibica, vru´ceg pepela i sliˇcnih stvari koje gore ili se dime.
17. Ne rabite ured¯aj bez filtera.
18. Ne rabite ured¯aj s oˇste´cenim kabelom ili utikaˇcem. Za izbjegavanje svake vrste opasnosti oˇste´ceni
kabel treba da zamjeni samo proizvod¯aˇc kabela, ovlaˇsteni servisni centar ili struˇcni elektriˇcni tehniˇcar.
19. Elektriˇcne ured¯aje ne drˇzite u blizini vrelih gasova i ne stavljajte na ili unutar vrelih pe´cnica.
20. Uvjerite se da otvori za ulaz i izlaz zraka nisu prekriveni ili zaˇcepljeni jer ´ce to utjecati na ˇsirenje
topline.
21. Kosu, ˇsiroku odje´cu, prste i ostale dijelove tijela drˇzite dalje od dijelova u pokretu.
22. Usisavaˇc ne rabite za usisavanje zapaljivih ili eksplozivnih teku´cina poput benzina i ured¯aj ne drˇzite
u prostorijama u kojima se nalazi ova vrsta tvari.
23. Ne rabite pribor koji ne preporuˇcuje proizvod¯aˇc jer u protivnom moˇze do´ci do ozljede.
24. Ovaj ured¯aj ne treba da rabe osobe s fiziˇckim, psihiˇckim i mentalnim invaliditetom (ukljuˇcuju´ci i
djecu mlad¯u od 8 godina) bez nadzora osobe koja moˇze snositi odgovornost za sigurnu uporabu ured¯aja.
Isto tako ured¯aj ne treba da rabe neiskusne i osobe koje nisu dovoljno upu´cene u naˇcin njegove uporabe.
25. Ured¯aj odlaˇzite na mjesta koja su nedostupna za djecu mlad¯u od 8 godina.
26. Ovaj ured¯aj treba rabiti u domu ili dolje navedenim prostorijama:
- U radniˇckim menzama, uredima ili sliˇcnim radnim sredinama;
- U ku´cama na imanju/farmi;
- U hotelu, motelu ili sliˇcnim objektima za odmor;
- 48 -
Page 50

- U pansionima.
27. Ured¯aj ne rabite u neke druge svrhe osim u svrhu za koju je dizajniran.
28. Saˇcuvajte ove upute za uporabu.
SAMO ZA KU´CANSKU UPORABU.
OPIS USISAVAˇCA
1. Crijevo, 2. Drˇzaˇc Crijeva, 3. Klizaju´ca Tipka, 4. Produˇzetak Cijevi, 5. ˇCetka za Tlo, 6. Ravan Dio za
Usisivanje, 7. Pravokutni Dio za Usisivanje, 8. Filter (Unutar Poklopca), 9. Prednji Poklopac, 10. Veliki
Kotaˇc, 11. Ulazni Dio Zraka, 12. Tipka Prijemnika, 13. Tipka Ukljuˇci/Iskljuˇci, 14. Tipka za Aktiviranje
SPECIFIKACIJE
• Ku´ciˇste s posebnim dizajnom
• Funkcija automatskog namatanja kabela
• Gumb za kontrolu brzine
• HEPA filter za izlaz zraka
• Kabel za napajanje od 4.5m
• Obujam vre´cice za praˇsinu: 2L
• Usisna snaga: ≥300W
• Razina buke: ≤ 84dBA
• Uz metalnu teleskopsu cijev , x 1 komad plastiˇcen ˇcetke za tlo, x 1 komad aparata cravige, x 1 komad
ˇcetka za fotelju , 1 komad tkanene torbice za praˇsinu, 1 komad papirne torbice za praˇsinu
• AC 230V, 50Hz, 2200W max
RUKOVANJE USISAVAˇCEM
Kada postavljanje ili odvajate dijelove obavezno izvucite utikaˇc iz utiˇcnice!
1. Produˇznu ili teleskopsku cijev spojite sa ruˇckom (Vidi sliku 1).
Ruˇcka
Teleskopska cijev
Slika 1
2. Podnu ˇcetku spojite sa teleskopskom cijevi. (Vidi sliku 2)
Teleskopska cijev
Podna ˇcetka
NAPOMENA: Podna ˇcetka je idealna za dnevno ˇciˇs´cenje tepiha i tvrdih podova (Vidi sliku 1).
Slika 2
- 49 -
Page 51

Usisavanje tepiha Usisavanje trvdih podloga
3. Fleksibilno crijevo umetnite u otvor za ulaz zraka koji se nalazi na gornjoj strani usisavaˇca. Pritisnite
sve dok se ne oglasi zvuk ‘klik’ koji oznaˇcava da se crijevo pravilno uklopilo. (Vidi Sliku 4).
NAPOMENA:
1) Izvucite utikaˇc iz utiˇcnice. Izvucite crijevo iz otvora za ulaz zraka.
2) Crijevo ne koristite za usisavanje teku´cina.
3) Crijevo ne uranjajte u vodu s ciljem ˇciˇs´cenja.
4) Crijevo uredno provjeravajte i ne rabite ako na njemu postoji bilo kakva vrsta
oˇste´cenja.
4. Prije poˇcetka uporabe ured¯aja izvucite kabel u dovoljnoj duljini i umetnite utikaˇc u utiˇcnicu. ˇZuta linija
na kabelu oznaˇcava dovoljnu duljinu kabela. Kabel ne izvlaˇcite dulje od crvene oznake na kabelu.
NAPOMENA:
1) Kada vrˇsite namatanje kabela jednom rukom pritisnite na tipku za namatanje kabela a drugom rukom
uzmite utikaˇc kabela za namatanje kako bi sprijeˇcili da kabel tijekom namatanja udara okolo i nanosi
ˇstetu stvarima.
2) Kada se ruˇcka na ku´ciˇstu ured¯aja nalazi u poziciji zatvoreno pritisnu´ce na gumb za namatanje ˇsto
´ce usloviti automatsko namatanje kabela.
5. Za pokretanje ured¯aja pritisnite na gumb za ukljuˇciti i provjerite usisnu snagu.
6. Kako biste olakˇsali funkciju usisavanja, uz pomo´c klize´ceg gumba podesite potrebnu duljinu teleskopske
cijevi.
UPORABA PRIBORA
1. Uskim nastavkom za procjepe i kutove moˇzete ˇcistiti radijatore, kutove, otvore i mjesta
izmed¯u jastuka. (Vidi sliku 5)
Slika 5
2. Rotiraju´com ˇcetkom i ravnim ˇcetvrtastim nastavkom moˇzete usisavati namjeˇstaj,
klima ured¯aje, teˇsko dostupna mjesta, knjige, lustere i police (Vidi sliku 6).
UPUTE ZA RUKOVANJE
Prije poˇcetka uporabe vaˇseg ured¯aja izvucite kabel u dovoljnoj duljini i umetnite utikaˇc u utiˇcnicu. ˇZuta
traka na kabelu oznaˇca idealnu duljinu kabela a crvena traka maksimalnu duljinu kabela koju moˇzete
izvu´ci. Kada se pojavi crvena traka ne pokuˇsavajte viˇse izvlaˇciti kabel.
1.Za pokretanje ured¯aja pritisnite na gumb za ukljuˇciti/iskljuˇciti.
Slika 3
Slika 6
- 50 -
Page 52

Gumb za ukljuˇciti/
iskljuˇciti
Gumb za
namatanje
kabela
2. Za namatanje kabela jednom rukom pritisnite na gumb za namatanje
a drugom rukom uzmite za utikaˇc kabela kako biste mogli vrˇsiti kontrolu
namatanja kabela i sprijeˇciti da utikaˇc kabela tijekom namatanja udara
naokolo i nanosi ˇstetu okolnim objektima.
MJERE PREDOSTROˇZNOSTI
U sluˇcaju zaˇcepljenja otvora za crijevo, crijeva, teleskopske cijevi ili nekog od aparata odmah iskljuˇcite
usisavaˇc.
Nakon uklanjanja uzroka zaˇcepljenja usisavaˇc ponovno moˇzete pokrenuti.
1. Usisavaˇc ne rabite u blizini grijalica, otvorenog plamena, opuˇsaka, i sliˇcnih izvora
topline (Vidi sliku 7).
Sliku 7
2. Kada utikaˇc ume´cete u utiˇcnicu uvjerite se da su vam ruke suhe (Vidi sliku
8).
3. Kako bi sprijeˇcili da dod¯e do oˇste´cenja papirnatog filtera prije pokretanja usisavaˇca
Sliku 9
4. Kada utikaˇc izvlaˇcite iz utiˇcnice nipoˇsto ne vucite za kabel. Uvijek uhvatite
za glavu utikaˇca i tako izvucite (Slika 10).
NAPOMENA: Za izbjegavanje svake vrste opasnosti oˇste´ceni kabel za napajanje treba da zamjeni
proizvod¯aˇc kabela, ovlaˇsteni servisni centar ili struˇcni elektriˇcni tehniˇcar.
ˇCIˇS´
CENJE I ODRˇZAVANJE
Zamjena vre´cice za praˇsinu
NAPOMENA:
1) Ured¯aj uvijek koristite sa umetnutom vre´cicom za praˇsinu.
2) Ne zaboravite postaviti vre´cicu za praˇsinu. Kod pogreˇsnog postavljanja vre´cice za praˇsinu ne´ce se
zatvoriti gornji poklopac.
Detalji su opisani dolje: (Vidi sliku 11):
• Nakon odvajanja teleskopske cijevi zasuna za zakljuˇcavanje gurnite ka gore i otvorite gornji poklopac.
• Izvadite vre´cicu za praˇsinu.
• Ako je vre´ciza za praˇsinu puna zamjenite je novom.
• Umetnite novu vre´cicu za praˇsinu.
• Zatvorite i poklopac gurnite ka dolje sve dok se ne zakljuˇca.
uklonite velike i oˇstre predmete sa poda. (Vidi sliku 9).
Sliku 8
Sliku 10
- 51 -
Page 53

Slika 11
Za ˇciˇs´cenje filtera
NAPOMENA:
1) Filter treba oˇcistiti najmanje 2 puta godiˇsnje ili joˇs ˇceˇs´ce ukoliko se oˇcevidno zaprlja.
2) Ured¯aj uvijek rabite sa postavljenim filterom.
3) U suprotnom do´ci ´ce do smanjenja usisne snage i oˇste´cenja motora.
4) Prije poˇcetka ˇciˇs´cenja filtera izvucite utikaˇc iz utiˇcnice.
5) Filter ne treba prati u perilici za pranje rublja.
6) Filter ne treba suˇsiti u perilici za pranje rublja.
Detalji su sljede´ci: (Vidi sliku 12):
• Izvadite vre´cicu za praˇsinu.
• Izvadite filter.
• Filter operite mlakom vodom i posuˇsite.
• Postavite filter na svoje mjesto.
Slika 12
Zamjena Mikro filtera za izlaz zraka
Detalji su sljede´ci (Vidi sliku 13):
• Podignite poklopac za izlaz zraka.
• Izvadite filter i zamjenite sa novim.
• Zatvorite poklopac otvora za izlaz zraka.
Slika 13
OKOLIˇS I ZDRAVLJE LJUDI
I vi moˇzete doprinjeti oˇcuvanju okoliˇsa!
Molimo vas da se pridrˇzavate lokalnih propisa: Dotrajale elektriˇcne ured¯aje predajte u odgovaraju´ce
sabirne centre.
- 52 -
Page 54

- 53 -
Page 55

- 54 -
Page 56

- 55 -
Page 57

- 56 -
Page 58

- 57 -
Page 59

- GARANT‹ fiARTLARI -
1) Garanti süresi,mal›n teslim tarihinden itibaren bafllar ve 2 y›ld›r.
2) Mal›n bütün parçalar› dahil olmak üzere tamam› Firmam›z›n garanti kapsam›ndad›r.
3) Mal›n garanti süresi içerisinde ar›zalanmas› durumunda, tamirde geçen süre garanti
süresine eklenir. Mal›n tamir süresi, 20 iflgününü geçemez. Bu süre mala iliflkin ar›zan›n
servis istasyonuna, servis istasyonunun olmamas› durumunda, mal›n sat›c›s›, bayii,
acentesi, temsilcili¤i, ithalatç›s› veya imalatç›s›-üreticisinden birine bildirim tarihinden
itibaren bafllar. Tüketicinin ar›za bildirimini; telefon, faks, e-posta, iadeli taahhütlü mektup
veya benzeri bir yolla yapmas› mümkündür. Ancak, uyuflmazl›k halinde ispat yükümlülü¤ü
tüketiciye aittir. Mal›n ar›zas›n›n 10 ifl günü içerisinde giderilememesi halinde, imalatç›üretici veya ithalatç›; mal›n tamiri tamamlan›ncaya kadar, benzer özelliklere sahip baflka
bir mal› tüketicinin kullan›m›na tahsis etmek zorundad›r.
4) Mal›n garanti süresi içerisinde gerek malzeme ve iflçilik, gerekse montaj hatalar›ndan
dolay› ar›zalanmas› halinde, iflçilik masraf›, de¤ifltirilen parça bedeli ya da baflka herhangi
bir ad alt›nda hiçbir ücret talep etmeksizin tamiri yap›lacakt›r.
5) Tüketicinin onar›m hakk›n› kullanmas›na ra¤men mal›n;
• Tüketiciye teslim edildi¤i tarihten itibaren, garanti süresi içinde kalmak kayd›yla, bir y›l
içerisinde en az dört defa veya imalatç›-üretici ve/veya ithalatç› taraf›ndan belirlenen
garanti süresi içerisinde alt› defa ar›zalanmas›n›n yan› s›ra, bu ar›zalar›n maldan
yararlanamamay› sürekli k›lmas›,
• Tamiri için gereken azami süresinin afl›lmas› ,
• Firman›n servis istasyonunun, servis istasyonunun mevcut olmamas› halinde s›rayla
sat›c›s›, bayii, acentesi temsilcili¤i ithalatç›s› veya imalatç›-üreticisinden birisinin
düzenleyece¤i raporla ar›zan›n tamirini mümkün bulunmad›¤›n›n belirlenmesi, durumlar›nda
tüketici mal›n ücretsiz de¤ifltirilmesini, bedel iadesi veya ay›p oranda bedel indirimi talep
edebilir.
6 ) Mal›n kullanma k›lavuzunda yer alan hususlara ayk›r› kullan›lmas›ndan kaynaklanan
ar›zalar garanti kapsam› d›fl›ndad›r.
7 ) Garanti Belgesi ile ilgili olarak ç›kabilecek sorunlar için Gümrük ve Ticaret Bakanl›¤›
Tüketicinin Korunmas› ve Piyasa Gözetimi Genel Müdürlü¤ü’ne baflvurabilir.
‹THALATÇI F‹RMA
DE‹MA ELEKTROMEKAN‹K ÜRÜNLER ‹NfiAAT SPOR MALZEMELER‹ ‹MALAT SAN. VE T‹C. A.fi.
Cihangir Mh. Güvercin Cd. No:4 Haramidere Mevkii Avcılar - ‹stanbul - Türkiye
Ça¤rı Merkezi: 444 66 86
www.sinbo.com.tr - info@sinbo.com.tr
- 58 -
Page 60

- SVC 3469 ELEKTR‹KL‹ SÜPÜRGE -
- GARANT‹ BELGES‹ -
Garanti Belge No : 78352
SSHY Belge No : 35274
‹THALATÇI F‹RMA
Ünvanı : DE‹MA ELEKTROMEKAN‹K ÜRÜNLER‹ ‹Nfi. SPOR MALZ.
‹MALAT SAN. ve T‹C. A.fi.
Adresi : Cihangir Mah. Güvercin Cad. No:4 Haramidere Mevkii
Avc›lar / ‹STANBUL
Tel. : Ça¤rı Merkezi: 444 66 86
Yetkili Kifli :
Yönetim Kurulu Baflkan›
Ürünün Cinsi : ELEKTR‹KL‹ SÜPÜRGE
Markası : S‹NBO
Modeli : SVC 3469
Alt Modeli : Bandrol ve Seri No :
Teslim Tarihi ve Yeri :
Garanti Süresi : 2 Yıldır
Azami Tamir Süresi : 20 ‹fl Günü
Kullanım Ömrü : Bakanl›kça belirlenen ve ilan edilen kullan›m ömrü 10 y›ld›r.
(Ürünün fonksiyonlar›n› yerine getirebilmesi için gereken yedek parça temin süresi)
SATICI F‹RMA
Ünvanı :
Adresi :
Tel.Fax :
Fatura Tarihi ve No :
Teslim Tarihi ve Yeri :
‹mza ve Kafle :
Bu bölüm, ürünü sat›n ald›¤›n›z Yetkili Sat›c› taraf›ndan imzalanacak ve kaflelenecektir.
Bu belgenin kullan›lmas›na; 4077 say›l› Tüketicinin Korunması Hakkında Kanun ve bu Kanun’a dayan›larak yürürlü¤e konulan Garanti Belgesi
Uygulama Esaslar›na Dair Yönetmelik uyar›nca, TC Gümrük ve Ticaret Bakanlı¤ı, Tüketicinin Korunması ve Piyasa Gözetimi Genel Müdürlü¤ü
tarafından izin verilmifltir.
Garanti Belge Onay Tarihi : 28/01/2010
Garanti Belge Vize Tarihi : 18/01/2012
SSHY Belge Onay Tarihi : 04/04/2012
- 59 -
Page 61

MÜfiTER‹ H‹ZMETLER‹
De¤erli Müflterimiz,
En uygun fiyata en iyi ürünü vermenin yan› s›ra; en iyi hizmeti vermenin de
önemli oldu¤una inan›yoruz. Bu nedenle siz bilinçli tüketicilere daha yak›n
olabilmek için, internet adresimizdeki eriflim formlar›n›n yan› s›ra, tüketici
dan›flma hattımızı da hizmetinize açm›fl durumday›z.
TÜKET‹C‹
DANIfiMA HATTI
444 66 86
Tüketici Dan›flma Hattımızı,
- Hafta içi her gün 08.00-18.00 saatleri aras›nda arayabilir; istek, öneri ve
flikayetlerinizi firmam›za iletebilirsiniz.
Tüketicinin Dikkatine:
Ürünlerimizle ilgili hizmetleri tam olarak alabilmek için afla¤›daki önerilere
uyman›z› rica ederiz:
1. Ürünü ald›¤›n›zda Garanti Belgesini mutlaka yetkili sat›c›n›za onaylatt›r›n›z.
2. Ürünü kullanma k›lavuzunda belirtilen hususlara göre kullan›n›z.
3. Ürününüzle ilgili hizmet talebiniz oldu¤unda yukar›daki telefon
numaralar›ndan, Tüketici Danıflma Hattına baflvurunuz.
4. Ürünü promosyon arac›l›¤› ile edinmiflseniz, ürüne ait garanti belgesini en
yak›n yetkili servisimize giderek onaylatt›r›n›z.
5. Teknik servisteki ifliniz bitti¤inde "Yetkili Servis Hizmet Fifli" almay›
unutmay›n›z. Alaca¤›n›z bu Hizmet Fifli, ileride ürününüzde meydana
gelebilecek herhangi bir sorunda size yarar sa¤layacakt›r.
www.sinbo.com.tr
0800 211 50 21
KAPIDAN KAPIYA
ÜCRETS‹Z
SERV‹S
Kap›dan Kap›ya Ücretsiz Servis Kampanyam›z dâhilinde Yurtiçi Kargo Firmas› ile iflbirli¤i içerindeyiz. Tüketicimiz
taraf›ndan sat›n al›nan ürünün fiyat› ne olursa olsun, Tüketicimiz ürün ile ilgili garanti kapsam›na giren herhangi
bir problem yaflad›¤›nda, 444 66 86 numaral› Tüketici Danıflma Hattımızı aramas› ve kay›t b›rakmas› yeterlidir.
Bu süreçten sonra Tüketicimizin ürünü ücretsiz olarak Yurtiçi Kargo taraf›ndan Tüketicimizin bulundu¤u adresten
al›n›p, 7• ifl günü içerisinde ürün çal›fl›r bir vaziyette, yine Tüketicimize Yurtiçi Kargo arac›l›¤› ile adresine teslim
edilmektedir. 7 ifl günü içerisinde sorunu çözülemeyen ürünler ise, yenisi ve/veya bir üst modeli ile de¤ifltirilmektedir.
Tüm bu süreçte Tüketicilerimizden hiçbir ücret talep edilmemektedir.
(•Ürünün servis garanti süresi, Yurtiçi Kargo ürünü Sinbo Fabrikas›’na teslim ettikten sonra bafllar.)
- 60 -
7 GÜNDE
TESL‹MAT
GARANT‹S‹
(•)
Page 62

- TEDAR‹KÇ‹ F‹RMA / EXPORTER United Favour Development Limited
Unit B, 10/F Lee May Building 788-790
Nathan Road, Mongkok, Kowloon, HK.
- UYGUNLUK BEYANI / CE Intertek Testing Services Shenzhen Ltd.
Guangzhou Branch
Block E, No.7-2, Guangdong Software&
Science Park, Caipin Road, Guangzhou
Science City, GETDD, Guangzhou, China
GZ12120219-1
EEE Yönetmeli¤ine uygundur.
Made in P.R.C.
‹mal Y›l› : 2013
 Loading...