

Page 1
OFF RUN HOLD
LOCK
SIMPSON ELECTRIC CO. ELGIN , IL 60120
897 DOSIMETER
SOUND MEASURING SYSTEM
SPL
"CAL"
INT
(60 sec)
DOSE
PEAK
Leq
MAX
TIME
PRINT
TEST SETUP
1
2
3
4
5
6
7
8
9
LO BATT
SPL MAX
INT 60s
% DOSE
dBA
Model 897
Dosimeter Sound Measuring System
OPERATOR’S MANUAL
SIMPSON ELECTRIC COMPANY 520 Simpson Avenue
Lac du Flambeau, WI 54538-0099 (715) 588-3311 FAX (715) 588-3326
Printed in U.S.A. Part No. 06-115891 Edition 6, 05/07
Visit us on the web at: www.simpsonelectric.com
32
Page 2

About this Manual
To the best of our knowledge and at the time written, the information contained in
this document is technically correct and the procedures accurate and adequate
to operate this instrument in compliance with its original advertised specifications.
Notes and Safety Information
This Operator’s Manual contains warning symbols which alert the user to check
for hazardous conditions. These appear throughout this manual where applicable, and are defined below. To ensure the safety of operating performance of
this instrument, these instructions must be adhered to.
Warning, refer to accompanying documents.
!
NOTES
Caution, risk of electric shock.
This instrument is designed to prevent accidental shock to the operator when
properly used. However, no engineering design can render safe an instrument
which is used carelessly. Therefore, this manual must be read carefully and completely before making any measurements. Failure to follow directions can result
in a serious or fatal accident.
Technical Assistance
SIMPSON ELECTRIC COMPANY offers assistance Monday through Friday
8:00 am to 4:30 pm Central Time. To receive assistance contact Technical Support or Customer Service at (715) 588-3311.
Internet: http://www.simpsonelectric.com
Warranty and Returns
SIMPSON ELECTRIC COMPANY warrants each instrument and other articles
manufactured by it to be free from defects in material and workmanship under
normal use and service, its obligation under this warranty being limited to making
good at its factory or other article of equipment which shall within one (1) year
after delivery of such instrument or other article of equipment to the original
purchaser be returned intact to it, or to one of its authorized service centers, with
transportation charges prepaid, and which its examination shall disclose to its
satisfaction to have been thus defective; this warranty being expressly in lieu of
all other warranties expressed or implied and of all other obligations or liabilities
on its part, and SIMPSON ELECTRIC COMPANY neither assumes nor authorizes any other persons to assume for it any other liability in connection with the
sales of its products.
This warranty shall not apply to any instrument or other article of equipment
which shall have been repaired or altered outside the SIMPSON ELECTRIC
COMPANY factory or authorized service centers, nor which has been subject to
misuse, negligence or accident, incorrect wiring by others, or installation or use
not in accord with instructions furnished by the manufacturer.
!
2
31
Page 3

NOTES
NOTES
30
3
Page 4

Contents
1. INTRODUCTION ............................................................................... 7
1.1 General Description ........................................................................... 7
1.2 Items Furnished With Instrument ........................................................ 7
1.3 Technical Data .................................................................................... 8
2. PREPARATION FOR USE ............................................................... 11
2.1 Unpacking And Inspection ...............................................................11
2.2 Preparation For Use .........................................................................11
2.3 Warranty ........................................................................................... 12
2.4 Shipping ...........................................................................................12
3. APPLICATION ................................................................................. 12
3.1 Decibel Scale ...................................................................................12
3.2 Sound Level Meter ...........................................................................12
3.3 Measurement And Exposure Standards ..........................................13
3.3.1 Steady Level or Slowly Varying Noise ............................................. 13
3.3.2 Impact Noise .................................................................................... 15
3.4 Dosimeter .........................................................................................15
3.5 Dosimeter Equation ..........................................................................15
3.6 Sound Fields ....................................................................................1 6
3.6.1 Free Field .......................................................................................... 16
3.6.2 Reverberant Field ............................................................................. 16
3.7 Microphone Orientation ....................................................................16
3.7.1 Area Monitor in a Free Field ............................................................. 16
3.7.2 Fixed Position Monitor in a Reverberant Field ................................. 16
3.7.3 Use of Dosimeter as a Personal Monitor ........................................ 16
3.8 Windscreen.......................................................................................17
4. OPERATION .................................................................................... 17
4.1 Safety Precautions ...........................................................................17
4.2 Operating Items And Features ......................................................... 17
4.3 Top Panel Operating Features ........................................................ 19
4.4 Battery Charging ..............................................................................19
4.5 Preliminary Checks .......................................................................... 20
4.5.1 Underrange Display ......................................................................... 20
4.5.2 Overrange Display ........................................................................... 20
4.5.3 Diagnostic Memory Test .................................................................. 20
4.6 Setting The Dosimeter Parameters .................................................. 21
4.6.1 The Dosimeter Parameters ............................................................. 21
4.6.2 To Program the Dosimeter ............................................................... 21
4.7 Security Controls ..............................................................................23
4.8 Selection Of Parallel Or Serial Output Format .................................2 3
4.9 Automatic Data Logger .....................................................................23
4.10 Data Output Formats ........................................................................ 24
4.11 Parallel Output And Serial Format 2 “Prn 2” .................................... 24
4.12 Spreadsheet Output Format “Prn 1” .................................................2 6
4.13 Calibration ........................................................................................27
4.14 Dosimeter Application ......................................................................28
4.14.1 Using Microsoft Works 4.0 .............................................................. 28
4.14.2 Using Microsoft Works 3.0 For Dos ................................................ 29
4.15 Error Message .................................................................................. 30
4
12. Save data or copy to another program to print.
Data will remain stored in the dosimeter while the dosimeter is still on; once the
dosimeter is turned off, the data will be erased.
4.14.2 Using Microsoft Works 3.0 For Dos
Access the WORKS program, and follow the prompts. Data is first received by the
Communications portion of WORKS, then moved to the word processor portion,
and finally into the spreadsheet.
From the Quick Start Options Menu, select “Create a New File” and then continue
below:
4.15 Error Message
If the display indicates “ERRO3”, turn off the dosimeter and wait 10 seconds. Then
turn the dosimeter on. This resets the 897 and the calibration is unaffected.
Communications <OK>
Options
Communication
Baud Rate [match the 897--try 9600]
Data Bits [8]
Stop Bits [1]
Handshake [Hardware]
Parity [None]
Port [COM1 or COM2], as required
<OK>
File Save [this will save the setup]
Transfer
Capture Text
Save file as [897.DAT] <OK>
Connect
Connect
>> On the 897, slide the “OFF-ON-HOLD” SWITCH TO “HOLD” AND PRESS
“PRINT”. You will see the data appear on the computer screen. When the data
stops appearing...
Connect
Connect
OK to disconnect? <OK>
File
Close
File
Open Existing File
897.DAT <OK>
Open File As <Word Processor>
<OK>
Select
Replace
Search for [*...........]
<Replace All> <OK>
29
Page 5
FULLY INSERT
MICROPHONE
NOTES
SET TO "RUN"
PRESS
"CAL"
897 DOSIMETER
SOUND MEASURING SYSTEM
LO BATT
SPL MAX
INT 60s
SPL
INT
"CAL"
(60 sec)
TEST SETUP
DOSE
Leq
PEAK
MAX
TIME
PRINT
LOCK
OFF RUN HOLD
SIMPSON ELECTRIC CO. ELGIN , IL 60120
% DOSE
dBA
SOUND LEVEL CALIBRATOR
OUTPUT FREQUENCY: 1000 HERTZ
ON
OFF
ON
LOW BATTERY
CAUTION
NEVER PLACE CALIBRATOR AGAINS EAR.
READ OPERATOR'S MANUAL.
SIMPSON ELECTRIC CO., ELGIN IL 61020
MADE IN USA
114dB
94 dB
887-2
SET TO "114dB"
POSITION
Figure 4-5. Calibration Hookup
f. (Optional) The time and date of this calibration may be recorded in the
Instrument’s memory by pressing and holding the “SPL (CAL)” switch until
the display flashes “CAL.” The Instrument will retain the two most recent such
occurrences, which may be observed only via the DATA OUTPUT. Due to
changes in atmospheric conditions, it is recommended that Instrument calibrations be conducted and recorded at the beginning and end of the day.
g. Turn off the calibrator, remove the microphone and replace the windscreen.
4.14 Dosimeter Application
The following text describes how to transfer data from the Simpson 897 Dosimeter into an IBM-compatible computer using Microsoft Works.
Using the optional RS-232-C serial cable, catalog #02233, connect the 897 to
your computer’s serial port, either COM1 or COM2.
4.14.1 Using Microsoft Works 4.0
1. Start Works 4.0
2. In Works Task Launcher, go to Works Tools.
3. Click on Communications.
4. Close the Easy Connect window if necessary.
5. Click on Settings and then Communications.
6. Choose the COM Port that the Dosimeter is connected to, then click on
Properties.
7. Set Port Settings to match the Dosimeter (Flow control=Xon/Xoff), click OK.
8. Click OK again.
9. Click on the Dial/Hang-up button on the toolbar.
10. Press PRINT on the Dosimeter.
11. Data should now be displayed.
28
5
Page 6

NOTES
START: 25/JAN/02 08:23
CAL: 114.0 dBA 08:09 25/JAN/02 RANGE: 80/130 dB
CAL: 114.0 dBa 08:40 25/JAN/02 RANGE: 80/130 dB
DOSE: 108.0%
LEQ 115.5
SPL-Max *130.0
Lc 90
th 80
rt 5
id 01
Pk 0
ET 17
HT 2
ET L
1 91.1 91.4 0 1 0
2 99.1 105.6 0 1 0
3 129.7 *130.0 0 1 0
4 130.0 *130.0 0 1 0
5 106.2 *130.0 0 1 0
6 *00.0 *00.0 0 1 0
7 *00.0 *00.0 0 0 0
8 95.9 96.7 0 1 0
9 89.9 96.7 0 1 0
10 80.1 80.3 0 1 0
11 80.5 94.6 0 -1 0
12 53.9 54.6 0 0 0
13 53.6 54.7 0 0 0
14 53.0 54.4 0 0 0
15 52.1 53.5 0 0 0
16 52.1 52.3 0 0 1
17 *00.0 *00.0 0 0 1
NOTES: 1 . When read by a spreadsheet program such as Microsoft Works™, the L
LMAX PEAKS RANGE HOLD
AVG
RANGE AND HOLD columns will be aligned.
2. *00.0 indicates an underrange reading
*100.0 or *130.0 indicates an overrange reading
Figure 4-5. Sample Printout - Spreadsheet Serial Format 1 (Prn 1)
, L-MAX, PEAKS,
AVG
4.13 Calibration
Always check the calibration before making any measurement. Use the Simpson
Sound Level Calibrator, Model 887, Series 2.
a. Remove the windscreen (if used) and carefully insert the microphone fully
into the acoustic cavity of the Calibrator.
b. Set the calibrator power switch to the “ON” position and check that the cali-
brator battery is okay.
!
Never place the operating calibrator tightly against the ear. The high sound level
could be harmful, especially to someone with a hearing deficiency.
c. Set the “OFF-RUN-HOLD” slide switch in the 897 to the “RUN” position. Wait
until the Display Test sequence is completed, then depress the SPL (CAL)
switch.
d. Select the desired range: For checking at 94 dB use the 50/100 range; for
checking at 114 dB use the 80/130 range.
e. If calibration is required, using the screwdriver supplied with the calibrator,
turn the adjustment control until a reading of either 94.0 dB or 114.0 dB is
indicated on the display.
6
27
Page 7

A sample of the Spreadsheet output format is illustrated in Figure 4-5. It is very
similar to the summary report, except it does not include a histograph and the
minute-by-minute data is not in real-time but in elapsed time. The Spread-Sheet
output is once for each minute of data saved by the data logger; that is once for
each minute of Elapsed Run Time (ET).
L
is the integrated (60 sec) reading.
AVG
L
is the maximum sound pressure level for this minute.
-MAX
PEAKS is the number of 140 dB peaks detected this minute.
RANGE can be 0 for the 50/100 range, 1 for 80/130 or -1 if the range
switch changed during this minute.
HOLD is a number “flag” with a 1 signifying that the dosimeter was
in “RUN”.
The Spreadsheet Output format is diagramed in Table 4-4. Note that each data
item is separated by two spaces.
Table 4-4. Spreadsheet Output Format
Actual Output Description
Start:<sp><sp>25/JAN/02<sp><sp>00:00<CR><LF> Starting date and time for this period
CAL:<sp><sp>0.0<sp>dBA<sp><sp>00:00<sp><sp>25/J The dBA reading, time, date and range
AN/100<sp><sp>RANGE:<sp><sp>80/130<sp><sp>
dB<CR><LF>
DOSE:<sp><sp>0.0<CR>LF> The calculated dose in percentage
Leq:<sp><sp>000.0<CR><LF> The calculated 8-hour Time Weighted
SPL-Max<sp><sp>000.0<CR><LF> The detected maximum SPL for this data
Lc<sp><sp>nn<CR><LF> Criterion Level in dB
Th<sp><sp>nn<CR><LF> Threshold in dB
rt<sp><sp>n<CR><LF> Exchange Rate in dB
ID<sp><sp>nn<CR><LF> Unit I.D. Number
Pk<sp><sp>nnn<CR><LF> Number of 140 dB peaks
ET<sp><sp>nnnn<CR><LF> Elapsed Run Time in minutes
HT<sp><sp>nnn<CR><LF><CR><LF> Elapsed Hold Time in minutes
ET<sp>L
RANGE<sp><sp>HOLD<CR>LF>
<sp><sp>MAX<sp><sp>PEAKS<sp><sp>
AVG
switch setting for each of two possible
calibration readings. If the output data is
only CAL:<sp><sp>?<CR><LF> then there
is no calibration reading stored. Also,
“RANGE:” may be 50/100.
Average (TWA) in dBA
period
1.INTRODUCTION
1.1 General Description
The Simpson Model 897 is a combination dosimeter and Class S2A sound level
meter. It is a portable, easy-to-operate, accurate digital sound measurement instrument designed to meet the requirements of OSHA and international noise
exposure regulations.
The 897 has a built-in data logger with a 31 hour storage capability. There are two
standard output formats available with the data logger, a Centronics compatible
parallel printer and an RS-232C serial printer or computer. The 897 also meets
the requirements for the American National Standard Institute (ANSI) Specification S1.4-1983 and IEC651 for class S2A sound level meters and American
National Standard Institute (ANSI) Specification S1.25-1978 for Personal Noise
Dosimeters.
Measuring continuous, intermittent and impulsive noise in the standard range
from 80 dBA to 130 dBA, the 897 also offers a 50 to 100 dB range where lower
sound level analysis is desired. When used as a personal noise dosimeter, the
897 may be worn in a shirt pocket or on a belt. The microphone is provided with a
clip which can be attached to the operator’s shirt close to the ear.
When used as a sound level meter, the Instrument is hand-held. A front end
attachment, properly contoured to avoid interference with incoming sound waves,
holds the microphone. The advanced microcomputer, large digital display and
special electret-condenser microphone offers easy operation and readability,
and excellent performance and reliability.
1.2 Items Furnished With Instrument
All items furnished with the 897 are listed in Table 1-1.
Table 1-1. Items Furnished with the Instrument
Qty Description Part No.
1 Windscreen Dust Cover 5-119753
1 Microphone Clip 5-119752
1 Splined Wrench 6-113274
1 Screwdriver, adjusting 5-116470
1 Microphone Adapter 10-865235
1 Operator’s Manual 6-115891
1 Parallel Cable 02234
1 AC Charger 6-115095
1 Carrying Case 10-865926
26
Optional Items
Description Part No.
887-2 Sound Level Calibrator 12648
RS-232 Serial Cable 02233
7
Page 8

1.3 Technical Data
The 897 conforms to ANSI S1.4-1983, ANSI S1.25-1978, and IEC651 (1979)
standards for type S2A sound level meters and noise dosimeters.
Table 1-2 lists the technical specifications for the 897 Noise Dosimeter/Sound
Level Meter.
Table 1-2. Instrument Specifications
Dosimeter Specifications
1. Microphone:
Type: 0.52 inch (13.2 mm) diameter electret con-
denser.
Maximum Pressure: 148 dBA sound pressure level.
Impedance: 1 K⍀
Directional Characteristics: Omnidirectional. The free field angle of inci-
dence which closely approximates the ran-
dom response is 70°.
2. Threshold Level: The threshold level is selectable over the
range of 50 to 99 dB, in 1 dB increments,
from the front panel. The dosimeter function
of the 897 is nonresponsive to noise levels
below the threshold setting.
3. Dose:
Resolution: 0.1% dose to 999.9%; above 1000%, dis-
play will automatically convert to a higher
range.
Maximum Indication: Dual automatic ranging: either 999.9% or
9999%. 100% corresponds to a criterion
level noise exposure for eight hours; 50%
corresponds to an eight hour noise exposure equal to the criterion level minus the
exchange rate.
4. Leq Display: Displays with 0.1 dB resolution. Selectable
upper limit of 115 or 130 dB.
5. Criterion Level: Selectable at 70, 80, 84, 85 or 90 dB from
the front panel.
6. Exchange Rates: 3, 4 or 5 dB, selectable from the front panel.
7. Elapsed Time: Displays either hours:minutes or
minutes:seconds, up to 99 hours, 59 minutes, 59 seconds. Timing accuracy: 6 0.05%.
8. Dynamic Range: Two switch selectable ranges, 50 to 100 dB
and 80 to 130 dB.
9. Accuracy: True RMS, per ANSI S1.4-1983, type S2 requirements.
10. Frequency Response
Weighting: “A” weighting.
11. Response Time: Slow (1 second).
12. Crest Factor: 10:1 at maximum indication.
13. Frequency Range: 31.5 Hz to 8 KHz.
14. Sound Pressure Reference: 0 dB = 20 µ Pascals.
15. Linearity: 60.5 dB @ 1 KHz: 50/100 Range: >60dB; 80/130 Range: >90dB
16. Criterion Duration (Tc): 8 hours.
8
Hrs:Min is the real-time that the data was logged.
L
is the integrated (60 sec) reading.
AVG
L-MAX is the maximum sound pressure level for that minute.
PEAKS is the number of 140 dB peaks detected in that minute.
RANGE is the range setting selected during that minute.
Readings preceded by an asterisk indicate they were either overrange or
underrange:
* 00.0 indicates an underrange reading (under 50 on the 50 to 100 dB range or
under 80 on the 80 to 130 dB range).
* 100.0 indicates an overrange reading on the 50 to 100 dB range.
* 130.0 indicates an overrange reading on the 80 to 130 dB range.
4.12 Spreadsheet Output Format “Prn 1”
SIMPSON 897 Dosimeter Sound Analysis Report Type S2A
CRITERION = 90 dB
THRESHOLD = 80 dB
EXCHANGE RATE = 5 dB
UNIT IDENTIFICATION # 01
JOB ______________________________________________________
NAME _____________________________________________________
LOCATION _________________________________________________
START DATE: 25/JAN/02
START TIME: 08:23
CALIBRATION: 114.0 dBA 08.09 25/JAN/02 RANGE: 80/130 dB
CALIBRATION: 114.0 dBA 08.40 25/JAN/02 RANGE: 80/130 dB
MEASUREMENT SUMMARY:
RUN TIME = 00:17
HOLD TIME = 00:02
L EQ = 115.5 dBA
SPL MAX = *130.0 dBA
DOSE = 108.0%
140 dB PEAKS = 0
HRS:MIN + --------- + ------------ + ------- + ---------- + ------------ + ---------------+ --------------- + ---------- +
08.24 = = = = = = = = = = = = = = = = = = = = = = = = 91
08:25 = = = = = = = = = = = = = = = = = = = = = = = 93
08:30 = = = = = = = = = = 69
08.35 == 52 HOLD
08:40 < HOLD
HRS:MIN + --------- + ------------ + ------- + ---------- + ------------ + ---------------+ --------------- + ---------- +
HRS:MIN L
08:24 91.1 91.4 0 80/130
08:25 99.1 105.6 0 80/130
08:26 129.7 *130.0 0 80/130
08:27 130.0 *130.0 0 80/130
08:28 106.2 *130.0 0 80/130
08:29 *00.0 *00.0 0 80/130
08:30 *00.0 *00.0 0 80/130
08:31 95.9 96.7 0 80/130
08:32 89.9 96.7 0 80/130
08:33 80.1 80.3 0 80/130
08:34 80.5 94.6 0 CHANGED
08:35 53.9 54.6 0 50/100
08:36 53.6 54.7 0 50/100
08:37 53.0 54.4 0 50/100
08:38 52.1 53.5 0 50/100
08:39 52.1 52.3 0 50/100 HOLD
08:40 *00.0 *00.0 0 50/100 HOLD
NOTE: *00.0 Indicates an underrange reading. *100.0 or *130.00 indicates an overrange reading
50 60 70 80 90 100 110 120 130
AVG
Figure 4-4. Sample Printout - Parallel Output and Serial Format 2 (Prn 2)
HISTOGRAPH
5-MIN AVERAGE LEVELS IN dBA
LMAX PEAKS RANGE
END OF REPORT
25
Page 9

observed during the preceding minute (not the same as the MAX function switch),
the number of 140 dB peaks during the preceding minute, the RANGE switch
setting, and the occurrence of the dosimeter entering the “HOLD” mode. This data
is available only via the “Data Output” connector.
4.10 Data Output Formats
Two standard output formats are available from the data logger of the dosimeter:
a summary report that can be printed on either a parallel printer, or an RS-232C
serial printer, and an output that is ideally formatted as input into a multi-column
spreadsheet type program such as Microsoft Works™. Each output format includes information of total “HOLD” time, dose, Leq, SPL MAX, total number of 140
dB peaks, and a minute-by-minute output of the data logger. Following are sample
printouts of the same data recorded by the 897 in each of the output formats. To
obtain a printout in either one of the formats: first set the dosimeter to “HOLD”,
then press the “PRINT” button to print the data.
4.11 Parallel Output And Serial Format 2 “Prn 2”
A sample of the summary report is illustrated in Figure 4-3. The report is divided
into four parts for explanatory reasons: Heading, Measurement Summary,
Histograph, and the Minute-by-Minute Data Logger Output.
Heading includes:
Type of report, measurement parameters set by the operator, location and job
identification as assigned by the operator
Date and time the Instrument was first set in “RUN” mode of operation. Also
included are calibration data and time if recorded by the operator. (See paragraph 4.13 for calibration instructions.)
Measurement Summary includes the following:
Run Time: Total time Instrument was in “RUN” mode.
Hold Time: Total time Instrument was in “HOLD” mode of operation.
Leq: The eight hour TWA (time weighted average) expressed in dBA.
This measurement can be from the threshold level, set by the
operator, up to 130 dB.
SPL Max: The maximum sound pressure level recorded by the data log-
ger.
DOSE: The calculated dose (in percent). A 100% equates to a criterion
noise level exposure for an eight hour time period.
140 dB Peaks: Total number of 140 dB peaks recorded.
Histograph presents five minute averages of the minute-by-minute L
ings. The histograph is independent of the range setting, however, when the L
readings are either underrange as indicated by * 00.0; or overrange as
indicated by * 100.0 or * 130.0, then these readings are averaged into the 5
minute summary. For example; if L
is averaged in the five minute histograph.
Note that the five minute averages start on the minute ending in either a 0 or a 5,
therefore, the initial and final averages may be less than 5 minute interval averages, as noted in Figure 4-3. The Instrument was in either the “HOLD” or “SPL”
mode of operation at anytime during the five minute interval, if the reading is
followed by the word “HOLD”.
Minute-by-Minute Data Logger Output includes the following:
= * 00.0, as noted in Figure 4-3, then 0.0 dB
AVG
24
AVG
read-
AVG
17. Calibration: Instantaneous with 100 Hz, 94 dB or 114 dB
SPL calibrator and adjustment on the top of
the 897. However, an annual factory
recalibration is recommended.
18. 140 dB Peaks: Front panel selectable display indicates
number of 140 dB peaks that have been detected.
19. Warm-up Time: One minute.
20: Data Logger
Recording Time: 31 hours maximum. Any data beyond this
time is not stored; only the first 31 hours
are retained.
Stored Information: a. The integrated 60 second average
(L
).
AVG
b. The highest SPL (Lmax).
c: The number of detected 140 dB peak
occurrences.
d: “HOLD” switch status.
e: “RANGE” switch status.
Storage Rate: Data is stored at 00:01:00 (hrs:min:sec) and
once per minute thereafter.
Data Retention: Data is retained for as long as the unit re-
mains powered in the “RUN” or “HOLD”
modes; all data is lost in the “OFFf” mode.
However, to minimize the chance that data
may be lost inadvertently, the data is retained
for 3 seconds after the power is turned off.
Data Output Port:
Parallel: With supplied cable, communicates with any
Centronics compatible, 80 column printer.
RS-232C Serial: With accessory cable, catalog #02233, com-
municates with any serial computer port at
baud rates of 300, 600, 1200, 2400, 4800 or
9600. (Serial port set for 8 bit words, no parity, 1 stop bit). It will also function with many
RS-232C serial printers.
Data Output Format:
Parallel: Includes criterion level, threshold level,
elapsed run time, elapsed hold time, Leq,
SPL MAX, dose, and number of 140 dB
peaks. A five minute average level
histograph is then output, which additionally gives indications of the RANGE switch
setting and activation of “HOLD” mode. This
is then followed by a complete listing of all
stored information on a minute-by-minute
basis. See para. 4:10 for further details.
Serial: Includes criterion level, threshold level, ex-
change rate, unit identification number,
elapsed hold time. Leq, SPL MAX, dose, and
number of 140 dB peaks. This is then followed by a complete listing of all stored in-
9
Page 10
formation on a minute-by-minute basis. All
of this data is formatted either for convenient
input to a spreadsheet program, such as
Microsoft Works 3.0 for DOS, or in the same
format as the parallel printer.
Real-Time Clock: A real-time clock provides time and date in-
formation on the printout. The clock continues running even with power “OFF”.
21. Power Requirements: The 897 is designed to be used with the
Simpson battery charger, part number 6115095, which is adequately insulated to
permit use of the 897 while being charged.
This charger has a rated input of 108 V AC to
264 V AC at 50/60 Hz. Use of any other
charger may be hazardous to the operator
or to the 897.
Internal Rechargeable
Nickel-cadmium Battery Pack: Rechargeable with supplied recharger.
Battery Life: Approximately 40 hours between charges in
“RUN”. Approximately 60 hours between
charges in “HOLD”.
NOTE: When the Instrument is switched to “RUN” and the display shows “ERR3”
and “LO BATT”, the battery must be charged at least 8 hours.
Clock, are saved in nonvolatile memory; the settings are retained even if the
battery becomes fully discharged.
4.7 Security Controls
The 897 has been designed with two special security provisions to prevent unauthorized personnel from tampering with the control settings.
A function lockout feature prevents selected functions from being changed. This
is accomplished by selecting the desired function, and while pressing this button,
moving the “OFF-RUN-HOLD” control switch from “RUN” to the “HOLD” position
and then back to the “RUN” position. The function touch pad is now disabled and
no further function selections will be acknowledged. To regain control of the function selections, simply move the “OFF-RUN-HOLD” switch from “RUN” to “HOLD”
and back to the “RUN” position.
The “OFF-RUN-HOLD” control switch can be locked in any one of the three
positions by inserting the #4 spline wrench into the Bristol Screw located next to
the switch and turning the screw clockwise.
4.8 Selection Of Parallel Or Serial Output Format
The selection of either the parallel or serial output is performed by the available
accessory cables. No other user action is required, other than setting the RS-232
Baud Rate. The accessory RS-232 cable comes with a female dB-9 connector,
which is standard on IBM PC/AT™ and compatible personal computers. The
accessory parallel cable comes with a 36-pin connector that is compatible with
most parallel-input printers. In the event that another custom cable configuration
is required, the pinout of the “DATA OUTPUT” connector is shown below.
Low Battery Indicator: Automatically displays “LO BATT” to indicate
at least eight hours of time remaining.
22. Display 4-digit liquid crystal display with six additional
characters: SPL, SPL MAX, INT 60, LO BATT,
% DOSE, dBA, plus a colon and decimal
point.
23. Keyboard Selected Functions:
SPL(CAL): Sound Pressure Level
INT (60 Sec): Continuous 60 second integrated SPL (also
referred to as L
DOSE: In percent.
PEAK: The number of detected 140 dB peaks, up to
a maximum of 250.
Leq: The eight-hour Time Weighted Average.
MAX: The maximum detected SPL.
TIME: Displays elapsed HRS:MIN or MIN:SEC.
PRINT: Activates the Data Output.
24. Mechanical Construction
Security Provisions: “Special” (#4 spline) wrench provided to lock
“OFF-RUN-HOLD” slide switch into any po-
AVG.
).
10
DATA OUTPUT PINOUT
PIN USE PIN USE
1. Must not be connected for parallel.
Must be connected to pin 4 for serial
2. Parallel bit 6 output
3. Parallel bit 5 output
4. Ground
5. Parallel bit 2 output
6. Parallel bit 1 output
7. Serial cts input
8. Parallel data strobe output
The requirements for the RS-232C output are: 8 bit words, no parity, 1 stop bit.
Data is transmitted only; there is no “data receive” function. Handshaking is via
one signal line, “CTS.”
9. Parallel bit 7 output
10. Serial data output
11. Parallel bit 4 output
12. Parallel bit 3 output
13. Ground
14. Parallel bit 0 output
15. Parallel data ready input
4.9 Automatic Data Logger
The dosimeter has a self-contained data logger with a 31 hour storage capability,
and will store up to to 31 hours of data, as long as the “OFF-RUN-HOLD” switch
is never switched to “OFF” and/or the self-contained batteries do not become fully
discharged. On a once-per-minute basis, the following information is logged: the
present value of the INT (60 sec) function, the maximum sound pressure level
23
Page 11
NOTE: In order to determine how much the Leq exceeds the OSHA upper limit of
115 dB, set the Leq to 130 dB.
Example:
5. Serial Output, Option 1 or 2 (Prn): Option 1 formats the data in spreadsheet format for a computer; option 2 outputs the data formatted for a
serial printer. This setting has no effect on the parallel output data format.
This is factory set to option 1.
Example:
6. Unit Identification Number (id), if multiple units are in service, units or
tens digit: 0 through 9; thus the unit identification number may range
from 00 to 99. This is factory set to unit #01.
Example:
7. RS-232 Baud Rate (0000): 300, 600, 1200, 2400, 4800, or 9600 baud.
This has no effect on the parallel output. It is factory set at 9600.
8. Real-Time Clock - Set Time:
Set Minutes: Unit Digit (00:0
Set Minutes: Tens digit (00:
Set Hours: (
NOTE: Based on 24 hour clock
Example:
00:00) Select 00 through 23.
0) 9 through 9.
00) 0 through 5.
sition. A keyboard switch “lockout” feature
allows the 897 to be locked into any desired
function.
Case Construction: Anodized aluminum extrusion.
Physical Dimensions:
Length: 6.8 inches (172 mm)
Width: 3.1 inches (80 mm)
Thickness: 1.1 inches (28 mm), excluding microphone
and clip.
Weight: 18 oz. (500 gm)
25. Environmental Specifications
Temperature:
Influence: 60.03 dB/°C, -10 to +25°C, 60.05 dB, +25 to
50°C (Reference 1000 Hz and 105 dB).
Operating Range: -10 to 50°C.
Storage Range: -30 to 45°C (limitation of batteries).
Humidity:
Influence: Less than 0.5 dB over measurement range.
Range: 0 to 95% RH.
Magnetic Field: No effect when placed in a field of 1 oersted
(80 A/m) with Model 897 oriented for maxi-
mum sensitivity to the field.
Atmospheric Pressure: Correction data is provided in the calibrator’s
operator’s manual.
2. PREPARATION FOR USE
This section contains instructions for preparing the new Instrument for use. Also
included are unpacking and inspection procedures, warranty and shipping instructions.
9. Real-Time Clock - Set Date:
Set Day: (1-:
Set Month: (2-:
Set Year: Unit Digit: (3-:
Set Year: Decade Digit: (3-:
Example:
d. Once all the parameter choices are made, switch the “OFF-RUN-HOLD”
switch (see figure 4-1) to “OFF” for three seconds and all changes will be
saved in the internal memory. It is unnecessary to go through the entire
sequence; you may stop and switch the power “OFF” once all needed changes
are made. All of the above parameters, with the exception of the Real-Time
N) N = number 01 through 31.
N) N = number 01 through 12.
N) N = number 0 through 9.
N) N = number 0 through 9.
22
2.1 Unpacking And Inspection
Examine the shipping carton and Instrument for damage. If undamaged, check
for internal damage . (Preliminary checks of the operating condition of the Instrument can be made after carefully reading Section 4). If there is external or internal
damage, immediately file a complaint with the carrier. Make certain all items in
Table 1-1 are included in shipment. Save the shipping carton for possible future
shipping of the Instrument.
NOTE: The 897 is powered by a self-contained rechargeable nickel cadmium
battery pack. Charge Instrument for 16 hours before use.
2.2 Preparation For Use
Accuracy of measurements can be affected by several factors, including the position of the microphone with respect to the sound source and the positioning of
the microphone on the user. Read Section 3 carefully for general background
information.
In operation, the Instrument can be attached to the belt with the clip provided, or
can be placed in the shirt pocket. Ideally the microphone should be clipped
11
Page 12
upright to the shirt on the center of the shoulder. If this is impractical, clip the
microphone facing upward on the shirt collar. To protect the microphone in dusty
or windy environments, place the windscreen over the microphone before attaching it to the shirt.
2.3 Warranty
The Simpson Electric Company warranty policy is printed on the inside front
cover of this manual. Read it carefully before requesting warranty repairs. For all
assistance, including help with the Instrument under warranty, contact the factory.
Give full details of any difficulty and include the Instrument model number and
date of purchase. Shipping instructions will be mailed promptly. If an estimate of
charges for nonwarranty or other service work is required, a maximum charge
estimate will be quoted. This charge will not be exceeded without prior approval.
2.4 Shipping
Pack the Instrument carefully and ship it prepaid and insured to the proper destination.
3. APPLICATION
This section contains the basic information required for effective application of
the 897. To understand the operation of the Instrument, the following paragraphs
discuss its function in relation to some of the subtleties of sound.
3.1 Decibel Scale
The human ear has a sound sensitivity range of greater than one million to one,
from the lowest level that can be detected to the highest level that can be tolerated without pain. Because of the large ratio involved, a linear meter scale marked
in sound pressure units becomes impractical. A scale based on logarithms, called
a decibel (dB) scale, is used. This scale expresses the ratio between the sound
pressure level being measured, with respect to a reference level and converts
large ratios into smaller convenient numbers. For example, a million-to-one pressure ratio can be compressed on a 0 to 120 dB scale. The zero dB is the low limit
reference which the human ear can barely perceive.
3.2 Sound Level Meter
number 1, 2 or 3, and should then freeze on this display. If this occurs, the
Instrument must be returned for repair.
If these tests pass, the Instrument will proceed to a “rotating digits” test. This will
cycle the display through all digits and all special annunciators. This test will
continue until either the “TIME” switch is pressed or the “OFF-RUN-HOLD” switch
is switched to “OFF.”
If the “TIME” switch was pressed, then the Instrument will continuously display
the real-time clock until the “OFF-RUN-HOLD” switch is switched to “OFF.”
4.6 Setting The Dosimeter Parameters
4.6.1 The Dosimeter Parameters
Criterion Level (Lc), Threshold Level (Th), Exchange Rate (rt), Leq Upper Limit
(H), Unit ID Number, Baud Rate and Time are easily programmable using the
buttons located on the front panel.
4.6.2 To Program the Dosimeter
a. Press and hold the “Setup” button (see Figure 4-1) while switching the “OFF-
RUN-HOLD” switch (see Figure 4-1) from “OFF” to “RUN.”
b. Select the parameter to be programmed by sequentially pressing the “Setup”
button. The order of the sequence is given in Table 4-3, Setup Mode Sequence.
c. Once the desired parameter is displayed, press the “Test” button (see Figure
4-1) to select the available choices of that parameter. The digit or digits which
will change as a result of pressing the “Test” button will flash. The display
prompt for each function is given within the parenthesis.
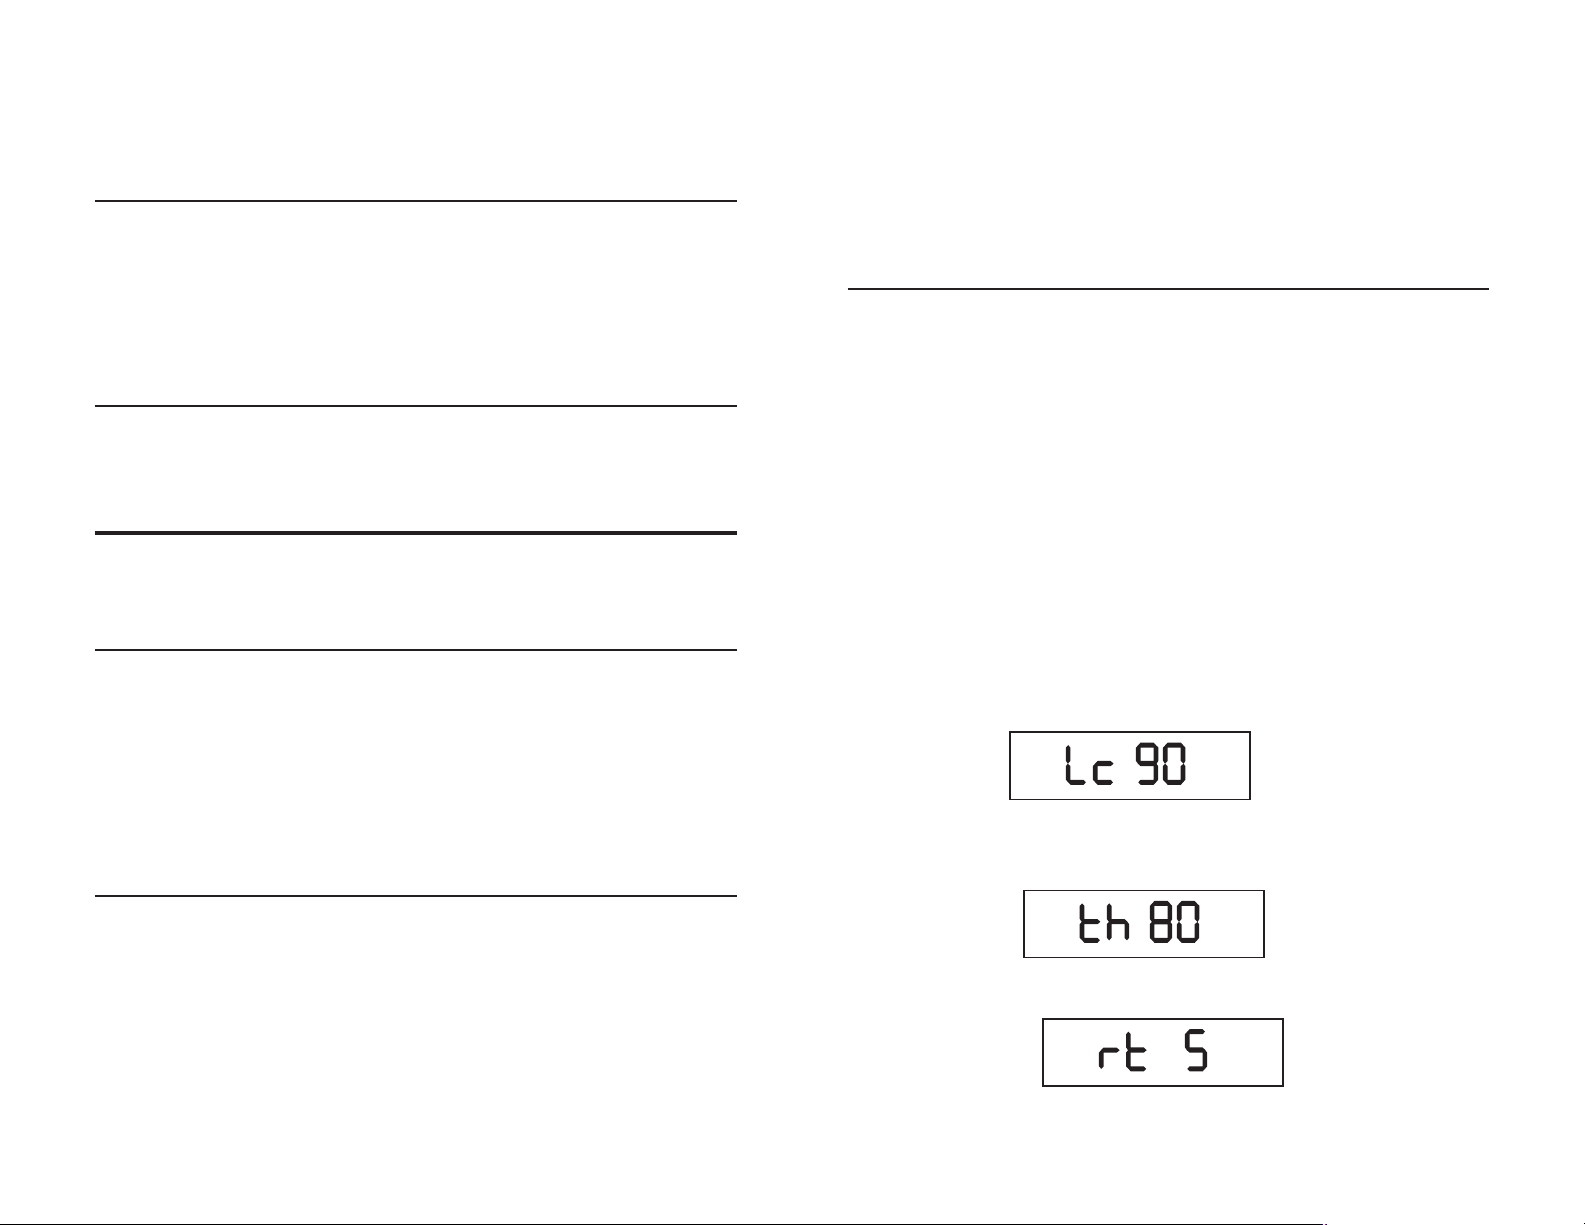
Table 4-3. Setup Mode Sequence
1. Criterion Level (Lc): 70, 80, 84, 85, or 90 dB. Factory set at 90 dB as
recommended by OSHA.
Example:
2. Threshold Level, units digit (th): 0 through 9.
Threshold Level, tens digit (th): 5 through 9; thus the threshold may be
set to any value from 50 through 99 dB. Factory set at 80 dB.
Example:
A sound level meter is a measuring device used to determine the existing sound
pressure level in a particular area. A choice of frequency responses called A, B
and C “weightings” is typically provided which relate to the human ear response
at low, middle and high sound pressure levels. The sound pressure level is expressed in dB A, dB B or dB C where 0 dB = 20 µ Pascals; the threshold of hearing
and the A, B and C define the “weighting” selected. (See Figure 3-1).
NOTE: All OSHA type sound level meters must be A-weighted. B and C weightings
are not required for compliance measurements.
The sound level meter function of the 897 meets the requirements of the American National Standards Institute (ANSI) Standard Specification S1.4 1983 for
type S2A (“A” weighted) general purpose sound level meter.
12
3. Exchange Rate (rt): 3, 4, or 5 dB. Factory set at 5 dB as recommended by
OSHA.
Example:
4. Leq Upper Limit (H): 115 or 130 dB. Factory set at 115 dB as recommended
by OSHA.
21
Page 13
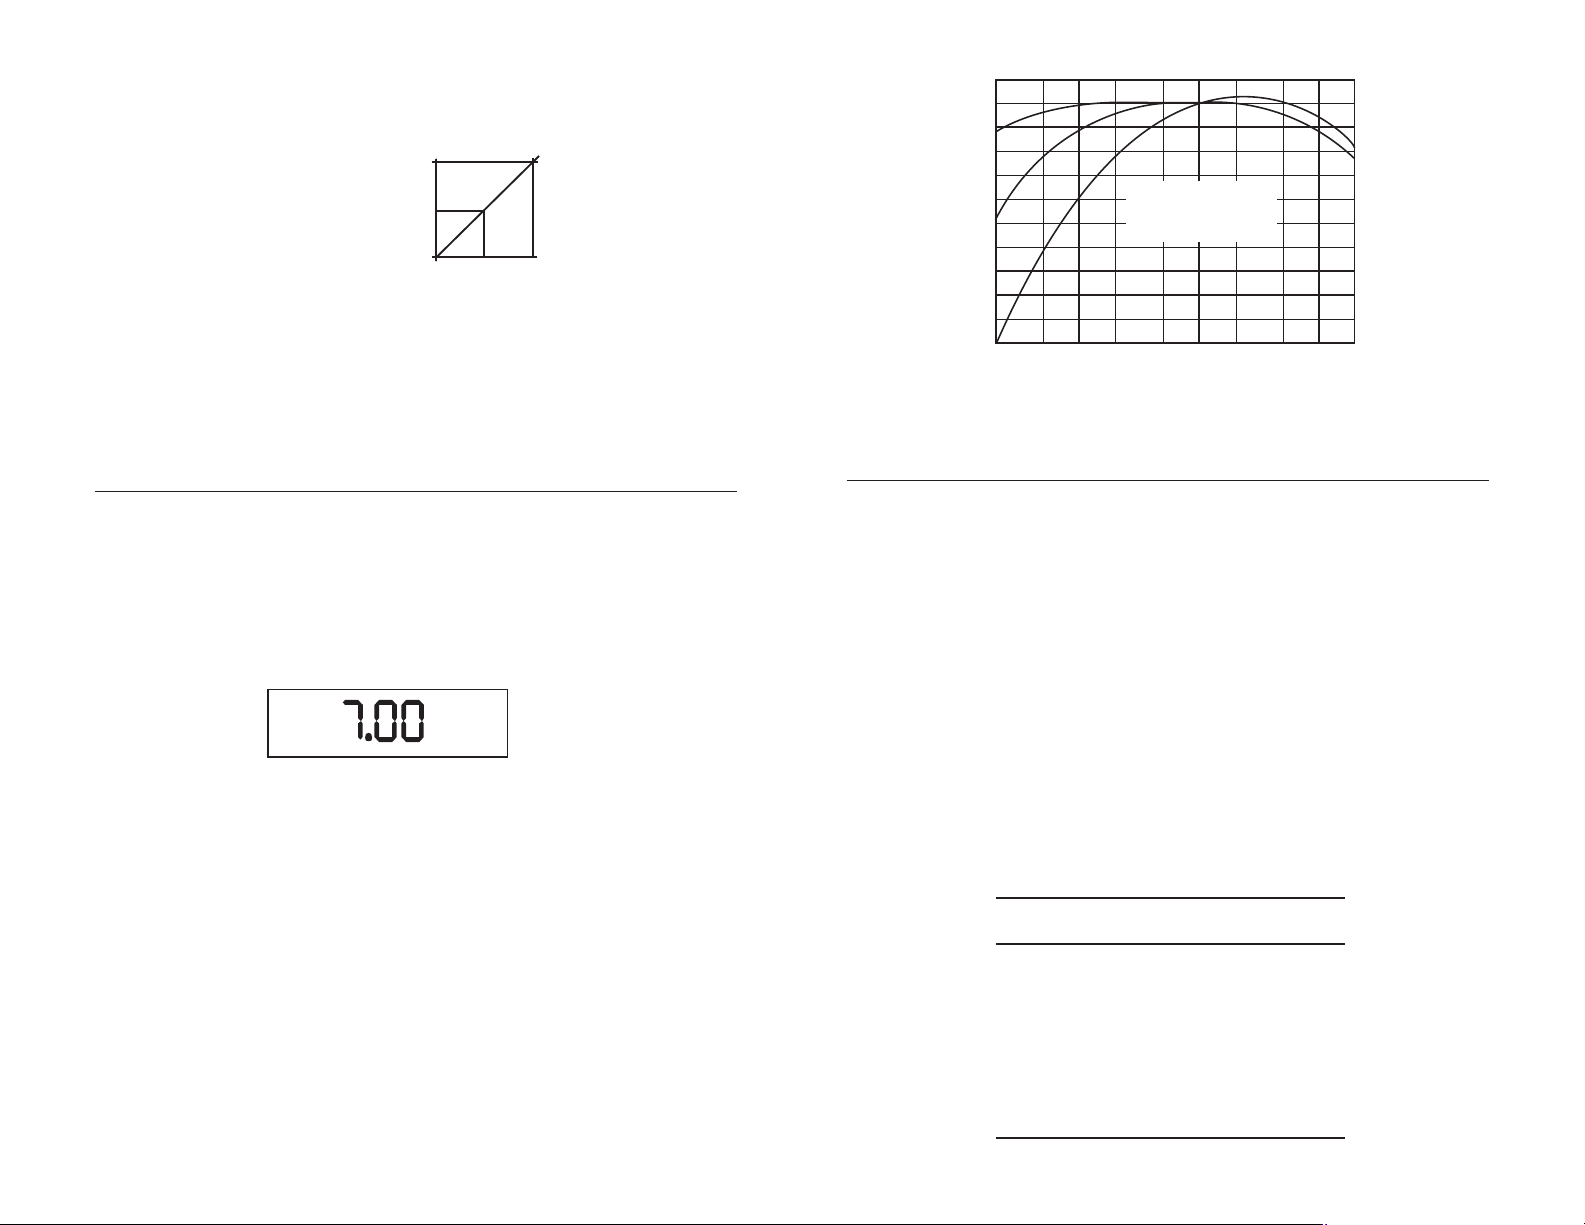
The approximate required time to fully charge the battery pack, in hours, is linearly proportional to the operating time of the dosimeter. See graph (Figure 4-3)
below.
TIME
16
10
2
0
15
OPERATING TIME
(HOURS)
40
CHARGE
(HOURS)
Figure 4-3
The Instrument will operate from the battery for approximately 40 hours between
charges in the “RUN” position or approximately 60 hours between charges in the
“HOLD” position, however, this time will vary according to use.
+5
0
–5
–10
–15
–20
–25
–30
–35
RELATIVE RESPONSE DECIBELS
–40
–45
–50
20 50 100
C
B
A
FREQUENCY RESPONSES
FOR SLM WEIGHTING
CHARACTERISTICS
1000 2000
500
200
FREQUENCY (Hz)
A
B AND C
5000
10,000
Figure 3-1. A, B & C Weighted Electrical Responses
20,000
4.5 Preliminary Checks
Set the “OFF-RUN-HOLD” switch to the “RUN” position. When the unit is first
turned on, a display segment test is performed. Next, the 897 will display in
sequence given:
Lc nn (Criterion Level)
th nn (Threshold Level)
rt n (Exchange Rate)
SPL Display
Example:
4.5.1 Underrange Display
The display will indicate “ur” if the SPL is underrange; i.e., under 50 on the 50 to
100 dB range or under 80 on the 80 to 130 dB range.
4.5.2 Overrange Display
The display will indicate “- - - -” if the SPL is overrange, i.e., over 100 on the 50 to
100 dB range, or over 130 on the 80 to 130 dB range.
4.5.3 Diagnostic Memory Test
The Instrument automatically performs a self diagnostic-memory test when turned
on. However, the operator may access and display this self-test routine via the
“TEST” switch. The self-test contains a complete memory diagnostic, a display
test routine, and a continuous real-time clock display. These three tests are enabled by pressing the “TEST” switch down and sliding the “OFF-RUN-HOLD”
switch to “RUN”. The display will first show “t 1.” If that passes, it will automatically
proceed to “t 2” and “t 3.” Each of these tests (t) are verifying different portions of
the internal memories. If any of these fail, the display will change to “Err” with the
20
3.3 Measurement And Exposure Standards
Sound level meter measurement standards are defined in American National
Standards Institute (ANSI) Specification S1.4-1983. Federal, State and local governments also have defined allowable noise (undesirable sound energy) level
exposure limits for persons in industrial environments. Selected and applicable
parts of those currently in force are cited in this manual.
NOTE: Standards and government regulatory laws are subject to modification or
expansion. Always check for latest available documents and information.
The Occupational Safety and Health Act of 1970 (OSHA), The Walsh-Healy Act
(Federal Register, Vol. 34, No. 96) and paragraph 1910.95 of the Occupational
Safety and Health Standards (Federal Register, Vol. 46, No. 162), set the present
legal standards of allowable employee noise exposure limits and are shown in
Tables 3-1 and 3-2.
3.3.1 Steady Level or Slowly Varying Noise
Table 3-1. Permissible Noise Exposure Limits
(Based on 90 dB criterion level and 5 dB exchange rate)
Duration Per Day Sound Level, dB A
in Hours SLOW Response
8 90
6 92
4 95
3 97
2 100
1 - 1/2 102
1 105
1/2 110
1/4 or less 115
13
Page 14
Table 3-2. Permissable Noise Exposure Limits for Continuous Noise
noitaruD
yaDreP
sruoHni
23
9.72
3.42
2.12
4.81
00.61
39.31
21.21
65.01
91.9
00.8
69.6
60.6
72.5
95.4
00.4
84.3
30.3
46.2
03.2
00.2
47.1
25.1
23.1
51.1
00.1
leveldnuoS
ABd
esnopserwolS
0878.0601
1867.0701
2866.0801
3875.0901
4805.0011
5844.0111
6883.0211
7833.0311
8892.0411
9852.05
0922.0611
1991.0711
2961.0811
3941.0911
49521.0021
5911.0121
69590.0221
79280.0321
89270
99360.0521
001450.0621
101740.0721
201140.0821
301630.0921
401130.0031
501
noitaruD
yadrep
sruohni
.0421
leveldnuoS
ABd
11
4.3 Top Panel Operating Features
Table 4-2. Top Panel Operating Features
esnopserwolS
1. RANGE switch: A 2-position switch that selects the operating range for
sound level measurements. The available ranges are 50
to 100 dB and 80 to 130 dB. The data logger records the
position of the switch and the time of any changes in the
position.
2. SPL (CAL)
adjust: Used with a calibrator to set the correct level.
3. EXT DC: Used with the supplied battery charger to recharge the
internal nickel-cadmium batteries. The Dosimeter may be
operated while connected to the charger.
4. DATA OUTPUT
CONNECTOR: Use with either parallel or RS-232 Serial accessory cable
to obtain data.
DATA OUTPUT
4
RANGE
50/100 80/130
SPL
CAL
EXT DC
1
2
3
Figure 4-2. Top Panel
Varying Level Noise
When daily noise exposure is composed of two or more periods of noise exposure at different levels, consider their combined effect rather than the individual
effect of each. The total dose is computed by the expression:
C1 + C2 + — + Cn
D +
T1 T2 Tn
Where: D is the noise dose; C1, C2 … Cn are the actual segments of exposure
time at different noise levels; and T1, T2 … Tn are the allowed time intervals (see
Table 4-1) for the mentioned segments of exposure. Unlike a sound level meter,
a dosimeter computes automatically the exposure, D, and displays the accumulated percentage of the allowed exposure.
B
Duration computed from where L = dB level, and rt = exchange
2 exp (L-90) rt
rate = 5 dB, in this example table.
*From the Federal Register, Vol. 46, No. 162, August 21, 1981.
14
4.4 Battery Charging
The 897 is designed to be used with the Simpson Battery Charger(part no. 6-
115095) which is insulated well enough to permit use of the 897 while being
charged. This charger has a rated input of 108V AC to 264V AC at 50/60 Hz. Use
of any other charger may be hazardous to the operator or the 897.
The self-contained, rechargeable nickel cadmium battery pack should be charged
before operating the Instrument for the first time, or when the Low Battery Indicator “LO BATT” is displayed, or before extended use where a power source is not
available.
The Instrument may be operated with the battery charger connected and thereby
maintaining its charge, however, cycling of the charge is “healthy” for Ni-Cad
batteries and extends their life. Do not attempt to keep them fully charged all the
time.
19
Page 15

D = 100
Tc
L - Lc
rt
兺
2
are suspended and printouts will indicate “HOLD” during the time SPL is
selected.
“HOLD”: In “HOLD” mode all data is retained without any modification except
that the elapsed time clock is kept running. The display will alternately flash
between “HOLD” and the presently selected function.
2. Control Switch “LOCK”:
A spline head screw is used to “lock” the control switch. Locking the control
switch, together with the keyboard switch lockout feature, provides protection against unauthorized tampering with control settings. To activate the
keyboard lockout, slide the “OFF-RUN-HOLD” switch to “HOLD”, then select
the desired function and while still holding that function button down, slide
the “OFF-RUN-HOLD” switch to “RUN”.
NOTE: The display will indicate four dashes (- - - -) for approximately five
seconds. At this point, none of the touch switches will respond. The keyboard may
be reactivated by again sliding the “OFF-RUN-HOLD” switch to “HOLD”.
3. Readout Display:
Four-digit LCD display plus eight special functions/units.
4. SPL (CAL):
When selected, the Instrument functions as a sound level meter. It reads the
incoming sound pressure level on a real time basis, and displays the Aweight dB reading.
NOTE: All dosimeter functions are suspended, and the printouts will indicate
“HOLD” during the time SPL is selected. The “SPL” mode is also used to calibrate
the Instrument when its microphone is inserted into the Model 887 Calibrator.
When the “SPL (CAL)” button is held down for three seconds until “CAL” is displayed, the reading will be retained in memory along with the time, date, and
position of the “RANGE” switch. The latest two such readings are always stored.
These saved readings are only viewable with the data output printout.
5. DOSE/PEAK:
Alternately displays the DOSE in percent or the number of 140 dB (or greater)
peaks that have been detected since entering “RUN”.
6. TIME:
Alternately selects an elapsed time display of “minutes:seconds” or
“hours:minutes” since the Dosimeter was first switched into “RUN” mode.
“Hours:minutes” is displayed with a flashing color indicator.
7. INT (60 sec):
Displays the sound pressure level integrated average over a 60 second time
period. The 60 second time period begins whenever the Dosimeter is switched
into “RUN” from either “OFF” or “HOLD”. It then updates continuously using
the latest 60 seconds of accumulated sound pressure levels. Additional depressions of this button will sequentially display the latest settings of the
programmable options, namely: cirterion level, threshold level, exchange
rate, time weighted average upper limit, serial output format, unit ID, baud
rate and time clock. Notice that it is not possible to change the settings here,
only to observe them. Refer to paragraph 4.6 for programming procedures.
8. Leq/Max:
Alternately displays Leq, based on eight hours, in dB or the maximum sound
pressure level in dB since entering “RUN”.
9. Print:
Instrument prints out one of the two output formats available from the data
logger depending on which accessory cable is presently connected. This
switch only functions while the Dosimeter is in the “HOLD” mode. (See paragraph 4.9 for further information.)
18
3.3.2 Impact Noise
For compliance, exposure to impulsive or impact noise must not exceed 140 dB
A peak sound level.
3.4 Dosimeter
To accurately determine a dosage level using a sound level meter is a tedious
procedure, as the total length of exposure at each dB level must be weighted and
summed (accumulated). The dosimeter function of the 897 automatically and
continuously performs these mathematical manipulations while it is operating
and provides the dosage readout directly in percent of allowable exposure.
3.5 Dosimeter Equation
The dosimeter function is defined by ANSI S1.25 as:
L - Lc
Dose (D) = 100
Tc
Where
q = rt
log 2
Thus:
D = 100
Tc
Since the A/D converter is performing continuous integration, the computer must
only resolve:
Note that the result is expressed as a percentage.
The equivalent sound level during the sample time, T, over which a percentage
criterion exposure (dose) is measured, is:
D = percentage criterion exposure;
Tc = criterion sound duration, defined as 8 hours;
T = actual exposure duration in hours;
L = slow, A-weighted sound level;
Lc = criterion sound level;
Lt = threshold level
rt = exchange rate: the change in sound level corresponding to a doubling or
halving of the exposure duration.
User selectable items:
Lt = 50 to 99 db;
Lc = 70, 80, 84, 85 or 90 dB;
rt = 3, 4 or 5 dB.
Upper level of allowable equivalent (Leq) sound level exposure: 115 or 130 dB.
T
q
10
冕
dt (when L > Lt)
0
L - Lc
rt
dt
T
2
冕
0
Leq = Lc + q log D Tc
100 T
15
Page 16
3.6 Sound Fields
3.8 Windscreen
3.6.1 Free Field
This field contains no reflecting objects. Ideally it is a point sound source located
in free space; however, it can be considered to exist whenever the sound level
being measured is caused mainly by the sound waves coming directly from the
sound source. This can occur even if there are reflecting objects.
3.6.2 Reverberant Field
This field is more common and exists whenever the sound level being measured
contains a significant amount of direct sound waves and a relatively small amount
of reflected sound waves.
3.7 Microphone Orientation
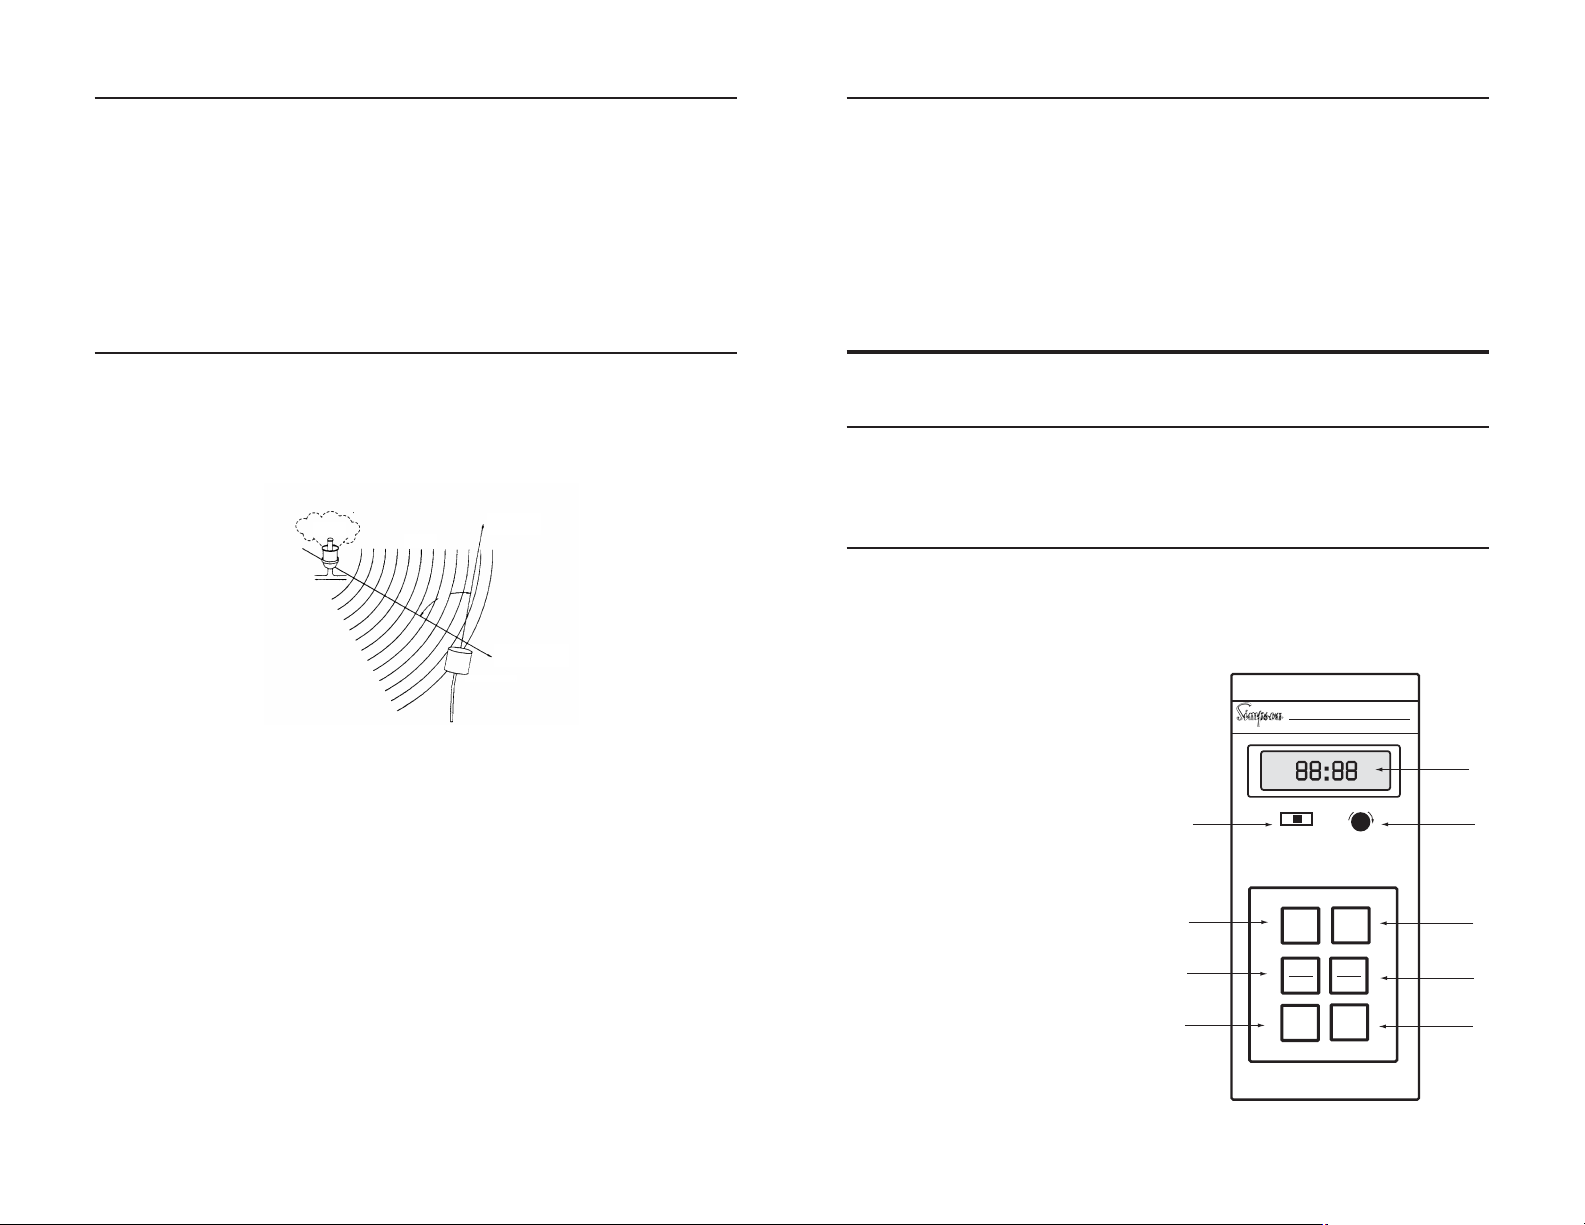
3.7.1 Area Monitor in a Free Field
When the Instrument is used as a fixed monitor in a free field or in a semireverberant field, the axis of the microphone should be oriented at approximately
70° with incident sound waves. Furthermore, the microphone should ideally be
placed as far from reflecting sound surfaces as possible. (See below.)
AXIS OF
SOUND
SOURCE
Figure 3-2. Microphone Orientation
3.7.2 Fixed Position Monitor in a Reverberant Field
When monitoring in a reverberant field, orientation of the microphone is not critical.
3.7.3 Use of Dosimeter as a Personal Monitor
For a practical and efficient application, clip the microphone to the shirt, on the
shoulder just below the ear, with the microphone diaphragm facing upward.
NOTE: The user of the Instrument disturbs the sound field near the microphone at
the upper limit of frequencies. For many practical situations, the measurement
error is relatively small, typically 1 to 3 dB higher than would occur with a fixed
monitor position. Since the fixed monitor cannot easily follow the motion of a
mobile individual, the personal dosimeter is the most accurate, practical means
of measuring individual noise dosage.
16
SOUND
WAVE
70˚
MICROPHONE
AXIS OF INCOMING
SOUND WAVE
MICROPHONE
NOTE: When the 897 is exposed to a dusty or windy environment, the windscreen
should be used to protect the microphone diaphragm from damage, and to assure a correct reading.
The windscreen will reduce the effects of wind noise by approximately 20 dB
without seriously affecting the frequency response of the microphone.
Grease and dirt on the windscreen may affect the accuracy of sound measurements. Under severe conditions the windscreen should be cleaned often. To
clean, wash with a mild detergent, thoroughly rinse and dry before placing over
the microphone.
4. OPERATION
This section provides the instructions required for the operation of the 897.
4.1 Safety Precautions
Read Section 3 before performing dosage measurements. Section 3 contains
important information pertaining to sound and noise measurement terminology,
standards, operating techniques and precautions.
4.2 Operating Items And Features
All front panel operating controls are described in Table 4-1 and shown in Figure
4-1. Top panel adjustments, controls and connectors are described in Table 4-2
and shown in Figure 4-2.
Table 4-1. Front Panel Operating Features
1. “OFF-RUN-HOLD” Control
Switch:
A 3-position slide switch used to
activate the Instrument and
“hold” accumulated data.
“OFF”: Power is removed from
the Instrument and all accumulated data is erased. When
switching from “RUN” to “OFF”,
there is a minimum three second delay before the 897 actually goes off. This will aid in preventing accidental loss of accumulated data. During this three
second period, the display may
appear dim; this is normal operation.
“RUN”: In “RUN” mode all data
relating to DOSE, Leq, INT (60
sec), MAX and PEAK is continuously monitored, updated and
stored, except when in SPL
mode of operation. In the SPL
mode, all dosimeter functions
17
1
4
5
6
897 DOSIMETER
SOUND MEASURING SYSTEM
LOCK
INT
(60 sec)
Leq
MAX
PRINT
% DOSE
dBA
LO BATT
SPL MAX
INT 60s
OFF RUN HOLD
SPL
"CAL"
TEST SETUP
DOSE
PEAK
TIME
SIMPSON ELECTRIC CO. ELGIN , IL 60120
Figure 4-1. Front Panel
3
2
7
8
9
 Loading...