


SUR-20
SUR-20
Learning Universal Remote
With LCD touch screen
User Manual


The SUR-20 User’s Manual
i
Preface
About this manual
This manual is designed to make using the SUR-20 Smart Remote
Control as easy as possible. Information in this document has been
carefully checked for accuracy; however, no guarantee is given to the
correctness of the contents. The information in this document is
subject to change without notice.
Copyright
© Copyright 2001
This document contains proprietary information protected by
copyright. All rights are reserved. No part of this manual may be
reproduced by any mechanical, electronic or other means, in any
form, without prior written permission of Sima Products Corp..
Trademarks
All trademarks and registered trademarks are the property of their
respective owners.
Sima Products Corp.
140 Pennsylvania Ave.
Bldg. # 5
Oakmont, PA 15139
800-345-7462 412-828-3700
412-828-3775 FAX
www.simacorp.com
Pn 21632 rev.20013

ii
Table of Contents
CHAPTER 1 - INTRODUCING THE SUR-20 ...................................... 1
Unpacking the SUR-20............................................................ 2
SUR-20 features....................................................................... 2
Identifying components.......................................................... 3
CHAPTER 2 -GETTING STARTED ...................................................... 4
Batteries ................................................................................... 4
Battery low icon ................................................................. 5
Battery tips and precautions............................................. 5
The LCD.................................................................................... 6
Turning the LCD on............................................................ 6
Touch screen precautions ................................................ 6
SUR-20 touch screen buttons ................................................ 7
CHAPTER 3 - OPERATING THE SUR-20..............................................
Changing the LCD layout ....................................................... 8
The AUX device button ......................................................... 11
CHAPTER 4 -THE LEARNING FUNCTION .........................................
Before you use the learning function.................................. 12
Using the learning function............................................. 13-16
CHAPTER 5 - LOADING PRE-PROGRAMMED CODES...................
Loading the Manufacturer's Code ..................................17-19
Manufacturer's Code Tables ...........................................20-25
CHAPTER 6 -THE DELETE FUNCTION...............................................
Using the delete function ..................................................... 26
Delete device button................................................... 26-29
CHAPTER 7 -THE MACRO FUNCTION ...............................................
Macro
......................................................................
30
Setting up a Macro example............................................ 30-33
Running the Macro................................................................ 33
Quick Start Macro setup Guide....................................... 34

Table of Contents
iii
CHAPTER 8 - SPECIAL FEATURES......................................................
Adjusting the LCD backlight............................................35-37
Turning off the beep signal ..................................................38
Recalling the original LCD layout ........................................ 39
APPENDIX A.......................................................................................
Specifications and Accessories........................................... 40
APPENDIX B.......................................................................................
Troubleshooting ...............................................................41-42
Quick Start Function Guide.......................................................... 43
WARRANTY........................................................................ 44


1
Chapter 1
Chapter 1Chapter 1
Chapter 1
Introducing the SUR-20
Congratulations on your purchase of the Sima
SUR-20 Universal Remote Control. The SUR-20 is a
digital universal remote control that is easy to use,
enabling you to control all of your electronic devices
equipped with an infra-red (IR) remote.
The SUR-20 uses a touch screen control panel,
which changes its display when you select a different
device. The touch screen eliminates the need for
dozens of buttons. It’s easy to find the functions you
want. Simply select a device and the appropriate screen
appears. You can control up to eight devices, including
VCRs, DVDs, TVs, and satellite dishes.
The SUR-20 is easy to set up. You can quickly
configure each device in your household or office using
the “learning eye”. In addition, the advanced macro
function enables you to initiate a chain of up to 25
commands with the touch of a single button.
Convenient and easy to use, the SUR-20 provides
you with a central control solution.
This manual will help you learn how to use all the
advanced features of the SUR-20. It will not explain
how to use the functions for your devices. Please
refer to your device’s user manual for information
related to your device.

The SUR-20 User’s Manual
2
Unpacking the SUR-20
After you have unpacked the SUR-20, check the
contents to make sure the following items are included.
• SUR-20
• This User’s Manual
If any of the above items are missing or appear
damaged, contact your dealer immediately. Do not
throw the shipping carton away in case you need to ship
your SUR-20.
SUR-20 features
The following list identifies the SUR-20’s key features.
For more information on getting the most from these
features, refer to Chapters 2 and 3.
• Large touch screen display with automatic backlighting for
visibility in dim lighting.
• Macro sequence function—each macro can store 25
commands.
• Controls up to eight devices including DVD, TV, Satellite,
VCR and CD.
• Learns the IR codes from your existing remote controls to
quickly set up devices.
• Adjustable backlight with four levels of ambient light
sensitivity.
• Pre-programmed manufacturer’s codes for many models.
Chapter 1 —Identifying Components
3
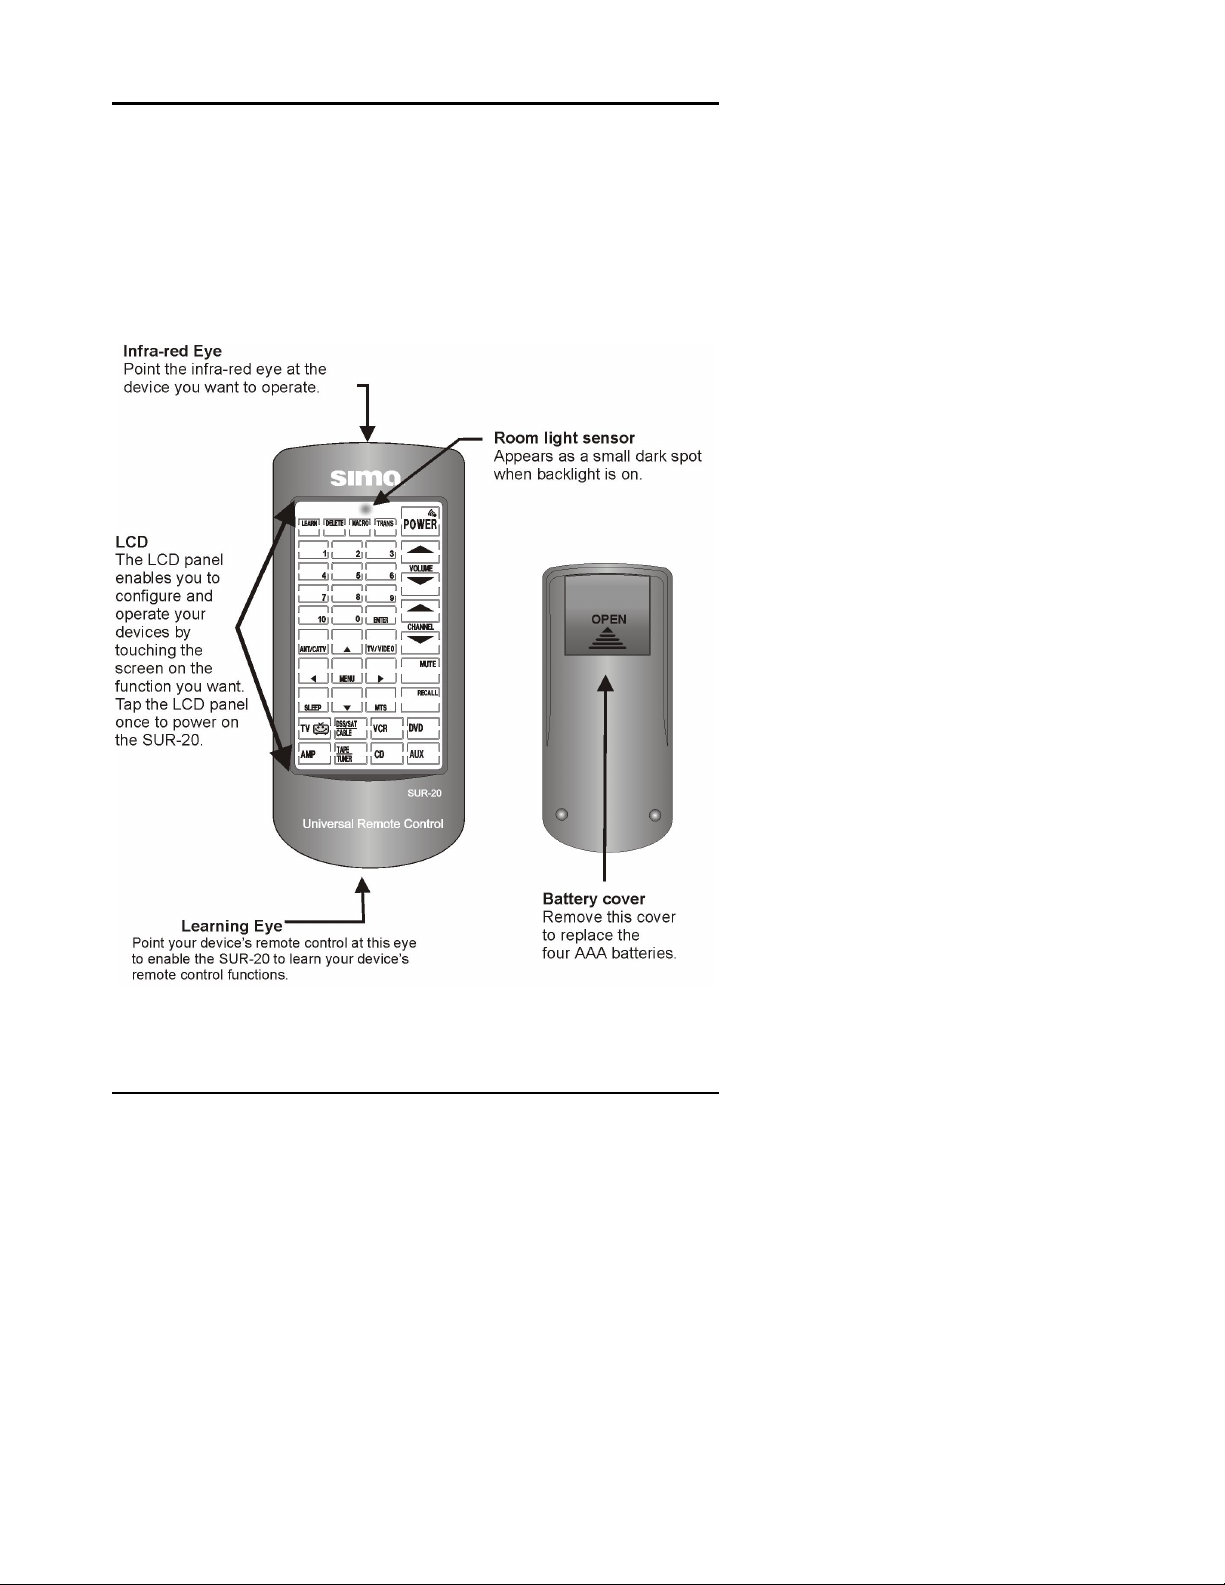
Identifying components
Please refer to the following illustrations to identify the
features of the SUR-20. This section provides an
overview of the SUR-20’s features and controls. Refer
to Chapters 3-8 for detailed descriptions on using the
LCD panel and controls.
Figure 1-1: Front and rear view
4
Chapter 2
Getting Started
This chapter will guide you through the steps for
inserting the batteries and using the many features.
Batteries
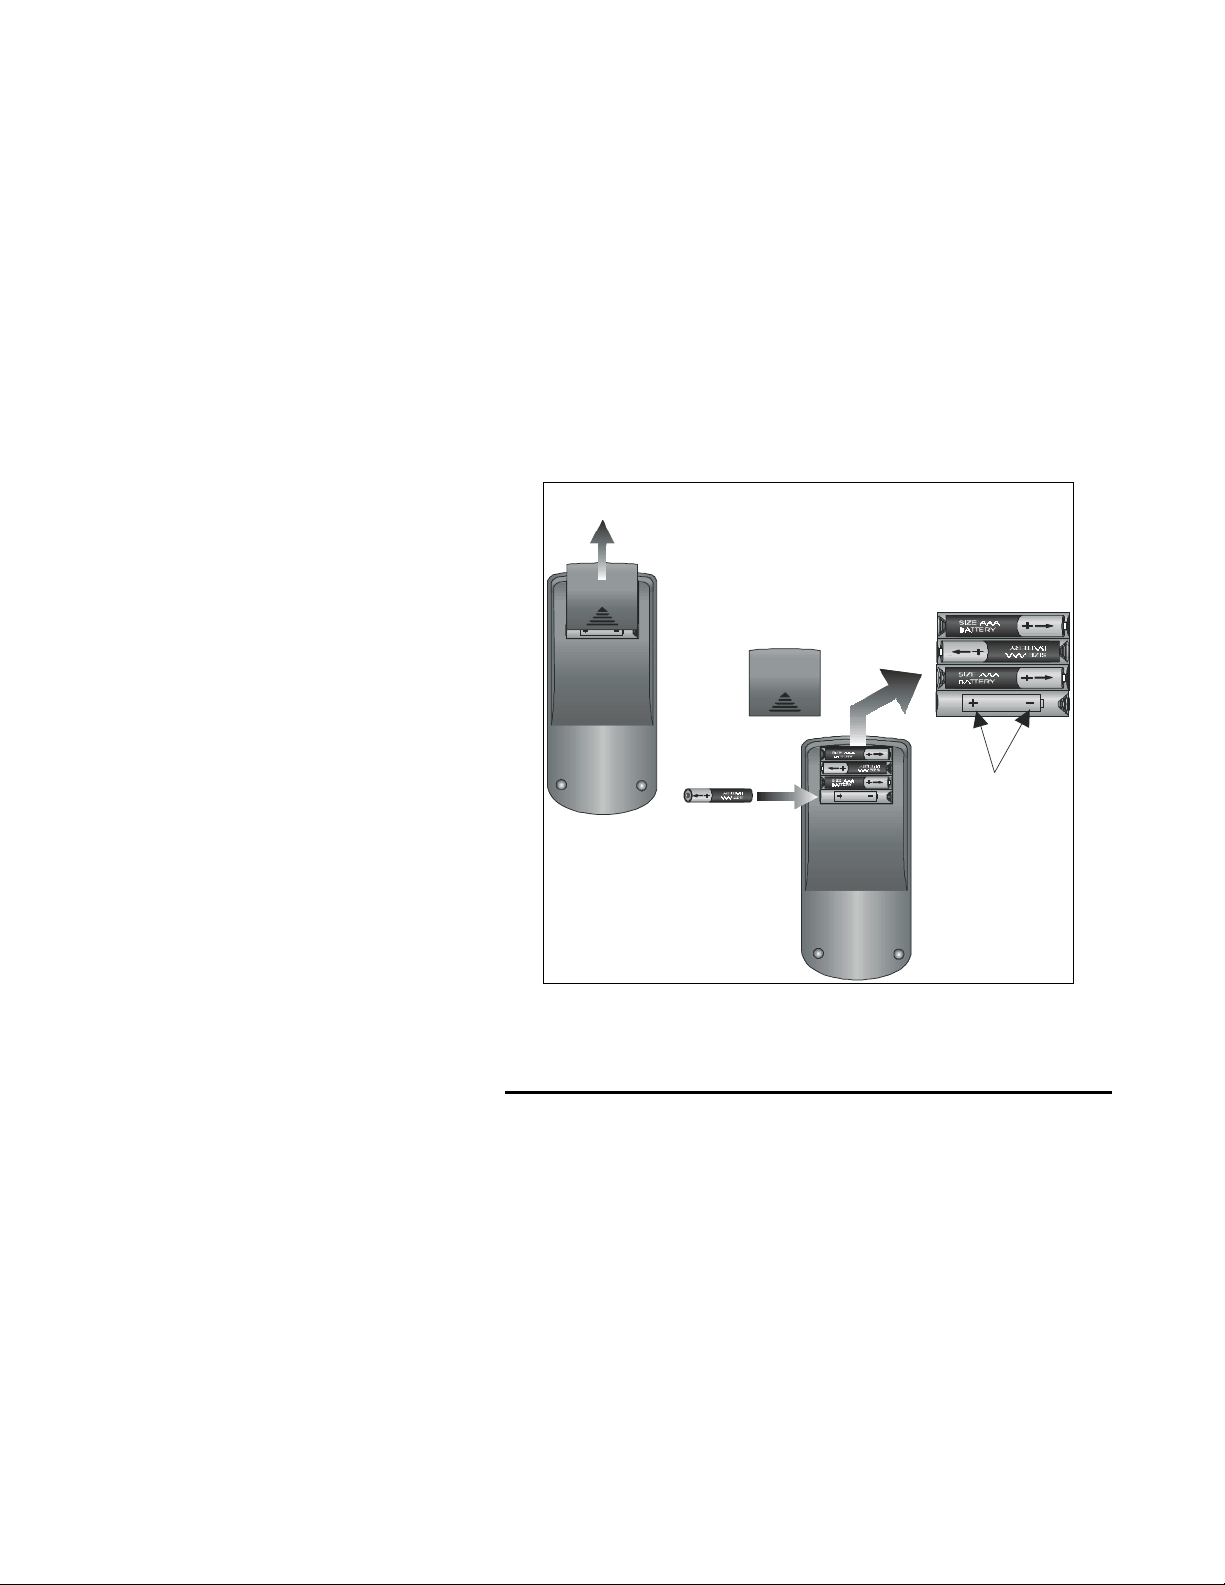
The SUR-20 operates on four AAA batteries (not
included). Batteries must be inserted before you can
operate the SUR-20. To insert the batteries, refer to the
following illustration:
Open the battery
case cover by
pushing in the
direction of the
arrow.
OPEN
A.
OPEN
Ensure
that you
insert
the batteries
according to
the marking
inside the
battery case.
Insert the
batteries.
B.
Figure 2-1: Inserting the batteries
Chapter 2 —Getting Started
5
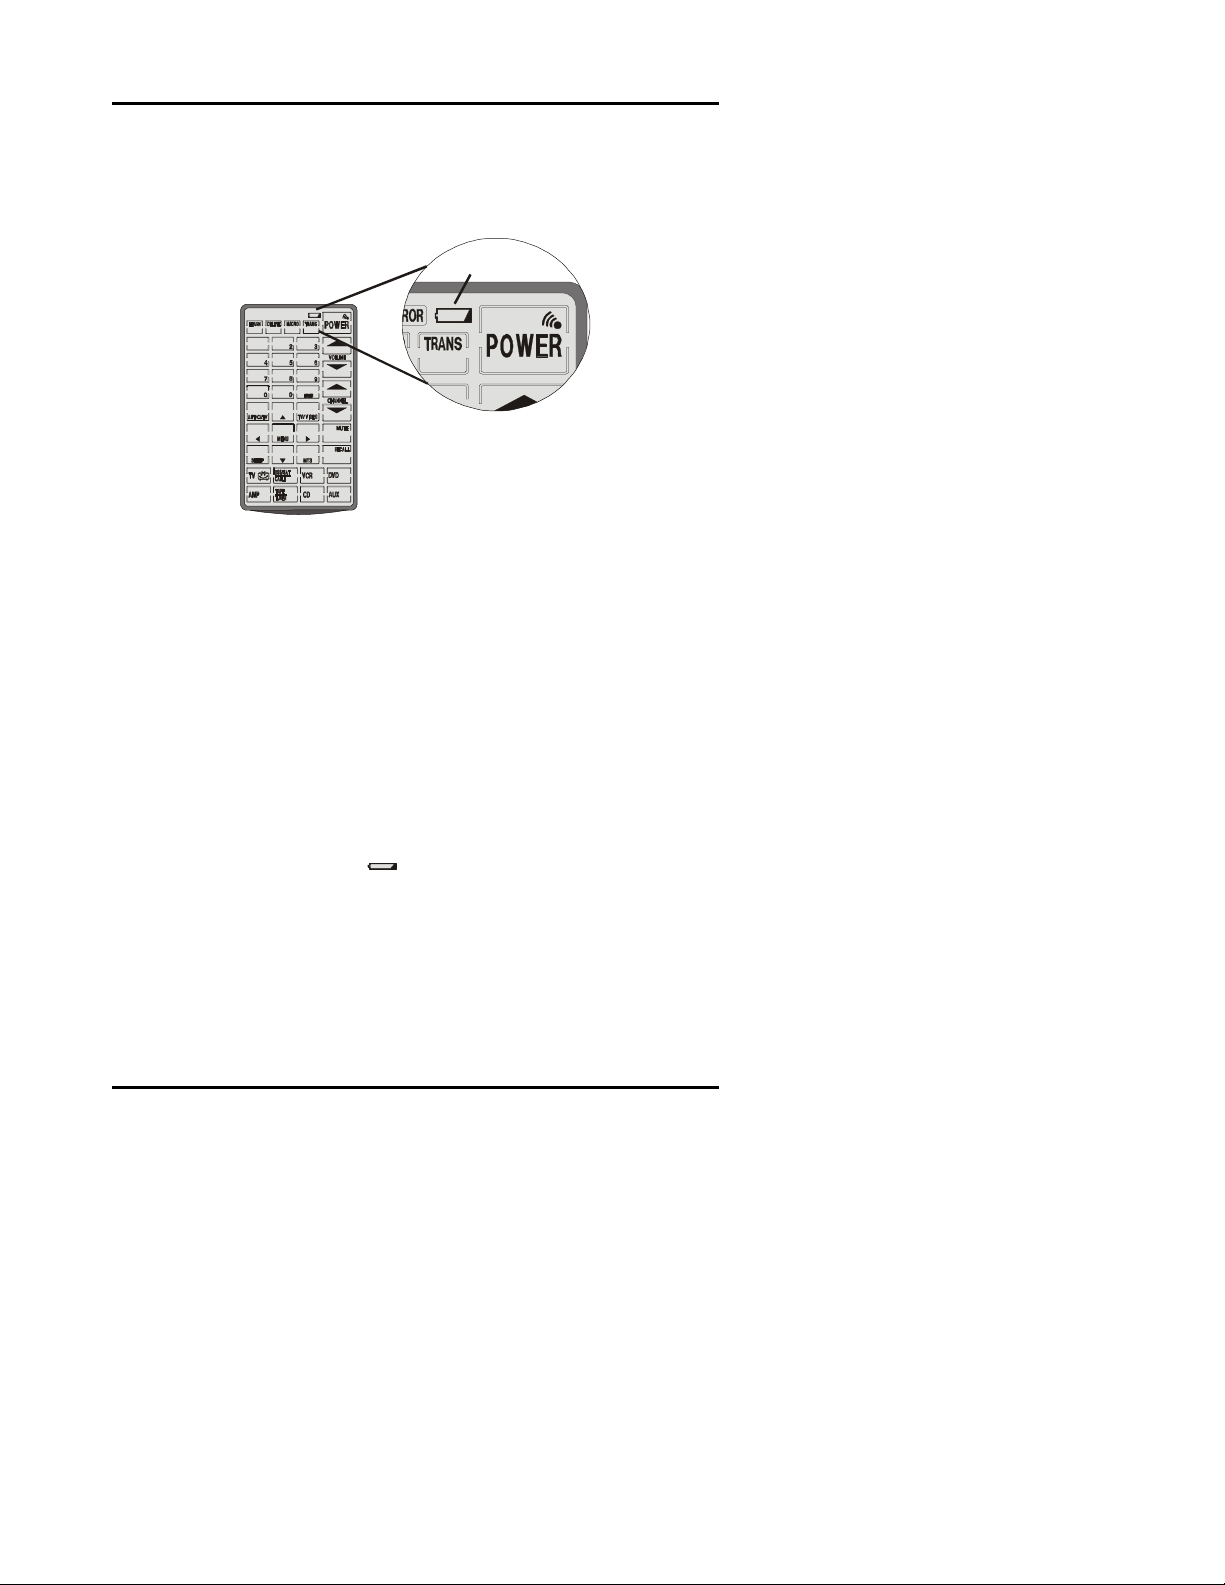
Battery low icon
When the batteries are low, the battery low icon will be displayed
next to the power button
:
1
1
Battery low icon
Figure 2-2: The battery low icon
You should replace the batteries with new ones immediately.
Battery tips and precautions
• Always use fresh batteries. Alkaline batteries
recommended. Do not mix different types of batteries.
• Be sure that the positive (+) and negative (-) polarities of
the batteries match the diagram shown in the compartment.
• Do not expose the batteries to excessive heat or flame.
• Keep batteries out of the reach of children.
• Weak batteries reduce the effective distance of the unit.
• Replace the batteries immediately when the battery low-
power warning icon
appears in the information screen.
• To reduce danger of leakage and damage, remove used
batteries when used longer than two years.
• The SUR-20 will not lose programmed data when batteries
are replaced
The SUR-20 User’s Manual
6
The LCD
(Liquid Crystal Display)
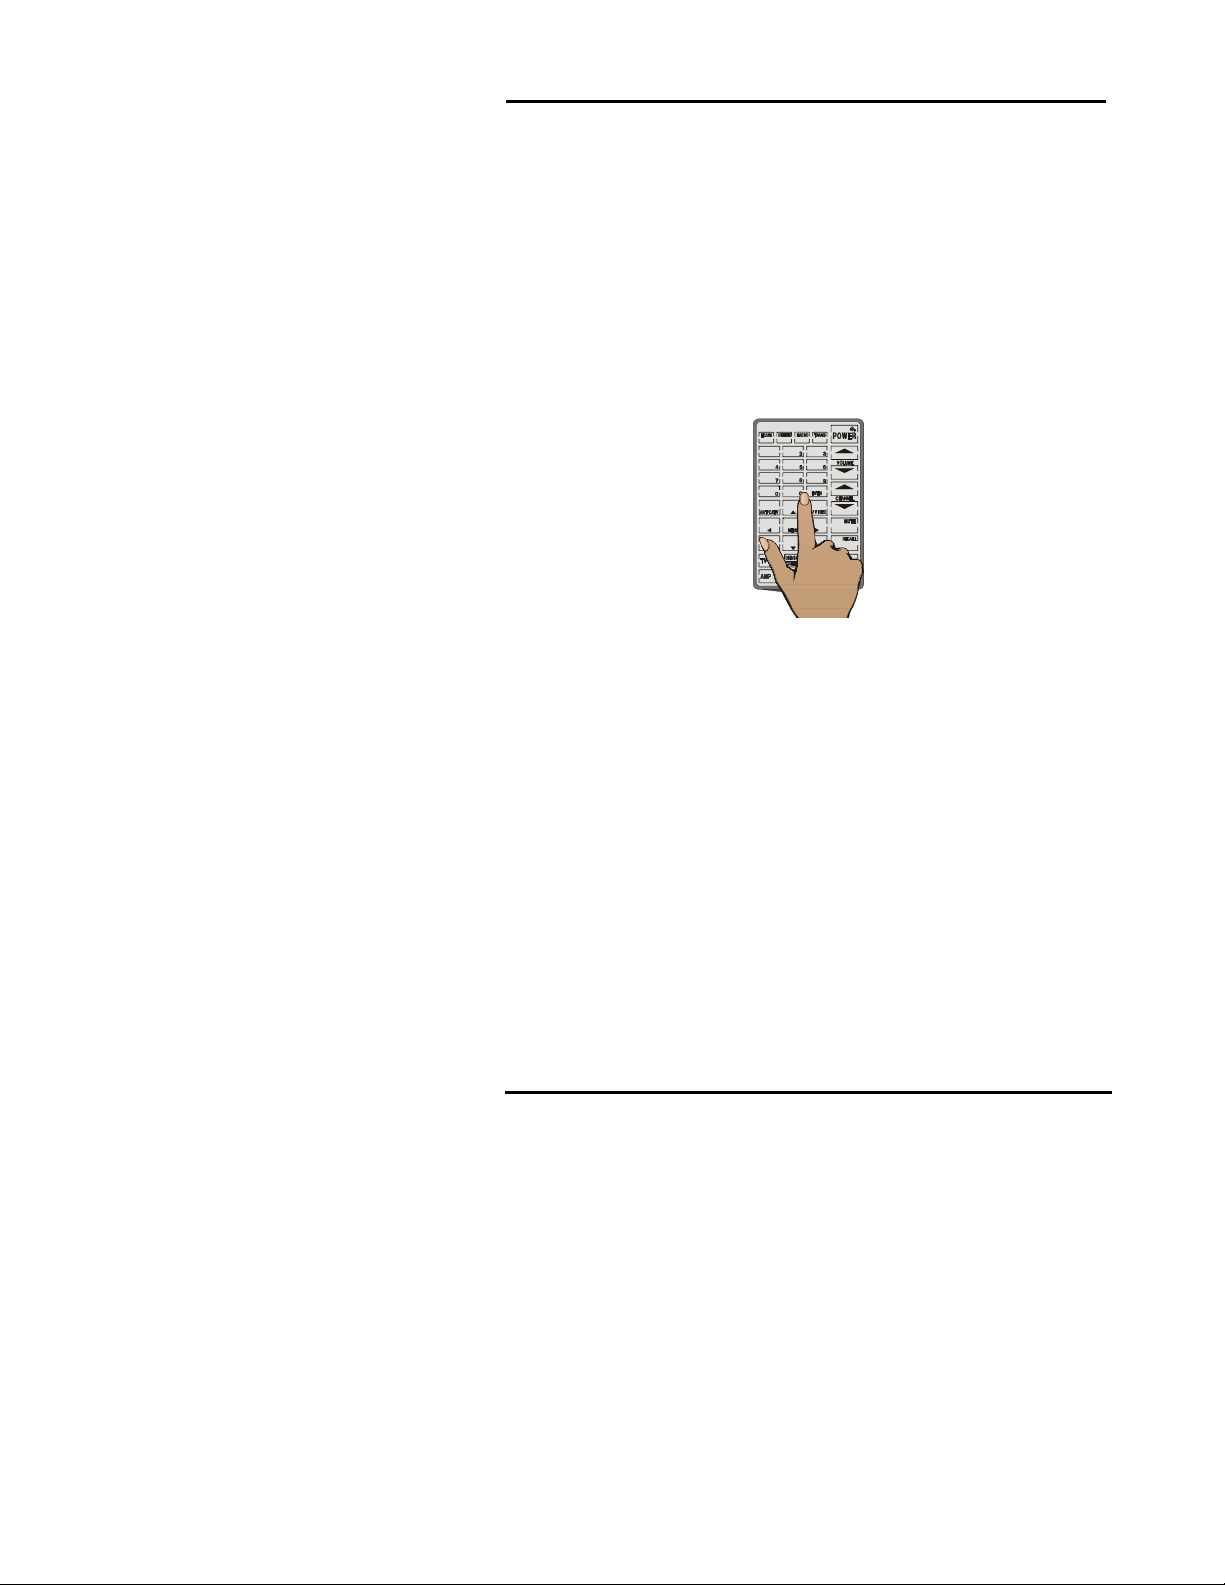
Turning the LCD on.
Using the LCD touch screen is easy. Simply touch the
screen to activate it. The touch screen reduces the number
of buttons by changing its configuration for each device
selected. In this way, the touch screen can provide a total of
224 buttons (8 devices x 28 buttons each).
It will turn itself off about 20 minutes after the last use.
1
1
Figure 2-3: Turning the LCD on
Touch screen precautions - Please read the
following instructions carefully:
• Tap the LCD touch screen gently; never use force.
• Do not use a pen or any sharp object to tap the screen.
You might damage the surface.
• Keep the touch screen dry. Wipe off any spills
immediately. The SUR-20 is not waterproof; never
immerse it in liquid.
• Don’t expose the SUR-20 to extreme temperatures. Keep
it away from heat sources.
• Avoid dropping the SUR-20.
• Don’t drop anything on the touch screen.
• Clean the LCD touch screen with a soft cloth. If needed,
dampen the cloth slightly before cleaning. Never use
abrasives or cleaning solutions.
Chapter 2 —Getting Started
7
SUR-20 touch screen buttons
The touch screen buttons enable you to operate the SUR-20.
Use these buttons to program codes from your existing
remotes, control your devices and set up command
sequences called macros. You will hear a beep when you
press a button. To activate or deactivate the beep, press any
device button twice. (For more info see Chpt. 8) The SUR-20
will turn itself off 20 minutes after the last use.
* Note:
To prevent accidental activation, the record button has a three
second safety delay. To instruct any device to record, you must press and
hold the REC button for three seconds.
Special function keys
LEARN - DELETE - MACRO -TRANS:
These four buttons activate program
modes that enable the SUR-20 to
perform advanced functions.
TRANS button used only with optional
link cable - see Appendix A.
Control buttons:
After programming, these buttons
operate devices in your home. The
LCD shows a different set of control
buttons for each device. These buttons
control functions such as: volume, play,
power off/on and more for your VCRs,
DVDs, TVs, etc… *
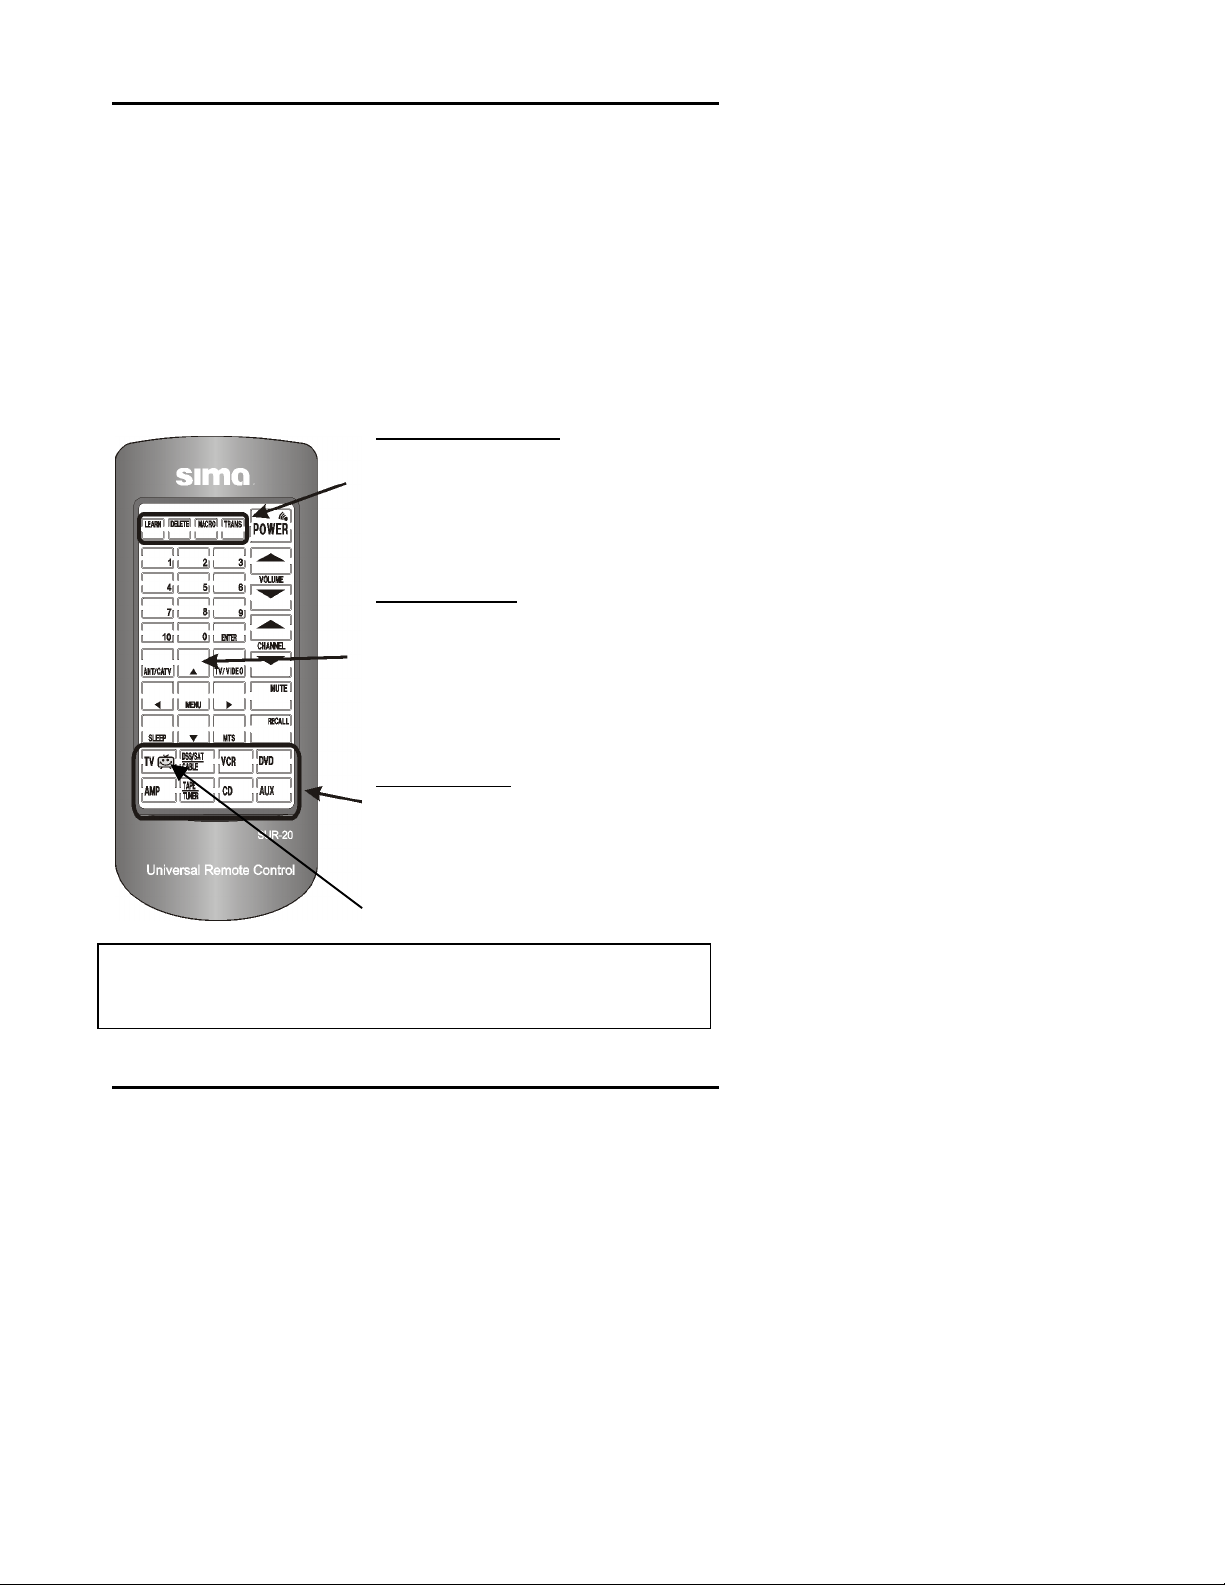
Device buttons:
These eight buttons select the device
you want to use. After pressing a
device button, a corresponding set of
control buttons will appear. An icon
indicates which device is active. In the
figure at left, TV is selected.
8
Chapter 3
Chapter 3 Chapter 3
Chapter 3
Operating the SUR-20
Overview: This chapter will tell you how to set up the
SUR-20 LCD display. Read the following chapters to
:
• Edit the LCD layout to match your devices (Chpt. 3)
• Teach existing remote controls to the SUR-20 (Chpt. 4)
• Access pre-programmed manufacturers codes in the
SUR-20, for lost remotes. (Chpt. 5)
•
Set up a macro sequence of commands (Chpt. 7)
Changing the LCD layout
The layout edit mode enables you to customize the
SUR-20’s display to match your existing remote
controls. Use the following steps to make the display on
the SUR-20 correspond to an existing remote.
Select the device you
want to use.
Press that device
screen button and
hold for three
seconds.
Chapter 3 —Changing the LCD Layout
9
You will hear a beep
and see the password
screen to the right.
Note: This screen
prevents you from
accidentally modifying
your SUR-20.
TIP: To exit the
password screen
,
touch any other button
once. The SUR-20 will
return to its normal
operation screen in 15
sec. if left untouched.
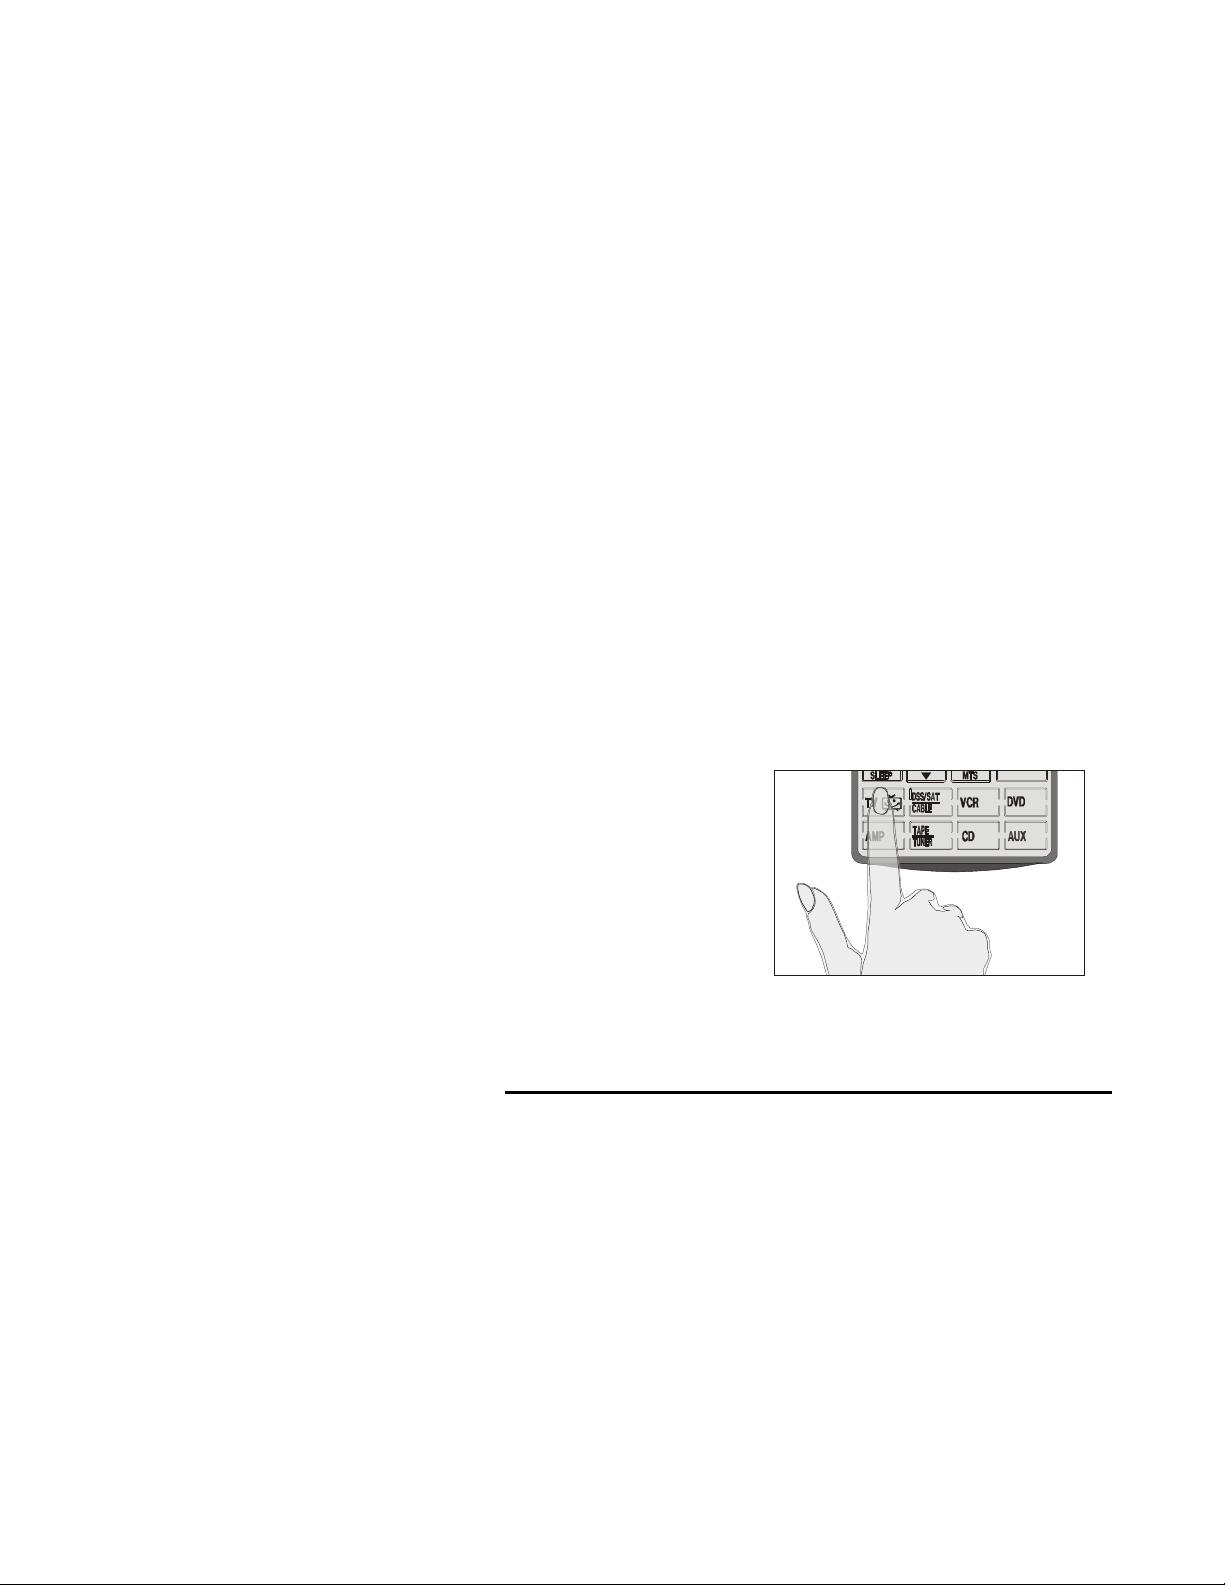
Press each number
button ( 2, 4, 6, 8)
until it disappears.
The LCD display will
begin flashing.
Tap the screen once.
The display will stop
flashing. (If a button
disappears where you
tapped, tap again and
it will re-appear.)
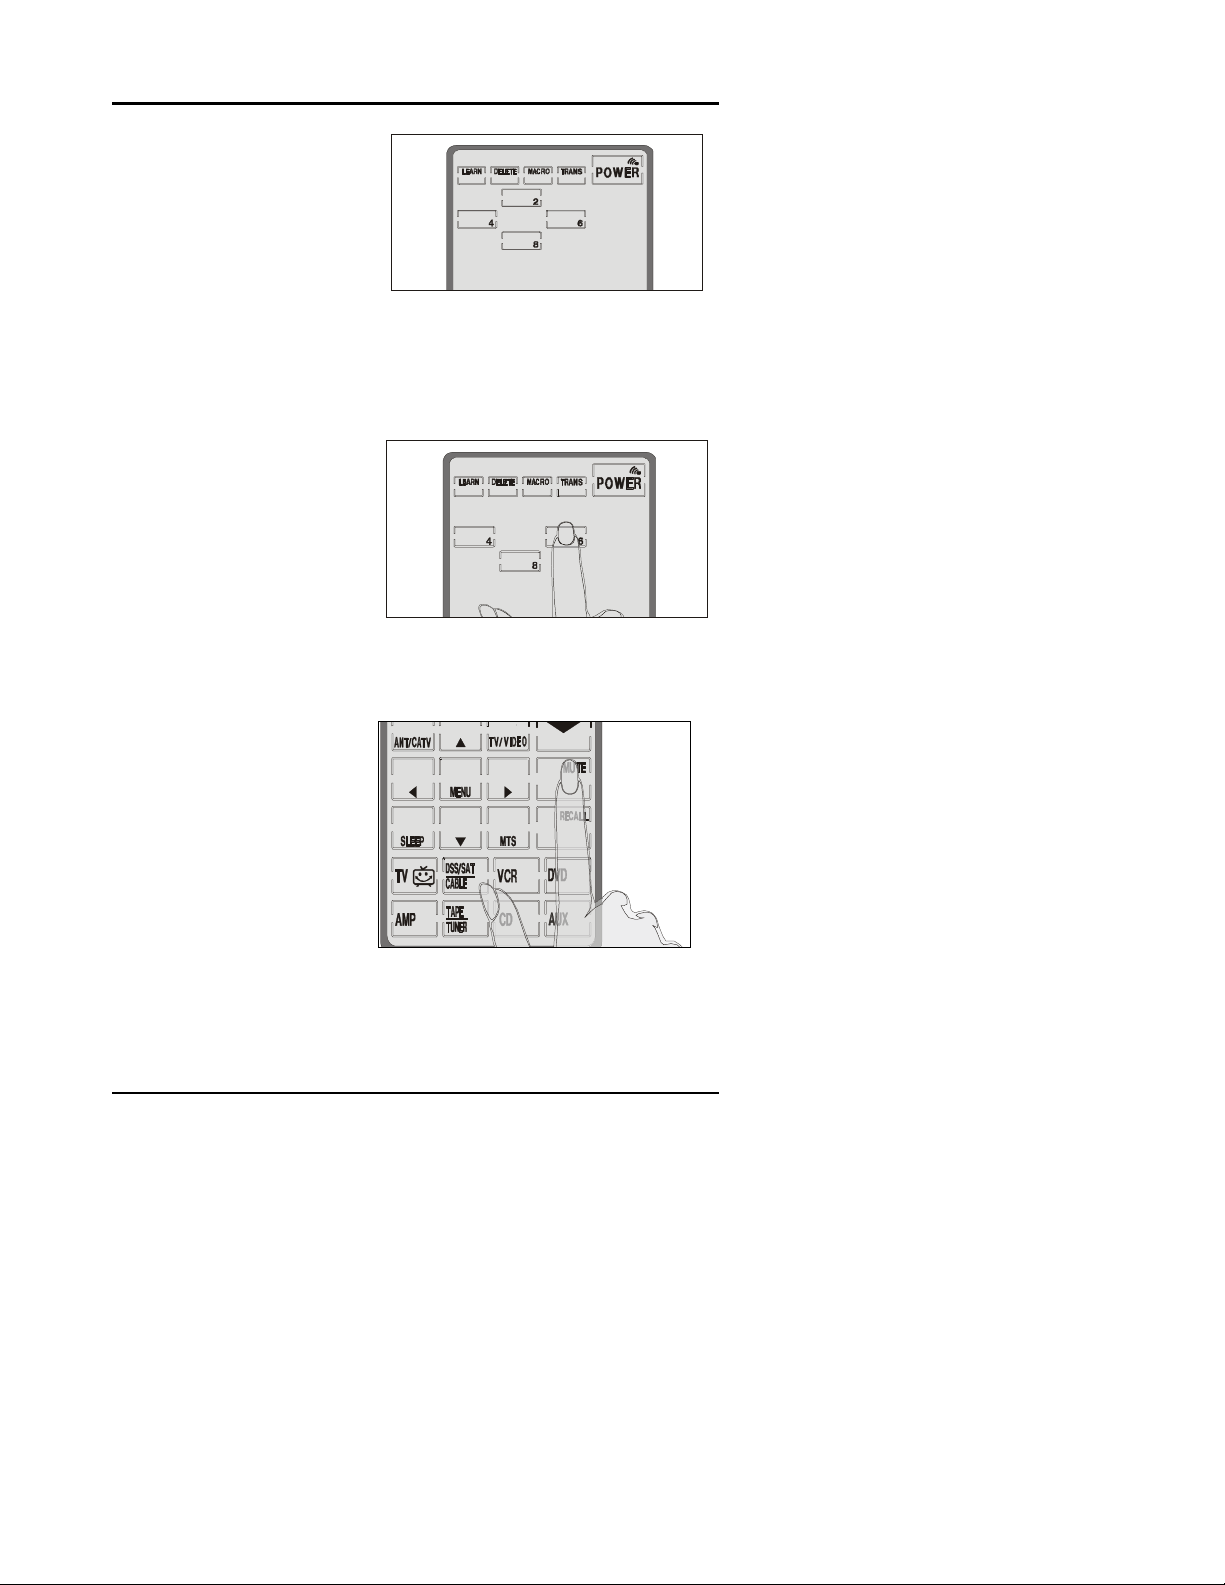
You are now ready to
change the layout of
the SUR-20 to match
your remote.
Select the button
whose configuration
you want to change.
Press once to delete
it.
The SUR-20 User’s Manual
10
Press the button
again to scroll
through other
functions that can be
assigned to that
button.
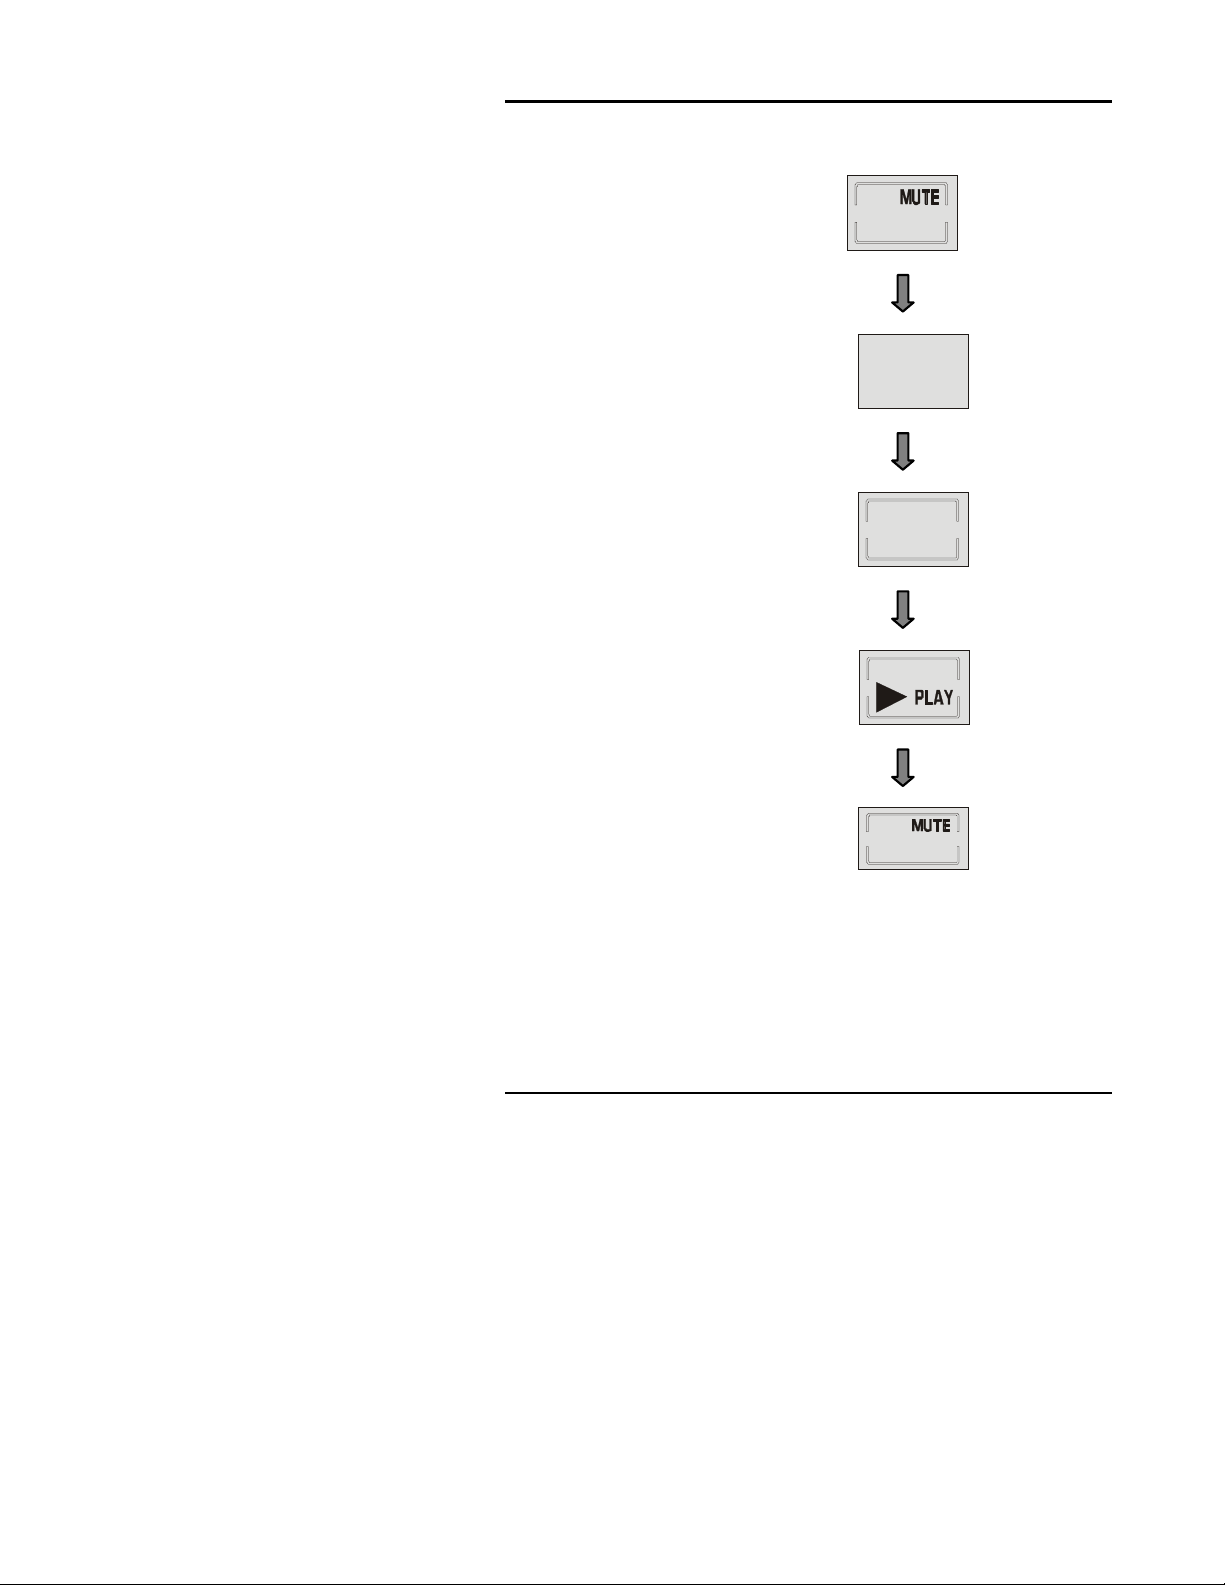
In the example at right,
successive taps on the
“Mute” button in the TV
device screen shown
in fig. A will:
Remove it. (Fig. B)
Change it to a generic
button to perform any
function. (Fig. C)
Tip:
Use generic
buttons to represent
buttons the SUR-20
does not have.
Change to “Play”
(Fig. D)
Return to its original
function. (Fig. A)
A.
B.
C.
D.
A.
Tip: Press and hold the power button while in layout edit mode to
see all of the available icons for each button simultaneously.
When you have finished making changes, press the device screen
button again. You will hear three beeps and the SUR-20 returns to
its normal operational mode.
 Loading...