

Page 1

MS08
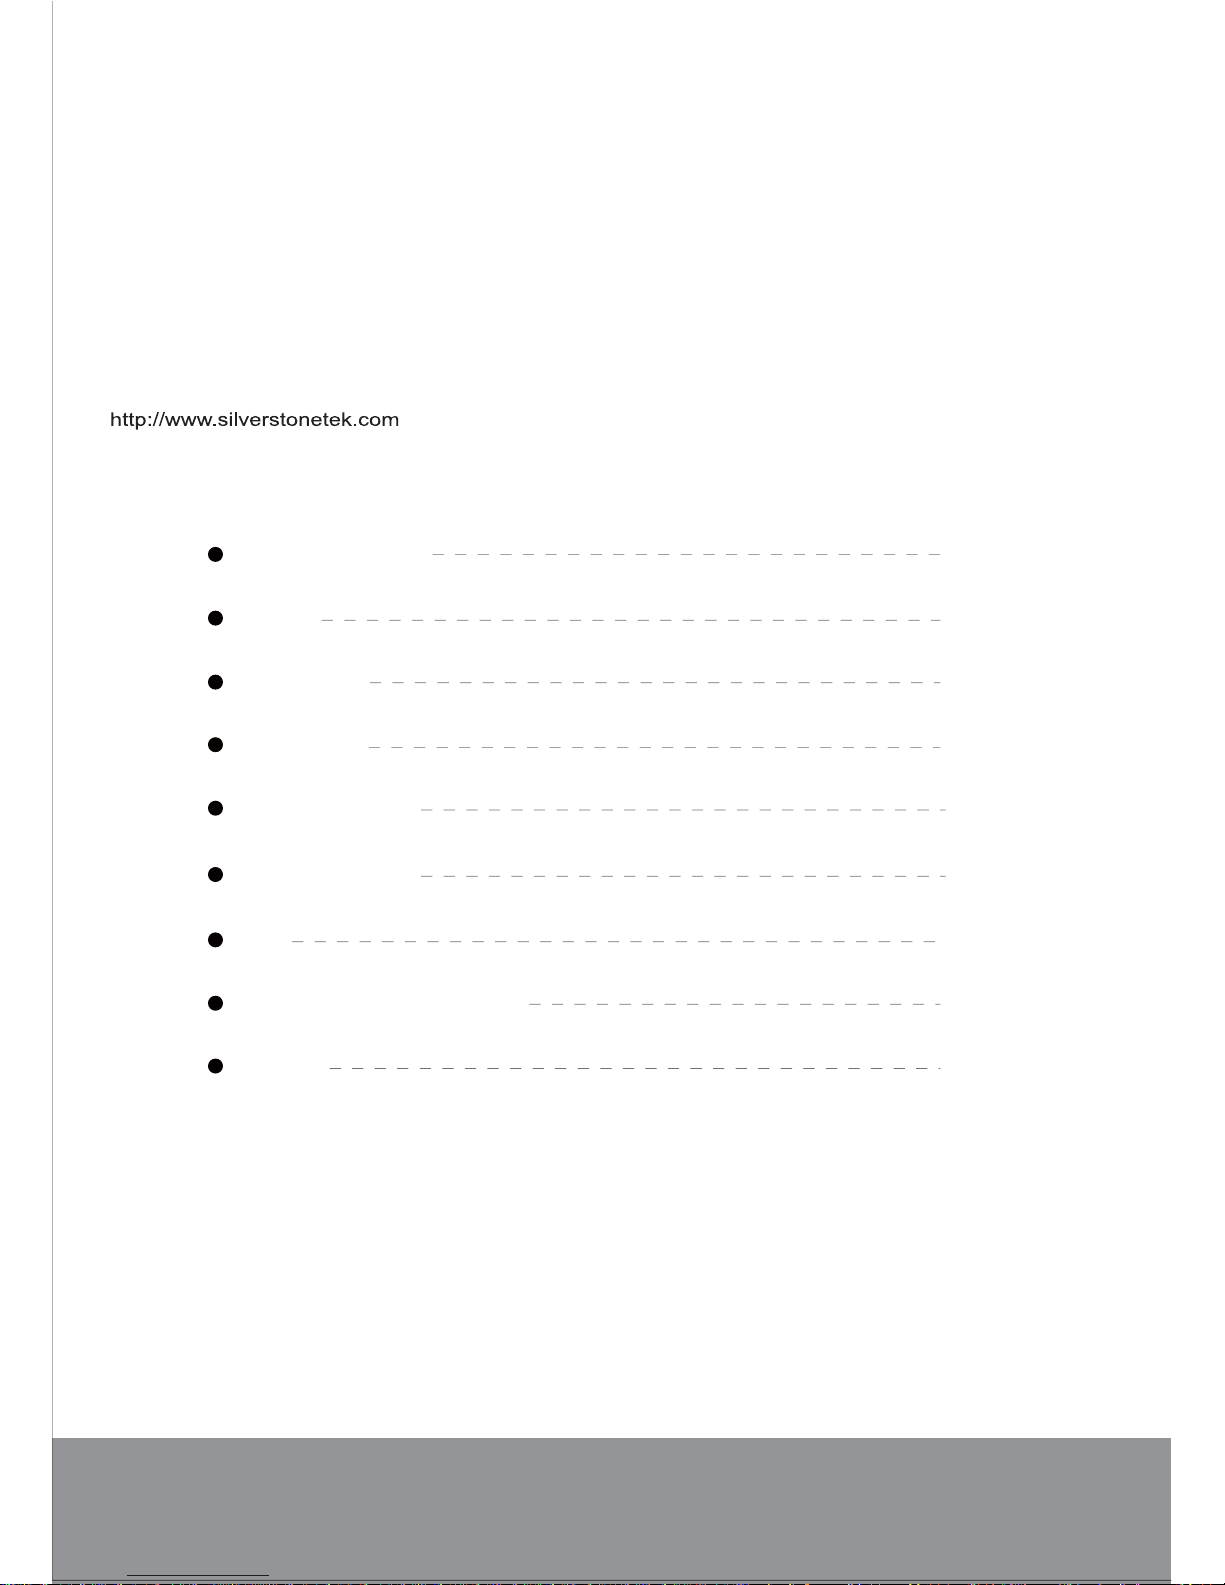
Dual 2.5” SATA hot-swap mobile rack with RAID
and tray-less design
Premium aluminum construction for durability and protection
Support for two 9.5mm 2.5” drives
Support RAID 0, 1, JBOD
Offer great performance of up to SATA 6Gb/s
Tool-less tray design for quick hot-swaps
Fits into any 3.5” drive bay
Page 2

Page 3
The following manual and guides were carefully prepared by the SilverStone engineering team to
help you maximize the potential of your SilverStone product. Please keep this manual for future
reference when upgrading or performing maintenance on your system. A copy of this manual can also
be downloaded from our website at:
Warranty Information
Installation and system optimization guide:
Product Overview
Preface
Specification
Applications
Package Content
Installation Chart
RAID
Usage as a 3.5” SATA HDD
Attention
P.1
P.1
P.1
P.3
P.4
P.6
P.12
P.16
P.18
Page 4
Product Overview
Specification
Mobile Series
Model No.
Enclosure material
Color
Power requirement
HDD size support
HDD interface support
Minimum System
Requirements
Enclosure interface
RAID mode support
Net Weight
Dimension
SST-MS08B
Aluminum + Plastic
Black
5V via SATA 15pin power connector
2.5” SATA HDD / SSD
SATA I / II / III
Windows XP, Vista, 7, 8, 8.1 (32bit/64bit)
Mac OS 10.x
Linux
SATA 6Gb/s
RAID 0, RAID 1, JBOD
194g ±20g
146mm (D) x 102mm (W) x 25.4mm (H)
MS08
Introduction
Preface
1
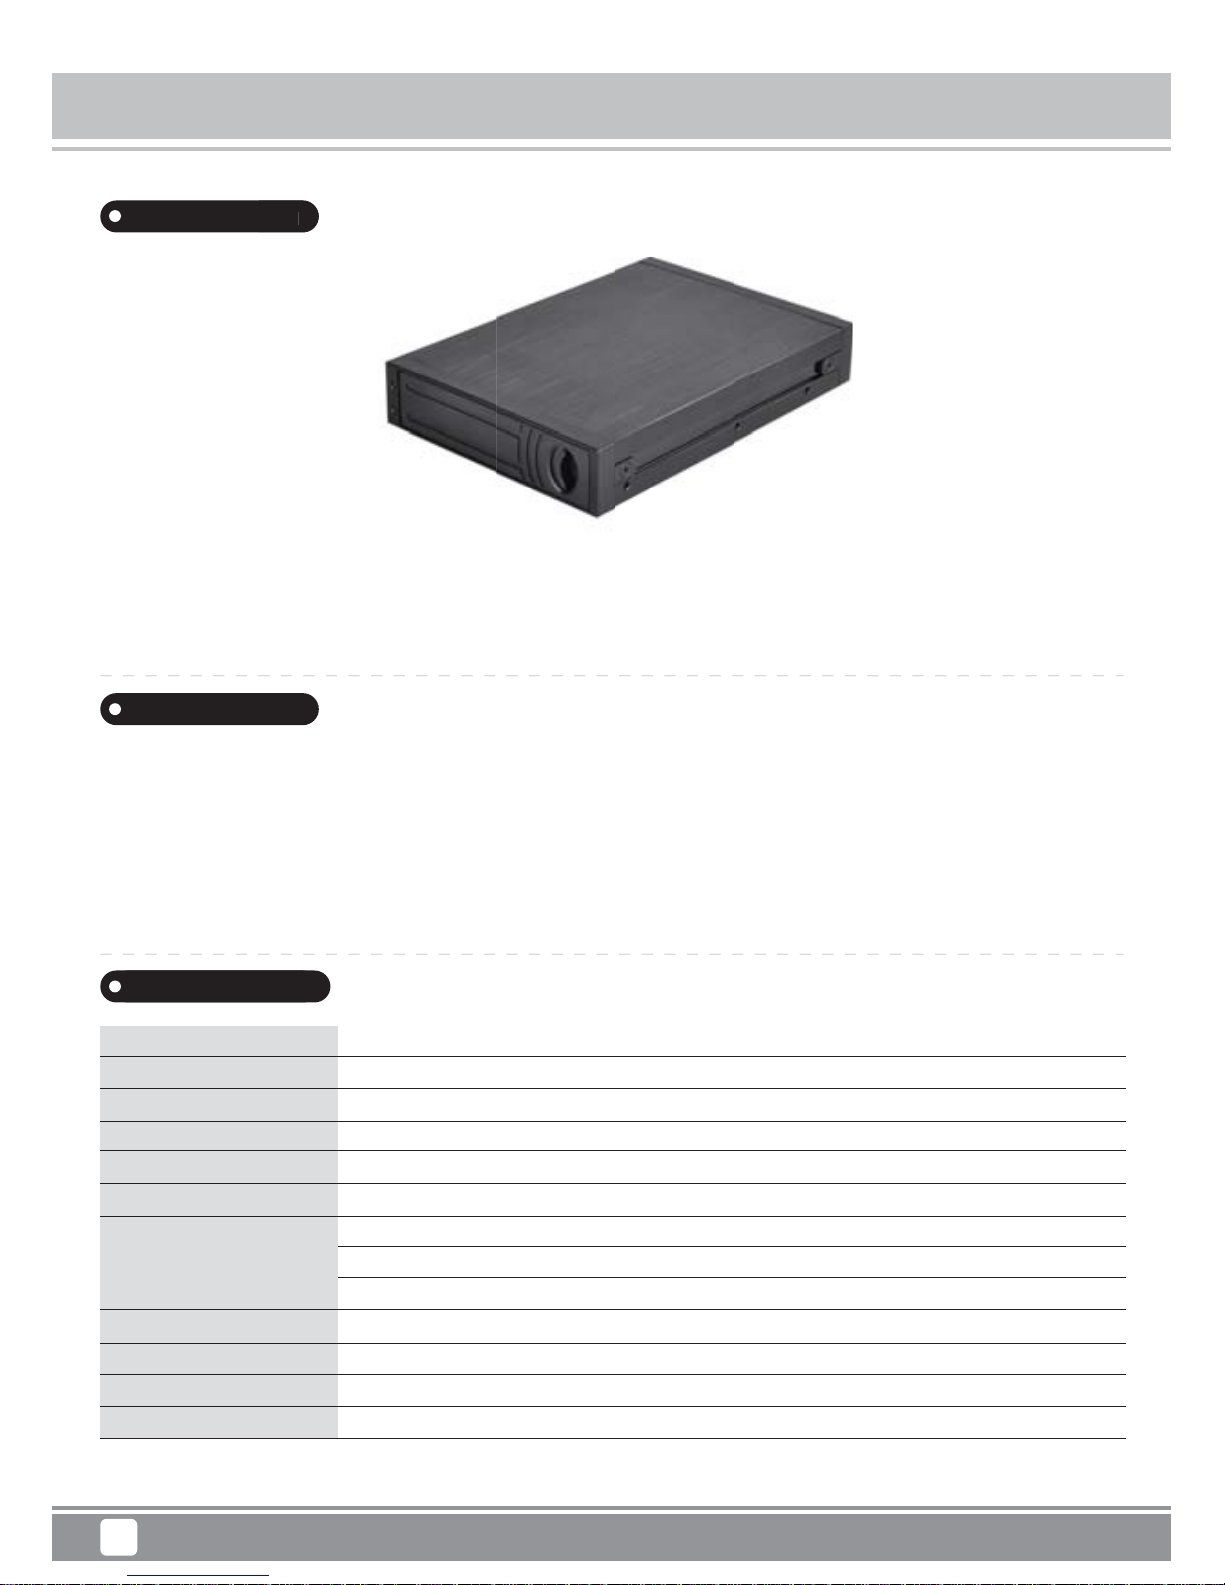
The SilverStone MS08 is a mobile rack designed to convert a standard 3.5” drive bay
into two hot-swappable 2.5” drive bays. It has full SATA 6Gb/s speed and RAID 0,
RAID 1, JBOD support to offer complete and flexible solution for users looking quickly
add 2.5” drives to their system.
When using this product for the first time, setting it to operate at any of the RAID
mode or perform "Initialize", "Partition", or "Format" actions on the hard drive will
result in original data on the hard drive to be lost.
This product is factory set to “RAID 1". If only one drive is installed, the original data
on the drive will not be affected. However, installing two drives will result in loss of
original data after initial setup. To change RAID mode, the rack will need to be
powered for changes to take effect.
ne MS08 is a mobile rack desi
g
ned to convert a standard
3
wappable 2.5” drive ba
y
s. It has full SATA 6Gb/s speed
Page 5
Product Overview
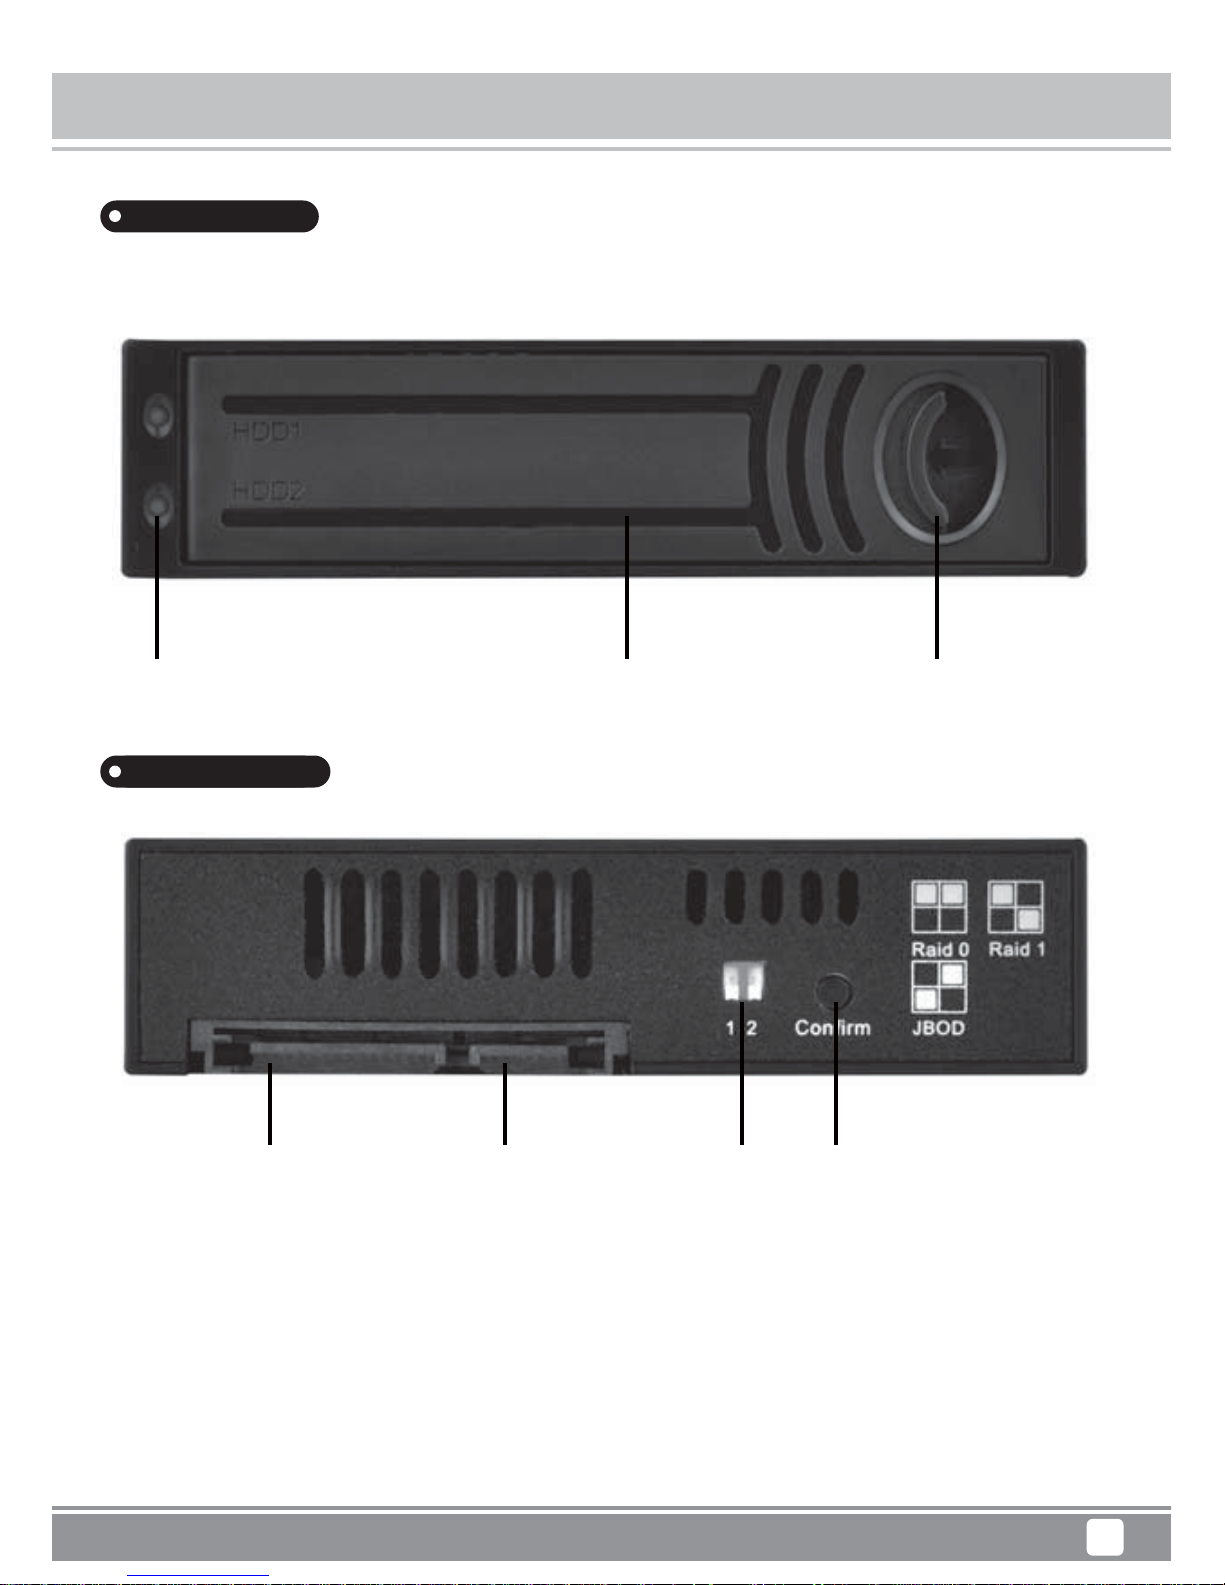
Rear Panel
Mobile Series MS08
Front Panel
2
Drive access indicator Drive front panel Door lock switch
15 Pin SATA power 7 Pin SATA data RAID mode Confirm button
connector connector Switch for RAID mode change
Confirm button: After selecting RAID mode, please press “Confirm button” for 5
seconds.
Note: Mode setting change will only take effect when powered so please perform this
action with the 15pin SATA power connector connected before installing it into the
computer chassis!
Page 6

Applications
Mobile Series MS08
3
1.어떤 3.5” 하드 드라이브 베이와도 함께 사용 가능
2.대부분의 3.5” SATA 내장/외장 인클로저와 함께 사용 가능
1.兼容任何標準的3.5吋大小之裝置槽位
2.兼容大多數機殼的內部/外部3.5吋SATA槽位
1.兼容任何标准的3.5吋大小之装置槽位
2.兼容大多数机壳的内部/外部3.5吋SATA槽位
1.任意の3.5”ハードディスクドライブベイと互換
2.殆どの3.5”SATA内部/外部エンクロージャーと互換
1.Compatible with any 3.5” hard drive bay
2.Compatible with most 3.5”SATA internal/external enclosure
1.Совместимость с любым отсеком для 3,5-дюймовых жестких дисков
2.Совместимость с большинством встраиваемых/внешних корпусов 3,5-дюймовых
дисков SATA
1.Kompatibel mit allen 3,5-Zoll-Laufwerkschächten
2.Kompatibel mit den meisten internen/externen 3,5-Zoll-SATA-Gehäusen
1.Compatible avec toute baie de disque dur 3,5"
2.Compatible avec la plupart des boîtiers internes/externes SATA 3,5"
1.Compatible con cualquier bahía para discos duros de 3,5”
2.Compatible con la mayoría de carcasas internas/externas SATA de 3,5”
1.Compatibile con qualsiasi alloggio disco rigido da 3,5”
2.Compatibile con la maggior parte di box interni/esterni SATA da 3,5”
Applications
Page 7
Mobile Series MS08
4
Package Content
Package Content
Item
Enclosure
User Manual
4PIN to SATA Power Cable
SATA Cable
Screw
Artikel
Gehäuse
Bedienungsanleitung
4-poliges SATA-Stromkabel
SATA-Kabel
Schraube
Quantity
1 pcs
1 pcs
1 pcs
1 pcs
4 pcs
Anzahl
1 Stk.
1 Stk.
1 Stk.
1 Stk.
4 Stk.
Élément
Boîtier
Manuel de l’utilisateur
Câble d'alimentation 4 broches vers SATA
Câble SATA
Vis
Quantité
1 unité
1 unité
1 unité
1 unité
4 unité
Ítem
Carcasa
Manual de usuario
Cable de potencia de 4 pines a SATA
Cable SATA
Tornillo
Cantidad
1 unidad
1 unidad
1 unidad
1 unidad
4 unidades
Elemento
Box
Manuale d’uso
Cavo d'alimentazione 4 pin a SATA
Cavo SATA
Vite
Quantità
1 pezzo
1 pezzo
1 pezzo
1 pezzi
4 pezzi
Page 8

Package Content
Mobile Series MS08
5
Компонент
Корпус
Руководство пользователя
4-контактный переходник к кабелю питания SATA
Кабель SATA
Винт
Количество
1 шт.
1 шт.
1 шт.
1 шт.
4 шт.
Item
抽取盒
使用者手冊
4PIN 轉 SATA 電源線
SATA 傳輸線
螺絲
Quantity
1 pcs
1 pcs
1 pcs
1 pcs
4 pcs
Item
抽取盒
使用者手册
4PIN 转 SATA 电源线
SATA 传输线
螺丝
Quantity
1 pcs
1 pcs
1 pcs
1 pcs
4 pcs
品目
エンクロージャー
ユーザーマニュアル
4ピン-SATA電気ケーブル
SATAケーブル
ネジ
数量
1個
1冊
1本
1本
4本
품목
인클로저
사용 설명서
4핀과 SATA 간 연결 전원 케이블
SATA 전원 케이블
나사
수량
1개
1개
1개
1개
4개
Page 9

Installation Chart
Mobile Series MS08
6
into 3.5” hard drive bay
01
PC 전원을 끄고 PC 전원
케이블을 뽑습니다.
關閉電腦電源,並拔掉
電腦電源線。
关闭计算机电源,并拔掉
计算机电源线。
PCの電源をオフにし、
PCの電源ケーブルを外し
ます。
Turn off PC power, and
unplug PC power cable.
Выключите питание
ПК и отключите
кабель питания.
Schalten Sie den PC
aus und ziehen Sie das
Netzkabel des PCs.
Éteignez le PC, et
débranchez le câble
d'alimentation du PC.
Apague la potencia del
PC y desconecte el
cable de potencia del
PC
Spegnere il PC e
scollegare il cavo
d’alimentazione del PC.
02
PC 케이스를 엽니다.
打開電腦機殼。
打开计算机机壳。
PCケースを開けます。
Open PC case. Откройте корпус ПК.
Öffnen Sie das
PC-Gehäuse.
Ouvrez le boîtier du PC.
Abra la carcasa del PC
Aprire il case del PC.
Page 10

Installation Chart
Mobile Series MS08
7
03
필요할 경우 3.5”베이를
빼냅니다.
如果需要請移除3.5吋
檔板。
如果需要请移除3.5吋
檔板。
必要であれば3.5″ベイ
を外します。
Remove 3.5″bay over if
needed.
При необходимости,
извлеките отсек для
3,5-дюймового диска.
Entfernen Sie die
Abdeckung des
3,5-Zoll-Schachts, falls
erforderlich.
Retirez le couvercle de
la baie 3,5" si
nécessaire.
Retire la cobertura de
la bahía de 3,5” si es
necesario
Rimuovere l’alloggio da
3,5”, se necessario.
04
3.5” 드라이브 베이에
랙을 끼웁니다.
安裝至3.5吋槽位。
安装至3.5吋槽位。
ラックを3.5″ドライ
ブベイに入れます。
Insert rack into 3.5″
drive bay.
Установите
устройство в отсек
для 3,5-дюймового
диска.
Setzen Sie das Rack in
den 3,5-ZollLaufwerkschacht ein.
Insérez le rack dans la
baie de lecteur 3,5".
Inserte el rack en la
bahía para dispositivo
de 3,5”
Inserire il rack nell’
alloggio da 3,5”.
Page 11

Installation Chart
Mobile Series MS08
8
05
나사로 랙을 고정합니다.
以螺絲鎖固。
以螺丝锁固。
ラックをネジで固定し
ます。
Secure rack with
screws.
Закрепите устройство
винтами.
Sichern Sie es mit
Schrauben.
Fixez le rack avec des
vis.
Asegure el rack con los
tornillos
Fissare il rack con le viti.
06
SATA 케이블을 랙과
마더보드에 연결합니다.
將SATA線連接主機板與裝置。
将SATA线连接主板与装置。
SATAケーブルをラックお
よびマザーボードに接続
します。
Connect SATA cable to
the rack and the
motherboard.
Подключите к
устройству и
системной плате
кабель SATA.
Schließen Sie das
SATA-Kabel an Rack
und Motherboard an.
Raccordez le câble
SATA au rack et à la
carte mère.
Conecte el cable SATA
al rack y a la placa
base
Collegare il cavo SATA al
rack e alla scheda madre.
Page 12

Installation Chart
Mobile Series MS08
9
07
전원 공급장치의 SATA
전원 케이블을 연결합니다.
將電源供應器的SATA 電源
線連接至裝置。
将电源供应器的SATA 电源
线连接至装置。
電源からのSATA電源
ケーブルを接続します。
Connect SATA power
cable from the power
supply.
Подключите кабель
питания SATA от
блока питания.
Verbinden Sie das
SATA-Stromkabel mit
dem Netzteil.
Branchez le cordon
d'alimentation sur la
source d'alimentation
Conecte el cable de
potencia SATA a la
fuente de alimentación
Collegare il cavo
d'alimentazione SATA
dall'alimentatore.
08
PC 케이스를 닫아서
설치를 완료합니다.
關上機殼完成安裝。
关上机壳完成安装。
PCケースを閉めると、
インストール完了です。
Close PC case to
complete installation.
Для завершения
установки закройте
корпус ПК.
Schließen Sie das
PC-Gehäuse; damit ist
die Installation
abgeschlossen.
Refermez le boîtier du
PC pour terminer
l'installation.
Cierre la carcasa del
PC para completar la
instalación
Chiudere il case PC per
completare l'installazione.
SATA 15 PIN
SATA 7 PIN
Confirm
1
2
Raid 0
Raid 1
JBOD
Page 13

Installation Chart
Mobile Series MS08
10
Drive installation
01
그림과 같이 왼쪽으로 밀
어서 도어를 엽니다.
如圖示向左按壓打開門檔。
如图示向左按压打开门档。
図のようにドアを左に押
して開けます。
Push to left and open
the door as shown.
Нажмите на фиксатор
влево и откройте
дверцу, как показано
на рисунке.
Drücken Sie die Tür wie
abgebildet nach links
und öffnen Sie sie .
Poussez à gauche et
ouvrez la trappe comme
illustré.
Empuje hacia la izquierda
y abra la puerta como se
muestra.
Spingere verso sinistra e
aprire lo sportello, come
mostrato.
02
2.5” SATA HDD나 SSD
를 랙에 끼웁니다.
插入 2.5吋 SATA HDD
或 SSD。
插入 2.5吋 SATA HDD
或 SSD。
2.5” SATA HDDまたは
SSDをラックに装着します。
Insert 2.5” SATA HDD
or SSD into the rack.
Установите в
устройство жесткий или
твердотельный
2,5-дюймовый диск
SATA.
Setzen Sie die 2,5-ZollSATA-Festplatte oder
-SSD in das Rack ein.
Insérez le HDD ou le
SSD SATA 2,5" dans le
rack.
Inserte el HDD o SSD
SATA de 2,5” en el rack.
Inserire l’unità HDD o
SSD SATA da 2,5” nel
rack.
Page 14

Installation Chart
Mobile Series MS08
11
03
도어를 닫습니다.
關上門檔。
关上门档。
ドアを閉めます。
Close the door. Закройте дверцу.
Schließen Sie die Tür.
Refermez le volet.
Cierre la puerta.
Chiudere lo sportello.
04
설치되어 있는 드라이브
를 꺼내려면그림과 같이
도어를 열고 눌러서 뺍
니다.
如圖示打開門檔到底,
往內按壓以彈出硬碟。
如图示打开门文件到底,
往内按压以弹出硬盘。
装着されたドライブを取
り出すには、ドアを開け
て図のように元に戻し
ます。
To eject installed
drives, open the door
and push it back as
shown.
Для извлечения
установленных дисков
откройте дверцу и
нажмите на нее в
направлении стрелки
(см. рис.).
Zum Auswerfen der
installierten Laufwerke
öffnen Sie die Tür und
drücken sie wie
abgebildet nach hinten.
Pour éjecter les disques
installés, ouvrez la
trappe et éjectez-les
comme indiqué.
Para eyectar los discos
instalados, abra la
puerta y empuje hacia
atrás como se muestra.
Per espellere le unità
installate, aprire lo
sportello e spingerlo,
come mostrato.
Page 15

RAID
Mobile Series MS08
12
RAID Function
Mode Description
JBOD Mode: Shows up in operating system as one drive, but the capacity equals to the total
capacities of both installed drives.
Raid 0 Mode: Data is separated and saved onto two installed drives. Capacity equals to twice the
amount of the smaller drive.
Raid 1 Mode: Duplicates data across both drives, providing full redundancy.Two drives store exactly
the same data, at the same time, and at all times. Capacity equals to that of the smaller drive.
**When you select a different mode, Under the conditions of power on: press “Confirm button for”
5 second” and then the mode can be switched completely. After the mode switch, go to Disc Management in the operating system to initialize the corresponding disk, partition, format, etc.
JBOD-Modus: Erscheint im Betriebssystem als ein Laufwerk, doch die Kapazität entspricht der
Summe der Kapazitäten beider installierten Laufwerke.
RAID 0-Modus: Daten werden auf zwei installierte Laufwerke aufgeteilt und gespeichert. Die
Kapazität entspricht dem Doppelten der Kapazität des kleineren Laufwerks.
RAID 1-Modus: Dupliziert Daten zwischen beiden Laufwerken, bietet vollständige Redundanz.Beide
Laufwerke speichern immer und gleichzeitig exakt dieselben Daten. Die Kapazität entspricht der
Kapazität des kleineren Laufwerks.
**Wenn Sie im eingeschalteten Zustand auf einen anderen Modus umschalten: Drücken Sie die
Bestätigungstaste 5 Sekunden lang; der Moduswechsel ist abgeschlossen. Rufen Sie nach dem
Moduswechsel die Datenträgerverwaltung im Betriebssystem auf und initialisieren, partitionieren und
formatieren Sie das entsprechende Laufwerk etc.
Raid 0 Raid 1 JBOD
1 2 1 2 1 2
Page 16

RAID
Mobile Series MS08
13
Mode JBOD : Apparaît dans le système d'exploitation comme un seul disque, mais de capacité
égale à la capacité totale des deux disques durs installés.
Mode RAID 0 : Les données sont séparées et enregistrées sur deux lecteurs installés. La capacité
est égale à deux fois le volume du plus petit lecteur.
Mode RAID 1 : Duplique les données sur deux disques, offrant une redondance totale. Deux
lecteurs stockent exactement les mêmes données, en même temps, et à tout moment. La
capacité est égale au volume du plus petit lecteur.
** Lorsque vous sélectionnez un mode différent, en état alimenté : appuyez pendant 5 secondes sur
le "bouton Confirmer", et le mode peut ensuite être changé complètement. Après le changement de
mode, allez dans la Gestion des disques du système d'exploitation pour initialiser le disque
correspondant, le partitionner, le formater, etc.
Modalità JBOD: È visualizzato nel sistema operativo come una unità, ma la capacità è uguale al
totale delle capacità di entrambe le unità installate.
Modalità RAID 0: I dati sono separati e salvati nelle due unità installate. La capacità è uguale a
due volte la capacità dell'unità più piccola.
Modalità RAID 1: Duplica i dati su entrambe le unità, fornendo una ridondanza completa. Due
unità archiviano esattamente gli stessi dati, allo stesso tempo e in ogni momento. La capacità è
uguale a due volte la capacità dell'unità più piccola.
** Quando si seleziona una modalità diversa, in condizioni di alimentazione: premere il tasto
“Conferma” per 5 secondi, quindi la modalità può essere modificata in modo completo e corretto.
Dopo avere modificato la modalità, andare alla Gestione disco del sistema operativo per
inizializzare il corrispondente disco, partizione, formattazione, eccetera.
Modo JBOD: Muestra el sistema operativo como un disco, pero la capacidad es igual a la
capacidad total de los dos discos instalados.
Modo RAID 0: Los datos se separan y se salvan en los dos discos instalados. La capacidad es
igual al doble de la cantidad del disco más pequeño.
Modo RAID 1: Duplica los datos en ambos discos, proporcionando redundancia completa. Dos
discos almacenan exactamente los mismos datos, a la vez, en todo momento. La capacidad es
igual a la del disco más pequeño.
**Cuando seleccione un modo diferente, bajo las condiciones de encendido: presione “Botón de
confirmación” durante 5 segundos y entonces el modo se cambiará completamente. Tras el cambio
de modo, vaya a Administrador de Discos en el sistema operativo para inicializar el disco, partición,
formato, etc., correspondiente.
Page 17

RAID
Mobile Series MS08
14
JBODモード:オペレーティングシステムには1台のドライブとして扱われ、容量は装着されたド
ライブ容量の合計となります。
Raid 0モード:データは装着された2台のドライブに分割されて保存されます。容量は小さい方
のドライブ容量の2倍となります。
Raid 1モード:データは2台のドライブに複製され、完全な冗長性を実現します。2台のドライブ
には同一データが同時に常に保存されます。容量は小さい方のドライブと同じとなります。
** 異なるモードを選択した際、電源オンの状態で「確認」ボタンを「5秒間」押すと、モードが完
全に切り替わります。モード切換え後、オペレーティングシステムにおいてディスク管理を実行し
て、対応するディスクの初期化、パーティション、フォーマットなどを行います。
JBOD模式: 在操作系统上显示为一个硬盘,但总容量等同于两个安装硬盘的容量加总。
Raid 0 模式: 数据会分别保存至两个安装硬盘,可提高传输效能。总容量为两个硬盘中,容量最小
硬盘为基准的两倍。
Raid 1 模式: 数据将同时保存至两个硬盘,提供备份防护功能。总容量为两个硬盘中较低者为基准。
** 当您欲选择不同的模式时,在供电运作的情况下按压Confirm钮”5秒”,运作模式方能完全切换。模
式切换后,再进入您的操作系统进行硬盘管理,分割对应扇区、格式化等后续作业。
Режим JBOD: В операционной системе отображается как один диск, однако, объем памяти
равен общему объему обоих установленных дисков.
Режим Raid 0: Данные разделяются и сохраняются на обоих установленных дисках. Объем
памяти равен двойному объему памяти диска с меньшим объемом памяти.
Режим Raid 1: Дублирование данных на обоих дисках, что обеспечивает полное
резервирование данных
. На обоих дисках постоянно сохраняются одни и те же данные,в
одно и то же время. Объем памяти равен объему памяти диска с меньшим объемом памяти
** При выборе другого режима при включенном питании нажмите и удерживайте кнопку
«Confirm» в течение 5 секунд, после чего режим переключится. После переключения режима
перейдите в режим «Disc Management» (Управление дисками) в операционной системе для
инициализации соответствующего диска, создания разделов, форматирования и др.
JBOD模式: 在操作系統上顯示為一個硬碟,但總容量等同於兩個安裝硬碟的容量加總。
Raid 0 模式: 資料會分別保存至兩個安裝硬碟,可提高傳輸效能。總容量為兩個硬碟中,容量最小
硬碟為基準的兩倍。
Raid 1 模式: 資料將同時保存至兩個硬碟,提供備份防護功能。總容量為兩個硬碟中較低者為基準。
** 當您欲選擇不同的模式時,在供電運作的情況下按壓Confirm鈕”5秒”,運作模式方能完全切換。模
式切換後,再進入您的操作系統進行硬碟管理,分割對應磁區、格式化等後續作業。
Page 18

RAID
Mobile Series MS08
15
JBOD 모드: 운영 체제에 드라이브 한 개로 표시되지만 용량은 설치된 양쪽 드라이브의 총 용량에
해당됩니다.
Raid 0 모드:데이터가 설치되어 있는 드라이브 두 개로 나뉘어서 저장됩니다. 총 용량은 작은 쪽
드라이브 용량의 두 배에 해당됩니다.
Raid 1 모드: 양쪽 드라이브에 걸쳐서 데이터를 복제하므로 완전한 중복성을 제공합니다. 드라이브
두 개에 정확하게 동일한 데이터가 항상 동시에 저장됩니다. 용량은 작은 쪽 드라이브의 용량에
해당됩니다.
** 다른 모드를 선택할 때 전원이 켜져 있는 상태에서 “Confirm(확인)” 버튼을 “5초” 동안 누르면
모드를 완전히 전환할 있습니다. 모드 전환 후 운영 체제의 디스크 관리로 들어가서 해당 디스크,
파티션, 포맷 등을 초기화하십시오.
Page 19

Usage as a 3.5” SATA HDD
Mobile Series MS08
16
MS08 can convert into a mobile 3.5" SATA HDD for use in HDD enclosure or external
hard drive devices.
Das MS08 kann sich in eine mobile 3,5-Zoll-SATA-Festplatte verwandeln (zur Verwendung in
einem Festplattengehäuse oder als externes Speichergerät).
Le MS08 peut se convertir en disque dur SATA 3,5" mobile pour une utilisation dans un
boîtier de disque dur ou des disques durs externes.
El MS08 puede convertirse en un HDD SATA móvil de 3,5” para usarlo con una carcasa para
HDD o dispositivos para discos duros externos
MS08 può convertirsi in un HDD SATA da 3,5” mobile da usare in box HDD o dispositivi HDD
esterni.
Page 20

Usage as a 3.5” SATA HDD
Mobile Series MS08
17
MS08를 이동식 3.5" SATA HDD로 전환하여 HDD 인클로저 또는 외장 하드 드라이브
장치에서 사용할 수 있습니다.
MS08可轉為3.5吋SATA 硬碟提供硬碟外接盒或硬碟外接座使用。
MS08可转为3.5吋SATA 硬盘提供硬盘外接盒或硬盘外接座使用。
MS08は、HDDエンクロージャー内または外付けハードディスクドライブとして、モバイル
3.5" SATA HDDへの変換が可能です。
MS08 может использоваться в качестве мобильного 3,5-дюймового жесткого диска
SATA для использования в корпусе для жестких дисков или в качестве внешнего
жесткого диска.
Page 21

Attention
Mobile Series MS08
18
Attention
1. Please ensure that your computer host supports hot-swap functionality before replacing drives in
the rack while the computer is turned on.
2. To avoid any data lost, please do not change or remove any drives when they are reading or
writing data.
3. After mode change, installed HDD or SSD need to be re-initialized, partitioned and formatted.
So all data will be destroyed and cannot be restored!
Achtung
1.Bitte stellen Sie sicher, dass Ihr Computer-Host Hot-Swapping unterstützt, bevor Sie
die Laufwerke im Rack bei eingeschaltetem Computer auswechseln.
2.Bitte ändern oder entfernen Sie keine Laufwerke, während Daten gelesen oder
geschrieben werden; andernfalls droht Datenverlust.
3.Nach dem Moduswechsel müssen die installierten Festplatten oder SSDs neu
initialisiert, partitioniert und formatiert werden. Dadurch werden alle Daten unwider
ruflich zerstört!
Attention
1.Veuillez vous assurer que votre ordinateur hôte prend en charge la fonctionnalité de remplacement
à chaud avant de remplacer les disques du rack avec l'ordinateur allumé.
2.Pour éviter toute perte de données, veuillez ne pas modifier ni retirer de lecteur pendant l'écriture
ou la lecture de données.
3.Après changement de mode, les HDD ou SSD installés doivent être réinitialisés, partitionnés et
formatés. Ainsi, toutes les données sont détruites et ne peuvent pas être restaurées !
Atención
1.Por favor, asegúrese de que su ordenador acepta la funcionalidad de cambio en caliente antes de
reemplazar los dispositivos del rack mientras el ordenador está conectado.
2.Para evitar cualquier pérdida de datos, por favor no cambie o retire ningún dispositivo cuando esté
leyendo o escribiendo datos.
3.Tras cambiar el modo, el HDD o SSD instalado necesita ser reinicializado, particionado o
formateado. ¡Por tanto, todos los datos serán destruidos y no podrán ser restaurados!
Attenzione
1.Assicurarsi che l'host computer supporti la funzionalità hot-swap prima di sostituire le unità nel rack
mentre il computer è acceso.
2.Per evitare la perdita dei dati, non modificare o rimuovere qualsiasi unità quando è in corso la lettura o
la scrittura dei dati.
3.Dopo la modifica della modalità, gli HDD o SSD installati devono essere ri-inizializzati, partizionati e
formattati. Quindi tutti i dati saranno distrutti e non potranno essere recuperati!
Page 22

Attention
Mobile Series MS08
19
주의:
1.컴퓨터가 켜져 있는 동안 랙에 있는 드라이브를 교체하기 전에 사용자의 컴퓨터 호스트가 핫 스왑
기능을 지원하는지 확인하십시오.
2.데이터 손실을 피하려면 드라이브가 데이터를 읽거나 쓰는 중에 드라이브를 교체하거나 제거하지
마십시오.
3.모드를 변경한 다음에는 설치되어 있는 HDD나 SSD를 새로 초기화하거나 파티션을 나누거나 포맷
해야 합니다. 그럴 경우 모든 데이터가 파손되어 복구할 수 없습니다!
注意:
1.若您要在開機狀態下替換硬碟時,請先確保您的電腦支援熱插拔功能。
2.為避免硬碟資料損毀,請勿在硬碟仍在進行讀寫的狀態下直接替換或拔除裝置。
3.在變更RAID模式後,本裝置內安裝的硬碟需要重新進行初始化、硬碟分割與格式化設定,此時硬碟內
所有的資料將被格式化且無法恢復。
注意:
1.若您要在开机状态下替换硬盘时,请先确保您的计算机支持热插拔功能。
2.为避免硬盘数据损毁,请勿在硬盘仍在进行读写的状态下直接替换或拔除装置。
3.在变更RAID模式后,本装置内安装的硬盘需要重新进行初始化、硬盘分割与格式化设定,此时硬盘内
所有的数据将被格式化且无法恢复。
ご注意:
1.コンピュータ稼働中にラック内のドライブを交換する際は、ご使用のコンピュータホストがホッ
トスワップ対応であることを確認してください。
2.データ消失を防ぐため、データ読み書きの最中は、いずれのドライブも着脱しないでください。
3.モード変更後、装着されたHDDまたはSSDは再度初期化、パーティション設定、フォーマットを行
う必要があります。ディスク上のデータは失われ、復元できません!
Внимание!
1.Для замены дисков при включенном питании компьютера, компьютер должен поддерживать
функцию «горячей» замены.
2.Во избежание потери данных, не заменяйте и не извлекайте диски в режиме чтения или
записи данных.
3.После смены режима жесткий или твердотельный диск следует заново инициализировать,
создать разделы и отформатировать. При этом все данные
будуть уничтожены и
восстановлению не подлежат!
Page 23

Mobile Series MS08
20
Warranty Information
This product has a limited 1 year warranty in North America and Australia.
For information on warranty periods in other regions, please contact your reseller or SilverStone authorized distributor.
1. Product component defects or damages resulted from defective production is covered under warranty.
Defects or damages with the following conditions will be fixed or replaced under SilverStone Technology’s jurisdiction.
a) Usage in accordance with instructions provided in this manual, with no misuse, overuse, or other inappropriate actions.
b) Damage not caused by natural disaster (thunder, fire, earthquake, flood, salt, wind, insect, animals, etc…)
c) Product is not disassembled, modified, or fixed. Components not disassembled or replaced.
d) Warranty mark/stickers are not removed or broken.
Loss or damages resulted from conditions other than ones listed above are not covered under warranty.
2. Under warranty, SilverStone Technology’s maximum liability is limited to the current market value for the product (depreciated value, excluding
3. Under warranty, SilverStone Technology is obligated to repair or replace its defective products. Under no circumstances will SilverStone
Technology be liable for damages in connection with the sale, purchase, or use including but not limited to loss of data, loss of business, loss of
profits, loss of use of the product or incidental or consequential damage whether or not foreseeable and whether or not based on breach of warranty,
contract or negligence, even if SilverStone Technology has been advised of the possibility of such damages.
4. Warranty covers only the original purchaser through authorized SilverStone distributors and resellers and is not transferable to a second hand
purchaser.
5. You must provide sales receipt or invoice with clear indication of purchase date to determine warranty eligibility.
6. If a problem develops during the warranty period, please contact your retailer/reseller/SilverStone authorized distributors or SilverStone
http://www.silverstonetek.com.
Please note that: (i) You must provide proof of original purchase of the product by a dated itemized receipt; (ii) You shall bear the cost of shipping
(or otherwise transporting) the product to SilverStone authorized distributors. SilverStone authorized distributors will bear the cost of shipping
(or otherwise transporting) the product back to you after completing the warranty service; (iii) Before you send the product, you must be issued a
Return Merchandise Authorization (“RMA”) number from SilverStone. Updated warranty information will be posted on SilverStone’s official website.
Please visit http://www.silverstonetek.com for the latest updates.
Warranty terms & conditions
Additional info & contacts
For North America (usasupport@silverstonetek.com)
SilverStone Technology in North America may repair or replace defective product with refurbished product
that is not new but has been functionally tested. Replacement product will be warranted for remainder of
the warranty period or thirty days, whichever is longer. All products should be sent back to the place of
purchase if it is within 30 days of purchase, after 30 days, customers need to initiate RMA procedure with
SilverStone Technology in USA by first downloading the “USA RMA form for end-users” form from the
below link and follow its instructions.
http://silverstonetek.com/contactus.php
For Australia only (support@silverstonetek.com)
Our goods come with guarantees that cannot be excluded under the Australian Consumer Law. You are
entitled to a replacement or refund for a major failure and for compensation for any other reasonably
foreseeable loss or damage. You a r e a l s o e n t i t l e d t o h a v e t h e g o o d s r e p a i r e d o r r e p laced if the goods fail to
be of acceptable quality and the failure does not amount to a major failure. Please refer to above “Warranty
terms & conditions” for further warranty details.
SilverStone Technology Co., Ltd. 12F No. 168 Jiankang Rd., Zhonghe Dist., New Taipei City 235
Taiwan R.O.C. + 886-2-8228-1238
(standard international call charges apply)
For Europe (support.eu@silverstonetek.de)
For all other regions (support@silverstonetek.com)
Page 24

G11223670
 Loading...