

Page 1
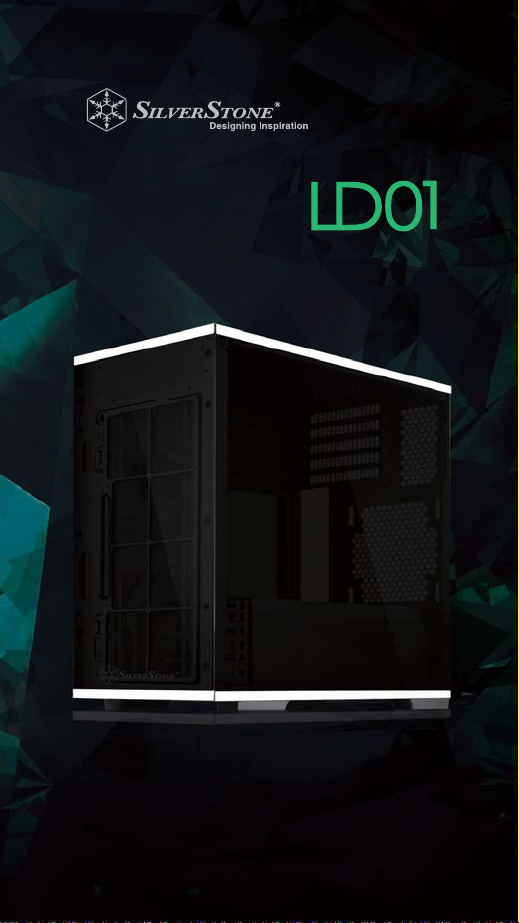
LUCID SERIES
Micro-ATX chassis with artful blend
of engineering and aesthetics
Page 2

INTRODUCTION
SilverStone created the Lucid series in an attempt to
combine SilverStone’s traditionally excellent engineering quality
with transparent or “lucid” aesthetics of glass-based exterior.
LD01, as the first Lucid series chassis, achieves this objective in
splendid fashion. The striking exterior is covered in tempered
glass flanked by functional stainless steel bands that not only
adds a touch of premium feel but also protect the glass and
simplify installation. With inverted motherboard tray design taken
from the Temjin TJ08-E, one of the best Micro-ATX cases ever
released, graphics or expansion cards installed into the LD01
can intake fresh air from above the chassis for vastly superior
cooling compared with traditional layout that has the PSU & drive
cage shroud limiting airflow. Another benefit of the inverted layout
is that graphics card supporter will make contact only with
graphics card's backside, thus eliminate potential interference
with graphics card fans. Other notable features the LD01 has
include front USB Type-C connector, quick access dust filter,
smart backside cable routing, highly flexible space for installing
all popular core components, and support for multiple cooling
configurations. There are five total 120 / 140mm fan slots around
the case with maximum radiator support at front, top, and rear.
For those looking for a compact, beautiful glass design in
Micro-ATX form factor without compromises, the LD01 is the
clear and lucid choice.
SPECIAL FEATURES
Three-sided tempered glass and stainless steel design
Graphics card holder included prevents card bending
Supports up to two 240 / 280mm radiators
Includes front mounted USB 3.1 Gen1 Type-C port
Easily accessible removable filters for dust reduction
Super clean internal look with PSU and drive bay cover
Flexible hard drive bracket can be repositioned to fit radiator or
big power supply
Page 3

SPECIFICATIONS
Model No.
SST-LD01B
Material
Tempered glass & stainless steel panels, steel body
Motherboard
Micro ATX, Mini-DTX, Mini-ITX
Drive Bay
Internal
Cooling System
Front
Rear
Top
Radiator Support
Front
Rear
Top
Expansion Slot
5
Front I/O Port
USB 3.0 Type-A x 2, USB 3.1 Gen1 Type-C x 1
Audio x 1, MIC x 1
Power Supply
Optional PS2 (ATX)
Expansion Card
Depends on the front radiator and fan thickness, Compatible up
to 14.5" (370mm) in length, width restriction –6.85" (174mm)
Limitation of CPU cooler
168mm
Limitation of PSU
160 ~ 220mm
Dimension
218mm (W) x 390mm (H) x 431mm (D), 36.6 Liters
* For 280mm radiators and fans, we recommend total thickness
of 55mm or less
3.5" x 3 (compatible with 2.5") , 2.5" x 2
2 x 120 / 140mm fan slot
1 x 120 / 140mm fan slot
2 x 120 / 140mm fan slot
120mm / 140mm / 240mm / 280mm x 1*
120mm / 140mm x 1
120mm / 140mm / 240mm / 280mm x 1*
Page 4
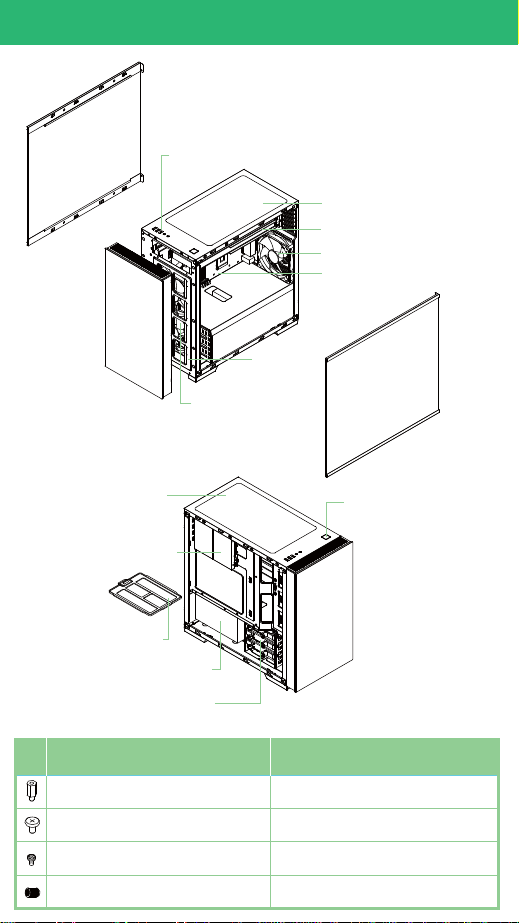
DISASSEMBLE CHART
USB 3.0 X2 + TYPE C + SPK + MIC
FILTER
12025 FAN X2
OR 14025 FAN X2
(OPTION)
12025 FAN X2 OR
14025 FAN X2 (OPTION)
EXPANSION SLOTS X5
12025 FAN X1 (OPTION)
MOTHERBOARD
FILTER
2.5” DRIVE BAY X2
FILTER
PS2-PSU (OPTION)
3.5” DRIVE BAY X3 OR
2.5” DRIVE BAY X3
ITEM PURPOSE
STANDOFF-6-32 X 6.5H-6-32
SCREW-I-6-32 X 5-BK
SCREW-P-M3 X 4-BK SECURE 2.5” DRIVES
STANDOFF-SOCKET-WRENCH
SUPPORT MOTHERBOARD
SECURE MOTHERBOARD, PSU
MOTHERBOARD STANDOFF
POWER-BUTTON
Page 5
INSTALLATION GUIDE
Before you begin, please make sure that you
Have all components collected.
Check that all components do not have compatibility problems
with each other or with the case.
If possible, assemble the components outside the case first to
make sure they are working.
Keep the motherboard manual ready for reference during
installation.
Prepare a Philips screwdriver.
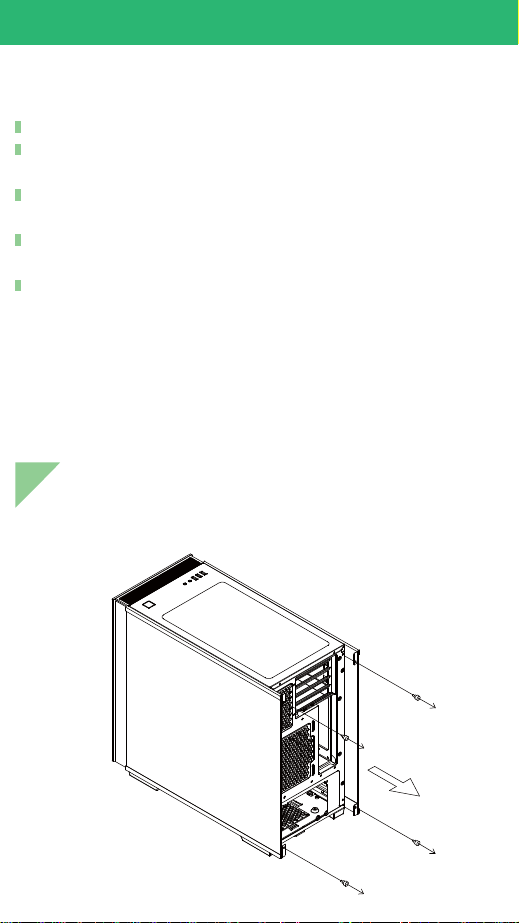
Loosen two screws from both left and right side panels to
1
remove them
Page 6
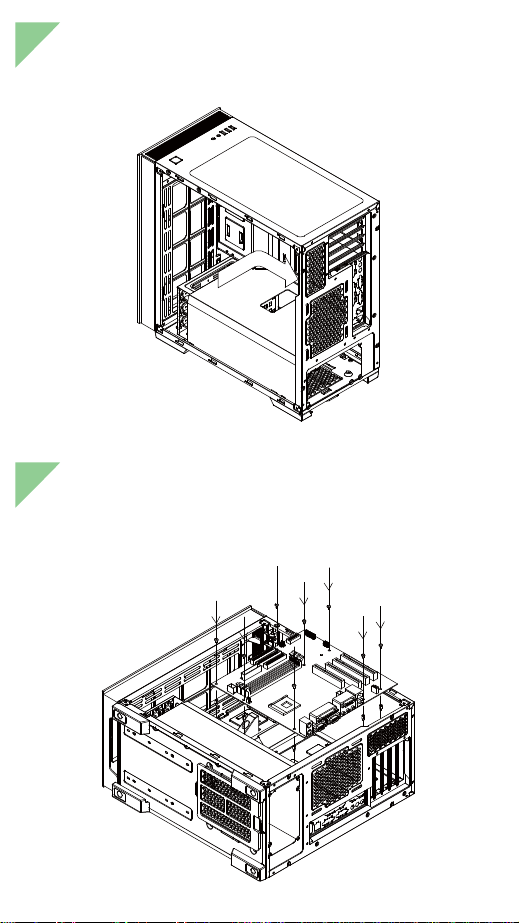
Insert the I/O shield included with your motherboard
2
Insert standoffs as required by your motherboard in
3
corresponding mounting holes, then install motherboard
Page 7

Remove expansion slot covers to install required expansion
4
cards.Then install the graphic card holder, this holder only
supports card on first and second expansion slot. Please
lay down the case before installing the card holder to
ensure that the graphics card is not bending by gravity
Pull out to open the tool-less bracket and secure your hard
5
drive on the tray. Pay attention to the orientation of the drive,
its connectors should be on the same side as the drive tray’s
pull tabs
Page 8

Install 2.5" drives behind the motherboard tray and secure
6
with screws
We recommend that you start cable manage now and
7
connect cables such as the ATX 24pin, front I/O connectors,
and any other connectors from front panel devices
Page 9

Connect all cables and wires
8
Install power supply into the case
9
Page 10

Reinstall side panels back onto the case
10
Page 11

CONNECTOR DEFINITION
(1) Front panel connector installation
Power Switch
Power switch installation guide:
Please refer to the motherboard manuals for the motherboard’s
“Front Panel Connector” or “System Panel Connector” pin definition.
Power switch has no polarity, so they can be connected in any
orientation
LED connector installation guide:
Power LED-
Power LED+
HDD LED+
HDD LED-
Please refer to the motherboard manuals for the motherboard’s
“Front Panel Connector” or “System Panel Connector” pin definition.
White colored wires are negative while other colored wires are
positive. Power LED connector is made to be individual pins by
design to accommodate different motherboard specifications
Page 12

(2) Front I/O connecter Guide
Below are the front I/O connectors pin definition, please also
check your motherboard manual to cross reference with
motherboard’s front I/O pin headers. SilverStone’s I/O connectors
are in block type to simplify installation
USB 3.0 CONNECTOR
IntA_P1_SSRX-
IntA_P1_SSRX+
IntA_P1_SSTX-
IntA_P1_SSTX+
IntA_P1_D-
IntA_P1_D+
Pin 10
HD CONNECTOR
AUD GND
PRESENCE
SENSE1_RETURN
SENSE2_RETURN
Pin 1
Vbus
GND
GND
ID
PIN
Pin 19
Vbus
IntA_P2_SSRXIntA_P2_SSRX+
GND
IntA_P2_SSTXIntA_P2_SSTX+
GND
IntA_P2_DIntA_P2_D+
Pin 11
PORT1L
PORT1R
PORT2R
SENSE_SEND
PORT2L
PIN
Page 13

COMPONENT SIZE LIMITATIONS
T
he LD01 was designed to accommodate oversized
components, but we still recommend referring to the following
dimension guidelines:
(1) CPU Cooler limitation
168mm
6.8mm
Height limitation for CPU cooler is 168mm with 6.8mm clearance
over the motherboard’s top edge
(2) Power supply limitation
160 ~ 220mm
HDD
PSU
BKT
The LD01 supports power supply depth from 160 to 220mm
depending on hard drive bracket’s position. Please refer to
diagram for locating the bottom screws that allow for hard drive
cage adjustments
Page 14

(3) Graphics card / expansion card length limitation
174mm
370mm
The total length available for graphics card and front panel fan
or radiator is 370mm. Width restriction is 174mm
Page 15

(4) Liquid cooling radiator limitations
105mm
71mm
20mm
LD01 supports 120/140/240/280mm radiator in the top panel.
The distance of fan mounting hole and the first expansion card
is 105mm. As shown in figure A, it can fit a dual-slot graphics
card along with a 30mm thick radiator and a 25mm thick fan.
The radiator and fan will occupy the install space for motherboard’s
third and fourth expansion slots.
Further detail on radiator and expansion card positioning:
As shown in Figure B, if 140mm fans are installed into LD01’s
top panel, they will be 20mm away from the surface of the
motherboard. This is the same distance that motherboard designs
use to keep clear of graphics card installed on the motherboard,
so technically the 140mm fans will also not interfere with other
components around the third and fourth expansion slots. If your
motherboard’s SATA slots are unfortunately blocked by installed
radiator or fan, we recommended purchasing SilverStone CP11
super slim SATA cables to solve the interference problem.LD01
supports 120/140/240/280mm radiator in the front panel. As
shown in Figure C, the total thickness of the fan and radiator can
be up to 71mm, we recommend installing the radiator with its
hoses on top. If you want to install 280mm radiators on both top
and front panels simultaneously, we recommend using radiators
with less than 30mm thickness to avoid potential interference
with one another. A 120mm radiator can be mounted on the the
rear panel of the case, there is no thickness limitation if the
height of the motherboard components in the same area are less
than 50mm.
Page 16

MAINTENANCE AND UPGRADE
Illustration: An example of a GPU cooler that is filled with
dust and has lost most of its cooling performance. We recommend
setting up LD01 as a positive air pressure case so along with the
included filters, they can help effectively reduce dust buildup inside
the case. Small air particles or lint will accumulate over time on
intake filters instead of on the components inside the case. To
maintain LD01’s cooling performance for years to come, we
recommend to clean all fan filters regularly every six months to a
year (depending on your environment)
F AN FILTER PURCHASE PROCESS
If you accidentally loose/damage filters or need additional
ones for backup, please contact your local SilverStone retailers
or distributors for purchasing information:
http://www.silverstonetek.com/wheretobuy_all.php
Page 17

WARRANTY
This product has a limited 1 year warranty in North America
and Australia. For information on warranty periods in other regions,
please contact your reseller or SilverStone authorized distributor.
WARRANTY TERMS & CONDITIONS
1. Product component defects or damages resulted from defective
production is covered under warranty.
Defects or damages with the following conditions will be fixed
or replaced under SilverStone Technology’s jurisdiction.
a) Usage in accordance with instructions provided in this manual,
with no misuse, overuse, or other inappropriate actions.
b) Damage not caused by natural disaster (thunder, fire, earthquake,
flood, salt, wind, insect, animals, etc…)
c) Product is not disassembled, modified, or fixed. Components
not disassembled or replaced.
d) Warranty mark/stickers are not removed or broken. Loss or
damages resulted from conditions other than ones listed above
are not covered under warranty.
2. Under warranty, SilverStone Technology’s maximum liability is
limited to the current market value for the product (depreciated
value, excluding shipping, handling, and other fees). SilverStone
Technology is not responsible for other damages or loss
associated with the use of product.
3. Under warranty, SilverStone Technology is obligated to repair
or replace its defective products. Under no circumstances will
SilverStone Technology be liable for damages in connection
with the sale, purchase, or use including but not limited to loss
of data, loss of business, loss of profits, loss of use of the product
or incidental or consequential damage whether or not foreseeable
and whether or not based on breach of warranty, contract or
negligence, even if SilverStone Technology has been advised
of the possibility of such damages.
Page 18

4. Warranty covers only the original purchaser through authorized
SilverStone distributors and resellers and is not transferable to
a second hand purchaser.
5. You must provide sales receipt or invoice with clear indication
of purchase date to determine warranty eligibility.
6. If a problem develops during the warranty period, please
contact your retailer/reseller/SilverStone authorized distributors
or SilverStone http://www.silverstonetek.com. Please note that:
(i) You must provide proof of original purchase of the product
by a dated itemized receipt
(ii) You shall bear the cost of shipping (or otherwise transporting)
the product to SilverStone authorized distributors. SilverStone
authorized distributors will bear the cost of shipping (or
otherwise transporting) the product back to you after
completing the warranty service
(iii) Before you send the product, you must be issued a Return
Merchandise Authorization (“RMA”) number from SilverStone.
Updated warranty information will be posted on SilverStone’s
official website. Please visit http://www.silverstonetek.com for
the latest updates.
Page 19

ADDITIONAL INFO & CONTACTS
For North America (usasupport@silverstonetek.com)
SilverStone Technology in North America may repair or replace
defective product with refurbished product that is not new but has
been functionally tested. Replacement product will be warranted
for remainder of the warranty period or thirty days, whichever is
longer. All products should be sent back to the place of purchase
if it is within 30 days of purchase, after 30 days, customers need
to initiate RMA procedure with SilverStone Technology in USA by
first downloading the “USA RMA form for end-users” form from
the below link and follow its instructions.
http://silverstonetek.com/contactus.php
For Australia only (support@silverstonetek.com)
Our goods come with guarantees that cannot be excluded under
the Australian Consumer Law. You are entitled to a replacement
or refund for a major failure and for compensation for any other
reasonably foreseeable loss or damage. You are also entitled to
have the goods repaired or replaced if the goods fail to be of
acceptable quality and the failure does not amount to a major
failure. Please refer to above “Warranty terms & conditions” for
further warranty details.
SilverStone Technology Co., Ltd. 12F No. 168 Jiankang Rd.,
Zhonghe Dist., New Taipei City 235 Taiwan R.O.C.
+ 886-2-8228-1238 (standard international call charges apply)
For Europe (support.eu@silverstonetek.de)
For China (support@silverstonetek.com.cn)
For all other regions (support@silverstonetek.com)
Page 20

©2018 SilverStone Technology Co., Ltd. All Rights Reserved
ALL trademarks are registered to their respective owners
 Loading...