

Silverline 675302 Instructions Manual
Y
e
a
r
G
u
a
r
a
n
t
e
e
3
3
R
E
G
I
S
T
E
R
O
N
L
I
N
E
*
www.silverlinetools.com
3 Year Guarantee
Register online within 30 days*
Terms & conditions apply
Garantie 3 Ans
Enregistrement sur le site dans les
30 jours* Acceptation des conditions
3 Jahre Garantie
Registrieren Sie sich online innerhalb
von 30 Tagen* Bedingungen gelten
GB
ESP
F
GB
ESP
I
F
GB
D
ESP
NL
I
ESP
ESP
I
ESP
NL
I
3 Jaar Garantie
Registreer online binnen 30 dagen*
Algemene voorwaarden van toepassing
3 Anni di Garanzia
Registrati on-line entro 30 giorni*
Condizioni di applicazione
3 Años de Garantía
Regístrese online dentro de 30 días*
Sujeta a términos y condiciones
675302_Instructions.indd 2 11/12/09 18:00:50
www.silverlinetools.com
675302
Y
e
a
r
G
u
a
r
a
n
t
e
e
3
3
R
E
G
I
S
T
E
R
O
N
L
I
N
E
*
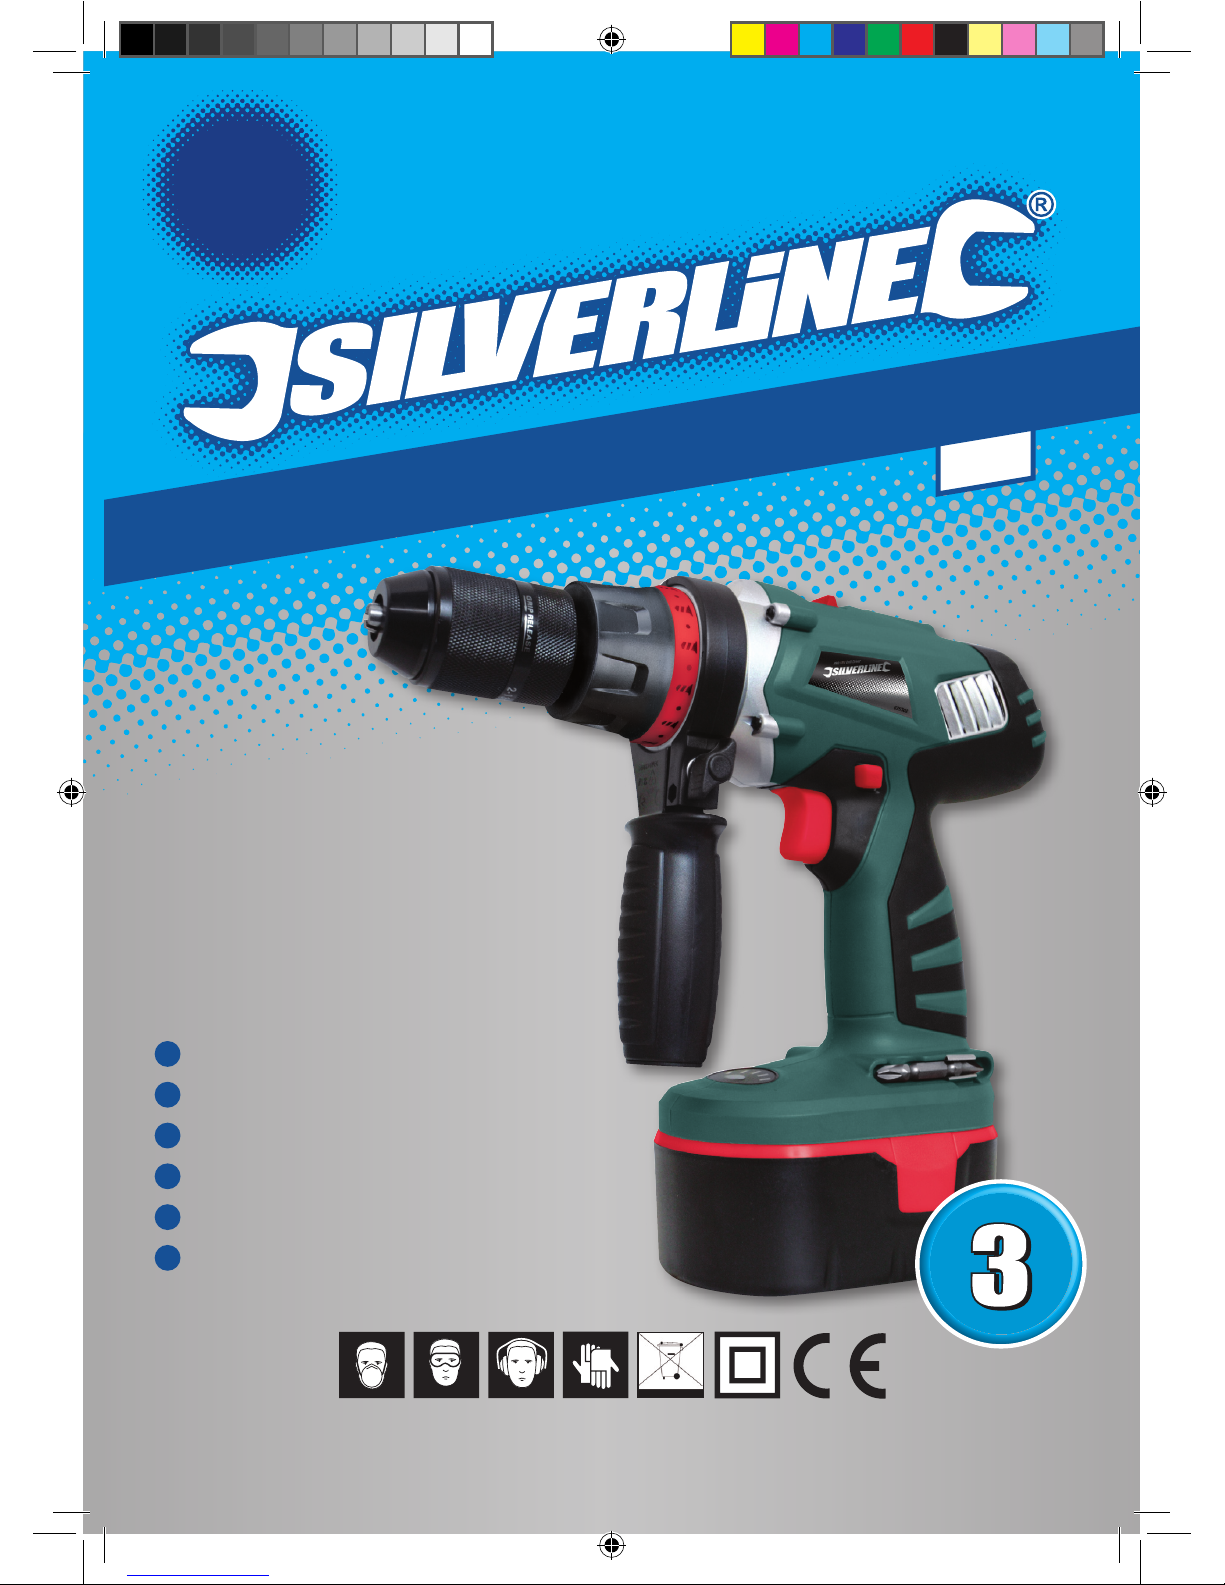
18V
Cordless Impact Drill
PRO
R
A
N
G
E
R
A
N
G
E
GB
ESP
F
GB
ESP
I
F
GB
D
ESP
NL
I
ESP
ESP
I
ESP
NL
I
Cordless Impact Drill
Foret Sans fil D’impact
Drahtloses Auswirkung-Bohrgerät
Taladro sin Cuerda del Impacto
Trivello Senza Sordone di Effetto
De Draadloze Boor van het Effect
675302_Instructions.indd 3 11/12/09 18:00:54
2
1
3 4
2
5
6
8
10
9
7
675302_Instructions.indd 2 11/12/09 18:00:59

PRO
R
A
N
G
E
R
A
N
G
E
18V
Cordless Impact Drill
www.silverlinetools.com
3
English .................. 4
Français ................ 8
Deutsch ................. 12
Español ................. 16
Italiano .................. 20
Nederlands ............ 24
®
675302_Instructions.indd 3 11/12/09 18:01:00

Wear suitable clothing and footwear
Do not wear loose fitting clothing, neckties, jewellery, or other items •
which may become caught. Wear non-slip footwear, or footwear with
protective toe caps where appropriate. Long hair should be covered or
tied back.
Keep your balance
Do not over reach, keep proper footing at all times, do not work on an •
unstable surface.
Accessories
The use of any attachment or accessory other than those mentioned •
in this manual could result in damage or injury. The use of improper
accessories could be dangerous, and will invalidate your guarantee.
Secure work
Always ensure work is secure, if appropriate use a clamp or vice.•
Check for damaged or missing parts
Before each use, check if any part of the tool is damaged or missing, •
check carefully that it will operate properly and perform its intended
function. Check alignment of moving parts for binding. Any guard or other
part that is damaged should be immediately repaired or replaced by an
authorised service centre. Do not use if defective.
Cordless Tool Safety
The wires in this product are coloured: •
Blue Neutral (N)
Brown Live (L)
Green & Yellow Earth (E)
As the colours may not correspond with the coloured markings in your •
plug, proceed as follows.
The wire which is coloured blue must be connected to the terminal •
which is marked with the letter N or coloured black, the wire which is
coloured brown must be connected to the terminal which is marked L
or coloured red.
This appliance must be protected by a suitable fuse.•
To prevent fire or shock hazard, do not expose this product to rain/water •
or moisture.
There are no user serviceable parts inside except those referred to in •
this manual. Always refer servicing to qualified service personnel. Never
remove any part of the casing unless qualified to do so; this unit contains
dangerous voltages.
Use of a residual current device (RCD) will reduce the risk ofelectric •
shock.
NEVER CONNECT THE BROWN OR BLUE WIRE TO THE EARTH PIN OF THE
13 AMP PLUG. IF IN DOUBT CONSULT A QUALIFIED ELECTRICIAN
Dangerous environment
Do not use power tools in damp or wet conditions, or expose them to •
rain. Provide adequate surrounding work space and keep area well lit.
Do not use power tools where there is a risk of explosion or fire from
combustible material, flammable liquids, flammable gasses, or dust of
an explosive nature.
Protect yourself from vibration
Hand held power tools may produce vibration. Vibration can cause •
disease. Gloves to keep the operator warm may help to maintain good
blood circulation in the fingers. Hand held tools should not be used for
long periods without a break.
Maintain your power tool
Ensure all ventilation holes are kept clear at all times. Overheating and •
4
GB
General Safety Instructions
Carefully read and understand this manual and any label before use. Keep
these instructions with the product for future reference. Ensure all persons
who use this product are fully acquainted with this manual.
Even when used as prescribed it is not possible to eliminate all residual risk
factors. Use with caution. If you are at all unsure of the correct and safe
manner in which to use this product, do not attempt to use it.
Remove adjusting keys
Always check to see that keys and adjusting devices are removed from •
the tool before use.
Clean the work area
Accidents can occur where benches and work areas are cluttered or •
dirty, floors must be kept clear, avoid working where the floor is slippery.
If working outdoors, make yourself aware of all potential slip and trip
hazards.
Children and pets
Children and pets should always be kept at a safe distance from your •
work area. Lock equipment away where children can’t get access to it.
Do not allow children, or untrained persons to use this product.
Use the correct tool
Do not force, or attempt to use a tool for a purpose it was not designed for.•
Explanation of Symbols
Specification
Drill:
Voltage ........................................................... 18V
No load speed ................................................0-400/
0-1200RPM
Weighted vibration .........................................7.71m/s
2
Sound pressure .............................................. 71.6dB(A)
Sound power ..................................................86dB(A)
Battery:
Voltage ........................................................... 18V
Capacity ......................................................... 2.0Ah
Type ............................................................... Ni-Cad
Charger:
Voltage ........................................................... 230V
Frequency ......................................................50Hz
Double insulated ............................................
As part of our ongoing product development, specifications
of Silverline products may alter without notice.
•ClassIIconstruction(Doubleinsulated).
•Weargloves.
•Wearbreathingprotection.
•Weareyeprotection.
•Wearhearingprotection.
• DonotdisposeofWEEE(WasteElectrical
and Electronic Equipment) as unsorted waste.
675302_Instructions.indd 4 11/12/09 18:01:00

www.silverlinetools.com
5
675302 Cordless Impact Drill 18V
fire may otherwise result.
Do not alter your power tool in any way. Any attempt to modify your •
tool will invalidate its guarantee and could result in serious injury to
yourself, or others around you.
Do not abuse the power cord
Be sure your charger cable is in good condition. Always have a damaged •
cable replaced at an authorised service centre before using it. Never
yank or pull the cable to disconnect it from the power socket. Never
carry your charger by its cable. Keep the cable away from damp, heat, oil
solvents, and sharp edges.
Don’t leave the tool running unattended
Always wait until your tool has come to a complete stop, or has otherwise •
totally stopped functioning, before leaving it.
Before Use
Unpacking and assembling your drill
Carefully unpack your drill, battery, and charger. Ensure all packaging •
materials are removed and fully familiarise yourself with all features of
the product.
If any parts are damaged or missing, have these parts repaired or •
replaced before use.
Always hold the machine, by the handles provided.•
Always wear appropriate personal protective equipment for the job that •
you are to do. Use of this machine may require ear defenders, safety
goggles, gloves, a breathing mask, and a hard hat.
675302_Instructions.indd 5 11/12/09 18:01:00
6
GB
Operating Instructions
Warning
Never fit any attachment with a maximum speed lower than the no load
speed of the machine.
Fitting a drill bit
Open the chuck (1) jaws by rotating the front chuck ring clockwise.•
The drill bit can then be placed into the chuck.•
Tighten the chuck jaws by rotating the front chuck ring anti-clockwise.•
Do not run the drill whilst tightening or releasing the chuck.•
When the drill bit is held tightly, test that it is central by running the drill. •
The drill bit should rotate smoothly with no “wobble”. If the drill bit is not
central, release the chuck, and retighten.
Direction control
The direction of rotation can be set using the reverse switch (3).•
To make the drill rotate anti-clockwise, push the reverse switch to the •
right.
To make the drill rotate clockwise, push the reverse switch to the left.•
When the reverse switch is in the central position, the drill is locked.•
Do not attempt to move the reverse switch when the drill is running.•
Switching on
To start the drill, squeeze the trigger switch (5).•
The speed of the drill is controlled by the movement of the trigger, the •
further the trigger is depressed, the faster the drill will run.
Gear selection
This drill is equipped with a 2 speed gearbox. The lower gear provides •
speeds between 0-400RPM with a high torque. The higher gear provides
speeds between 0-1200RPM with reduced torque.
For jobs that do not require speeds above 400RPM, use low gear. This •
will reduce the load on the motor.
To select a gear, slide the gear selector (3) to the appropriate position.•
Do not attempt to move the gear selector when the drill is running.•
Level Bubble
The level bubble enables you to check that holes are being drilled •
horizontally.
To ensure a perfectly horizontal hole, keep the bubble central between •
the two black lines while drilling.
Side Handle
The side handle (9) should always be used to ensure a secure grip and •
good control.
The side handle can be adjusted to the best position for the job to be •
done. To adjust the side handle, loosen the clamp and rotate. Retighten
the clamp before use.
Checking battery level
This drill is fitted with a battery level indicator (8). •
To check the charge remaining in the battery, press the button in the •
middle of the indicator.
If only red lights illuminate, the battery is low. If only red and orange •
lights illuminate, the battery is part charged. If red, orange, and green
lights illuminate then the battery is fully charged.
Torque control
This drill is fitted with a torque control clutch (2). This limits the torque •
output of the drill, enabling screws to be driven without the risk of
damage.
The clutch settings are indicated by the symbols on the clutch ring. •
Rotate the clutch ring to select the correct torque.•
For drilling, rotate the clutch ring to the drill symbol. This will lock the •
clutch for maximum torque.
Charging the battery
The following procedure should be followed:
The battery should be fully discharged before charging•
The battery should be charged at 20˚C (room temperature)•
Plug the charger into the power supply•
Ensure that the power supply is switched on•
Insert the battery pack into the charger•
The red indicator light will illuminate, indicating that the battery is being •
charged.
Allow 15mins for the battery to cool before use.•
Ensure that the charger is disconnected from the mains supply, and is •
stored correctly.
IMPORTANT: Failure to follow the correct procedure when charging the
batteries will result in permanent damage. You must follow the correct
procedure.
Maintenance and Disposal
Replacement brushes
Over time, the carbon brushes in the motor will wear away. This wear •
process will be accelerated if the machine is used in dusty environments,
or if the machine is overloaded.
If the brushes have become excessively worn; motor performance may •
decrease, the machine may fail to start, or excessive sparking may be
observed.
If you suspect that the brushes may be worn, have them replaced at an •
authorised service centre.
Cleaning
Disconnect the machine from the mains supply before cleaning.•
Keep your machine clean. Always clean dust/particles away, and never •
allow ventilation holes to become blocked. Use a soft brush, or dry cloth
to clean the machine, if available blow through the ventilation holes with
clean, dry, compressed air.
Disposal
Do not dispose of power tools, or other waste electrical and electronic •
equipment (WEEE), with household waste.
Contact your local waste disposal authority for information on the proper •
way to dispose of power tools.
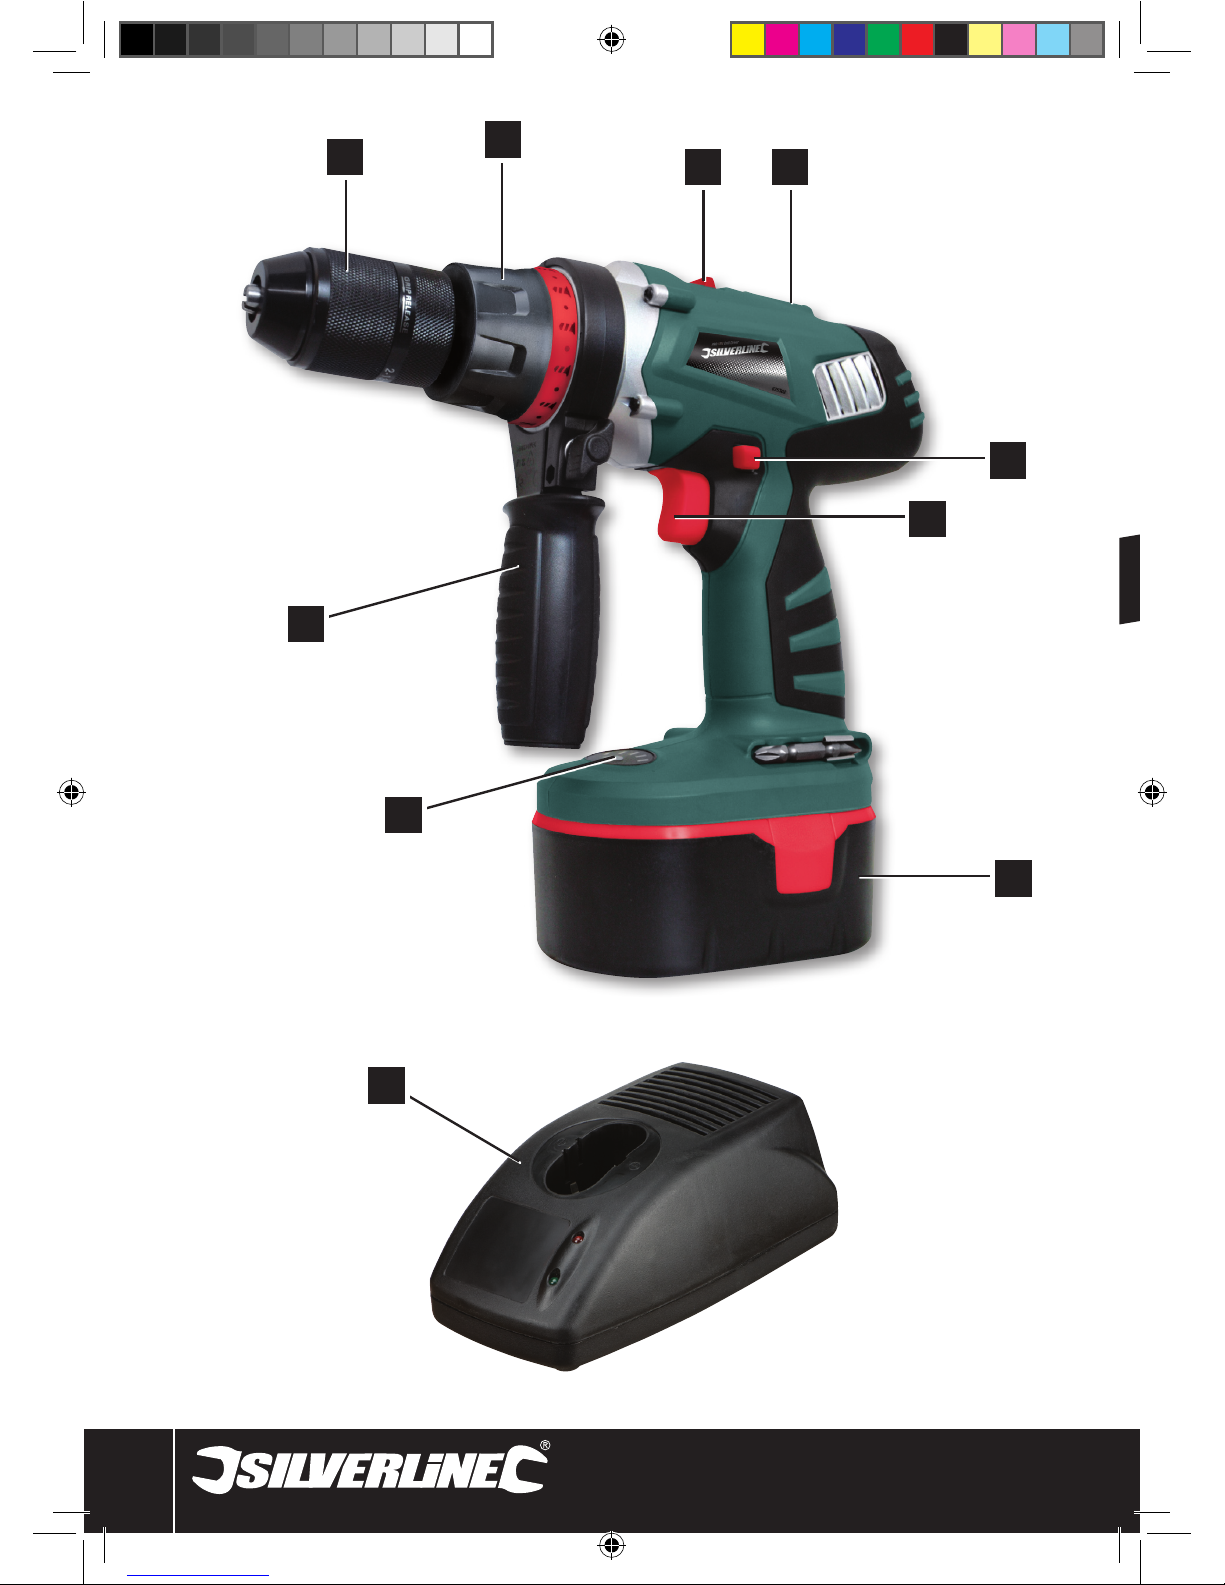
1 Chuck
2 Torque control
3 Gear selector
4 Level bubble
5 Reverse switch
6 Trigger switch
7 Battery
8 Battery level indicator
9 Side handle
10 Charger
Product Familiarisation
675302_Instructions.indd 6 11/12/09 18:01:01

www.silverlinetools.com
7
Cordless Impact Drill 18V675302
Terms & Conditions
This Guarantee and guarantee period becomes effective at the date of retail
purchase as detailed on your sales receipt.
PLEASE KEEP YOUR SALES RECIEPT
If this product develops a fault within 30 days of purchase, return it to the
stockist where it was purchased, with your receipt, stating details of the
fault. You will receive a replacement or refund.
If this product develops a fault after the 30 day period, return it to:
Silverline Tools Service Centre
PO Box 2988
Yeovil
BA21 1WU, UK
The guarantee claim must be submitted during the guarantee period.
You must provide the original sales receipt indicating the purchase date, your
name, address and place of purchase before any work can be carried out.
You must provide precise details of the fault requiring correction.
All claims will be verified by Silverline Tools that the deficiencies are of a
material or manufacturing fault within the guarantee period.
We do not refund carriage. All products should be in a suitably clean and
safe state for repair, and should be packaged carefully to prevent damage or
injury during transportation. We may reject unsuitable or unsafe deliveries.
All work will be carried out by Silverline Tools or its authorised repair agents.
The repair or replacement of the product will not extend the period of
guarantee.
Defects recognised by us as being covered by the guarantee shall be
corrected by means of repair of the tool free of charge (excluding carriage
charges) or by replacement with a tool in perfect working order.
Retained tools, or parts, for which a replacement has been issued, will
become the property of Silverline Tools.
The repair or replacement of your product under guarantee provides benefits
which are additional to and do not affect your statutory rights as a consumer.
What is covered:
The repair of the product, if it can be verified to the satisfaction of the
Silverline Tools that the deficiencies were due to faulty materials or
workmanship within the guarantee period of purchase.
If any part is no longer available or out of manufacture, Silverline Tools will
replace it with a functional replacement part.
Use of the product in the EU.
What is not covered:
Silverline Tools does not guarantee repairs required as a result of:
Normal wear and tear caused by use in accordance with the operating
instructions eg blades, brushes, belts, bulbs, batteries etc.
The replacement of any provided accessories drill bits, blades, sanding
sheets, cutting discs and other related items.
Accidental damage, faults caused by negligent use or care, misuse, neglect,
careless operation or handling of the product.
Use of the product for anything other than normal domestic purposes.
Change or modification of the product in any way.
Use of parts and accessories which are not Silverline Tools genuine
components.
Faulty installation (except installed by Silverline Tools).
Repairs or alterations carried out by parties other than Silverline Tools or its
authorised repair agents.
Claims other than the right to correction of faults on the tool named in these
guarantee conditions are not covered by the guarantee.
This Silverline product comes with a 3 year guarantee.
To qualify you must register this product at silverlinetools.com within 30
days of purchase. The guarantee period begins on the date of purchase as
detailed on your sales receipt.
Registering your purchase
Registration is made at silverlinetools.com by selecting the Guarantee
Registration button. You will need to enter:-
Your personal details•
Details of the product and purchase information •
Once this information is entered your guarantee certificate will be created in
PDF format for you to print out and keep with your purchase.
Silverline Tools Guarantee
EC Declaration of Conformity
The undersigned: Mr Philip Ellis
as authorized by: Silverline Tools
Declares that the
Name/ model: Cordless Impact Drill 18V
Type/ serial no: 675302
Conforms to the following:
EN55014-1:2000+A1:2001+A2:2002•
EN55014-2:1997+A1:2001•
EN61000-3-2:2000+A2:2005•
EN61000-3-3:1995+A1:2001+A2:2005•
EN60745-1:2006•
EN60745-2-2:2003+A11:07•
EN60745-2-1:2003+A11:07•
The technical documentation is kept by: Silverline Tools
Notified body: Intertek
Place of declaration: Shanghai, China
Date: 10/12/09
Signed by:
Position in Company: Director
Name and address of Manufacturer or Authorised representative:
Silverline Tools, Boundary Way, Lufton Trading Estate, Yeovil, Somerset,
BA22 8HZ United Kingdom
675302_Instructions.indd 7 11/12/09 18:01:01
8
F
Utiliser l’outil correct
Ne pas forcer ou utiliser un outil à des fins pour lesquelles il n’est pas •
conçu.
Porter des chaussures et des vêtements adaptés
Ne pas porter de vêtements amples, de cravate, de bijoux ou d’autre •
élément qui pourrait se faire saisir. Au besoin, porter des chaussures
antidérapantes ou équipées de protection des orteils. Les longs cheveux
doivent être couverts ou noués vers l’arrière.
Conservez votre équilibre
Ne pas tenter de travailler dans des endroits hors de portée, conserver une •
stabilité correcte en permanence, ne pas travailler sur une surface instable.
Accessoires
L’utilisation de tout équipement ou accessoire différent de ceux •
mentionnés dans ce manuel peut provoquer des dégâts ou des
blessures. L’utilisation d’accessoires inadéquats peut être dangereuse
et annule votre garantie.
Travail en sécurité
Toujours s’assurer de la sécurité des conditions de travail. Au besoin, •
utiliser une fixation ou un étau.
Vérifier l’absence de pièces endommagées ou manquantes
Avant chaque utilisation, vérifier qu’aucune pièce du produit ne manque •
ou n’est endommagée. Vérifier le fonctionnement correct et la bonne
exécution des fonctions voulues. Vérifier l’alignement et l’absence
de grippage des pièces mobiles. Toute protection ou autre pièce
endommagée doit être immédiatement réparée ou remplacée par un
centre de service agréé. Ne pas utiliser d’outil défectueux.
Sûreté Sans fil D’outil
Cette prise de courant doit être protégée par un fusible approprié.•
Pour prévenir les risques d’incendie ou de choc, ne pas exposer ce •
produit à la pluie, à l’eau ou à l’humidité.
Il n’y a pas de parties utilisables par l’utilisateur à l’intérieur sauf celles •
mentionnées dans ce manuel. Toujours confier l’utilisation au personnel
qualifié pour l’utilisation. Ne jamais enlever une partie du boîtier sauf
si vous êtes qualifié pour le faire : cette unité contient des tensions
dangereuses.
L’utilisation d’un dispositif de courant résiduel réduira le risque de choc •
électrique.
Environnement dangereux
Ne pas utiliser d’appareils électriques dans un environnement humide ou •
sous la pluie. Fournir un espace de travail adéquat et un bon éclairage.
Ne pas utiliser d’appareils électriques lorsqu’il y a un risque d’explosion
ou d’incendie dû à du matériau combustible, des liquides inflammables,
des gaz inflammables ou des poudres de nature explosive. Lors de
l’utilisation d’appareils électriques, éviter le contact avec tout objet en
contact avec la terre, tels que des tuyaux, des radiateurs, des chaudières,
des réfrigérateurs, des baignoires en métal ou des robinets.
Se protéger des vibrations
Les appareils électriques tenus en main peuvent produire des vibrations. •
Les vibrations peuvent provoquer des maladies. Les gants utilisés par
l’opérateur pour garder ses mains au chaud peuvent aider à conserver
une bonne circulation sanguine dans les doigts. Les appareils tenus en
main ne doivent pas être utilisés pendant de longues périodes, sans
interruption.
Entretien de l’appareil électrique
S’assurer que tous les trous d’aération sont dégagés à tout moment,car •
cela pourrait avoir pour résultat une surchauffe ou un incendie.
Ne modifiez votre outil électrique d’aucune manière. Toute tentative de •
modification de votre outil annule la garantie et présente un risque de
blessure grave pour vous-même et votre entourage.
Ne pas tirer sur le cordon d’alimentation
S’assurer que le cordon ou cordon prolongateur est en bon état. Faire •
remplacer toujours le cordon ou cordon prolongateur auprès d’un centre
de services autorisé avant de l’utiliser. Ne jamais tirer sur le cordon pour
le débrancher de la prise d’alimentation. Ne jamais transporter l’appareil
Consignes de Sécurité Générales
Lire attentivement et comprendre ce manuel ainsi que toute étiquette avant
l’utilisation. Conservez ces consignes avec le produit en guise de référence
ultérieure. Assurez-vous que toutes les personnes qui utilisent ce produit
connaissent parfaitement ce manuel.
L’utilisation prescrite n’élimine pas tout facteur de risque résiduel. Utiliser
avec prudence. Ne pas utiliser ce produit en cas de doute au sujet de la
méthode sûre et correcte.
Déposer les clavettes de réglage
Toujours vérifier que les clavettes et autres dispositifs de réglage sont •
déposés avant l’utilisation.
Nettoyer la zone de travail
Des accidents peuvent se produire quand les bancs et zones de travail •
sont encombrés ou sales. Le sol doit être dégagé. Evitez de travailler sur
un sol glissant. En cas de travail à l’extérieur, s’informer de tout risque
de glissement ou de déplacement.
Enfants et animaux
Toujours maintenir une distance de sécurité entre les enfants ou les •
animaux et votre zone de travail. Enfermer les outils en lieu sûr, hors
de portée des enfants. Ne pas laisser les enfants ou des personnes
inexercées utiliser ce produit.
Signification des Symboles
Spécification
Perceuse:
Tension..........................................................18V
Vitesse à vide ................................................0-400/
0-1200RPM
Vibration pondérée ........................................7.71m/s
2
Pression sonore.............................................71.6dB(A)
Puissance sonore ..........................................86dB(A)
Battery:
Tension..........................................................18V
Capacité ........................................................2.0Ah
Type ..............................................................Ni-Cad
Chargeur:
Tension..........................................................230V
Fréquence .....................................................50Hz
Double isolation.............................................
Silverline Tools se réserve le droit de modifier
les spécifications du produit sans préavis.
Construction de classe II (Double isolation).•
Portez des gants.•
Portez un masque de protection respiratoire.•
Portez des lunettes de protection.•
Portez un casque de protection auditive.•
Ne mettez pas au rebut le matériel électrique ou •
électronique comme s’il s’agissait de déchets
ne nécessitant aucun tri.
675302_Instructions.indd 8 11/12/09 18:01:01
 Loading...