

Page 1
QSG145: WGM110 SLEXP4320 Wi-Fi
Expansion Kit Quick-Start Guide
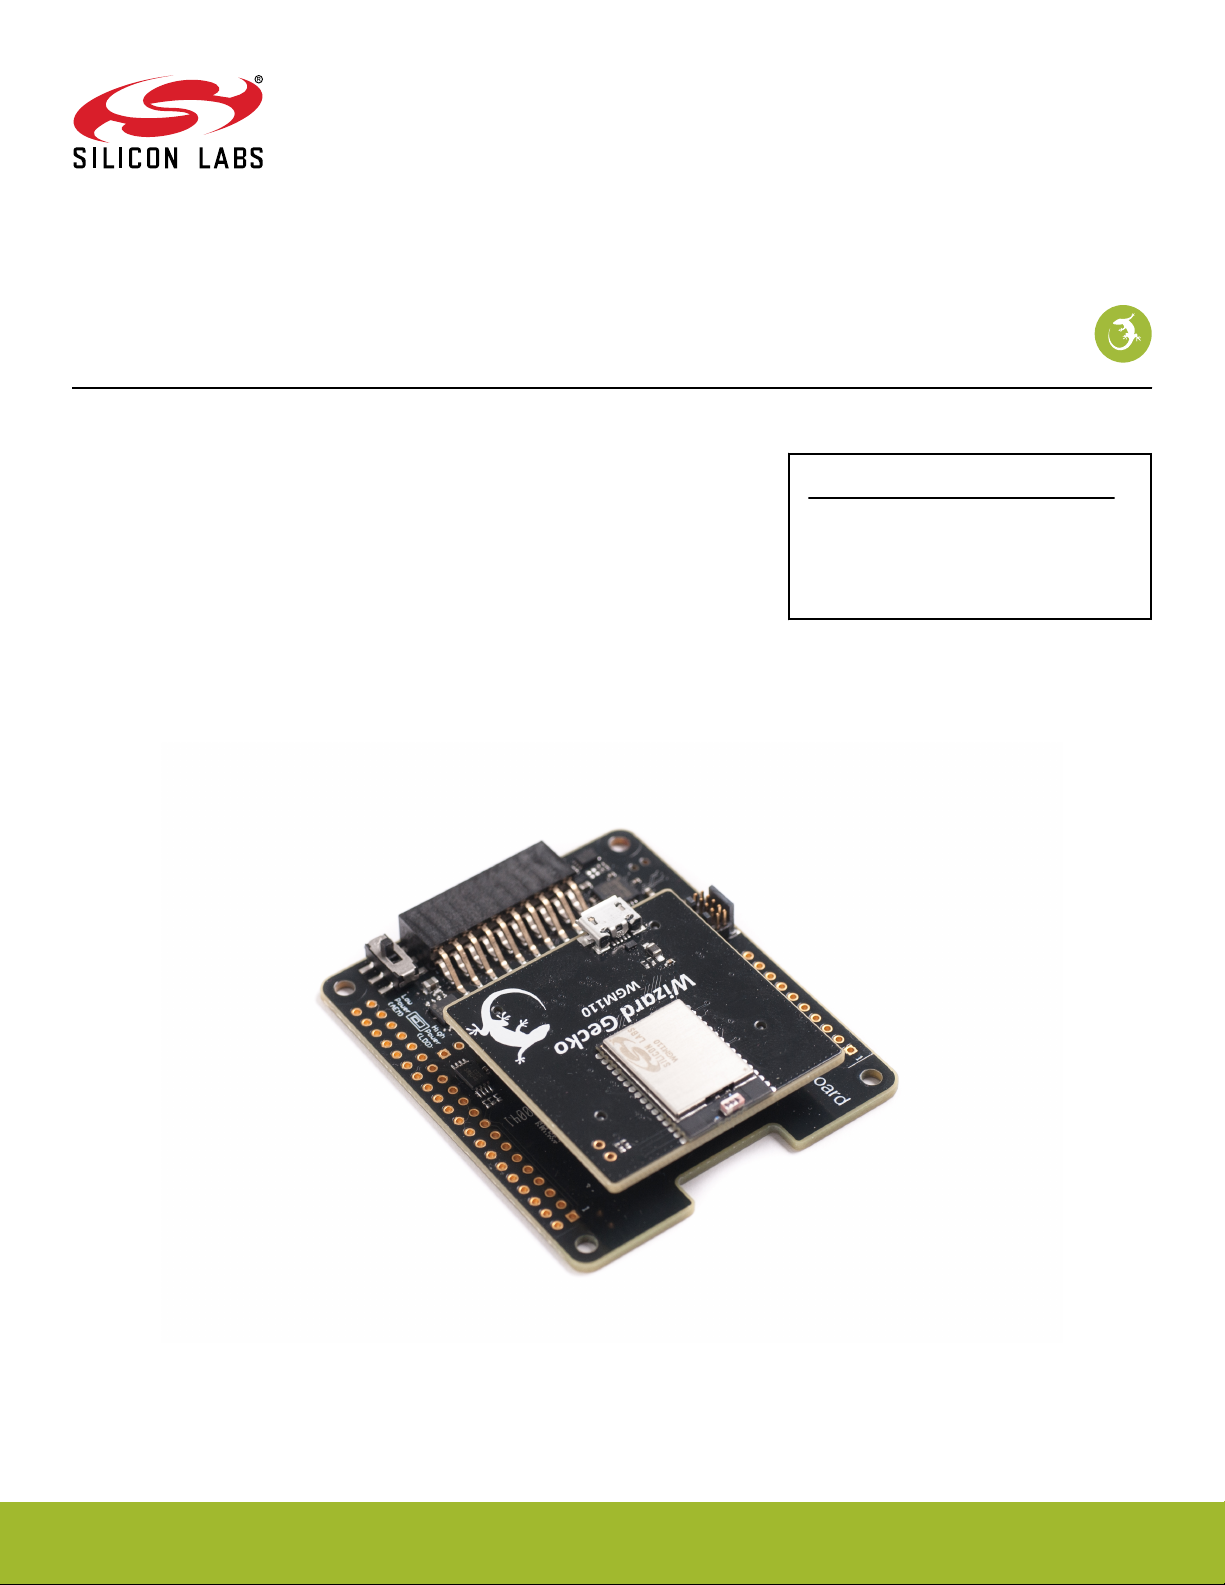
The WGM110 Wi-Fi Expansion Kit is an excellent way to get started with Wi-Fi connectivity for Silicon Labs MCUs.
The kit contains an expansion board that can be connected to one of 3 MCU starter-kits,
listed below. The expansion board allows the EFM32 MCU to connect to a WGM110 WiFi module, which can connect to Wi-Fi networks, but also be an access point to which
other devices can connect. The expansion kit works with the following Silicon Labs MCU
Starter kits:
•
EFM32 Pearl Gecko PG12 Starter Kit – SLSTK3402A
• EFM32 Pearl Gecko PG1 Starter Kit – SLSTK3401A
• EFM32 Giant Gecko GG11 Starter Kit – SLSTK3701A
KIT CONTENTS
• Expansion board with radio board socket
•
WGM110 radio board
• Getting Started card
silabs.com | Building a more connected world. Rev. 0.1
Page 2
QSG145: WGM110 SLEXP4320 Wi-Fi Expansion Kit
Getting Started
1. Getting Started
Required Components
The WGM110 Wi-Fi Expansion Kit contains a Wi-Fi module. To use the kit, an MCU starter-kit is required, where the MCU will be the
host that communicates and controls the Wi-Fi module. Supported Starter Kits are listed below. Click the link to see a description of the
kit and associated MCU, and ensure one of these kits is available:
• EFM32 Pearl Gecko PG12 Starter Kit – SLSTK3402A
https://www.silabs.com/products/development-tools/mcu/32-bit/efm32-pearl-gecko-pg12-starter-kit
• EFM32 Pearl Gecko PG1 Starter Kit – SLSTK3401A
https://www.silabs.com/products/development-tools/mcu/32-bit/efm32-pearl-gecko-starter-kit
• EFM32 Giant Gecko GG11 Starter Kit – SLSTK3701A
https://www.silabs.com/products/development-tools/mcu/32-bit/efm32-giant-gecko-gg11-starter-kit
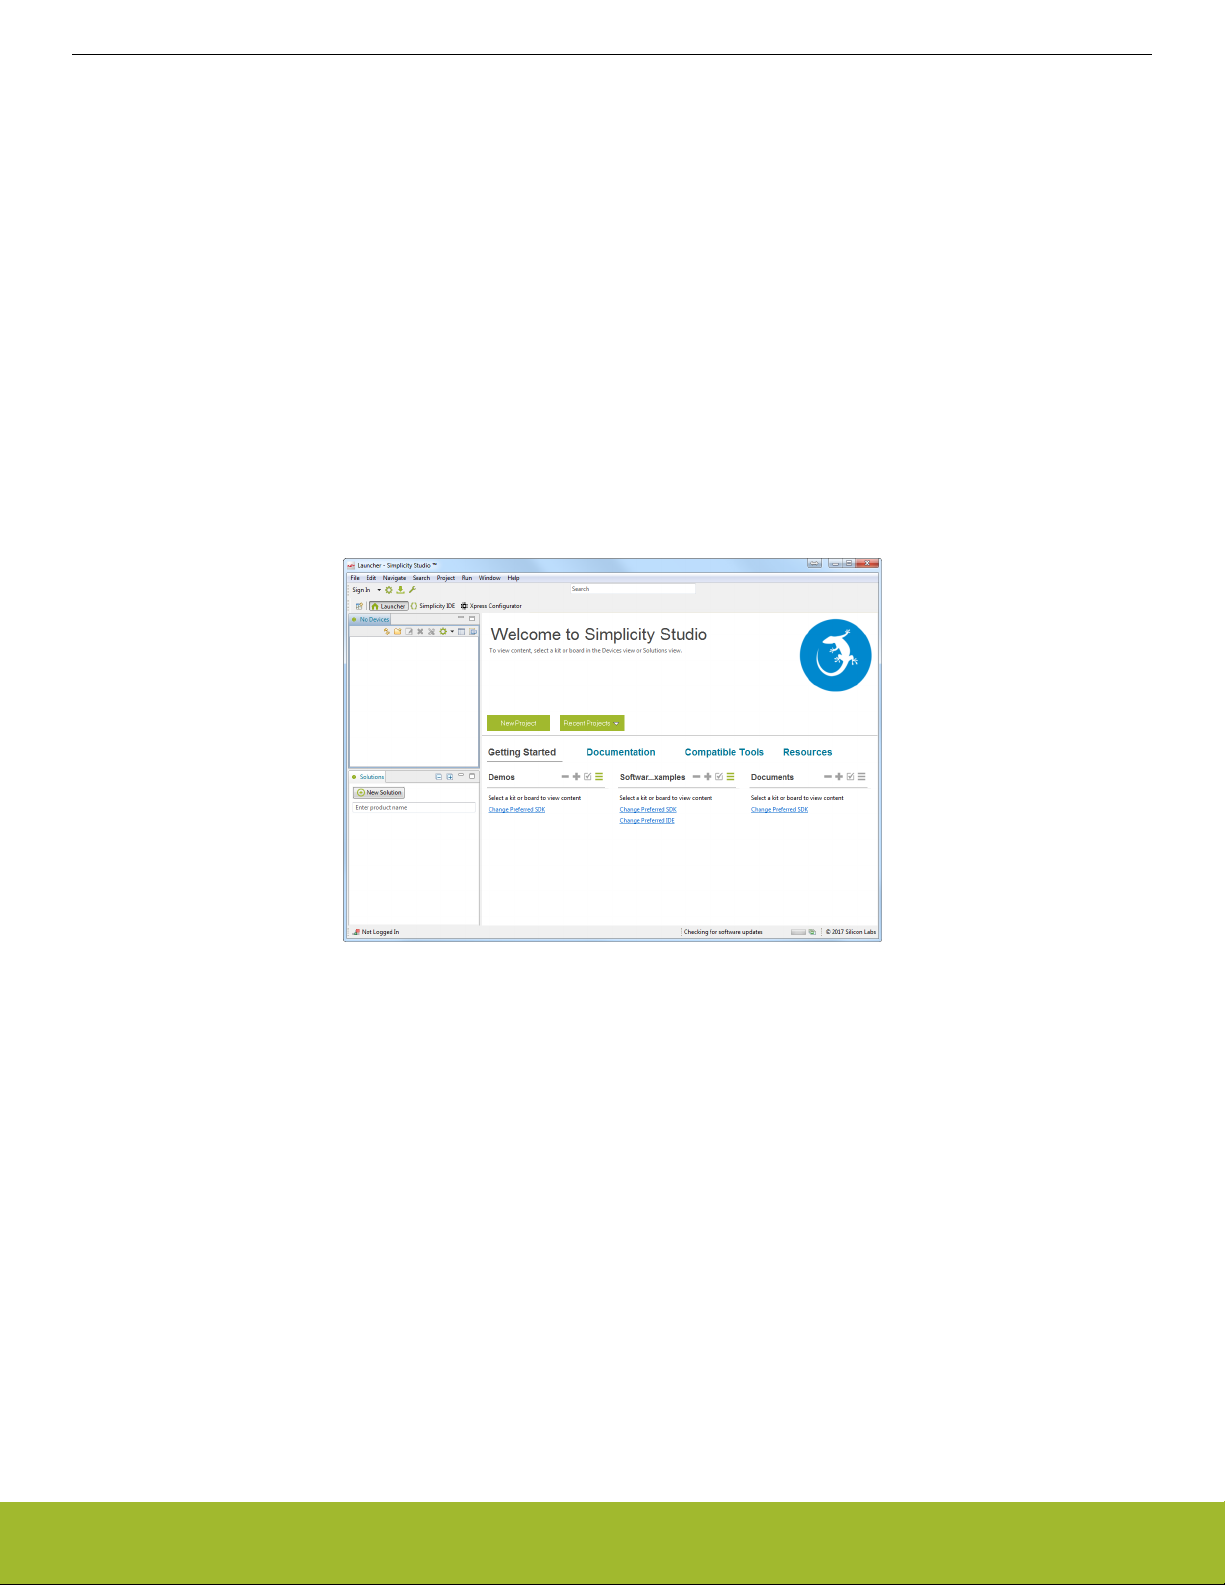
Install Simplicity Studio
Simplicity Studio is a free software suite needed to start developing your application.
1. Download the latest version of Simplicity Studio from the Silicon Labs website: http://www.silabs.com/simplicity-studio.
silabs.com | Building a more connected world. Rev. 0.1 | 2
Page 3
QSG145: WGM110 SLEXP4320 Wi-Fi Expansion Kit
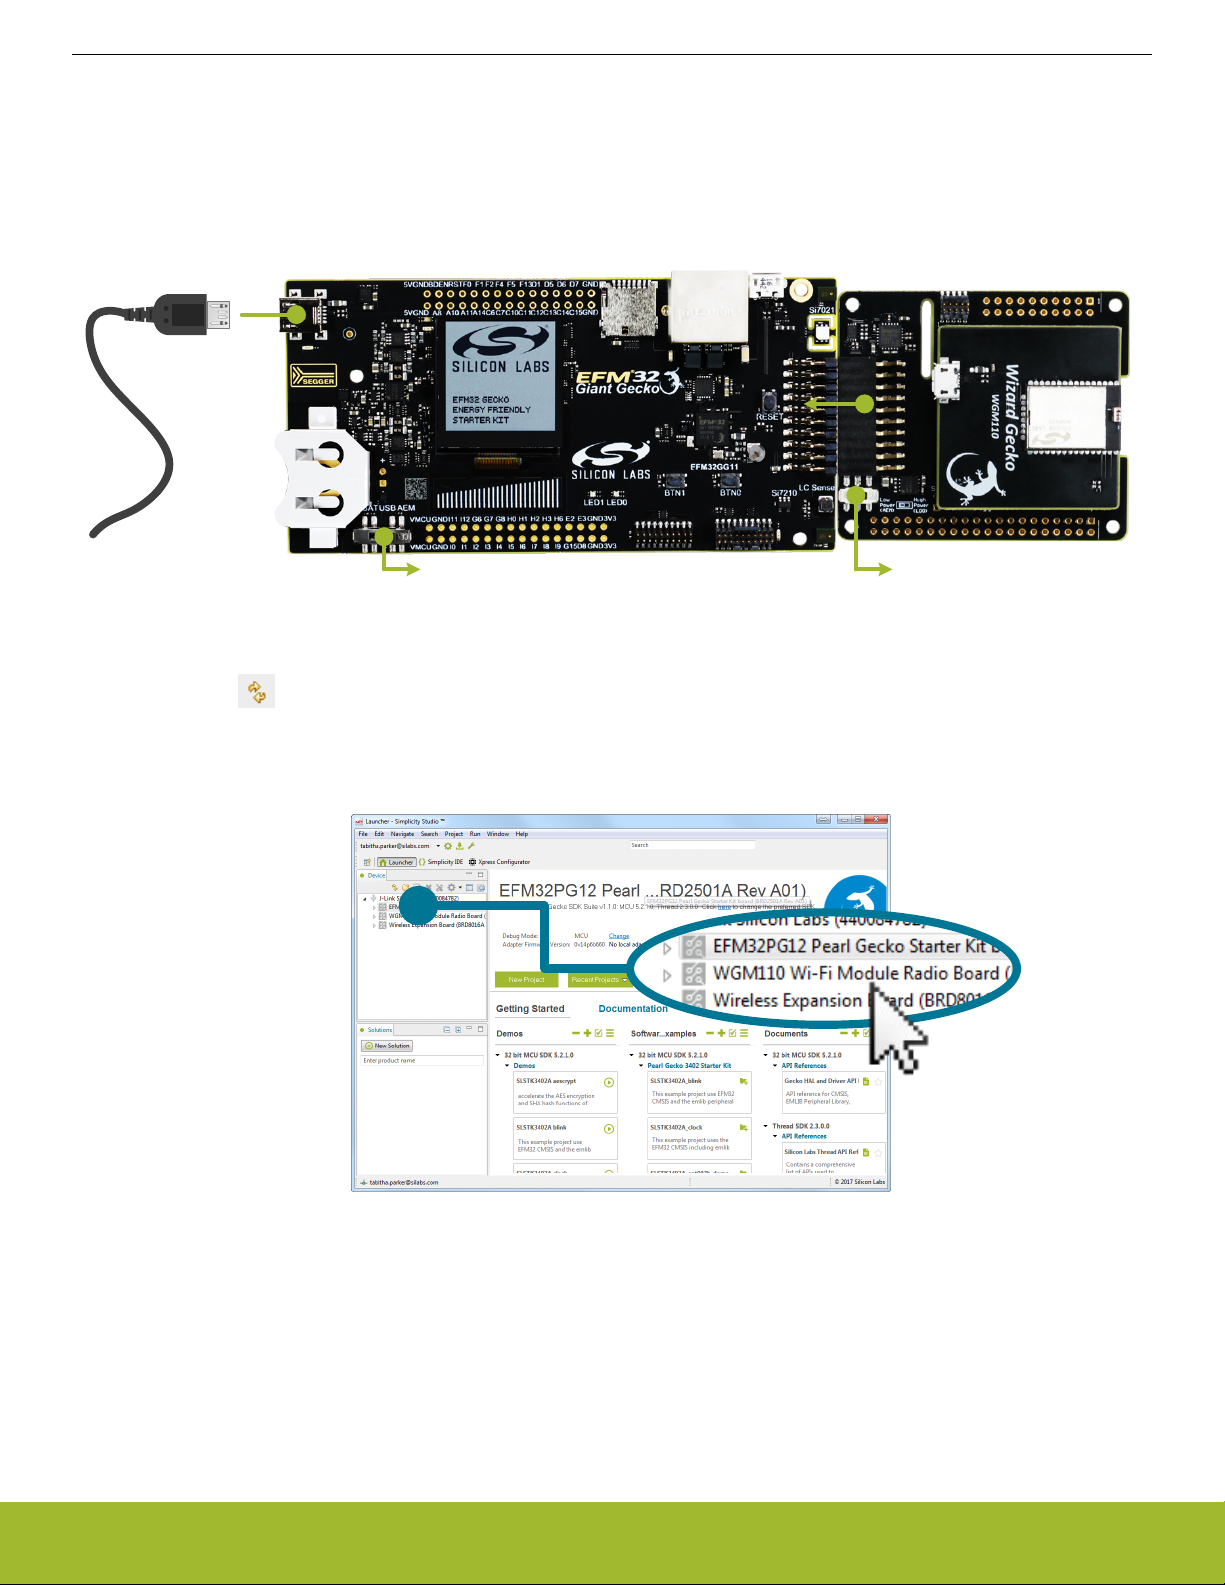
Set Up Your Kit
1. Connect the Expansion Kit to the MCU Starter Kit.
2. Provide power to the board by connecting the [DBG] USB connector to the PC using the provided USB cable.
3. Ensure that the power selector switch on the STK is in the [AEM] position.
4. Ensure that the power selector switch on the Wireless Expansion Board is in the [High Power (LDO)] position.
Getting Started
Detect Your Device
1.
Click [Refresh] button if your device does not show up in the [Device] view in the Simplicity Studio Launcher. The board
might take some time to appear due to driver installations for the debug adapter.
2. Once an item with a name that starts with [J-Link Silicon Labs] appears, expand it by clicking the arrow, and verify that the detected device matches your kit.
silabs.com | Building a more connected world. Rev. 0.1 | 3
Page 4
QSG145: WGM110 SLEXP4320 Wi-Fi Expansion Kit
Getting Started
Set Up Your Wi-Fi Access Point
Before playing with the demo, the demo needs to know what Wi-Fi access point it should connect to. To keep things simple, these are
hard-coded in a file called app_wifi_cfg.h. In an end-application, these could be obtained through presenting a UI to the user, or by
setting up an access point on the WGM110 and leveraging the built-in web-server to allow a cell phone or computer to connect to the
WGM110 in order to configure it.
1. Select the MCU Starter Kit in the [Device] area.
2. Under [Getting Started] in the Launcher, scroll down in the [Software Examples] column until you find [micriumos_wifi_white-
board] and click it.
3. Answer [Yes] when a dialog opens asking you whether you want to switch to the IDE perspective and create the example project.
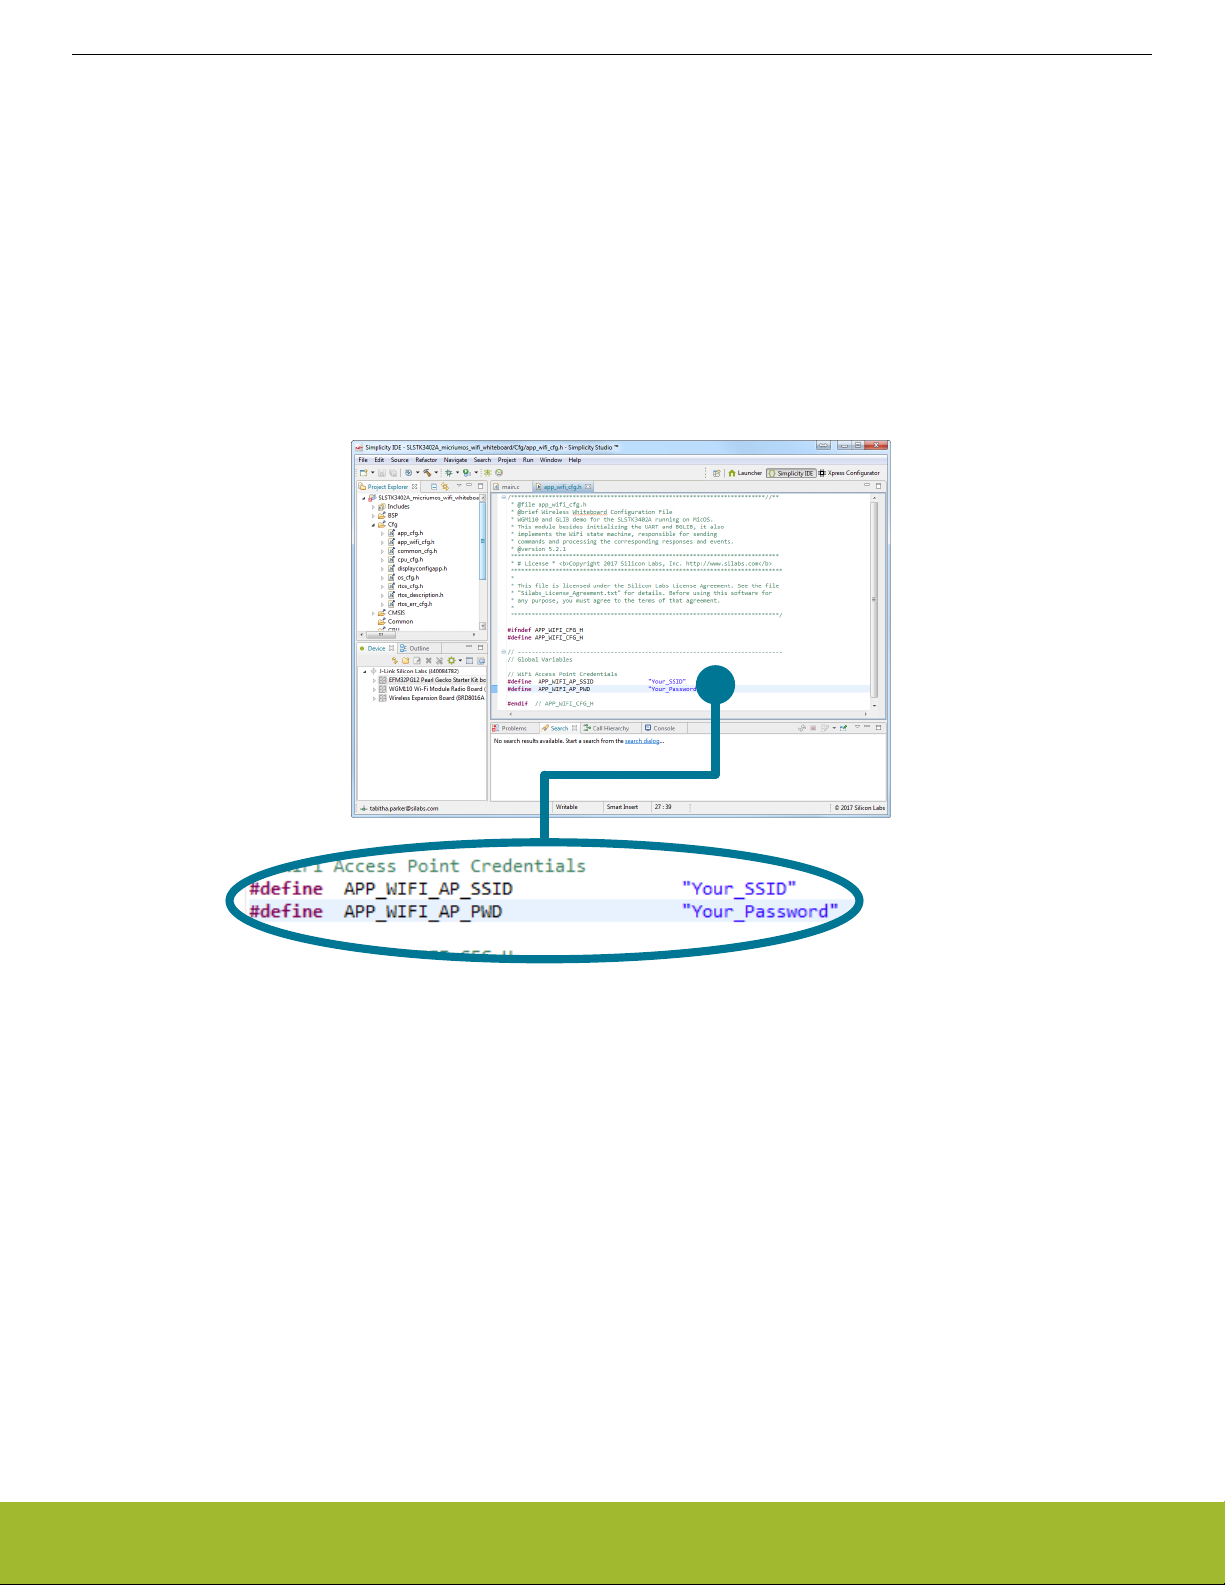
4. In the Simplicity IDE, locate the [Project Explorer] and expand the new project that was created. Go into the [Cfg] folder and open
app_wifi_cfg.h.
5. In app_wifi_cfg.h, change the value of APP_WIFI_AP_SSID and APP_WIFI_AP_PWD to the values of the Wi-Fi access point you
want to connect to.
Note:
If the app_wifi_cfg.h file is not visible in the [Cfg] folder, you can find the file in one of three ways:
1. Pressing [F3] when the cursor hovers over any of the configuration macros like APP_WIFI_AP_SSID.
2. Expanding the includes tree to find the app_wifi_cfg.h file.
3. Navigating to the project. In Windows, this would typically be located in C:\Users\<username>\SimplicityStudio\<workspace>
\<demo name>.
silabs.com | Building a more connected world. Rev. 0.1 | 4
Page 5

QSG145: WGM110 SLEXP4320 Wi-Fi Expansion Kit
Getting Started
Start the Example
1. Click the [Debug] button to compile and download the demo to the MCU. Once downloaded, click the [Resume]
button. The demo will show several messages as it attempts to connect to the Wi-Fi network and then the AWS service that serves
the demo.
2. Press [BTN1] and verify that the display shows a MAC Address status message:
3. In case the application does not display the status message and instead remains in one of the other status messages, try the following troubleshooting tips:
a. Confirm that your Wireless Access Point’s SSID and Password match those configured in app_wifi_cfg.h.
b. Confirm that the WGM110 is running the latest firmware from the Wizard Gecko Wi-Fi SDK. To do this, download http://
www.silabs.com/products/development-tools/software/wizard-gecko-wi-fi-sdk and upgrade the device firmware using BGTool
in the bin folder and the production.bin firmware image in the example/production folder.
c. Confirm that the Wireless Access Point has access to the Internet and that your Internet Provider’s DNS can resolve demo.si-
labs.com.
silabs.com | Building a more connected world. Rev. 0.1 | 5
Page 6

QSG145: WGM110 SLEXP4320 Wi-Fi Expansion Kit
Getting Started
Draw on the Wireless Whiteboard
1. The whiteboard supports black and white and colored drawings depending on the LCD onboard the Starter Kit.
2. Open your favorite Internet browser, go to the page at http://demo.silabs.com/whiteboard, and select the Wireless Whiteboard
Demo for the Starter Kit.
3. After selecting the correct board, enter the board’s [MAC address] in the top-right corner of the web page and start drawing. The
MAC address is displayed on the display of the Starter Kit.
4. Draw something in the view.
5. The drawing will appear on the kit display. Use the kit buttons [BTN0] and [BTN1] to switch between screens.
6. Keep drawing. The image drawn on the whiteboard is dynamically transferred to the kit display.
silabs.com | Building a more connected world. Rev. 0.1 | 6
Page 7

QSG145: WGM110 SLEXP4320 Wi-Fi Expansion Kit
How the Example Works
2. How the Example Works
The embedded application in the host MCU runs on MicriumOS, and the Wi-Fi module is connected to the Host MCU via a UART interface. The LCD screen is connected via an SPI interface on the Host MCU.
When a finger lifts from the
3
touch screen, an image of
the drawing gets posted to a
web service at AWS EC2.
AWS EC2 not only hosts the
4
whiteboard webpage, but
also acts as a proxy server
to process the image.
The web service converts
the image to a special
format that makes it ready to
display on the board’s LCD.
The whiteboard page is
2
hosted at Amazon Web
Services (AWS). Browse to
the page and enter the
board’s MAC address
(unique ID).
5
The board displays its MAC
1
address on the LCD.
Figure 2.1. System Overview
The board queries a web
service at AWS EC2
periodically to check if the
image has changed. If so, it
will download the image and
display it on the LCD.
silabs.com | Building a more connected world. Rev. 0.1 | 7
Page 8

int main(void)
Kernel Tick
Task
OSInit()
OSTaskCreate()
OSStart()
Kernel Start
Task
Kernel Idle
Task
Startup
Task
BSP_Init()
CPU_Init()
Mem_Init()
DISPLAY_Init()
DMD_Init()
GLIB_contextInit()
BGLIB_INITIALIZE()
AppTaskCreate()
QSG145: WGM110 SLEXP4320 Wi-Fi Expansion Kit
How the Example Works
Task Priority
Tick 1
Stat 14
Idle 15
Startup 3
WiFi 4
Display 5
Whiteboard
OSTaskSemPost()
OSTaskSemPend()
Display
Task
Graphics API
LCD GLib
GLIB_drawString()
GLIB_drawBitmap()
SPI
USART_TX()
Push Buttons
BTN0
BTN1
GPIO ISR
WiFi Module
UART ISR
OSTaskSemPost()
OSTaskSemPend()
Timeout
WiFi
Task
wifi_cmd_x() USART_TX()
wifi_rsp_x
Wifi_evt_x
WiFi BGLib
USART_RX()
UART
WGM110
Figure 2.2. Software System Overview
1. The main() function starts by initializing MicriumOS Kernel through a call to OSInit(), which in turn creates the following internal
tasks:
• Tick Task—OS_TickTask() is used by the Kernel to keep track of tasks waiting for time to expire or for tasks that are pending
on kernel objects with a timeout. OS_TickTask() is a periodic task that waits for signals from the tick ISR.
• Statistics Task—OS_StatTask() is used by the Kernel to calculate run-time statistics such as CPU usage.
• Idle Task—OS_IdleTask() is used by the Kernel to run whenever there are no other tasks that are ready to run.
main() continues by creating the Startup Task and starting the multi-tasking process by calling OSStart().
2. The Startup Task is used to initialize various hardware and software modules, including the Memory LCD and the WGM110 Wi-Fi
module interface. The Startup Task finishes the startup process by creating the rest of application tasks as follows:
• Display Task—the application uses this task to process commands to display something on the LCD, including status messages
and the image drawn by the user. It is also responsible to process the push button interrupts. The task simply waits for a signal
to its own semaphore from either the GPIO Interrupt Service Routine or the Wi-Fi task to process the different commands.
• WiFi Task—the application uses this task to process the responses and events from the Wi-Fi module. The task waits for a
signal from the UART ISR before processing each command.
3. To understand how the Wi-Fi connection is managed, read through app_wifi.c, which implements the connection and communi-
cation aspects of the demo. Use the WGM110 API Reference Manual to see how the BGLIB API works and how to communicate
with the WGM110 module. See 4. Additional Resources for more information.
silabs.com | Building a more connected world. Rev. 0.1 | 8
Page 9

QSG145: WGM110 SLEXP4320 Wi-Fi Expansion Kit
Extended Debugging
3. Extended Debugging
Micrium µC/Probe is an application that allows you to read and write the memory of any embedded target processor during run-time
and map those values to a set of virtual controls and indicators placed on a graphical dashboard. In this example application, µC/Probe
is used to display during run-time a state machine diagram that shows you the current state of the Wi-Fi module.
µC/Probe is a part of the Simplicity Studio installation and is available if it has been selected during installation.
1. To make sure µC/Probe is installed, click the [Help] menu, then [Update Software] or the [Update Software] button in the
[Launcher] view. In the dialog that opens, navigate to the [Tools] tab, find [Micrium uC/Probe] in the list, and verify that it is installed or install it.
2.
To launch µC/Probe, navigate to [Compatible Tools] from the [Launcher] and scroll down. Alternatively, click the [µC/Probe]
button in the [Simplicity IDE] view.
Figure 3.1. Micrium µC/Probe
The µC/Probe software will initially open with a blank workspace. After opening µC/Probe:
1. Go to [File]>[Open].
2. Browse to the [micriumos_wifi_whiteboard] project typically located in C:\Users\<username>\SimplicityStudio\<workspace>
\<demo name> on Windows, and select the Probe\uCProbe.wspx file.
3. A [Missing File] dialog may be displayed. If so, click the [Browse...] button in the dialog. Select the ELF file that is typically located
in the following folder: C:\Users\<username>\SimplicityStudio\<workspace>\SLSTK*_micriumos_wifi_whiteboard\GNU AR
M v4.9.3 – Debug\*.axf. Click [Update] The .axf file contains information about the compiled program, and can also be upda-
ted by clicking the [ELF] button in the main window.
silabs.com | Building a more connected world. Rev. 0.1 | 9
Page 10

4. Click the [Run] button in the [Home] menu bar to run the visualization.
QSG145: WGM110 SLEXP4320 Wi-Fi Expansion Kit
Extended Debugging
Figure 3.2. Wireless Whiteboard Status Screen
silabs.com | Building a more connected world. Rev. 0.1 | 10
Page 11

QSG145: WGM110 SLEXP4320 Wi-Fi Expansion Kit
Extended Debugging
This software can also show a list of MicriumOS tasks, along with their runtime statistics. If this is not available in the visualization as an
additional tab, go out of the visualization, find the [Workspace Explorer] on the right-hand side, click the [Screens] menu, and select
[Micrium OS Kernel (µC/OS-5)]. Then, click the [Run] button to run the visualization again and select the corresponding tab.
Figure 3.3. Wi-Fi Demo Usage Statistics in Micrium µC/Probe
silabs.com | Building a more connected world. Rev. 0.1 | 11
Page 12

4. Additional Resources
For more information, review the following:
•
WGM110 Wizard Gecko Wi-Fi® Module Data Sheet
• WGM110 API Reference Manual
• Starter Kit MCU Data Sheet
• Starter Kit MCU Reference Manual
QSG145: WGM110 SLEXP4320 Wi-Fi Expansion Kit
Additional Resources
silabs.com | Building a more connected world. Rev. 0.1 | 12
Page 13

Simplicity Studio
One-click access to MCU and
wireless tools, documentation,
software, source code libraries &
more. Available for Windows,
Mac and Linux!
IoT Portfolio
www.silabs.com/IoT
Disclaimer
Silicon Labs intends to provide customers with the latest, accurate, and in-depth documentation of all peripherals and modules available for system and software implementers using or
intending to use the Silicon Labs products. Characterization data, available modules and peripherals, memory sizes and memory addresses refer to each specific device, and "Typical"
parameters provided can and do vary in different applications. Application examples described herein are for illustrative purposes only. Silicon Labs reserves the right to make changes
without further notice and limitation to product information, specifications, and descriptions herein, and does not give warranties as to the accuracy or completeness of the included
information. Silicon Labs shall have no liability for the consequences of use of the information supplied herein. This document does not imply or express copyright licenses granted
hereunder to design or fabricate any integrated circuits. The products are not designed or authorized to be used within any Life Support System without the specific written consent of
Silicon Labs. A "Life Support System" is any product or system intended to support or sustain life and/or health, which, if it fails, can be reasonably expected to result in significant personal
injury or death. Silicon Labs products are not designed or authorized for military applications. Silicon Labs products shall under no circumstances be used in weapons of mass
destruction including (but not limited to) nuclear, biological or chemical weapons, or missiles capable of delivering such weapons.
Trademark Information
Silicon Laboratories Inc.® , Silicon Laboratories®, Silicon Labs®, SiLabs® and the Silicon Labs logo®, Bluegiga®, Bluegiga Logo®, Clockbuilder®, CMEMS®, DSPLL®, EFM®, EFM32®,
EFR, Ember®, Energy Micro, Energy Micro logo and combinations thereof, "the world’s most energy friendly microcontrollers", Ember®, EZLink®, EZRadio®, EZRadioPRO®,
Gecko®, ISOmodem®, Micrium, Precision32®, ProSLIC®, Simplicity Studio®, SiPHY®, Telegesis, the Telegesis Logo®, USBXpress®, Zentri and others are trademarks or registered
trademarks of Silicon Labs. ARM, CORTEX, Cortex-M3 and THUMB are trademarks or registered trademarks of ARM Holdings. Keil is a registered trademark of ARM Limited. All
other products or brand names mentioned herein are trademarks of their respective holders.
Silicon Laboratories Inc.
400 West Cesar Chavez
Austin, TX 78701
USA
SW/HW
www.silabs.com/simplicity
Quality
www.silabs.com/quality
Support and Community
community.silabs.com
http://www.silabs.com
 Loading...