

Page 1
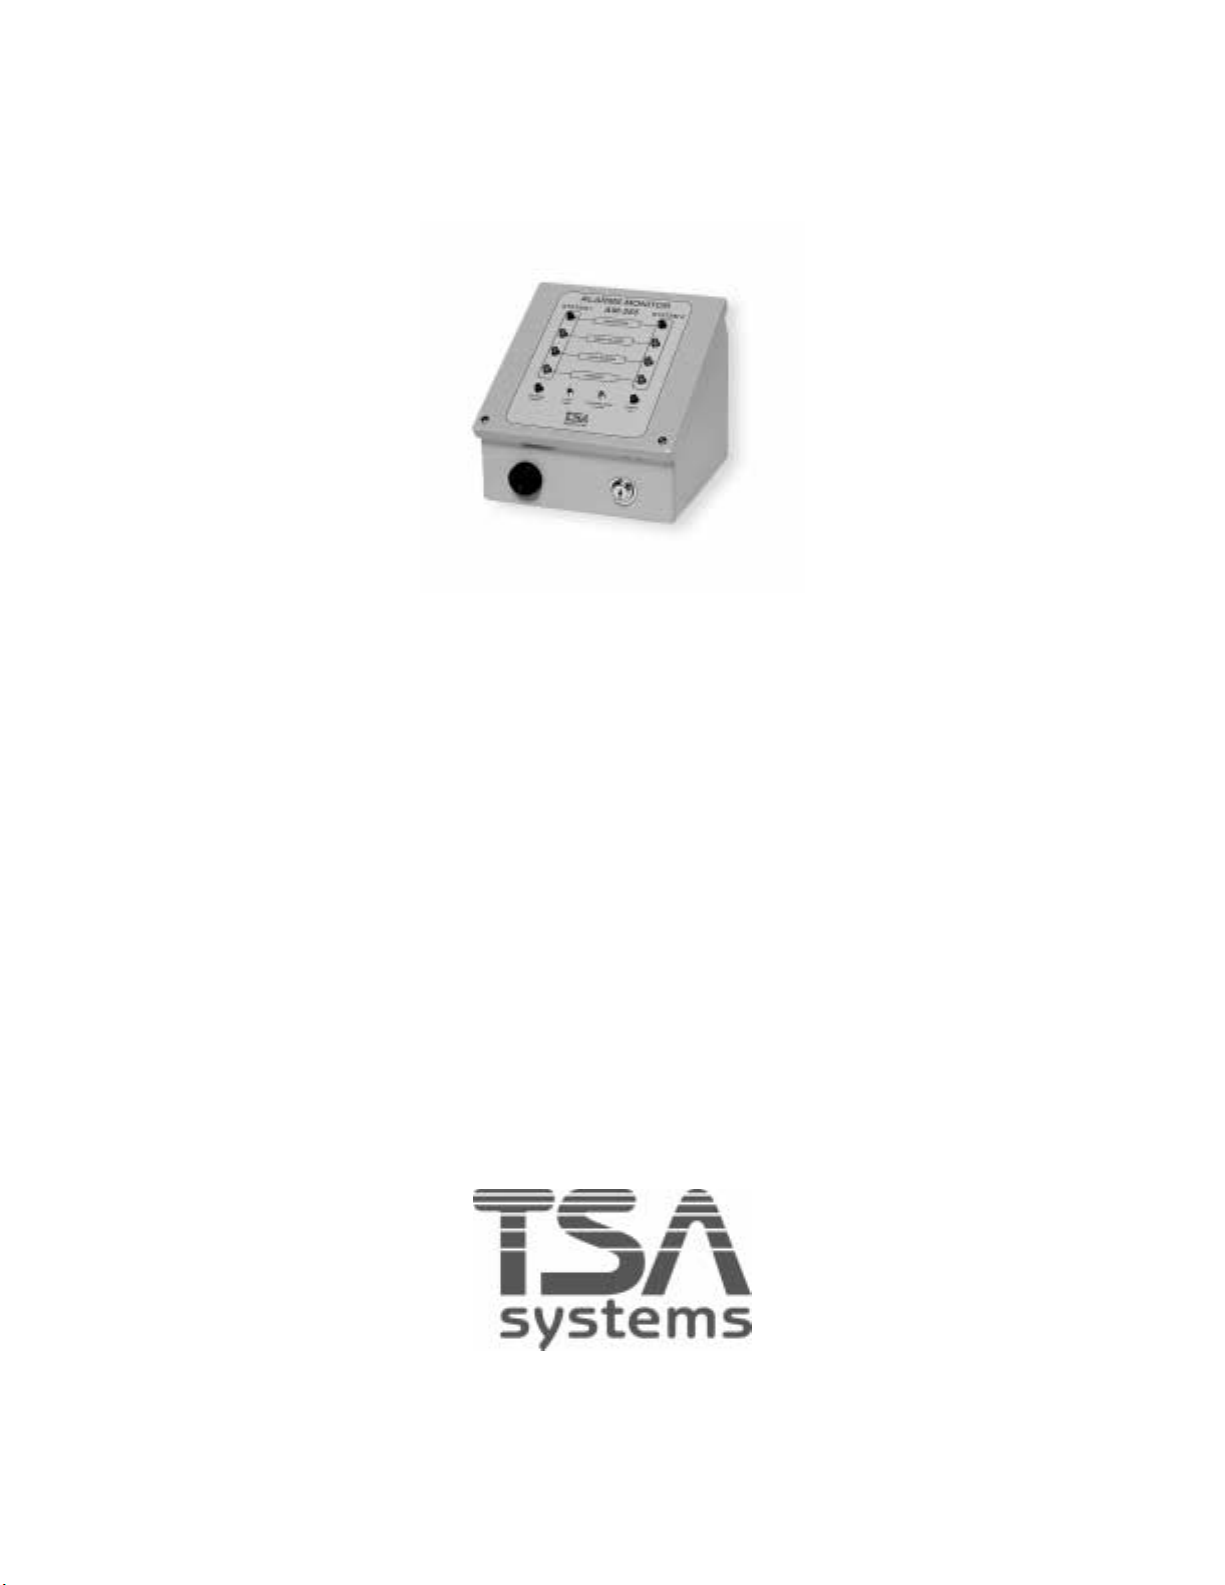
ALARM MONITOR
MODEL AM-255
OPERATING AND SERVICE MANUAL
Version 1.01z
December 20,2004
Page 2

AM-255
TABLE OF CONTENTS
1. INTRODUCTION.....................................................................................................................1
1.1. SCOPE AND PURPOSE OF MANUAL....................................................................1
1.2. GENERAL DESCRIPTION.......................................................................................1
1.3. SAFETY PRECAUTIONS.........................................................................................1
1.4. SPECIFICATIONS.....................................................................................................2
2. INSPECTION AND SETUP ....................................................................................................3
2.1. INSPECTION..............................................................................................................3
2.2. SET-UP PROCEDURES ............................................................................................4
2.3. WIRING INSTRUCTIONS........................................................................................5
2.4. INITIAL SETUP CHECKLIST..................................................................................8
3. OPERATING INSTRUCTIONS.............................................................................................9
3.1. CONTROLS AND INDICATORS.............................................................................9
3.2. SUMMARY OF ALARM INDICATIONS..............................................................10
3.3. OPERATION............................................................................................................11
4. THEORY OF OPERATION..................................................................................................12
4.1. UNIT OPERATION..................................................................................................12
4.2. COMPONENTS........................................................................................................ 13
5. MAINTENANCE....................................................................................................................14
5.1. MAINTENANCE PROCEDURES ..........................................................................14
5.2. PERFORMANCE VERIFICATION CHECKLIST .................................................15
6. TROUBLESHOOTING .........................................................................................................16
6.1. COMPONENT ACCESS..........................................................................................16
6.2. TROUBLESHOOTING GUIDE ..............................................................................17
6.3. TROUBLESHOOTING............................................................................................18
Page 3

APPENDIX..................................................................................................................................19
A. WARRANTY..........................................................................................................................19
B. GLOSSARY............................................................................................................................20
C. FORMULAS...........................................................................................................................22
C.1. ACTIVITY FROM COUNTS..................................................................................22
C.2. EFFICIENCY...........................................................................................................22
C.3. N*SIGMA ALARM LEVEL ...................................................................................22
C.4. RELIABLE DETECTABLE ACTIVITY (RDA) FORMULA................................23
C.5. SIGNAL TO BACKGROUND RATIO...................................................................23
C.6. VARIANCE..............................................................................................................24
D. CONFIGURATION TRACKING SHEET..........................................................................25
E. PARTS.....................................................................................................................................26
E.1. RECOMMENDED SPARE PARTS........................................................................26
E.2. SPARE PARTS ORDERING INFORMATION......................................................26
F. DRAWINGS............................................................................................................................27
Page 4

1. INTRODUCTION page 1
1. INTRODUCTION
1.1. SCOPE AND PURPOSE OF MANUAL
This manual is designed to enable operating and service personnel to properly operate and care
for the AM-255. Since applications are necessarily site-specific, operation procedures are given
in general terms. Service and repair are covered to the board level. Anything more complex
than this requires that the instrument or assembly be returned to TSA.
1.2. GENERAL DESCRIPTION
The TSA Model AM-255 Alarm Monitor is a self-contained unit designed for use with TSA’s
personnel and vehicle portal monitors. The AM-255 provides both audible and visual alarm
indication for radiation level, high and low background, low power and tamper conditions. In
addition, output relays are provided to integrate the AM-255 into existing alarm systems.
The AM-255 is a dual input instrument, which will monitor two sets of pillars, or two master
pillars. It has two complete sets of front panel lamps, as well as two input and two output
connectors. The two systems are totally independent.
1.3. SAFETY PRECAUTIONS
WARNINGS:
The AM-255 uses 90 to 250Vac for the battery charger. Service should only be performed by
qualified technical personnel.
The maximum voltage and current being switched by the relays must not exceed 0.6 amp
at 120Vac.
CAUTIONS:
As with any sensitive electronic instrument, the AM-255 should not be dropped or subjected to
severe mechanical shock.
Model AM-255
Page 5

1. INTRODUCTION page 2
1.4. SPECIFICATIONS
Display: 4 alarm indicator LEDs per pillar being monitored;
One systems ready LED, one power on LED
Power: Internal: 12 volt, 7Ah sealed lead-acid battery pack
Relay Power: Maximum 0.6 amp at 120Vac
Battery life: More than 24 hours of normal operation
Controls: Momentary contact alarm acknowledge switch, key lock switch,
and lamp test switch
Connectors:
Input: One 4 pin, quick connect type terminal strip per system
Output: One 12 pin, quick connect type terminal strip per system
Dimensions: 7.5"h x 8.375"w x 8"d (19 x 21.3 x 20.3cm)
Weight: ≈15lb (6.8kg)
Environmental:
Temperature: 32˚ to 120˚F (0˚ to 50˚C)
Humidity: Up to 95% non-condensing
Model AM-255
Page 6

2. INSPECTION AND SET-UP page 3
2. INSPECTION AND SETUP
The following procedures should allow on-site personnel to correctly install and set up the
AM-255 for normal operation. Follow the procedures in the order given. It is recommended that
a copy of the Initial Installation Set-Up Checklist (section 2.4.). be filled out after initial
installation and whenever the AM-255 is put into service after prolonged storage.
If necessary, consult TSA Systems for assistance in case of unusual site conditions or special
requirements.
2.1. INSPECTION
2.1.1. Incoming Inspection:
Immediately inspect the instrument for mechanical damage, scratches, dents or other defects. It
should be examined for evidence of concealed, as well as external damage.
2.1.2. Damage Claims;
If the instrument is damaged in transit or fails to meet specifications upon receipt, notify the
carrier and TSA Systems immediately. Shipping cartons, packing materials, waybills and other
such documentation should be preserved for the carrier’s inspection. TSA will assist in
providing replacement or repair of the instrument if necessary.
2.1.3. Storage;
If the instrument is to be stored for any length of time, first disconnect power to the instrument
and remove and store any batteries separately in a cool place. If batteries are to be stored for
any length of time, they should be inspected and charged if necessary at least once a month.
Care should always be taken to avoid subjecting the instrument to severe mechanical or
environmental shock. The instrument should be stored in a dry, temperature constant location.
Model AM-255
Page 7

2. INSPECTION AND SET-UP page 4
2.1.4. Shipping:
Before returning the instrument for any reason, notify TSA Systems of the difficulty
encountered, giving the model and serial numbers of the equipment. TSA will furnish specific
shipping instructions.
2.2. SET-UP PROCEDURES
An Initial Setup Checklist is included at the end of this section. It is recommended that a copy
of this be filled out when the AM-255 is first installed, and whenever it is put into service after
prolonged storage.
Input and output connections are located on the AM-255 board. There are two 5 pin terminal
strips for alarm input connections from the portal Monitors. There are also two 12 pin terminal
strips to provide connections to an external alarm system.
To install the AM-255, use the following procedure.
NOTE: Due to varying site requirements, the cable between the AM-255 and the system to be
monitored is not shipped with the AM-255. Any commercial quality, five conductor, 22 ga,
signal cable may be used.
2.2.1. Connect the Cables:
Connect the cables from the portal monitor to the alarm input connections. Information
on portal monitor alarm connections can be found in the Operating and Service Manual for that
monitor. Next loosen the two screws at the bottom corners of the front panel and open the panel.
2.2.2. Connect the Alarm Output Cables:
Connect the alarm output cables as required. The AM-255 will operate properly with or without
these connected.
Model AM-255
Page 8

2. INSPECTION AND SET-UP page 5
2.2.3. Connect the Positive Battery Cable:
The positive battery cable is disconnected for shipping, and must be connected to the positive
battery terminal.
2.2.4. Power:
Plug the power cord into a standard 90 to 250Vac outlet.
2.2.5. Toggle Power Switch:
There is a toggle power switch on the circuit board. This switch must be turned on (away from
the connector edge of the board). The green power LED on the front panel will be illuminated
to indicate that the battery is charged and connected, and the power switch is in the on position.
2.2.6. Jumper:
There is a jumper on the AM-255 board to select blinking or steady alarm lamps. The board will
be jumped for blinking when the unit is shipped. If steady lamps are preferred, move the jumper
to the steady position.
2.3. WIRING INSTRUCTIONS
Four strain reliefs are provided in the back panel of the enclosure to accommodate The cables
from the portal system(s) and the relay outputs to the site’s alarm system. Remove the cap by
unscrewing it, remove the plastic washer and rubber weather seal. Feed the cables through the
nut, washer, seal, and into the enclosure.
NOTE: There is a nylon tool for the terminal strips supplied with the AM-255. It is shipped on
the key ring along with the keys for the key switch.
Model AM-255
Page 9

2. INSPECTION AND SET-UP page 6
Connect the wires to the appropriate connections on the terminal strips. The following tables
outline the connections.
SYSTEM #1
INPUT SIGNALS RELAY OUTPUTS
Signal Terminal Strip, Pin Signal Terminal Strip, Pin
Radiation Alarm J3-1 Radiation, C J4-1
High Background J3-2 Radiation, NC J4-2
Low Background J3-3 Radiation, NO J4-3
Tamper J3-4* High Background, C J4-4
Common J3-5 High Background, NC J4-5
High Background, NO J4-6
Low Background, C J4-7
Low Background, NC J4-8
Low Background, NO J4-9
Tamper, C J4-10
Tamper, NC J4-11
Tamper, NO J4-12
Model AM-255
Page 10

2. INSPECTION AND SET-UP page 7
SYSTEM #2
INPUT SIGNALS RELAY OUTPUTS
Signal Terminal Strip, Pin Signal Terminal Strip, Pin
Radiation Alarm J5-1 Radiation, C J2-1
High Background J5-2 Radiation, NC J2-2
Low Background J5-3 Radiation, NO J2-3
Tamper J5-4* High Background, C J2-4
Common J5-5 High Background, NC J2-5
High Background, NO J2-6
Low Background, C J2-7
Low Background, NC J2-8
Low Background, NO J2-9
Tamper, C J2-10
Tamper, NC J2-11
Tamper, NO J2-12
NOTE: If the tamper input is not used, it must be jumped to the common terminal to prevent
constant tamper alarms.
Model AM-255
Page 11

2. INSPECTION AND SET-UP page 8
2.4. INITIAL SETUP CHECKLIST
___ Initial inspection done
___ Cabling properly connected
___ AC power available
___ READY and POWER lamps go on when unit is plugged in
___ ACKNOWLEDGE button operates correctly
___ TEST function operates properly
___ Alarm test
___ All indicator lamps operate properly
___ Sonalert sounds when alarm indicated
___ Relays setup and operate correctly (if used)
Performed by: ___________________________ Date: _____________
Model AM-255
Page 12

3. OPERATING INSTRUCTIONS page 9
3. OPERATING INSTRUCTIONS
3.1. CONTROLS AND INDICATORS
The controls and indicators can be made to operate in several different ways. How they operate
is controlled by the software installed.
The front panel contains the power LED, ready LED, alarm indicator LEDs, and the
acknowledge switch. The power LED is on whenever the system has power. The ready LED
shows that the system is clear of alarms and working properly. The alarm indicator LEDs blink
when enabled, and indicate the following conditions:
Tamper:
Amber lamp indicates either a fault in the cable between the AM-255 and the
portal monitor, or the tamper switch(s) in the pillar are activated. The tamper
indication is also used to indicate a low battery condition when the AM-255 is
used with TSA’s Personnel/Vehicle Monitors.
High Background Alarm:
When the radiation level exceeds the high alarm level that has been programmed
into the system, the high background alarm is indicated.
Radiation Alarm:
When the system detects that the radiation level has exceeded the alarm threshold
while the portal is occupied, the red radiation alarm lamp will illuminate and the
audible alarm will sound.
Low Background Alarm:
The low background alarm indicates that the background counts are below the
low background setting in the system. This could be caused by a detector failure
or by shielding the pillar.
Model AM-255
Page 13

Acknowledge:
This is a momentary contact pushbutton switch which clears the audio and visual
indication of alarm conditions.
Key Switch:
The key switch is used to clear alarm lamps or test relays during maintenance.
Test:
A momentary contact pushbutton switch used to test the lamps, LEDs, and
Relays.
Sonalert:
The Sonalert provides audible alarm.
3. OPERATING INSTRUCTIONS page 10
3.2. SUMMARY OF ALARM INDICATIONS
SUMMARY OF ALARM INDICATIONS
High background alarm flashing amber and audible
Low background alarm flashing amber and audible
RAD alarm flashing red and audible
Tamper alarm flashing amber and audible
Power fail
power indicator off
The AM-255 provides
both audible and visual
alarm indications for
radiation alarms, low
and high background
alarms, and tamper
conditions.
NOTE:
Power failure indicator is for the remote alarm console only. If power fails in the pillar and the
battery reaches a low condition, the low alarm indicator will come on.. Personnel/vehicle
monitor’s low battery levels are signaled by the tamper alarm.
Model AM-255
Page 14

3. OPERATING INSTRUCTIONS page 11
3.3. OPERATION
During normal operation no operator intervention is needed. If an alarm condition is indicated,
the AM-255 will sound an audible alarm and the panel lamps will indicate the nature of the
alarm so that proper action may be taken.
Pressing the test button will cause all the alarm lamps to flash, the ready LED to illuminate and
the audio alarm to sound. If the key switch is in the normal position, it will energize the relays.
Model AM-255
Page 15

4. THEORY OF OPERATION page 12
4. THEORY OF OPERATION
The alarm monitor model AM-255 is a battery powered, remote monitor unit used with TSA’s
pedestrian and vehicle portal monitors. The AM-255 provides both audible and visual alarm
indications for radiation alarms, low and high background alarms, and tamper conditions.
Parallel relay outputs are provided to permit interfacing with existing alarm systems.
Please reference the wiring/signal flow diagram drawings package provided with the instrument
as they are noted in this manual. The Drawings list can be found in the APPENDIX F. Drawings
section in this manual.
4.1. UNIT OPERATION
The relays in the portal monitor are continuously monitored by the AM-255. Whenever the
relays change state, the AM-255 reads the change and turns on the correct lamp and relay, and
sounds the audio alarm. The alarm will follow the system. The green ready LED will go out
when the alarm condition occurs, and re-illuminate when the alarm condition clears.
NOTE:
Multiple alarms can occur and more than one alarm lamp be illuminated simultaneously.
The monitor operates from the 12 volt, lead acid battery. If ac power is lost, the battery provides
power to permit continued operation without interruption. Should the battery get too low for
reliable operation (approximately 10.5 volts), the monitor will turn itself off. Normal operation
will resume when the battery has been recharged to approximately 12.5 volts.
Model AM-255
Page 16

4. THEORY OF OPERATION page 13
4.2. COMPONENTS
4.2.1. AM-255 Board:
The AM-255 Board is the controller board for the system. It receives information from the
system, and enables the appropriate lamps, relays, and the Sonalert. All functions of the
AM-255 board are controlled by a Programmable Logic Device.
There is also a battery monitoring circuit on the board. If the battery voltage drops below 10.5
Vdc the load disconnect will turn off the system power. When the battery voltage rises to 12.5
Vdc the load disconnect will automatically reconnect the power to the system.
4.2.2. Battery Module:
The battery module consists of a 7A/h, 12 volt sealed lead-acid battery.
4.2.3. Battery Charger:
The battery charger is a universal input, constant voltage output type designed to maintain a full
charge on the battery.
Model AM-255
Page 17

5. MAINTENANCE page 14
5. MAINTENANCE
5.1. MAINTENANCE PROCEDURES
The AM-255 has been designed for continuous use, and once initial installation has been
completed, little maintenance is required. Periodic inspection is recommended to insure proper
functioning. This should include (but is not limited to):
- checking the alarm lamps and Sonalert with the TEST switch
- performing an alarm test, High, Radiation, Low, Tamper
- visual inspection for loose cables, wires, etc.
It is recommended that a copy of the Performance Verification Checklist (section 5.2.) be filled
out whenever the AM-255 is put into service after repair or prolonged storage.
Model AM-255
Page 18

5. MAINTENANCE page 15
5.2. PERFORMANCE VERIFICATION CHECKLIST
___ Repairs made (if any): list component and type of repair:
______________________________________________________________________________
______________________________________________________________________________
______________________________________________________________________________
______________________________________________________________________________
______________________________________________________________________________
___ Cabling properly connected.
___ AC power available.
___ READY and POWER lamp go on when unit is plugged in.
___ ACKNOWLEDGE button operates correctly.
___ TEST function operates properly.
___ Alarm test.
___ All indicator lamps operate properly.
___ Sonalert sounds when radiation alarm indicated.
___ Relay’s set up and operate correctly (if used).
Performed by: _______________________ Date: ______________
Model AM-255
Page 19

6. TROUBLESHOOTING page 16
6. TROUBLESHOOTING
This guide is designed so that on-site personnel can service the AM-255 and effect necessary
minor repairs. It covers procedures and parts down to the board level. Any other problems
should be referred to factory authorized service personnel. Unauthorized repair voids warranty.
When repairs are completed and the unit returned to operation, a copy of the Performance
Verification Checklist (section 5.2.) should be filled out and filed for future reference.
6.1. COMPONENT ACCESS
6.1.1. AM-255 Controller Board:
The AM-255 Controller board is mounted on standoffs inside the lid of the enclosure. To access
it, open the front panel by removing the two screws holding it in place. Unplug the twelve pin
Molex connector, and disconnect the wires to the terminal stripes. Remove the four phillips
screws holding the AM-255 board, and lift the board out. To reinstall, replace the board on the
standoffs using the four phillips screws, reconnect the wires, and Molex connector. Close the
front panel and replace the two screws.
6.1.2. Battery:
There is a metal bracket that retains the battery and charger. Remove the two screws from the
bracket and remove it. The battery charger is mounted to the Battery with two velcro strips.
Detach the battery charger from the battery by pulling it to unhook the velcro. Unplug the wires
going to the battery and pull it off the velcro strips that hold it to the enclosure.
Model AM-255
Page 20

6. TROUBLESHOOTING page 17
6.1.3. Battery Charger:
The Battery Charger is wired directly into Molex connector to the AM-255 board. To disconnect,
the Molex pins must be removed from the housing by inserting a small screwdriver or sharp
pointed object into the slots in the housing and pressing down, while pulling gently on the wire.
The ac input plugs into the charger with a standard IEC connector. To reinstall the battery
charger insert the pins into the Molex housing, and reconnect the ac input to the IEC connector.
6.1.4. Lamps:
The Lamps are soldered to the circuit board.
6.2. TROUBLESHOOTING GUIDE
NOTE:
Some steps will require tools, supplies, DMM, and possibly an oscilloscope. These steps
should only be performed by qualified service personnel.
Perform a physical inspection of the unit, looking for faulty or broken wiring, foreign material,
broken or damaged components, and loose connections. Proceed by checking the individual
assemblies as follows:
6.2.1. Battery and Charger:
If the unit is not operating at all and the green power LED is off, use the following steps to
check the battery and charger. Refer to Drawing 3. "Controller Board" (Appendix F.)
Open the front panel and disconnect the positive lead to the battery. Measure the voltage across
the battery with a meter; it should be at least 12.4 volts. If the voltage is low or not present then
the battery must be charged or replaced.
NOTE:
Do not go to step 2 until the battery voltage is 12.4 or greater.
Model AM-255
Page 21

6. TROUBLESHOOTING page 18
To check the charger, disconnect the positive terminal from the battery and J1 from the AM-255
circuit board. Measure the voltage from between the black and red battery wires. It should be at
least 13.5 volts. If it is not then the charger must be replaced.
NOTE:
Do not go on to the next step until the charger is working correctly. Battery voltage must be at
least 12.5 Vdc for the unit to turn on.
6.3. TROUBLESHOOTING
If the unit is totally inoperative, verify that the unit is receiving power throughout the system.
Refer to "Controller Board" Drawing 3 (Appendix F.) for the following procedure.
6.3.1. AM-255 Controller Board:
If the unit has power but still does not operate, test the power to the controller board. Connect
the negative lead of the DVM to TP1 and the positive lead to TP2. The power should be
5 ±0.1 Vdc.
Model AM-255
Page 22

APPENDIX A. WARRANTY page19
APPENDIX
A. WARRANTY
STANDARD WARRANTY FOR TSA SYSTEMS INSTRUMENTS
TSA Systems, Ltd., warrants this instrument to be free from defects in workmanship and
materials for a period of twelve months from the date of shipment, provided that the equipment
has been used in a proper manner and not subjected to abuse. At TSA’s option, repairs or
replacements will be made on in-warranty instruments without charge at the TSA factory.
Warranty of sub-systems made by other manufacturers will be extended to TSA customers only
to the extent of the manufacturer’s liability to TSA. TSA reserves the right to modify the design
of its product without incurring responsibility for modification of previously manufactured
units. Since installation conditions are beyond the company’s control, TSA does not assume
any risks or liabilities associated with methods of installation or with installation results.
Every effort is made to keep the manuals up to date and accurate. However, because TSA
Systems is constantly improving and upgrading the product line, TSA can make no guarantee as
to the content of current manuals. No obligations are assumed for notice of change or future
manufacture of these instruments.
Manufactured by
TSA SYSTEMS, LTD.
14320 LONGS PEAK COURT
LONGMONT, COLORADO 80504
970.535.9949
FAX: 800.508.0083
Model AM-255
Page 23

APPENDIX B. GLOSSARY page20
B. GLOSSARY
ADC: Analog to Digital Converter, is an integrated circuit that converts an analog signal into a
binary number that can be used by the microprocessor.
CPS or cps: Counts Per Second
High Background Alarm/Fault: The condition that occurs if the counts exceed the
programmed high background level. This condition prevents further operation until the problem
is corrected. Normally set in cps.
LLD: The Lower Level Discriminator provides a threshold, usually adjustable, that determines
the lowest signal level that will be accepted as a nuclear pulse by the system’s electronics. Some
systems have both upper and lower level discriminators that can be used to set a discriminator
window. The discriminator window can be used to effectively reduce the background counts,
and increase system sensitivity to certain isotopes. Also see ULD.
Low Background Alarm/Fault: The condition that occurs if the counts fall below the
programmed high background level. This condition prevents further operation until the problem
is corrected. Normally set in cps.
POST: Power On Self Test
Model AM-255
Page 24

APPENDIX B. GLOSSARY page21
Rolling Background: This is the background accumulation method used in most of TSA’s
instruments. Background accumulation is done in ten separate buffers, each buffer represents
1/10 of the total background time. As each buffer is filled, the background is updated. This
results in a background update at background time/10. Initial background accumulation requires
the full background time.
Standard Background: Standard background requires the full background time for the initial
background and updates.
ULD: The Upper Level Discriminator provides a threshold, usually adjustable, that determines
the highest signal level that will be accepted as a nuclear pulse by the system’s electronics. Also
see LLD.
Model AM-255
Page 25

APPENDIX C. FORMULAS page22
C. FORMULAS
The following formulas are used in various systems manufactured by TSA Systems, Ltd. They
are provided to assist in verifying system operation and to give our customers a better
understanding of how the systems operate
C.1. ACTIVITY FROM COUNTS
Where:
Activity = Activity in nCi
Eff = Decimal efficiency (i.e. 10% = 0.1.)
N = Net counts per second (cps – background cps)
C.2. EFFICIENCY
N = cps with source – background cps
Where:
activity = test source activity in nCi
C.3. N*SIGMA ALARM LEVEL
This formula calculates the minimum activity, in disintegrations per minute, that can be reliably
detected under a given set of operational conditions.
Where:
bkg = Background counts
Sigma = 1bkg
N = N*Sigma value
Model AM-255
Page 26

APPENDIX C. FORMULAS page23
C.4. RELIABLE DETECTABLE ACTIVITY (RDA) FORMULA
This formula calculates the minimum activity, in disintegrations per minute, that can be reliably
detected under a given set of operational conditions.
BKG = total background counts
per count time
CON = confidence sigma
CT = count time in seconds
E = system efficiency in percent
F = false alarm level in cps
FA = false alarm sigma
G = intermediate variance
RDA = reliable detectable activity
in DPM
C.5. SIGNAL TO BACKGROUND RATIO
The following formula is helpful is determining the optimum discriminator settings. Always
perform a variance test at the final setting of the lower-level discriminator to ensure that system
noise is not being introduced into the amplifier stage.
Q = Quality factor
S = Net signal (count with source - background)
Where:
B = Background count
Higher values of Q result in better sensitivity
B = Background count
Model AM-255
Page 27

APPENDIX C. FORMULAS page24
C.6. VARIANCE
The variance analyzer mode is used to check whether the counts seen by the controller are
actually from the proper distribution. If the distribution approaches normal, the resulting number
will approach 0. Any significant deviation from the normal distribution will result in a larger
number.
The two most common problems resulting in variance failure are light leaks in the detectors, and
periodic noise in the electronics. Periodic noise will result in a number of about 1, a light leak
will usually result in a number larger than 2. The number displayed during a variance test is the
absolute value of the average of a number of these tests, with one test being performed every
nn seconds. The data is valid after three iterations of nn seconds. The pass/fail criteria varies
from unit to unit and is included in the variance section of the manual on most units.
R = the quality factor
C = each of the individual counts
Where:
N = number of counts taken
_
R = mean variance
I = number of iterations
Model AM-255
Page 28

APPENDIX D. CONFIGURATION TRACKING SHEET page25
D. CONFIGURATION TRACKING SHEET
TSA MODEL NUMBER:______________ SERIAL NUMBER:________________
SOFTWARE VERSION:_______________ DATE RECEIVED:________________
OPTIONS AND ACCESSORIES:_______________________________________________
___________________________________________________________________________
SYSTEM MODIFICATIONS
MODIFICATION:____________________________________________________________
___________________________________________________________________________
INSTALLED BY:________________________________ DATE:__________
MODIFICATION:____________________________________________________________
___________________________________________________________________________
INSTALLED BY:________________________________ DATE:__________
MODIFICATION:____________________________________________________________
___________________________________________________________________________
INSTALLED BY:________________________________ DATE:__________
MODIFICATION:____________________________________________________________
___________________________________________________________________________
INSTALLED BY:________________________________ DATE:__________
Model AM-255
Page 29

APPENDIX E. PARTS LISTS page26
E. PARTS
E.1. RECOMMENDED SPARE PARTS
A complete list of spare parts is available by contacting TSA Systems, Ltd.
E.2. SPARE PARTS ORDERING INFORMATION
To facilitate the processing of spare parts orders the following information is required.
- Product Number
- Product Serial Number
- TSA Stock number
- Part description (from parts list included with the instrument)
When ordering programmed proms, the software version is required. This can be
found on the prom label.
NOTE:
Model number suffixes are generally not included in the text of the manual, however, the
suffixes in the PARTS LISTS must be included on orders for spare parts.
For Assistance Call:
TSA SYSTEMS, LTD.
14320 LONGS PEAK COURT
LONGMONT,COLORADO 80504
970.535.9949
FAX: 800.508.0083
Model AM-255
Page 30

APPENDIX F. DRAWINGS page27
F. DRAWINGS
Please reference the drawings package provided with the instrument to view the following:
AM-255 Pictorial View ................................................................................................................. 1
AM-255 Pictorial View ................................................................................................................. 2
AM-255 Controller Board ............................................................................................................. 3
For Assistance Call:
TSA SYSTEMS, LTD.
14320 LONGS PEAK COURT
LONGMONT, COLORADO 80504
970.535.9949 • FAX: 800.508.0083
Model AM-255
 Loading...