

Page 1

Sprint Mobile Broadband
USB Modem
by Sierra Wireless
®
AirCard
595U
www .s prin t.co m
© 2007 Sprint Nextel. All rights reserved. No reproduction in whole or in
part without prior written approval. Sprint, the “Going Forward” logo,
and other trademarks are trademarks of Sprint Nextel.
Page 2

Table of Contents
Welcome to Sprint . . . . . . . . . . . . . . . . . . . . . . . . . . . . . . . . . . . . . . . . . . . . . . . . . . . . . . . . . . . i
Introduction . . . . . . . . . . . . . . . . . . . . . . . . . . . . . . . . . . . . . . . . . . . . . . . . . . . . . . . . . . . . . . . . .ii
Section 1: Basics of Your Sprint Mobile Broadband USB Modem . . . . . . . . . . . . . . . . . .1
1A. Introducing the Sprint Mobile Broadband USB Modem . . . . . . . . . . . . . . . . . . .3
Your Sprint Mobile Broadband USB Modem . . . . . . . . . . . . . . . . . . . . . . . . . . . . . . . . . 4
CDMA Networks . . . . . . . . . . . . . . . . . . . . . . . . . . . . . . . . . . . . . . . . . . . . . . . . . . . . . . . . . . . 4
Package Contents . . . . . . . . . . . . . . . . . . . . . . . . . . . . . . . . . . . . . . . . . . . . . . . . . . . . . . . . . . 6
About This Guide . . . . . . . . . . . . . . . . . . . . . . . . . . . . . . . . . . . . . . . . . . . . . . . . . . . . . . . . . . . 6
1B. Getting Started With Your Sprint Mobile Broadband USB Modem . . . . . . . . .7
Getting Started . . . . . . . . . . . . . . . . . . . . . . . . . . . . . . . . . . . . . . . . . . . . . . . . . . . . . . . . . . . . 8
System Requirements . . . . . . . . . . . . . . . . . . . . . . . . . . . . . . . . . . . . . . . . . . . . . . . . . . . . . . 8
The Sprint Mobile Broadband USB Modem Software . . . . . . . . . . . . . . . . . . . . . . . 10
Care and Maintenance . . . . . . . . . . . . . . . . . . . . . . . . . . . . . . . . . . . . . . . . . . . . . . . . . . . . 10
Section 2: Installing the Sprint Mobile Broadband USB Modem . . . . . . . . . . . . . . . . . .13
2A. Installing the Software . . . . . . . . . . . . . . . . . . . . . . . . . . . . . . . . . . . . . . . . . . . . . .15
Getting Started . . . . . . . . . . . . . . . . . . . . . . . . . . . . . . . . . . . . . . . . . . . . . . . . . . . . . . . . . . . 16
2B. Inserting and Removing the Sprint Mobile Broadband USB Modem . . . . . . .19
Inserting the Sprint Mobile Broadband USB Modem . . . . . . . . . . . . . . . . . . . . . . . . 20
Removing the Sprint Mobile Broadband USB Modem . . . . . . . . . . . . . . . . . . . . . . . 20
2C. Setting Up Service . . . . . . . . . . . . . . . . . . . . . . . . . . . . . . . . . . . . . . . . . . . . . . . . . .21
Activating and Using Sprint Service . . . . . . . . . . . . . . . . . . . . . . . . . . . . . . . . . . . . . . . . 22
Preactivated Device . . . . . . . . . . . . . . . . . . . . . . . . . . . . . . . . . . . . . . . . . . . . . . . . . . . . . . . 22
Non-preactivated Device: Activation Wizard . . . . . . . . . . . . . . . . . . . . . . . . . . . . . . . 23
Data Provisioning (IOTA) . . . . . . . . . . . . . . . . . . . . . . . . . . . . . . . . . . . . . . . . . . . . . . . . . . 25
2D. Getting Help . . . . . . . . . . . . . . . . . . . . . . . . . . . . . . . . . . . . . . . . . . . . . . . . . . . . . . .26
Visiting the Sprint Web Site . . . . . . . . . . . . . . . . . . . . . . . . . . . . . . . . . . . . . . . . . . . . . . . 27
Contacting Sprint Customer Service . . . . . . . . . . . . . . . . . . . . . . . . . . . . . . . . . . . . . . . 27
Troubleshooting . . . . . . . . . . . . . . . . . . . . . . . . . . . . . . . . . . . . . . . . . . . . . . . . . . . . . . . . . . 27
Page 3

Section 3: Using the Sprint Mobile Broadband USB Modem . . . . . . . . . . . . . . . . . . . . .29
3A. Your Sprint Mobile Broadband USB Modem: The Basics . . . . . . . . . . . . . . . . .31
Sprint Connection Manager . . . . . . . . . . . . . . . . . . . . . . . . . . . . . . . . . . . . . . . . . . . . . . . 32
Starting Sprint Connection Manager . . . . . . . . . . . . . . . . . . . . . . . . . . . . . . . . . . . . . . . 32
Starting Sprint Connection Manager Automatically . . . . . . . . . . . . . . . . . . . . . . . . 33
Sprint Connection Manager Window . . . . . . . . . . . . . . . . . . . . . . . . . . . . . . . . . . . . . . 33
Connection States . . . . . . . . . . . . . . . . . . . . . . . . . . . . . . . . . . . . . . . . . . . . . . . . . . . . . . . . . 35
System Tray Connection States . . . . . . . . . . . . . . . . . . . . . . . . . . . . . . . . . . . . . . . . . . . . 39
Determining the Type of Coverage . . . . . . . . . . . . . . . . . . . . . . . . . . . . . . . . . . . . . . . . . 40
Location-Based Services . . . . . . . . . . . . . . . . . . . . . . . . . . . . . . . . . . . . . . . . . . . . . . . . . . . 40
Powering the Device On and Off . . . . . . . . . . . . . . . . . . . . . . . . . . . . . . . . . . . . . . . . . . . 42
Controlling the Sprint Connection Manager Window . . . . . . . . . . . . . . . . . . . . . . . 43
Launching a Sprint Power Vision or Sprint Vision Connection . . . . . . . . . . . . . . . 45
Viewing the Amount of Data Transferred . . . . . . . . . . . . . . . . . . . . . . . . . . . . . . . . . . 48
Ending a Connection . . . . . . . . . . . . . . . . . . . . . . . . . . . . . . . . . . . . . . . . . . . . . . . . . . . . . . 49
Online Help . . . . . . . . . . . . . . . . . . . . . . . . . . . . . . . . . . . . . . . . . . . . . . . . . . . . . . . . . . . . . . . 49
Displaying Your Phone Number . . . . . . . . . . . . . . . . . . . . . . . . . . . . . . . . . . . . . . . . . . . . 50
Security . . . . . . . . . . . . . . . . . . . . . . . . . . . . . . . . . . . . . . . . . . . . . . . . . . . . . . . . . . . . . . . . . . . 50
Accessing Links . . . . . . . . . . . . . . . . . . . . . . . . . . . . . . . . . . . . . . . . . . . . . . . . . . . . . . . . . . . 53
Uninstalling the Sprint Connection Manager Software . . . . . . . . . . . . . . . . . . . . . 54
3B. Menu Options . . . . . . . . . . . . . . . . . . . . . . . . . . . . . . . . . . . . . . . . . . . . . . . . . . . . . .55
Sprint Connection Manager Menu . . . . . . . . . . . . . . . . . . . . . . . . . . . . . . . . . . . . . . . . . 56
System Tray Menu . . . . . . . . . . . . . . . . . . . . . . . . . . . . . . . . . . . . . . . . . . . . . . . . . . . . . . . . 58
3C. Changing the Settings of Sprint Connection Manager . . . . . . . . . . . . . . . . . . .59
Settings Window . . . . . . . . . . . . . . . . . . . . . . . . . . . . . . . . . . . . . . . . . . . . . . . . . . . . . . . .
General Settings . . . . . . . . . . . . . . . . . . . . . . . . . . . . . . . . . . . . . . . . . . . . . . . . . . . . . . . . . . 61
Sprint Vision Settings . . . . . . . . . . . . . . . . . . . . . . . . . . . . . . . . . . . . . . . . . . . . . . . . . . . . . 63
Sprint Location Services Settings . . . . . . . . . . . . . . . . . . . . . . . . . . . . . . . . . . . . . . . . . . . 66
3D. Tools . . . . . . . . . . . . . . . . . . . . . . . . . . . . . . . . . . . . . . . . . . . . . . . . . . . . . . . . . . . . . .69
Viewing the Connection History . . . . . . . . . . . . . . . . . . . . . . . . . . . . . . . . . . . . . . . . . . . 70
Viewing Alerts . . . . . . . . . . . . . . . . . . . . . . . . . . . . . . . . . . . . . . . . . . . . . . . . . . . . . . . . . . . . 71
Running Diagnostics . . . . . . . . . . . . . . . . . . . . . . . . . . . . . . . . . . . . . . . . . . . . . . . . . . . . . . 72
. . 60
Updating the Software . . . . . . . . . . . . . . . . . . . . . . . . . . . . . . . . . . . . . . . . . . . . . . . . . . . . 74
About Sprint Mobile Broadband . . . . . . . . . . . . . . . . . . . . . . . . . . . . . . . . . . . . . . . . . . . 75
Page 4

3E. Frequently Asked Questions . . . . . . . . . . . . . . . . . . . . . . . . . . . . . . . . . . . . . . . . . .76
What is Sprint Connection Manager? . . . . . . . . . . . . . . . . . . . . . . . . . . . . . . . . . . . . . . 77
If the connection is “always on,” am I always being billed? . . . . . . . . . . . . . . . . . . 77
How fast is the connection with Sprint Connection Manager? . . . . . . . . . . . . . . 77
Can I connect to a dial-up account like AOL or EarthLink? . . . . . . . . . . . . . . . . . . . 77
How do I get the location-enhanced Local Search feature? . . . . . . . . . . . . . . . . . . 77
Where do I find the location-enhanced Local Search feature? . . . . . . . . . . . . . . . 78
How do I use the location-enhanced Local Search feature? . . . . . . . . . . . . . . . . . 78
Where can I use GPS? . . . . . . . . . . . . . . . . . . . . . . . . . . . . . . . . . . . . . . . . . . . . . . . . . . . . . 78
Once I connect to the network, how do I access my corporate network
through a VPN? . . . . . . . . . . . . . . . . . . . . . . . . . . . . . . . . . . . . . . . . . . . . . . . . . . . . . . . . . . . 78
How can I optimize my settings to achieve the fastest speeds and
conserve data when accessing my corporate network? . . . . . . . . . . . . . . . . . . . . . 78
Why won’t my laptop go into hibernation mode when using my
Sprint Mobile Broadband USB Modem? . . . . . . . . . . . . . . . . . . . . . . . . . . . . . . . . . . . . 79
3F. Troubleshooting Tips . . . . . . . . . . . . . . . . . . . . . . . . . . . . . . . . . . . . . . . . . . . . . . . .80
Problems, Causes, and Solutions . . . . . . . . . . . . . . . . . . . . . . . . . . . . . . . . . . . . . . . . . . . 81
GO Button Is Unavailable . . . . . . . . . . . . . . . . . . . . . . . . . . . . . . . . . . . . . . . . . . . . . . . . . . 82
Searching for Service . . . . . . . . . . . . . . . . . . . . . . . . . . . . . . . . . . . . . . . . . . . . . . . . . . . . . . 82
Cannot Connect to the Network . . . . . . . . . . . . . . . . . . . . . . . . . . . . . . . . . . . . . . . . . . . 83
Power LED Goes Off and On, and Then Stays Red . . . . . . . . . . . . . . . . . . . . . . . . . . . 83
Location-Based Services Don't Seem To Be Available . . . . . . . . . . . . . . . . . . . . . . . . 84
Could Not Prepare Data Services . . . . . . . . . . . . . . . . . . . . . . . . . . . . . . . . . . . . . . . . . . . 84
Unable To Prepare Data Services . . . . . . . . . . . . . . . . . . . . . . . . . . . . . . . . . . . . . . . . . . . 84
Sprint Connection Manager Stops Working After Upgrading Windows . . . . . . 85
Section 4: Technical Specifications and Regulatory Information . . . . . . . . . . . . . . . . .87
4A. Technical Specifications . . . . . . . . . . . . . . . . . . . . . . . . . . . . . . . . . . . . . . . . . . . . .89
LED Operation . . . . . . . . . . . . . . . . . . . . . . . . . . . . . . . . . . . . . . . . . . . . . . . . . . . . . . . . . . . . 90
Radio Frequency and Electrical Specifications . . . . . . . . . . . . . . . . . . . . . . . . . . . . . . 91
Software Specifications . . . . . . . . . . . . . . . . . . . . . . . . . . . . . . . . . . . . . . . . . . . . . . . . . . . 92
Environmental Specifications . . . . . . . . . . . . . . . . . . . . . . . . . . . . . . . . . . . . . . . . . . . . . . 93
Mechanical Specifications . . . . . . . . . . . . . . . . . . . . . . . . . . . . . . . . . . . . . . . . . . . . . . . . . 93
4B. Regulatory Information . . . . . . . . . . . . . . . . . . . . . . . . . . . . . . . . . . . . . . . . . . . . . .94
Regulatory Notices . . . . . . . . . . . . . . . . . . . . . . . . . . . . . . . . . . . . . . . . . . . . . . . . . . . . . . . . 95
Page 5

Patents . . . . . . . . . . . . . . . . . . . . . . . . . . . . . . . . . . . . . . . . . . . . . . . . . . . . . . . . . . . . . . . . . . . 97
Trademarks . . . . . . . . . . . . . . . . . . . . . . . . . . . . . . . . . . . . . . . . . . . . . . . . . . . . . . . . . . . . . . . 98
Copyright . . . . . . . . . . . . . . . . . . . . . . . . . . . . . . . . . . . . . . . . . . . . . . . . . . . . . . . . . . . . . . . . . 98
Limitation of Liability . . . . . . . . . . . . . . . . . . . . . . . . . . . . . . . . . . . . . . . . . . . . . . . . . . . . . . 99
Additional Information and Updates . . . . . . . . . . . . . . . . . . . . . . . . . . . . . . . . . . . . . . . 99
Section 5: Safety Information and Terms & Conditions . . . . . . . . . . . . . . . . . . . . . . . 101
5A. Safety and Notices . . . . . . . . . . . . . . . . . . . . . . . . . . . . . . . . . . . . . . . . . . . . . . . . 103
Important Notice . . . . . . . . . . . . . . . . . . . . . . . . . . . . . . . . . . . . . . . . . . . . . . . . . . . . . . . .104
Safety and Hazards . . . . . . . . . . . . . . . . . . . . . . . . . . . . . . . . . . . . . . . . . . . . . . . . . . . . . .104
5B. Terms and Conditions . . . . . . . . . . . . . . . . . . . . . . . . . . . . . . . . . . . . . . . . . . . . . 105
Subscriber Agreement/General Terms and Conditions of Services . . . . . . . . .106
Section 6: Glossary and Index . . . . . . . . . . . . . . . . . . . . . . . . . . . . . . . . . . . . . . . . . . . . . . 123
6A. Glossary . . . . . . . . . . . . . . . . . . . . . . . . . . . . . . . . . . . . . . . . . . . . . . . . . . . . . . . . . 125
6B. Index . . . . . . . . . . . . . . . . . . . . . . . . . . . . . . . . . . . . . . . . . . . . . . . . . . . . . . . . . . . . 129
Page 6

Page 7

Welcome to Sprint
We are committed to bringing you the best wireless technology available, and we
built our network right from the start, so no matter where you are on the network,
all your services will work the same.
When it comes to mobile connectivity, the Sprint Mobile Broadband USB modem
offers more freedom than ever before. No wires, no cables, just access to your data
when you need it. The power of the Internet and company data is truly at your
fingertips.
This guide will familiarize you with our technology and with Sprint Connection
SM
Manager
Sprint Mobile Broadband USB modem through simple, easy-to-follow
instructions.
software with location-enhanced Local Search and your new
Welcome and thank you for choosing Sprint.
i
Page 8

Introduction
This User’s Guide introduces you to Sprint service and all the features of your new
wireless Sprint Mobile Broadband USB modem. It’s divided into six sections:
⽧ Section 1: Basics of Your Sprint Mobile Broadband USB Modem
⽧ Section 2: Installing the Sprint Mobile Broadband USB Modem
⽧ Section 3: Using the Sprint Mobile Broadband USB Modem
⽧ Section 4: Technical Specifications and Regulatory Information
⽧ Section 5: Safety Information and Terms & Conditions
⽧ Section 6: Glossary and Index
Throughout the guide, you’ll find tips that highlight special shortcuts and timely
reminders to help you make the most of your wireless USB modem and services.
The Table of Contents and Index will help you locate specific information quickly.
The Sprint Connection Manager software includes extensive online help to guide
you through the steps to use each feature.
You’ll get the most out of your new Sprint Mobile Broadband USB modem if you
read each section of this document. However, if you’d like to get right to a specific
feature, simply go to that page. Follow the instructions in that section and you’ll
be ready to use your device in no time.
Tip:
You can view this guide online or print it to keep on hand. If you’re viewing it online,
simply click a topic in the Table of Contents, a page number in the Index, or any page
or section reference. The PDF automatically displays the appropriate page.
ii
Page 9

Section 1
Basics of Your
Sprint Mobile Broadband USB Modem
Page 10

2
Page 11

Section 1A
Introducing the Sprint Mobile Broadband
USB Modem
In This Section
⽧ Your Sprint Mobile Broadband USB Modem
⽧ CDMA Networks
⽧ Package Contents
⽧ About This Guide
This section introduces the basic features and functions of your Sprint Mobile
Broadband USB modem, what is included with your device, and how to use this
guide to get you started.
Section 1A: Introducing the Sprint Mobile Broadband USB Modem 3
Page 12

Your Sprint Mobile Broadband USB Modem
The Sierra Wireless AirCard® 595U USB modem is a dual-band wireless USB
modem. It enhances the functionality of your mobile or desktop computing
devices by adding wireless data.
This device allows you to do the following (subject to feature availability), without
using a landline phone or network:
䢇 Connect to the Internet, VPN, and corporate networks
䢇 Send and receive large email messages
䢇 Use Location-Based Services (on Windows® only)
䢇 Conduct video-conferencing
䢇 Access streaming, real-time media
䢇 Play games online
Your Sprint Mobile Broadband USB modem fits into a USB slot (available on most
notebook and desktop PCs).
CDMA Networks
The Sprint Mobile Broadband USB modem operates over a type of wireless
network called CDMA (Code Division Multiple Access).
To use the Sprint Mobile Broadband USB modem, you need an account that gives
you access to the CDMA network. Some features described in this manual may not
be available with your account. For details of the services and accounts available,
contact Sprint (page 27).
There are CDMA networks that operate in the frequency bands supported by
the Sprint Mobile Broadband USB modem throughout North America and parts of
Latin America, Asia, and New Zealand. However, each service provider operates a
network that covers a limited geographical area within the overall CDMA coverage
area.
The fee for service may be higher when you are roaming (connecting to a network
other than Sprint).
Sprint has “roaming” agreements with other service providers, so that you can get
service outside of the coverage area of the network. (There may be additional
charges for roaming service.)
4 Section 1A: Introducing the Sprint Mobile Broadband USB Modem
Page 13

CDMA technology provides a variety of connectivity features, depending on your
Sprint account (actual speed depends on the network conditions):
䢇 1xEV-DO Rev. A (Sprint Power Vision
SM
) supports Internet connections with data
rates up to 3.1 Mbps (downlink from the network) and 1.8 Mbps (uplink to the
network). Average data rates are 450-800 kbps (downlink from the network)
and 300-400 kbps (uplink to the network).
䢇 1xEV-DO Rev. 0 (Sprint Power Vision) supports Internet connections with data
rates up to 2.4 Mbps (downlink from the network) and 153 kbps (uplink to the
network). Average data rates are 400-700 kbps (downlink from the network)
and 40-80 kbps (uplink to the network).
䢇 1X (Sprint Vision) supports Internet connections with data rates up to 153 kbps.
You can set Sprint Connection Manager to automatically establish a packet data
connection (Sprint Power Vision or Sprint Vision) when it starts.
You can also set Sprint Connection Manager so that, without running
Sprint Connection Manager, you can make a Sprint Power Vision or Sprint Vision
connection simply by starting whatever application you want to use (such as your
Web browser or email application).
If the packet data connection is lost, the connection is restarted automatically.
This provides an “always-on” network connection (as far as permitted by network
coverage). Once the connection is established, you can open your browser and
connect to any Web site that is accessible through the Internet, or access other
Internet services (such as email).
The connection is “active” when data transmission is occurring. If data
transmission stops for a period of time (determined by the network), the
connection becomes “dormant.” (See page 35.)
More information about CDMA networks is available on the CDMA Development
Tip:
Group Web site, www. cdg.or g
For pointers on optimizing your settings, see “How can I optimize my settings to
Tip:
achieve the fastest speeds and conserve data when accessing my corporate
network?” on page 78.
.
Section 1A: Introducing the Sprint Mobile Broadband USB Modem 5
Page 14

Package Contents
Your Sprint Mobile Broadband USB modem package contains the following
components:
䢇 Sprint Mobile Broadband USB modem by Sierra Wireless (Model AirCard 595U)
䢇 Rechargeable modem battery
䢇 Docking station with attached cable
䢇 Getting Started guide
䢇 Installation CD containing the Sprint Connection Manager software, warranty
information, and this document
About This Guide
This user's guide is designed to provide you with all the information you need to
install and use your Sprint Mobile Broadband USB modem by Sierra Wireless
(AirCard 595U).
Note:
The comprehensive Getting Started guide that comes with the
Sprint Mobile Broadband USB modem should be sufficient for most
installations.
䢇 Section 1 (which you are reading) gives you an overview of the Sprint Mobile
Broadband USB modem (AirCard 595U).
䢇 Section 2 provides step-by-step instructions for installing the Sprint Mobile
Broadband USB modem and Sprint Connection Manager software (page 13).
䢇 Section 3 provides step-by-step instructions on using the device (page 29).
䢇 Section 4 provides electrical, radio frequency, and other parameters of the
Sprint Mobile Broadband USB modem for those who require technical
information, as well as regulatory information (page 87).
䢇 Section 5 provides important safety and liability information and the Terms and
Conditions of use for the Sprint Mobile Broadband USB modem (page 101).
䢇 Section 6 include a glossary (page 125) and index (page 129).
6 Section 1A: Introducing the Sprint Mobile Broadband USB Modem
Page 15

Section 1B
Getting Started With Your Sprint Mobile Broadband
USB Modem
In This Section
⽧ Getting Started
⽧ System Requirements
⽧ The Sprint Mobile Broadband USB Modem Software
⽧ Care and Maintenance
This section describes the basics of getting started with your Sprint Mobile
Broadband USB modem, and how to look after your device.
Section 1B: Getting Started With Your Sprint Mobile Broadband USB Modem 7
Page 16

Getting Started
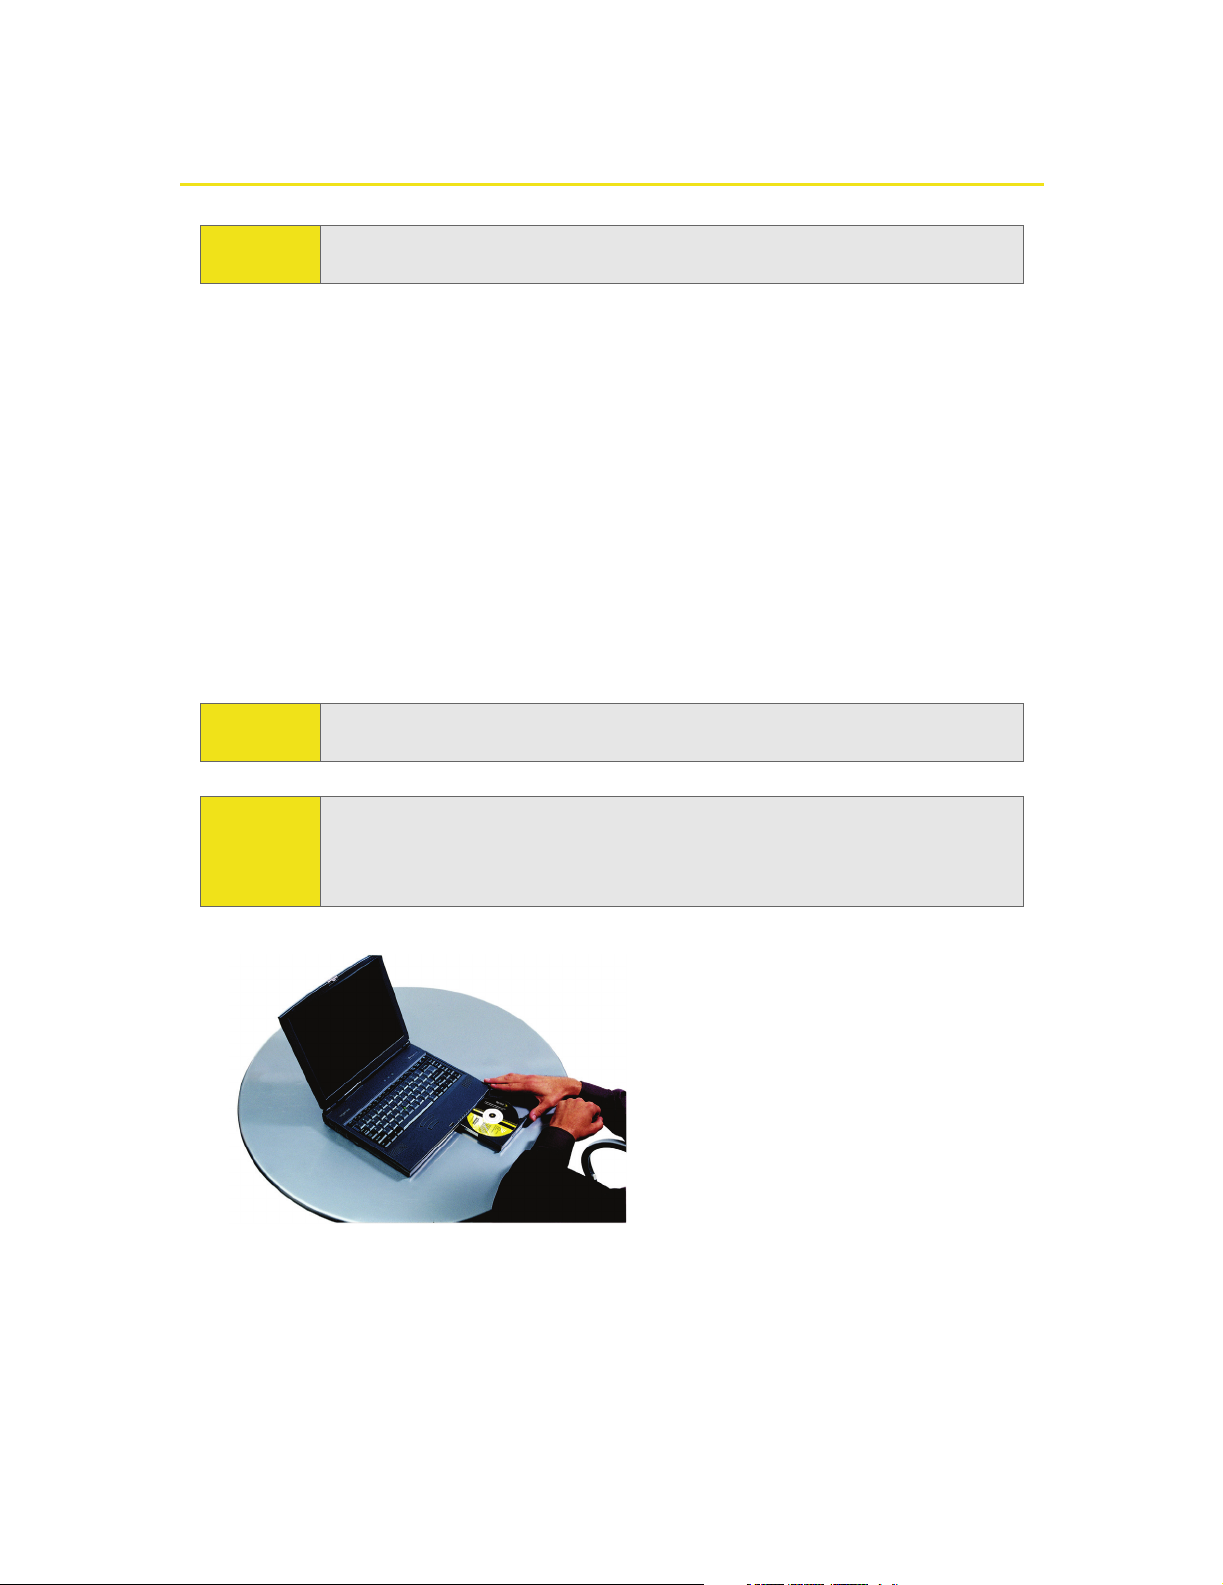
CAUTION:
Do not insert the Sprint Mobile Broadband USB modem into the USB
slot until you have installed and run the Sprint Connection Manager
software, and the software displays “No device.”
Before you begin using your Sprint Mobile Broadband USB modem, you must:
1. Check that your computer has the system requirements listed below (“System
Requirements”).
2. Install the Sprint Connection Manager software, located on the installation
CD, onto your PC. See page 16.
3. Start Sprint Connection Manager.
4. Insert the battery into the Sprint Mobile Broadband USB modem, and insert
the device into your computer; this installs the drivers for the device.
5. Charge the battery for approximately two hours.
6. Activate your Sprint account and configure the Sprint Mobile Broadband USB
modem to use your account (unless the device has been preactivated). See
page 22.
System Requirements
The Sprint Mobile Broadband USB modem is supported on:
䢇 Windows Vista.
䢇 Windows XP (Home and Professional versions).
䢇 Windows 2000 with Service Pack 1 or later (Service Pack 4 is recommended),
with high encryption support. (See “High Encryption Requirements” on page 9.)
䢇 Mac OS X (supported through the Watcher
TM
Lite software—available from the
Sierra Wireless Web site at www.sierra wireless.com/ support).
8 Section 1B: Getting Started With Your Sprint Mobile Broadband USB Modem
Page 17

To install and run the Sprint Mobile Broadband USB modem and accompanying
Sprint Connection Manager software, you will need the minimum system
resources shown in the following table.
USB slots One USB slot. (If your computer’s USB slot is vertical, use the
docking station. Do not use the Sprint Mobile Broadband USB
modem in a USB hub or in a USB slot on a keyboard.)
Optical drive CD-ROM
Memory 32 MB
Disk space 32 MB
High Encryption Requirements
Depending on your configuration, an IOTA (Internet Over The Air) session may
automatically start as part of the installation/activation process. IOTA requires
high-security 128-bit encryption to establish a secure Internet connection to the
CDMA network. (For more information, see “Data Provisioning [IOTA]” on
page 25.)
If you are running Windows Vista or Windows XP, your computer should already
include high-security 128-bit encryption.
If you are running Windows 2000 with Internet Explorer
1. Ensure you have installed the Windows 2000 High Encryption Pack: in Internet
Explorer, select Help > About Internet Explorer.
If you see “Cipher Strength: 128-bit,” then the High Encryption Pack is
installed. Proceed to step 2.
If the High Encryption Pack is not installed, download and install it
(www.micr osoft.com/windows2000/ downloads/r ecommended/ encryption).
2. If your version of Internet Explorer is earlier than 5.5, download and install the
latest version (www.microsoft.com/windows/ie/downloads
).
If you are running Windows 2000 with Netscape Communicator
Ensure your version of Netscape Communicator is 4.7 or higher.
To verify that your version supports 128-bit encryption:
1. In Navigator, select Help > About Navigator.
– or –
In Netscape Communicator, select Help > About Communicator.
Section 1B: Getting Started With Your Sprint Mobile Broadband USB Modem 9
Page 18

2. See the section “Contains encryption software from RSA Data Security, Inc.”
If the next paragraph states “This version supports U.S. security,” you have
128-bit security.
If the paragraph states that you have International security, you have 40-bit
security. Download a version that supports 128-bit security.
The Sprint Mobile Broadband USB Modem Software
The Sprint Mobile Broadband USB modem comes with the following software:
䢇 Sprint Connection Manager, which allows you to manage the device’s actions
and monitor your connections
䢇 The driver software that forms the interface between the Sprint Mobile
Broadband USB modem and your Windows operating system
Before you insert the Sprint Mobile Broadband USB modem for the first time, you
must install and then run the Sprint Connection Manager software. The driver
software is installed the first time you insert the device into your computer.
Detailed instructions are provided beginning on page 16.
Care and Maintenance
As with any electronic device, the Sprint Mobile Broadband USB modem must be
handled with care to ensure reliable operation. Follow these guidelines in using
and storing the device:
䢇 The device should fit easily into your USB slot. Forcing the device into a slot may
damage the connector pins.
䢇 Protect the device from liquids, dust, and excessive heat.
䢇 When not installed in your computer, store the device in a safe place.
䢇 Remove the device before storing or transporting your computer.
䢇 When inserting or removing the device, always grip it by the sides rather than
the end.
䢇 To avoid the risk of explosion, use the same battery model when replacing the
battery. Properly dispose of the used battery.
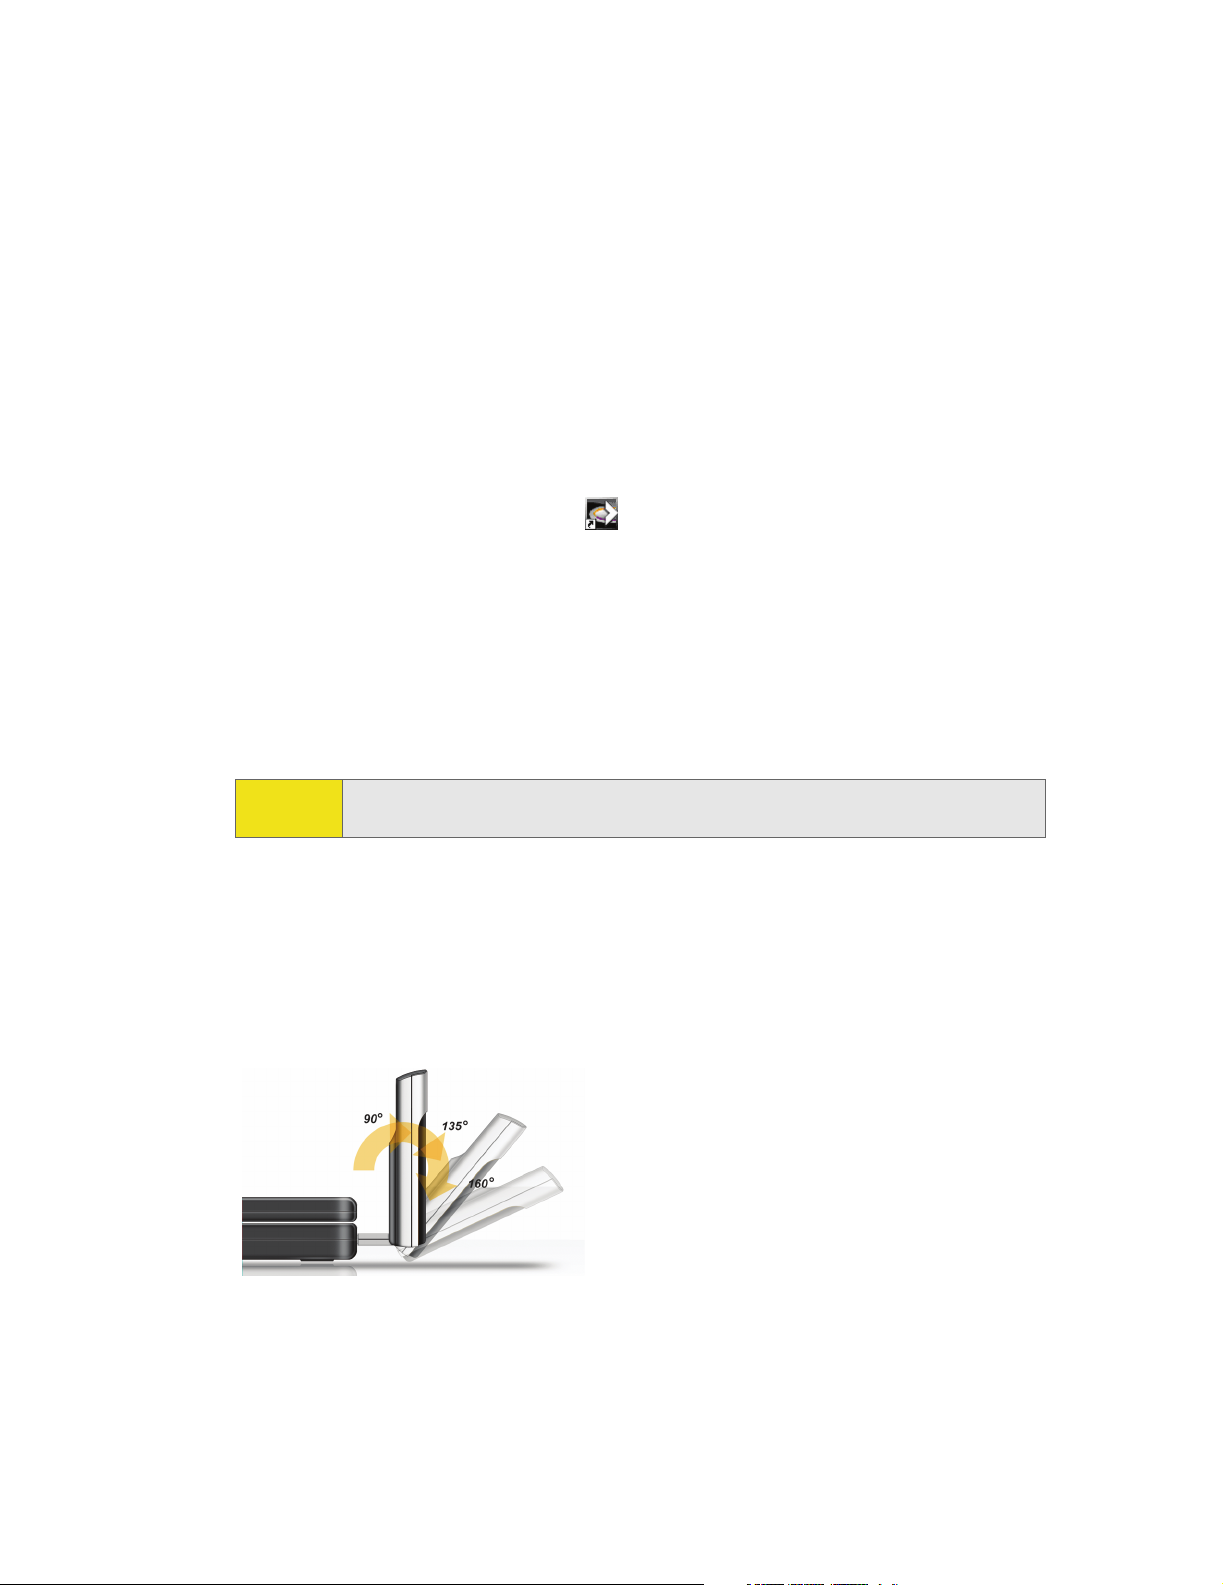
䢇 The device’s USB connector is adjustable to three positions. Do not force the
hinge past the last position—this may break the connector. For more
information, see the picture on page 17.
10 Section 1B: Getting Started With Your Sprint Mobile Broadband USB Modem
Page 19

䢇 Do not use the device with a handheld computer; it is designed only for
notebook or desktop computers running Windows® Vista, XP, 2000, or
Mac OS X.
䢇 Do not handle or operate the device while driving or operating a vehicle. Doing
so may distract you from properly operating the vehicle. In some states and
provinces, operating communication devices while in control of a vehicle is a
criminal offense.
Section 1B: Getting Started With Your Sprint Mobile Broadband USB Modem 11
Page 20

12
Page 21

Section 2
Installing the Sprint Mobile
Broadband USB Modem
Page 22

14
Page 23

Section 2A
Installing the Software
In This Section
⽧ Getting Started
This section explains how to install your Sprint Connection Manager software.
The process may vary, depending on the operating system that you are running.
Section 2A: Installing the Software 15
Page 24
Getting Started
Note:
For comprehensive instructions on installing the Sprint Connection
Manager software and activating the device, see the Getting Started guide.
Before you can use your device, you must first install the device’s software and
configure the device for your computer. The installation process consists of:
䢇 Software installation - Installing the Sprint Connection Manager software on
your computer (described in this section).
䢇 Insertion of the rechargeable battery into the device
䢇 Device insertion and driver installation - Starting the Sprint Connection Manager
software and inserting the device, which automatically installs the drivers on
your computer.
䢇 Device activation and provisioning - Activating your Sprint account and
configuring the device to use your account. (See “Setting Up Service” on
page 21.)
CAUTION:
Do not insert the device into your computer’s USB slot before installing the
software.
Note: Windows Vista and Windows 2000 users: You must log in with
administrative privileges to install the software and drivers.
Windows XP users: You may need to log in with administrative privileges,
depending on your Windows configuration.
1. If the installation CD is not already in your CD-ROM drive, insert it.
The CD should autostart.
If the CD does not autostart, select Start > Run and enter d:\SCMInstaller.exe,
where d is the drive letter of your CD-ROM drive.
16 Section 2A: Installing the Software
Page 25
2. Use the Next and Back buttons to navigate through the wizard, noting the
following:
䡲 You must select I accept the terms in the license agreement to indicate your
acceptance of the terms of the license agreement to proceed with the
installation.
䡲 Use the default settings for the Destination Folder unless you have special
requirements and an advanced understanding of PC configuration. (The
Destination Folder dictates where the software is installed.)
3. When the “Installation Complete!” window is displayed, click Finish.
4. Run Sprint Connection Manager.
(Double-click the program’s icon [ ] on your desktop.)
5. Wait for Sprint Connection Manager to start up and display “No device...”.
6. Slide the front panel off the Sprint Mobile Broadband USB modem.
7. Hold the battery so that the side with two white arrows faces up and the gold
contact points on the end of the battery line up with the gold contact points
on the Sprint Mobile Broadband USB modem. Insert the battery into the
device.
Warning:
To avoid the risk of explosion, use the same battery model when replacing
the battery. Properly dispose of the used battery.
8. Slide the front panel onto the device until the panel clicks into place.
9. Slide the lever on the bottom of the device in the direction indicated by the
triangle to release the device's USB connector.
10. Adjust the USB connector to the desired angle. (The USB connector is
adjustable to three positions—approximately 90, 135, and 160 degrees. Do
not force the hinge past the last position—this may break the connector.)
Section 2A: Installing the Software 17
Page 26

11. Insert the device into your computer’s USB slot.
Alternatively, you can attach the docking station to your computer’s USB slot,
and insert the device into the docking station.
Note:
Warning:
If your computer’s USB slot is vertical, use the docking station.
Do not insert the device into a USB hub or a USB slot on a keyboard.
If the orientation of your computer’s USB slot or the thickness of your
computer are such that pressure is applied to the device’s end or side (as
shown by the red circles in the drawings below), you may damage the device
or your computer. In such cases, do not insert the device directly into your
computer’s USB slot; use the docking station instead.
When the device is properly inserted, the Power LED is lit, and the battery starts to
charge.
Windows detects the device and installs the drivers for it. This may take a few
minutes. Once completed, Sprint Connection Manager should display
“Disconnected.”
12. Charge the battery for approximately two hours.
Note:
If you have an older version of Sprint Connection Manager and are
experiencing problems during installation, use the Add/Remove Programs
Utility (see page 54) to remove the older version of Sprint Connection
Manager. Then reinstall the current version of Sprint Connection Manager
from the Installation CD.
After you’ve charged the battery, proceed to configure the device to use your
account (if it was not preactivated); see “Activating and Using Sprint Service” on
page 22. If your device is preactivated, after you’ve charged the battery, you are
ready to connect to the network; to learn about using the software, see “Your
Sprint Mobile Broadband USB Modem: The Basics” on page 31.
18 Section 2A: Installing the Software
Page 27

Section 2B
Inserting and Removing the Sprint Mobile Broadband
USB Modem
In This Section
⽧ Inserting the Sprint Mobile Broadband USB Modem
⽧ Removing the Sprint Mobile Broadband USB Modem
This section describes how to properly insert the Sprint Mobile Broadband USB
modem and remove it from your PC.
Section 2B: Inserting and Removing the Device 19
Page 28

Inserting the Sprint Mobile Broadband USB Modem
To insert the Sprint Mobile Broadband USB modem into a notebook or desktop
computer:
1. Holding the Sprint Mobile Broadband USB modem by its sides, insert the
device into the USB slot of your computer.
Alternatively, you can attach the docking station to your computer’s USB slot,
and insert the device into the docking station.
Note:
If your computer’s USB slot is vertical, use the docking station. Do not insert
the Sprint Mobile Broadband USB modem into a USB hub or a USB slot on a
keyboard.
When you insert the Sprint Mobile Broadband USB modem, the following should
occur:
䢇 The first time the device is inserted, Windows detects the device and installs
the drivers for it. This may take a few minutes. Once completed,
Sprint Connection Manager should display “Disconnected.” To connect to the
network, click GO.
䢇 If sound effects are enabled, the PC beeps.
The Sprint Mobile Broadband USB modem is powered as soon as you insert it.
Removing the Sprint Mobile Broadband USB Modem
IMPORTANT!
When inserting or removing your device, always grip the device by its
sides. Gripping the device by its end may damage the device.
To remove the Sprint Mobile Broadband USB modem:
1. Exit Sprint Connection Manager if it is open (page 44).
2. Remove the device from your computer’s USB slot by gripping both sides of
the device and pulling straight out.
20 Section 2B: Inserting and Removing the Device
Page 29

Section 2C
Setting Up Service
In This Section
⽧ Activating and Using Sprint Service
⽧ Preactivated Device
⽧ Non-preactivated Device: Activation Wizard
⽧ Data Provisioning (IOTA)
This section walks you through setting up service for your Sprint Mobile
Broadband USB modem, after you have installed the Sprint Connection Manager
software (page 16) and inserted the Sprint Mobile Broadband USB modem.
Section 2C: Setting Up Service 21
Page 30

Activating and Using Sprint Service
Before using your Sprint Mobile Broadband USB modem, you must have a
Sprint wireless network account set up. The process of setting up an account is
called activation.
When the Sprint Mobile Broadband USB modem is inserted and
Sprint Connection Manager is started, it will detect whether the device has been
configured with an account (“preactivated”). If it has not, the Activation Wizard
starts automatically.
Preactivated Device
If you received your Sprint Mobile Broadband USB modem in the mail or
purchased it at a Sprint Store, it probably has already been activated.
To prevent unauthorized use, preactivated devices may have been set with a
security lock. If so, Sprint Connection Manager displays the message “Device
locked.”
To unlock your Sprint Mobile Broadband USB modem:
1. Click the icon. (If is not visible, click to expand Sprint Connection
Manager.)
2. In the Enter User Lock Code window, enter your four-digit lock code, and click
OK. For security purposes, the code is not visible as you type.
Tip:
After unlocking your preactivated Sprint Mobile Broadband USB modem, it is
ready for use. See “Using the Sprint Mobile Broadband USB Modem” on page 29.
If you can’t recall your lock code, try using the last four digits of either your
Social Security number or your device’s phone number (MDN), or try 0000. If
none of these work, call Sprint Customer Service at 1-888-211-4727.
22 Section 2C: Setting Up Service
Page 31

Non-preactivated Device: Activation Wizard
If your device is not preactivated, please see the Getting Started guide included
with your device.
If your Sprint Mobile Broadband USB modem is not preactivated,
Sprint Connection Manager automatically detects that no account has been
configured when you run it for the first time. It then runs the Activation Wizard to
guide you through the activation and configuration process.
To set up your account, you will be contacting Sprint.
Before you call Sprint, have these things ready:
䢇 A phone
䢇 Your Sprint Mobile Broadband USB modem
䢇 Your Social Security number
䢇 Your driver’s license number
䢇 The city and state where the device will be primarily used
䢇 A pen and paper to write down your account information. Your package
includes a printed Getting Started guide, where you can record this
information.
When you call Sprint, Sprint Customer Service will help you select your service
plan and guide you through the activation process. They will also provide you with
this information:
䢇 Your device’s activation code (gives you access to configure the account)
䢇 Your device’s phone number (MDN)
䢇 Your device’s MSID (Mobile System ID) code, used for WLNP (Wireless Local
Number Portability) and to determine whether you are “home” or “roaming”
Section 2C: Setting Up Service 23
Page 32

Stepping Through the Activation Wizard
If the Activation Wizard has not started automatically:
1. Ensure the Sprint Mobile Broadband USB modem is inserted, and
Sprint Connection Manager is running. If Sprint Connection Manager is not
running, select:
(Windows Vista or Windows XP) Start > All Programs > Sprint > Sprint Mobile
Broadband (Sierra).
(Windows 2000) Start > Programs > Sprint > Sprint Mobile Broadband (Sierra).
Sprint Connection Manager should display “Disconnected.”
2. If Sprint Connection Manager displays “Device locked,” unlock the device
(page 52).
3. If Sprint Connection Manager displays “Device powered off,” power the device
on (page 38).
4. Start the Activation Wizard: select MENU > Settings > Sprint Vision - Sierra
Wireless > Activation Wizard.
Once the Activation Wizard is running:
1. To begin activation of the Sprint Mobile Broadband USB modem, click Next.
2. Call Sprint at the phone number listed on the screen. Click Next.
3. Give the account representative your ESN (Electronic Serial Number) or MEID
(Mobile Equipment IDentifier) number as displayed by the Activation Wizard.
Enter the activation code provided by the account representative and
click Next.
4. Enter the phone number (no spaces or hyphens) and, if not the same value as
the phone number, the MSID value given by the account representative, and
then click Next.
A confirmation window will be displayed.
5. Confirm with the service representative that the information is correct. If it is,
click Ye s . If it isn't, click No, and re-enter the information.
6. Click Finish to close the Activation Wizard.
7. Wait a few moments for the Sprint Mobile Broadband USB modem to
automatically reset. Depending on your configuration, an IOTA session may
automatically start. (See “Data Provisioning [IOTA]” on page 25.)
After Sprint sets up your account on the network, your Sprint Mobile Broadband
USB modem should be configured and ready for use.
24 Section 2C: Setting Up Service
Page 33

Data Provisioning (IOTA)
IOTA (Internet Over The Air), supported by some service providers (including
Sprint), is an automated feature to perform account setup for you by making a
connection to the CDMA network and using a secure Internet connection to
download account parameters to your Sprint Mobile Broadband USB modem. To
make this secure connection, IOTA requires that your computer support 128-bit
encryption. (See “High Encryption Requirements” on page 9.)
Depending on your configuration, the first time Sprint Connection Manager
detects the activated device, an IOTA session may automatically start, during
which status messages (“Updating User Profile…”) are displayed.
After this first activation, there may be changes to your account that require
updating the parameters in the Sprint Mobile Broadband USB modem. If this is
needed:
1. In the Device Info & Diagnostics window (page 72), click Update Data Profile.
(If this button is not displayed, remove and reinsert the device.)
2. In the IOTA Provisioning window, click Ye s .
Your Sprint Mobile Broadband USB modem then retrieves the updates to your
data services account. Once the updates are successful, Sprint Connection
Manager is displayed (“Disconnected”). You can now connect to the network.
Section 2C: Setting Up Service 25
Page 34

Section 2D
Getting Help
In This Section
⽧ Visiting the Sprint Web Site
⽧ Contacting Sprint Customer Service
⽧ Troubleshooting
This section describes where you can find more information on Sprint services,
options, and troubleshooting problems you have encountered.
26 Section 2D: Getting Help
Page 35

Visiting the Sprint Web Site
Stop by www.sprint.com and log on to get up-to-date information on
Sprint services, options, and more.
You can also:
䢇 Review coverage maps.
䢇 Access your account information.
䢇 Add additional options to your service plan.
䢇 Check out frequently asked questions.
䢇 And more.
Contacting Sprint Customer Service
You can reach Sprint Customer Service by:
䢇 Logging on to your account at www .sprint.com .
䢇 Calling us toll-free at 1-888-211-4727.
䢇 Writing to us at Sprint Customer Service, P.O. Box 8077,
London, KY 40742.
Troubleshooting
The Online Help for Sprint Connection Manager (see page 49) includes
descriptions of most common error messages. Look in the Contents under
Troubleshooting.
For help with other problems:
䢇 See “Troubleshooting Tips” on page 80.
䢇 Consult the Sierra Wireless Web site at www .sierrawir eless.com, where you will
find an extensive knowledge base that can be searched to address most
problems, and the Installation Troubleshooting wizard (in the Support &
Download section).
䢇 Contact Sprint as noted above.
Section 2D: Getting Help 27
Page 36

28
Page 37

Using the Sprint Mobile
Broadband USB Modem
Section 3
Page 38

30
Page 39

Section 3A
Your Sprint Mobile Broadband USB Modem: The Basics
In This Section
⽧ Sprint Connection Manager
⽧ Starting Sprint Connection Manager
⽧ Starting Sprint Connection Manager Automatically
⽧ Sprint Connection Manager Window
⽧ Connection States
⽧ System Tray Connection States
⽧ Determining the Type of Coverage
⽧ Location-Based Services
⽧ Powering the Device On and Off
⽧ Controlling the Sprint Connection Manager Window
⽧ Launching a Sprint Power Vision or Sprint Vision Connection
⽧ Viewing the Amount of Data Transferred
⽧ Ending a Connection
⽧ Online Help
⽧ Displaying Your Phone Number
⽧ Security
⽧ Accessing Links
⽧ Uninstalling the Sprint Connection Manager Software
Your Sprint Mobile Broadband USB modem is packed with features that simplify
your life and expand your ability to stay connected to the people and information
that are important to you. This section guides you through the basic features of
your Sprint Mobile Broadband USB modem.
Section 3A: Your Sprint Mobile Broadband USB Modem: The Basics 31
Page 40

Sprint Connection Manager
Sprint Connection Manager is the application that allows you to manage and
monitor the high-speed Sprint Power Vision (1xEV-DO) and Sprint Vision (1X)
connection to the Sprint network. You use Sprint Connection Manager to:
䢇 Determine your signal strength and other network connection parameters (page 33).
䢇 Initiate data calls (page 45).
䢇 Access Location-Based Services (page 40).
䢇 View call statistics (page 70) and messages (page 35).
䢇 Customize features and options (page 60).
Tip:
Without running Sprint Connection Manager, you can make a data connection
simply by starting whatever application you want to use (such as your Web browser
or email application). Prerequisites: you must have previously selected, in
Sprint Connection Manager,
(page 64). However, to make use of other features of the Sprint Mobile
ready
Broadband USB modem (including Location-Based Services), you must run
Sprint Connection Manager.
Enable NIC for data connections and GO automatically when
Starting Sprint Connection Manager
To start Sprint Connection Manager:
1. Ensure the Sprint Mobile Broadband USB modem is inserted into your
computer’s USB slot.
2. Double-click the program’s icon ( ) on your desktop, or, from the Start menu
on your Windows desktop, select:
(Windows Vista or Windows XP) All Programs > Sprint > Sprint Mobile Broadband
(Sierra).
(Windows 2000) Programs > Sprint > Sprint Mobile Broadband (Sierra).
When Sprint Connection Manager is running, it places an icon ( ) in the system
tray, usually at the right end of the taskbar. (See page 39.)
Tip:
You can also set Sprint Connection Manager to launch automatically
whenever your device is detected. (See “Starting Sprint Connection
Manager Automatically” on page 33.)
32 Section 3A: Your Sprint Mobile Broadband USB Modem: The Basics
Page 41

Starting Sprint Connection Manager Automatically
To set Sprint Connection Manager to start automatically (whenever your device is
detected):
䊳 From the General option of the Settings window (page 61), select Launch
Connection Manager automatically.
Note:
Tip:
Changes to this setting apply only after you restart Windows.
You can also set the connection to launch automatically whenever
available. (See “GO automatically when ready” on page 64.) These settings
provide an “always-on” connection, as long as you have network coverage.
Sprint Connection Manager Window
Menu
Show/
hide
details
Message area
Indicator area
Minimize
Exit
Establish/
cancel a
connection
The text (for example, “Connected” shown in the screenshot above) and icon(s) in
Sprint Connection Manager indicate the connection state (page 35), and also (only
when disconnected) the lock state (page 50) (locked or unlocked ).
Section 3A: Your Sprint Mobile Broadband USB Modem: The Basics 33
Page 42

Sprint Connection Manager may display, depending on the connection state,
some of the following icons:
CDMA network signal strength, indicated by the number of bars.
The ToolTip indicates the type of coverage you have (for example, 1X
and/or 1xEV-DO), and the signal strength, in dBm.
You are roaming. Roaming charges may apply.
If this icon is flashing, you are in a non-preferred roaming area, and you
may not be able to complete your calls.
Tip: You can change the roaming option ("Roam Mode"; for example, to
disable roaming, select Sprint), and also enable the Roam Guard feature (from
the Sprint Vision Settings window; page 63).
1xEV-DO Rev. A transmit/receive icon: a data connection is active.
The up arrow is animated (for example: ) when data is being
transmitted to the network.
The down arrow is animated (for example: ) when data is being
received from the network.
1xEV-DO Rev. 0 transmit/receive icon: a data connection is active.
The up arrow is animated (for example: ) when data is being
transmitted to the network.
The down arrow is animated (for example: ) when data is being
received from the network.
1xEV-DO (Rev. 0 and Rev. A) transmit/receive icon: the data connection
is dormant. The up and down arrows are gray.
1X transmit/receive icon: a data connection is active.
The up arrow is black and animated when data is being transmitted to
the network.
The down arrow is black and animated when data is being received
from the network.
1X transmit/receive icon: the data connection is dormant. The up and
down arrows are gray.
34 Section 3A: Your Sprint Mobile Broadband USB Modem: The Basics
Page 43

Sprint Connection Manager has the following buttons and text:
䢇 Menu or the button — Displays the Sprint Connection Manager menu
(page 56).
䢇 — Expands Sprint Connection Manager and displays the amount of data
transferred (when Connected), or, when disconnected, the lock status of your
device (locked or unlocked ).
䢇 (Displayed when Sprint Connection Manager is expanded) — Hides the
amount of data transferred and the lock status of your device.
䢇 (upper right corner of the window) — Minimizes Sprint Connection Manager
(page 44).
䢇 — Exits Sprint Connection Manager.
䢇 GO — Starts the Sprint Power Vision or Sprint Vision connection (page 45).
䢇 Stop — Ends the connection (visible when a connection is established).
Connection States
Sprint Connection Manager can display various connection and interaction states,
including:
䢇 No device
䢇 Initializing
䢇 Updating User Profile… (See “Data Provisioning [IOTA]” on page 25.)
䢇 Searching for service...
䢇 Disconnected
䢇 Connecting
䢇 Connected
䢇 Connected to NDIS
䢇 Device locked
䢇 Device powered off
Section 3A: Your Sprint Mobile Broadband USB Modem: The Basics 35
Page 44

If you initiate Location-Based Services (page 40), a window may display
“Searching.”
Note:
The system tray icon also indicates the connection state (page 16).
No device
Sprint Connection Manager did not detect the Sprint Mobile Broadband USB
modem. The GO button is unavailable.
Insert the Sprint Mobile Broadband USB modem. If it is already inserted, remove
and reinsert it; wait a few moments. If this message is still displayed, uninstall
(page 54) and reinstall Sprint Connection Manager, or contact Sprint (page 27).
Initializing
Sprint Connection Manager is attempting to establish communication with the
Sprint Mobile Broadband USB modem.
Searching for service...
Sprint Connection Manager is determining whether 1X or 1xEV-DO service is
available. If this message persists, see page 82.
Disconnected
Sprint Connection Manager is ready to make a connection to the network or to
use Location-Based Services. The GO button is available; the signal strength icon
( ) and the roaming icon ( ) (if you’re roaming) are visible. If Sprint Connection
Manager is expanded, the lock icon ( or ) is visible.
36 Section 3A: Your Sprint Mobile Broadband USB Modem: The Basics
Page 45

To connect to the network, click GO.
Connecting
Sprint Connection Manager is establishing a connection to the network.
Connected
The connection is established. In addition to the signal strength icon ( ) and the
roaming icon ( ) (if you’re roaming), the transmit/receive icon ( for 1xEV-DO
Rev. A; for 1xEV-DO Rev. 0; for 1X) is also displayed.
If you expand Sprint Connection Manager ( ), the amount of data transferred is
shown. (See note on page 48.)
To end the connection, click Stop.
Connected to NDIS
This message applies only if you have selected Enable NIC for data connections
(page 64). For a description, see “Connected” (above).
Section 3A: Your Sprint Mobile Broadband USB Modem: The Basics 37
Page 46

Device locked
The device is locked, so that others cannot use the device and your account. To use
most of the features, you must unlock the device (page 52).
Device powered off
The device has been powered off (through Menu > Power Off Modem). To use the
device, select Menu > Power On Modem.
For more information, see “Powering the Device On and Off” on page 42.
Searching
The device is requesting GPS satellite information from the network.
38 Section 3A: Your Sprint Mobile Broadband USB Modem: The Basics
Page 47

System Tray Connection States
Sprint Connection Manager has an associated icon ( ) that appears in the
system tray. The icon reflects the connection state.
Sprint Connection Manager is not ready to connect to the network.
Your Sprint Mobile Broadband USB modem is either locked
(“Device locked”; page 38), or not detected (“No device”; page 36),
or powered off (“Device powered off”; page 38).
Disconnected — Sprint Connection Manager is ready to make a
connection to the network (page 36), or
Connecting — Sprint Connection Manager is making a connection
to the network (page 37).
Connected — Connection is established to the network; data
transfer is in progress (page 37).
Dormant — Connection is established, but no data transfer is
taking place.
Clicking the system tray icon toggles between displaying and minimizing
Sprint Connection Manager.
Right-clicking the icon displays the shortcut menu (page 58).
Section 3A: Your Sprint Mobile Broadband USB Modem: The Basics 39
Page 48

Determining the Type of Coverage
The ToolTip over the signal strength indicator ( ) indicates the type of coverage
you have (for example, 1X [synonym of 1xRTT] or 1xEV-DO):
Tip:
The type of coverage is also displayed in the lower left part of the Device Info
& Diagnostics window under “Network Service” (page 73).
Location-Based Services
Location-Based Services (Location & Search Services) allow you to query the
network for information on points of interest that are near your current location.
The network automatically determines your current location. All you have to do is
specify the type of business that you are looking for (for example, a restaurant or
hotel).
To use Location-Based Services:
䊳 In Sprint Connection Manager, click Menu > Location & Search Services.
Note:
If the menus and windows (page 40 and page 66) related to Location-Based
Services are unavailable in Sprint Connection Manager, see “Location-Based
Services Don't Seem To Be Available” on page 84.
40 Section 3A: Your Sprint Mobile Broadband USB Modem: The Basics
Page 49

If the GPS fix is successful or if data from a recent GPS fix is available, then the
Sprint Nextel Location & Search window is displayed. The bottom part of the
window displays location information (latitude and longitude) of your device, and
the time that the location information was acquired.
From the Location & Search window, enter or select the type of item you want to
find, and click Go.
If more than a preconfigured period of time has elapsed since the last time you’ve
submitted a location search, a window is displayed asking whether you want to
get an updated (GPS) position fix. (Depending on your account, you may be
charged for each position fix or after you have performed a certain number of
fixes.) If your current location is different from where you submitted your last
location search, click Ye s.
Note:
Sprint Connection Manager uses Microsoft Internet Explorer to display the
results of Location-Based Services.
Section 3A: Your Sprint Mobile Broadband USB Modem: The Basics 41
Page 50

Internet Explorer opens and displays the results of your search query. In the
search results of some mapping and search services, you can right-click your
location to get additional information—for example, driving instructions.
From the Location & Search window, you can submit additional searches.
From the Settings window, you can specify the settings for Sprint Location
Services (page 66).
Powering the Device On and Off
If you are using your Sprint Mobile Broadband USB modem in an aircraft, hospital,
or other environment where the device may cause interference, you can power
the device off (without removing it from your USB slot), and still use other
functions of your computer.
This also allows you to conserve your notebook computer’s battery and charge the
device’s battery.
To power the device off:
1. Close any active data connection (page 49).
2. Select MENU > Power Off Modem.
When the device is powered off, the menu option switches to Power On Modem,
and Sprint Connection Manager displays the message “Device powered off .”
To power the device on:
䊳 Select MENU > Power On Modem.
42 Section 3A: Your Sprint Mobile Broadband USB Modem: The Basics
Page 51

Controlling the Sprint Connection Manager Window
Expanding Sprint Connection Manager
Sprint Connection Manager has two views: compact and expanded.
Compact view:
To expand Sprint Connection Manager, click . Sprint Connection Manager now
also displays the amount of data transferred during the current connection, and
(only when disconnected) the lock state of the device (locked or unlocked ).
Expanded view:
To change back to the compact view, click .
Section 3A: Your Sprint Mobile Broadband USB Modem: The Basics 43
Page 52

Minimizing Sprint Connection Manager
To save space on your screen for other programs, you can minimize Sprint Connection
Manager:
䊳 Click (in the upper right corner of Sprint Connection Manager).
– or –
Click the Sprint Connection Manager icon in the system tray.
– or –
Right-click the system tray icon and select Close Sprint Mobile Broadband.
You can use the system tray icon to monitor the connection state (page 39).
Tip:
Tip:
You can set Sprint Connection Manager to start minimized. (See “Start in
system tray” on page 62.)
You can prevent Sprint Connection Manager from minimizing by setting
Always on top (page 62).
Restoring Sprint Connection Manager
To restore Sprint Connection Manager when it is minimized:
䊳 Click the Sprint Connection Manager icon in the system tray.
– or –
Right-click the system tray icon and select Open Sprint Mobile Broadband.
Exiting Sprint Connection Manager
To exit Sprint Connection Manager:
䊳 In Sprint Connection Manager, select Menu > Exit, or click the button,
– or –
Right-click the Sprint Connection Manager icon in the system tray and,
from the shortcut menu, select Exit.
If you have not selected Enable NIC for data connections (page 64) and a connection
is in progress, a window is displayed asking whether you want to disconnect the
call. To end the connection and close Sprint Connection Manager, you must click
Ye s .
44 Section 3A: Your Sprint Mobile Broadband USB Modem: The Basics
Page 53

Sprint Connection Manager closes, and the Sprint Connection Manager icon
disappears from the system tray.
Note:
If you have selected Enable NIC for data connections (page 64), after exiting
Sprint Connection Manager, you are still connected to the network (data
may still be transferred). To manage the connection, use the Windows
network connection icon in the system tray.
Launching a Sprint Power Vision or Sprint Vision
Connection
To launch a connection:
䊳 In Sprint Connection Manager, click GO. (If GO is unavailable, see “GO Button Is
Unavailable” on page 82.)
Note:
When the connection is successfully established, the network welcome screen
appears (unless you have turned off the display of the welcome screens; see
“Always show Welcome Screens” on page 64).
A connection is automatically established if, after you select Menu >
Location & Search Services
, a GPS fix is successfully acquired.
Sprint Connection Manager displays “Connected” or “Connected to NDIS”
(page 37).
You can now use your Web browser, perform data transfers, and so on.
Section 3A: Your Sprint Mobile Broadband USB Modem: The Basics 45
Page 54

To monitor the status of the connection, you can use the text (page 35) and icons
(page 33) in Sprint Connection Manager, and the icon in the system tray (page 39).
You can also view the amount of data transferred (page 48).
Tip:
You can optionally specify which application to automatically launch when
the connection is established. (See “Auto-launch Upon Network
Connection” on page 47.)
You can also set the connection to launch automatically whenever
available. (See “GO automatically when ready” on page 64.) If you also set
Sprint Connection Manager to launch automatically (see “Launch
Connection Manager automatically” on page 62), this can provide an
“always-on” connection, as long as you have network coverage.
You can have a connection established automatically—without running
Sprint Connection Manager—simply by starting whatever application you
want to use (such as your Web browser or email application). Select
NIC for data connections
Sprint Connection Manager and its icon in the system tray won’t be
available for you to monitor the status of the connection. Location-Based
Services also won’t be available.
and GO automatically when ready (page 64). However,
Enable
Roam Guard
The Roam Guard feature, when enabled, displays a warning message if you are
roaming and a data connection is established or about to be established. The
message reminds you that roaming rates may apply.
From the window with the warning message, you can:
䢇 Turn off the warning message for this data session only ("Do not ask again
during this data session").
䢇 Continue with the data connection ("Roam") (in which case you may be subject
to roaming rates).
䢇 End the data connection ("Cancel").
46 Section 3A: Your Sprint Mobile Broadband USB Modem: The Basics
Page 55

Note:
This feature is available only if Roam Mode is set to Automatic (from the
Sprint Vision option of the Settings window; page 63).
To turn on the Roam Guard feature:
1. From the Sprint Vision option of the Settings window, ensure Roam Mode is
set to Automatic.
2. Select Roam Guard.
To permanently turn off the Roam Guard feature:
䊳 From the Sprint Vision option of the Settings window, clear Roam Guard.
Auto-launch Upon Network Connection
You can optionally specify which application to automatically launch when a
Sprint Power Vision or Sprint Vision connection is established.
To specify which application to automatically launch:
1. Ensure Sprint Connection Manager is running and not locked (page 51).
2. Ensure that your Sprint Mobile Broadband USB modem is not powered off
(page 38).
3. Select MENU > Settings > Sprint Vision - Sierra Wireless.
4. Select Auto Launch.
5. In the Auto-Launch Options window, select one of the following:
䡲 None — Do not auto-launch any application.
䡲 Website — Auto-launch Internet Explorer. In the URL field, specify the Web
site (such as http://www.sierrawireless.com) you want to view on
connection.
䡲 Microsoft VPN (PPTP) Connection — Auto-launch a Windows VPN connection.
Type in the address of the VPN connection, or, from the drop-down list,
select the VPN connection.
䡲 Application (VPN client, etc.) — Auto-launch an installed VPN program, or any
other program. In the field, enter the path to the program, or use the
Browse button to locate the program.
The changes are applied the next time you launch a connection.
Note:
This feature functions only when Sprint Connection Manager is running.
Section 3A: Your Sprint Mobile Broadband USB Modem: The Basics 47
Page 56

Viewing the Amount of Data Transferred
Note:
Even though the number of bytes sent and received is displayed while the
connection is running, this is not necessarily the actual amount of data
being transmitted across the network.
billing.
If you have selected Enable NIC for data connections (page 64), after exiting
Sprint Connection Manager, you are still connected to the network. Data
may still be transferred.
Do not use this information to estimate
To view the number of bytes sent/received during the current connection:
䊳 If Sprint Connection Manager is not expanded, click the button.
The number of bytes sent/received during the current connection is displayed, in
three significant digits (such as 581 kb, 1.23 Mb, 1.81 Mb).
Once you end the connection, the figures reset to zero.
To hide the part of Sprint Connection Manager that displays this information,
click the button.
48 Section 3A: Your Sprint Mobile Broadband USB Modem: The Basics
Page 57

Ending a Connection
To end a connection:
䊳 In Sprint Connection Manager, click Stop.
If you have not selected Enable NIC for data connections (page 64) and you exit
Sprint Connection Manager while a connection is in progress, a window is
displayed asking whether you want to disconnect the call. By clicking Ye s, you can
end the connection and exit Sprint Connection Manager. (See “Exiting
Sprint Connection Manager” on page 44.)
If you have enabled GO automatically when ready, manually disconnecting will
leave the device disconnected. It will not reconnect until one of the following
occurs:
䢇 You make a connection through Sprint Connection Manager
䢇 A GPS fix is successfully acquired after you initiate Location-Based Services
(page 40)
䢇 You have selected Enable NIC for data connections and you remove and reinsert
the device
䢇 You have not selected Enable NIC for data connections and you restart
Sprint Connection Manager
Online Help
Sprint Connection Manager includes extensive online help to provide operating
hints and step-by-step instructions for getting the most from your Sprint Mobile
Broadband USB modem.
With Sprint Connection Manager running, you can access online help in several
ways:
䢇 Press <F1> in any window.
䢇 From the Sprint Connection Manager window, select MENU > Help.
䢇 Right-click the system tray icon ( ) and select Help.
䢇 Click the Help button available in many windows.
The help file has a table of contents and an index.
Section 3A: Your Sprint Mobile Broadband USB Modem: The Basics 49
Page 58

Displaying Your Phone Number
You can view your phone number in the Device Info & Diagnostics window
(Menu > Device Info & Diagnostics).
Security
When it is disconnected, you can lock your Sprint Mobile Broadband USB modem
so that others cannot use the device and your account. A four-digit lock code is
needed to unlock the device.
You can set the Sprint Mobile Broadband USB modem to lock:
䢇 Whenever Sprint Connection Manager is started (page 51), or
䢇 Immediately (without restarting Sprint Connection Manager) — useful if you
are lending your Sprint Mobile Broadband USB modem and PC or leaving it for a
short time (page 51).
Initial Lock Code
The initial lock code value is determined by your service provider.
For service provider configurations that do not require account activation, a
default lock code is set at the factory to a value determined by the service
provider. For assistance, contact Sprint (page 27).
Configurations that use the Activation Wizard set the initial lock code to the last
four digits of your account phone number whenever a new phone number is
activated.
After activation, you can change the lock code (page 53) from the initial value to
any four-digit code you choose. (See “Warning Regarding the Lock Code” below.)
Note:
The security lock code is reset to the last four digits of the phone number
whenever an account is activated. This may change a custom value you
have set.
Warning Regarding the Lock Code
If you lock the Sprint Mobile Broadband USB modem and forget the lock code, you
will not be able to use the device until you receive assistance from Sprint.
50 Section 3A: Your Sprint Mobile Broadband USB Modem: The Basics
Page 59

When the Sprint Mobile Broadband USB Modem Is Locked
When the Sprint Mobile Broadband USB modem is locked, you can:
䢇 Unlock the device (page 52).
䢇 Power off the device (page 42).
When the device is locked, you cannot:
䢇 Make data connections (the GO button is unavailable).
䢇 Use Location-Based Services.
䢇 Run the Activation Wizard.
Locking the Device
Warning:
If you forget the lock code, you will not be able to use the device until you
receive assistance from Sprint.
To lock the Sprint Mobile Broadband USB modem immediately:
1. End any active connection. (You can lock the device only when it is
disconnected; page 36.)
2. If Sprint Connection Manager is not expanded, click to expand it.
3. Click the icon.
4. In the Enter User Lock Code window, enter the lock code, and click OK.
When the device is locked, Sprint Connection Manager displays “Device locked,”
and the lock icon is now . The GO button is unavailable.
Tip:
You can also set the device to be locked upon startup of Sprint Connection
Manager, as described next.
Locking Upon Sprint Connection Manager Startup
To set the Sprint Mobile Broadband USB modem to lock as soon as Sprint Connection
Manager starts up:
1. End any active connection. (You can lock the device only when disconnected;
see page 36.)
2. If Sprint Connection Manager is not expanded, click to expand it.
3. Click the lock icon ( or , depending on the current lock status).
Section 3A: Your Sprint Mobile Broadband USB Modem: The Basics 51
Page 60

4. In the Enter User Lock Code window, enter the lock code, and select Relock
modem when program exits.
5. Click OK.
Note:
This setting takes effect only after you exit and restart Sprint Connection
Manager.
Unlocking the Device
When the device is locked, Sprint Connection Manager displays “Device locked,”
and the lock icon is .
To unlock the device:
1. If Sprint Connection Manager is not expanded, click to expand it.
2. Click the icon.
3. In the Enter User Lock Code window, enter the lock code, and click OK.
When the device is unlocked, Sprint Connection Manager no longer displays
“Device locked,” and the lock icon is .
52 Section 3A: Your Sprint Mobile Broadband USB Modem: The Basics
Page 61

Changing the Lock Code
Warning:
To change the lock code:
1. In the Sprint Vision settings window, click User Lock Change.
The Change User Lock Code window is displayed:
If you forget the lock code, you will not be able to use the device until you
receive assistance from Sprint.
2. Enter the current lock code.
3. Enter a new four-digit lock code.
4. Enter the new lock code for confirmation.
5. Click OK.
Accessing Links
For your convenience, Sprint Connection Manager includes links to Sprint products
and services. To access these links:
1. In Sprint Connection Manager, click Menu.
2. Select Links.
Note:
You cannot add or remove links from the Links menu. To add or remove
links, use your Web browser.
Section 3A: Your Sprint Mobile Broadband USB Modem: The Basics 53
Page 62

Uninstalling the Sprint Connection Manager Software
To remove the Sprint Connection Manager software from your computer, use the
Add/Remove Programs utility built into your Windows operating system.
1. Exit Sprint Connection Manager (page 44).
2. Remove the Sprint Mobile Broadband USB modem. (See “Removing the
Sprint Mobile Broadband USB Modem” on page 20.)
3. Select Start > Control Panel and select:
(Windows Vista) Programs and Features.
(Windows XP or Windows 2000) Add/Remove Programs.
The Windows Add/Remove Programs utility will start. Be sure the Change or
Remove Programs feature is selected (default).
4. From the list, select Sprint Mobile Broadband (Sierra), and click Remove or
Uninstall.
54 Section 3A: Your Sprint Mobile Broadband USB Modem: The Basics
Page 63

Section 3B
Menu Options
In This Section
⽧ Sprint Connection Manager Menu
⽧ System Tray Menu
This chapter describes each menu option you may encounter while using your
Sprint Mobile Broadband USB modem and the Sprint Connection Manager
software.
Section 3B: Menu Options 55
Page 64

Sprint Connection Manager Menu
Clicking Menu or the button, located in the upper left corner of
Sprint Connection Manager, displays the Sprint Connection Manager menu.
Note:
Tip:
Depending on your configuration and settings, not all menu options may be
shown or enabled as described here.
You can also display the menu by positioning the cursor over the Menu text
or button and then pressing the spacebar or Enter key on your keyboard.
To hide the menu, press
Esc, or click outside the menu.
The following table describes the menu options:
Menu Item Description
Alert Log View a record of all alerts (for example, connection errors)
that have been received while establishing and maintaining
connections.
See “Viewing Alerts” on page 71.
Connection
History
View a record of connections established using your
Sprint Mobile Broadband USB modem (unavailable if the
Connection History is empty, or if Keep Connection History
[page 62] is not selected).
See “Viewing the Connection History” on page 70.
56 Section 3B: Menu Options
Page 65

Menu Item Description
Device Info &
Diagnostics
View information about your Sprint Mobile Broadband
USB modem and run diagnostic tests.
See “Running Diagnostics” on page 72.
Power Off
Modem
Location &
Search
Services
Software
Updates
Power off your Sprint Mobile Broadband USB modem.
See “Powering the Device On and Off” on page 42.
Query the network for information on points of interest that
are near your current location.
See “Location-Based Services” on page 40.
Retrieve updates for Sprint Connection Manager and your
Sprint Mobile Broadband USB modem.
See “Updating the Software” on page 74.
Links Access links to Sprint products and services.
See “Accessing Links” on page 53.
Help Display the online Help, which has operating hints and step-
by-step instructions for getting the most from your
Sprint Mobile Broadband USB modem.
See “Online Help” on page 49.
About
Sprint Mobile
Broadband
Display brief information about the Sprint Connection
Manager software. To close the window, click anywhere inside
it.
See “About Sprint Mobile Broadband” on page 75.
Settings Change the settings for Sprint Connection Manager. Contains
submenu items:
䢇 General: See “General Settings” on page 61.
䢇 Sprint Vision - Sierra Wireless: See “Sprint Vision Settings” on
page 63.
䢇 Sprint Location Services: See “Sprint Location Services
Settings” on page 66.
Exit Exits Sprint Connection Manager.
Section 3B: Menu Options 57
Page 66

System Tray Menu
When you right-click the system tray icon ( ), a shortcut menu is displayed:
The following table describes the menu options:
Menu Item Description
Open/Close
Sprint Mobile
Broadband
Help Display the online Help.
About
Sprint Mobile
Broadband
Exit Exit Sprint Connection Manager.
Minimize Sprint Connection Manager (Close), or restore
(Open) if Sprint Connection Manager is minimized.
Display brief information about the Sprint Connection
Manager software. To close the window, click anywhere
inside it.
58 Section 3B: Menu Options
Page 67

Section 3C
Changing the Settings of Sprint Connection Manager
In This Section
⽧ Settings Window
⽧ General Settings
⽧ Sprint Vision Settings
⽧ Sprint Location Services Settings
This chapter describes the windows from which you can change the settings for
Sprint Connection Manager.
Section 3C: Changing the Settings of Sprint Connection Manager 59
Page 68

Settings Window
Note:
Temporarily unavailable, if you have powered off the device (page 42).
From the Settings window, you can specify the settings for Sprint Connection
Manager.
1. In Sprint Connection Manager, click Menu.
2. Select Settings.
3. From the drop-down list, select one of the following categories of settings:
䡲 General (general behavior of Sprint Connection Manager)
䡲 Sprint Vision - Sierra Wireless (behavior of your Sprint Power Vision/
Sprint Vision connection)
䡲 Sprint Location Services
4. Make the appropriate changes to the settings (described in the following
pages).
5. To change other settings, repeat steps 3 and 4.
6. Click OK.
Note:
Changes to the setting Launch Connection Manager automatically apply only
after you restart Windows. Changes to the setting
only after you exit and restart Sprint Connection Manager.
Start in system tray apply
Tip:
You can also access the Settings window from the Connection History
window (page 70): click
File > Settings.
60 Section 3C: Changing the Settings of Sprint Connection Manager
Page 69

General Settings
From the General option of the Settings window, you can specify settings that
affect the general behavior of Sprint Connection Manager.
Section 3C: Changing the Settings of Sprint Connection Manager 61
Page 70

The following table describes the options:
Menu Item Description
Play sound
effects
Always on
top
Start in
system tray
Keep
Connection
History
Launch
Connection
Manager
automatically
Check for
updates once
per month
Play a clicking sound whenever an action is made in
Sprint Connection Manager.
Keep Sprint Connection Manager visible on your screen
regardless of which applications are open.
Have Sprint Connection Manager start (minimized) in the system
tray on startup. (See “Restoring Sprint Connection Manager”
on page 44.)
Have Sprint Connection Manager keep a log of your data
connections (page 70).
Have Sprint Connection Manager start automatically (when
your device is detected).
Tip: You can also set the Sprint Power Vision or Sprint Vision
connection to launch automatically whenever available (see “GO
automatically when ready” on page 64). These settings provide an
“always-on” connection, as long as you have network coverage.
Have Sprint Connection Manager automatically check for
software updates (page 74).
Check Now Check for software updates immediately.
Note: During the software update, Sprint Connection Manager will
close. Before you initiate the software update, finish any Web
browsing, data transfers, and so on.
Note: Changes to the setting Launch Connection Manager automatically apply only
after you restart Windows. Changes to the setting
only after you exit and restart Sprint Connection Manager.
Start in system tray apply
62 Section 3C: Changing the Settings of Sprint Connection Manager
Page 71

Sprint Vision Settings
From the Sprint Vision option of the Settings window, you can change the
behavior of your Sprint Power Vision or Sprint Vision connection.
Section 3C: Changing the Settings of Sprint Connection Manager 63
Page 72

The following table describes the options:
Menu Item Description
Always show
Welcome
Screens
GO
automatically
when ready
Enable NIC
for data
connections
Display a welcome screen upon a successful connection to the
network.
Automatically connect to the network after Sprint Connection
Manager starts, or whenever Sprint Connection Manager
loses the network connection.
Tip: You can also set Sprint Connection Manager to start
automatically (see “Launch Connection Manager automatically” on
page 62). These settings provide an “always-on” connection, as long
as you have network coverage.
You can have a connection established automatically, without
having to run Sprint Connection Manager. Select
connections
(below) and GO automatically when ready.
Enable NIC for data
Make a connection automatically, without running
Sprint Connection Manager—simply by starting whatever
application you want to use (such as your Web browser or
email application).
Note: GO automatically when ready must also be selected.
Location-Based Services are available only when Sprint Connection
Manager is running.
Network
Mode:
Automatic
Network
Mode:
1xEV-DO
Attempt a Sprint Power Vision (1xEV-DO) connection and, if
not successful, attempt the slower Sprint Vision (1X)
connection.
Attempt only a Sprint Power Vision (1xEV-DO) connection.
Note: When in an area that has only Sprint Vision (1X) coverage, you
won’t be able to connect to the network.
Only
Network
Mode:
1X Only
Roam Mode:
Sprint
Attempt only a Sprint Vision (1X) connection (even when you
are in Sprint Power Vision [1xEV-DO] coverage, which provides
faster data transmission speeds).
Note: When in an area that has only Sprint Power Vision (1xEV-DO)
coverage, you won’t be able to connect to the network.
Disable roaming when Sprint coverage is unavailable. You will
be able to connect only when Sprint coverage is available.
64 Section 3C: Changing the Settings of Sprint Connection Manager
Page 73

Menu Item Description
Roam Mode:
Automatic
Roam Mode:
Roam Only
Roam Mode:
Roam Guard
Activation
Wizard
User Lock
Change
Allow roaming when Sprint coverage is unavailable.
Note: Roaming rates may apply. Roam Guard (page 46) can remind
you of this.
Allow only roaming.
Note: Roaming rates may apply. Roam Guard (page 46) can remind
you of this.
Display a warning message when you are about to establish a
data connection while roaming. For more information, see
“Roam Guard” on page 46.
Available only if Roam Mode is set to Automatic (page 65).
Note: If you proceed with the data connection, roaming rates may
apply.
Used only when activating a Sprint Mobile Broadband USB
modem, or when changing your device’s phone number
(page 23).
Change the security lock code of the Sprint Mobile Broadband
USB modem (page 53).
Auto Launch Optionally specify which application to automatically launch
when a connection is established.
See “Auto-launch Upon Network Connection” on page 47.
Section 3C: Changing the Settings of Sprint Connection Manager 65
Page 74

Sprint Location Services Settings
From the Sprint Location Services option of the Settings window, you can change
the behavior of the Location-Based Services. (For more information on LocationBased Services, see page 40.)
66 Section 3C: Changing the Settings of Sprint Connection Manager
Page 75

The following table describes the options:
Menu Item Description
Enable
Location on
Device
Display
'Location &
Search
Services' on
the menu
Do not show
Privacy
Consent
Agreement
for 'Location
& Search
Services'
menu
Turn on support (by your device) for Location-Based Services.
Note: To use Location-Based Services, your account must also be
configured appropriately. If you are unable to use Location-Based
Services, contact Sprint Customer Service (page 27).
Show or hide the Sprint Connection Manager menu item that
displays the Sprint Nextel Location & Search window. For
more information on this window, see “Location-Based
Services” on page 40.
Note: If you hide this menu item, you won’t be able to access Location-
Based Services
.
Prevent a Privacy Consent Agreement window from appearing
every time you invoke Location-Based Services.
Microsoft Live
MapQuest
Specify which mapping and search service (for example,
Microsoft® Live, or Google™ Maps) Internet Explorer uses for
Location-Based Services.
Yahoo! Maps
Some mapping and search services may have data that is
Google Maps
more current or accurate than that of other mapping and
search services.
Section 3C: Changing the Settings of Sprint Connection Manager 67
Page 76

Menu Item Description
Test GPS Verify that your device is able to obtain data for Location-
Based Services.
The results (including the number of satellites, latitude,
longitude, and elevation information) are displayed to the
right of the Test GPS button.
68 Section 3C: Changing the Settings of Sprint Connection Manager
Page 77

Section 3D
To o ls
In This Section
⽧ Viewing the Connection History
⽧ Viewing Alerts
⽧ Running Diagnostics
⽧ Updating the Software
⽧ About Sprint Mobile Broadband
This chapter describes various features you can use to view information about the
Sprint Mobile Broadband USB modem and the Sprint Connection Manager
software.
Section 3D: Tools 69
Page 78

Viewing the Connection History
Connection History displays a record of connections established using your
Sprint Mobile Broadband USB modem. You can sort records by connection name
to easily distinguish between personal and business usage.
From this window you can also access the Settings window (page 60) (File >
Settings).
Note:
For connections to be recorded, Keep Connection History must be enabled
(page 62).
To view the Connection History:
1. In Sprint Connection Manager, click Menu.
2. Select Connection History.
To sort the entries:
䊳 Click the button that contains the title of the column you want to sort by. (You
can reverse the sort order by clicking the button again.)
– or –
Click an option under the Sort menu.
To export the entries to a text file:
1. Select File > Export.
2. Specify a file name and path.
3. Click Save.
To copy one or more entry:
1. Select the entries. (Click a single entry, or use Ctrl-click or Shift-click to select
multiple entries; to select all entries, use Edit > Select All.)
2. Select Edit > Copy.
3. Paste the entries (for example, into a text file or email message).
70 Section 3D: Tools
Page 79

To delete all entries:
䊳 Click the Clear button.
To delete one or more entry:
1. Select the entries. (Click a single entry, or use Ctrl-click or Shift-click to select
multiple entries.)
2. Select Edit > Delete.
Viewing Alerts
The Alert Log displays a record of all alerts (for example, connection errors) that
have been received while establishing and maintaining connections. You can use
the Alert Log to help isolate and resolve connection issues.
To view the Alert Log:
1. In Sprint Connection Manager, click Menu.
2. Select Alert Log. (This menu option is unavailable if the alert log is empty.)
To sort the entries:
䊳 Click the button that contains the title of the column you want to sort by. (You
can reverse the sort order by clicking the button again.)
– or –
Click an option under the Sort menu.
To export the entries to a text file:
1. Select File > Export.
2. Specify a file name and path.
3. Click Save.
Section 3D: Tools 71
Page 80

To copy one or more entry:
1. Select the entries. (Click a single entry, or use Ctrl-click or Shift-click to select
multiple entries; to select all entries, use Edit > Select All.)
2. Select Edit > Copy.
3. Paste the entries (for example, into a text file or email message).
To delete all entries:
䊳 Click the Clear button.
To delete one or more entry:
1. Select the entries. (Click a single entry, or use Ctrl-click or Shift-click to select
multiple entries.)
2. Select Edit > Delete.
Running Diagnostics
To identify problems when connecting to the network, use the Device
Info & Diagnostics window. Device Info & Diagnostics evaluates issues with your
USB port, port configuration, network signal strength, Sprint Connection
Manager, and more. Once the program runs a diagnostics check, it recommends
solutions.
The program also displays information such as your phone number.
Results of the diagnostics can be shared with a Sprint Customer Service Specialist,
to assist that person with troubleshooting.
To access the Device Info & Diagnostics window:
1. Ensure the Sprint Mobile Broadband USB modem is inserted.
2. In Sprint Connection Manager, click Menu.
3. Select Device Info & Diagnostics.
72 Section 3D: Tools
Page 81

The tests automatically start when the window opens.
From the Device Info & Diagnostics window, you can view system information
(page 74) and save the system information to an RTF file.
From the Device Info & Diagnostics window, you can also update parameters in
your Sprint Mobile Broadband USB modem:
䊳 Click Update Data Profile. (If this button is not displayed, remove and reinsert
the device.)
Section 3D: Tools 73
Page 82

Displaying System Information
The System Information window displays:
䢇 System Parameters: Information about your computer hardware and software.
䢇 Installed Files: Files related to Sprint Connection Manager.
䢇 Device Info & Diagnostics: Information about the Sprint Mobile Broadband USB
modem (including its phone number), and results of various tests.
To display system information:
1. Select Menu > Device Info & Diagnostics.
2. In the Device Info & Diagnostics window, click System Information.
To save the information to a file (for example, if you are requested to send the report to
your service provider representative):
1. In the System Information window, click Create Report.
2. Specify a file name and path.
3. Click Save.
Updating the Software
From time to time, Sprint may release updates for Sprint Connection Manager and
your Sprint Mobile Broadband USB modem. These updates may add features or
improve network performance.
Note:
To update the software:
1. Ensure you have a network connection.
2. In Sprint Connection Manager, click Menu. Select Software Updates.
– or –
From the General option of the Settings window (page 60), click Check Now.
You can also set the software to automatically check for updates once a month:
1. In Sprint Connection Manager, click Menu and then select Settings.
2. Select Check for updates once per month.
During the software update, Sprint Connection Manager will close. Before
you initiate the software update, finish any Web browsing, data transfers,
and so on.
74 Section 3D: Tools
Page 83

About Sprint Mobile Broadband
The About Sprint Mobile Broadband window displays information about the
Sprint Connection Manager software.
To display this window:
䊳 In Sprint Connection Manager, click Menu and then select About Sprint Mobile
Broadband.
– or –
Right-click the Sprint Connection Manager icon ( ) in the system tray and,
from the shortcut menu, select About Sprint Mobile Broadband.
To close this window, click anywhere inside it.
Tip:
To display more information, you can run diagnostics (page 72).
Section 3D: Tools 75
Page 84

Frequently Asked Questions
In This Section
⽧ What is Sprint Connection Manager?
⽧ If the connection is “always on,” am I always being billed?
⽧ How fast is the connection with Sprint Connection Manager?
⽧ Can I connect to a dial-up account like AOL or EarthLink?
⽧ How do I get the location-enhanced Local Search feature?
⽧ Where do I find the location-enhanced Local Search feature?
⽧ How do I use the location-enhanced Local Search feature?
⽧ Where can I use GPS?
Section 3E
⽧ Once I connect to the network, how do I access my corporate network
through a VPN?
⽧ How can I optimize my settings to achieve the fastest speeds and
conserve data when accessing my corporate network?
⽧ Why won’t my laptop go into hibernation mode when using my
Sprint Mobile Broadband USB Modem?
76 Section 3E: Frequently Asked Questions
Page 85

What is Sprint Connection Manager?
Sprint Connection Manager is software that lets you connect to the Sprint Power
Vision or Sprint Vision network. Sprint Connection Manager takes advantage of
the increased data speeds offered by the Sprint Mobile Broadband Network.
If the connection is “always on,” am I always being billed?
No. The connection to the network goes dormant after a period of inactivity, but
the connection can be re-established faster than having to reconnect. Billing
occurs only when data is passed across the network.
How fast is the connection with Sprint Connection Manager?
The Sprint Mobile Broadband Network allows you to connect to the Internet at
speeds of up to 3.1 Mbps (1xEV-DO Rev. A), 2.4 Mbps (1xEV-DO Rev. 0), or 144 kbps
(1X). Average connection speeds are:
For 1xEV-DO Rev. A: between 450 and 800 kbps downlink from the network, and
between 300 and 400 kbps uplink to the network;
For 1xEV-DO Rev. 0: between 400 and 700 kbps downlink from the network, and
between 40 and 80 kbps uplink to the network;
For 1X: between 40 and 80 kbps.
These speeds are faster than dial-up connection speeds.
Can I connect to a dial-up account like AOL or EarthLink?
No. The software does not support dial-up connections.
How do I get the location-enhanced Local Search feature?
The location-enhanced Local Search feature works only with GPS-capable data
cards and the latest version of Sprint Connection Manager. The feature is
available at no additional charge in the latest version of Sprint Connection
Manager.
Section 3E: Frequently Asked Questions 77
Page 86

Where do I find the location-enhanced Local Search feature?
In Sprint Connection Manager, select Menu > Location & Search Services.
How do I use the location-enhanced Local Search feature?
When running Sprint Connection Manager, select Menu > Location & Search
Services. Some predefined, most frequently used queries are listed. There is also an
option to run your own custom query.
Where can I use GPS?
GPS works wherever there is both Sprint CDMA network access and GPS access.
Note:
In some locations where CDMA network access is available, GPS may not
be available at this time. For the latest on service available by location,
refer to Sprint Nextel Coverage maps.
Once I connect to the network, how do I access my
corporate network through a VPN?
Once you complete a wireless connection, you may need to launch an extranet
client provided by your company and supply the appropriate username and
password to gain access. For support, contact your company help desk.
How can I optimize my settings to achieve the fastest
speeds and conserve data when accessing my corporate
network?
Depending on your corporate email client, you can optimize your settings by
doing the following:
䢇 Work in “offline” mode, and connect only when you need to send or receive
email.
䢇 Remove the Preview Pane, or use the AutoPreview for headers only.
78 Section 3E: Frequently Asked Questions
Page 87

䢇 Save attachments to a desktop folder and then open from that folder, rather
than opening the attachment directly from the message.
For more information, access the Microsoft white paper at:
www.microsoft.com/ office/outlook/ev aluation/p erform.doc.
Why won’t my laptop go into hibernation mode when
using my Sprint Mobile Broadband USB Modem?
If you’re using Windows 2000, you need to upgrade to Service Pack 4 from
www .mic roso ft.co m
.
Section 3E: Frequently Asked Questions 79
Page 88

Troubleshooting Tips
In This Section
⽧ Problems, Causes, and Solutions
⽧ GO Button Is Unavailable
⽧ Searching for Service
⽧ Cannot Connect to the Network
⽧ Power LED Goes Off and On, and Then Stays Red
⽧ Location-Based Services Don't Seem To Be Available
⽧ Could Not Prepare Data Services
⽧ Unable To Prepare Data Services
Section 3F
⽧ Sprint Connection Manager Stops Working After Upgrading Windows
This section helps you diagnose and solve common problems you may experience
while using your Sprint Mobile Broadband USB modem and the Sprint Connection
Manager software.
80 Section 3F: Troubleshooting Tips
Page 89

Problems, Causes, and Solutions
When properly installed, the Sprint Mobile Broadband USB modem is a highly
reliable product.
Most problems are caused by one of these issues:
䢇 Network coverage is not available (because of your “Network Mode” settings
[page 63], or because you are outside the network, or because of an account or
network problem).
䢇 The drivers were not properly installed because of a problem with your
computer’s USB slot.
䢇 System resources required by the device are being used by other devices.
Tips when troubleshooting problems with your Sprint Mobile Broadband USB
modem and software:
䢇 Ensure your device is inserted, not locked (page 51), and not powered off
(page 38).
䢇 Ensure the Power LED is green.
䢇 To determine the connection status, use the icons in the system tray (page 39),
and icons and messages in Sprint Connection Manager (page 33 and page 35).
䢇 The alert log might indicate the nature of the problem (page 71).
䢇 Run diagnostic tools supplied with Sprint Connection Manager (page 72).
䢇 Check the Frequently Asked Questions (page 76).
䢇 Use the resources listed in “Getting Help” (page 26).
䢇 Has Sprint Connection Manager stopped working after you’ve upgraded to a
different version of Windows (page 85)?
If, after reading this section, you are unable to resolve a problem, please visit
www .s pri nt.c om
or contact Sprint Customer Service. (See “Getting Help” on
page 26.)
Section 3F: Troubleshooting Tips 81
Page 90

GO Button Is Unavailable
Ensure the Sprint Mobile Broadband USB modem is properly inserted, not locked
(page 51), and not powered off (page 38).
If Sprint Connection Manager displays “Searching for service” for a long period of
time (for example, several minutes), see “Searching for Service” below.
If Roam Mode (from the Sprint Vision option of the Settings window) is set to
Sprint, ensure you are not roaming, or change the setting (page 64). (You may be
subject to roaming rates.)
Searching for Service
If Sprint Connection Manager displays “Searching for service” for a long period of
time (for example, several minutes), try one of the following:
䢇 Try reorienting your computer, or try adjusting the angle of the device’s USB
connector (see the picture on page 17).
䢇 If you are inside a building or near a structure that may be blocking the signal,
change the position or location of your computer.
䢇 If Roam Mode (from the Sprint Vision option of the Settings window) is set to
Sprint, ensure you are within the network coverage area, or change the Roam
Mode setting. (You may be subject to roaming rates.)
䢇 If Roam Mode (from the Sprint Vision option of the Settings window) is set to
Roam Only, ensure you are roaming, or change the Roam Mode setting.
䢇 If Network Mode (from the Sprint Vision option of the Settings window) is set to
1X Only, and only 1xEV-DO coverage is available, either move to an area that
has 1X coverage, or change the setting to Automatic or 1xEV-DO Only.
䢇 If Network Mode (from the Sprint Vision option of the Settings window) is set to
1xEV-DO Only, and only 1X coverage is available, either move to an area that
has 1xEV-DO coverage, or change the setting to Automatic or 1X Only.
䢇 Check with Sprint — a network or account problem may be preventing the
Sprint Mobile Broadband USB modem from obtaining service.
82 Section 3F: Troubleshooting Tips
Page 91

Cannot Connect to the Network
If you're having problems connecting, or there's no Sprint Power Vision (1x-EVDO)
coverage in your area, set Network Mode (from the Sprint Vision option of the
Settings window) to 1X Only, and try to establish a connection.
If the connection is dropped as soon as it is established:
䊳 Charge the battery for at least 30 minutes if the Power LED is red. (If the
connection still gets dropped as soon as it is established, continue with the
following steps.)
– or –
1. Select:
(Windows Vista) Start > Control Panel > Network and Sharing Center >
Manage Network Connections
(Windows XP) Start > Control Panel > Network Connections
(Windows 2000) Start > Settings > Control Panel > Network and Dial-Up
Connections
2. Right-click Sprint Vision - Sierra Wireless, and select Properties.
3. Select:
(Windows Vista) Options, and select PPP Settings.
(Windows XP) Networking tab, and select Settings.
4. Ensure that “Enable LCP Extensions” is selected and “Negotiate multi-link for
single link connections” is not selected.
5. Click OK.
Power LED Goes Off and On, and Then Stays Red
This situation may occur under extreme usage conditions when you’re
transmitting data in a coverage area with a weak signal.
1. Wait until the Power LED turns green.
2. Resume your connection.
䊳 If the Power LED still goes off, and then comes on again and stays red, charge
the battery for at least 30 minutes.
Section 3F: Troubleshooting Tips 83
Page 92

Location-Based Services Don't Seem To Be Available
If the menus or windows related to Location-Based Services are unavailable in
Sprint Connection Manager:
䊳 In the Settings window (page 60), check whether the drop-down list has a
Sprint Location Services option.
If the drop-down list does not have the Sprint Location Services option, then your
account, your device, or both are not configured to support Location-Based
Services; contact Sprint Customer Service (page 27).
If the drop-down list has the Sprint Location Services option, select it and ensure
that Enable Location on Device and Display 'Location & Search Services' on the menu
are selected.
Could Not Prepare Data Services
See “Unable To Prepare Data Services” (page 84).
Unable To Prepare Data Services
Note:
The Sprint Mobile Broadband USB modem was unable to access the IOTA server to
obtain data account parameters for you. This may be because the signal strength
is poor or because the IOTA server is not responding.
䢇 Confirm you have sufficient signal strength. Try the actions listed for
“Searching for Service” (page 82).
䢇 Contact Sprint for assistance (page 27).
This message may indicate that your system does not support 128-bit encryption
for high-security access to data provisioning. You will not be able to complete the
activation of data services until you upgrade your system’s security. (See “High
Encryption Requirements” on page 9.)
The message may appear as “Could not prepare data services. Please contact...”
84 Section 3F: Troubleshooting Tips
Page 93

Sprint Connection Manager Stops Working After
Upgrading Windows
Note: After the following steps, any changes you made to Sprint Connection
Manager settings will be lost; you will have to re-apply the changes.
If you’ve upgraded Windows, and Sprint Connection Manager stopped working:
1. Uninstall Sprint Connection Manager (page 54).
2. Reinstall Sprint Connection Manager (page 15).
Section 3F: Troubleshooting Tips 85
Page 94

86
Page 95

Section 4
Technical Specifications and
Regulatory Information
Page 96

88
Page 97

Section 4A
Technical Specifications
In This Section
⽧ LED Operation
⽧ Radio Frequency and Electrical Specifications
⽧ Software Specifications
⽧ Environmental Specifications
⽧ Mechanical Specifications
This section describes the LED and various specifications of your Sprint Mobile
Broadband USB modem.
Section 4A: Technical Specifications 89
Page 98

LED Operation
Your device has two LED lights. The LEDs operate as follows:
LED State Indicates
Data Off The device has no power. The device may not be
completely inserted into the computer, the
computer may be in suspend mode (which powers
down the device), or you have powered the device
off (page 42).
Solid
green
Green,
blinking
slowly
Green,
blinking
rapidly
Power Off The device has no power. The device may not be
Red The device has power; the battery is low.
The device has power, has found a signal, and is
ready to connect.
The device is powering up, or no service is available.
See “Searching for Service” on page 82.
The device is sending or receiving data.
completely inserted into the computer, the
computer may be in suspend mode (which powers
down the device), or you have powered the device
off (page 42).
Charge the battery by inserting the device into the
USB slot of your computer. Alternatively, insert the
device into the docking station, and attach the
docking station to your computer.
Green The device has power; the battery is charged.
90 Section 4A: Technical Specifications
Page 99

Radio Frequency and Electrical Specifications
Approvals Compliant with:
IS-2000 Release 1.0 (CDMA (1X), IS-707-A Data, IS-856
(CDMA 1xEV-DO), IS-866, IS-878, IS-890,
CDMA Development Group
FCC (ID: N7N-MC5725U)
Industry Canada (ID: 2417C-MC5725U)
Vol ta ge +5.0 Vdc from USB slot
Current Maximum: 500 mA (from USB port)
Typical data call current (talk mode), at 3.3 V:
285 mA (1X)
295 mA (1xEV-DO)
Standby: 2.75 mA (1xEV-DO/IS-2000 hybrid mode),
at 3.3 V
Transmitter
power
Tra nsmi t PCS: 1805 to 1870 MHz
Receive PCS: 1715 to 1780 MHz
Channel
spacing
Frequency
stability
200 mW (+23 dBm)
Cellular: 824 to 849 MHz
Cellular: 868 to 894 MHz
GPS:
1.25 MHz
±150 Hz
1575.42 MHz
Section 4A: Technical Specifications 91
Page 100

Software Specifications
CDMA
specification
Data service IS-707A
SMS (IS-637) Not supported
FAX Not supported
IOTA Supported
OTASP (IS-683A,
IS-683B, IS-683C)
OTAPA Supported
PRL (preferred
roaming list)
Authentication Supported
Voi ce Not supported
NAM Single
E911 Not supported
IS-2000 Release 0
Supported
Supported
Position Location Supported (Mobile Station based)
TTY/Accessibility Not supported
Mobile IP Supported
92 Section 4A: Technical Specifications
 Loading...