

Sierra Wireless AirCard 763S Quick Start Manual

Sierra Wireless
Mobile Hotspot
AirCard
®
763S
www.sierrawireless.com
QUICK START GUIDE
GUIDE DE DÉMARRAGE RAPIDE
1
External RF
antenna connector
Also in the box:
• Lithium ion battery
• Wall charger
• USB cable
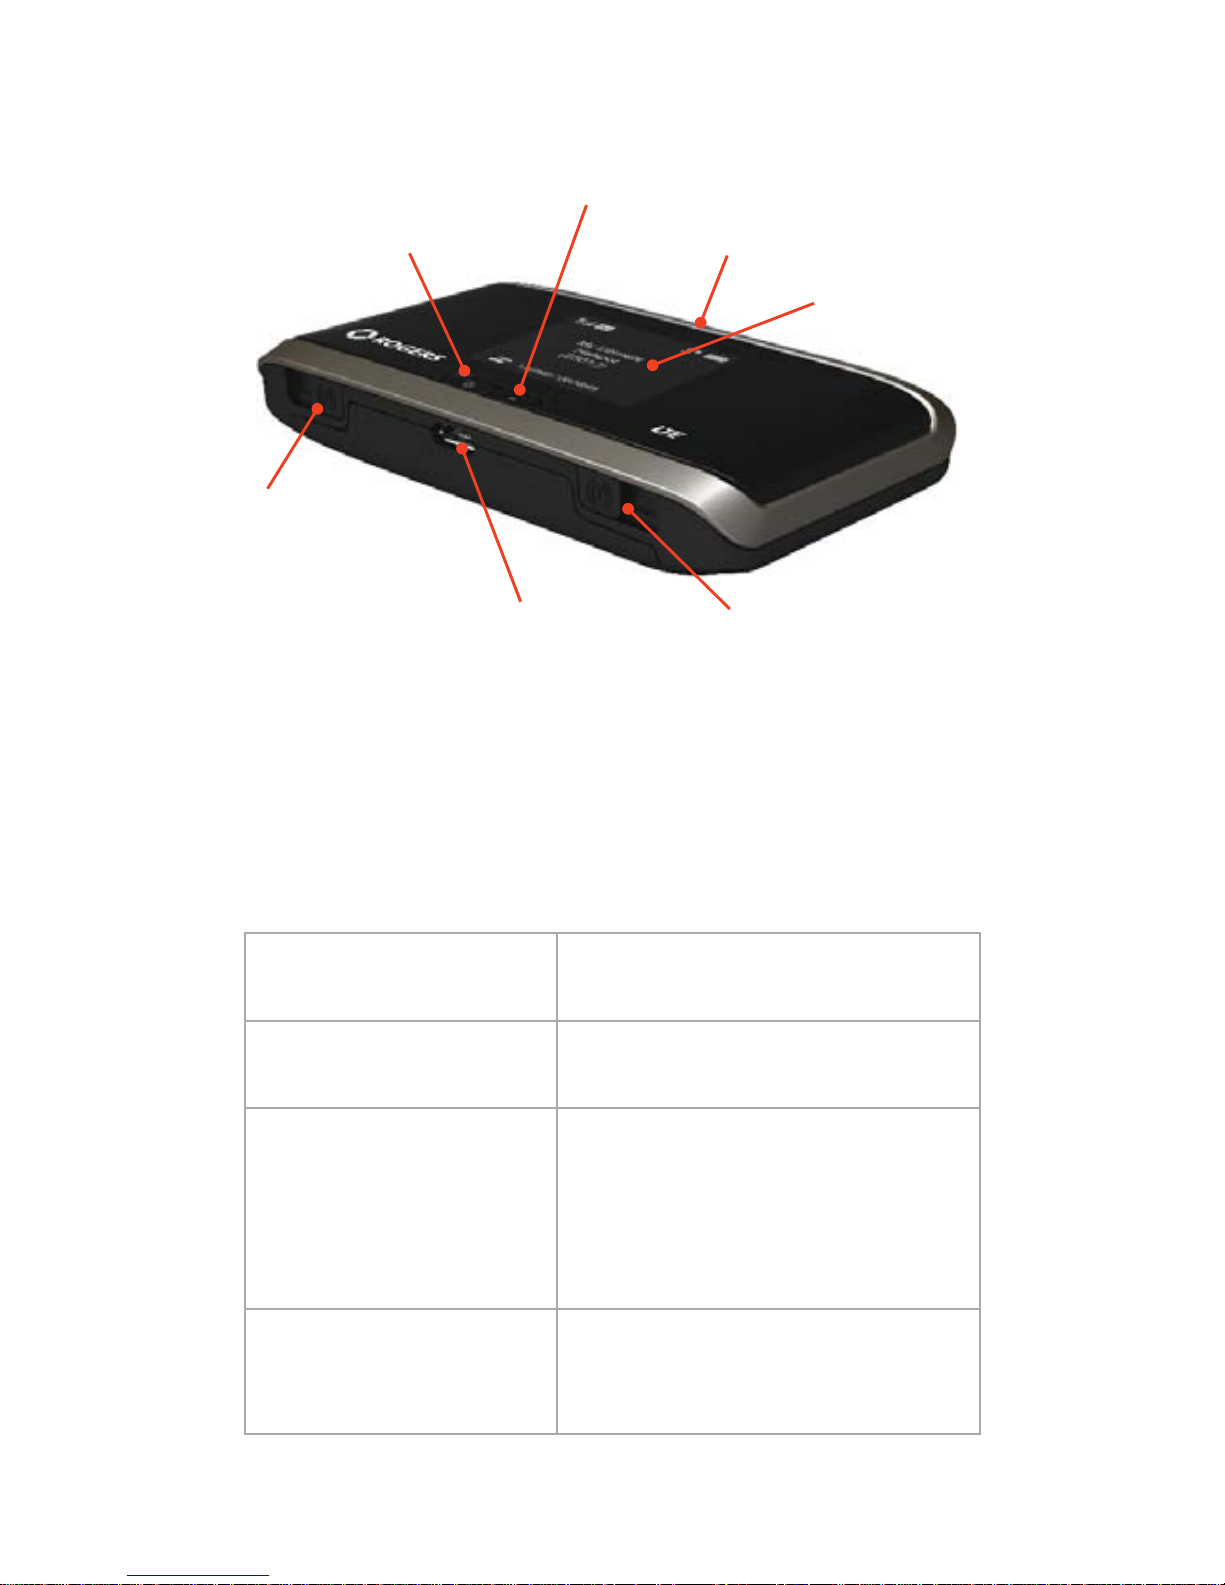
Get to Know Your Device
WPS button
micro USB port
Power key
External RF
antenna connector
Navigation key
LCD screen
Buttons & keys
Lock the mobile hotspot Press and hold the Navigation key
for 3 seconds.
Unlock the mobile
hotspot
Press and release any key. Press
the Power key to confi rm.
Mute / unmute the audio
alerts
• Press and hold WPS button and
Navigation key for 3 seconds, or
• Press the Navigation key to go
to the Messages / Alerts LCD
screen and follow the prompts.
Reset the device to
factory settings
Press and hold the WPS button
and Power key for 5 seconds and
follow the LCD on-screen prompts.
2
English
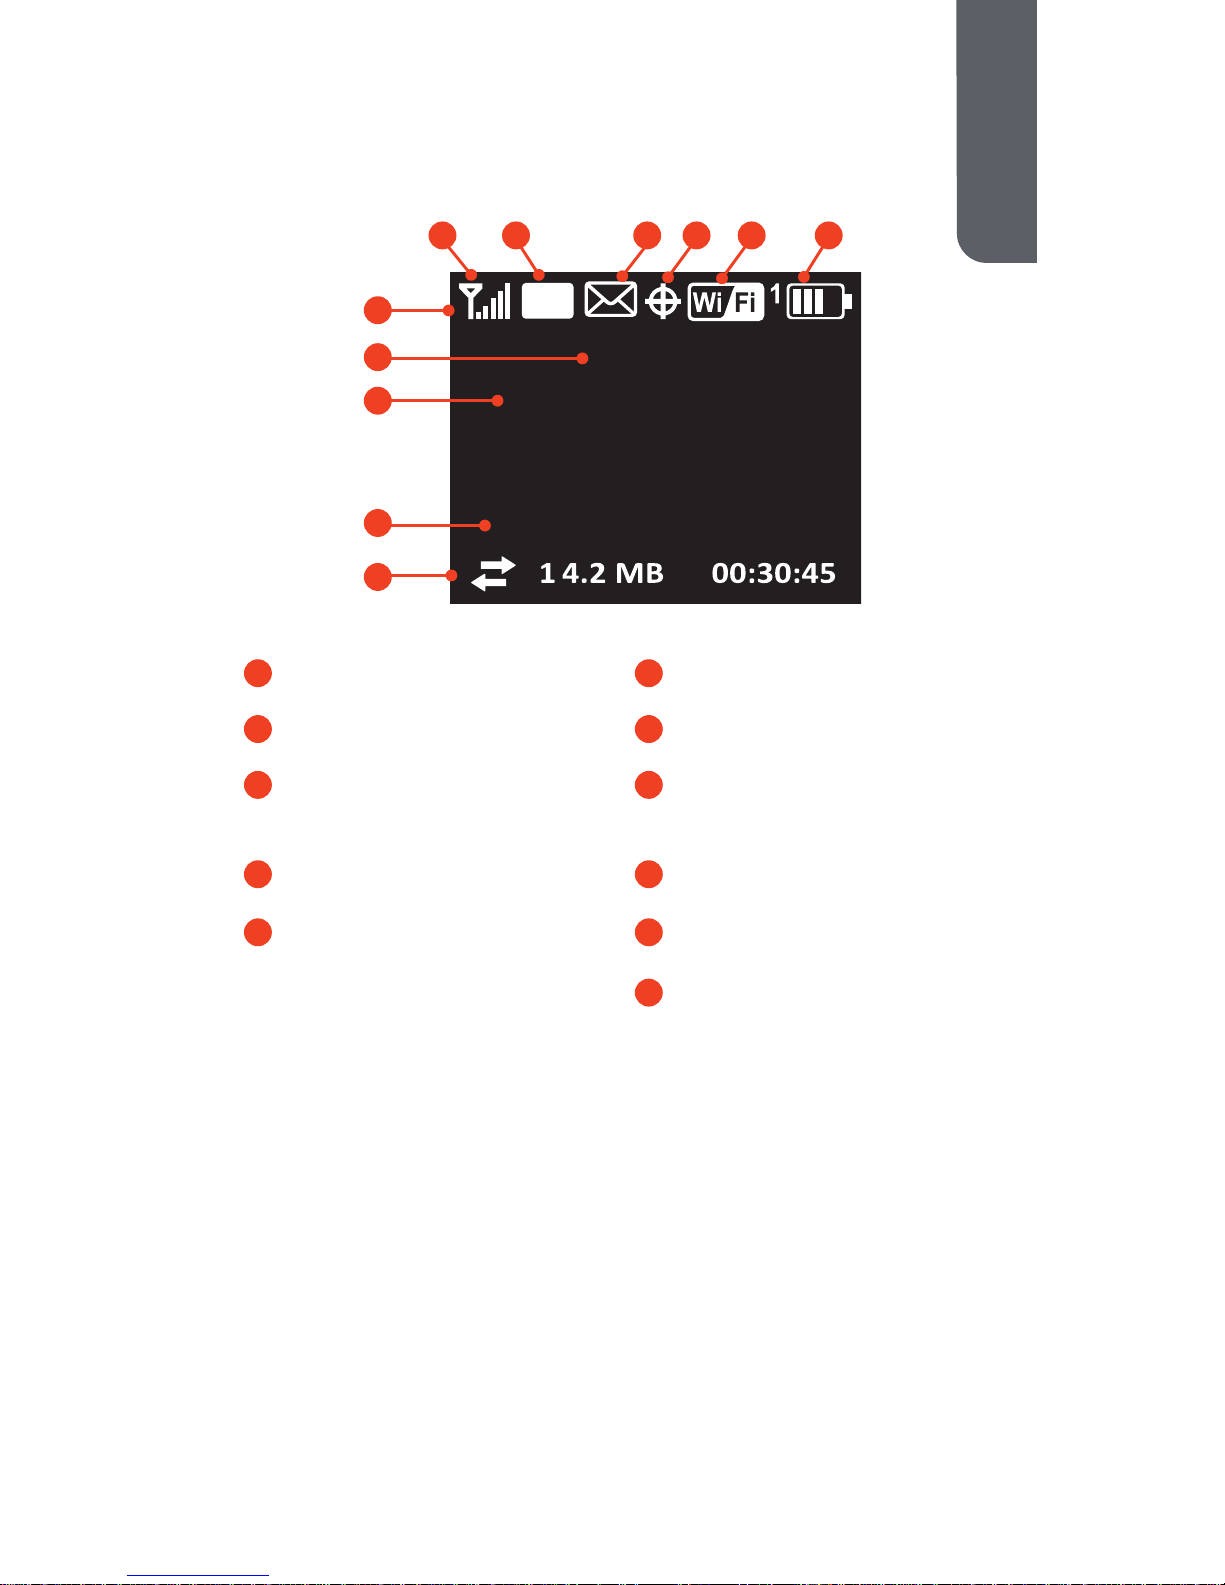
Status icons
Signal strength
Network technology
Messages
Battery
Wi-Fi on or off
(View at http://rogers.hotspot)
The number indicates
the number of devices
connected.
Your Device LCD Screen
GPS fi nding fi x or tracking
Press the Navigation key to cycle through the following
screens:
• Connect Info (Wi-Fi SSID and Wi-Fi Passphrase)
• WPS Setup
• Messages/Alerts
• Data Usage/Billing Info
• Device Info/About
Homepage URL
Operator name
Data usage information
Rogers
SSID: AirCard-xxxx
Wi-Fi Passphrase: 12345678
To conĮŐƵre yŽƵƌŚŽƚƐƉŽƚ
LT E
ŐŽƚŽŚƩƉƌŽŐĞƌƐŚŽƚƐƉŽƚ
21
7
6543
8
10
11
1
2
3
4
5
6
7
8
11
9
Wi-Fi SSID
9
10
3
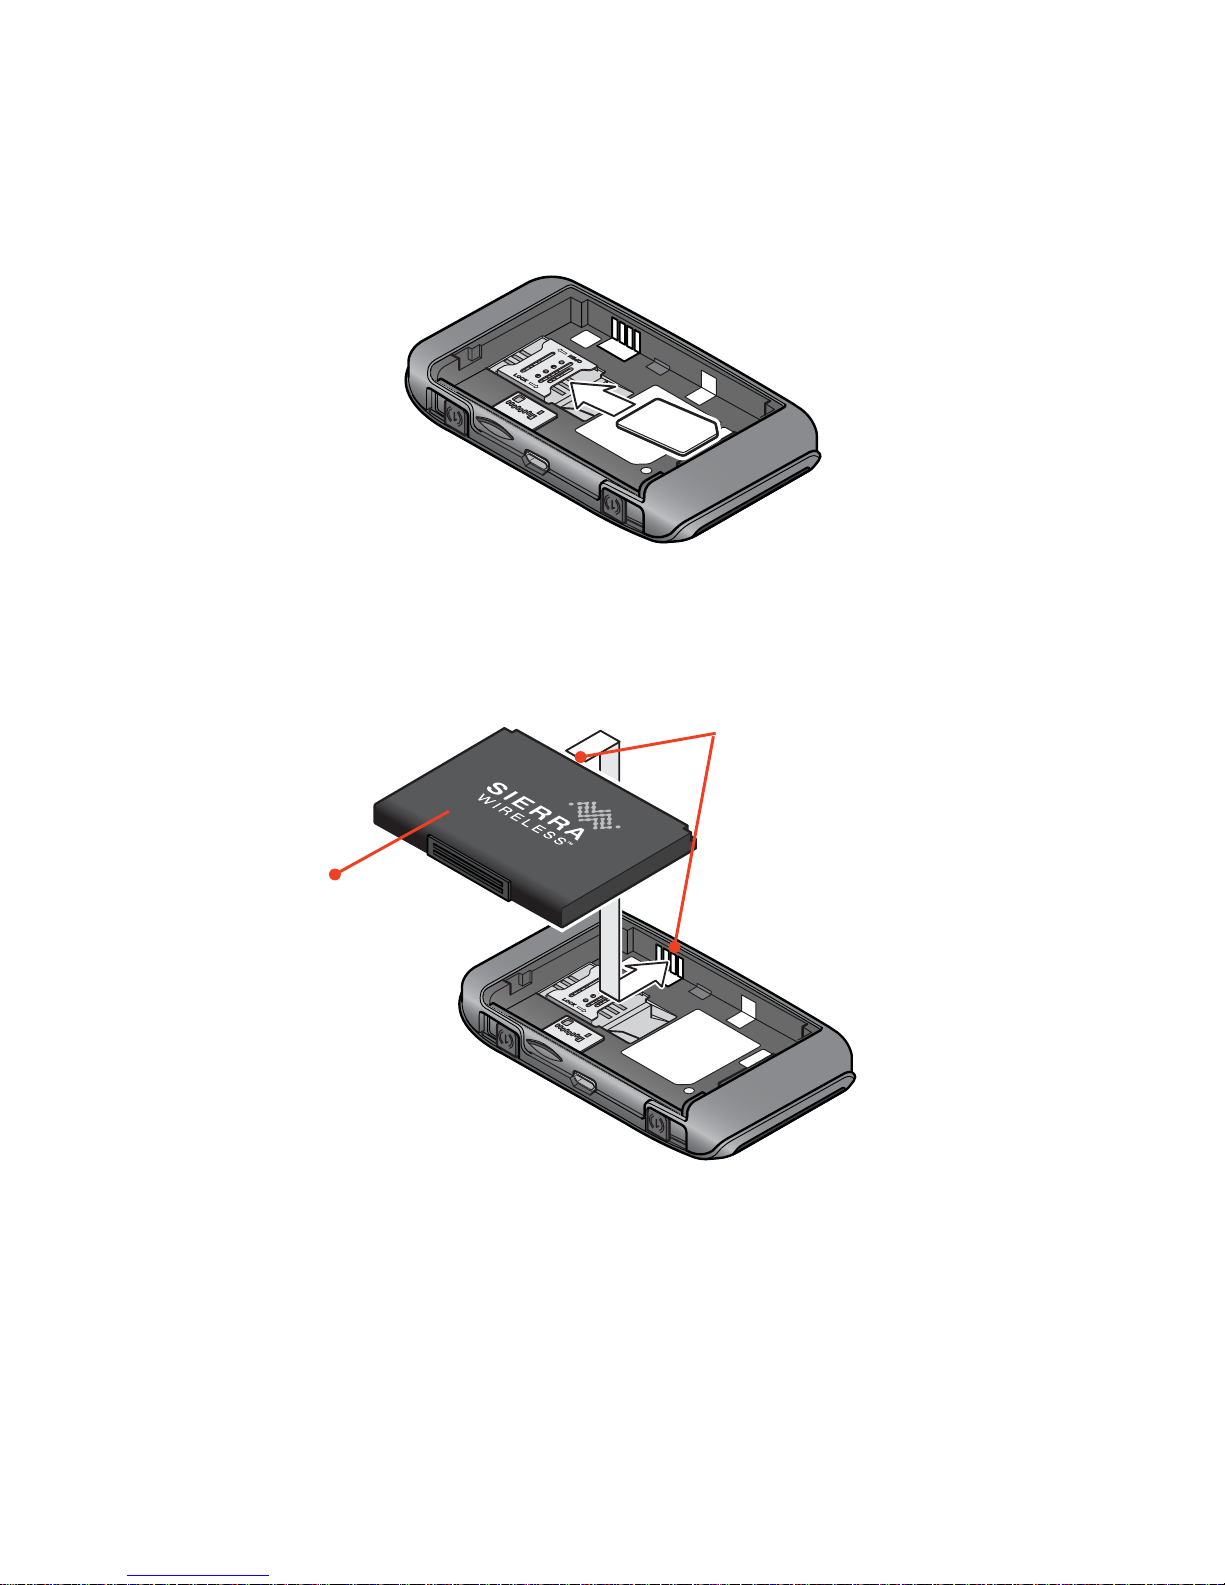
Step 1: Set up Device
Your AirCard Mobile Hotspot comes with the battery partially
charged. When you need to recharge the battery, use the USB
cable to attach the hotspot to:
• A wall socket, using the AC adapter (fastest option)
• The USB port on your laptop
1. Slide the SIM card under the cover, as shown in the
illustration.
2. Insert the battery as shown in the illustration. (The battery
installs easily. If it does not go in easily, check the orientation.
Do not force it.)
3. Replace the back cover.
Gold contacts
Battery
4
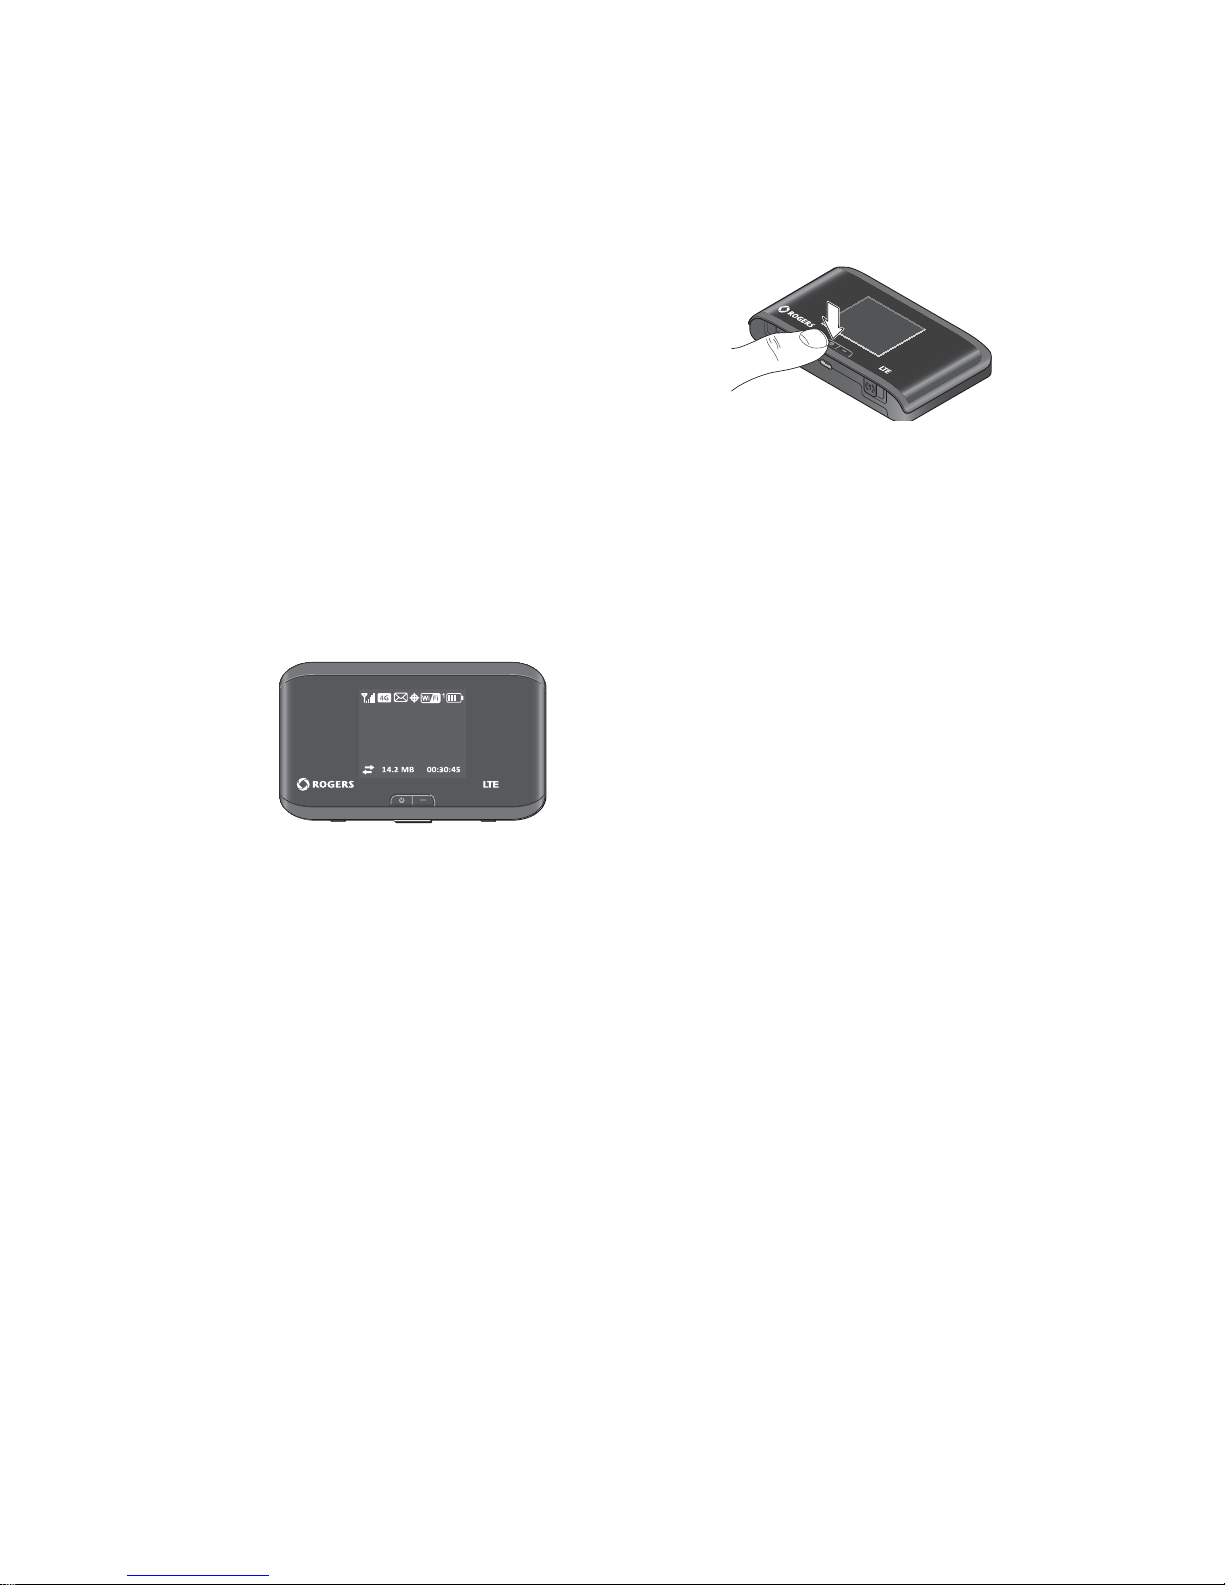
1. Press and hold the P
ower key for a
few seconds. Once powered up, the
mobile hotspot automatically connects
to the mobile broadband network.
The fi rst time you turn on the mobile
hotspot, you’ll be asked to select a language on the LCD.
After that, you can change the language on the homepage.
2. The LCD screen displays the message “Connect your
computer to Wi-Fi network” and shows you the Wi-Fi SSID
(Network name) and Wi-Fi Passphrase.
3. On your computer or mobile device, open your Wi-Fi /
network connection manager.
4. Select the Wi-Fi SSID displayed on the LCD screen.
5. When prompted, enter your Wi-Fi Passphrase, as it appears
on the LCD screen.
When the computer or mobile device connects to the mobile
hotspot, a ‘1’ appears beside the Wi-Fi icon on the LCD
screen.
6. Launch your browser and, if desired, go to http://rogers.
hotspot to personalize your settings. (Note: The mobile
hotspot is completely secured using its default security
settings.)
7. Optional step: Depending on your service provider, you may
need to create a profi le to connect to the mobile broadband.
Follow the instructions on page 10.
Note: The LCD screen goes into sleep mode to save power. To
wake up the LCD screen, press and release the Power key.
Step 2: Connect to the
Internet
Rogers
SSID: AirCard-xxxx
go to ŚƩƉƌŽŐĞƌƐŚŽƚƐƉŽƚ
To co nĮŐƵre yŽƵƌŚŽƚƐƉŽƚ

5
Security Credentials
Wi-Fi Passphrase
• Use to connect a wireless device to your Wi-Fi network
• The Wi-Fi Passphrase is shown on the LCD screen.
Admin Password
• Your default Admin Password is swiadmin.
• Use this password to log in to the AirCard Homepage and
make changes such as enabling GPS or changing your
security settings.
The default Wi-Fi Passphrase and Admin Password are printed
on the label under the battery.
Reset the Wi-Fi Passphrase and Admin
Password
To reset your device to the default settings:
1. Press and hold the WPS button and the Power key for
5 seconds.
2. When prompted, press the Power key.
3. Reconnect your Wi-Fi devices.
Note: If you change your Wi-Fi Passphrase, you may need to
update the saved information in your laptop’s Wi-Fi / network
connection manager.
AirCard Watcher app
Download the complimentary AirCard Watcher app from
www.sierrawireless.com/AirCardApps.
Use this app to view your connection, settings, and data usage from your smartphone
or tablet. To manage all hotspot settings, go
to the homepage (http://rogers.hotspot).

6
Mobile Hotspot Homepage
To access your mobile hotspot homepage, connect to your
device, and in your browser, enter http://rogers.hotspot. Log in
with your Admin Password (swiadmin) to modify settings.
Note: Alternatively, you can enter the device IP address
http://192.168.1.1
On the homepage, you can:
• Change the SSID, Wi-Fi Passphrase, Admin Password, and
Wi-Fi encryption
• Set autoconnect options
• Set GPS options
• Use GPS to map or track your location and fi nd nearby
amenities
• View data usage
• Set audio alerts
• View and change other settings
• Check device status

7
Check Your Data Usage
You have two options to view an estimate of your data usage.*
On the mobile hotspot LCD Dashboard:
1. Press the Navigation key to cycle through the screens. The
billing information screen shows your data usage.
Billing Info
Data used from: 2011/06/18
Data transferred: 4.23 MB*
Cycle restarts: 2011/07/01
ĂLJƐůĞŌϭϮĚĂLJƐ
* approximate
On the Homepage:
1. Go to http://rogers.hotspot.
2. Click the Session Data icon.
3. Optionally, set the billing cycle to match your data plan’s
billing date.
* Not accurate for billing purposes.
 Loading...