

Page 1
2130135
Rev B
PRE-DRAFT 15/10/01
AirCard
®
710
Wireless Network Card
User Guide
Page 2

Page 3
Preface
Rev. B Oct. 2001 3
Important Notice
Becauseof thenatureof wireless communications, transmission and reception
of data can never be guaranteed. Data may be delayed, corrupted (i.e., have
errors) or be totally lost. Although significant delays or losses of data are rare
when wireless devices such as the Sierra Wireless network card are used in a
normal manner with a well-constructed network, the Sierra Wireless network
card should not be used in situations where failure to transmit or receive data
could result in damage of any kind to the user or any other party, including
butnotlimited to personal injury, death, or loss of property. Sierra Wireless,
Inc. accepts no responsibility for damages of any kind resulting from delays or
errors in data transmitted or received using the Sierra Wireless network card,
or for failure of theSierra Wireless network card to transmit or receive such
data.
Safety and Hazards
Do not operate the Sierra Wireless AirCard 710 wireless network card in areas
where blasting is in progress, where explosive atmospheres may be present, or
nearmedical equipment, life support equipment, or any equipment which
may be susceptible to any form of radio interference. In such areas, the Sierra
Wireless network card
MUST BE POWERED OFF
. The Sierra Wireless
network card can transmit signals that could interfere with this equipment.
Do not operate the Sierra Wireless network card in any aircraft, whether the
aircraft is on the ground or in flight. In aircraft, the Sierra Wireless network
card
MUST BE POWERED OFF
. When operating, the Sierra Wireless network
card can transmit signals that could interfere with various onboard systems.
Note: Some airlines may permit the
use of ce ll ul ar phon es w h ile t he
airc raf t is on the gr o un d an d the door
is open. Sierra Wireless network
cards may be used at this time.
Thedriveror operator of any vehicle should not operate the Sierra Wireless
network card while in control of a vehicle. Doingso will detract from the
driver or operator's control and operation of thatvehicle. In some states and
provinces, operatingsuch communications devices while in control of a
vehicle is an offence.
FCC RF Exposure
Information
In August1996 the Federal Communications Commission (FCC) of the United
States with its action in Report and Order FCC 96-326 adopted an updated
safety standard for human exposure to radio frequency (RF) electromagnetic
energy emitted by FCC regulated transmitters. Those guidelines are consistent
with the safety standard previously set by both U.S. and international
standards bodies. The design of this wir eless network card complies with the
FCC guidelines and these international standards.
Use only the supplied or an approved antenna. Unauthorized antennas,
modifications, or attachments could impair callquality, damage the phone, or
resultin violation of FCC regulations.
This device has been tested for FCC RF exposure requirements in a laptop
PC. To comply with FCC RF exposure requirements the AirCard 710 PCS
GSM modem card must be operated with a minimum separation distance of
2 cm (0.8 inches) between the user/nearby persons and the antenna
.
For more informationabout RF exposure, please visit the FCC web site at
www.fcc.gov
.
Limitation of
Liability
Theinformation in this manual is subjectto changewithoutnotice and does
not represent a commitment on the part of Sierra Wireless, Inc. SIERRA
WIRELESS, INC. SPECIFICALLY DISCLAIMS LIABILITY FOR ANY AND
ALL DIRECT, INDIRECT, SPECIAL, GENERAL, INCIDENTAL, CONSE-
QUENTIAL, PUNITIVE OR EXEMPLARY DAMAGES INCLUDING, BUT
Page 4

AirCard 710 Wireless Netw ork Card - User Guide
4 2130135
NOT LIMITED TO, LOSS OF PROFITS OR REVENUE OR ANTICIPATED
PROFITS OR REVENUE ARISING OUT OF THE USE OR INABILITY TO USE
ANY SIERRAWIRELESS,INC. PRODUCT, EVEN IF SIERRA WIRELESS,
INC. HAS BEEN ADVISED OF THE POSSIBILITY OF SUCH DAMAGES OR
THEY ARE FORESEEABLE OR FOR CLAIMS BY ANY THIRD PARTY.
Patents
[NOTE: WHAT ARE PROPER PATENTS TO LIST HERE? - Derek]
Portions of this product are covered by some or all of the following US patents:
5515013, 5617106, 5629960, 5682602, 5748449, 5845216, 5847553, 5878234,
5890057, 5929815, 6169884, 6191741, 6199168, D367062, D372248, D372701,
D416857, D442170 and other patents pending.
Copyright
© 2001 Sierra Wireless, Inc. All rights reserved.
Trademarks
Sierra Wireless and the SierraWireless logo are trademarks of Sierra Wireless,
Inc. Heart of the Wireless Machine
®
and AirCard®are registered trademarks
of Sierra Wireless, Inc. Other trademarks arethe property of the respective
owners.All product specifications are subject to change without notice.
Other trademarks are the property ofthe respective owners.
Contact
Information
Your comments and suggestions on improving this documentation are
welcome and appreciated. Please e-mail your feedback to
documen-
tation@sierrawireless.com
. Thank you.
Consultour web site for up-to-date product descriptions , d ocumentation,
application notes, firmwareupgrades, troubleshooting tips, andpress releases:
www.sierrawireless.com
Sales Desk: phone: 1-604-232-1488
hours: 8:00am to 5:00pm Pacific Time
e-mail: sales@sierrawireless.com
Technical Support: phone: 1-604-231-1128
hours: 6:00am to 5:00pm Pacific Time
e-mail: support@sierrawireless.com
address: Sierra Wireless, Inc.
13811 Wireless Way
Richmond, BC
Canada V6V 3A4
fax: 1-604-231-1109
web: www.sierrawireless.com
Page 5
Rev B Oct. 2001 5
Table of Contents
Introducing the AirCard® 710 Wireless Network Card .....................1
About the AirCard® 710 Wireless Network Card ........................1
Supported Computer Platforms and Wireless Networks . . . . . . . . . . . . . . 2
A Network Card, a Modem, and a Phone ..............................3
How Circuit Mode and Packet Mode Data Connections Differ . . . . . . . . . 3
Connection Speed . . . . . . . . . . . . . . ................................4
Package Contents. . . . . . . . . . . . . . . . . . ................................ 5
HowToUseThisGuide............................................. 5
Getting Started ....................................................... 7
The AirCard® 710 Software. . . . . . . . . . ................................7
Account Activation and Configuration ................................7
Choosing a GSM Wireless Service Provider ........................8
SIM Card Information. . . . . . . . . . . . . . . ................................ 9
Inserting a SIM Card . . . . . . . . . . . . ...............................10
Removing a SIM Card . . . . . . . . . . . ...............................10
Setting Up the AirCard Network Card With Your Service Provider . . . . 11
Care and Maintenance of Your AirCard 710 Wireless Network Card . . . . . . 12
Installation on Notebook PCs . . . . . . . . . . ...............................15
Notebook PC System Requirements . . ...............................15
Software Installation. . . . . . . . . . . . . . . . ...............................16
Driver Installation . . . . . . . . . . . . . . . . . . ...............................18
Windows98,Me,2000,andXP...................................18
Windows 95 Driver Installation . . . ...............................21
Windows NT Driver Installation . . . ...............................23
Account Configuration . . . . . . . . . . . . . . ...............................28
Activation and Configuration Methods ............................28
Manual Activation . . . . . . . . . . . . . . ...............................28
Inserting and Removing the AirCard Wireless Network Card . . . . . . . . . . . . 29
Inserting the AirCard 710 PC Card . ...............................29
Removing the AirCard 710 PC Card ..............................30
Page 6
AirCard 710 Wireless Netw ork Card - User Guide
6 2130135
The Watcher Window and Indicators . . . . . . . ............................33
Launching the Watcher Program . . . . . . . . ............................33
Launching Watcher on Notebook PCs ............................33
Menus and Window Controls . . . . . . . . . . . ............................34
TheMenuBar ................................................. 34
The Minimize, Toggle Full/Compact and Close Boxes ...............35
Connection Displays. . . . . . . . . . . . . . . . . . . ............................ 35
Connection Status Area . . . . . . . . . . . . ............................35
Call Status Box . . . . . . . . . . . . . . . . . . . . ............................ 37
Indicator Area . . . . . . . . . . . . . . . . . . . . . ............................ 38
Taskbar Status Area Icons. . . . . . . . . . . . . . ............................39
Data Connections Through GSM and GPRS . ............................41
Dial-Up Circuit Mode Calls . . . . . . . . . . . . . ............................42
Initiating a Dial-Up Data Call . . . . . . . . ............................42
Closing a Dial-Up Data Call . . . . . . . . . ............................43
Incoming Data Calls . . . . . . . . . . . . . . . ............................ 43
Packet Mode Connections. . . . . . . . . . . . . . ............................43
Initiating a Packet Mode Connection . ............................43
Closing a Packet Mode Connection . . ............................43
GSM Voice Connections . . . . . . . . . . . . . . . . . . ............................45
The Dial Pad .....................................................46
The Scratch Pad ..................................................47
Making a Voice Call . . . . . . . . . . . . . . . . . . . ............................ 48
Initiating a Voice Call . . . . . . . . . . . . . . ............................48
AnsweringaVoiceCall .........................................48
Ending a Voice Call . . . . . . . . . . . . . . . . ............................48
Watcher Menu Options . . . . . . . . . . . . . . . . . . . ............................ 51
TheViewMenu...................................................51
Always On Top . . . . . . . . . . . . . . . . . . . . ............................ 51
Docking ......................................................51
Toggle Full/Compact . . . . . . . . . . . . . . . ............................ 51
Page 7
Contents
Rev B Oct. 2001 7
TheToolsMenu................................................... 53
SMS Manager… . . . . . . . . . . . . . . . . ...............................53
Phone Book . . . . . . . . . . . . . . . . . . . . ............................... 59
Call Log ......................................................59
Connection Manager . . . . . . . . . . . . ...............................61
KeyGuard .....................................................63
Options… .....................................................63
Administration > Activation Wizard… ............................81
Administration > Modem Update… ..............................81
TheHelpMenu ...................................................81
Help Topics… . . . . . . . . . . . . . . . . . . ...............................81
About Watcher… . . . . . . . . . . . . . . . ...............................83
Network Adapter Manager (for Multiple Network Cards) ..................85
How Windows® Works With Network Interface Cards..................85
Windows95,98,NTandMe.........................................86
Switching Primary Cards . . . . . . . . ...............................86
Windows2000andXP.............................................87
Stopping a Network Card . . . . . . . . ...............................88
Pop-Up Menu Items . . . . . . . . . . . . . . . . ...............................88
Online Help . . . . . . . . . . . . . . . . . . . . ...............................88
VersionInformation ............................................88
Closing the Network Adapter Manager ...........................88
AirCard 710 PC Card:
Technical Specifications . . . . . . . . . . . . . . . ...............................91
LED Operation . . . . . . . . . . . . . . . . . . . . . ...............................91
Radio Frequency and Electrical Specifications ........................92
Environmental Specifications . . . . . . . . ...............................92
AirCard 710 PC Card:
Regulatory Information . . . . . . . . . . . . . . . . ...............................93
Page 8

AirCard 710 Wireless Netw ork Card - User Guide
8 2130135
Page 9
Rev B Oct. 2001 1
AirCard 710
Basics
1: Introducing the AirCard® 710
Wireless Network Card
• A bout the AirCard®
710 Wireless Network
Card
• A Network Card, a
Modem, and a Phone
• P ackage Contents
• How To Use This
Guide
About the AirCard®710 Wireless
Network Card
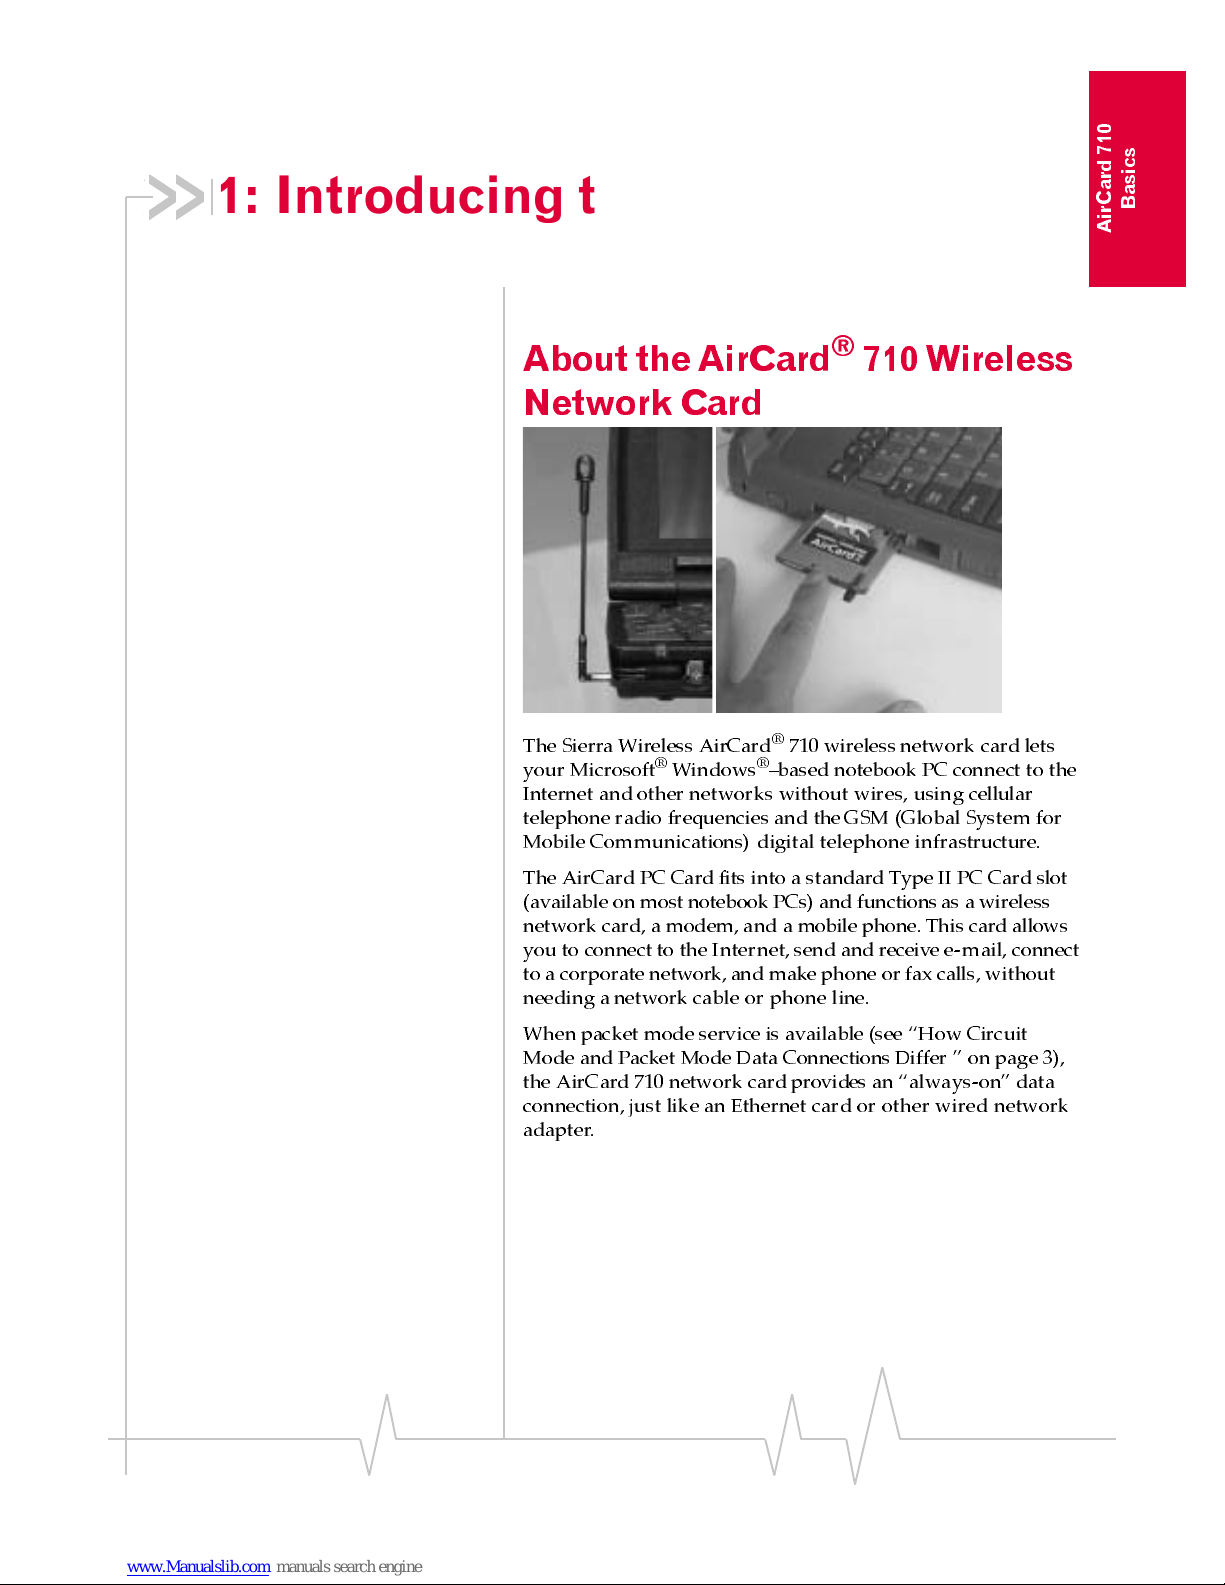
The Sierra Wireless AirCard®710 wirelessnetwork card lets
your Microsoft
®
Windows®–based notebook PC connect to the
Internet and other networks without wires, usin g cellular
telephone radio frequencies and theGSM (Global System for
Mobile Communications) digital telephone infrastructure.
The AirCard PC Card fits into a standard Type II PC Card slot
(available on most notebook PCs) and functions as a wireless
network card, a modem, and a mobile phone. This card allows
you to connect to the Internet, send and receive e-mail,connect
to a corporate network, and make phone or fax calls, without
needing a network cable or phone line.
When packet mode service is available (see “How Circuit
Mode and Packet Mode Data Connections Differ ” on page 3),
the AirCard 710 network card provides an “always-on” data
connection, just like an Ethernet card or other wired network
adapter.
Page 10
AirCard 710 Wireless Network Card - User Guide
2 2130135
Note: Do not insert the AirCard
710 wireless network card into a
PC Card slot until afte r
you have
installed the software from the
AirCard 710 CD-ROM.
The AirCard network card includes its own retractable
antenna, and a connector for a standard c e llular telephone
headset for voice calls. It draws electricity from your
computer’s PC Card slot, so it does not need its own battery
power.
Supported Computer Platforms and
Wireless Networks
Note: If you have more than one
type of supported computer, you
can move the AirCard 710
network card from one notebook
PC to another at any time—as
long as you have installed the
proper softwar e and drivers on
each computer.
Windows Computer Platforms
The AirCard 710 wireless
network card functions in notebook PCs running Windows 95,
98, 98 SE, Me, NT 4.0, 2000, and XP. For more details, see
“Notebook PC System Requirements” on page 15.
North American GSM Wireless Networks
The AirCard 710
network card operates over a type of wireless network called
GSM (Global System for Mobile communications), supported
by a number of wireless carriersin North America and around
the world.
This network technology has many features beyond providing
a wireless link, including SMS(Short Messaging Service, also
known as text messaging) which allows you to exchange brief
text messages with others on the GSM network, whether they
are using a wireless network card on their computers, or
simply an SMS-capable mobile GSM telephone.
To use the AirCard 710 network card, you must have an
account that gives you access to a GSM network running on
North American PCS (Personal Communications System)
radio channels. For technical details, see “Radio Frequency
and Electrical Specifications” on page 92.
Note : Eve r y GSM network worldwid e operates on one of three r adio
frequency bands. The AirCard 710 network card operate s only in the
1900 MHz PCS band used in North America. Sierra Wireless also
manufactures the AirCard 750 wireless network card, which supports
all three bands and works anywhere worldwide with GSM coverage.
Like GSM mobile phones, the AirCard 710 network card
requires a SIM card (also known as a “smart card” or “smart
chip”), provided by your wireless service provider, in order to
function. See “SIM Card Information” on page 9.
Page 11
Introduction
Rev B Oct. 2001 3
AirCard 710
Basics
Note: More information about
GSM networks is available on
the GSM Development Group
web site, www.cdg.org.
A Network Card, a Modem, and
a Phone
The AirCard 710 wireless network card operates in three
different modes, depending on the services y ou need to use
and their availability in your current area:
Network Card (Packet Mode)
Where
packet mode
service is
available (see the next section), the AirCard 710 wireless
network card is a true network card that works just like the
network cards familiar to most corporate computer users (such
as Ethernet andToken Ring cards).
Modem (Circuit Mode)
When acting as a modem (in
circuit
mode
), the AirCard 710 network card allows you to dial up any
other modem (such as an Internet service provider for dial-up
Internet access) or receive faxes.
Phone (Voice Mode)
You can also connect a handset to the
AirCard 710 network card and use it as a phone in
voice mode
.
In this mode, your computer acts like a mobile phone handset,
but with some different and often more flexible features. See
the chapter “GSM Voice Connections” on page 45.
How Circuit Mode and Packet Mode Data
Connections Differ
While the AirCard 710’s voice mode works much like a mobile
telephone, there are several differences between the card’s two
data modes:
•
Circuit mode connections
(also known as
circuit-switched data,
or CSD) require the AirCard network card to dial a
telephone number and make a connection like a traditional
computer modem, using the GSM digital cellular network
just as traditionalmodems use telephone wires. They work
just like voice phone calls: the connection between your
AirCard network card and the other modem consumes a
complete
circuit
on the telephone network, which remains
open as long as the connection is open.
When you are finished with a CSD call, as with a voice call,
you disconnect from the network. Wireless service provid-
ers typically charge for circuit mode connections by con-
nection time—per minuteor per second, just like voice
calls. You are charged whenever you are connected, even if
you are not transmitting any data.
•
Packet mode data connections
, on the other hand, allow the
AirCard network card to connect instantly to the GSM
network with a few mouse clicks, using a protocol called
Page 12
AirCard 710 Wireless Network Card - User Guide
4 2130135
General Packet Radio Service (GPRS). Like Internet
connections over cable modems, digital subscriber lines
(DSL), or high-bandwidth corporate connections, GPRS
connections do not consume an entire data circuit—they
break up their data into small chunks called
packets,
which
share data circuits with other packetsfromother users,
and find their way across the network to be reassembled at
their destination. Such connections are known as
packet-
switched data.
The Internet is a packet-switched network.
To connect to the Internet or your corporate network in
packet mode, you simply insert the AirCard 710 PC Card,
click a few buttons, and launch your network software—
such as a web browser, e-mail client, file transfer applica-
tion, or other program. A packet mode connection behaves
as an “always on” connection—you do not need to dial up
each time you connect. Since GPRS efficiently shares radio
and network resources with other GSM users, wireless ser-
vice providers typically charge for packet mode data by
the amount of information transmitted, not by connection
time, so you can remain connected indefinitely.
In general, packet mode service is more economical, faster, and
more convenient for most users. However, since it requires
service providers to install GPRS technology at each cellular
radio tower, it is not available everywhere that GSM coverage
is. (For information about service providers and GSM
coverage, see “Choosing a GSM Wireless Service Provider”on
page 8.)
Since the AirCard 710 network card supports both circuit and
packet modes, it provides all the advantages of GPRS packet
data where it is available, while allowing you to use circuit-
switched connections where GPRS has not yet been imple-
mented. The benefits to you are that you can use the AirCard
network card in anyarea that has 1900 MHz GSM coverage
(assuming there are no account restrictions) and you will be
able to take advantage of the fastest possible data transmission
speed.
Connection Speed
The speed of your wireless network connection depends on a
number of factors, including:
•
Whether you have a circuit mode (CSD) or packet mode
(GPRS) dataconnection.
•
How your service provider has configured its GSM data
network.
•
How many people are using GSM data and voice services
in your current area.
Page 13
Introduction
Rev B Oct. 2001 5
AirCard 710
Basics
Circuit mode data connections
(see “Dial-Up Circuit Mode Calls”
on page 42) have a maximum data throughput of 9.6 kilobits
per second (kbps), usable for basic e-mail and web browsing
applications.
GPRS packet mode data connections
(see “Packet Mode Connec-
tions” on page 43) are generally much faster, but can vary
considerably depending on network configuration and
congestion. The theoretical maximum for GPRS packet mode
connections is 171.2 kbps, while in real-world situations, the
actual maximum throughput is about 115 kbps, which is
comparable to high-speed Internet connections such as cable
modems and digital subscriber lines (DSL).
Package Contents
Your AirCard 710package contains the following components:
•
AirCard 710 wireless network card with retractable
antenna
•
CD containing the AirCard software and this user guide in
Adobe Acrobat (PDF) format
•
Quick reference card
Depending on your wireless service provider and the retailer
who supplied your AirCard 710 wireless network card, the
package may also include:
•
SIM card, also known as a “smart card” or “smart chip”
If you want to use the AirCard 710 network card as a phone, a
headset is necessary. Any standard headset with a 2.5 mm jack
should work.
How To Use This Guide
This user guide is designed to provide you with all theinfor-
mation you need to install and use your network card.
•
All users should read “Introducing the AirCard® 710
Wireless Network Card” (this chapter), and “Getting
Started” on page 7, which give you an overview of the
AirCard 710 network card, providing the background
information to understand the following sections.
•
Depending on what type of computer you are using and
its operating system,you will need to read the appropriate
section of one of the next three chapters. “Installation on
Notebook PCs” on page 15, “Installation on Handheld
PCs” on page 33, or “Installationon Pocket PCs” on page
41. Each provides step-by-step instructions on installing
Page 14

AirCard 710 Wireless Network Card - User Guide
6 2130135
and configuring the AirCard 710 network card on the
various supported computer platforms.
•
Everyone should look over “The Watcher Window and
Indicators”on page 33,“DataConnections Through GSM
and GPRS” on page 41, “GSM Voice Connections” on page
45, and“Watcher Menu Options” on page 51. Those
chapters describe how to use the Watcher software to
control your AirCard 710 network card.
•
If you use a notebook computer, “ Network Adapter
Manager (for Multiple Network Cards)” on page 85
describes how the Sierra Wireless Network Adapter
Manager program allows you to switch from one network
card to another, if you have more than one insta lled.
•
“AirCard 710 PC Card: Technical Specifications”onpage
91 provides electrical, radio frequency, and other infor-
mation about the AirCard 710 for those who require
technical details, while“ AirCard 710 PC Card: Regulatory
Information” on page 93 provides information on various
regulatory approvals.
Page 15
Rev B Oct. 2001 7
AirCard 710
Basics
2: Getting Started
• The AirCard® 710
Software
• Acco unt Activation and
Configuration
• S IM Card Information
• Care and Maintenance
of Your Air Card 710
Wireless Network Card
Before you can begin using the AirCard®710wireless network
card, you must:
1.
Ensure that you have a SIM card (also known as a “smart
card” or “smart chip”), and insert it into the slot in your
AirCard PC Card. A SIM card should eitherbe included
with your AirCard package, or obtained from your
wireless service provider.
2.
Install the AirCard 710 software.
3.
Activate an account and configure the AirCard network
card to use your account, unless it has been preactivated.
This section provides an overview of this process.
The AirCard®710 Software
The AirCard 710 wireless network card comes with this
software:
Note: You must run Watcher
anytime you use the
AirCar d 710 network card.
•
An application calledWatcher that you use to manage the
AirCard and monitor your wireless connections
•
An application called the Network Adapter Manager that
allows you to switch between the AirCard 710 network
card and other network cards
•
The driver software thatforms the interface between the
network card and your Windows
®
operating system
Detailed installation instructions are provided in the next
chapter.
Note: Install the AirCard
software from the CD before
inserting the AirCard PC Card
into your computer, using the
instructions in the installation
chapter appropriate for your
computer and operating system.
Account Activation and
Configuration
Companies that operate GSM networks and provide access to
these networks are called wireless serviceproviders. They are
often subsidiaries of or otherwise related to traditional
telephone and telecommunications companies. You must have
Page 16
AirCard 710 Wireless Network Card - User Guide
8 2130135
an account with a GSM service provider to use the AirCard710
network card. The process of settingup an account is called
activation.
Choosing a GSM Wireless Service
Provider
If you purchased the AirCard 710 wireless network card from
a service provider, you may already have an account and a
SIM card (see the next section).Ifso, your network card is
preactivated—you need only insert the SIM card and install
the software and drivers to start using your card. Otherwise,
you can refer to the Sierra Wireless web site,
www.sierrawireless.com
, for a list of service providers.
When choosing a service provider, consider the following
criteria:
•
Basic GSM Coverage
Note: Most service p roviders
have coverage maps on their
web sites, and their retailers
usually have printed coverage
maps available.
There are GSM networks that operate in the frequency
bands supported by the AirCard 710 wireless network card
(the 1900 MHz radio channels known as the PCS band)
throughout North America and in some other parts of the
world. Other GSM operators, such as those in Europe, may
use other frequency bands not supported by the AirCard
710 network card. (Sierra Wireless also manufactures the
AirCard 750 wireless network card, which supports all cur-
rent GSM radio frequencies worldwide.)
Each service provider operates a network that covers a lim-
ited geographical area within the overall GSM coverage
area. Most service providers have “roaming” agreements
with other service providers, so that they can offer service
outside of the coverage area of their own networks. For
example, if you live in Vancouver and travel frequently to
Los Angeles, you can obtain an account with a Vancouver
service provider that has a roaming agreement with a ser-
vice provider in Los Angeles. You would then have local
service in Vancouver, and roaming service in Seattle. (Most
service providers chargemore for roaming service than
local service.)
Select a service provider that gives you network coverage
in all areas you intend to use the AirCard 710 network
card.
•
GPRS Coverage
Support for the high-speed packet mode data features of
the AirCard 710 network card requires that your service
provider offer General Packet Radio Service (GPRS). To do
Page 17

Getting Started
Rev B Oct. 2001 9
AirCard 710
Basics
so, service providers must install additional equipment at
their cellular radio towers and throughout their networks,
so not all areas with GSM coverage also have GPRS cover-
age.
If you intend to use packet mode data connections, ensure
that your service provider offers them in your area and
that their roaming agreements with other providers
include GPRS services.
•
Pricing
Note: The fee for service is
usually higher when you are
roaming (connecting to a
network other than the one
belonging to your service
provider).
Each service provider has its own pricing options. There
are flat rate accounts which provide you a maximum num-
ber ofminutes of network usage for a fixed monthly fee.
There are accounts for which you are charged for network
usage by the minute or by the amount of data transmitted.
You may want to shop around to find the best value,
depending on the mix of voice, circuit-modedata, and
packet-mode data services you intend to use.
SIM Card Information
Note: If you change GSM
service providers at any time
(such as if you move to a new
city), you will need a new SIM
card from your new service
provider, and you must
reactivate your AirCard 710
network card in the new location.
The SIM card is a small, thin data chip, about the size of a
postage stamp, that identifies your account and your
AirCard 710 network card to the GSM wireless network. It is
the same type of card used as a “smart card” or “smart chip”
in GSM mobile phones—in fact, your service provider may
allow you to move the same SIM card between a mobile phone
and your AirCard network card. Your AirCard package may
have included a SIM card from your service provider, or you
may need to obtain one.
Figure 2-1: A SIM Card (Left)
Page 18

AirCard 710 Wireless Network Card - User Guide
10 2130135
Inserting a SIM Card
To install your SIM card into the AirCard 710 network card,
follow these steps:
1.
Hold the AirCard 710 network card with the label on top
and the antenna closest to you, as shown in the first photo-
graph.
2.
Locate the thin SIM card slot on the left side of the AirCard
PC Card’santenna end.
3.
Grasp the SIM card as shown, with the metal connectors
on the bottom, the serial number on top, and the corner
notch on the right side closest to you.
4.
Insert theend of the SIM card into the slot, and gently
push it until it clicks into place.
Figure 2- 2 : I n se rt i ng th e S IM Card Into the AirC ar d 71 0 S IM Ca r d Slot
5.
Oncethe SIM card is properly inserted, it should not stick
out significantly from the slot.
Figure 2-3: A Properly Inserted SIM Card
Removing a SIM Card
To remove the SIM card, you will need a slim object, such as
the tip of a pen or a straightened paper clip, to push into the
eject hole.
1.
Place the AirCard 710 PC Card on a smooth, hard surface
such as a tabletop, as shown in the following photograph.
Page 19

Getting Started
Rev B Oct. 2001 11
AirCard 710
Basics
Figure 2-4: Po sitioning a Pen to Eject the SI M C a r d
2.
Position your pen or paperclip above the eject hole, which
is on the top surface of the AirCard housing, just to the
right of the SIM card slot.
3.
Press down firmly (but without excessive force) on the
eject hole. The SIM card should pop out of its slot.
Figure 2-5: Ejecting and Removing the SIM Card
4.
Gently pull the SIM card from the slot until it slides free.
Setting Up the AirCard Network Card
With Your Service Provider
Your service provider will activate your account. You may be
able to do so by telephone, on your service provider’s web site,
or in person at a retail store.
To activate your account, your service provider needs to know:
•
The billing information used to collect payment for your
network usage
•
The ESN (electronic serial number) assigned to your
wireless network card during the manufacturing process.
The ESN is printed on a label on the bottom of the AirCard
housing, in the form
00-A0-D5-
xx-xx-xx
, where the x’s are
characters unique to your particular card. The ESN can
also be displayed in Watcher (see “About Watcher…” on
page 83).
•
The SIM card serial number (printed on the upper surface
of the SIM card itself)
Page 20

AirCard 710 Wireless Network Card - User Guide
12 2130135
Your service provider must provide to you:
•
A phone number for your AirCard network card
•
An activation code to let you set up your AirCard network
card using the Watcher Activation Wizard
Unless your AirCard network card has been preactivated,
Watcher will automatically detect that no account has been
configured when you run it for the first time. Watcher will then
auto-launch the Activation Wizard to guide you through the
activation and configuration process.
Figure 2-6: The First Sc reen of the Act ivation Wizard
Care and Maintenance of Your
AirCard 710 Wireless Network
Card
As with any electronic device, the AirCard 710 wireless
network card must be handled with care to keep it operating
reliably. Follow these guidelines in using and storing your
card:
•
Do not apply adhesive labels to the AirCard housing. This
may cause the PC Card to become jammed inside the card
slot in your computer, or prevent it from being inserted
properly.
•
Radio signal strength is usually best when the antenna is
fully extended and perpendicular to the AirCard 710 PC
Card housing. The antenna should bend easily at the
hinge.
Figure 2-7: (Left) Proper Positioning of the AirCard 710 Antenna
•
When storing or transporting your PC in a case (such as a
notebook bag), retract the AirCard antenna and position
Page 21

Getting Started
Rev B Oct. 2001 13
AirCard 710
Basics
the computer where the antenna tip cannot be crushed or
broken.
•
The AirCard network card should fit easily into your
computer’s PC Card slot. Forcing the AirCard into a slot
may damage the connector pins.
Figure 2- 8 : I n se r ti ng the AirCard 710 Wir e les s Network Card
•
Protect the card from liquids, dust, and excessive heat
(see“Radio Frequency and Electrical Specifications ” on
page 92 for details).
•
When it is not installed in your computer, store the
AirCard network card in a safe place.
Page 22

AirCard 710 Wireless Network Card - User Guide
14 2130135
Page 23

Rev B Oct. 2001 15
Installation
on Notebook PCs
3: Installation on Notebook PCs
• Notebook PC System
Requirements
• So ftware Installatio n
• Driver Installation
• Account Configuration
• Account Configuration
This chapter guides you through the steps necessary to make
the AirCard
®
710 wireless network card operational on a
notebook PC.
The basic steps are:
•
Insert the AirCard CD into your CD-ROM drive and install
the Watcher and Network Adapter Manager (NAM)
software.
•
Insert the AirCard network card into the PC Card slot of
your computer and install the AirCard 710 driver from the
CD.
•
If the AirCard network card has not been preactivated by
your service provider, use the Activation Wizard (which
should launch automatically) to configure it.
Note: You must install the
software before
inserting the
AirCard network card into your
computer, by following the
detaile d software and dri ver
installation instructions in this
chapter.
Before you begin the installation process, ensure that your PC
is running a supported operating system and meets the
hardware requirements described below.
Notebook PC System
Requirements
On notebook computers, the AirCard 710 wireless network
card requ ires an Intel-compatible processor
1
, and supports the
following operating systems:
•
Microsoft
®
Windows®95 OSR2 and higher
•
Windows 98 and 98 SE
1. Non-Intel–compatible processors such as the Compaq Alpha
are not supported, even if they run a supported operating system such as Windows NT.
Page 24

AirCard 710 Wireless Network Card - User Guide
16 2130135
•
Windows Me
•
Windows NT4.0 with ServicePack 6a
•
Windows 2000
•
Windows XP
To install the AirCard wireless network card, you require these
system resources:
Software Installation
Follow these steps to install the Watcher and Network Adapter
Manager programs required by your AirCard network card:
Figure 3- 1 : I n se r ti ng the AirCard 71 0 CD to Install the Software
1.
If the AirCard CD is not already in your CD-ROM drive,
insert it. The CD should start automatically and display a
menu.
Table 3-1 :Syst em Res ource Requ irement s
Card Slots 1 Type II PCMCIA (PC Card) Slot
Communications Ports 1 Available
Disk Drive CD-ROM
I/O Resources 1 IRQ, 40 bytes I/O Space
Memory 32 MB
Disk Space 7 MB
Page 25

Install - Notebook PCs
Rev B Oct. 2001 17
Installation
on Notebook PCs
Figure 3- 2 : Th e A irC a rd 710 Installati on M en u
Note: Users of Windows 2000,
NT, and XP must be logged in
with administrative privileges to
install the AirCard software.
2.
If the menu does not appear, select
Start > Run
and enter
d:\launch.exe
, wheredis the drive letter of your CD-ROM
drive.
3.
From the CD start-upwindow, select
notebook installation
and documentation
and then
notebook software installation
to
launch the InstallShield Wizard.
4.
Use the
Next
and
Back
buttons to navigate through the
wizard, noting the following:
·
The first series of windows in th e InstallShield Wizard
installs Watcher, and the second series installs the
Network Adapter Manager.
·
You must indicate your acceptance of the terms of the
license agreement by clicking
Yes
to proceed with the
installation.
·
Use the default settings for the Destination Location and
Program Folder unless you have special requirements
and an advanced understanding of PC configuration.
(The Destination Location dictates where the software is
installed. The Program Folder dictates the name
assigned to the software in Start menu.)
·
A check box allows you to choose to display release
notes. The release notes list known issues in the software
and appear in the Windows Notepad. (If you choose to
display them, when you are finished reading, use the
close box in the upper right corner of the window to
close Notepad.)
·
A check box allows you to choose to have a desktop
shortcut forWatcher. This gives you the option of
launching Watcher by double clicking an icon on your
desktop (as well as from the Start menu).
·
Click
Finish
to close the last screen of each wizard.
Once your PC is re-started, the software is installed. You can
proceed to install the driver.
Page 26

AirCard 710 Wireless Network Card - User Guide
18 2130135
Driver Installation
Note: A driver is software that
forms the interf ace between a
device (such as the AirCard 710
network card) and the operating
system on your PC (such as
Windows 98).
There is an AirCard driver for each supported operating
system on the AirCard CD. The AirCard 710 wireless network
card will not function properly unless the appropriate driver
for your operating system is installed.
In Windows 95, 98, Me, 2000, andXP, driver in stallation is
done through a wizard. Windows NT does not have a wizard
to facilitate driver installation. Follow the detailed instructions
for your operating system in one of the following sections.
Windows 98, Me, 2000, and XP
To install the AirCard driver in Windows 98, 2000 or Me,
follow these instructions:
Note: Do not forcefully insert the
AirCard network card into your
computer, or you may damage
the connector pins.
1.
Insert the AirCard CD into your CD-ROM drive, if not
already inserted, and close any Windows programs that
are running.
2.
If the CD start-up menu is displayed, use the
exit
option in
the lower left corner of the screen to exit the menu.
3.
With the label facing up, carefullyinsert the AirCard
network card into your computer’s PC Card slot. Windows
should detect that a new device has been inserted and
launch the w izard that guides you through the driver
installation.
Figure 3- 3 : I n se rt i ng the AirCard 710 Net wo r k Car d
4.
Before working with the wizard, grasp the tip of the
AirCard 710 antenna and pull it to extend the antenna
fully (it should click into place). Then pivot the antenna
hinge so that it is vertical, as shown.
Page 27

Install - Notebook PCs
Rev B Oct. 2001 19
Installation
on Notebook PCs
Figure 3-4: Extending the AirCard 710 Antenna Until It Clicks Into Place
Figure 3- 5 : P iv o tin g the AirCard 710 An tenna at the Hinge
5.
Follow the instructions corresponding to your operating
system below.
Windows 98 and 98 SE
1.
Click
Next
on the first window of the Add New Hardware
Wizard to proceed to the next window.
2.
Select
Search for the best driver for your device (Recommended)
and click
Next
to proceed to the next window.
3.
Ensure that
Specify a location
is the only check box selected,
enter
d:\Drivers\Win98
wheredis the drive letter foryour
CD-ROM drive, and click
Next
to proceed.
4.
Click
Next
on the window that displays the file name.
5.
Click
Finish
and repeat steps 1 to 4 as prompted.
6.
If you are prompted to restart your PC, click
Yes
.
Otherwise, restart your PC from the Start menu. (You must
restart your PC to complete the driver installation.)
Windows Me
1.
Click
Specify the location of the driver (Advanced)
on the first
window of the Add New Hardware Wizard and click
Next
to proceed.
2.
Select the
Search for the best driver for your device
radio
button, and the
Specify a location
check box, then enter
Page 28

AirCard 710 Wireless Network Card - User Guide
20 2130135
d:\Drivers\WinMe
wheredis the drive letter of your CD-
ROM drive. Click
Next
to proceed to the next window.
3.
If prompted, “What would you li ke to install?”, select
The
updated software (Recommended)
and click
Next
.
4.
Click
Next
on the window that displays a file name.
5.
Click
Finish
and repeat steps 1 to 4 as prompted.
6.
If you are prompted to restart your PC, click
Yes
.
Otherwise, restart your PC from the Start menu. (You must
restart your PC to complete the driver installation.)
Windows 2000
1.
Click
Next
on the first window of the Found New
Hardware Wizard to proceed to the next window.
2.
Select
Search for a suitable driver for my device (recommended)
and click
Next
.
3.
Ensure that
Specify a location
, under Optional search
locations, is selected and click
Next
to proceed.
4.
Enter
d:\Drivers\Win2k
, wheredis the drive letter for your
CD-ROM drive, and click
OK
to proceed.
5.
Click
Next
on the window that displays the file name.
6.
If the Digital Signature Not Found window displays, click
Yes
.
7.
Click
Finish
to proceed. Repeat steps 1 to 6 as prompted.
8.
If you are prompted to restart your PC, click
Yes
.
Otherwise, restart your PC from the Start menu. (You must
restart your PC to complete the driver installation.)
Windows XP
1.
Click
Next
on the first window of the Found New
Hardware Wizard to proceed to the next window.
2.
Select
Search for a suitable driver for my device (recommended)
and click
Next
.
3.
Ensure that
Specify a location
, under Optional search
locations, is selected and click
Next
to proceed.
4.
Enter
d:\Drivers\Win2k
, wheredis the drive letter for your
CD-ROM drive, and click
OK
to proceed.
5.
Click
Next
on the window that displays the file name.
6.
If the Digital Signature Not Found window displays, click
Yes
.
7.
Click
Finish
to proceed. Repeat steps 1 to 6 as prompted.
8.
If you are prompted to restart your PC, click
Yes
.
Otherwise, restart your PC from the Start menu. (You must
restart your PC to complete the driver installation.)
Page 29

Install - Notebook PCs
Rev B Oct. 2001 21
Installation
on Notebook PCs
Onceyour PC is restarted, the driver isinstalledandyou can
proceed to configure the AirCard network card to use your
account (if it was not preactivated).
Windows 95 Driver Installation
Note: Windows system files may be required to complete installation
of the AirCard 710 driver. These files are lo cated on the Windows CD
and may be stored on your hard drive in .CAB files. Ensure you have
your Windows CD, or know the location of the .CAB files, before
proceeding.
Depending on how Windows 95 was installed on your PC and
what devices have since beeninstalled, your PC Card
(PCMCIA) slots may or may not have been enabled and the
TCP/IP stack may or may not be installed.
These instructions gu ide you through these steps:
1.
Verifying that the PC Card slots are enabled
2.
Verifying that TCP/IP is installed
3.
Installing the driver
Verifying That the PC Card Slots Are Enabled
1.
Open the ControlPanel by selecting
Start > Settings>
Control Panel
.
2.
Double click the PC Card icon.
3.
If the PC Card (PCMCIA) Properties window is displayed,
the slots are enabled and you can proceed to the section
“Verifying That TCP/IP Is Installed”.
4.
If the PC Card (PCMCIA) Wizard is displayed, the slots
are not yet enabled, and the wizard guides you through
the enabling process. (Generally it is sufficient to click
Next
at each window.) Click
Finish
on the final window and
click
Yes
when prompted to restart the PC.
Verifying That TCP/IP Is Installed
1.
If the ControlPanel is not already open, select
Start >
Settings > Control Panel
to open it.
2.
Double click the Network icon.
3.
Look for TCP/IP next to any listing on the Configuration
tab. If TCP/IP is listed, you can close the window and
proceed to the section “Installing the Driver”.
4.
If TCP/IP is not listed, click the
Add...
button to open the
Select ComponentType window.
Page 30

AirCard 710 Wireless Network Card - User Guide
22 2130135
5.
Select
Protocol
in the component type list and click the
Add...
button to open the Select Network Protocolwindow.
6.
Select
Microsoft
under Manufacturers and
TCP/IP
under
Network Protocols, then click the
OK
button.
7.
Verify that a listing for TCP/IP appears in the Network
window and then click the
OK
button to close the window.
8.
If you are prompted thatyour networ k is not complete,
make the selections appropriate to your network configu-
ration.
9.
If you are prompted for the Windows CD, remove the
AirCard CD and insert the Windows CD in your CD-ROM
drive, or enter the path to the .CAB files.
10.
Click
Yes
at the prompt to restart your PC. Once the PC
has restarted, proceed to the next section.
Installing the Driver
1.
Insert the AirCard CD into your CD-ROM drive, if it is not
already inserted, and close any Windows programs that
are running.
2.
If the CD start-up menu is displayed, use the
exit
option in
the lower left corner of the screen to exit the menu.
3.
With the label facing up, carefullyinsert the AirCard
network card into your computer’s PC Card slot. Windows
should detect that a new device has been inserted and
launch the w izard that guides you through the driver
installation.
Figure 3- 6 : I n se rt i ng the AirCard 710 Net wo r k Car d
4.
Before working with the wizard, grasp the tip of the
AirCard 710 antenna and pull it to extend the antenna
fully (it should click into place). Then pivot the antenna
hinge so that it is vertical, as shown.
Page 31

Install - Notebook PCs
Rev B Oct. 2001 23
Installation
on Notebook PCs
Figure 3-7: Extending the AirCard 710 Antenna Until It Clicks Into Place
Figure 3- 8 : P iv o tin g the AirCard 710 An tenna at the Hinge
5.
Click
Next
on the first window of the Update DeviceDriver
Wizard to proceed to the next window.
6.
Click the
Other Locations...
button to open the Select Other
Location window.
7.
Enter
d:\Drivers\Win95
wheredis the drive letter for your
CD-ROM drive and click
OK
. The wizard should search for
and find the Windows 95 AirCard driver on the CD-ROM
drive.
8.
Click
Finish
and repeat steps 4 to 6 as prompted.
9.
If you are prompted to insert the Windows 95 CD, remove
the AirCard CD and insert the Windows CD.
10.
If you are prompted to restart your PC, click
Yes
.
Otherwise, restart your PC from the Start menu.You must
restart your PC to complete the driver installation.
Windows NT Driver Installation
Since Windows NT does not have the “Plug and Play” feature
included in other Windows operating systems, installing the
AirCard driver requires more steps. Installation involves:
1.
Verifying that your PC Card slots are enabled
2.
Checking whether Networking is installed
Page 32

AirCard 710 Wireless Network Card - User Guide
24 2130135
Note: You must re-ins tall the
Windows NT Service Pack
following installation of the
AirCard driver. Ensure you have
your Service Pack CD before
you begin. (Windows NT 4.0
Service Pack 6a is supported.)
Onceyou have determined whether Networking is installed,
proceed to theappropriate section:
•
“Installing the Driver When Networking Has Not Been
Installed” on page 26, or
•
“Installing the Driver When Networking Is Already
Installed” on page 27
Note: Windows system files may also be required to complete the
installation. These files are located on the Windows NT CD and may
also be sto red as .CAB files on your hard drive. If the .CAB files are
not available to you, copy the Windo ws NT driver from the Ai rCard CD
to a directory on your hard drive. The Windows NT driver is located on
the CD in the directory \Drivers\WinNT.
Windows NT Users: Your PC
must be powered off
whenever
you insert or eject the AirCard
network card.
1.
If your PC is on, close any Windows programs that are
running and shut down the PC.
2.
With the label facing up
and your PC powered off
, carefully
insert the AirCard network card into your computer’s PC
Card slot.
Figure 3- 9 : I n se rt i ng the AirCard 710 Net wo r k Car d
3.
Grasp the tip of the AirCard 710 antenna and pull it to
extend the antenna fully (it should click into place). Then
pivot the antenna hinge so that it is vertical, as shown.
Figure 3- 1 0: Extending th e Air C a rd 71 0 An te nn a U nt il I t Clic ks Into P l ac e
Page 33

Install - Notebook PCs
Rev B Oct. 2001 25
Installation
on Notebook PCs
Figure 3- 11: Pivo ting the AirCar d 710 Antenna at the Hinge
4.
Insert the AirCard CD into your CD-ROM drive, if it is not
already inserted.
Figure 3-12: I nserting the AirCard 7 1 0 CD to Install the Windows NT Driver
5.
If the CD start-up menu is displayed, use the
exit
option in
the lower left corner of the screen to exit the menu.
Verifying That the PC Card Slots Are Enabled
1.
Open the ControlPanel by selecting
Start > Settings>
Control Panel
from the taskbar.
2.
Double click the PC Card icon.
3.
If a window titled PC Card (PCMCIA) Properties displays,
the slots are already enabled. Close this window and
proceed to the next section.
4.
If the PC Card (PCMCIA) Wizard displays, the slots are
not yet enabled, and the wizard guides you through the
installation process. (Generally it is sufficient to click
Next
at each window.) Click
Finish
on the final window and you
should be prompted to restart your PC. Click
Yes
and
allow the PC to shut down. Then restart it.
Determining Whether Networking is Installed
1.
If the ControlPanel is not open, select
Start > Settings >
Control Panel
.
2.
Double click the Network icon.
Page 34

AirCard 710 Wireless Network Card - User Guide
26 2130135
3.
If the Network window opens, netwo rking is already
installed. Proceed to the section “Installing the Driver
When Networking Is Already Installed ” on page 27.
4.
If a dialog box appears prompting you to install
Networking, the component has not yet been installed.
Proceed to the next section, “Installing the Driver When
Networking Has Not Been Installed”.
Installing the Driver When Networking Has Not Been
Installed
1.
Click
Yes
to the prompt, “Do you want to instal l it now?”
to launch the wizard that installs Networking.
2.
Click the check boxes on the first window of the wizard so
that
Wired to the network:
is checked and Remote access to
the network: is
not
checked. Click
Next
to proceed.
3.
Click the
Select from list...
button to open the Select
Network Adapter window.
4.
Click the
Have Disk...
button to open the Insert Disk
window.
5.
If you have copied the driver fromthe AirCard CD to your
hard drive, enter the path to the driver and click
OK
to
open the Select OEM Option window.
6.
If you are installing the driver from the AirCard CD, enter
d:\Drivers\WinNT
wheredis the drive letter for your CD-
ROM drive and click
OK
to open the Select OEM Option
window.
7.
If Sierra Wireless AirCard 710 ishighlighted, click
OK
.The
Sierra Wireless AirCard 710 should appear in the Network
Setup Wizard under Network Adapters.Otherwise click
Cancel
and repeat the previous two steps.
8.
Click
Next
to display a list of network protocols.
9.
Ensure
TCP/IP Protocol
is checked (as well as any other
protocols appropriate to your network configuration) and
click
Next
to display a list of network services.
10.
Select the services appropriate to your network configu-
ration and click
Next
. (For the purpose of installing the
AirCard 710, it does not matter what selections you make
in this window.)
11.
Click
Next
.
12.
If the Windows NT Setup window appears, system files
are requ ired to install the components you checked. Either
insert the Windows NT CD and enter your CD-ROM drive
letter, or enter the path to the .CAB files. Click
Continue
.
13.
Use the drop down menus to select an IRQ and I/O Space,
noting that the AirCard 710 requires 1 IRQ and 40 bytes of
Page 35

Install - Notebook PCs
Rev B Oct. 2001 27
Installation
on Notebook PCs
I/O Space. By default, Windows displays an available IRQ
Level and available I/O Port Address. Inmost cases, these
values will work. Click
Continue
.
14.
If the Windows NT Setup window displays again, enter
the path to your CD-ROM drive or the .CAB files.
15.
Click
Yes
at the DHCP promp t to proceed to a display of
network bindings. (DHCP or Dynamic Host Configuration
Protocol is required by the AirCard 710 regardlessof your
network configuration.)
16.
Click
Next
to start the Network component.
17.
Click
Next
to proceed to the window in whichyou entera
Computer Name and Workgroup or Domain.
18.
Enter the information appropriate to your network config-
uration and click
Next
.
19.
Click
Finish
on the final window of the wizard.
20.
Click
Yes
at the prompt to restart yourPC. (You must
restart your PC to complete the driver installation.)
21.
When the PC restarts, re-install your Service Pack.
22.
On completion of this step, the driver is installed and you
can proceed to configurethe AirCard network card to use
your account (if it was not preactivated).
Installing the Driver When Networking Is Already
Installed
1.
Click the
Adapters
tab in the Network window.
2.
Click the
Add...
button to open the Select Network Adapter
window.
3.
Click the
Have Disk...
button to open the Insert Disk
window.
4.
If you have copied the driver fromthe AirCard CD to your
hard drive, enter the path to the driver and click
OK
to
open the Select OEM Option window.
5.
If you are installing the driver from the AirCard CD, enter
d:\Drivers\WinNT
wheredis the drive letter for your CD-
ROM drive and click
OK
to open the Select OEM Option
window.
6.
If Sierra Wireless AirCard 710 ishighlighted, click
OK
.The
Sierra Wireless AirCard 710 should appear under Network
Adapters in the Network Setup Wizard. Otherwise, click
Cancel
and repeat the previous two steps.
7.
Use the drop-down menus to select an IRQ and I/O Space,
noting that the AirCard 710 requires 1 IRQ and 40 bytes of
I/O Space. By default, Windows displays an available IRQ
Page 36

AirCard 710 Wireless Network Card - User Guide
28 2130135
Level and I/O Port Address. In most cases, these values
will work. Cl ick
Continue
.
8.
Click the
Close
button on the Network window to display
the Microsoft TCP/IP Properties window.
9.
Click
Yes
when prompted to restart your PC. (You must
restart your PC to complete the driver installation.)
10.
When the PC restarts, re-install your Service Pack.
11.
On completion of this step, the driver is installed and you
can proceed to configurethe AirCard network card to use
your account (if it was not preactivated).
Account Configuration
The final step to making the AirCard 710 wireless network
card operational is configuring it to use your account.
Note: For information on
obtaining a GSM wireless
account from a service provider,
see “Introducing the AirCard®
710 Wireless Network Card” on
page 1 and “Getting Started” on
page 7. In particular, consult the
sectio n “SIM Card Infor m a ti on”
on page 9.
If you purchased a preactivated card, this step is not necessary.
Oncethe software and driver are installed, the AirCard
network card is ready for use. Otherwise,you must use the
Activation Wizard to activate and configure your account.
Activation and Configuration Methods
Your service provider mayoffer several methods of setting up
your AirCard network card to work on their GSM system—by
telephone, on the Web, in person at a retail outlet, or automati-
cally using your AirCard network card in your computer.
Consult your service provider for the best one to use.
Manual Activation
Manual Activation, the most common way of activating and
configuring your account, involves phoning yourservice
provider (or visiting their web site), exchanging information,
and entering your account information into the appropriate
fields in the Activation Wizard.You require a phone or
Internet connection, other than the AirCard network card
itself, to use this method.
To activate an account and configure your AirCard network
card:
1.
Insert the AirCard network card into your PC Card slot, if
it is not already inserted.
2.
If the Activation Wizard does not launch automatically,
run Watcher by selecting
Start>Programs>Sierra Wireless
>
Page 37

Install - Notebook PCs
Rev B Oct. 2001 29
Installation
on Notebook PCs
AirCard 710>Watcher for AirCard 710
and inWatcher select
Tools>Administration>Activation Wizard
.
Figure 3- 1 3: The AirCar d 710 Activati on Wi za r d
3.
Use the
Next
and
Back
buttons to navigate through the
Activation Wizard, noting the fol lowing:
·
Use the radio buttons to select
Manual Activation
as the
method of activation you want to use, unless your
service provider specifies another.
·
Obtain the billing information listed on the second
window of the wizard before contacting the service
provider or proceeding to the next window.
·
Tell therepresentative (or enter into the web form) the
ESN number listed in the wizard.
·
Enter the information the service provider gives you
back to activate and configure your wireless network
card.
4.
Click
Finish
on the final window of the wizard.
Now that your card is configured, proceed to “The Watcher
Window and Indicators” on page 33.
Inserting and Removing the
AirCard Wireless Network Card
Inserting the AirCard 710 PC Card
The AirCard wireless network card should be inserted into the
PC Card slot with the label facing up.
Note: If you are using Windows NT, the PC must be powered off
whenever you insert or eject the AirCard network card.
Page 38

AirCard 710 Wireless Network Card - User Guide
30 2130135
Figure 3-14: Inserting the AirCard 710 Network Card
In Windows 95, 98, Me, 2000, andXP, when you insert the
AirCard network card, the following sh ould occur:
1.
If sound effects are enabled, the PC beeps.
2.
The PC Card icon appears in the status area (also known
as the system tray, at the far right edge of the Windows
taskbar). The icon may already be displayed for another
card, or it may not appear if the feature has been disabled.
3.
The Network Adapter Manager icon for the AirCard 710
network card appears (unless another device is set as the
primary network card—see “Network Adapter Manager
(for Multiple Network Cards)” on page 85).
Figure 3- 1 5: Status Area Ic ons, With AirCa r d 71 0 Ico n C irc le d and PC Card
Icon t o I ts Left
4.
Watcher launches.
The AirCard network card is powered as soon as you insert it.
For information about the meaning of th e status light next to
the antenna, see “LED Operation” on page91.
Removing the AirCard 710 PC Card
Note: If you are using Windows NT, the PC must be powered off
whenever you insert or eject the AirCard network card.
To remove the AirCard (Windows 95, 98, Me, 2000, or XP):
1.
Close Watcher if it is open.
2.
Click the PC Card icon in the status area to display the
option to stop the card.
Page 39

Install - Notebook PCs
Rev B Oct. 2001 31
Installation
on Notebook PCs
3.
Click on “Stop Sierra Wireless AirCard 710 PC Card
Parent”.
4.
Click
OK
in the dialog box that notifies you that itis safe to
remove the card.
5.
Pivot the antenna so that it is once again parallel to the end
of the AirCard housing, then gently push it all the way
into its retracted position.
Figure 3-16: Retracting the AirCard 710 Antenna
6.
Push the PC Card eject button on your computer to eject
the card.
Figure 3- 1 7: Ejecting th e Air Card 710 PC Card Fr om I t s Slot
7.
Grasp the AirCard PC Card and remove it from the slot.
Figure 3-18: Removing the AirCard 710 PC Card From Its Slot
Page 40

AirCard 710 Wireless Network Card - User Guide
32 2130135
Page 41

Rev B Oct. 2001 33
Use on Notebooks,
HPCs, and PPCs
4: The Watcher Window and
Indicators
• Launching the
Watcher Pr ogra m
• Menus and Window
Controls
• Connection Displays
• T askbar S tatus Are a
Icons
Watcher is the application that
allows you to manage and monitor
the connection between the
AirCard
®
710 network card and the
GSM network. You use Watcher to:
•
Determine your signal strength,
roaming status, packet mode
(GPRS) availability, and other
network connection parameters
•
Initiate voice, data, and fax calls
•
View call statistics and SMS messages (text messages)
•
Enable and disable features like Always On Top (which
allows you to set theWatcher window to display in front
of other application windows), and KeyGuard (which
prevents accidental dialing)
•
Set various options and preferences
Launching the Watcher Program
Whenever you use the AirCard 710 wireless network card, you
must run Watcher.
Launching Watcher on Notebook PCs
On notebook PCs, Watcher should launch automatically
anytime you insert the AirCard 710.You can also launch
Watcher by:
1.
Double clicking the Watcher icon on your desktop
(as shown to the right)
2.
Selecting
Start > Programs > Sierra Wireless > AirCard
710 > Watcher
Page 42

AirCard 710 Wireless Network Card - User Guide
34 2130135
Figure 4-1: The Main Watcher Window
Menus and Window Controls
The Watcher window has these components:
•
A menu bar (on the upper left side of the window)
•
The Minimize, Toggle Full/Compact and Close buttons in
the top right corner (on notebook PCs only)
•
The Data and Voice tabs on the upper right side of the
window
•
A section of the window that resembles an LCD screen
(beneath the menu bar) that includes these areas:
·
The Connection Status area at the top
·
The Call Status box in the middle
·
The Indicator area at the bottom
The Menu Bar
“Watcher Menu Options” on page 51 gives a detailed
description of each option in each of Watcher’s three menus:
View, Tools, and Help.
Page 43

Watcher Window & Indicators
Rev B Oct. 2001 35
Use on Notebooks,
HPCs, and PPCs
The Minimize, Toggle Full/Compact and
Close Boxes
Note: These window control
boxes appear only in the
notebook PC version of Watcher.
•
The
Minimize
button closesthe Watcher
window but leaves the application
running. When Watcher is minimized, the
Watcher icon in the Windows status area
can be used to determine the AirCard status. (For details,
see the section “Taskbar Status Area Icons” on page 39.)
•
The
Toggle Full/Compact
button
is used to switch between the
full Watcher window and the
compact view:
The compact view allows you
to see connection status infor-
mation while you use other applications.
•
The
Close
button exitsWatcher.
Connection Displays
The LCD-style panel on the left side ofthe Watcher window
shows information about your connection status and call
status, as well as other informational icons. It is divided into
three regions, from top to bottom:
•
The Connection Status area
•
The Call Status box
•
The Indicator area
Connection Status Area
The Connection Status areauses these icons:
Page 44

AirCard 710 Wireless Network Card - User Guide
36 2130135
Table 4-1 :Connection Status Area Icons
Icon Meaning
The Signal Strength indicator uses bars to
show the intensity of the radio signal. The
numbe r of b a rs increases a s signal
strength increases to a maximum of five
bars.
When the bars are dimmed and the
antenna icon is crossed out, no connection
is possible for one of these reasons:
•
the antenna is retracted
•
you are outside the GSM network
coverage area
•
the signal strength is too weak
•
a network or account problem is
preventing the AirCard 710 from
obtaining service
To improve signal strength when you know
there is GSM coverage in your area, try
adjusting the position of the antenna (it
should be vertical), moving near a window,
or otherwise changing the position of your
computer so that the AirCard antenna is
better positioned to receive radio signals
from nearby cellular radio towers.
The In Use indicator show s whether a call is i n progress. Depending
on the in-use state, one of these icons is displayed:
When the In Use indi cator is a handset, a
voice call is in progress.
When the In Use indicator is a modem, a
circuit mode data (or fax) call is in progress
(see “Dial-Up Circuit Mode Calls” on page
42).
When the In Use indicator is a modem with
packet indicator, a packet mode (GPRS)
data call is in progress. (See “Packet Mode
Connections” on page 43.)
When the In Use indicator is a large “X”,
the AirCard is not functioning properly and
no connection is available. (Try closing
Watcher and restarting your computer.)
Page 45

Watcher Window & Indicators
Rev B Oct. 2001 37
Use on Notebooks,
HPCs, and PPCs
Note: Watcher begins timing
outgoing calls from the time the
call is initiated—not from the
time the call is answered.
Call Status Box
The Call Status Box displays one of these messages:
•
“
Ready to Connect
” indicates that you have a network
connection but there is no call in progress.
•
“
Dialing
” indicates that the AirCard is attempting to
connect to a phone number, either as a voice, fax, or circuit
mode data call. “
Connecting
” (which will display only
briefly) appears instead when using packet mode services.
•
Once a call is connected, what appears depends on the
type of call.
The packet mode indicator shows whether
GPRS packet data coverage is avai l abl e in
this area. Where GPRS is available, you
can make packet mode (“always on”) data
connections, if your billing p la n allows for it.
For more information, see “How Circuit
Mode and Packet Mode Data Connections
Diff er” on page 3, and “ Packet Mo de
Connections” on page 43.
The Roaming Status indicator shows
whether you are roaming onto the network
of a service provider other than your own.
When the indicator is off (gray), you are
within the local coverage area of your
service provider . When the indicator is on
(solid bla c k) , you are in a “preferred”
roaming area. When the indicator is
blinking, you are within the coverage area
of a GSM network but not in a “preferred”
roaming area.
Your coverage area and billing charges
depend upon your service provider and the
type o f account you have. There may be
surcharges for roaming service that vary
based on whether you are in a preferred
roaming area or a non-preferred roaming
area. If there is no roaming agreement
between your servi ce provider an d the loc al
carrier, you ma y be unable to complete
calls in non-preferred roaming areas.
Table 4-1 :Connection Status Area Icons
Icon Meaning
Page 46

AirCard 710 Wireless Network Card - User Guide
38 2130135
·
For voice calls, “
Time
” indicates the current duration of
the call. If available via Caller ID or your Address Book,
the name of the other party appears—otherwise,
Watcher disp lays “
Unknown
”. Watcher also displays the
other party’s phone number.
·
For data calls, Watcher displays “
Time
” for the current
duration of the call, “
Rx
” for the number of bytes of data
receives, and “
Tx
” for the bytes transmitted.
Indicator Area
The Indicator area displays icons that notify you when you
receive messages and indicate whether certain options and
features are enabled. The icons are black when “on” and gray
when “off”.
Table 4-2 :In dicator Area Icon s
Icon Meaning
The SMS Message indicator shows
whether you have unread t ext messages. If
it is blinking, at least one of your unread
messages is urgent.
To read and respond to SMS messages,
select
Tools
>
SMS Manager…
or click the
icon. (For detai ls, see “SMS Manager …” on
page 53.)
The Voice Mail indicator shows whether
you have unheard voice messages. To
hear the messages, you must dial your
wireless service provider’s voice
messaging system. Click the icon to
connect to your voice messaging system.
(For information, see the Options section
“Voice Tab” o n page 77.)
The Missed Call indicator displays if you
failed to answer an incoming call. To view
the phone number(s) of any missed calls,
click the icon to display the Call Log (see
“Call Log” on page 59).
The Auto-Answer indicator shows whether
Watcher is set to automatically answer
incoming call s. You can enable and disable
this feature under
Tools
>
Options
(see
“Voice Tab” o n page 77).
Page 47

Watcher Window & Indicators
Rev B Oct. 2001 39
Use on Notebooks,
HPCs, and PPCs
Taskbar Status Area Icons
Watcher displays an icon in the status area (also known as the
system tray, usually located in the lower right corner of your
screen). The status area icon indicates your connection status
or notifies you when youhave voice mail or SMS messages, or
when you have missed a call.
The Headset indicator shows whether a
headset is connected to the AirCard
headset connector, near t he antenna at the
end of the AirCard 710 housing. The
connector is designed to use standard
2.5mm mobile voice h eadsets.
The Silent Ringer indicator means that no
sound is played when an incoming call is
received. You can enable and disable this
feature under
Tools
>
Options
(see “Voice
Tab” on page 77) or with the Mute key
when no call is underway (see “The
Watch e r D ial Pad” o n page 46).
The Privacy indicator shows whether
encryption is in use on voice calls.
(Encryption prevents your calls from being
monit o re d .) Your se rv ic e p r o vi der
determines whether encryption is available
its GSM network.
The compression indicator shows whether
data compression is in use. Where
available (which depends on your service
provider), compression can increase
throughput and the effective data
transmission speed.
Table 4-3 :Stat us Area Icon s
Icon Meaning
There is no GSM network connection.
The AirCard 710 wireless network card is
connected to the GSM network.
Table 4-2 :In dicator Area Icon s
Icon Meaning
Page 48

AirCard 710 Wireless Network Card - User Guide
40 2130135
You missed (failed to answer) an incoming
call. You can view the number of the caller
in the Call Log (choose
Tools > Call Log…
in
Watcher).
You have one or more unread SMS (text)
messages. Choose
Tools
>
SMS
Manager…
to read them.
You have voice mail. Dial your voice mail
system to retrieve your messages.
Table 4-3 :Stat us Area Icon s
Icon Meaning
Page 49

Rev B Oct. 2001 41
Use on Notebooks,
HPCs, and PPCs
5: Data Connections Through
GSM and GPRS
• Dia l-Up Circuit Mode
Calls
• Packet Mode
Connections
You use the Data tab in the main Watcher window to make
data connections, such as for browsing the Web, sending and
receiving e-mail, dialing into your corporate network, or
sending and receiving faxes.
The AirCard
®
710 network card offers two different types of
data connections (also see “How Circuit Mode and Packet
ModeData Connections Differ” onpage 3):
Note: You cannot have a data
and a voice connection at the
same time. If you have a data
connection when an incoming
call occurs, your caller will get a
busy signal or be put through to
your voice mail box.
•
Dial-up circuit mode call
– in this type of connection, the
AirCard 710 network card functions as a modem. You
provide the phone number and the AirCard modem dials
the number and converts your data into sounds that are
transmitted over the GSM voice circuit—just as a tradi-
tional modem sends sounds over a phone line.
Using this type of connection, you can connect to any other
modem (including oneat your Internet provider) and
receive faxes. The maximum speed of this type of connec-
tion is 9.6kbps. (Effective throughput may be faster with
data compression.) For more information, see “Connection
Speed” on page 4.
Note: Depending on your billing
plan, there may be a surcharge
or different billing arrangement
for GPRS packet mode connections.
•
Packet mode network connection
– in this type of
connection, the AirCard 710 network card behaves like a
LAN card, and establishes a fully digital GPRS connection
to the GSM network. (You do not need to provide a phone
number and there is no dialing involved.) The maximum
speed of this connection is115kbps (see “Connection
Speed” on page 4), but it is only available in areas where
GPRS has been implemented by the GSM service provider.
Note: Although you may not be
charged extra money while
connected in packet mode, but
not a ctively moving da ta, the
AirCard netw o rk card continues
to use power in that mode. For
best power conservation from
your c omputer, shut d own any
AirCard wireless connections if
you do not need them.
The packet mode connection provides “always on” direct
access to the Internet, without having to dial an Internet
provider’s modem bank first. Once the connection is estab-
lished, you can browse the Web, sendand receive e-mail,
transfer files, connect to your company’ s virtual p rivate
network (VPN) and so on. Once you have made a packet
mode connection, you can leave it running if you wish,
since service providers usually charge only for data sent
and received, not for the time you are connected (see “How
Circuit Modeand Packet Mode Data Connections Differ”
on page 3).
Page 50

AirCard 710 Wireless Network Card - User Guide
42 2130135
Figure 5- 1 : The Watcher Data Tab
Dial-Up Circuit Mode Calls
Before making a dial-up data call, you must set up the number
in the Connection Manager. (This step is only necessary the
first time you dial the number.) Choose
Tools > Connection
Manager
, or click the
Connection Manager
button to the right of
the Connect button. (For more, see “Connection Manager” on
page 61.)
Initiating a Dial-Up Data Call
Note: You can make a dial-up data call anywhere there is GSM voice
coverage, thoug h data speeds may be af fected by radio recept ion and
network congestion.
1.
Select the connection name from the pull-down menu on
the Data tab of the main Watcher window. The number is
then displayed in the
Dial-Up #
field.
Note: If you change the number
in the
Dial-Up #
field, the
Connection Manager record is
not changed. The ne xt time you
select the connection, the old
number appears. If you want to
permanently change the record,
you can do so in the Connection
Manager (see page 61).
2.
If necessary, change the phone number in the
Dial-Up #
field. (For example, depending on your location, you may
need to add or remove the area code.)
3.
Click the
Connect
button.
Watcher then initiates the connection.
Progress is shown in the Call Status
area. Once the connection is estab-
lished, the call statistics (duration,
bytes transmitted, and bytes received)
are displayed.
Figure 5- 2 : C al l Stat u s Area During a Dat a Conn ec t i on
Page 51

Data Connections
Rev B Oct. 2001 43
Use on Notebooks,
HPCs, and PPCs
Closing a Dial-Up Data Call
To terminate a call:
•
Click the
Cancel
button (during the connection process) or
the
Disconnect
button (once the connection is established).
Incoming Data Calls
By default, the AirCardnetwork card is set to answer all calls
as voice calls. To receive a fax or data call, you must set
Watcher to answer appropriately.
This setting is in the Options window (
Tools > Options
)onthe
General
tab. For a detailed explanation, see “General Tab” on
page 64.
Packet Mode Connections
When the packet mode indicator is on, you can make a packet
mode (GPRS) connection.
Note: Packet mode connections are only available where GSM
service providers have installed the appropriate GPRS infrastructure.
Not all GSM coverage areas have GPRS coverage. Contact your
service provider for coverage information in your area.
Initiating a Packet Mode Connection
To make a packet mode connection:
1.
Select
Packet Mode (GPRS)
fromthe drop-down menu on
the Data tab of the main Watcher window.
2.
Click the
Connect
button. (No phone number or dialing is
required.)
Note: Depending on your billing
plan, there may be a surcharge
or different billi ng sys tem for
packet mode service.
Oncethe connection is established, you can use any Internet
application wirelessly. The speed of your connection depends
on your service provider, as well as on network coverage and
congestion in your current location. For more information, see
“Connection Speed” on page 4.
Closing a Packet Mode Connection
To terminate a packet mode connection, click
Disconnect
button.
Page 52

AirCard 710 Wireless Network Card - User Guide
44 2130135
Page 53

Rev B Oct. 2001 45
Use on Notebooks,
HPCs, and PPCs
6: GSM Voice Connections
• The Dial Pad
• The Scratch Pad
• Making a Voice Call
You can use your AirCard®710 network card as a GSM
mobile phone simply by connecting any standard
mobile headset with a 2.5 mm jack
.
The headset plugs into the circular connector on the end of the
AirCard housing, next to the antenna:
Figure 6-1: Location of the AirCard 710 Headset Connector
The AirCard 710 network card has a number voice features:
•
The Volume controls allow you to adjust the loudness of
what you hear.
•
The Mute button allows you to turn off the speaker so that
you cannot be heard.
•
The
SEND
button allows you to dial any number or select
or enter, or to redial the previously dialed number.
•
The Any-Key Answerfeature allows you to answer an
incoming call by pressing any button on the dial pad
except
END,CLR
, or the Volume controls.
•
The Auto-Answer feature can be enabled to automatically
answer incoming calls within a specified number of rings.
•
The KeyGuard feature prevents accidental dialing.
•
The Silent Ringer feature prevents any sound from
occurring when you receive calls.
•
The Missed Call indicator notifies you of any incoming
calls that were not answered.
•
A Scratch Pad provides an easily accessible temporary
placeto record very brief notes.
•
The Call Log window records details about all incoming
and outgoing calls, providing useful information such as
the phone numbers of missedcalls.
•
Watcher supports conference calling (three-way calling),
voice mail, call alert, and Caller ID, if available to you.
Headset Connector
 Loading...