

Page 1

Installation instructions
Page 2

2
Page 3

3
Assembly Instructions
For the installer
and kitchen expert!
Important installation Properly dispose of packaging materials.
notes Do not use oven door handle for
transporting or handling the unit during
installation.
WARNING: Connection and first start of the
appliance may only be performed by an
authorised specialist.
Connection must be made using an
H05RR-F 3 G 1,5mains connection cable.
Rated consumption, rated voltage and type
no. of the appliance:
See appliance nameplate behind the oven door
to the left beneath the side edge of the oven.
The unit's nameplate is located at on the
sidewall of the unit.
Electrical safety of the appliance can be ensured
only if the equipment earth in the building
installation has been installed according to
regulations.
On the installation side a separating device shall
be provided. Any switch with a contact gap
The connection diagramm is exceeding 3 mm may be considered a separating
located on the rear panel of the device. Other examples are LS switches, fuses
appliance. and contactors.
In the case of repairs interrupt all power
connections to the unit.
The properly installed appliance must be covered
on all sides in such a fashion that not even
components with rough insulation are exposed to
the touch.
The cover must be removable with tools only.
220-240V
~
L
N
Page 4
4
Installation without cupboard
1. 2.
600
m
min.
720
in.
min. 38
550
0
Page 5

5
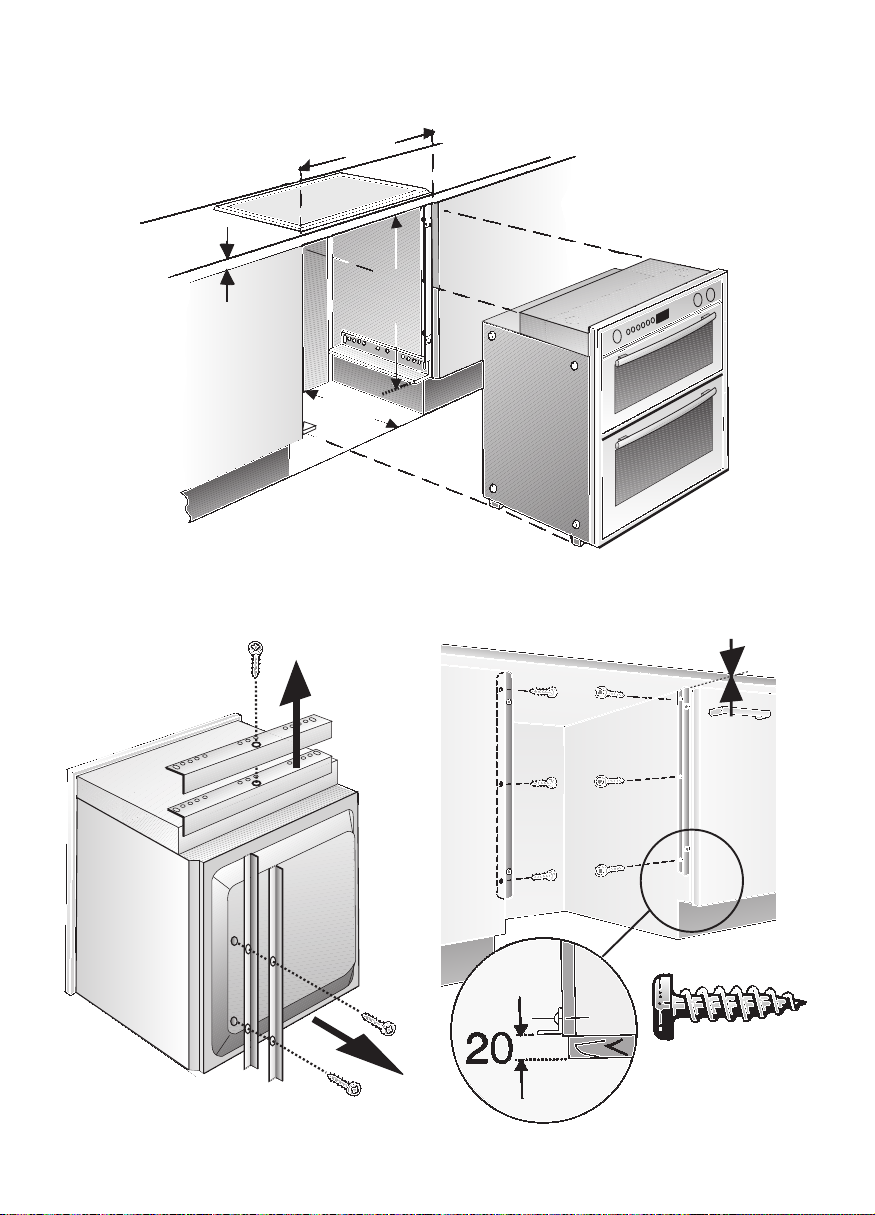
Installation of the
build-in oven
To burn-in the insulation, heat up the oven
prior to installing the unit.
Push the built-in oven into the housing unit
and align the unit until it is in a level
position.
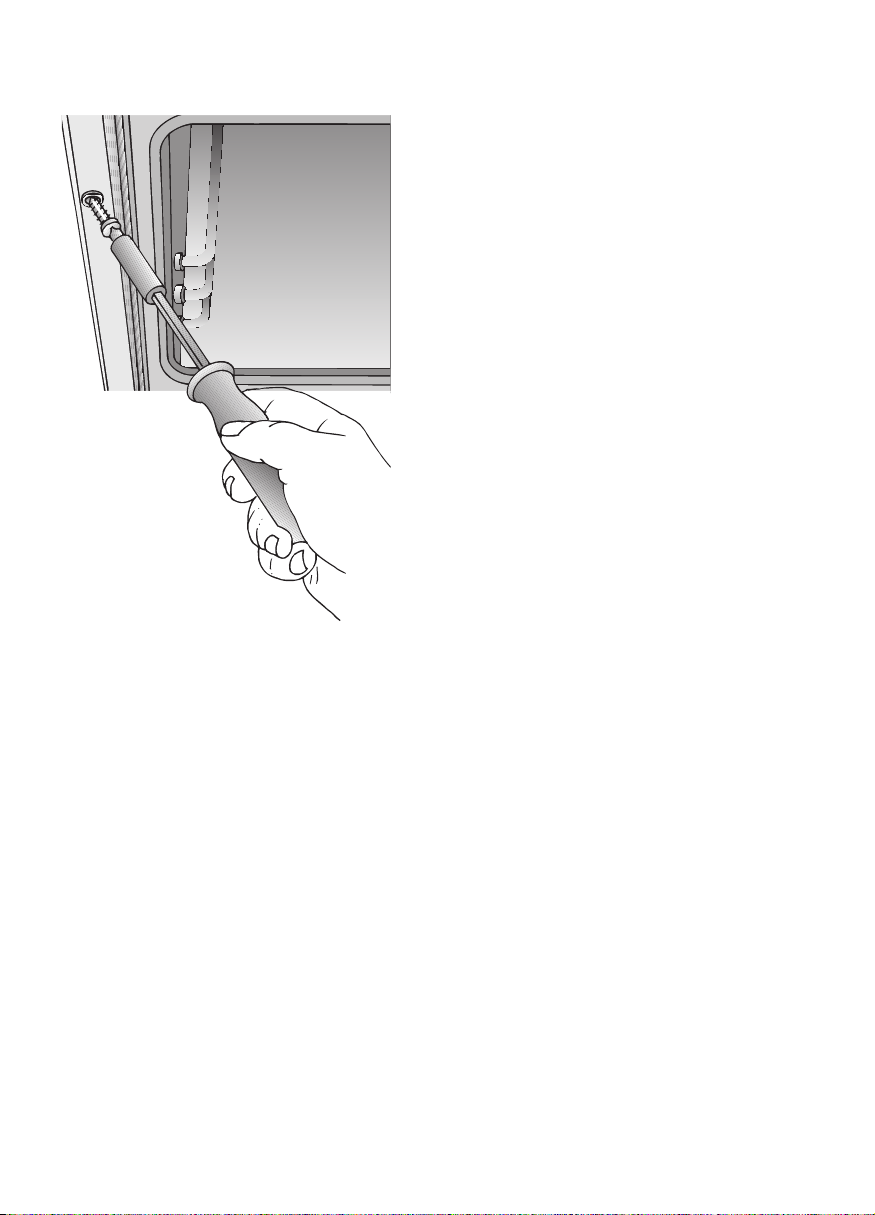
Open the oven door and, using one screw
on each side, fasten the built-in oven to the
side strips of the housing unit
(see illustration).
The two screws (supplied with the built-in
oven) must be started slightly outward.
Verify that the built-in oven is positioned
securely and in a level position, and that
the required installation dimensions have
been maintained.
The properly installed appliance must be
covered on all sides in such a fashion that
not even components with rough insulation
are exposed to the touch.
The cover must be removable with tools
only.
Kitchen furniture
Oven housing units from virtually all lines of
kitchen furniture are suitable for installing the
built-in oven.
However, the veneers or plastic laminates
on the housing unit must be applied with
heat-resistant glue (90 °C).
If plastic laminate or glue are not sufficiently
heat-resistant, warping, bubbling or
detachment of the finish may result.
4.
5.
3.
2.
1.
3.
0
Page 6

6
Installation with cupboard
1.
560-
570
min. 38
720
min. 3
min.
550
Page 7
7
Installation of the
build-in oven
To burn-in the insulation, heat up the oven
prior to installing the unit.
Push the built-in oven into the housing unit
and align the unit until it is in a level
position.
Open the oven door and, using one screw
on each side, fasten the built-in oven to the
side strips of the housing unit
(see illustration).
The two screws (supplied with the built-in
oven) must be started slightly outward.
Verify that the built-in oven is positioned
securely and in a level position, and that
the required installation dimensions have
been maintained.
The properly installed appliance must be
covered on all sides in such a fashion that
not even components with rough insulation
are exposed to the touch.
The cover must be removable with tools
only.
Kitchen furniture
Oven housing units from virtually all lines of
kitchen furniture are suitable for installing the
built-in oven.
However, the veneers or plastic laminates
on the housing unit must be applied with
heat-resistant glue (90 °C).
If plastic laminate or glue are not sufficiently
heat-resistant, warping, bubbling or
detachment of the finish may result.
2.
Page 8

9000 034 865
Printed in Germany 0405 Es.
 Loading...