

Siemens Sonoline G20 Quick Reference Manual
Medical G20 Quick Reference
Page 1

Medical G20 Quick Reference
Page 2
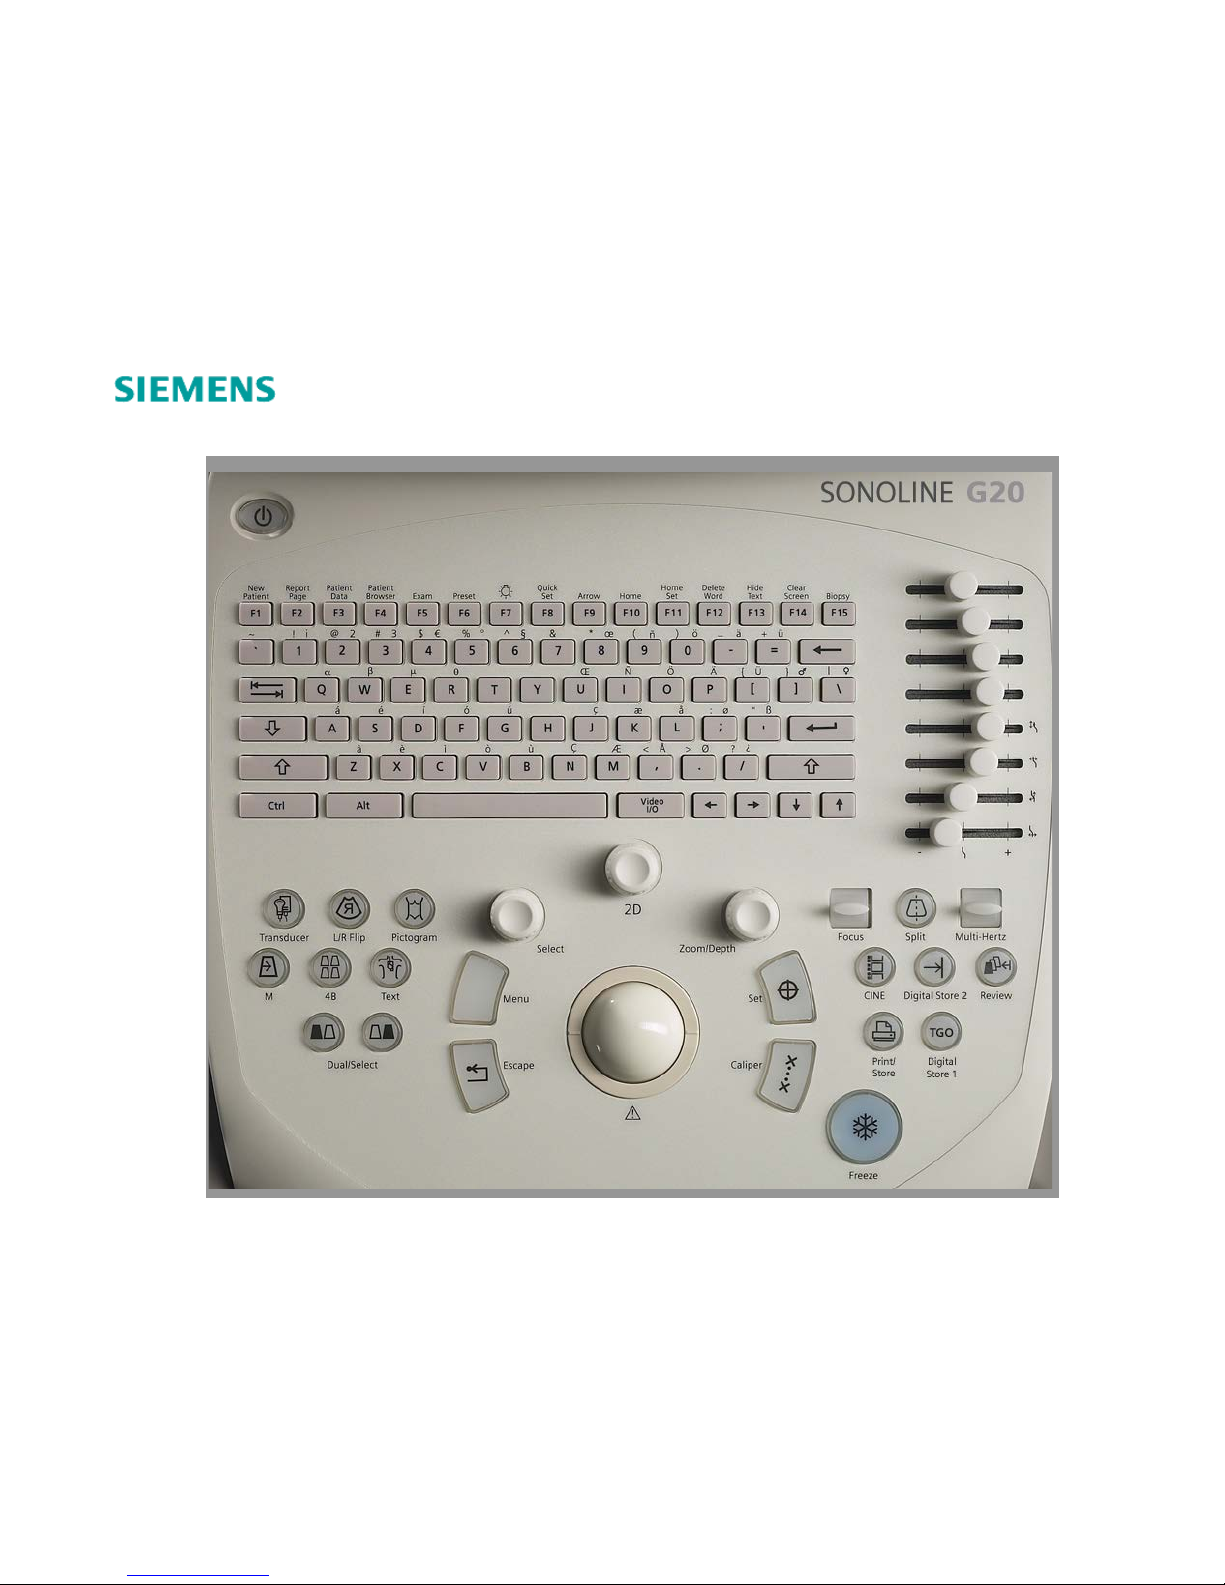
Note: The term select is used to describe the action of rolling the trackball to position the pointer (cursor) on an object and then
pressing SET on the control panel.
Beginning an Exam
Press the Power Switch on the upper left side of the keyboard. A blue light will indicate the power is on.
To enter data for a new patient:
1. Press NEW PATIENT (F1)
2. Enter the patient name and ID using the keyboard
3. Enter other pertinent information
4. Use TAB to move to next data field
5. Use TRACKBALL and cursor to select OK
6. If exam is not the Boot Up exam, press Exam to select the correct Quickset
7. Quicksets can also be recalled using EXAM key (F5) on keyboard
Optimizing the 2-D Image
To adjust… Do this:
One Touch Gain Optimization Press TGO (option) button
More Penetration Push MULTIHERTZ toggle down
Clean out noise/clutter Push MULTIHETTZ toggle up to THI
Overall Gain/brightness Rotate 2-D knob
Depth Rotate DEPTH/ZOOM knob
Focus Push FOCUS toggle up or down
Zoom Press DEPTH/ZOOM knob to select
Gain Adjust DGC sliders
Bright Light Scanning Use Gray Map D or L
To Rotate or Flip Image L/R
To change image orientation from left to right
To rotate the image 90°
Press the L/R FLIP key on the control panel
Press L/R FLIP key while pressing and holding the SHIFT
key on the keyboard.
 Loading...