

Siemens HiPath 4000, optiPoint WL 2 professional, optiPoint WL 2 professiona Operating Manual
Page 1

HiPath 4000
optiPoint WL 2 professional
Operating Manual
Page 2
Before You Begin
Before You Begin
This operating manual describes the handset optiPoint WL 2 professional at at your communication platform HiPath 4000, version 3.0.
It describes all functions you can operate with your handset. You may find that some of the
functions you wish to use are not available on your handset. This may be due to one of the
following reasons:
• The function has not been configured for your handset – please contact your service
personnel.
• Your communication platform does not support this function – please contact your service personnel.
The information provided in this document contains merely general descriptions or characteristics of performance which in case of actual use do not always apply as described or
which may change as a result of further development of the products.
An obligation to provide the respective characteristics shall only exist if expressly agreed
in the terms of contract.
All trademarks are the property of Siemens AG or their respective owners.
Not all of the functions described in this operating manual are available in all countries.
Safety Precautions
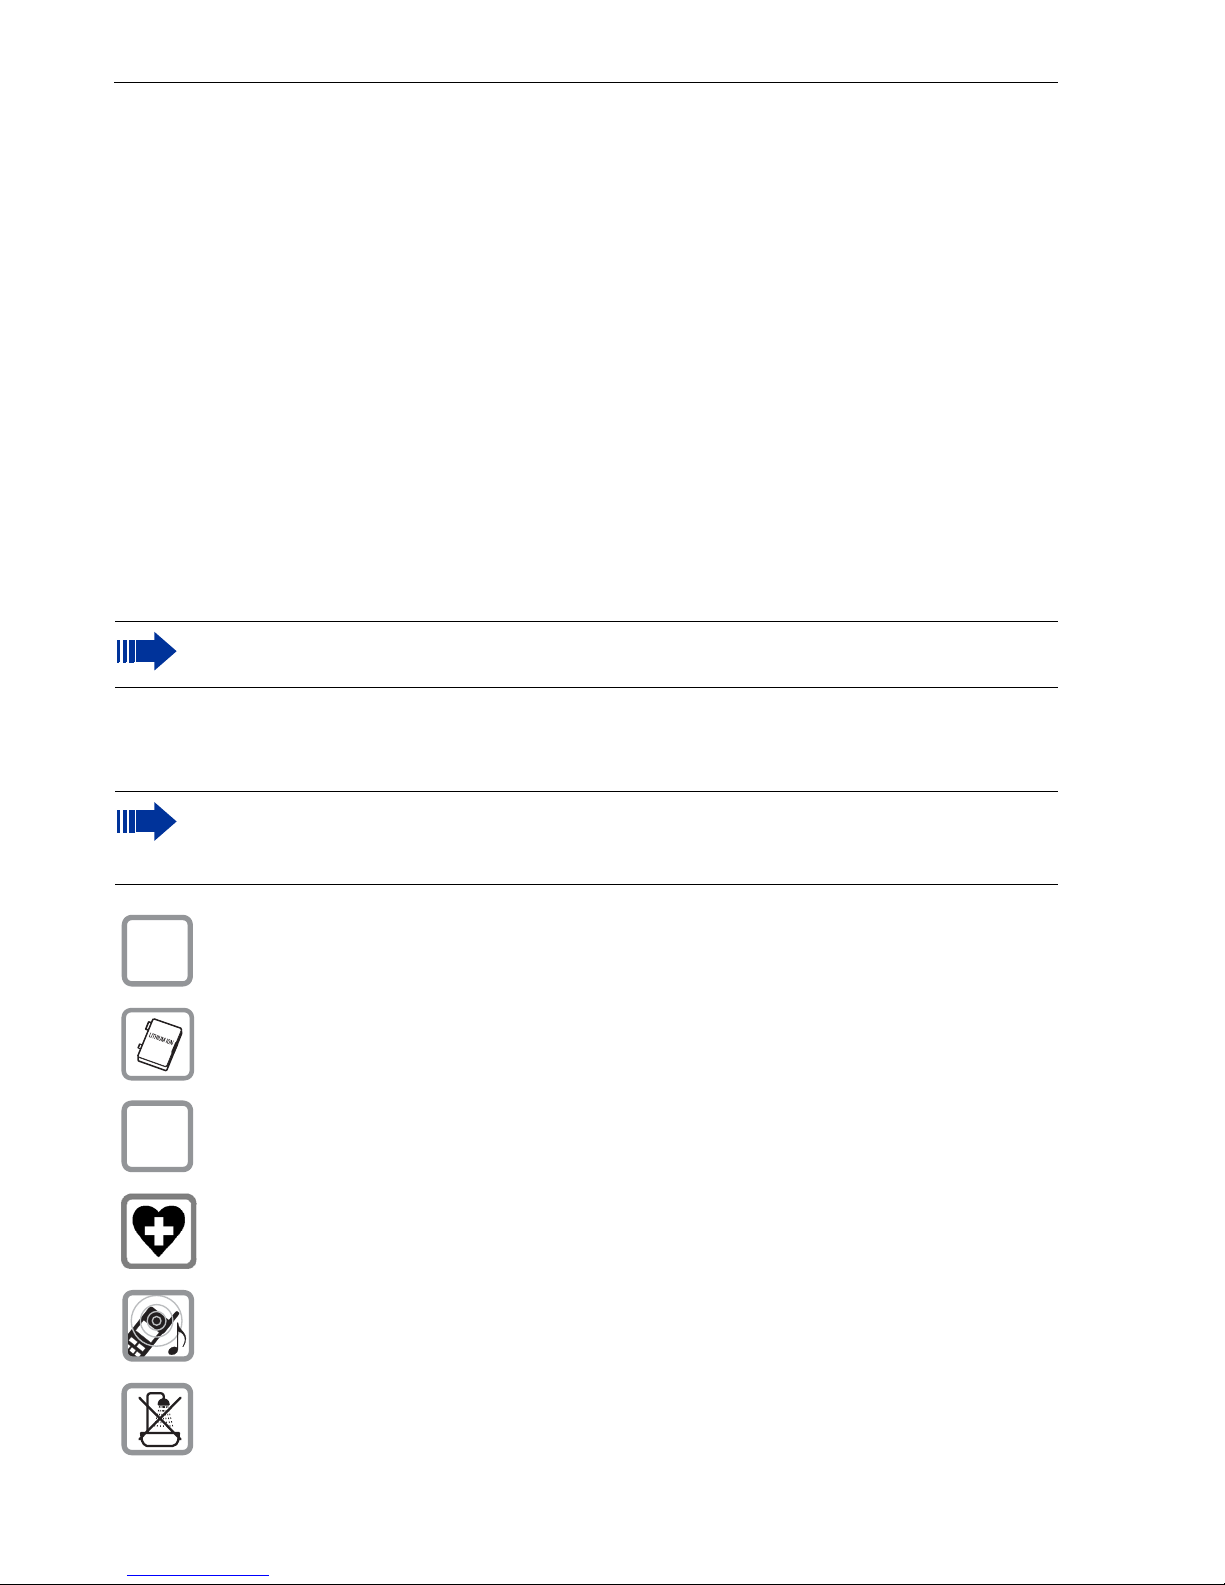
Please read the operating manual and safety precautions carefully before use.
Explain the content and the hazards associated with using the handset to your children.
Only use the power supply provided as indicated on the underside of the charg-
$
‹
Œ
ing unit.
Only use recommended rechargeable batteries. Never use other battery types
or non-rechargeable batteries as this can cause serious damage to your health
and property.
Insert the rechargeable battery making sure the poles are facing in the correct
directions and use the battery as described in the operating manual.
The handset can interfere with medical equipment. Please refer to the technical
specifications applicable to the relevant environment (medical practice,
for instance).
The handset can cause unpleasant humming in hearing aids.
Do not install the charging unit in bathrooms or shower rooms. The handset and
charging unit are not splash-protected.
2
Page 3
Before You Begin
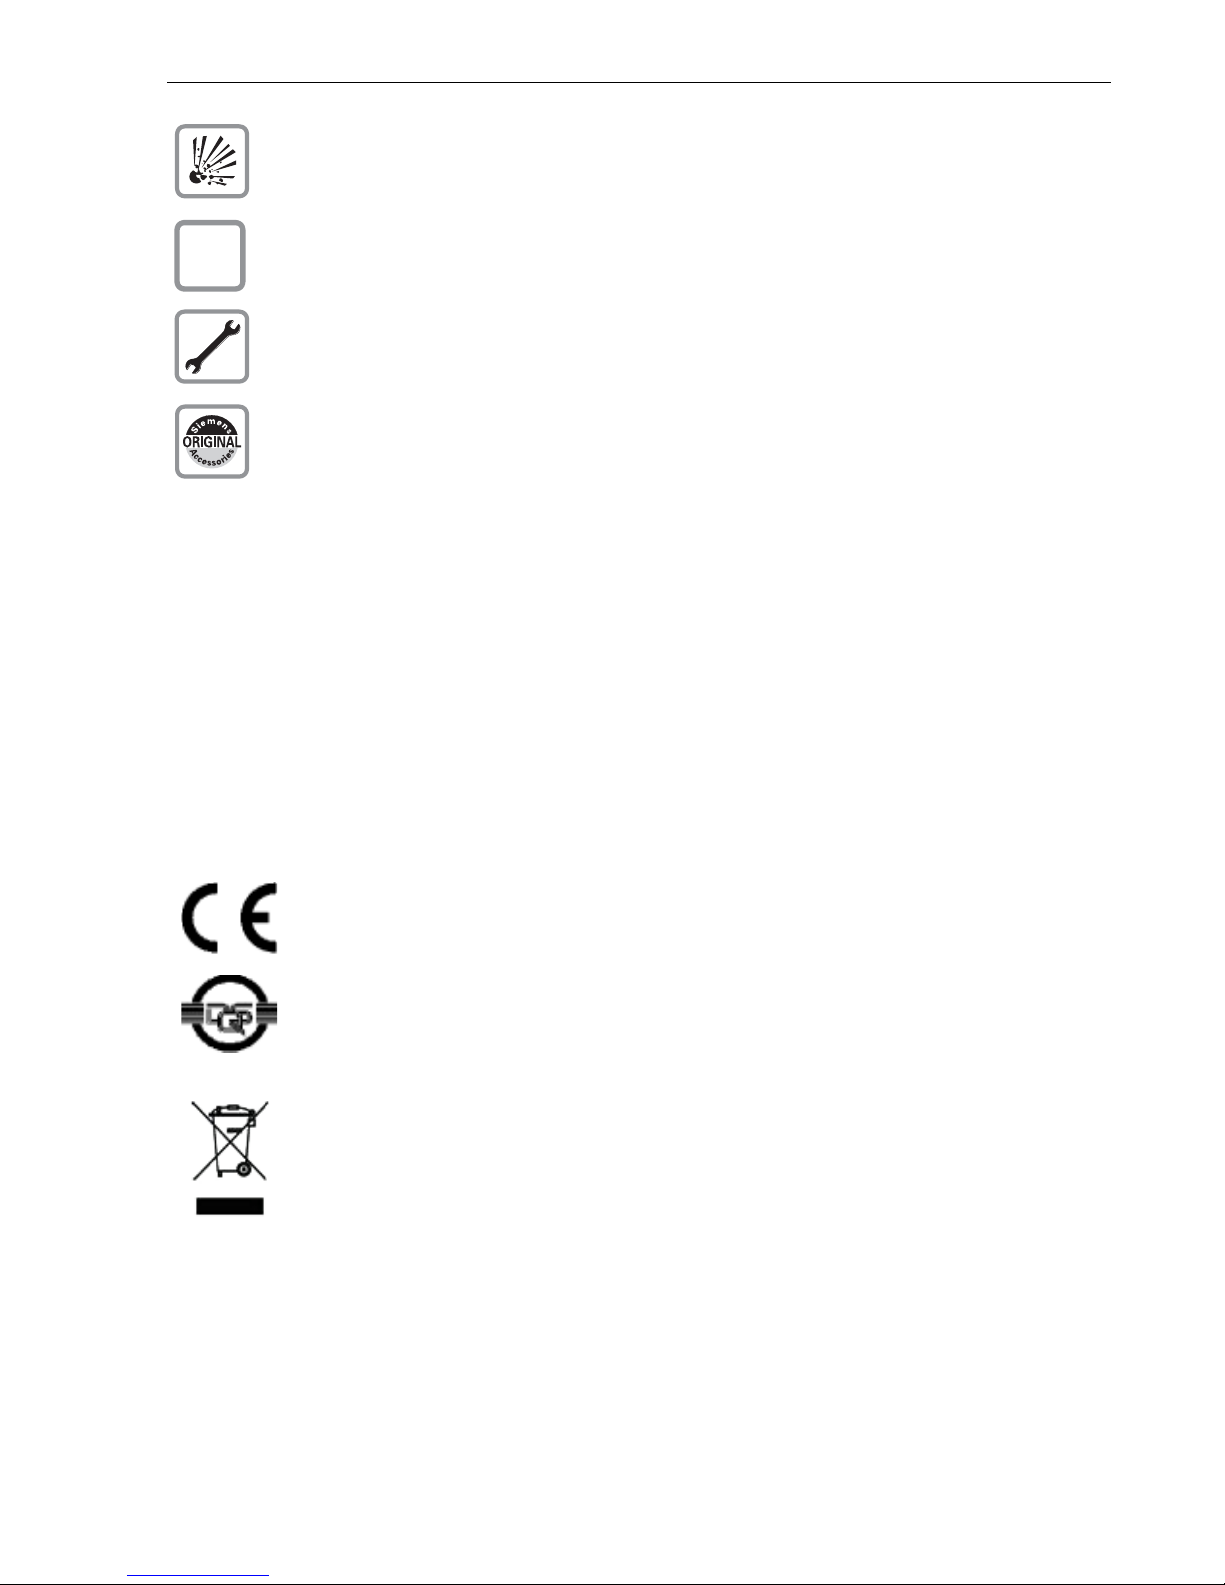
Do not operate your handset in environments where there is risk of explosion
(paintshops, for instance).
Remember to include all relevant documentation when passing on your handset
Œ
to third parties.
Never open your handset. In the event of problems, consult your service personnel.
Use only original Siemens accessories. The use of other accessories is dangerous and will invalidate the warranty and the CE mark.
Care Instructions
• Always use a damp or antistatic cloth to clean the handset. Never use a dry cloth.
• If the handset is heavily soiled, clean it with a diluted surfactant-based neutral cleaner,
such as, dishwashing detergent. Afterwards remove all traces of the cleaner with a
damp cloth (using water only).
• Do not use alcohol-based or corrosive cleaners or abrasive powders.
• Never allow the handset to come into contact with staining or aggressive liquids,
such as, coffee, tea, juice, or soft drinks.
Marks
The device conforms to the EU directive 1999/5/EC as attested by the CE
mark.
This device has been manufactured in accordance with a certified environmental management system (ISO 14001). This process ensures that energy
consumption and the use of primary raw materials are kept to a minimum,
thus reducing waste production.
All electrical and electronic products should be disposed of separately from
the municipal waste stream via designated collection facilities appointed by
the government or the local authorities.
The correct disposal and separate collection of your old appliance will help
prevent potential negative consequences for the environment and human
health. It is a precondition for reuse and recycling of used electrical and electronic equipment.
For more detailed information about disposal of your old appliance, please
contact your city office, waste disposal service, the shop where you purchased the product or your sales representative.
The statements quoted above are only fully valid for equipment which is installed and sold in the countries of the European Union and is covered by the
directive 2002/96/EC. Countries outside the European Union may have other
regulations regarding the disposal of electrical and electronic equipment.
3
Page 4

Before You Begin
Compliance with FCC Guidelines for Human Exposure to Radiofrequency Electromagnetic Fields
For body worn operation, this phone has been tested and meets FCC RF exposure guidelines when used with an accessory that contains no metal and that positions the handset
a minimum of 0 in from the body. Use of other accessories may not ensure compliance
with FCC RF exposure guidelines.
4
Page 5

Contents
Contents
Before You Begin. . . . . . . . . . . . . . . . . . . . . . . . . . . . . . 2
Safety Precautions. . . . . . . . . . . . . . . . . . . . . . . . . . . . . . . . . . . . . . . . . . 2
Care Instructions . . . . . . . . . . . . . . . . . . . . . . . . . . . . . . . . . . . . . . . . . . . 3
Marks. . . . . . . . . . . . . . . . . . . . . . . . . . . . . . . . . . . . . . . . . . . . . . . . . . . . 3
Compliance with FCC Guidelines for Human Exposure to Radiofrequency
Electromagnetic Fields . . . . . . . . . . . . . . . . . . . . . . . . . . . . . . . . . . . . . . 4
Basic Operating Instructions. . . . . . . . . . . . . . . . . . . 11
Overview of optiPoint WL 2 professional . . . . . . . . . . . . . . . . . . . . . . . 11
How to Use this Operating Manual. . . . . . . . . . . . . . . . . . . . . . . . . . . . 12
Getting Started . . . . . . . . . . . . . . . . . . . . . . . . . . . . . . . . . . . . . . . . . . . 13
Inserting the Battery . . . . . . . . . . . . . . . . . . . . . . . . . . . . . . . . . . . . 13
Placing the Handset in the Charging Unit and Charging the Battery 14
Activating/Deactivating the Handset . . . . . . . . . . . . . . . . . . . . . . . . 15
Activating/Deactivating the Keypad Lock. . . . . . . . . . . . . . . . . . . . . 15
Display. . . . . . . . . . . . . . . . . . . . . . . . . . . . . . . . . . . . . . . . . . . . . . . . . . 16
Display Icons . . . . . . . . . . . . . . . . . . . . . . . . . . . . . . . . . . . . . . . . . . 16
Keyboard . . . . . . . . . . . . . . . . . . . . . . . . . . . . . . . . . . . . . . . . . . . . . . . . 17
Navigation Key . . . . . . . . . . . . . . . . . . . . . . . . . . . . . . . . . . . . . . . . . 17
Display Keys . . . . . . . . . . . . . . . . . . . . . . . . . . . . . . . . . . . . . . . . . . 18
Additional Key Functions . . . . . . . . . . . . . . . . . . . . . . . . . . . . . . . . . 19
Audio and Visual Signaling. . . . . . . . . . . . . . . . . . . . . . . . . . . . . . . . . . . 20
Handset States . . . . . . . . . . . . . . . . . . . . . . . . . . . . . . . . . . . . . . . . 20
Illumination. . . . . . . . . . . . . . . . . . . . . . . . . . . . . . . . . . . . . . . . . . . . 21
Advisory Tones . . . . . . . . . . . . . . . . . . . . . . . . . . . . . . . . . . . . . . . . 21
FCN Function. . . . . . . . . . . . . . . . . . . . . . . . . . . . . . . . . . . . . . . . . . . . . 22
Changing Labels. . . . . . . . . . . . . . . . . . . . . . . . . . . . . . . . . . . . . . . . 22
Text Entry . . . . . . . . . . . . . . . . . . . . . . . . . . . . . . . . . . . . . . . . . . . . . . . 23
Accessing Functions . . . . . . . . . . . . . . . . . . . . . . . . . . . . . . . . . . . . . . . 24
... interactively . . . . . . . . . . . . . . . . . . . . . . . . . . . . . . . . . . . . . . . . . 24
... via the Program/Service Menu. . . . . . . . . . . . . . . . . . . . . . . . . . . 24
... via the Main Menu. . . . . . . . . . . . . . . . . . . . . . . . . . . . . . . . . . . . 24
... via the FCN List . . . . . . . . . . . . . . . . . . . . . . . . . . . . . . . . . . . . . . 24
Which Functions Are Available? . . . . . . . . . . . . . . . . . . . . . . . . . . . . . . 25
Functions in the Main Menu . . . . . . . . . . . . . . . . . . . . . . . . . . . . . . 25
Basic and Enhanced Functions in the System Menu. . . . . . . . . . . . 25
How Can I Use My Handset Effectively? . . . . . . . . . . . . . . . . . . . . . . . 25
5
Page 6

Contents
Making Calls – Basic Functions . . . . . . . . . . . . . . . .26
Accepting a Call. . . . . . . . . . . . . . . . . . . . . . . . . . . . . . . . . . . . . . . . . . . 26
Ending a Call . . . . . . . . . . . . . . . . . . . . . . . . . . . . . . . . . . . . . . . . . . . . . 26
Dialing/Making Calls . . . . . . . . . . . . . . . . . . . . . . . . . . . . . . . . . . . . . . . 26
Speakerphone Mode . . . . . . . . . . . . . . . . . . . . . . . . . . . . . . . . . . . . . . . 27
Activating/Deactivating Speakerphone Mode . . . . . . . . . . . . . . . . . 27
Saved Number Redial . . . . . . . . . . . . . . . . . . . . . . . . . . . . . . . . . . . . . . 28
Local Redial List. . . . . . . . . . . . . . . . . . . . . . . . . . . . . . . . . . . . . . . . 28
Saved Station Number. . . . . . . . . . . . . . . . . . . . . . . . . . . . . . . . . . . 28
Last Number Redial . . . . . . . . . . . . . . . . . . . . . . . . . . . . . . . . . . . . . 28
Calling a Second Party (Consultation Hold) . . . . . . . . . . . . . . . . . . . . . . 29
Alternating between Two Calls (Split) . . . . . . . . . . . . . . . . . . . . . . . 29
Transferring a Call . . . . . . . . . . . . . . . . . . . . . . . . . . . . . . . . . . . . . . 30
Call Forwarding . . . . . . . . . . . . . . . . . . . . . . . . . . . . . . . . . . . . . . . . . . . 31
Using Call Forwarding . . . . . . . . . . . . . . . . . . . . . . . . . . . . . . . . . . . 31
Fixed Call Forwarding . . . . . . . . . . . . . . . . . . . . . . . . . . . . . . . . . . . 33
Variable Call Forwarding . . . . . . . . . . . . . . . . . . . . . . . . . . . . . . . . . 35
Using Callback . . . . . . . . . . . . . . . . . . . . . . . . . . . . . . . . . . . . . . . . . . . 39
Storing a Callback . . . . . . . . . . . . . . . . . . . . . . . . . . . . . . . . . . . . . . 39
Answering a Callback. . . . . . . . . . . . . . . . . . . . . . . . . . . . . . . . . . . . 39
Canceling Callback . . . . . . . . . . . . . . . . . . . . . . . . . . . . . . . . . . . . . . 40
Checking/Deleting Stored Callbacks . . . . . . . . . . . . . . . . . . . . . . . . 40
Storing Station Numbers and Sequences as FCN Entries. . . . . . . . . . . 41
Saving on Saved Number Redial . . . . . . . . . . . . . . . . . . . . . . . . . . . 41
Saving/Editing on Repdial . . . . . . . . . . . . . . . . . . . . . . . . . . . . . . . . 41
Saving a Station Number for "Redial". . . . . . . . . . . . . . . . . . . . . . . . . . . 44
Saving a Caller’s Station Number. . . . . . . . . . . . . . . . . . . . . . . . . . . 44
Saving a Random Station Number. . . . . . . . . . . . . . . . . . . . . . . . . . 44
Dialing with Repdial . . . . . . . . . . . . . . . . . . . . . . . . . . . . . . . . . . . . 44
Settings in the System Menu . . . . . . . . . . . . . . . . . . . . . . . . . . . . . . . . 45
Adjusting the Ring Volume . . . . . . . . . . . . . . . . . . . . . . . . . . . . . . . 45
Adjusting the Ring Tone . . . . . . . . . . . . . . . . . . . . . . . . . . . . . . . . . 45
Adjusting the Display Contrast . . . . . . . . . . . . . . . . . . . . . . . . . . . . 45
Changing the Receiving Volume During A Call . . . . . . . . . . . . . . . . 45
Changing the Contrast for FCN Labeling . . . . . . . . . . . . . . . . . . . . . 46
Adjusting the Speakerphone to the Room Acoustics . . . . . . . . . . . 46
Changing the Volume of the Alert Tone. . . . . . . . . . . . . . . . . . . . . . 46
Selecting the Language for the System Menu . . . . . . . . . . . . . . . . 47
Switching from the System Menu to Idle State . . . . . . . . . . . . . . . . . . 47
6
Page 7

Contents
Making Calls – Enhanced Functions . . . . . . . . . . . . 48
Accepting Calls . . . . . . . . . . . . . . . . . . . . . . . . . . . . . . . . . . . . . . . . . . . 48
Accepting Calls for Another Member of Your Team . . . . . . . . . . . . 48
Direct Call Pickup. . . . . . . . . . . . . . . . . . . . . . . . . . . . . . . . . . . . . . . 48
Answering Calls in the Hunt Group . . . . . . . . . . . . . . . . . . . . . . . . . 49
Using the Speakerphone . . . . . . . . . . . . . . . . . . . . . . . . . . . . . . . . . 49
Answering a Call with the Headset . . . . . . . . . . . . . . . . . . . . . . . . . 49
Dialing/Making Calls . . . . . . . . . . . . . . . . . . . . . . . . . . . . . . . . . . . . . . . 50
Dialing from the Local Directory . . . . . . . . . . . . . . . . . . . . . . . . . . . 50
Voice Dialing . . . . . . . . . . . . . . . . . . . . . . . . . . . . . . . . . . . . . . . . . . 50
Dialing from the LDAP Database . . . . . . . . . . . . . . . . . . . . . . . . . . . 50
Using the Call Log . . . . . . . . . . . . . . . . . . . . . . . . . . . . . . . . . . . . . . 51
"Missed Calls" in the FCN List . . . . . . . . . . . . . . . . . . . . . . . . . . . . . 53
Speed Dialing. . . . . . . . . . . . . . . . . . . . . . . . . . . . . . . . . . . . . . . . . . 54
Using Mailboxes . . . . . . . . . . . . . . . . . . . . . . . . . . . . . . . . . . . . . . . 55
Addressing Colleagues over the Speaker . . . . . . . . . . . . . . . . . . . . 56
During a Call . . . . . . . . . . . . . . . . . . . . . . . . . . . . . . . . . . . . . . . . . . . . . 57
Using Second Call . . . . . . . . . . . . . . . . . . . . . . . . . . . . . . . . . . . . . . 57
Activating/Deactivating Second Call. . . . . . . . . . . . . . . . . . . . . . . . . 57
Accepting a Second Call . . . . . . . . . . . . . . . . . . . . . . . . . . . . . . . . . 57
Using Menu Prompts to Accept a Second Call . . . . . . . . . . . . . . . . 58
FCN Entry "Changeover" . . . . . . . . . . . . . . . . . . . . . . . . . . . . . . . . . 59
FCN Entry "Re-Display“ . . . . . . . . . . . . . . . . . . . . . . . . . . . . . . . . . . 60
FCN Entry "Time-Date". . . . . . . . . . . . . . . . . . . . . . . . . . . . . . . . . . . 61
System-Supported Conference . . . . . . . . . . . . . . . . . . . . . . . . . . . . . . . 62
Setting up a Conference . . . . . . . . . . . . . . . . . . . . . . . . . . . . . . . . . 63
Adding a Party to a Conference . . . . . . . . . . . . . . . . . . . . . . . . . . . . 64
Transferring a Conference . . . . . . . . . . . . . . . . . . . . . . . . . . . . . . . . 65
During the Conference. . . . . . . . . . . . . . . . . . . . . . . . . . . . . . . . . . . 66
Using Tone Dialing to Enter Commands (DTMF Suffix Dialing) . . . . . . 67
System-Wide Parking . . . . . . . . . . . . . . . . . . . . . . . . . . . . . . . . . . . . . . 68
Automatic Call Parking . . . . . . . . . . . . . . . . . . . . . . . . . . . . . . . . . . 68
Manual Call Parking . . . . . . . . . . . . . . . . . . . . . . . . . . . . . . . . . . . . . 69
Parking Not Possible . . . . . . . . . . . . . . . . . . . . . . . . . . . . . . . . . . . . 70
If You Cannot Reach a Destination ... . . . . . . . . . . . . . . . . . . . . . . . . . . 71
Call Waiting (Camp-On) . . . . . . . . . . . . . . . . . . . . . . . . . . . . . . . . . . 71
Busy Override - Joining an Ongoing Call . . . . . . . . . . . . . . . . . . . . . 71
HiPath 4000 as an Internal Two-Way Intercom System (Intercom and Two-
Way Calling System) . . . . . . . . . . . . . . . . . . . . . . . . . . . . . . . . . . . . . . . 72
System-Wide Two-Way Speaker Call . . . . . . . . . . . . . . . . . . . . . . . 73
Two-Way Speaker Call in a Group . . . . . . . . . . . . . . . . . . . . . . . . . . 74
Two-Way Calling in a Group. . . . . . . . . . . . . . . . . . . . . . . . . . . . . . . 75
Broadcast (Announcement) to all Members of a Line Trunk Group. 76
Using Call Forwarding . . . . . . . . . . . . . . . . . . . . . . . . . . . . . . . . . . . . . . 77
Using Control Relays to Activate/Deactivate Call Forwarding . . . . . 77
Forwarding Calls Automatically . . . . . . . . . . . . . . . . . . . . . . . . . . . . 77
Call Forwarding with Codes. . . . . . . . . . . . . . . . . . . . . . . . . . . . . . . 78
7
Page 8

Contents
Delayed Call Forwarding . . . . . . . . . . . . . . . . . . . . . . . . . . . . . . . . . . . . 80
Forwarding Calls for Another Station . . . . . . . . . . . . . . . . . . . . . . . . . . 80
Storing a Destination for Another Phone/Activating Call Forwarding 80
Storing a Destination for Fax, PC or
on Busy/Activating Call Forwarding . . . . . . . . . . . . . . . . . . . . . . . . . 81
Displaying/Deactivating Call Forwarding for Another Phone . . . . . . 82
Displaying/Deactivating Call Forwarding for Fax, PC or on Busy. . . 82
Changing Call Forwarding for Another Station. . . . . . . . . . . . . . . . . 83
Station Number Directories and Lists . . . . . . . . . . .84
Directory . . . . . . . . . . . . . . . . . . . . . . . . . . . . . . . . . . . . . . . . . . . . . . . . 84
Creating a New Entry. . . . . . . . . . . . . . . . . . . . . . . . . . . . . . . . . . . . 85
Adding Voice Dialing Recordings for an Entry . . . . . . . . . . . . . . . . . 85
Directory List . . . . . . . . . . . . . . . . . . . . . . . . . . . . . . . . . . . . . . . . . . 87
LDAP Database . . . . . . . . . . . . . . . . . . . . . . . . . . . . . . . . . . . . . . . . . . . 89
Searching for an LDAP Entry . . . . . . . . . . . . . . . . . . . . . . . . . . . . . . 89
Importing an LDAP Entry into the Directory . . . . . . . . . . . . . . . . . . 90
Redial List . . . . . . . . . . . . . . . . . . . . . . . . . . . . . . . . . . . . . . . . . . . . . . . 91
Importing an Entry into the Directory. . . . . . . . . . . . . . . . . . . . . . . . 91
Saving Functions, Wake-Up Calls, and Reminders92
Saving Station Speed-Dial Numbers . . . . . . . . . . . . . . . . . . . . . . . . . . . 92
Extension . . . . . . . . . . . . . . . . . . . . . . . . . . . . . . . . . . . . . . . . . . . . . 92
Programming Speed Dialing . . . . . . . . . . . . . . . . . . . . . . . . . . . . . . 93
Storing a Function in the FCN List . . . . . . . . . . . . . . . . . . . . . . . . . . . . 94
Activating a Function in the FCN List. . . . . . . . . . . . . . . . . . . . . . . . 94
Reminder Function . . . . . . . . . . . . . . . . . . . . . . . . . . . . . . . . . . . . . . . . 95
Saving Reminders . . . . . . . . . . . . . . . . . . . . . . . . . . . . . . . . . . . . . . 95
Using Timed Reminders . . . . . . . . . . . . . . . . . . . . . . . . . . . . . . . . . 95
Programming the Alarm Clock. . . . . . . . . . . . . . . . . . . . . . . . . . . . . . . . 96
Activating/Deactivating and Setting the Alarm Clock. . . . . . . . . . . . 96
Deactivating a Wake-Up Call . . . . . . . . . . . . . . . . . . . . . . . . . . . . . . 97
Dialing with Call Charge Assignment . . . . . . . . . . .98
Dialing with Project Assignment . . . . . . . . . . . . . . . . . . . . . . . . . . . . . . 98
Call Duration Display . . . . . . . . . . . . . . . . . . . . . . . . . . . . . . . . . . . . . . . 99
Privacy/Security. . . . . . . . . . . . . . . . . . . . . . . . . . . . .100
Activating/Deactivating Do Not Disturb . . . . . . . . . . . . . . . . . . . . . . . 100
Activating/Deactivating Speaker Call Protect. . . . . . . . . . . . . . . . . . . . 101
Caller ID Suppression at the Called Party . . . . . . . . . . . . . . . . . . . . . . 101
Identifying Anonymous Callers (Call Tracing). . . . . . . . . . . . . . . . . . . . 102
Locking the Telephone to Prevent Unauthorized Use. . . . . . . . . . . . . 102
8
Page 9

Contents
Additional Features/Services . . . . . . . . . . . . . . . . . 104
Using Another Telephone Like Your Own . . . . . . . . . . . . . . . . . . . . . . 104
Identifying Yourself at Another Phone. . . . . . . . . . . . . . . . . . . . . . . . . 104
Identifying Yourself via PIN and Dialing . . . . . . . . . . . . . . . . . . . . . 104
Deactivating Identification at Another Phone . . . . . . . . . . . . . . . . . . . 105
Relocating to Another Phone. . . . . . . . . . . . . . . . . . . . . . . . . . . . . . . . 106
Relocating to the "Guest Phone" . . . . . . . . . . . . . . . . . . . . . . . . . . 106
Relocating Back to the "Home Phone". . . . . . . . . . . . . . . . . . . . . . 106
Logging Off Via the "Home Phone" . . . . . . . . . . . . . . . . . . . . . . . . 107
Special functions for One Number Service . . . . . 108
Programming the Handset . . . . . . . . . . . . . . . . . . . . 109
Handset Configuration. . . . . . . . . . . . . . . . . . . . . . . . . . . . . . . . . . . . . 109
Setting the Display Color . . . . . . . . . . . . . . . . . . . . . . . . . . . . . . . . 109
Adjust Contrast . . . . . . . . . . . . . . . . . . . . . . . . . . . . . . . . . . . . . . . 110
Adjust brightness. . . . . . . . . . . . . . . . . . . . . . . . . . . . . . . . . . . . . . 110
Setting night mode . . . . . . . . . . . . . . . . . . . . . . . . . . . . . . . . . . . . 111
Setting Display Language . . . . . . . . . . . . . . . . . . . . . . . . . . . . . . . 111
WLAN access . . . . . . . . . . . . . . . . . . . . . . . . . . . . . . . . . . . . . . . . 112
EasyAnswer. . . . . . . . . . . . . . . . . . . . . . . . . . . . . . . . . . . . . . . . . . 113
Vibration Alert . . . . . . . . . . . . . . . . . . . . . . . . . . . . . . . . . . . . . . . . 113
PIN . . . . . . . . . . . . . . . . . . . . . . . . . . . . . . . . . . . . . . . . . . . . . . . . . 114
Advisory Tones . . . . . . . . . . . . . . . . . . . . . . . . . . . . . . . . . . . . . . . 115
Handset Name . . . . . . . . . . . . . . . . . . . . . . . . . . . . . . . . . . . . . . . 116
Restoring the Factory Defaults . . . . . . . . . . . . . . . . . . . . . . . . . . . 117
Status Display . . . . . . . . . . . . . . . . . . . . . . . . . . . . . . . . . . . . . . . . . . . 118
Connection Wizard . . . . . . . . . . . . . . . . . . . . . . . . . . . . . . . . . . . . . . . 119
Automatic Start . . . . . . . . . . . . . . . . . . . . . . . . . . . . . . . . . . . . . . . 119
Manual Start. . . . . . . . . . . . . . . . . . . . . . . . . . . . . . . . . . . . . . . . . . 119
Configuration over the Web Interface . . . . . . . . . . . . . . . . . . . . . . . . . 120
Start Preparations . . . . . . . . . . . . . . . . . . . . . . . . . . . . . . . . . . . . . 121
Login . . . . . . . . . . . . . . . . . . . . . . . . . . . . . . . . . . . . . . . . . . . . . . . 122
Documentation. . . . . . . . . . . . . . . . . . . . . . . . . . . . . . 124
9
Page 10

Contents
Reference Guide. . . . . . . . . . . . . . . . . . . . . . . . . . . . .125
Telephone Maintenance . . . . . . . . . . . . . . . . . . . . . . . . . . . . . . . . . . . 125
Echo Effect . . . . . . . . . . . . . . . . . . . . . . . . . . . . . . . . . . . . . . . . . . . . . 125
Troubleshooting. . . . . . . . . . . . . . . . . . . . . . . . . . . . . . . . . . . . . . . . . . 125
Responding to Error Messages on the Screen . . . . . . . . . . . . . . . . . . 126
Contacts in the Event of Problems . . . . . . . . . . . . . . . . . . . . . . . . . . . 127
Technical Data . . . . . . . . . . . . . . . . . . . . . . . . . . . . . .128
General Data . . . . . . . . . . . . . . . . . . . . . . . . . . . . . . . . . . . . . . . . . . . . 128
Factory Defaults . . . . . . . . . . . . . . . . . . . . . . . . . . . . . . . . . . . . . . . . . 128
Index. . . . . . . . . . . . . . . . . . . . . . . . . . . . . . . . . . . . . . .129
Maximum Service Menu functions available . . .132
Main Menu Overview . . . . . . . . . . . . . . . . . . . . . . . .133
10
Page 11
Basic Operating Instructions
Overview of optiPoint WL 2 professional
Basic Operating Instructions
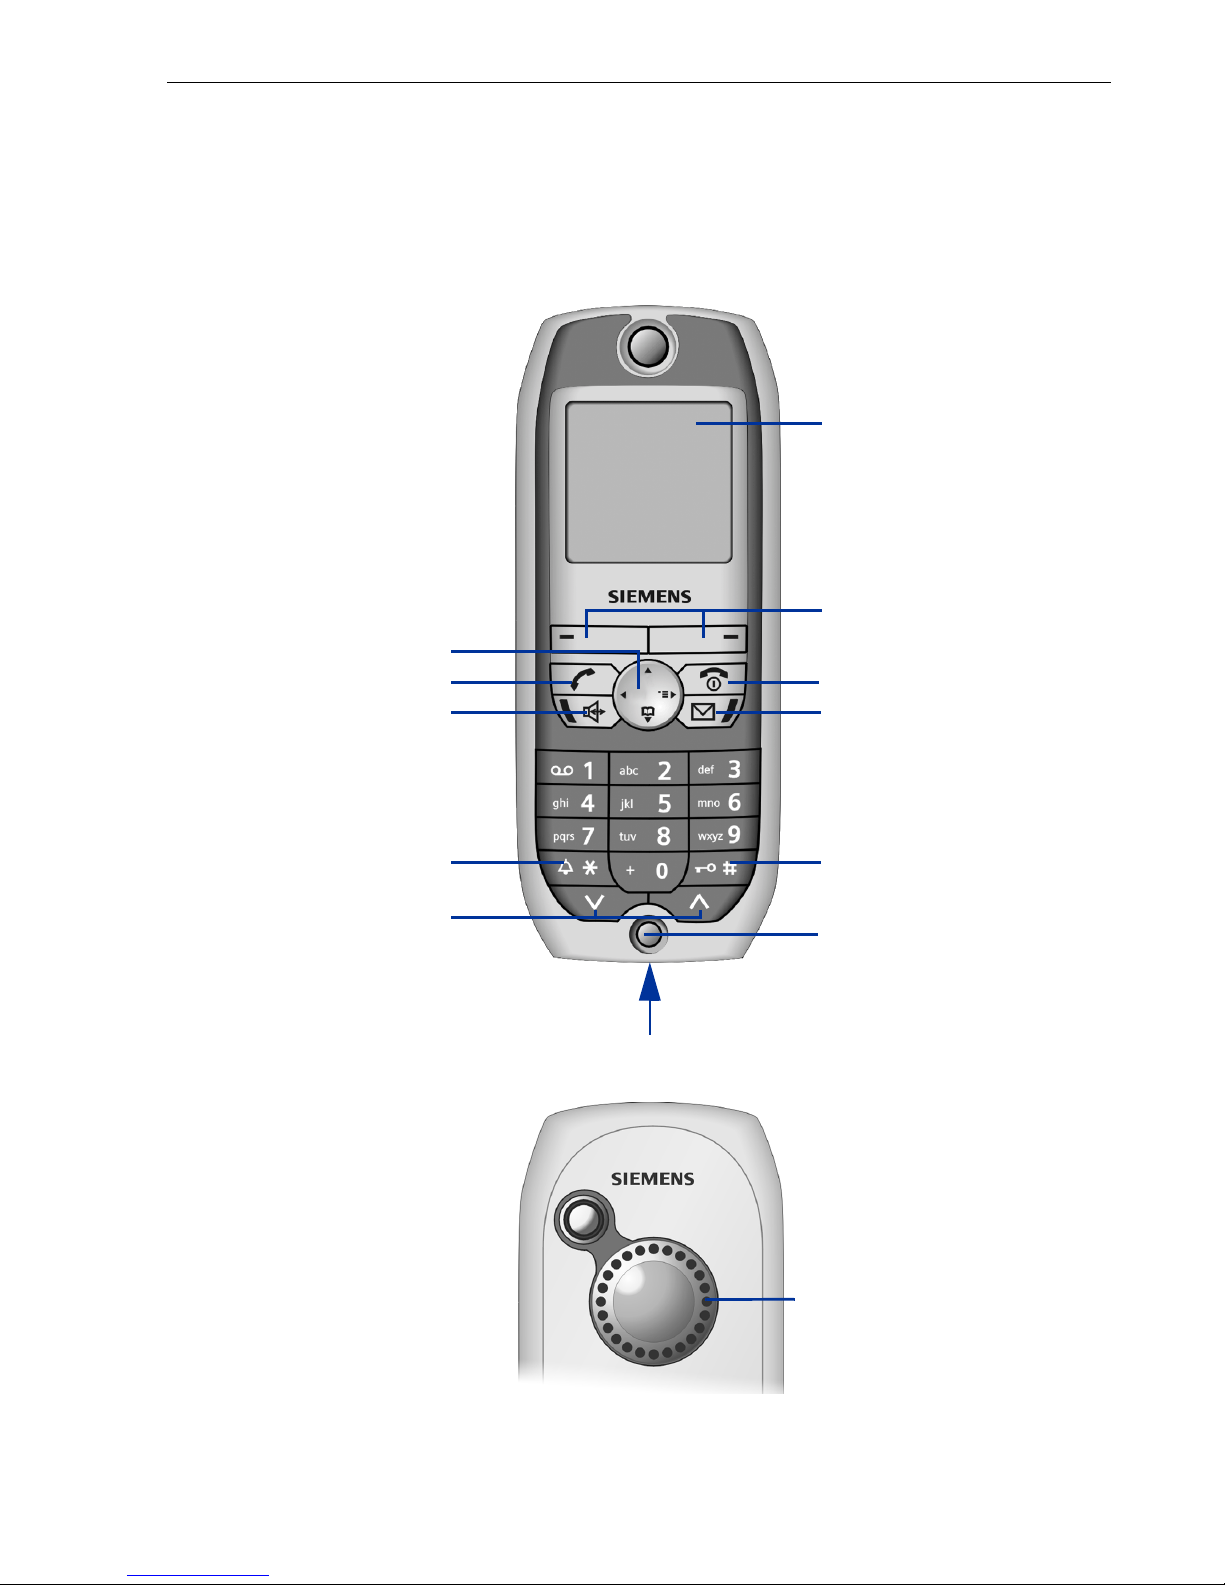
Six-line color display
Æ Page 16
Display keys Æ Page 18
Navigation key Æ Page 17
Talk key
Speakerphone key
with LED
STAR key
Settings keys
Rear
On-hook key
Mailbox key with LED
POUND key
Microphone
Connection jack for headset and PC
Loudspeaker
11
Page 12

Basic Operating Instructions
Step by Step
Å The handset is ringing.
How to Use this Operating Manual
Operating steps are depicted in their logical sequence in the colored column. Below is an explanation of the icons used:
Õ You are conducting a call.
~ Enter digits or letters via the keypad.
Save Current display key function.
Press the display key directly below (A
activate the function.
r Press the navigation key left or right.
q Press the navigation key up or down.
or B) to
cQ* etc. Press the key shown on the handset.
Ö You hear an alerting tone or a melody.
James Bond
Settings
Consultation?
Ringer pitch?
r OK Browse the System menu for an option.
FCN entry with sample label.
Entry from the local main menu.
OK An option from the System menu is displayed.
Confirm by pressing the display key B.
Do this by pressing the navigation key r until the option appears on the display.
Then confirm it by pressing the display key B.
12
Page 13
Basic Operating Instructions
Getting Started
Inserting the Battery
Only use rechargeable batteries recommended by Siemens
Æ Page 128. Never use conventional (non-rechargeable) batteries or
other battery types as this can cause serious damage to your health
and property. For instance, it could damage the battery cladding or
cause the battery to explode. It could also damage your handset and
interfere with how your it works.
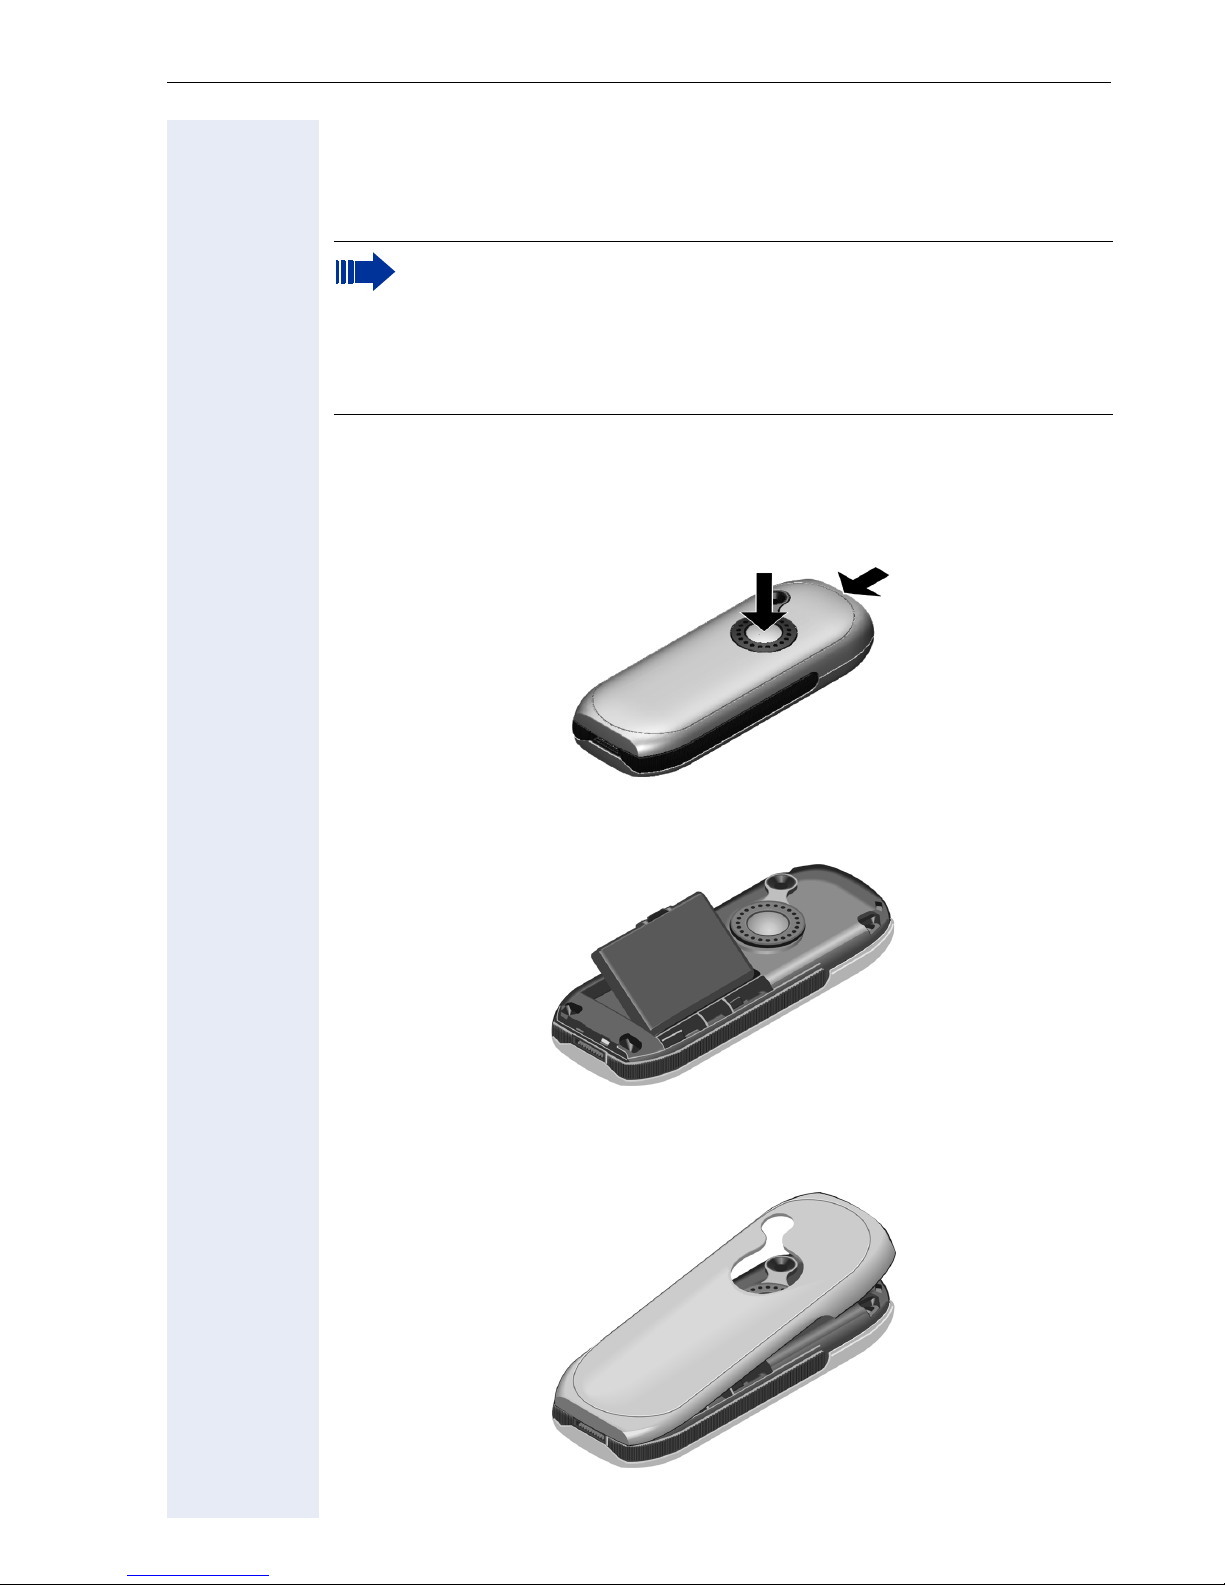
1. Hold your handset face down in the palm of your hand.
2. With the other hand, place your thumb on the loudspeaker on the back
of the device (a) and use your index finger to grip the recess provided
at the top of the handset (b).
a
3. Lift the cover.
4. Insert the battery correctly and lock it in place.
5. Hold the battery cover at a slight angle and insert the two projections
provided on the lower side into the battery compartment. Then close
the cover until it snaps shut.
b
13
Page 14

Basic Operating Instructions
Placing the Handset in the Charging Unit and Charging the
Battery
1. Connect the charging unit’s power supply to the power outlet.
2. Place the handset in the charging unit with the display facing towards
you.
You can perform manual logon for the handset if "No Access" or "No Server"
appears on the display Æ Page 119.
Leave the handset in the charging unit to charge the batteries.
= Battery charging is indicated on the upper right of the display by the battery
icon’s change level indicator. The battery icon shows the battery charging
status during operation Æ Page 16.
Initial battery charging and discharging
Accurate charging status display can only be guaranteed if the battery is
first fully charged and then discharged.
Do this by leaving the handset in the charging unit for five straight hours.
Then, remove the handset from the charging unit and do not put it back in
until the battery is fully discharged.
Once the battery has been initially charged and discharged, you can return
your handset to the charging unit after every call.
• You must repeat this procedure every time you remove and replace your handset battery.
• The battery can warm up during charging. This is not dangerous.
• For technical reasons, the battery’s charging capacity decreases
over time.
Your handset is now ready for use!
14
Page 15

Activating/Deactivating the Handset
Activating
a Hold down the on-hook key.
~ Enter your PIN (if set Æ Page 114).
Your handset will block after three failed attempts to enter the PIN
and can only be unlocked by your service personnel.
The handset is now idle Æ Page 20.
Deactivating
a Hold down the on-hook key.
Activating/Deactivating the Keypad Lock
Basic Operating Instructions
Activating
# Hold down the POUND key.
Ø This icon appears on the display and you hear the confirmation tone.
You cannot make emergency calls if the keypad lock is active.
Deactivating
# Hold down the POUND key once more.
The keypad lock automatically deactivates when you receive an incoming
call. It reactivates when the call is finished.
15
Page 16
Basic Operating Instructions
Display
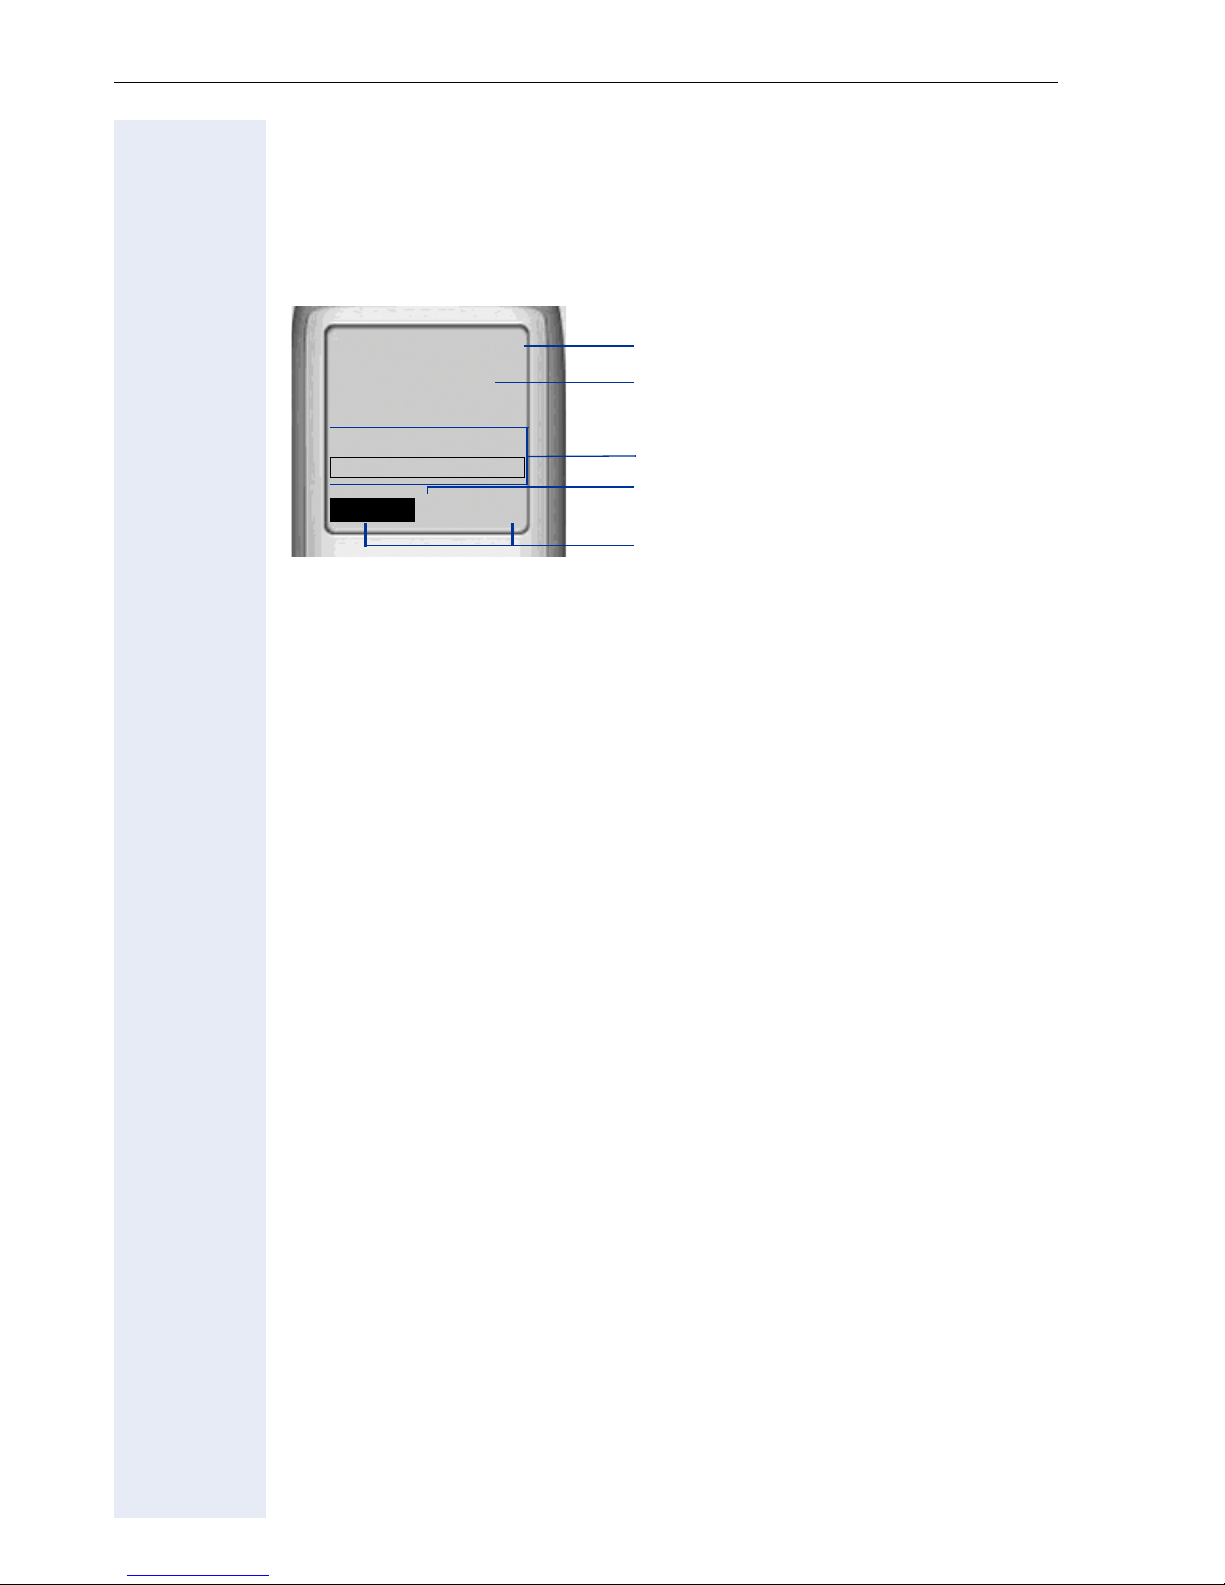
optiPoint WL 2 professional features a six-line illuminated color display. You
can choose from four different color settings. A special feature of the default setting Æ Page 109 is that it uses different colors to visualize the different handset states Æ Page 20.
Ð
James Bond
10:24 FR 10 DEC 04
2308
FCN
fg
V
Z
n
o
p
q
r
Display Icons
n Icons for important settings and handset states:
Ð i Ñ Ò |
Ú
Ø Keypad lock activated Æ Page 15
U V e = Battery charging status (full to empty) Æ Page 14
¼
Reception strength (high to no reception)
Æ Page 119
Audio signals deactivated Æ Page 115
Wake-up call activated Æ Page 96
Õ A call is ongoingÆ Page 26
Ö
A call is ongoing in speakerphone mode
Æ Page 27
o Name of the handset Æ Page 116
p System menu: The first line contains prompts or confirmation messag-
es from the System menu, depending on the situation. This is followed by
a list of functions. Text is displayed as a ticker if an entry is too long.
q More options are available Æ Page 18
r Display the display key functions Æ Page 18
16
Page 17
Basic Operating Instructions
Keyboard
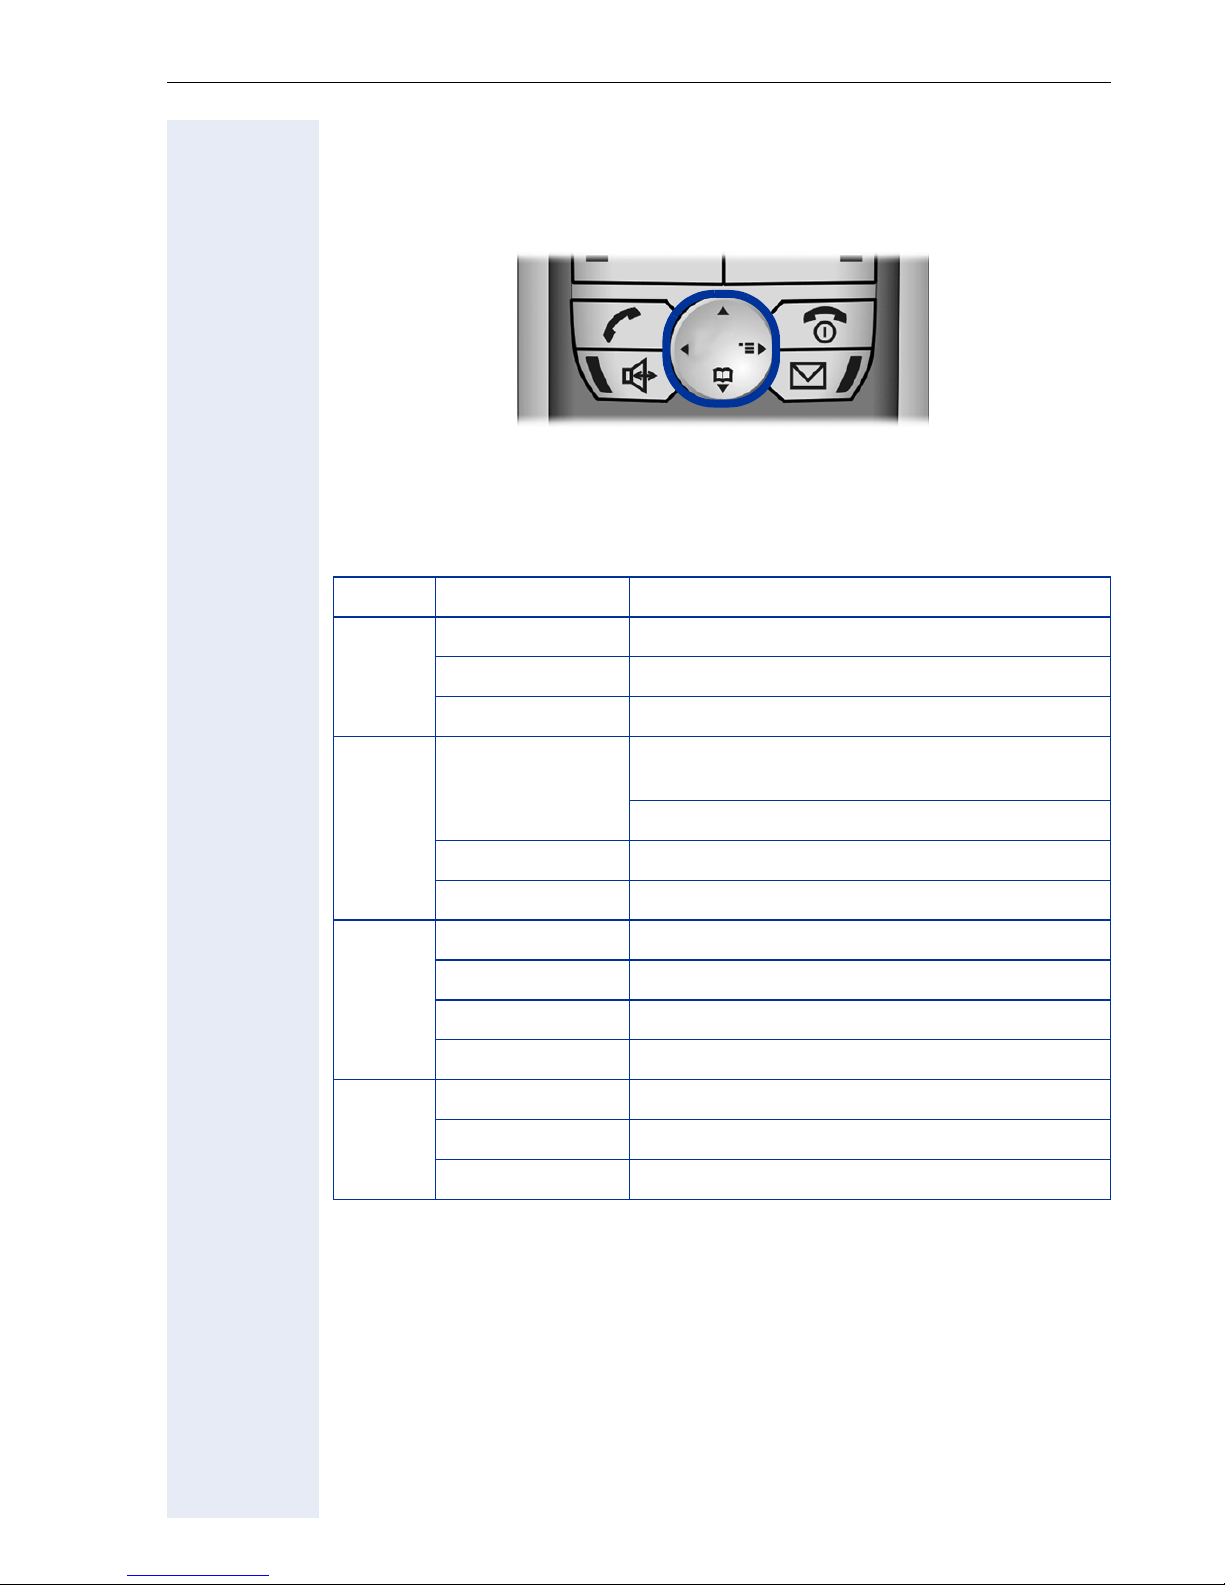
Navigation Key
Navigation key functions
The side of the navigation key (up, down, right, left) to be pressed is
marked black.
Key Mode Function
Idle state Open the main menu Æ Page 20
[1]
t
Lists
/menus
Scroll up
Text entry Move the cursor up
Idle state
s
[1]
Lists
Text entry Move the cursor down
Idle state Open the System menu Æ Page 20
System menu Scroll through functions Æ Page 20
v
Lists
Text entry Move the cursor right
Lists
u
[1] Call lists, such as the directory list
System menu Scroll through functions Æ Page 20
Text entry Move the cursor left
/menus Scroll down
[1]
/menus Confirm the selected entry
[1]
/menus Jump back to the previous layer or cancel
Press quickly: Open the directory
Æ Page 84
Hold down: Start voice dialing Æ Page 50
17
Page 18
Basic Operating Instructions
Display Keys
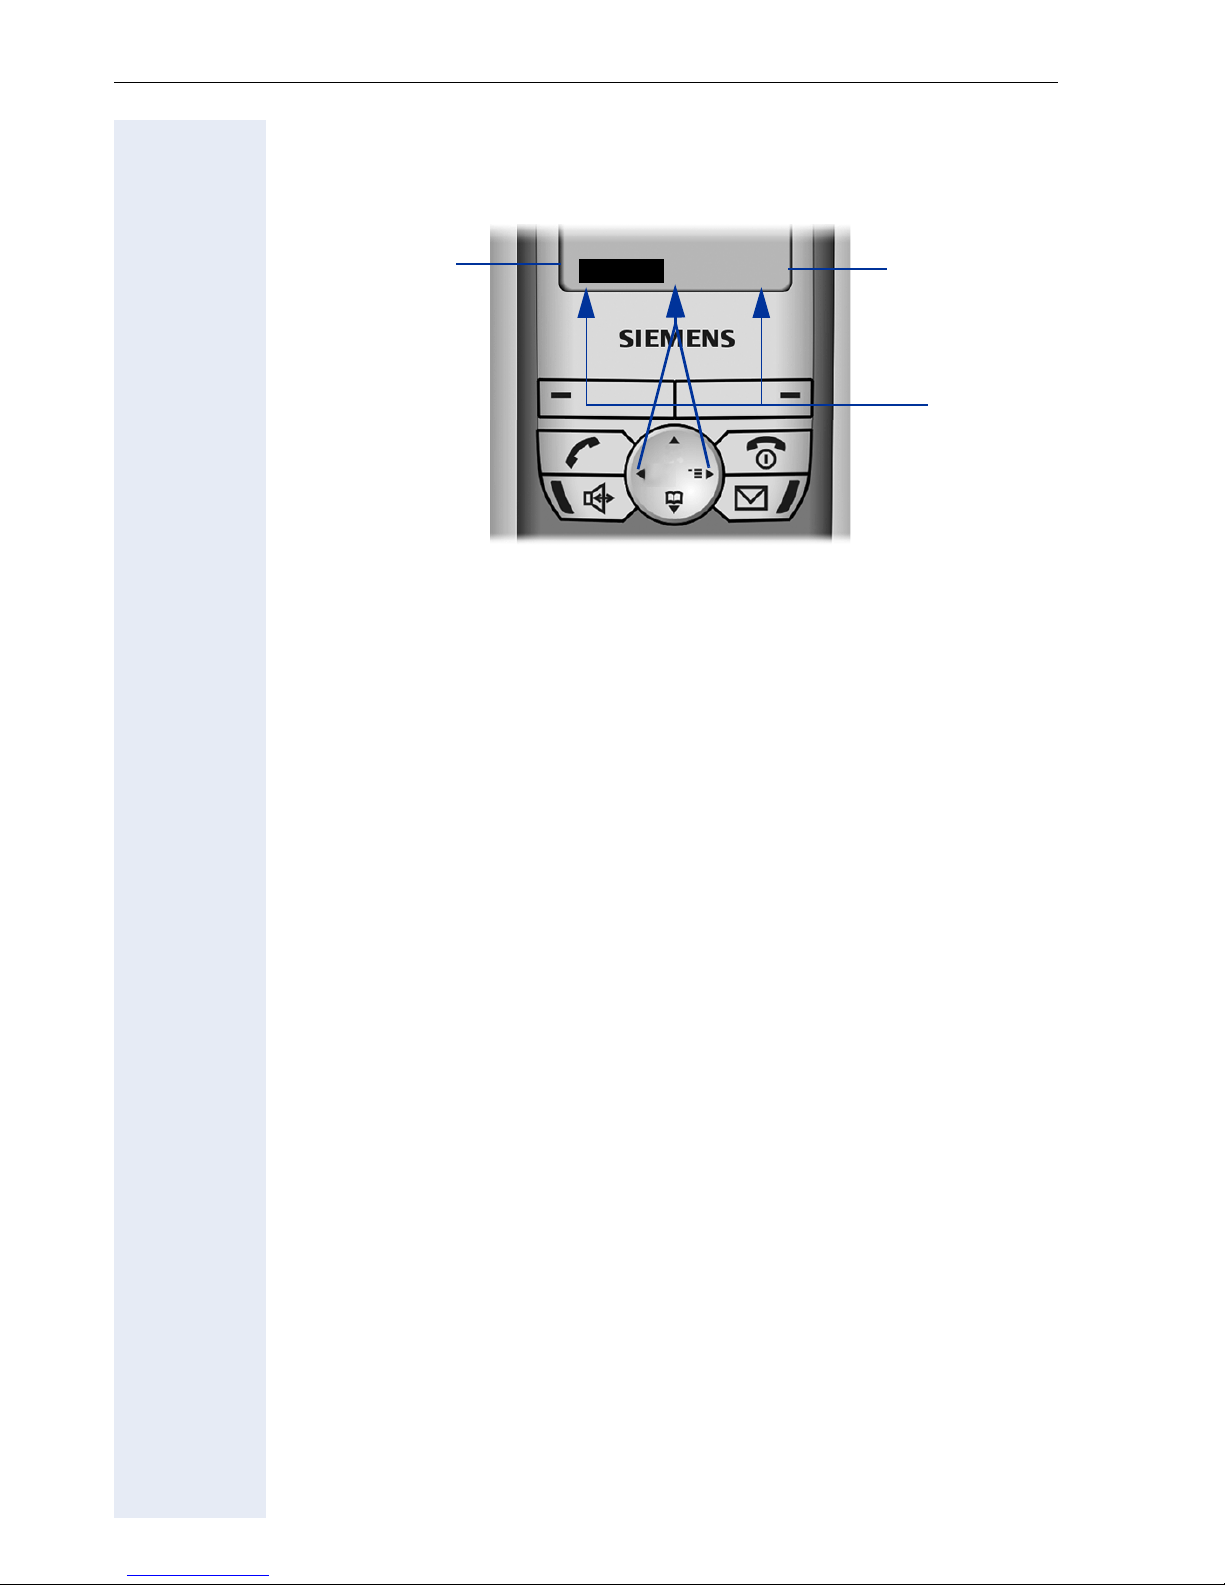
Display key functions change depending on the current operating situation.
n Function of the left display key (for example, open FCN list Æ Page 94)
o Function of the right display key (for example, open the System menu
Æ Page 20)
n
FCN
q
f
g
Z
o
p
p Display keys
q More functions are available in the System menu
Symbols for display keys
Important display keys are:
”
©
X
Return to the previous menu or cancel the current operation.
Open the main menu or a status-specific menu.
Delete button: Delete an entry character by character from right to
left.
18
Page 19

Basic Operating Instructions
Additional Key Functions
Key Mode Function
Call state Accept a call Æ Page 26
c
[1]
Lists
Idle state
Start dialing the selected entry
Press quickly: Open the redial list
Hold down: Start dialing
Handset deactivated
Call state End the call
a
General
(apart from in system state)
[1]
Lists
Idle state Hold down: Deactivate the handset
Call state Accept a call in speakerphone mode
d
[2]
Lists
[1]
Idle state Hold down: Start dialing
[2]
f
LED lit Start polling voice messages
Idle state Hold down: Deactivate audio signals
*
Text Entry Press quickly: Toggle case
# Idle state
Idle state Settings in the System menu Æ Page 45
S
Call state Adjust the volume (lower)
Hold down: Activate the handset
Press quickly: One layer back
Hold down: Return to idle state
Close the list
Start dialing the selected entry
Hold down: Activate/deactivate the keypad
lock
C
[1] Call lists, such as the directory list
[2] These keys have an additional LED display Æ Page 21
Idle state Settings in the System menu Æ Page 45
Call state Adjust the volume (higher)
19
Page 20
Basic Operating Instructions
Audio and Visual Signaling
Handset States
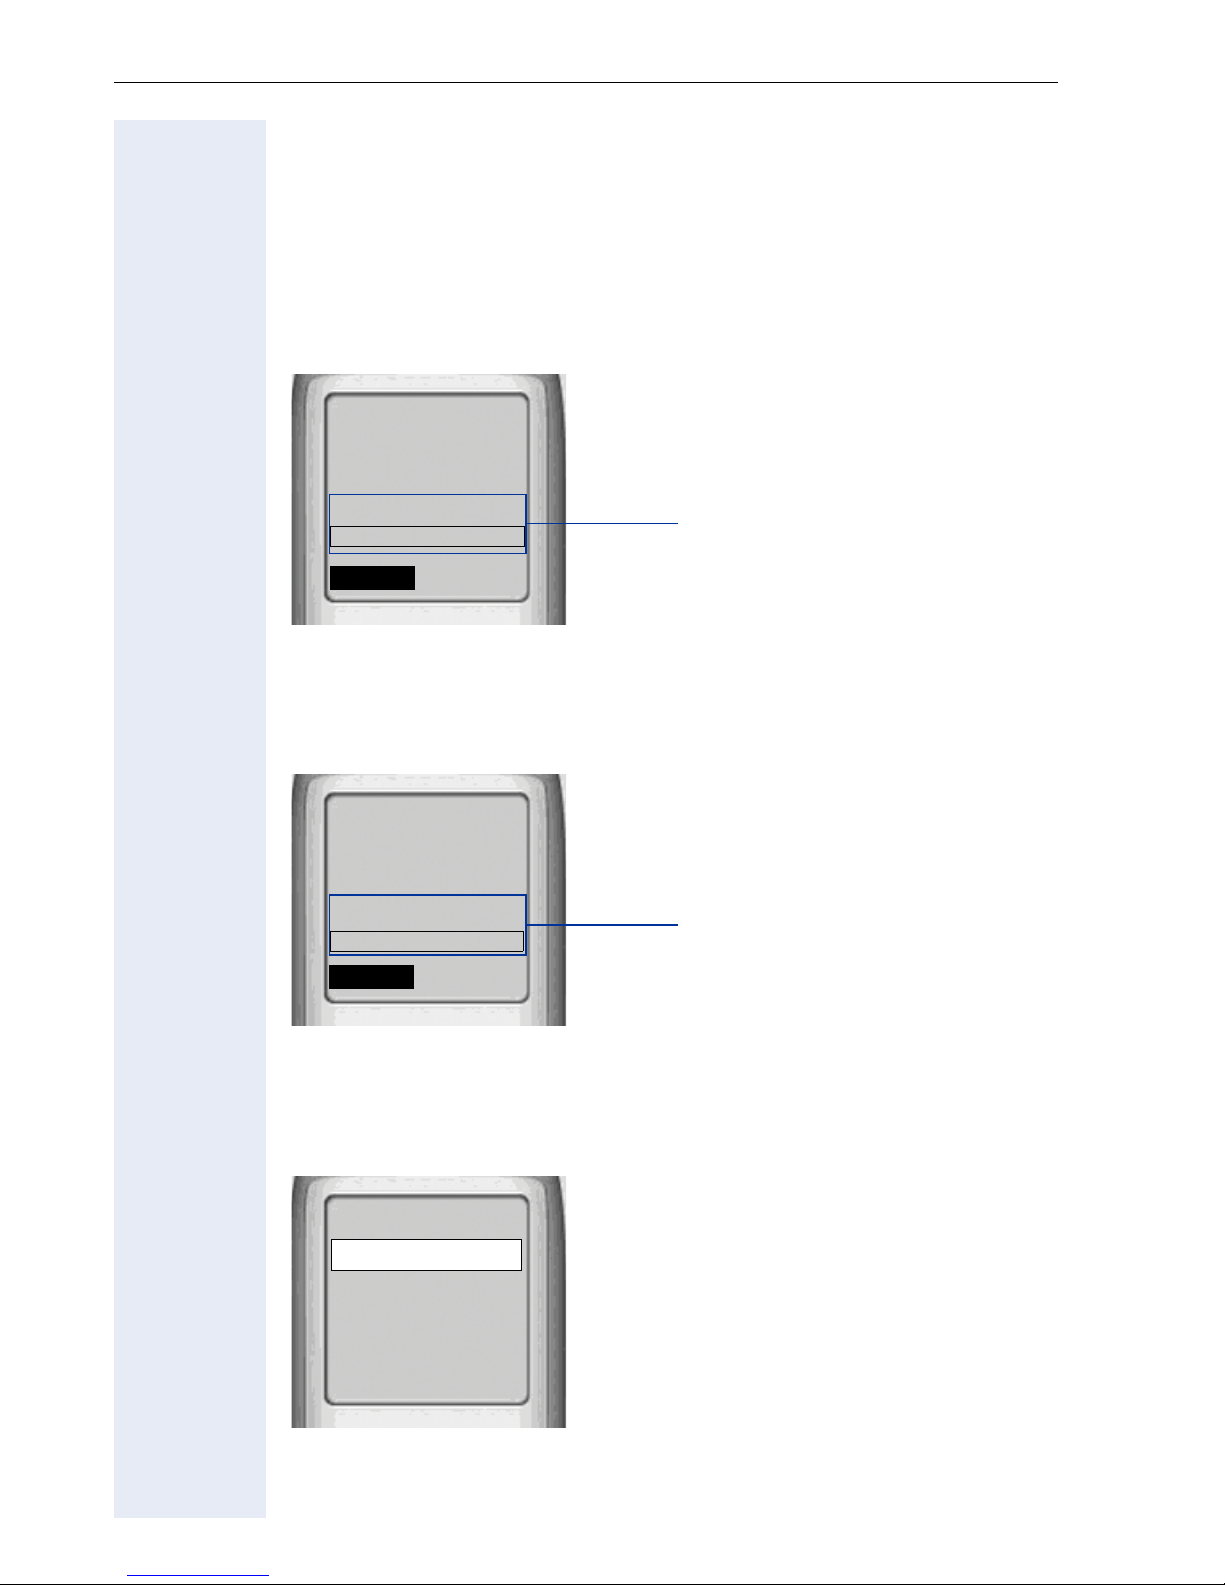
Your optiPoint WL 2 professional has a number of different states.
Idle state
The handset is in the charging unit and ready for use.
Ð
James Bond
10:24 FR 10 DEC 04
2308
FCN
fg
V
Z
System menu (this content is
dictated by your communication system)
Call state
State when making calls and during a call. You can access the System
menu (r) and the FCN list.
Ð
089123456
Consultation?
FCN
Õ
James Bond
f
V
g
Z
System menu
Main menu
t Press the navigation key up in idle state. All settings are stored locally and
only apply to your handset.
Main Menu 1
Directory
Settings
Status
Alarm Clock
Î
20
t
Z
x
Page 21

Basic Operating Instructions
Illumination
The display and key illumination switches on automatically
• when you receive an incoming call
• when you press a key
The display illumination fades after about 15 seconds. If your handset is not
in use, the illumination deactivates after 45 seconds.
Keys/entries with LED display
Key Mode Function
Speakerphone key
Mailbox key
FCN entry
d flashing Incoming call
d lit Speakerphone mode is active
f flashing Voice message received
f lit New messages received
dark Function is deactivated
lit Function is activated
flashing Function is active
Advisory Tones
The following events are signaled acoustically:
• "Save" was successful
• Error message
• End of menu/list
• Key tones
• Battery is almost empty
• Poor reception strength
You can deactivate audio signaling Æ Page 115 and import your own melodies Æ Page 123.
21
Page 22
Basic Operating Instructions
Step by Step
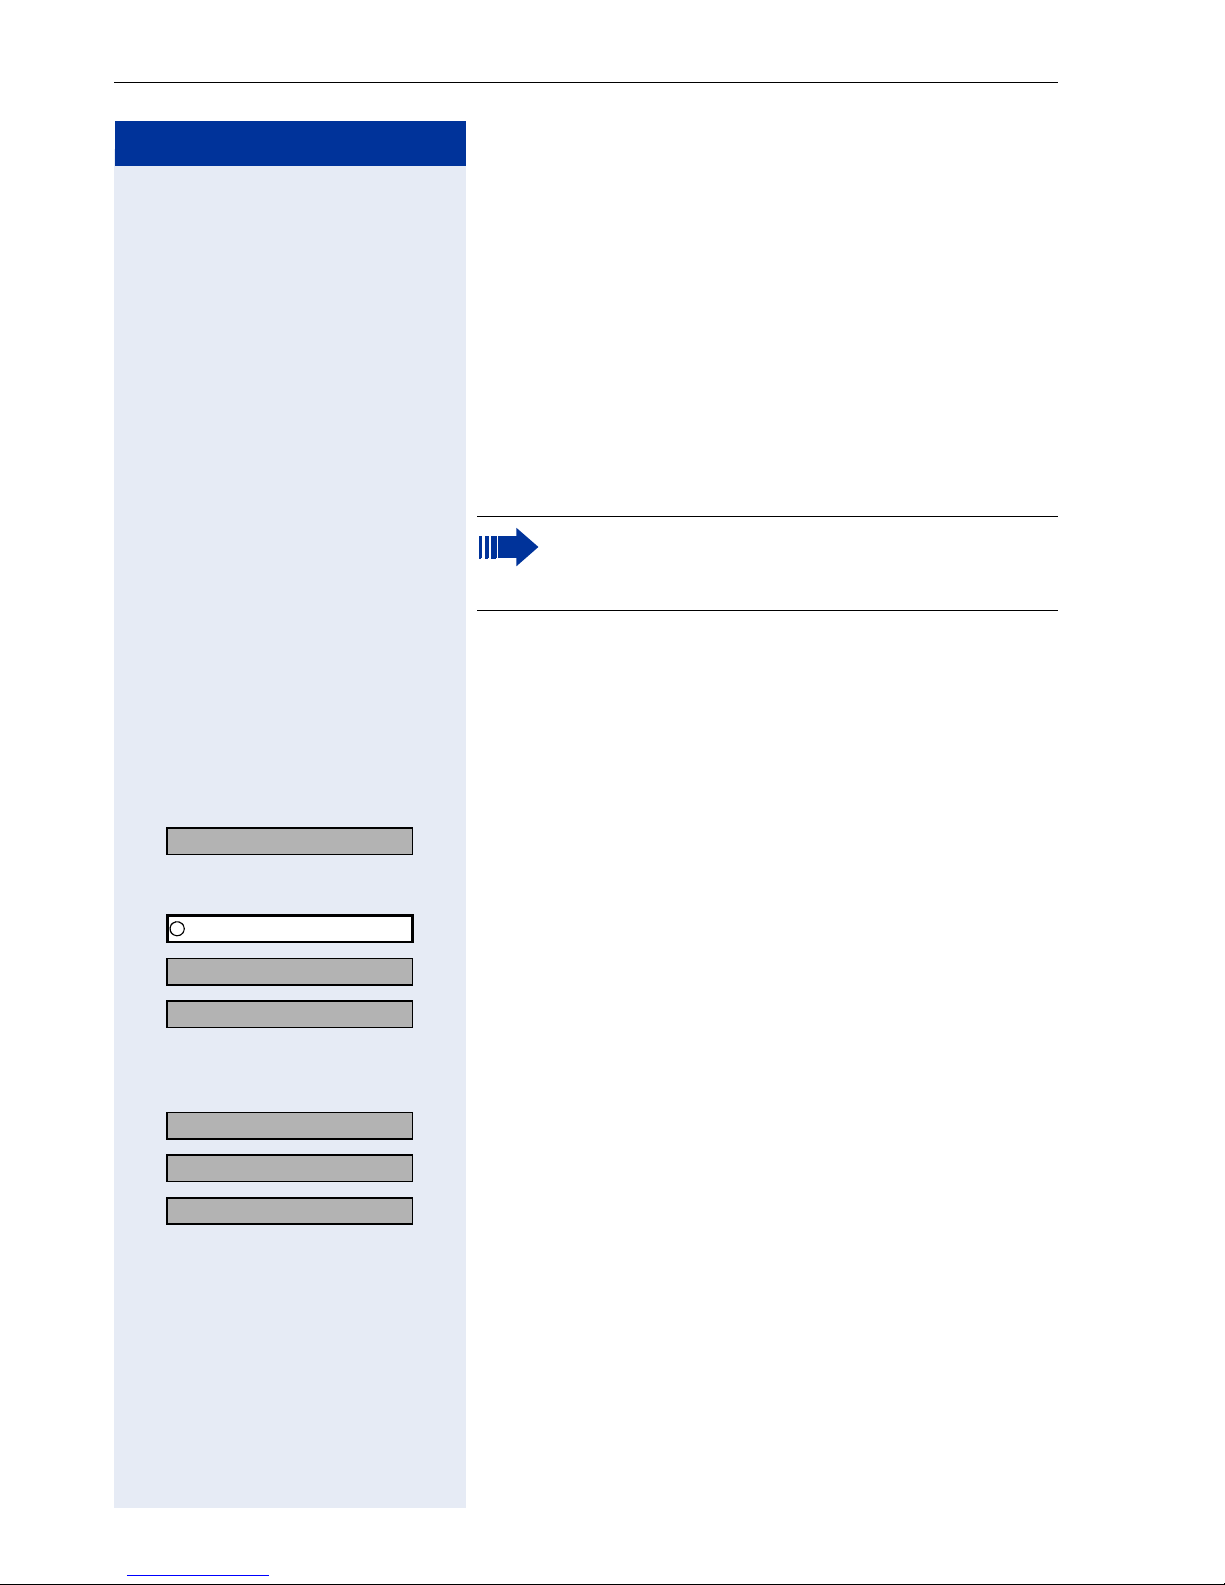
FCN Function
An entry in the FCN list is comparable with a function
key on an optiPoint phone. In other words, you can save
specific functions from the System menu to the FCN
list and activate them as required. The function key LED
on the optiPoint phone is replaced in
optiPoint WL 2 professional by an animated icon
Æ Page 21.
You can replace the default labels for repdial and DSS
entries with your own texts.
Up to 12 functions from your communication
system can be defined in the FCN list
Æ Page 94.
Changing Labels
You can also choose to change a label when configuring
an FCN entry Æ Page 41.
Changing the label on an existing FCN entry:
Program/Service?
v OK Select and confirm.
FCN Press the display key.
q OK Select and confirm the FCN entry you want.
r OK Select and confirm.
r OK Select and confirm.
r OK Select and confirm. Your entry is saved.
r OK Select and confirm. Deletes the label.
James Bond
Edit Label?
Create Personal Label?
Q ... O * # Enter text via the keypad Æ Page 23 (up to
12 characters allowed).
Backspace?
Save?
Delete?
OK Confirm. Deletes the character to the left of the cursor.
22
Page 23

Basic Operating Instructions
Text Entry
The following rules apply when entering text:
• Characters are inserted to the left of the cursor.
• In an entry field, use the navigation key to move the cursor up t,
down s, right v or left u.
Each key is assigned letters and characters. These appear on the last display line as soon as you press a button.
Example:
To enter "R", press the # key once and the M key three times.
Key 1x 2x 3x 4x 5x 6x 7x 8x 9x 10x
1
2 a b c 2 дбавгз
I d e f 3 ëéèê
4 g h i 4 ïíìî
[1]
1
5 j k l 5
L m n o 6 цсутф х
M p q r s 7ß
N t u v 8 üúùû
O w x y z 9ÿýæø å
Q . , ? ! 0
[2]
#
[3]
Press p to select special characters and enter them with Insert.
[1]
s
_ ! ? @,’"¤
( ) ; : .-+&%
*
* = < > / â £$¥
[ ] § Â
[4]
\~^¿¡
{ } # |
[1] Space
[2] Next letter uppercase (active for up to one second)
[3] Toggle to digit input
[4] Line break
23
Page 24
Basic Operating Instructions
Step by Step
Accessing Functions
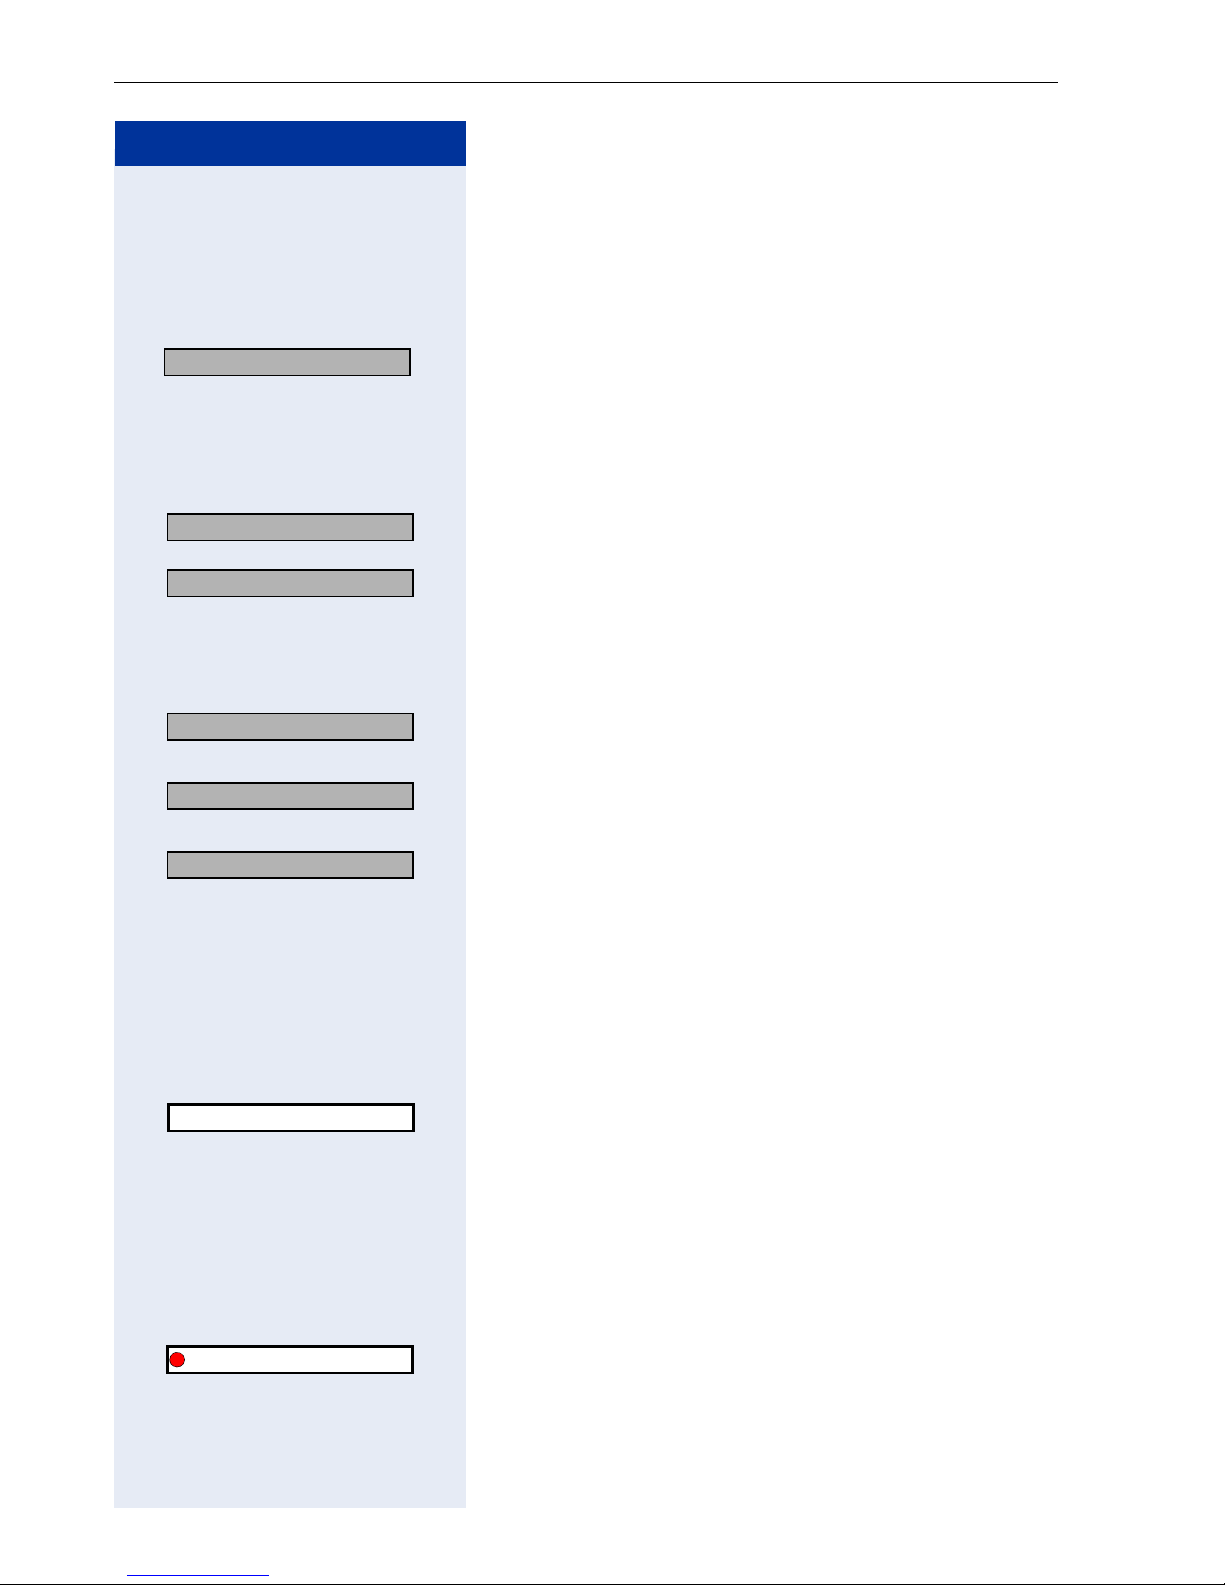
... interactively
You can select some functions while the telephone is
idle, for example:
Act. FWD-VAR-ALL-BOTH?
r OK Select with the navigation key r and confirm with the
display key B.
You can select other functions directly when conduc-
ting a call, depending on the situation.
You call a number, but the line is busy:
Callback?
Dial again?
r OK Select with the navigation key r, confirm with the dis-
OK Confirm by pressing the display key B.
or
play key B, and dial another station number.
... via the Program/Service Menu
Program/Service?
r OK Select with the navigation key r and confirm with the
display key B.
More features?
r OK Select with the navigation key r and confirm with the
display key B.
Display suppression?
r OK Once again, select with the navigation key r and con-
firm with the display key B.
... via the Main Menu
t Press the navigation key up to open the main menu.
2 Enter a code (overview Æ Page 133)
or
Settings
q OK Select with the navigation key q and activate with the
FCN Confirm by pressing the display key A.
q OK Select the function with the navigation key q and acti-
24
Callback?
navigation key v or the display key B.
... via the FCN List
If you saved a function in the FCN list, you can access it
directly as follows.
vate it with the navigation key v or the display key
B.
Page 25

Basic Operating Instructions
Which Functions Are Available?
Functions in the Main Menu
optiPoint WL 2 professional has a local main menu where you can make
personal settings and update a directory.
Basic and Enhanced Functions in the System Menu
You can use all basic and enhanced communication platform functions that
appear interactively on the screen and in the Program/Service menu.
How Can I Use My Handset Effectively?
• No doubt there are some functions that you use more than others. You
should save these functions in the FCN list so that you can activate
them with greater ease and speed (for information on storing a function
in the FCN list Æ Page 94).
• All too often you reach a busy line when dialing a number. Amid the
confusion of your working day, it’s easy to forget to try the number
again later on. To avoid this, make it a habit to use the "Callback" function Æ Page 39.
25
Page 26

Making Calls – Basic Functions
Step by Step
c or d Press the talk key or the speakerphone key.
Making Calls – Basic Functions
Accepting a Call
An incoming call is signaled in four different ways on the
handset:
• the handset rings and/or vibrates
• the handset lights up
• a display appears on the screen
• the speakerphone key LED flashes
You can accept the call in one of the following ways:
or Remove the handset from the charging unit ("Auto An-
swer“ must be activated Æ Page 113).
Ending a Call
a Press the on-hook key.
Dialing/Making Calls
~ Internal: Enter the station number.
External: Enter the external code and station number.
c Press the talk key.
or
c Hold down the talk key.
~ Internal: Enter the station number.
External: Enter the external code and station number.
26
Page 27

Step by Step
Making Calls – Basic Functions
Speakerphone Mode
If you choose to let someone else listen in on your call,
make sure you inform the other party first.
Activating/Deactivating Speakerphone Mode
Activation when dialing
~ Enter a station number
and
d Press the speakerphone key.
Activation during a call
d Press the speakerphone key.
Deactivation during a call
d Press the speakerphone key.
The icon Ö appears on the first display line when
speakerphone mode is active.
If you want to place the handset in the charging
unit during a call, you must hold down the speakerphone key when inserting the handset.
Changing the volume while speakerphone mode is
active
S or C Raise or lower the volume. Keep pressing the keys until
you are happy with the volume.
Save Press the display key.
27
Page 28
Making Calls – Basic Functions
Step by Step
Saved Number Redial
Local Redial List
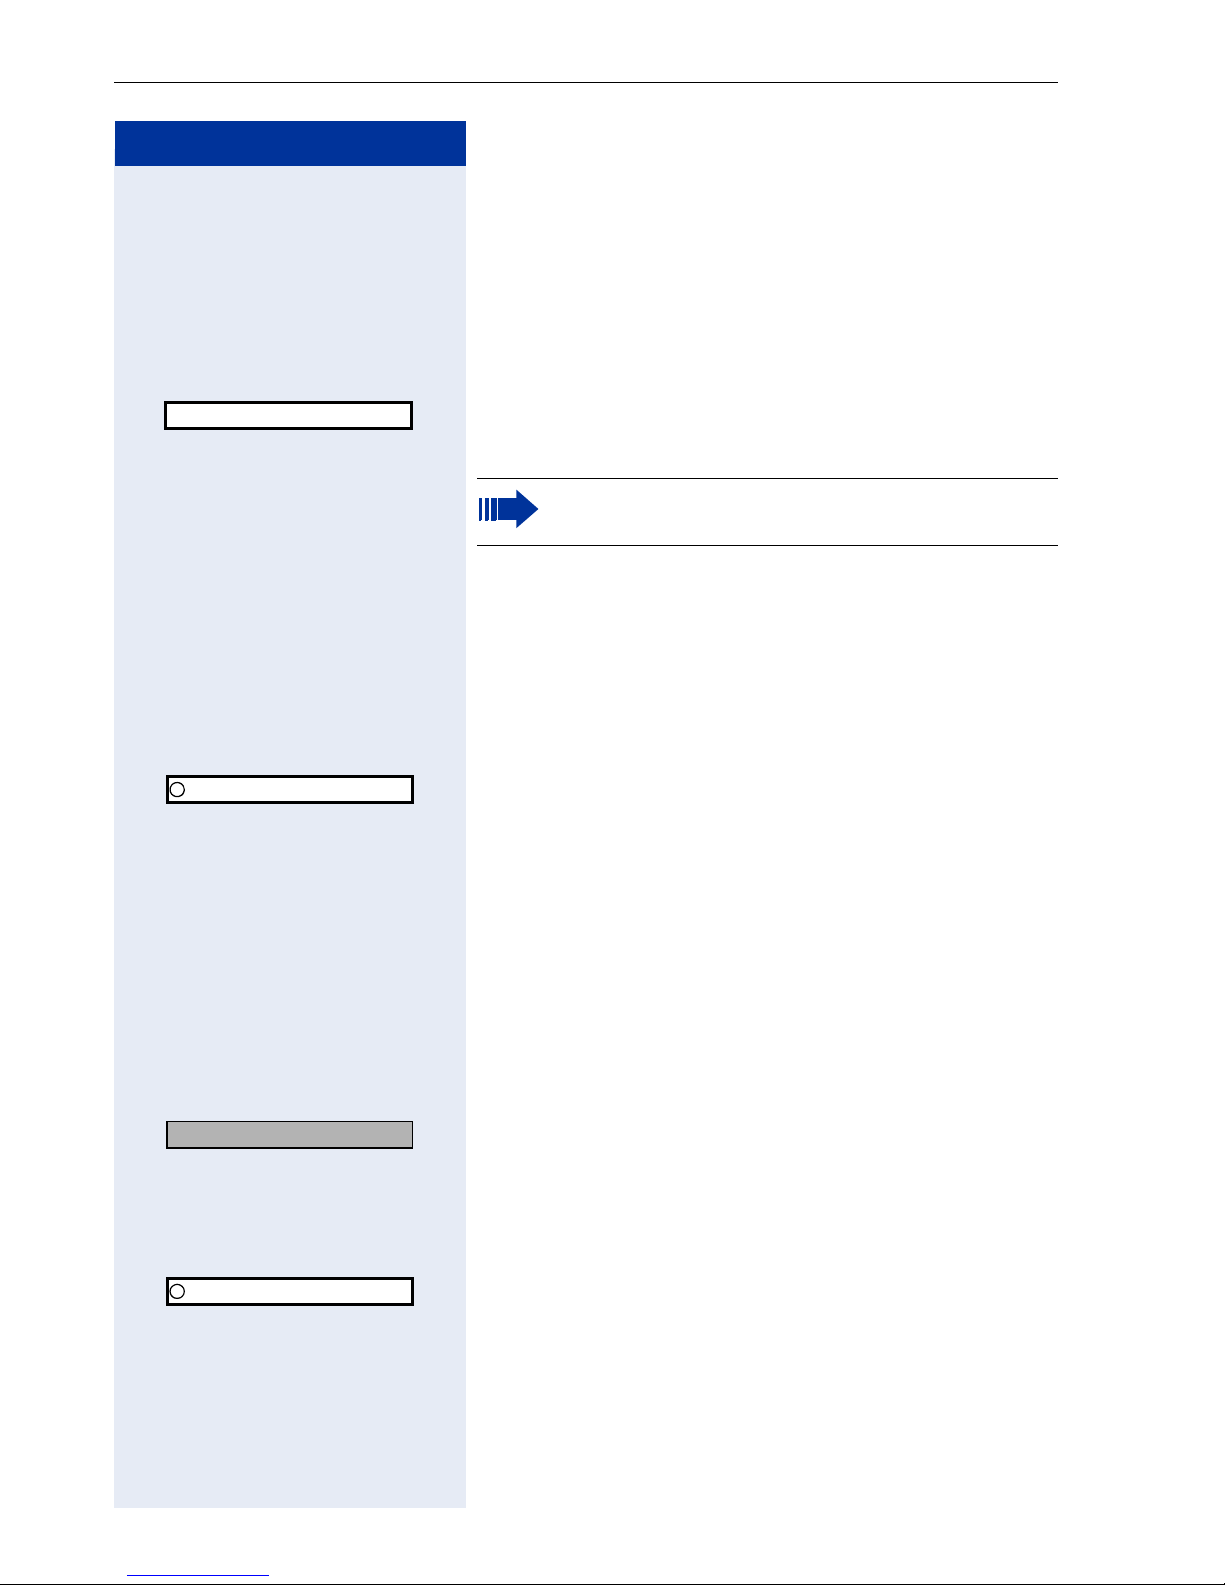
Precondition: Your handset is idle and your service
personnel activated the local redial list.
c Press the talk key quickly.
089123456
q Select the required entry.
c Press the talk key to start dialing.
You are not yet able to transfer saved entries to
the "Directory" Æ Page 91.
Saved Station Number
If this type of saved number redial is configured for you,
you can save a station number in the FCN list and redial
it later Æ Page 44.
FCN Press the display key.
q OK Select and confirm.
Saved # Dial
The other party answers:
cord Press the talk key or the speakerphone key.
Last Number Redial
If this type of saved number redial is configured for you,
every last station number dialed is automatically saved
for redial.
c Press the talk key.
Last number redial
v OK Select and confirm.
or If you have saved the function in the FCN list
(Æ Page 94):
FCN Press the display key.
q OK Select and confirm.
Last # Dial
cord Press the talk key or the speakerphone key (if neces-
28
The other party answers:
sary).
Page 29

Step by Step
Making Calls – Basic Functions
Calling a Second Party (Consultation
Hold)
You can call a second party while conducting a call. The
first party is placed on hold.
Consultation?
OK Confirm.
~ Call the second party.
Ending the second call – reverting to the first party:
Return to held call?
OK Confirm.
Alternating between Two Calls (Split)
Precondition: You called a second party during another
call (see above) or you accepted a second call
Æ Page 57.
Switching to the party on hold:
Toggle/Connect?
v OK Select and confirm.
Ending the current call – reverting to the held call:
Return to held call?
v OK Select and confirm.
Uniting the calling parties in a three-party conference:
Conference?
OK Confirm.
An alert tone signals that a conference is now set up between all three parties.
29
Page 30
Making Calls – Basic Functions
Step by Step
Transferring a Call
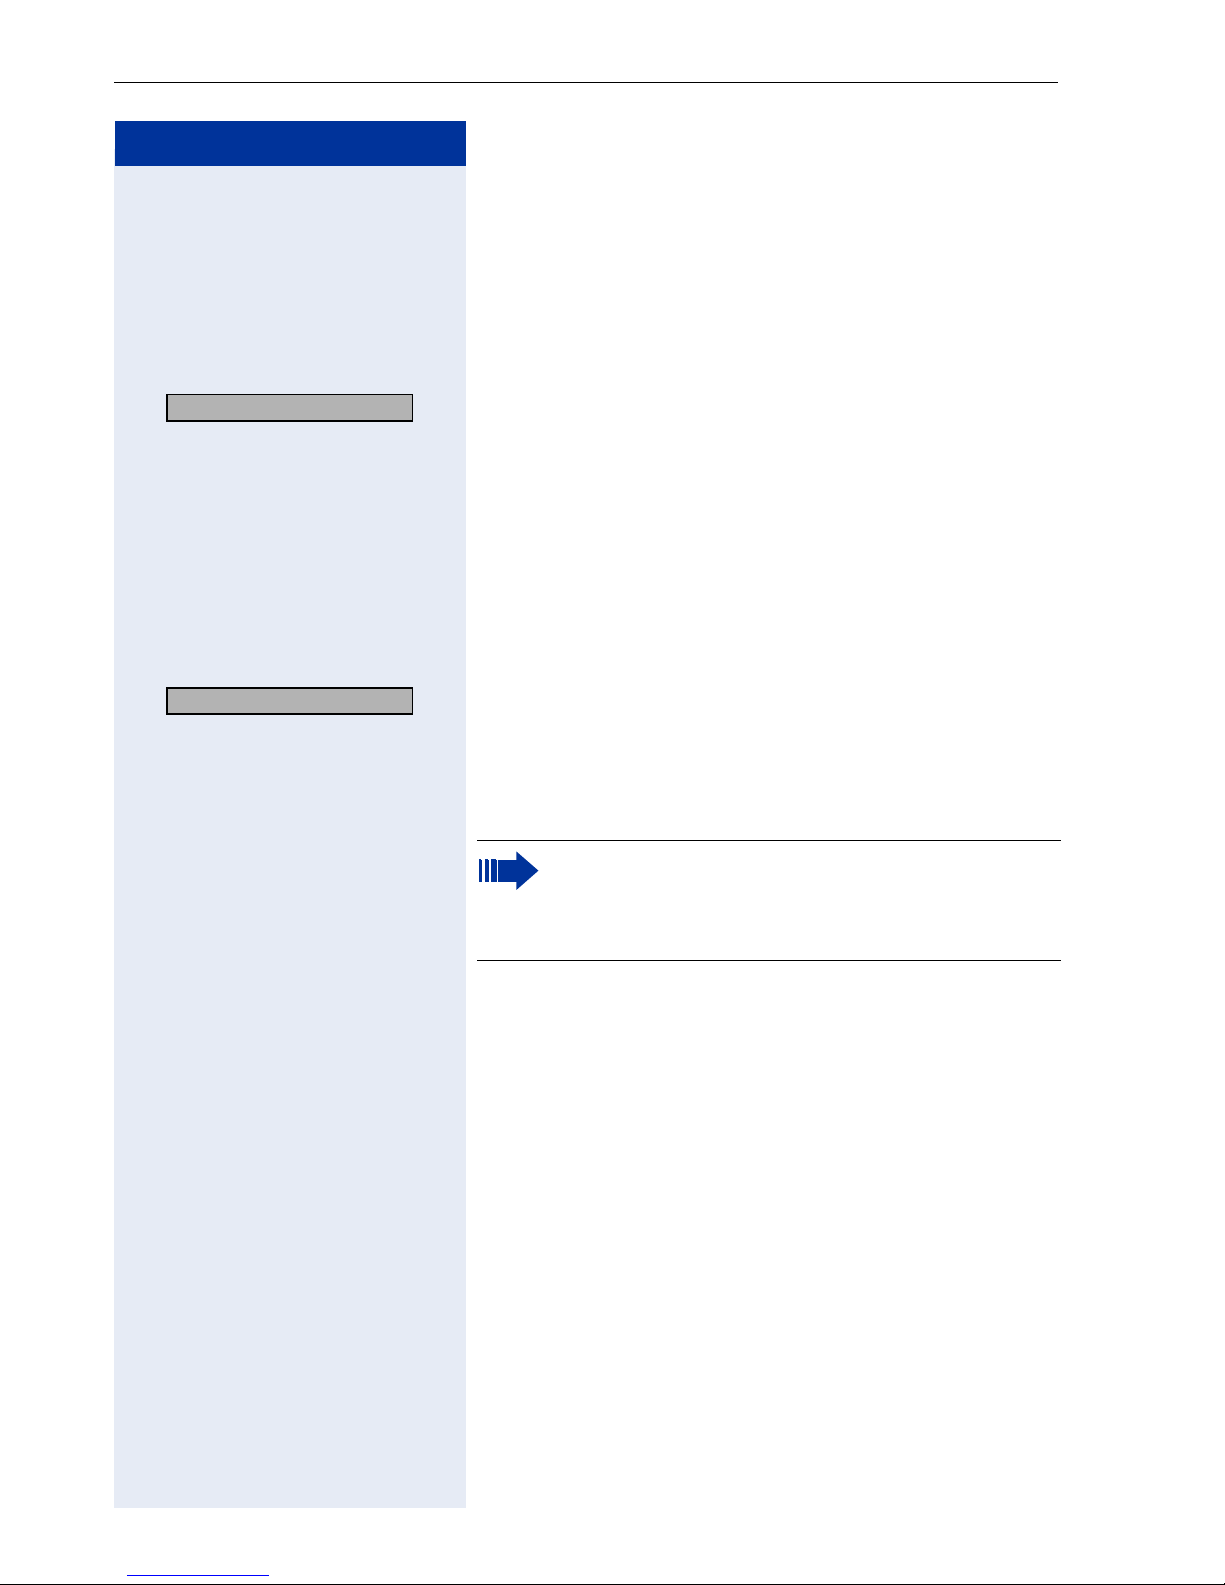
If the person you are speaking to wants to talk to a specific colleague of yours, you can transfer the call this colleague.
Transfer with announcement:
Consultation?
OK Confirm.
~ Enter the number of the party to whom you want to
transfer the call.
Announce the other party.
a Press the on-hook key.
Your calling party and the party he/she wanted to talk to
are connected.
Transfer without announcement:
Start transfer?
v OK Select and confirm.
~ Enter the number of the party to whom you want to
transfer the call.
a Press the on-hook key.
If the connection between the two other parties
is not established within 40 seconds, the call is
routed back to you. You are connected once more
to the initial caller.
30
Page 31

Step by Step
Making Calls – Basic Functions
Call Forwarding
If your telephone belongs to an ONS group (One
Number Service Æ Page 108), please note the
following features:
Call forwarding can be set up on any telephone in
the ONS group and then applies for all telephones in the ONS group.
Call forwarding between two telephones in an
ONS group is not possible.
Using Call Forwarding
You can program two types of call forwarding:
• "fixed call forwarding" and
• "variable call forwarding"
In the case of fixed call forwarding, the forwarding destination you programmed is valid until you change or delete it. You can activate or deactivate this type of forwarding.
Variable call forwarding, on the other hand, offers six
different forwarding types:
• Variable call forwarding (unconditional call forwarding)
• Internal call forwarding
• External call forwarding
• Call forwarding on busy
• Call forwarding no reply
• Call forwarding on busy/no reply
Programming a call forwarding destination activates call
forwarding. Deactivating call forwarding deletes the forwarding destination.
31
Page 32

Making Calls – Basic Functions
Step by Step
The following display may appear when the handset is
idle and call forwarding is active:
Forwarding type Display
Fixed call forwarding
Variable call forwarding
Forwarding to
e.g. 222 Kevin Miller
(own station number)
Call forwarding for inter-
FWD-VAR-ALL-INT/EXT on
nal/external
Call forwarding on busy FWD-VAR-BUSY-BOTH on
Call forwarding no reply FWD-VAR-RNA-BOTH on
Call forwarding on busy/
FWD-VAR-BZ/NA-BTH on
no reply
Fixed call forwarding FWD-FIXED on
32
Page 33

Step by Step
Fixed Call Forwarding
If you have already programmed a call forwarding destination for fixed call forwarding, you can activate or deactivate call forwarding over the Program/Service menu
or via the FCN list (function configured by your service
personnel). The programmed call forwarding destination remains unchanged until you delete it or program a
new one.
Programming/changing a call forwarding destination
Program/Service?
v OK Select and confirm.
Making Calls – Basic Functions
Destinations?
Call forwarding?
Next forwarding type? >
OK Confirm.
OK Confirm. "FWD-VAR-ALL-BOTH" is displayed.
OK Confirm. "FWD-FIXED" is displayed. The call forwarding
destination is displayed if call forwarding was already
programmed.
Next forwarding type? >
Ente r destination:
OK Open "FWD-FIXED".
~ Enter the station number of the call forwarding destina-
tion. An existing destination is overwritten.
Save?
OK Confirm if the station number is complete.
Activating/deactivating fixed call forwarding
You can only activate fixed call forwarding if a destination station number is programmed.
Program/Service?
v OK Select and confirm.
Destinations?
Call forwarding?
OK Confirm.
OK Confirm. "Variable call forwarding" is displayed.
Next forwarding type? >
Activate?
v OK Select and confirm. Fixed call forwarding is activated.
FWD-FIXED on
OK Confirm. "FWD-FIXED" is displayed. If call forwarding
was already programmed, the forwarding destination is
displayed irrespective of whether or not forwarding is
active.
Output in the first line. The following display appears
when the handset is idle:
Forwarding to
e.g. 2223 Kevin Miller (own station number)
33
Page 34
Making Calls – Basic Functions
Step by Step
or
Deactivate?
v OK Select and confirm. Fixed call forwarding is deactivated.
FWD-FIXED off
Output in the first line.
If variable call forwarding was already programmed and
activated, it is now deactivated and the call forwarding
destination is deleted.
Deactivating fixed call forwarding in the idle menu
You can also deactivate fixed call forwarding when the
handset is idle.
Deact call forwarding?
v OK Select and confirm. Fixed call forwarding is deactivated.
The destination station number is maintained.
Activating/deactivating call forwarding in the FCN
list
Activating
FCN Press the display key.
q OK Select and confirm.
Call Forward
Deactivating
FCN Press the display key.
q OK Select and confirm. The LED goes out.
v OK Select and confirm.
v OK Select and confirm. The call forwarding destination is
Call Forward
Program/Service?
Destinations?
Call forwarding?
Next forwarding type? >
Delete?
Deleting the fixed call forwarding destination
You can delete the call forwarding destination for fixed
call forwarding.
OK Confirm.
OK Confirm. "FWD-VAR-ALL-BOTH" is displayed.
OK Confirm. "FWD-FIXED" and the call forwarding destina-
tion are displayed.
deleted. If fixed call forwarding is activated, it is now deactivated. An active FCN entry for call forwarding is deactivated.
34
Page 35

Step by Step
Making Calls – Basic Functions
Variable Call Forwarding
You can choose between six forwarding types for variable call forwarding:
• Variable call forwarding (unconditional call forwarding) - "FWD-VAR-ALL-BOTH"
• Internal call forwarding - "FWD-VAR-ALL-INT"
• External call forwarding - "FWD-VAR-ALL-EXT"
• Call forwarding on busy - "FWD-VAR-BUSY-BOTH"
• Call forwarding no reply - "FWD-VAR-RNA-BOTH"
• Call forwarding on busy/no reply - "FWD-VAR-BZ/
NA-BTH"
Apart from "FWD-VAR-ALL-INT" and "FWD-VAR-ALLEXT", the call forwarding types are mutually exclusive.
You can program a call forwarding destination for each
of the exceptions and then activate call forwarding.
Example:
You activated variable call forwarding. Then program the
call forwarding type "FWD-VAR-RNA-BOTH" and activate it so that "FWD-VAR-ALL-BOTH" is automatically
deactivated and your call forwarding destination is deleted.
Selecting a variable call forwarding type
Program/Service?
v OK Select and confirm.
Destinations?
Call forwarding?
OK Confirm.
OK Confirm.
First you are offered variable call forwarding:
FWD-VAR-ALL-BOTH on
Next forwarding type? >
Output in the first line.
Output in the second line.
v or OK Edit or confirm the call forwarding type to select the
next call forwarding type.
FWD-FIXED off
Output in the first line.
Next forwarding type? >
FWD-FIXED off
22805 Harold Miller >
v or OK Edit or confirm the call forwarding type to select the
Output in the second line.
or If you have already programmed a fixed call forwarding
destination:
Output in the first line.
Output in the second line.
next call forwarding type.
35
Page 36

Making Calls – Basic Functions
Step by Step
FWD-VAR-ALL-INT off
Next forwarding type? >
Output in the first line.
Output in the second line.
v or OK Edit or confirm the call forwarding type to select the
next call forwarding type.
FWD-VAR-ALL-EXT off
Next forwarding type? >
Output in the first line.
Output in the second line.
v or OK Edit or confirm the call forwarding type to select the
next call forwarding type.
FWD-VAR-ALL-INT off
Ente r destina tion:
Program/Service?
v OK Select and confirm.
Destinations?
Call forwarding?
OK Confirm. "FWD-VAR-ALL-BOTH" is displayed.
Output in the first line.
Output in the second line.
Programming/changing a call forwarding destination
OK Confirm.
Next forwarding type? >
Next forwarding type? >
Ente r destination:
OK Confirm. "FWD-FIXED" is displayed.
OK Confirm. "FWD-VAR-ALL-INT" is displayed.
OK Confirm.
~ Enter the station number of the call forwarding destina-
tion. An existing destination is overwritten.
Save?
v OK Select and confirm if the station number is complete.
To select another call forwarding type, proceed as described on Æ Page 35.
If variable call forwarding was already programmed and
activated, it is now deactivated and the call forwarding
destination is deleted (for exception, see Æ Page 35).
Fixed call forwarding is deactivated.
Deleting the call forwarding destination
A variable call forwarding destination is automatically
deleted by deactivating the call forwarding type.
36
Page 37
Making Calls – Basic Functions
Step by Step
Activating variable call forwarding
Variable call forwarding is automatically activated by
programming the call forwarding destination.
You can also activate unconditional variable call forwarding in the idle menu.
Act. FWD-VAR-ALL-BOTH?
v OK Select when the handset is idle and confirm.
~ Enter the destination number.
If you enter a system-wide station number, you
must terminate it with
#.
Save?
OK Confirm. Call forwarding is immediately active.
Deactivating variable call forwarding
You can deactivate all variable call forwarding types over
the Program/Service menu.
Program/Service?
v OK Select and confirm.
Destinations?
Call forwarding?
Next forwarding type? >
Next forwarding type? >
Deactivate?
v OK Select and confirm. Variable call forwarding is deactivat-
OK Confirm.
OK Confirm. "FWD-VAR-ALL-BOTH" is displayed.
OK Confirm. "FWD-FIXED" is displayed.
OK Confirm. "FWD-VAR-ALL-INT" is displayed.
ed and the call forwarding destination is deleted.
FWD-VAR-ALL-INT off
Output in the first line, for example, for "FWD-VAR-ALLINT".
To select another variable call forwarding type, proceed
as described on Æ Page 35.
Displaying call forwarding
To check the relevant call forwarding types, proceed as
described on Æ Page 35. The status "ON" or "OFF" is
displayed in the first line. The second line contains the
call forwarding destination if this type of variable call forwarding is active.
37
Page 38

Making Calls – Basic Functions
Step by Step
Deactivating variable call forwarding in idle state
The following variable call forwarding types can also be
deactivated when the handset is idle:
• Variable call forwarding - FWD-VAR-ALL-BOTH
• Internal and external call forwarding - FWD-VARALL-INT/EXT
Deact call forwarding?
v OK Select when the handset is idle and confirm. Call for-
warding is deactivated and the destination station number is deleted.
38
Page 39

Step by Step
Making Calls – Basic Functions
Using Callback
If an internal station is busy or if nobody answers, you
can save an automatic callback. This also applies to external calls over ISDN attendants. This feature saves you
from having to make repeated attempts to reach the user.
You receive a callback
• when the other party is no longer busy
• when the user who did not answer has conducted
another call,
• when a user with mailbox responds to your callback
request Æ Page 55.
If your telephone belongs to an ONS group (One
Number Service Æ Page 108), please note the
following features:
Callback On Busy is indicated only on the busy
telephone, not in the whole ONS group.
Callback On No Reply is entered in the mailbox
Æ Page 55 for all internal system telephones in
an ONS group.
Storing a Callback
Precondition: You have reached a busy internal station
or nobody answers.
Callback?
Callback?
v OK Select and confirm if the user activated call forwar-
OK Confirm.
or
ding. (In this case, you are called back from the call for-
warding destination.)
Answering a Callback
Precondition: A callback was saved.
The handset is ringing. "Cancel callback" appears display
indicating that the call signaled is a callback.
cord Press the talk key or the speakerphone key. You hear a
ring tone.
39
Page 40

Making Calls – Basic Functions
Step by Step
Canceling Callback
The handset is ringing. "Cancel callback" appears display
indicating that the call signaled is a callback.
Cancel callback?
OK Confirm.
or Let the phone ring four times, do not accept the call.
Checking/Deleting Stored Callbacks
Precondition: You have stored callbacks.
Display callbacks?
v OK Select and confirm.
The oldest entry is displayed first.
Next callback?
v OK Select and confirm to display additional entries.
Deleting a displayed entry:
Delete?
v OK Select and confirm.
Ending callback display:
a Hold down the on-hook key.
40
Page 41

Step by Step
Making Calls – Basic Functions
Storing Station Numbers and Sequences as FCN Entries
A user can save a sequence of access codes, PINs,
codes, and station numbers together as an entry in the
FCN list and then activate the entry by selecting and
confirming it.
Sample applications:
• Speaker call with destination
• Call forwarding with destination
• PIN and destination station number for identification
at another terminal
• Handset blocking with simultaneous forwarding to a
destination
• Station number dialing with pause
• Automatic consultation with destination station
number
Saving on Saved Number Redial
Program/Service?
v OK Select and confirm.
FCN Press the display key.
q OK Select and confirm.
Saved # Dial
New entry?
OK Confirm.
~ For example, enter server access + PIN number + code
number + destination station number or only the station
number (up to 22 characters).
Save?
OK Confirm.
Saving/Editing on Repdial
Program/Service?
v OK Select and confirm.
Destinations?
Repdial?
v OK Select and confirm.
OK Confirm.
q OK Select and confirm the entry you want.
FCN Press the display key.
41
Page 42
Making Calls – Basic Functions
Step by Step
Entering a number and creating a label
Enter new number?
OK Confirm.
~ Enter the number.
Completed?
Use Destination Number?
e.g. The station number entered is displayed as the key la-
v OK Select and confirm.
e.g. If the number entered is assigned a name in
v OK Select and confirm.
e.g. You can enter a name of your choice. For more informa-
v OK Select and confirm. "RF" appears on the screen.
R5412
Use Destination Name?
R Miller
Create Personal Label?
Garth Miller
Enter Consult?
OK Confirm. Your entry is saved.
OK Confirm.
bel.
or
HiPath 4000, you can use this as the label.
or
tion, see Æ Page 22.
or Entering a number with automatic consultation
(example)
~ Enter the destination station number.
If you activate this entry during a call, a consultation call is immediately set up. The first party is
placed on hold and the number of the saved destination station is dialed.
or Entering a number with pause (example)
Enter Pause?
v OK Select and confirm. "P" appears on the screen.
~ Enter additional digits.
or Deleting an existing number
Delete?
v OK Select and confirm. The number and name (if available)
are deleted.
or If you mistyped
Cancel?
v OK Select, confirm and re-enter the sequence.
Saving the entry
Save?
v OK Select and confirm. Your entry is saved.
42
Page 43

Step by Step
Making Calls – Basic Functions
Blocking the handset with simultaneous forwarding to another destination (example)
*2Q Enter the code to block the handset, for example, *20.
*4M Code for activating call forwarding, for example, *47.
~ Enter the destination station number.
In networked systems, the sequence must end
with
#.
43
Page 44
Making Calls – Basic Functions
Step by Step
Saving a Station Number for "Redial"
Precondition: "Saved number redial" is configured, not
"Last number redial".
Saving a Caller’s Station Number
You have called a party and are still taking to him/her. Or
you are talking to another party who called you and
whose station number was transferred.
FCN Press the display key.
q OK Select and confirm.
Saved # Dial
a Press the on-hook key.
Saving a Random Station Number
Precondition: Your handset is idle.
Program/Service?
v OK Select and confirm.
FCN Press the display key.
q OK Select and confirm.
Saved # Dial
New entry?
OK Confirm.
~ Enter the station number.
Save?
OK Confirm.
Saved number redial Æ Page 28.
Dialing with Repdial
FCN Press the display key.
q OK Select and confirm the entry you want.
44
Precondition: You have saved a station number as repdial in the FCN list Æ Page 41.
Page 45

Step by Step
Making Calls – Basic Functions
Settings in the System Menu
Adjusting the Ring Volume
S or C Press one of these keys while the handset is idle.
Ringer volume?
S or C Raise or lower the volume (1 - 8). Keep pressing the
OK Confirm.
keys until you are happy with the volume.
OK Save.
Adjusting the Ring Tone
S or C Press one of these keys while the handset is idle.
Ringer pitch?
v OK Select and confirm.
S or C Adjust the ring tone (1 - 16). Keep pressing the keys until
the desired tone is set.
OK Save.
Adjusting the Display Contrast
You can adjust the display contrast to any of four levels
to suit your individual lighting conditions.
S or C Press one of these keys while the handset is idle.
Display contrast? >
v OK Select and confirm.
S or C Change the display contrast (1 - 4). Keep pressing the
S or C Raise or lower the volume. Keep pressing the keys until
If applicable
SC together Save to keep the setting for future calls.
keys until the desired level is set.
OK Save.
Changing the Receiving Volume During A Call
Õ You are conducting a call.
you are happy with the volume.
45
Page 46

Making Calls – Basic Functions
Step by Step
Changing the Contrast for FCN Labeling
S or C Press one of these keys while the handset is idle.
Label contrast?
v OK Select and confirm.
S or C Change the contrast (1 - 4). Keep pressing the keys until
the desired contrast is set.
OK Save.
Adjusting the Speakerphone to the Room
Acoustics
To make sure the other party understands you clearly
while talking into the microphone, you can adjust the
handset to the acoustics of your environment, for example, "Room with echo", "Normal room" or "Quiet room".
S or C Press one of these keys while the handset is idle.
Speakerphone mode?
v OK Select and confirm.
S or C Set the room type. Keep pressing these keys until the
setting you want appears on the screen.
OK Save.
Changing the Volume of the Alert Tone
An alert tone sounds, for example, if you receive a second call while you are conducting a call or if a call is not
accepted in your team.
S or C Press one of these keys while the handset is idle.
Warni ng tone?
v OK Select and confirm.
S or C Change the volume (1 - 8). Keep pressing the keys until
you are happy with the volume.
OK Save.
46
Page 47
Step by Step
Making Calls – Basic Functions
Selecting the Language for the System Menu
Your HiPath 4000 system can be configured for up to
five languages. The first language set is the default language. If "Language" is configured as an FCN entry on
your handset, you can set another language.
The length of time the other language remains active
depends on how language selection is configured. Two
different variants exist:
• Static language selection
The language remains set until you select another
language.
• Temporary language selection
The language is set until you end the next call and
then reverts to the default language.
Selecting the language:
FCN Press the display key.
q OK Select and confirm.
r OK Select and confirm.
Language
German?
The selected language appears on your screen for five
seconds and is then set.
This operating manual is also available in other
languages Æ Page 124.
Switching from the System Menu to
Idle State
You are in a HiPath 4000 menu and would like to quickly
revert to idle state.
FCN Press the display key.
Service
OK Confirm.
47
Page 48
Making Calls – Enhanced Functions
Step by Step
Making Calls – Enhanced Functions
Accepting Calls
Accepting Calls for Another Member of Your
Team
If the team member called does not reply within 15 seconds (depending on the system), the other members
hear an alert tone.
In idle state
The telephone rings. "Call for..." appears on the display.
FCN Press the display key.
q OK Select and confirm.
Pickup
c Press the talk key.
You have now picked up the call.
Direct Call Pickup
A call is signaled at another telephone and you know its
extension number or a colleague asks you to pick up a
call for a specific telephone. If you do not know the station number you can display it Æ Page 49.
c Press the talk key.
Direct call pickup?
r OK Select and confirm.
~ Enter the extension number of the telephone where
you were asked to or want to pick up a call. You effectively pick up the call when you enter this number.
48
Page 49

Step by Step
~ The extension number is displayed after you enter the
Enter the code!
Making Calls – Enhanced Functions
Displaying the extension called
If the number of the extension where you want to pick
up a call is not displayed in a call pickup group, you can
lift the handset and enter the code for "Display on request". Ask your service personnel for this code.
c Press the talk key.
code.
Answering Calls in the Hunt Group
All team members can also be reached at a hunt group
station number.
Your telephone rings.
c Press the talk key.
Using the Speakerphone
A colleague addresses you directly over the speaker.
Speakerphone mode and open listening are automatically activated.
You can automatically answer in speakerphone mode.
or
c Press the talk key and answer the call.
Placing a speaker call to a colleague Æ Page 56.
Activating speaker call protect Æ Page 101.
Answering a Call with the Headset
The procedure is the same as for speakerphone mode
Æ Page 27.
Precondition: The headset is connected.
d The LED flashes to signal an incoming call.
Press the speakerphone key. Conduct the call.
Ending a call
d Press the speakerphone key. The LED goes out.
49
Page 50
Making Calls – Enhanced Functions
Step by Step
Dialing/Making Calls
Dialing from the Local Directory
Precondition: An entry is saved in the directory list
Æ Page 87.
s Open the directory.
089123456789
q OK Select and confirm the entry you want.
or
Bond, James
q Select the required entry and
c press the talk key
The connection is set up.
Bond, James ´
or
Voice Dialing
Precondition: A voice recording has been saved for an
entry in the directory Æ Page 85.
Please following the onscreen instructions.
s Hold down the navigation key.
Ø State the name of the party you want to call into the mi-
crophone.
Ö The name is repeated for confirmation and the corre-
sponding entry is shown on the display for five seconds.
The connection is set up.
a Cancel.
Dialing from the LDAP Database
Precondition: You have searched for and selected an
entry in the LDAP database Æ Page 89.
Dialling
50
© Press the display key.
OK Confirm
Page 51

Step by Step
Making Calls – Enhanced Functions
Using the Call Log
If your telephone belongs to an ONS group (One
Number Service Æ Page 108), please note the
following features:
A Call Log is kept for all telephones in an ONS
group. The Call Log can be queried by all internal
parties in the ONS group with a system telephone.
An external and/or internal call that you were unable to
accept is saved in the call log (see also page
Æ Page 53). You can also configure your phone to save
incoming and outgoing calls in the call log.
Your handset saves the last ten unanswered, the last six
outgoing and the last 12 incoming calls in chronological
order.
Each call is assigned a time stamp. The log’s most recent unanswered entry is displayed first. Multiple calls
from the same caller do not automatically generate new
entries in the call log. Instead, only the most recent
time stamp for this caller is updated and its number incremented.
There are no new calls in the log
v Press.
Destinations?
Call log?
v OK Select and confirm.
OK Confirm.
or There are new calls in the log
v Press.
Unanswered calls?
Incoming calls?
v OK Select and confirm.
OK Confirm.
or
or
Outgoing calls?
v OK Select and confirm.
51
Page 52

Making Calls – Enhanced Functions
Step by Step
The first call in the call log is displayed:
Station
32456 Miller V.
busy 25.10.15.30 >
Next call?
v OK Select and confirm.
a Hold down the on-hook key.
Reason, date, and time of the entry.
The most recent unanswered call request is displayed
first. The number of calls is displayed in the case of multiple calls from the same caller.
Displaying additional calls from the log:
Ending a retrieve operation:
Dialing a station number from the call log
Precondition: You have polled the call log and the call
you want is displayed.
Output?
v OK Select and confirm.
The station is called.
Removing an entry from the call log
Precondition: You have polled the call log and the call
you want is displayed.
Delete?
v OK Select and confirm.
52
Page 53
Step by Step
Making Calls – Enhanced Functions
"Missed Calls" in the FCN List
Precondition: Your service personnel have a caller list
and a "missed calls" (unanswered calls) entry is configured for your handset in the FCN list.
FCN Press the display key.
q Select.
Missed Calls
The icon flashes. There are unanswered calls in the list.
OK Confirm.
The first call in the call log is displayed:
Station
32456 Miller V.
free 25.10.15.30 >
Output?
v OK Select and confirm.
Next call?
v OK Select and confirm.
Current state of the caller, date, and time of the entry.
The most recent unanswered call request is displayed
first. The number of calls is displayed in the case of multiple calls from the same caller.
Calling back a station
The relevant station is displayed.
or Displaying additional calls from the log
Delete?
v OK Select and confirm.
Return?
v OK Select and confirm.
Unanswered calls?
or Removing an entry from the call log
The relevant station is displayed.
Ending a retrieve operation
a Hold down the on-hook key. You are in idle state.
or
You are in the caller list and can check the incoming calls
and outgoing calls, for instance.
53
Page 54

Making Calls – Enhanced Functions
Step by Step
Speed Dialing
Dialing with station speed-dial numbers
Speed-dial numbers may contain command or access
code sequences and be linked with other speed-dial
numbers (for more information, see Æ Page 92).
Precondition: You have saved station speed-dial numbers Æ Page 92.
Program/Service?
v OK Select and confirm.
I Enter the service code.
or
Use speed dialing?
v OK Select and confirm.
and
Q...O Enter the speed-dial number.
The other party answers:
cord Press the talk key or the speakerphone key.
Dialing with system speed-dial numbers
You can ask your service personnel for a printout of the
central speed-dial directory, for instance, or find it in the
internal corporate directory.
You can suffix-dial an extension number after dialing a
speed-dial number programmed for another telecommunication system.
Extension
Service personnel can configure speed-dial numbers for
users and program them with features that can contain
an access code in addition to a station number.
54
Page 55
Step by Step
Making Calls – Enhanced Functions
Using Mailboxes
Callers that try to reach you in your absence can leave a
callback request in your mailbox.
The mailbox can also contain voice or fax messages
from the mail server (if configured).
If your telephone belongs to an ONS group (One
Number Service Æ Page 108), please note the
following features:
An indication that a message is waiting in the
mailbox (MWI) is available for all telephones in an
ONS group.
Polling the mailbox
f The mailbox key LED lights up where there are new en-
tries that have not yet been polled in your mailbox.
Press the key.
The first entry is displayed. Press the mailbox key again
to display more entries.
Understanding displays:
"Call" = callback request,
Miller Call
for example, from Mr. Miller
Responding to a callback request
Miller Call
Output?
v OK Select and confirm.
Callback request is displayed.
The station is called.
Deleting mailbox entries
The required entry is displayed.
Delete?
v OK Select and confirm.
You cannot delete new voice messages that have
not yet been played back in full. To mark the message as "played back", use LL to jump to
the end of the message.
Ending mailbox polling
f Press the mailbox key. The LED goes out.
Undeleted entries remain in the mailbox.
55
Page 56
Making Calls – Enhanced Functions
Step by Step
Using the mailbox function (optional)
Users with a mailbox (HiPath Xpressions) can use functions associated with this system by dialing the messaging station number and, for example, setting call forwarding types and polling existing messages. An audio
prompt leads to all existing functions. The messaging
station number is displayed when call forwarding to the
mailbox is active on the display. For information on call
forwarding, refer to the chapter "Call forwarding"
Æ Page 31.
Addressing Colleagues over the Speaker
You can address an internal user at the HiPath 4000 directly over the speaker on his or her phone. You can also
use the functions under "HiPath 4000 as internal twoway intercom system" Æ Page 72.
Precondition: The entry "Spkr. 2-way" is saved in the
FCN list.
FCN Press the display key.
q OK Select and confirm.
Spkr. 2-way
~ Enter the station number.
Ö Wait for the tone.
cord Press the talk key or the speakerphone key and speak
directly to the other party.
If the user addressed activated speaker call protect Æ Page 101, he or she receives your call attempts as a normal call.
56
Page 57
Step by Step
During a Call
Using Second Call
You should activate second call if you are expecting an
important call. A second call is then signaled while you
are conducting a call. You can either accept or ignore the
second call.
Activating/Deactivating Second Call
Program/Service?
v OK Select and confirm.
21 Enter the service code.
or
Feature Settings?
v OK Select and confirm.
Making Calls – Enhanced Functions
Camp-on?
v OK Select and confirm.
and
Activate?
Deactivate?
v OK Select and confirm.
OK Confirm
or
Accepting a Second Call
Precondition: You are conducting a call. Second call is
active and "Pickup" is saved in the FCN list.
If your telephone belongs to an ONS group (One
Number Service Æ Page 108), please note the
following features:
In addition to the alerting tone on the busy telephone, the second call is indicated on the other
telephones in the ONS group by a ringing tone.
Ö You hear the alert tone.
q Select.
Pickup
FCN Press the display key.
The icon flashes. The caller hears the ring tone as if you
were free.
OK Confirm. You are immediately connected to the second
caller. The first party is placed on hold.
57
Page 58

Making Calls – Enhanced Functions
Step by Step
Ending the second call and resuming the first one
a Press the on-hook key.
c Press the talk key.
Using Menu Prompts to Accept a Second Call
Precondition: You are conducting a call. Second call is
active. The FCN list contains no entry for "Pickup" or
"Changeover" Æ Page 59.
Ö A second call is shown on the display with name/station
number and signaled by a camp-on tone. The caller
hears the ring tone as if you were free.
Answer camp-on
v OK Select and confirm. You are immediately connected to
the second caller. The first party is placed on hold.
Ending the second call and resuming the first one
a Press the on-hook key.
c Press the talk key.
58
Page 59

Step by Step
Making Calls – Enhanced Functions
FCN Entry "Changeover"
You can use the FCN entry "Changeover" for the following functions (must be configured by System Support):
• Consultation (return to the held call or the held conference)
• Split
• Second call acceptance
• Group call acceptance
Second call
Ö You hear a camp-on tone. Call information appears on
the display.
FCN Press the display key.
q OK Select and confirm.
Changeover
Accept the camped-on call.
Split
You are connected to two different parties. One party is
waiting.
FCN Press the display key.
q OK Select and confirm to switch to the other party. The first
Changeover
party is placed on hold.
Consultation hold
You call a second party. The second party does not answer.
FCN Press the display key.
q OK Select and confirm to revert to the held party or confer-
Changeover
ence.
q OK Select and confirm to accept the group call; the first par-
Changeover
Group call
You are connected to a party. A group call is received.
Information about the group call appears on the display.
FCN Press the display key.
ty is placed on hold.
59
Page 60
Making Calls – Enhanced Functions
Step by Step
FCN Entry "Re-Display“
You can briefly display information about the initial call station number or caller name - on the screen during an
internal or external second call or consultation call. The
re-display function must be saved in the FCN list by your
service personnel.
During a second call or consultation call
Herbert Meyer
Return to held call?
The current party is displayed.
FCN Press the display key.
q OK Select and confirm.
Re-Display
3724 Annie Fox
Purchasing Dept.
Herbert Meyer
Return to held call?
The handset briefly displays information about the held
party.
The current party is then displayed once again.
Information cannot be re-displayed:
• if you have parked a call (group park).
• if a party is camped-on to your phone.
• if you are conducting a conference.
60
Page 61

Step by Step
Making Calls – Enhanced Functions
FCN Entry "Time-Date"
The current date and time are indicated on your handset’s display, even during a call (for example, during a
conference).
Precondition: "Time-Date" is saved in the FCN list.
FCN Press the display key.
q OK Select and confirm.
Time-Date
If the date-and-time display is replaced in idle state by a
system message, you can also use this entry to show
the current time.
The time information is only provided by HiPath 4000.
61
Page 62

Making Calls – Enhanced Functions
Step by Step
System-Supported Conference
You can unite up to eight internal and external parties in
the system-supported conference. Parties with system
telephones can run or use all of the functions listed below. ISDN phones and external parties are passive parties – they can only join the current conference.
You can include parties and conferences from a remote
system in your conference. The remote parties can initiate and expand a separate conference. The parties
participating in this conference are included in your current conference. However, they cannot run or use the
following functions.
The following functions are supported for all conference
participants with system telephones:
• Set up (initiate) a conference if you call a party or receive a call, conduct a consultation call or receive a
second call
• Accept a second call and add a caller to the conference
• Alternate between the conference and a consultation call or second call
• Hold a consultation call during a conference and add
party to conference
• Unite conference participants from two independent conferences over a remote network
• Place the conference on hold if there are trunks configured in the FCN list
• Get an overview of all conference participants
• Transfer a conference to a new party
The functions specified can be executed at the same
time by all conference participants.
62
Page 63

Step by Step
Setting up a Conference
You can set up a conference from the following types of
connection:
• individual call
• consultation call
• second call
Initiating a conference from an individual call
You want to set up a conference.
You receive a call.
or
~ You call a station.
Start conference?
v OK Select and confirm.
Making Calls – Enhanced Functions
~ Call the second party.
Announce the conference.
Conference?
OK Confirm.
You receive the following message briefly: "1 is your position"
Conf. 1-2-3
Add to conference?
This display appears.
Setting up a conference from a consultation call
You are connected to one party and call a second party.
Consultation?
OK Confirm.
~ Call the second party. When the second party answers,
you announce that a conference is underway.
Conference?
v OK Select and confirm.
You receive the following message briefly: "1 is your position"
Setting up a conference from a second call
You are conducting a call.
Conference?
v OK Select and confirm.
Ö A second call is shown on the display and signaled with
a camp-on tone.
You accept the second call (Æ Page 57 or Æ Page 58).
The other party is placed on hold.
You receive the following message briefly: "1 is your position". All parties are united in a conference.
63
Page 64

Making Calls – Enhanced Functions
Step by Step
Adding a Party to a Conference
Each member of a system conference can expand the
conference by
• calling another party directly and adding them to the
conference
• by adding a party from a consultation call to the conference
• accepting a second call and adding the caller to the
conference
Calling another party directly and adding them to
the conference
You want to call another party and add them to the conference.
Add to conference?
v OK Select and confirm.
~ Call the new party.
Announce the conference.
Conference?
OK Confirm.
The party is added to the conference.
If the new party does not answer:
Return to conference?
OK Confirm.
Changing a consultation call into a conference
You want to conduct a consultation call during a conference.
Consultation?
v OK Select and confirm. The conference is placed on hold.
~ Call a user. Place the consultation call on hold.
Conference?
v OK Select and confirm to add the party from the consulta-
tion call to the conference.
or
Toggle/Connect?
v OK Switch back and forth between conference and the con-
Return to held call?
v OK Select and confirm to end the consultation call and re-
64
sultation call.
or
turn to the conference.
Page 65
Making Calls – Enhanced Functions
Step by Step
Accepting a second call and adding it to the conference
If you receive a second call during a conference, you can
add this party to the conference.
Ö A second call is shown on the display and signaled with
a camp-on tone.
You accept the second call (Æ Page 57 or Æ Page 58).
The conference is placed on hold.
Conference?
v OK Select and confirm to add the second caller to the con-
ference.
or
Toggle/Connect?
v OK Switch back and forth between conference and second
call.
or
Return to held call?
v OK Select and confirm to end the second call and return to
the conference.
Transferring a Conference
Every party can transfer the conference to a third party
who was called via a consultation call or with the "Add
party" function.
The conference cannot be transferred to a second call.
Precondition: You are conducting a conference call.
Consultation?
v OK Select and confirm. The conference is placed on hold.
~ Call a user.
or
Add to conference?
Transfer conference?
v OK Select and confirm.
OK Select and confirm.
~ Call a user and announce the transfer.
You leave the conference.
a Press the on-hook key.
65
Page 66
Making Calls – Enhanced Functions
Step by Step
During the Conference
You are involved in a conference with three to eight parties and want to display the parties, disconnect a specific party or disconnect the last party added.
Displaying and disconnecting specific parties
View members?
v OK Select and confirm.
George Miller 1
Next conference party?
Next conference party?
The station number or the name of the conference
member with the first key number is displayed.
OK Confirm to display the next party.
or
Stop viewing?
v OK Select and confirm to quit the display.
or
Release party?
v OK Select and confirm to remove the current party from the
conference.
Disconnecting the last party
You want to remove the last party added from the conference.
Remove last party?
v OK Select and confirm. The last party added is disconnect-
ed.
Placing a conference on hold
If the FCN list contains a "Trunk" entry Æ Page 94, you
can place the conference on hold and, for example, conduct a call on another line.
FCN Press the display key.
q OK Select and confirm.
v OK Select and confirm.
Ln
Hold?
FCN Press the display key.
q OK Select and confirm the trunk on which the conference
66
Ln
or
Reverting back a conference
is held.
Page 67
Step by Step
Using Tone Dialing to Enter Commands
(DTMF Suffix Dialing)
You can set tone dialing after entering a station number to use commands to operate equipment, such as,
answering machines and automatic information or attendant systems in dual-tone multifrequency (DTMF)
mode.
Program/Service?
v OK Select and confirm.
N1 Enter the service code.
or
More features?
v OK Select and confirm.
DTMF suffix dialing?
v OK Select and confirm.
Making Calls – Enhanced Functions
You can now use the keys Q through O, * and
# to enter the commands.
Ending the call also deactivates DTMF suffix dialing.
Depending on the system configuration, "DTMF
suffix dialing" appears on the display as soon as
the station number has been entered. You can
then enter commands immediately after dialing a
station number.
67
Page 68
Making Calls – Enhanced Functions
Step by Step
System-Wide Parking
You can park up to 10 internal and/or external calls in
HiPath 4000 and then retrieve them at another phone.
There are two ways to park a call:
• automatic parking
• manual parking
Parking is not permitted if
• all park slots are busy
• the required park slot is busy
• the station is the attendant console
• the call is a consultation call
• the call is in a conference
Automatic Call Parking
You can automatically park a call in a free park slot on
your phone and then retrieve it later at your own or another phone.
Parking
FCN Press the display key.
q OK Select and confirm (must be configured).
System Park
The first free park slot number is seized and shown on
the display. The call is parked.
You can also start by placing the call on hold by
confirming "Consultation" and then park it.
a Press the on-hook key.
Retrieving a parked call
cord Press the talk key or the speakerphone key.
FCN Press the display key.
q OK Select and confirm.
System Park
Q...O Enter the park slot number of the parked call and re-
68
sume the call.
Page 69

Step by Step
Making Calls – Enhanced Functions
Manual Call Parking
You can manually park a call in a free park slot on your
phone and then retrieve it later at your own or another
phone. You can also perform this function on phones
without display.
Parking
Consultation?
~ Enter the system code for "System park" (if necessary,
~ Enter the system code for "System park" (if necessary,
OK Confirm.
Enter the code!
consult your service personnel).
Q...O Enter the number of the park slot (0 - 9) and make a note
of it.
The call is parked.
a Press the on-hook key.
Retrieving a parked call
cord Press the talk key or the speakerphone key.
Enter the code!
consult your service personnel).
Q...O Enter the park slot number you noted (0-9) and resume
the call.
69
Page 70

Making Calls – Enhanced Functions
Step by Step
Parking Not Possible
An audio message and a visual message are output if all
park slots or the ones you want are busy or if parking is
not possible for another reason.
Automatic parking
If all park slots are busy, a display message to this effect
appears and a continuous tone is output.
Manual parking
If the park slot you want is busy, a display message and
the busy tone are output.
Return to held call?
OK Confirm and proceed with the call.
or
a Press the on-hook key. You receive a recall from the held
call.
70
Page 71
Making Calls – Enhanced Functions
Step by Step
If You Cannot Reach a Destination ...
Call Waiting (Camp-On)
Precondition: The internal party called is busy. You urgently need to contact this party.
Camp-on?
v OK Select, confirm and wait a moment.
Your colleague hears the camp-on tone during his/her
ongoing call. The "Accept call" key flashes on telephones with function keys. The name and station number are displayed on telephones with display.
You cannot perform camp-on without the necessary authorization.
Camp-on is not possible if camp-on protection is
active at the station called.
Busy Override - Joining an Ongoing Call
Precondition: The party called is busy. You urgently
need to contact this party.
Override?
v OK Select and confirm.
Your colleague and the person to whom he or she is
talking hear an alert tone.
You can now start talking.
You cannot perform busy override without the
necessary authorization.
Busy override is not possible if override protection is active at the station called.
71
Page 72

Making Calls – Enhanced Functions
Step by Step
HiPath 4000 as an Internal Two-Way
Intercom System (Intercom and TwoWay Calling System)
You can set up a call by addressing an internal user at
the HiPath 4000 directly over the speaker on his or her
phone. You can also initiate a two-way speaker call from
a consultation call. The following functions are possible:
• System-wide two-way speaker call
– to a variable destination
– to a fixed destination
• Two-way speaker call in a group
– to a variable destination
– to a fixed destination
• Two-way calling within a group
– to a variable destination
– to a fixed destination
• Broadcast call to all members of a line trunk group
You can cancel the two-way speaker call or broadcast
call by pressing the on-hook key or resuming the held
call during a consultation call.
Ensure that speaker call protect is deactivated
for all functions at the relevant
phonesÆ Page 101. Speaker call protection is deactivated via a configured key in telephones without display, for example, optiPoint 410 entry.
If a station where speaker call protect is active is
addressed directly, the two-way speaker call is ignored and replaced by a normal call.
72
Page 73
Step by Step
Making Calls – Enhanced Functions
System-Wide Two-Way Speaker Call
You can use your handset to set up a two-way speaker call
to any internal party who has a phone that supports speakerphone mode or has a speaker.
A connection is immediately set up if
• the other party is not busy
• speaker call protect is not activated
Ö As the caller, you receive a confirmation tone if the con-
nection is set up and talking is possible.
cord As the called party, press the talk key to accept the call.
If the called party presses the speaker key, the connection is cancelled.
The number of possible two-way speaker calls is
the same as the number of possible normal connections.
Two-way speaker calls to a variable destination
cord Press the talk key or the speakerphone key.
~ System code for "Two-way speaker call"
Enter the code!
or
FCN Press the display key.
q OK Select and confirm (must be configured).
Spkr. 2-way
~ Enter the internal station number of the party.
Two-way speaker call to a fixed destination
The system code for the two-way speaker call and the
destination station number are saved as an FCN entry
Æ Page 41.
FCN Press the display key.
q OK Select and confirm the relevant entry.
A connection to the destination’s speaker is immediately set up.
73
Page 74
Making Calls – Enhanced Functions
Step by Step
cord Press the talk key or the speakerphone key.
~ System code for "Two-way speaker call in a group"
Enter the code!
or
Two-Way Speaker Call in a Group
You can also set up a normal call within a group or team
(with team call = speed-dial number for team members
0-9 or 00-99) with the two-way speaker call function.
The two-way speaker call is initiated from a group telephone.
The function "Two-way speaker call in a group" is
not line-specific – anyone can set up a two-way
speaker call with anyone else.
Two-way speaker calls to a variable destination
FCN Press the display key.
q OK Select the FCN entry for "Two-way speaker call in a
group" (must be configured).
~ Speed-dial number for the relevant group member.
Two-way speaker call to a fixed destination
The system code for "Two-way speaker call in a group"
and the speed-dial number for the relevant group member are saved as an FCN entry Æ Page 41.
FCN Press the display key.
q OK Select and confirm the relevant entry.
74
Page 75

Step by Step
~ System code for "Two-way calling in a group"
Making Calls – Enhanced Functions
Two-Way Calling in a Group
In the case of two-way calling in a group, the destination
telephone’s speaker and microphone are automatically
activated.
Two-way calling to a variable destination
cord Press the talk key or the speakerphone key.
Enter the code!
or
FCN Press the display key.
q OK Select and confirm the entry for "Two-way calling in a
Spkr. 2-way
group" (must be configured).
~ Enter the speed-dial number for the relevant group
member.
Two-way calling to a fixed destination
The system code for "Two-way calling in a group" and
the speed-dial number for the relevant group destination are saved as an FCN entry Æ Page 41.
FCN Press the display key.
q OK Select and confirm the relevant entry.
75
Page 76
Making Calls – Enhanced Functions
Step by Step
Ö As the caller, you receive a confirmation tone if the con-
cord Press the talk key or the speakerphone key.
~ System code for "Broadcast“
Enter the code!
or
FCN Press the display key.
Broadcast (Announcement) to all Members of
a Line Trunk Group
You can use this function to broadcast a call simultaneously to all members (10 to 40) of a line trunk group.
nection is set up and talking is possible.
q OK Select the FCN entry for "Broadcast" (must be config-
ured).
~ Internal station number of a group member.
Ending a broadcast call
a Press the on-hook key.
If a group member lifts the handset, he or she is
connected to you and the broadcast call is ended. If a group member presses the speakerphone key, the broadcast call is disconnected at
his or her station.
76
Page 77

Step by Step
Using Call Forwarding
Using Control Relays to Activate/Deactivate
Call Forwarding
If a call forwarding destination was programmed for
fixed call forwarding, you can activate or deactivate this
forwarding instruction with the control relay function.
You can only deactivate variable call forwarding with this
function.
Program/Service?
v OK Select and confirm.
Feature Settings?
v OK Select and confirm.
Call forwarding?
v OK Select and confirm.
Making Calls – Enhanced Functions
Activate?
v OK Confirm.
or
Deactivate?
v OK Confirm. This deletes the destination station number
for variable call forwarding.
Forwarding Calls Automatically
Your service personnel can program different call forwarding types in the system for internal and external
calls and activate them for your station. Call forwarding
can be performed
• unconditionally for all calls
• on busy
• on no reply
Unconditional call forwarding should only be programmed for all calls if the station is only intended for
outgoing calls (for example, in elevators).
If you have programmed a fixed or variable call forwarding instruction and if the manual call forwarding destinations cannot be reached (for example, busy), the call is
automatically forwarded to the system call forwarding
destinations.
77
Page 78

Making Calls – Enhanced Functions
Step by Step
Call Forwarding with Codes
The following call forwarding types can be programmed
with codes:
Forwarding type Code
(example)
Programming and activating fixed call forwarding
Activating fixed call forwarding
Deleting (and deactivating) fixed call for-
warding
Deactivating fixed call forwarding
Programming and activating unconditional
variable call forwarding
Programming and activating variable call
forwarding for internal calls
Programming and activating variable call
forwarding for external calls
Programming and activating variable call
forwarding on busy
Programming and activating variable call
forwarding on no reply
Programming and activating variable call
forwarding on busy/no reply
Deactivating variable and fixed call for-
warding
Deactivating variable call forwarding for in-
ternal calls
Deactivating variable call forwarding for ex-
ternal calls
Activating system call forwarding
Deactivating system call forwarding
*51
*41
#51
#41
*42
*44
*43
*45
*46
*47
#41
#44
#43
*90
#90
78
Page 79

Step by Step
~ Enter a code, for example, *51 (consult your service
~ Enter a code, for example, *41 (consult your service
Making Calls – Enhanced Functions
Programming and activating call forwarding
cord Press the talk key or the speakerphone key.
Enter the code!
personnel). You hear the dial tone.
~ Enter the destination number.
# Enter the terminator character. You hear a confirmation
tone, call forwarding is activated.
a Press the on-hook key.
Activating fixed call forwarding
cord Press the talk key or the speakerphone key.
Enter the code!
personnel). You hear a confirmation tone.
a Press the on-hook key.
Deactivating call forwarding
cord Press the talk key or the speakerphone key.
~ Enter a code, for example, #41 (consult your service
Enter the code!
personnel). You hear a confirmation tone.
a Press the on-hook key.
79
Page 80

Making Calls – Enhanced Functions
Step by Step
Delayed Call Forwarding
This is configured by the service personnel responsible
for the system.
Precondition: "Second call" must be activated
Æ Page 57.
If you activated "Call forwarding on busy/no reply" or "Call
forwarding no reply" for your phoneÆ Page 35, a second
call is automatically signaled by the camp-on tone and information on the caller appears on the display. This
means you can accept this call before it is forwarded
(for example, if you are waiting for an urgent call).
A caller hears the ring tone and is only forwarded to another station after a set period of time.
Forwarding Calls for Another Station
You can save, activate, display, and deactivate a call forwarding instruction for another phone, fax or PC station
at your own phone. To do this, you must know the station’s PIN or have the authorization "Call forwarding for
third-party station". Consult your service personnel.
Storing a Destination for Another Phone/
Activating Call Forwarding
Program/Service?
v OK Select and confirm.
Destinations?
Forwarding station No.?
v OK Select and confirm.
Variable call forw.?
Completed?
OK Confirm.
OK Confirm.
~ Enter the other telephone’s station number.
OK Confirm.
Completed?
Save?
80
~ Enter the PIN (only if your own station does not have
the authorization "Call forwarding for third-party station").
OK Confirm.
~ Enter the destination number.
OK Confirm.
Call forwarding is immediately active.
Page 81
Step by Step
Storing a Destination for Fax, PC or
on Busy/Activating Call Forwarding
Program/Service?
v OK Select and confirm.
Making Calls – Enhanced Functions
Destinations?
Forwarding station No.?
v OK Select and confirm.
Forward other?
v OK Select and confirm.
OK Confirm.
~ Enter the code for the forwarding type required. Codes
are assigned by your service personnel. You can enter
your assigned codes in the following table:
"Call forwarding for fax":
"Call forwarding for PC":
"Call forwarding on busy":
~ Enter the other station’s number.
Completed?
OK Confirm.
~ Enter the PIN (only if your own station does not have
the authorization "Call forwarding for third-party station").
Completed?
OK Confirm.
Save?
~ Enter the destination number.
OK Confirm.
Call forwarding is activated.
81
Page 82
Making Calls – Enhanced Functions
Step by Step
Displaying/Deactivating Call Forwarding for
Another Phone
Program/Service?
v OK Select and confirm.
Feature Settings?
v OK Select and confirm.
Forwarding station No.?
v OK Select and confirm.
Variable call forw.?
OK Confirm.
~ Enter the other telephone’s station number.
Completed?
OK Confirm.
~ Enter the PIN
(only if your own station does not have the authorization
"Call forwarding for third-party station").
Completed?
Deactivate?
Display?
v OK Select and confirm.
OK Confirm.
Deactivating
OK Confirm.
or Displaying
Sample display:
3428----------------------->8968
Meaning: calls for station 3428 are forwarded to
station 8968.
Program/Service?
v OK Select and confirm.
Feature Settings?
v OK Select and confirm.
Forwarding station No.?
v OK Select and confirm.
Forward other?
v OK Select and confirm.
82
Displaying/Deactivating Call Forwarding for
Fax, PC or on Busy
~ Enter the code for the forwarding type required. Codes
are assigned by your service personnel. You can enter
your assigned codes in the following table:
Page 83
Step by Step
Making Calls – Enhanced Functions
"Display call forwarding for fax":
"Display call forwarding for PC":
"Display call forwarding on busy":
"Deactivate call forwarding for fax":
"Deactivate call forwarding for PC":
"Deactivate call forwarding on busy":
~ Enter the other station’s number.
Completed?
OK Confirm.
~ Enter the PIN (only if your own station does not have
the authorization "Call forwarding for third-party station").
Completed?
OK Confirm.
Deactivating
Deactivate?
OK Confirm.
or Checking
Display?
v OK Select and confirm.
(Sample display Æ Page 82).
Changing Call Forwarding for Another Station
To do this, proceed as described for storing/activating:
for another phone Æ Page 80,
for fax, PC or on busy Æ Page 81.
83
Page 84

Station Number Directories and Lists
Step by Step
Station Number Directories and
Lists
Directory
You can use the directory to save station numbers and
additional information on contacts (up to 200 entries).
You can create a new entry:
• via the main menu Æ Page 85
• via the menu if an entry is selected Æ Page 88
• by importing from the redial list Æ Page 91
• by importing from the LDAP database Æ Page 90
You can use the Web interface to import a directory file from your PC to the directory and create
backup copies of your data Æ Page 123.
Possible entry fields are:
•"Surname:"
•"First Name:"
• "Phone (home):"
• "Phone (office):"
• "Phone (mobile):"
• "Department:"
• "Street:"
• "Post code:"
•"City:"
You must enter at least a station number before you can
save an entry.
All station numbers that are assigned to an entry
are available when dialing from the directory
Æ Page 50.
84
Page 85
Step by Step
Station Number Directories and Lists
Creating a New Entry
s Open the directory.
<New Entry>
Bond
James
s ~ Select the "First Name:" entry field and enter the first
OK Confirm.
The cursor jumps to the "Surname:" entry field.
~ Enter the name here.
name.
s ~ For example, select the "Phone (home):" entry field and
enter the station number.
X Press the display key to delete the character to the left
of the cursor.
s ~ Select additional entry fields and enter the relevant da-
ta.
Save Press the display key to save the entries.
” Press the display key to discard the entries.
Adding Voice Dialing Recordings for an Entry
You can add voice dialing recordings for up to
30 entries.
Saving a voice recording
Precondition: The entry in the directory list is selected
Æ Page 87.
The reliability of voice recognition depends on
the pitch of the voice, and the speaker’s voice
speed and volume.
Use the long, unique name and avoid loud background noise during the recording.
Bond, James
s
© Press the display key.
Record Pattern
s OK Select and confirm.
Please following the onscreen instructions while
recording.
Ø State the name of the party you want to call into the mi-
crophone.
85
Page 86

Station Number Directories and Lists
Step by Step
Ö Wait for a positive alerting tone.
Ø Repeat the recording.
¯ If recording is successful, the entry is marked with this
icon in the directory list.
If recording failed, an error message is displayed and
you hear a negative alerting tone.
Playing back a voice recording
Precondition: A voice recording has already been
saved, the entry in the directory list is selected.
© Press the display key.
Play Pattern
s OK Select and confirm.
Ö The recording associated with the entry is played back.
Deleting a voice recording
Precondition: A voice recording has already been
saved, the entry in the directory list is selected.
© Press the display key.
Delete Pattern
s OK Select and confirm.
The recording associated with the entry is deleted.
86
Page 87

Step by Step
Station Number Directories and Lists
Directory List
All entries are listed in alphabetical order in the directory
list.
Other sort rules:
1. Complete entries (name/first name)
– Numbers before letters
– Lowercase before uppercase
2. Entries that only contain station numbers
Representation in the directory list
Precondition: There are entries saved in the directory
list Æ Page 85.
Bond, James
Bond, James
0455 3625 ¯ ¾
If applicable If there are multiple matching entries:
Entries that have not been selected are shown on a single line.
A selected entry is displayed on two lines.
The entry can contain the following icons:
Voice dialing
¯
Business telephone number
Ô
Private telephone number
¾
Mobile telephone number
Å
Searching for an entry
Precondition: There are entries saved in the directory
list Æ Page 85.
s Open the directory.
q Scroll through the directory list,
or
~ Enter the first letters of the required contact’s name (for
information on entering characters Æ Page 23).
q Select the required entry.
Bond, James
0455 3625 ¯ ¾
87
Page 88

Station Number Directories and Lists
Step by Step
View Press the display key.
q Scroll through the entry fields.
Edit Confirm to edit the entry Æ Page 88.
OK Confirm. You are returned to the directory list.
© Press the display key.
Viewing an entry
Precondition: The entry in the directory list is selected
Æ Page 87.
Editing an entry
Precondition: The entry in the directory list is selected
Æ Page 87.
Edit Entry
OK Confirm.
q Use the navigation key to select the entry field you want
to edit.
X Press the display key to delete the character to the left
of the cursor.
Save Press the display key to save the entries.
Creating an entry
Precondition: An entry is selected in the directory list
Æ Page 87.
© Press the display key.
New Entry
s OK Select and confirm.
Deleting an entry
Precondition: The entry in the directory list is selected
Æ Page 87.
© Press the display key.
Delete Entry
s OK Select and confirm.
88
The entry is deleted from the directory list.
Page 89
Step by Step
Clearing the directory list
Precondition: The entry in the directory list is selected
Æ Page 87.
© Press the display key.
Delete List
s OK Select and confirm.
Yes Press the display key to permanently delete all directory
entries.
Memory capacity
© Press the display key.
Available Memory
s OK Select and confirm.
Station Number Directories and Lists
LDAP Database
You can access your corporate directory (LDAP database).
This function must be correctly configured to use
the LDAP database. Consult your service personnel.
Searching for an LDAP Entry
s Open the directory.
<LDAP>
s OK Select and confirm.
Basic Search
Advanced Search
s OK Select and confirm.
OK Confirm.
or
In contrast to the standard search, the advanced
search provides options for running searches on
the basis of additional corporate directory fields
(max. five).
If applicable
s Select the search field ("Advanced Search" only).
~ Enter the search text (for information on entering char-
acters Æ Page 23).
The hit list contains one or more entries, the first of
which is selected.
89
Page 90
Station Number Directories and Lists
Step by Step
q Select the required entry.
Bond, James
0455 3625 ¯ ¾
You can now
• call the LDAP contact Æ Page 50
• view the LDAP entry Æ Page 90
• import an LDAP entry to the directory
Viewing an LDAP entry
Precondition: You have searched for and selected an
entry in the LDAP database Æ Page 89.
© Press the display key.
View
s OK Select and confirm.
” Cancel.
or
Copy to Directory
q OK Select and confirm to copy the LDAP entry to the direc-
tory Æ Page 90.
Importing an LDAP Entry into the Directory
Precondition: You have searched for and selected an
entry in the LDAP database Æ Page 89.
© Press the display key.
Import
s OK Select and confirm.
The LDAP entry is now saved in your directory.
90
Page 91

Station Number Directories and Lists
Step by Step
Redial List
The redial list contains the last ten numbers dialed by
the handset. If any of the numbers are in the directory,
the matching names are displayed.
Importing an Entry into the Directory
Precondition: You dialed station numbers that are not
yet saved in the directory.
c Press the talk key quickly.
089123456
q Select the required entry.
© Press the display key.
Copy to Directory
Bond
q ~ Use the navigation key to select the "Name:" entry field
OK Confirm.
You are now in the directory list. The station number is
entered.
and enter the name.
q ~ Use the navigation key to select other entry fields and
enter additional information.
X Press the display key to delete the character to the left
of the cursor.
Save Press the display key to save the entries.
Removing an entry from the redial list
c Press the talk key quickly.
089123456
q Select the required entry.
© Press the display key.
Delete Entry
OK Confirm.
089123456
q Select the required entry.
Delete List
Deleting the redial list
c Press the talk key quickly.
© Press the display key.
OK Confirm.
91
Page 92

Saving Functions, Wake-Up Calls, and Reminders
Step by Step
Saving Functions, Wake-Up Calls,
and Reminders
Saving Station Speed-Dial Numbers
You can program a station number on digit keys 0 to 9
and dial it at the push of a button Æ Page 54.
Extension
In addition to the destination station number, you can
program a speed-dial number with multiple access
codes and a reference to another speed-dial number.
You can link up to ten speed-dial numbers in this way.
Example 1
You want to activate a night station, for example. To do
this, program a speed-dial number with the following
sequence, for example:
*96 (code for night answer) + 91 (attendant code) + 1
to 8 (for variants 1 to 8) + #
Dial one of the speed-dial numbers now to activate the
relevant night station.
Example 2
You want to disable your phone, for example, when you
leave the office and at the same time activate call forwarding. You can program both of these actions on a
speed-dial number:
*20 (code for phone block) + *47 (code for activating
call forwarding) + 123456 (destination station number).
You can also program a speed-dial number to deactivate
the phone lock and the call forwarding instruction.
92
Example 3
As the number of characters for a speed-dial entry is
limited to 22, you can also link two speed-dial numbers
together for a longer sequence. You can program one
speed-dial number with the server access and a code
number, for example, as well as a reference to a second
Page 93

Step by Step
Saving Functions, Wake-Up Calls, and Reminders
speed-dial number that is then programmed with an
LCR access code and the destination station number,
for example.
Program the following sequence on speed-dial
number 1:
*3 (PIN access code) + 12345678901 (PIN) + *55
(speed-dial code) + 5 (number of the next speed-dial
number you want to use).
Then program the entry for speed-dial number 5.
9 (LCR access code) + 156192317 (destination station
number).
If you now select speed-dial number 1, this entry is first
processed and followed automatically by the entry for
speed-dial number 5.
Programming Speed Dialing
Program/Service?
v OK Select and confirm.
Destinations?
Speed dialing?
v OK Select and confirm.
New entry?
Save?
OK Confirm.
~ Enter the speed-dial number you wish to use (0 to 9).
If the relevant digit is already programmed, the associated station number is displayed.
OK Confirm.
~ Enter the station number.
In the case of external station numbers, enter the external code followed by the station number.
OK Confirm.
93
Page 94
Saving Functions, Wake-Up Calls, and Reminders
Step by Step
Storing a Function in the FCN List
In addition to station numbers and sequences
(Æ Page 41), you can also save functions as entries (up
to 12 entries) in the FCN list.
Precondition: Your handset is idle.
An incoming call will interrupt the programming
procedure.
Program/Service?
v OK Select and confirm.
Key function?
r OK Select and confirm.
FCN Press the display key.
q OK Select a free entry and confirm.
Change?
OK Confirm.
r OK Select and confirm one of the system functions avail-
able.
If applicable Change the label (for repdial only) Æ Page 22.
Save?
OK Confirm.
The function is now saved in the FCN list but it is not active. Activate the function Æ Page 94.
Activating a Function in the FCN List
Precondition: The function is saved in the FCN list
Æ Page 94.
FCN Press the display key.
q OK Select and confirm the function you want.
Callback
If the function is activated, a red icon appears
(like the LED on an optiPoint phone with function
keys).
94
Page 95

Saving Functions, Wake-Up Calls, and Reminders
Step by Step
Reminder Function
You can program your telephone to give you a call when
you want to be reminded of an appointment
Æ Page 95. To do this you must save the required time
of the call. Reminders can be programmed for appointments due to take place within the next 24 hours.
Saving Reminders
Program/Service?
v OK Select and confirm.
M Enter the service code.
or
Reminder?
v OK Select and confirm.
The phone displays whether or not reminders have already been saved.
New reminder?
OK For the first reminder: Confirm.
For further reminders: Select and confirm.
~ Enter the time in three- or four-digit format, for example,
845 for 8.45 or 1500 for 15.00.
Save?
Program/Service?
v OK Select and confirm.
OK Confirm.
Deleting a saved reminder:
M Enter the service code.
or
Reminder?
v OK Select and confirm. A saved reminder is displayed.
Next reminder?
v OK Confirm if you have saved multiple reminders.
Delete?
v OK Select and confirm.
Using Timed Reminders
Precondition: You have saved a reminder. The current
time now matches the saved time.
Å The handset rings.
Press any key to deactivate the call.
95
Page 96
Saving Functions, Wake-Up Calls, and Reminders
Step by Step
Programming the Alarm Clock
If the alarm function is activated, you receive a call signaled by the melody you selected everyday at the wakeup time set (see also the reminder function Æ Page 95).
Activating/Deactivating and Setting the
Alarm Clock
Precondition: The handset is idle.
t Open the main menu.
4 Enter the code
or
Alarm Clock
s OK Select and confirm.
Activating/deactivating the alarm clock
In the "Alarm Clock:" entry field:
<On>
r OK Select and confirm.
<Off>
<00:00>
s Scroll to the "Time:" entry field.
<08:45>
<Melody 1>
s Scroll to the "Melody" entry field.
<Melody 1>
r OK Select and confirm.
OK Confirm.
or
Setting the alarm clock
~ Enter the wake-up time (hours/minutes; four-digit).
Setting the wake-up melody
You can choose from up to 16 melodies (Æ Page 123).
Save Press the display key to save changes.
a Hold down the on-hook key.
96
¼ Icon appears on the idle display.
Page 97

Step by Step
Saving Functions, Wake-Up Calls, and Reminders
Deactivating a Wake-Up Call
If your optiPoint WL 2 professional is in use at
the set wake-up time, the wake-up call is signaled as soon as the handset returns to idle status.
Precondition: You have saved a wake-up call. The current time now matches the saved time.
Å The selected melody signals the wake-up call for 60
seconds at the handset.
Press any key to deactivate the wake-up call.
97
Page 98

Dialing with Call Charge Assignment
Step by Step
Dialing with Call Charge Assignment
You can assign external calls to certain projects.
Precondition: Project numbers (from 1 to 5) are configured for specific projects and you have an account code
(project code) for the project.
Dialing with Project Assignment
Program/Service?
v OK Select and confirm.
~ Enter a service code between 61 (for project number 1)
and 65 (for project number 5).
~ Enter the PIN.
or
Program/Service?
v OK Select and confirm.
PIN / COS?
v OK Select and confirm.
PIN 1?
If applicable
OK Confirm.
v OK Select PIN2 to PIN5 and confirm.
~ Enter the number of the external station.
Project assignment is temporary. It deactivates
automatically if you do not use your phone for five
minutes, for example.
98
Page 99

Step by Step
Dialing with Call Charge Assignment
Call Duration Display
The call duration display is configured by your service
personnel. The display either shows the call duration or
the call charges. The display can also be deactivated.
The call duration is displayed in 24-hour format
(HH:MM:SS) on the right of the top line. The display activates 10 seconds after the call starts.
The call charge display feature has to be requested from
your service provider and must be installed by your service personnel.
99
Page 100
Privacy/Security
Step by Step
Privacy/Security
Activating/Deactivating Do Not Disturb
You can activate the do not disturb function if you do not
want the receive any calls. Internal callers hear the ring
tone and see the message "DND" and external callers
are forwarded to the attendant. Your service personnel
can also configure DND for call forwarding destinations
to forward internal and external calls.
If your telephone belongs to an ONS group (One
Number Service Æ Page 108), please note the
following features:
Do Not Disturb can be switched on or off on all
telephones in the ONS group; this then applies
for all telephones in the ONS group.
Precondition: Your service personnel activated DND
for all HiPath 4000 stations in your system.
Program/Service?
v OK Select and confirm.
22 Enter the service code.
or
Feature Settings?
v OK Select and confirm.
Do not disturb?
v OK Select and confirm. The display indicates whether DND
is on or off.
Activate?
Deactivate?
v OK Select and confirm.
OK Confirm
or
When you press the talk key, a tone reminds you
that DND is on.
The attendant can bypass DND and reach you.
If your service personnel blocked DND for all
HiPath 4000 stations, the DND menu item does
not appear in the Program/Service menu.
100
 Loading...