

Siemens HiPath 2000, HiPath 3000, HiPath 5000, optiPoint 420 advance, optiPoint self labeling key module Operating Instructions Manual
Page 1

HiPath 2000
HiPath 3000
HiPath 5000
optiPoint 420 advance
optiPoint
self labeling key module
Operating Instructions
Page 2
Before You Begin
Before You Begin
These operating instructions describe the optiPoint 420 advance telephone on your
HiPath 2000 and HiPath 3000 / 5000.
They describe all functions you can use from your telephone. You may find that some functions you wish to use are not available on your telephone. This may be due to one of the
following reasons:
• The function has not been configured for your telephone - address any questions to
your service personnel.
• Your communications platform does not support this function - contact your service
personnel to upgrade your system.
Important Notes
Do not operate the telephone in environments where there is a danger of
explosions.
Use only original Siemens accessories. Using other accessories may cause
a hazard and will invalidate the warranty and the CE mark.
Never open the telephone or a key module. If you encounter any problems,
contact your service personnel.
CE (customer equipment) does not continue to support emergency dialing after loss of
mains power, if battery back up and power fail switchover to emergency analogue phones
is not available.
Never allow the telephone to come into contact with staining or aggressive liquids such as
coffee, tea, juice, or soft drinks. For information on telephone maintenance ! Page 125.
The information provided in this document contains merely general descriptions or characteristics of performance which in case of actual use do not always apply as described or
which may change as a result of further development of the products.
An obligation to provide the respective characteristics shall only exist if expressly agreed
in the terms of contract.
The trademarks used are owned by Siemens AG or their respective owners.
2
Page 3

Marks
Before You Begin
The device conforms to the EU guideline 1999/5/EG, as attested by the CE
mark.
This device has been manufactured in accordance with our certified environmental management system (ISO 14001). This process ensures that energy
consumption and the use of primary raw materials are kept to a minimum,
thus reducing waste production.
All electrical and electronic products should be disposed of separately from
the municipal waste stream via designated collection facilities appointed by
the government or the local authorities.
The correct disposal and separate collection of your old appliance will help
prevent potential negative consequences for the environment and human
health. It is a precondition for reuse and recycling of used electrical and electronic equipment.
For more detailed information about disposal of your old appliance, please
contact your city office, waste disposal service, the shop where you purchased the product or your sales representative.
The statements quoted above are only fully valid for equipment which is installed and sold in the countries of the European Union and is covered by
the directive 2002/96/EC. Countries outside the European Union may have
other regulations regarding the disposal of electrical and electronic equipment.
3
Page 4

Contents
Contents
Before You Begin. . . . . . . . . . . . . . . . . . . . . . . . . . . . . .2
Important Notes . . . . . . . . . . . . . . . . . . . . . . . . . . . . . . . . . . . . . . . . . . . 2
Marks . . . . . . . . . . . . . . . . . . . . . . . . . . . . . . . . . . . . . . . . . . . . . . . . . . . 3
Basic operating instructions . . . . . . . . . . . . . . . . . . . .9
optiPoint 420 advance and
optiPoint self labeling key module control panel . . . . . . . . . . . . . . . . . . 9
How to Use these Operating Instructions. . . . . . . . . . . . . . . . . . . . . . . 10
Displays . . . . . . . . . . . . . . . . . . . . . . . . . . . . . . . . . . . . . . . . . . . . . . 11
Accessing Functions . . . . . . . . . . . . . . . . . . . . . . . . . . . . . . . . . . . . . . . 12
... Interactively . . . . . . . . . . . . . . . . . . . . . . . . . . . . . . . . . . . . . . . . . 12
... Via the Program/Service Menu . . . . . . . . . . . . . . . . . . . . . . . . . . 12
... With Function Keys . . . . . . . . . . . . . . . . . . . . . . . . . . . . . . . . . . . 12
Functions You Can Use . . . . . . . . . . . . . . . . . . . . . . . . . . . . . . . . . . . . . 13
Self Labelling Key Function . . . . . . . . . . . . . . . . . . . . . . . . . . . . . . . 13
Basic and Enhanced Functions . . . . . . . . . . . . . . . . . . . . . . . . . . . . 13
Additional Team and Executive/Secretary Functions. . . . . . . . . . . . 13
Using the Telephone Efficiently. . . . . . . . . . . . . . . . . . . . . . . . . . . . . . . 14
Safety Precautions for IP Telephony . . . . . . . . . . . . . . . . . . . . . . . . . . . 14
Making Calls – Basic Functions . . . . . . . . . . . . . . . .15
Answering Calls. . . . . . . . . . . . . . . . . . . . . . . . . . . . . . . . . . . . . . . . . . . 15
Answering a Call With the Handset. . . . . . . . . . . . . . . . . . . . . . . . . 15
Answering a Call with the Speaker (Speakerphone Mode) . . . . . . . 15
Switching to Speakerphone Mode . . . . . . . . . . . . . . . . . . . . . . . . . . . . 16
Switching to the Handset . . . . . . . . . . . . . . . . . . . . . . . . . . . . . . . . 16
Open Listening in the Room During a Call . . . . . . . . . . . . . . . . . . . . . . 17
Making Calls . . . . . . . . . . . . . . . . . . . . . . . . . . . . . . . . . . . . . . . . . . . . . 18
Off-Hook Dialing . . . . . . . . . . . . . . . . . . . . . . . . . . . . . . . . . . . . . . . 18
On-Hook Dialing . . . . . . . . . . . . . . . . . . . . . . . . . . . . . . . . . . . . . . . . 18
Ending the call . . . . . . . . . . . . . . . . . . . . . . . . . . . . . . . . . . . . . . . . . . . . 18
Redialing a Number . . . . . . . . . . . . . . . . . . . . . . . . . . . . . . . . . . . . . . . . 19
Turning the Microphone On and Off . . . . . . . . . . . . . . . . . . . . . . . . . . . 20
Calling a Second Party (Consultation Hold) . . . . . . . . . . . . . . . . . . . . . . 21
Switching to the Party on Hold (Toggle) . . . . . . . . . . . . . . . . . . . . . 21
Transferring a Call . . . . . . . . . . . . . . . . . . . . . . . . . . . . . . . . . . . . . . 22
Call Forwarding . . . . . . . . . . . . . . . . . . . . . . . . . . . . . . . . . . . . . . . . . . . 23
Using Variable Call Forwarding . . . . . . . . . . . . . . . . . . . . . . . . . . . . 23
Using Call Forwarding No Reply (CFNR) . . . . . . . . . . . . . . . . . . . . . 24
Call Forwarding in the Carrier Network
and Forwarding Multiple Subscriber Numbers (MSN) (Not for U.S.) 25
Call Forwarding in the Event of a Telephone Malfunction . . . . . . . . 26
4
Page 5

Contents
Using Callback . . . . . . . . . . . . . . . . . . . . . . . . . . . . . . . . . . . . . . . . . . . . 27
Storing a Callback. . . . . . . . . . . . . . . . . . . . . . . . . . . . . . . . . . . . . . . 27
Answering a Callback. . . . . . . . . . . . . . . . . . . . . . . . . . . . . . . . . . . . 27
Checking and Canceling a Saved Callback . . . . . . . . . . . . . . . . . . . . 27
Saving Repertory Dialing Numbers on a Key. . . . . . . . . . . . . . . . . . . . . 29
Using Repertory Dialing Keys . . . . . . . . . . . . . . . . . . . . . . . . . . . . . 31
Telephone Settings . . . . . . . . . . . . . . . . . . . . . . . . . . . . . . . . . . . . . . . . 32
Adjusting the Ring Volume . . . . . . . . . . . . . . . . . . . . . . . . . . . . . . . 32
Adjusting the Ring Tone. . . . . . . . . . . . . . . . . . . . . . . . . . . . . . . . . . 32
Adjusting the Attention Ring Volume. . . . . . . . . . . . . . . . . . . . . . . . 32
Adjusting the display contrast . . . . . . . . . . . . . . . . . . . . . . . . . . . . . 33
Adjusting the key label contrast. . . . . . . . . . . . . . . . . . . . . . . . . . . . 33
Adjusting the Speakerphone to the Room Acoustics . . . . . . . . . . . 33
Adjusting the Receiving Volume During a Call. . . . . . . . . . . . . . . . . 34
Adjusting the Display to a Comfortable Reading Angle . . . . . . . . . . 34
Display backlight . . . . . . . . . . . . . . . . . . . . . . . . . . . . . . . . . . . . . . . 34
Selecting the Language of Screen Prompts . . . . . . . . . . . . . . . . . . 34
Making Calls – Convenience Functions . . . . . . . . .35
Answering Calls. . . . . . . . . . . . . . . . . . . . . . . . . . . . . . . . . . . . . . . . . . . 35
Accepting a Specific Call for Your Colleague . . . . . . . . . . . . . . . . . . 35
Rejecting Calls . . . . . . . . . . . . . . . . . . . . . . . . . . . . . . . . . . . . . . . . . 36
Using the Speakerphone . . . . . . . . . . . . . . . . . . . . . . . . . . . . . . . . . 36
Answering a Call With a Headset . . . . . . . . . . . . . . . . . . . . . . . . . . 37
Answering Calls from the
Entrance Telephone and Opening the Door. . . . . . . . . . . . . . . . . . . 38
Accepting a Call From an Answering Machine . . . . . . . . . . . . . . . . 39
Dialing/Making Calls . . . . . . . . . . . . . . . . . . . . . . . . . . . . . . . . . . . . . . . 40
En-Bloc Sending / Correcting Numbers . . . . . . . . . . . . . . . . . . . . . . 40
Using a Caller List . . . . . . . . . . . . . . . . . . . . . . . . . . . . . . . . . . . . . . 41
Speed-dial . . . . . . . . . . . . . . . . . . . . . . . . . . . . . . . . . . . . . . . . . . . . 43
Dialing a Number From the Internal Directory . . . . . . . . . . . . . . . . . 45
Dialing from the Telephone Database (LDAP) . . . . . . . . . . . . . . . . . 47
Using Mailboxes . . . . . . . . . . . . . . . . . . . . . . . . . . . . . . . . . . . . . . . 49
Talking to Your Colleague With a Speaker Call . . . . . . . . . . . . . . . . 49
Talking to Your Colleague with Discreet Calling . . . . . . . . . . . . . . . 50
Automatic Connection Setup (Hotline). . . . . . . . . . . . . . . . . . . . . . . 50
Reserve Trunk . . . . . . . . . . . . . . . . . . . . . . . . . . . . . . . . . . . . . . . . . 50
Assigning a Station Number (Not for U.S.) . . . . . . . . . . . . . . . . . . . 51
Associated Dialing/Dialing Aid . . . . . . . . . . . . . . . . . . . . . . . . . . . . . 51
During a Call . . . . . . . . . . . . . . . . . . . . . . . . . . . . . . . . . . . . . . . . . . . . . 53
Using Call Waiting . . . . . . . . . . . . . . . . . . . . . . . . . . . . . . . . . . . . . . 53
Accepting a Waiting Call (Camp-On) . . . . . . . . . . . . . . . . . . . . . . . . 53
Preventing and Allowing Call Waiting (Automatic Camp-On). . . . . . 54
Turning the Call Waiting Tone On and Off . . . . . . . . . . . . . . . . . . . . 54
Parking a Call . . . . . . . . . . . . . . . . . . . . . . . . . . . . . . . . . . . . . . . . . . 55
5
Page 6

Contents
Placing External Calls on Hold . . . . . . . . . . . . . . . . . . . . . . . . . . . . . 56
Conducting a Conference . . . . . . . . . . . . . . . . . . . . . . . . . . . . . . . . 57
Ending a Conference (Initiator Only) . . . . . . . . . . . . . . . . . . . . . . . . 58
Activating Tone Dialing/DTMF Suffix-Dialing . . . . . . . . . . . . . . . . . . 59
Recording Calls . . . . . . . . . . . . . . . . . . . . . . . . . . . . . . . . . . . . . . . . 60
Transferring a Call after a Speaker Call
(Announcement) in a Group. . . . . . . . . . . . . . . . . . . . . . . . . . . . . . . 61
Trunk Flash . . . . . . . . . . . . . . . . . . . . . . . . . . . . . . . . . . . . . . . . . . . 62
If You Cannot Reach a Destination ... . . . . . . . . . . . . . . . . . . . . . . . . . . 63
Call Waiting (Camp-On) . . . . . . . . . . . . . . . . . . . . . . . . . . . . . . . . . . 63
Busy Override - Joining a Call in Progress . . . . . . . . . . . . . . . . . . . . 63
Using Night Answer . . . . . . . . . . . . . . . . . . . . . . . . . . . . . . . . . . . . . . . 64
Saving Functions, Procedures and Appointments.65
Assigning Functions to Keys . . . . . . . . . . . . . . . . . . . . . . . . . . . . . . . . . 65
Assigning a Procedure (Operating Steps) to a Key . . . . . . . . . . . . . . . . 69
Appointments Function . . . . . . . . . . . . . . . . . . . . . . . . . . . . . . . . . . . . . 71
Saving Appointments. . . . . . . . . . . . . . . . . . . . . . . . . . . . . . . . . . . . 71
Using Timed Reminders . . . . . . . . . . . . . . . . . . . . . . . . . . . . . . . . . 72
Displaying and Assigning Call Charges. . . . . . . . . .73
Displaying Call Charges (Not for U.S.) . . . . . . . . . . . . . . . . . . . . . . . . . . 73
Displaying Call Charges for Another Telephone (Not for U.S.) . . . . . . . 74
Dialing with Call Charge Assignment . . . . . . . . . . . . . . . . . . . . . . . . . . 75
Private Sphere/Security . . . . . . . . . . . . . . . . . . . . . . .76
Turning Ringer Cutoff On and Off . . . . . . . . . . . . . . . . . . . . . . . . . . . . . 76
Turning Do Not Disturb On and Off. . . . . . . . . . . . . . . . . . . . . . . . . . . . 76
Caller ID Suppression . . . . . . . . . . . . . . . . . . . . . . . . . . . . . . . . . . . . . . 77
Monitoring a Room . . . . . . . . . . . . . . . . . . . . . . . . . . . . . . . . . . . . . . . . 78
Trace Call: Identifying Anonymous Callers (Not for U.S.) . . . . . . . . . . . 79
Locking the Telephone to Prevent Unauthorized Use . . . . . . . . . . . . . . 80
Locking Another Telephone to Prevent Unauthorized Use . . . . . . . . . . 81
Saving Your PIN. . . . . . . . . . . . . . . . . . . . . . . . . . . . . . . . . . . . . . . . . . . 82
Using Other Functions. . . . . . . . . . . . . . . . . . . . . . . . .83
Sending a Message . . . . . . . . . . . . . . . . . . . . . . . . . . . . . . . . . . . . . . . . 83
Creating and Sending a Message . . . . . . . . . . . . . . . . . . . . . . . . . . 83
Displaying and Deleting Messages You Have Sent . . . . . . . . . . . . . 84
Answering Messages . . . . . . . . . . . . . . . . . . . . . . . . . . . . . . . . . . . 84
Leaving an Advisory Message . . . . . . . . . . . . . . . . . . . . . . . . . . . . . 85
Deleting Advisory Messages . . . . . . . . . . . . . . . . . . . . . . . . . . . . . . 85
Display Number of Waiting Calls and Overload Indication . . . . . . . . . . 86
6
Page 7

Contents
Using Another Telephone Like Your Own for a Call . . . . . . . . . . . . . . . 86
Using Another Telephone Like your Own for an Extended Period
of Time (Mobility). . . . . . . . . . . . . . . . . . . . . . . . . . . . . . . . . . . . . . . . . . 87
Fax Details and Message on Answering Machine . . . . . . . . . . . . . . . . 88
Resetting Services and Functions
(System-Wide Cancellation for a Telephone). . . . . . . . . . . . . . . . . . . . . 88
Activating Functions for Another Telephone . . . . . . . . . . . . . . . . . . . . . 89
Using System Functions from the Outside
(DISA: Direct Inward System Access) . . . . . . . . . . . . . . . . . . . . . . . . . . 90
Using functions in ISDN via code dialing (keypad dialing) . . . . . . . . . . . 92
Controlling Connected Computers or Other Programs
and Telephone Data Service
(HiPath 3500/3550/3700/3750/3800 Only). . . . . . . . . . . . . . . . . . . . . . . 93
Communicating with PC Applications over a CSTA Interface . . . . . . . . 94
Controlling Relays (not for HiPath 2000) . . . . . . . . . . . . . . . . . . . . . . . . 95
Sensors (HiPath 3300/3350/3500/3550 Only) . . . . . . . . . . . . . . . . . . . . 95
Radio Paging (Not for U.S.) . . . . . . . . . . . . . . . . . . . . . . . . . . . . . . . . . . 96
Using Other Team Functions. . . . . . . . . . . . . . . . . . .97
Turning Group Call On and Off . . . . . . . . . . . . . . . . . . . . . . . . . . . . . . . 97
Accepting a Call for Another Member of Your Team . . . . . . . . . . . . . . 99
Activating and Deactivating a Ringing Group. . . . . . . . . . . . . . . . . . . . 100
Uniform Call Distribution (UCD). . . . . . . . . . . . . . . . . . . . . . . . . . . . . . 101
Team and Executive/Secretary
Functions With Trunk Keys . . . . . . . . . . . . . . . . . . .103
Using Trunk Keys. . . . . . . . . . . . . . . . . . . . . . . . . . . . . . . . . . . . . . . . . 103
Answering Calls With Trunk Keys . . . . . . . . . . . . . . . . . . . . . . . . . 104
Making Calls with Trunk Keys . . . . . . . . . . . . . . . . . . . . . . . . . . . . 104
Using a Trunk Key to Place a Call on Hold and Retrieve It Again. . 104
Switching Between Phone Calls on Multiple Trunks . . . . . . . . . . . 105
MULAP Conference Release . . . . . . . . . . . . . . . . . . . . . . . . . . . . . 105
Forwarding Calls on Lines . . . . . . . . . . . . . . . . . . . . . . . . . . . . . . . . . . 106
Using DSS Keys. . . . . . . . . . . . . . . . . . . . . . . . . . . . . . . . . . . . . . . . . . 108
Using DSS Keys to Answer Calls. . . . . . . . . . . . . . . . . . . . . . . . . . 108
Calling a Team Member Directly . . . . . . . . . . . . . . . . . . . . . . . . . . 108
Transferring a Call in Progress. . . . . . . . . . . . . . . . . . . . . . . . . . . . . . . 109
Accepting a Call for Another Team Member . . . . . . . . . . . . . . . . . . . . 109
Joining or Leaving a Group Call
(Not for the Executive Telephone in an Executive/Secretary Team) . . 109
Transferring Calls Directly to the Executive
(Only in an Executive/Secretary Group) . . . . . . . . . . . . . . . . . . . . . . . . 110
7
Page 8

Contents
Testing the Telephone. . . . . . . . . . . . . . . . . . . . . . . .111
Testing the Telephone Functions . . . . . . . . . . . . . . . . . . . . . . . . . . . . 111
Checking the Key Assignment . . . . . . . . . . . . . . . . . . . . . . . . . . . . . . 111
Special Functions in the LAN (PC Network). . . . .112
Leaving a Hunt Group/Group Call . . . . . . . . . . . . . . . . . . . . . . . . . . . . 112
Transferring Call Forwarding . . . . . . . . . . . . . . . . . . . . . . . . . . . . . . . . 113
Using Night Answer . . . . . . . . . . . . . . . . . . . . . . . . . . . . . . . . . . . . . . 114
Activating and Deactivating a Ringing Group. . . . . . . . . . . . . . . . . . . . 115
Controlling Relays (not for HiPath 2000) . . . . . . . . . . . . . . . . . . . . . . . 116
Opening the Door . . . . . . . . . . . . . . . . . . . . . . . . . . . . . . . . . . . . . . . . 117
Different Displays (HiPath 4000 Environment) . . .118
Changing Key Labels. . . . . . . . . . . . . . . . . . . . . . . . .120
Entering Text on the Telephone . . . . . . . . . . . . . . .121
Labeling, Documentation and Accessories . . . . .123
Labeling Key Fields . . . . . . . . . . . . . . . . . . . . . . . . . . . . . . . . . . . . . . . 123
Attaching a Station Number Label. . . . . . . . . . . . . . . . . . . . . . . . . . . . 123
Documentation . . . . . . . . . . . . . . . . . . . . . . . . . . . . . . . . . . . . . . . . . . 123
Accessories . . . . . . . . . . . . . . . . . . . . . . . . . . . . . . . . . . . . . . . . . . . . . 124
Fixing Problems . . . . . . . . . . . . . . . . . . . . . . . . . . . . .125
Telephone Maintenance . . . . . . . . . . . . . . . . . . . . . . . . . . . . . . . . . . . 125
Echo Effect . . . . . . . . . . . . . . . . . . . . . . . . . . . . . . . . . . . . . . . . . . . . . 125
Troubleshooting. . . . . . . . . . . . . . . . . . . . . . . . . . . . . . . . . . . . . . . . . . 125
Responding to Error Messages on the Screen . . . . . . . . . . . . . . . . . . 126
Contacts for Resolving Problems . . . . . . . . . . . . . . . . . . . . . . . . . . . . 127
Index. . . . . . . . . . . . . . . . . . . . . . . . . . . . . . . . . . . . . . .128
Overview of Functions/Codes (Alphabetical). . . .133
FCC and Industry Canada Compliance. . . . . . . . . .138
FCC Certification and Requirements . . . . . . . . . . . . . . . . . . . . . . . . . . 138
Equipment Attachment Limitations. . . . . . . . . . . . . . . . . . . . . . . . . . . 140
8
Page 9
Basic operating instructions
Basic operating instructions
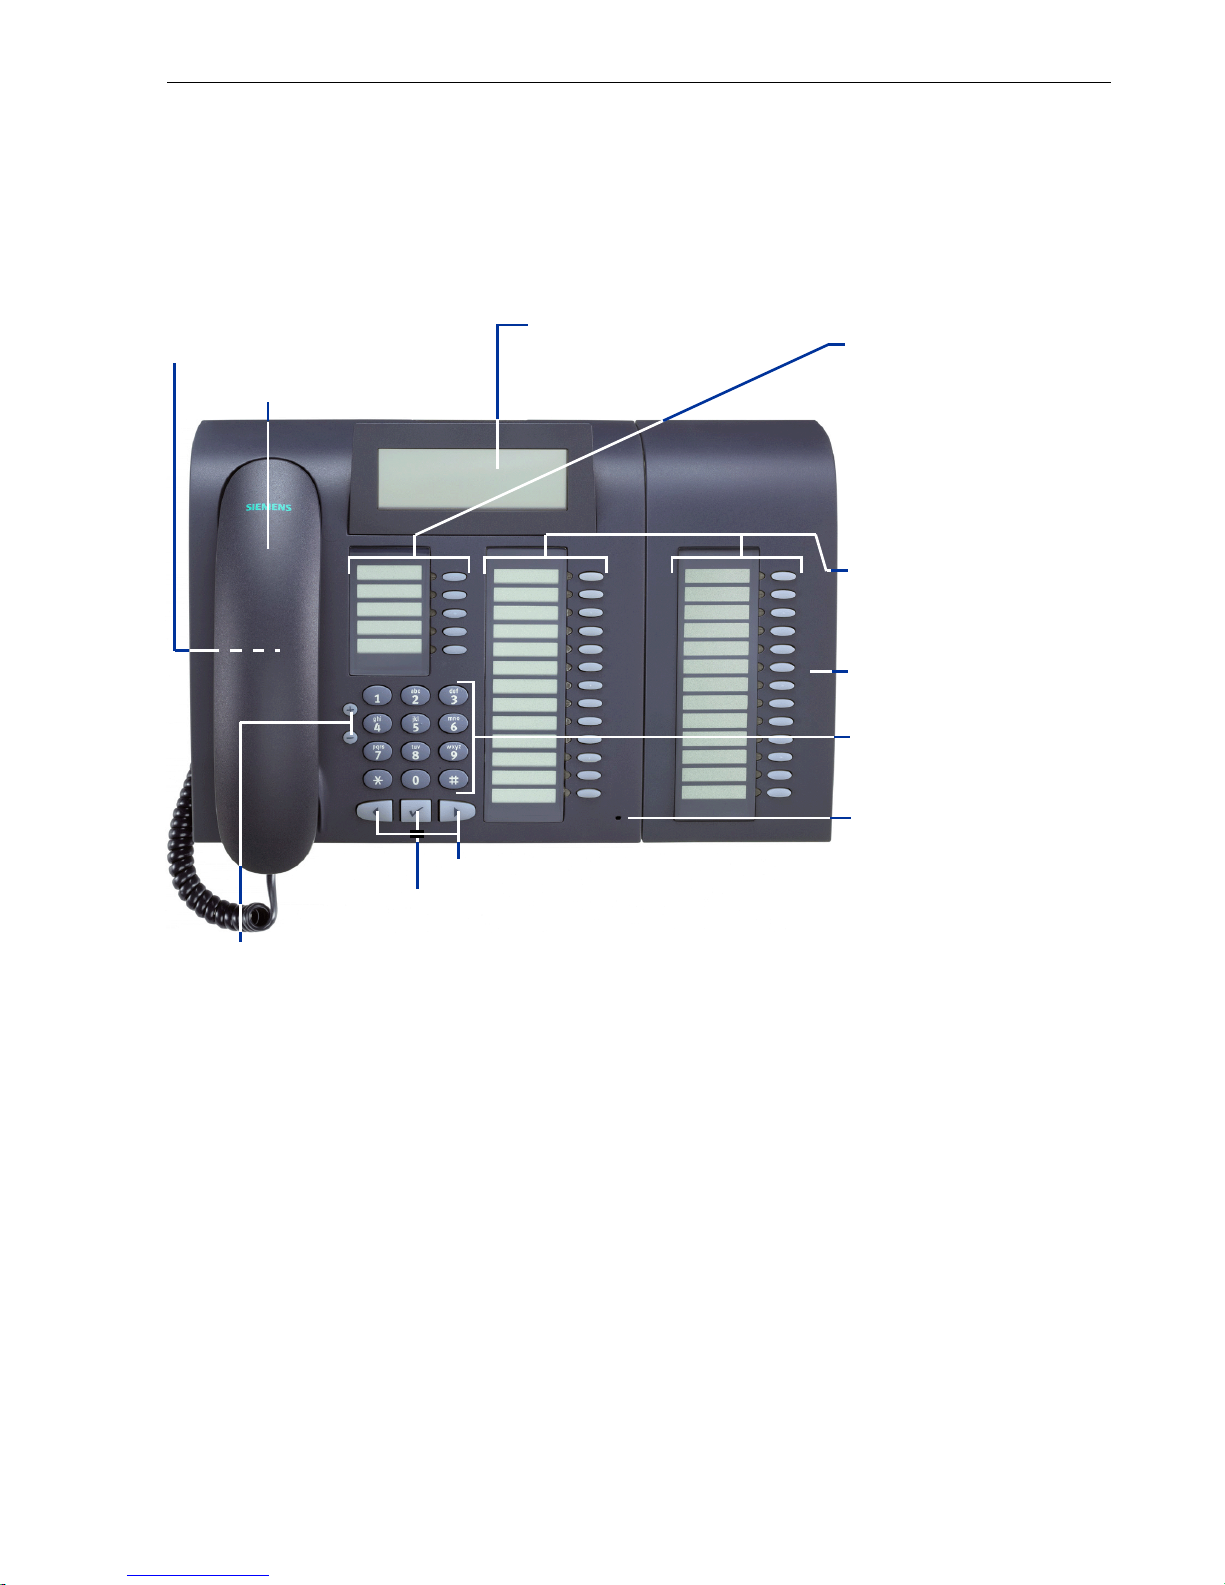
optiPoint 420 advance and
optiPoint self labeling key module control panel
Speaker for open listening
and ring tones
Handset
Key for confirming a function
Backlight graphics
display, 4 lines with
24 chars
Keys for scrolling to functions
Key field –
fixed function keys
Program/Service
Redial
Mailbox
Mute or Internal
Speaker
Key field
freely programmable
keys
optiPoint self labeling
key module
Keypad
Microphone
for speakerphone mode
2
2
–
1
1
:
2
Keys for telephone settings
[1] With automatic key labeling
[2] Cannot be changed on optiPoint 420 advance
9
Page 10

Basic operating instructions
Step by Step
How to Use these Operating Instruc-
tions
You will find a graphic representation of the steps in logical sequence in the left column. Below is an explanation of the symbols:
n Lift the handset (off-hook).
t Replace the handset (on-hook).
s Conduct a call.
o Enter a telephone number or code.
dd Enter the code.
u or v Press volume controls on the telephone.
Program/Service
Speaker
Start conference?
Display contrast?
> : Search for an option.
Press the key.
Press the illuminated key.
Press the flashing key.
: The option appears on the screen.
Press the
Press the
until the option appears on the screen.
Then press the
: key to confirm your selection.
< > keys,
:
key to confirm your selection
.
10
Page 11
Step by Step
Basic operating instructions
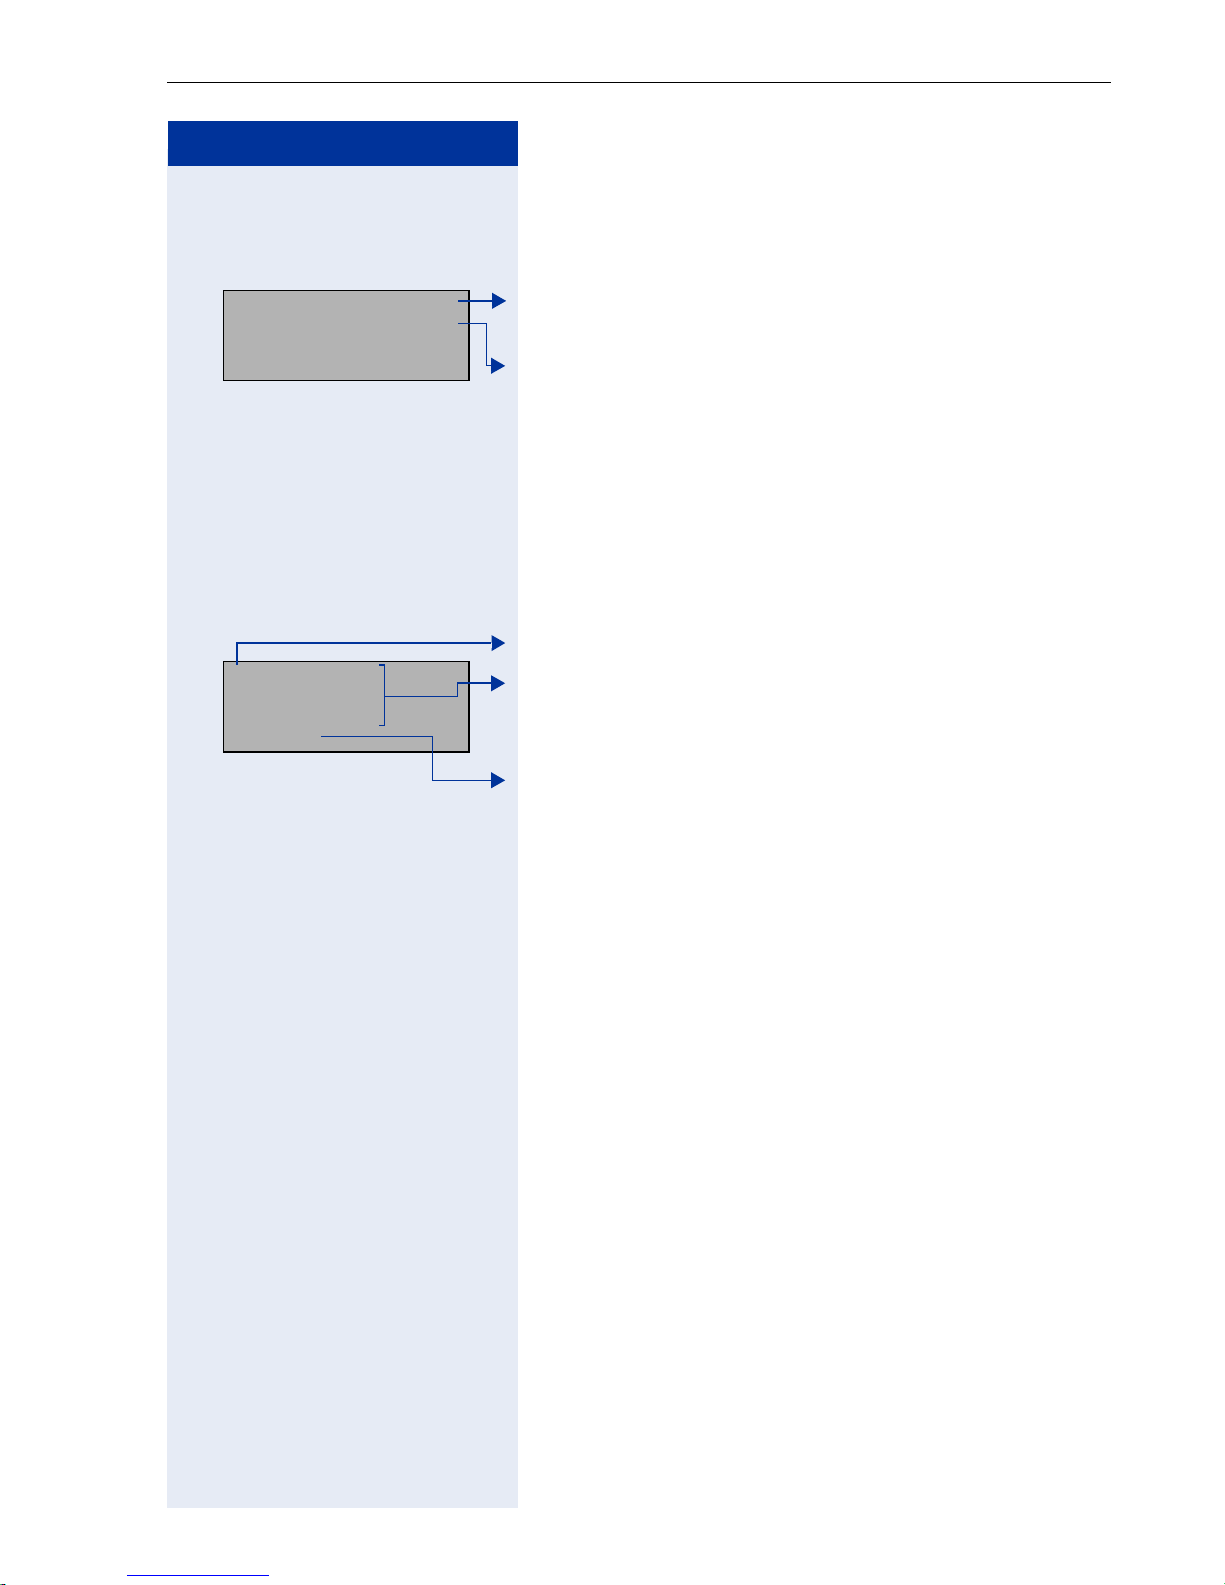
Displays
Two-line display
1
12:47 FR 9 JUL 04
2
Directory? >
3
4
1
" Brink Sandra
2
Daum Johann
3
Meier Georg
4
Call? >
Line 1 displays situation-specific prompts or confirmation messages.
Line 2 displays functions that you can select by pressing
:. The symbol “>” on the right of this line indicates
that additional options are available; you can scroll to
these using
List display
When list display mode is active, entries are displayed
in the form of a multi-line list. The selected entry is indicated by a square (cursor) at the start of the line.
Cursor indicating the selected entry.
Lines 1 to 3 contain up to three list entries. Use
v
to scroll through the entire list.
Line 4 displays functions that you can operate by press-
ing < > and : (see above).
The following functions are displayed in lists:
• Caller list ! Page 41
(list of unanswered calls)
• Call pickup ! Page 99
(list of users to be picked up)
• Internal directory ! Page 45
(list of internal station numbers and system speeddialing numbers)
• Conference ! Page 57
(list of conference participants)
• LDAP telephone database ! Page 48
(list of LDAP search results)
• Connection costs ! Page 73
(list of toll connections)
< >.
u
and
11
Page 12
Basic operating instructions
Step by Step
Accessing Functions
For information on displays and how to use lists
displayed ! Page 11.
...
Interactively
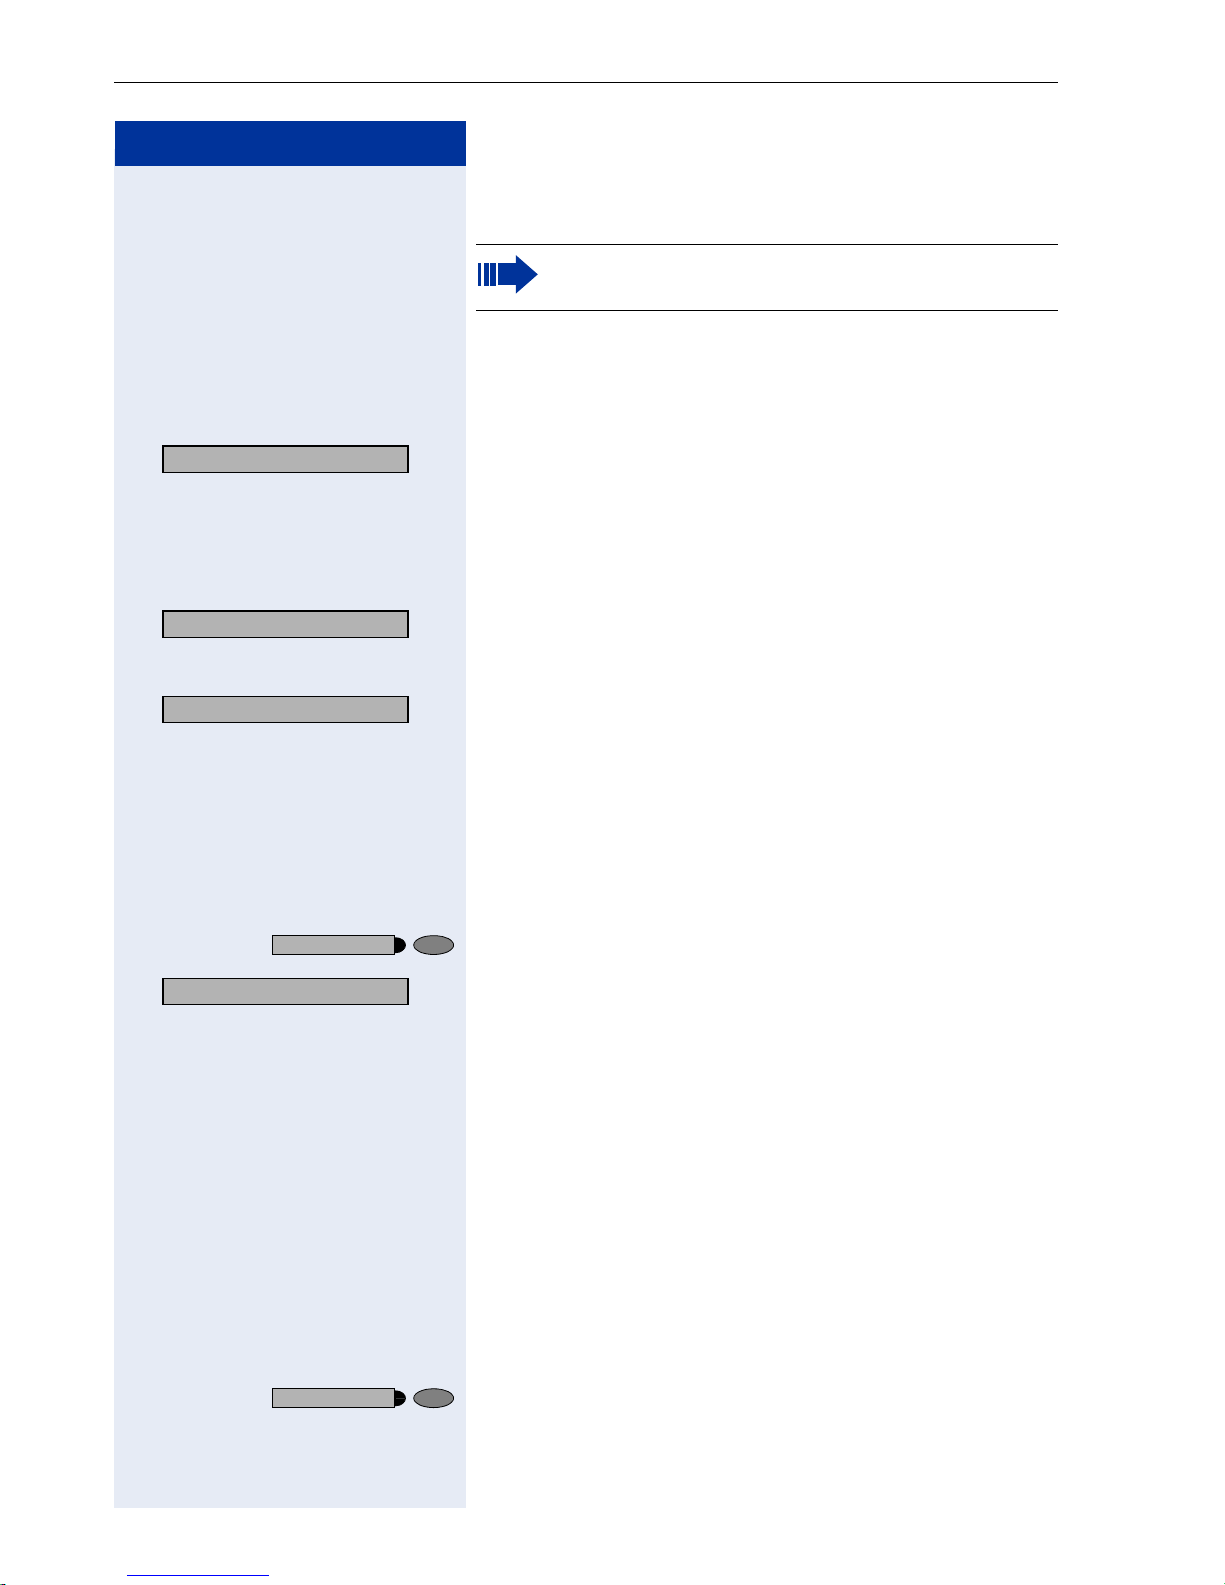
You can select some functions while the telephone is
idle, for example:
Forwarding on
> : Use < > to scroll to a function and press : to
execute it.
You can select other functions directly depending on
the situation. Example: you call a number, but the line
is busy:
Callback
Send message
> : Use < > to scroll to a function and press : to
Program/Service
#0=Reset services?
> : Use < > to scroll to a function and press : to
: Press : to confirm.
or
execute it.
...
Via the Program/Service Menu
First press the "Program/Service" key. You then see a list
of selection options, such as: "#0=Reset services"
! Page 88.
Press the key.
execute it.
or
rd Enter the code directly.
The Quick-Reference Operating Instructions ("Overview
of Functions/Codes (Alphabetical)" ! Page 133) contain
a list of codes. However, they are also displayed on
screen along with the corresponding function.
12
...
With Function Keys
If you saved a function on a key ! Page 65, you can ac-
cess it directly as follows:
Press the Mute key to execute the function.
Page 13

Step by Step
Basic operating instructions
Functions You Can Use
Self Labelling Key Function
Thanks to the Self Labelling Key function, you do not
need to label your telephone's programmable function
keys manually. Depending on how they are programmed, your HiPath automatically assigns a standard
label to your function keys.
However, if you wish, you can also define your own text
labels for the function keys rather than using the standard labels ! Page 120.
Basic and Enhanced Functions
You can use all basic and enhanced communications
platform functions that appear interactively on the
screen, in the Program/Service menu, and when you
press function keys.
Additional Team and Executive/Secretary
Functions
! Page 103f.
To help working and project groups work together more
efficiently, the service personnel can configure a variety
of team functions, depending on your preferences
when working in the team. You can use these team
functions in addition to the basic and enhanced functions.
In addition to call pickup, hunting groups (group call),
and call distribution groups, you can also set up teams
with multiple lines per telephone.
You can tell if a telephone has trunk keys if your station
number and the numbers of your colleagues are programmed on trunk keys. You can access all lines and
can also conduct different calls simultaneously on multiple lines.
Another team function category includes the executive/
secretary
functions, which are configured by the service personnel. You can use executive and secretary functions in
addition to the basic and enhanced functions as well as
other team functions.
13
Page 14

Basic operating instructions
Step by Step
An executive/secretary telephone has DSS keys for the
executive or secretary, trunk keys for the executive and
secretary, as well as ring transfer keys.
Using the Telephone Efficiently
• You probably have certain colleagues or external parties with whom you talk on the phone especially frequently. To dial these numbers faster and more conveniently, you can save them on keys
(Saving station numbers for repertory dialing on
keys ! Page 29).
• All too often you reach a busy line when dialing a
number. Amid the confusion of your working day,
it’s easy to forget to try the number again later on.
To avoid this, make it a habit to use the "Callback"
! Page 27 function.
Safety Precautions for IP Telephony
Different methods can be implemented to protect an IP
environment from external attacks (denial of service attacks, viruses, etc.) and call monitoring.
There are no special procedures for operating this device. Please contact your service personnel to find out
more about IP telephony security.
14
Page 15

Step by Step
Making Calls – Basic Functions
Making Calls – Basic Functions
Answering Calls
Special default ring signaling is set for your telephone:
• When you receive an internal call, your telephone
rings once every four seconds (single-tone sequence).
• When you receive an external call, your telephone
rings twice in rapid succession every four seconds
(dual-tone sequence).
• When you receive a call from the entrance telephone,
your telephone rings three times in rapid succession
every four seconds (triple-tone sequence).
• If a call is waiting, you hear a short tone (beep) every
six seconds.
Your service personnel can adjust the ring cadence for external and internal calls for you. In
other words, different ring cadences can be set
for different internal callers.
The number or the name of the caller appears on the
display.
Answering a Call With the Handset
The telephone rings. The caller appears on the screen.
n Lift the handset.
u or v Raise or lower the volume. Keep pressing the key until
the desired volume is set.
Answering a Call with the Speaker
(Speakerphone Mode)
Speaker
u or v Raise or lower the volume. Keep pressing the key until
The telephone rings. The caller appears on the screen.
Press the key. The LED lights up.
Speakerphone mode.
the desired volume is set.
15
Page 16

Making Calls – Basic Functions
Step by Step
Ending the call:
Speaker
Speaker
Release
Press the key. The LED goes out.
or
Press the key.
Notes on speakerphone mode:
• Tell the other party that you are using speakerphone
mode.
• The speakerphone works bests at a low receiving
volume.
• The ideal distance between the user and the telephone set in speakerphone mode is about 50 cm
(approx. 20 inches).
Switching to Speakerphone Mode
Precondition: You are conducting a call with the handset.
and
t Hold down the key and replace the handset.
(in the U.S.: press the key once and replace the handset). Then release the key and continue the call.
Switching to the Handset
Precondition: You are engaged in a call in speakerphone mode.
n and s Lift the handset. Continue the call.
16
Page 17

Step by Step
Making Calls – Basic Functions
Open Listening in the Room During a
Call
You can let other people in the room join in on the call.
Let the other party know that you have turned on the
speaker.
Precondition: You are conducting a call with the handset.
Activating ring transfer:
Speaker
Speaker
Press the key. The LED lights up.
Deactivating this function:
Press the key. The LED goes out.
17
Page 18

Making Calls – Basic Functions
Step by Step
Making Calls
Off-Hook Dialing
n Lift the handset.
o Internal calls: Enter the station number.
External calls: Enter the external code and the station
number.
The called party does not answer or is busy:
t Replace the handset.
On-Hook Dialing
Speaker
o Internal calls: Enter the station number.
External calls: Enter the external code and the station
number.
The other party answers with speaker:
n Lift the handset.
or On-hook: Use speakerphone mode .
The called party does not answer or is busy:
Press the key. The LED goes out.
Your system may also be programmed so that
you have to press the Internal key before you dial
an internal number.
To call an external party, you have to enter an external code before dialing the party’s telephone
number (Prime Line is not active; contact your
service personnel).
Release
18
Ending the call
t Replace the handset.
or
Press the key.
Page 19
Step by Step
Making Calls – Basic Functions
Redialing a Number
The last three external telephone numbers dialed are
stored automatically.
You can redial them simply by pressing a key.
The station number appears on your screen for two seconds and is then dialed.
Redial
Press the key once to dial the number last dialed.
Press the key twice to dial the next to the last number
dialed.
Press the key three times to dial the third-to-the-last
number dialed.
Displaying and dialing saved station numbers
Next?
Redial
: Press the "OK" dialog key within two seconds to confirm
Press the key.
your choice.
Next?
: The next stored number is displayed. Press the "OK" di-
alog key to confirm four selection.
Call?
> : Select and confirm.
If this feature is configured (contact your service
personnel), account codes entered are also
saved ! Page 75.
19
Page 20

Making Calls – Basic Functions
Step by Step
Turning the Microphone On and Off
To prevent the other party from listening in while you
consult with someone in your office, you can temporarily switch off the handset microphone or the handsfree
microphone. You can also switch on the handsfree microphone to answer an announcement via the telephone speaker (speaker call, ! Page 36).
Precondition: You are conducting a call. The microphone is switched on.
Mute
Press the key. The LED lights up.
or
Mute
Press the illuminated key. The LED goes out.
or
Mute on?
> : Select and confirm.
or
Mute off?
> :
or
Program/Service
Press the key. The LED lights up.
qif or rif Enter the code for "on" or "off".
20
Page 21
Step by Step
Making Calls – Basic Functions
Calling a Second Party
(Consultation Hold)
You can call a second party while engaged in a call. The
first party is placed on hold.
US: Consultation?
UK: Enquiry?
:
:
Confirm.
o Call the second party.
Return to the first party:
Return to held call?
Quit and return?
Program/Service
: Confirm.
or
:
or
qd Press the key. The LED lights up. Enter the code. The
LED goes out.
Switching to the Party on Hold (Toggle)
Toggle/Connect?
> : Select and confirm.
or
Program/Service
qf Press the key. The LED lights up. Enter the code. The
LED goes out.
Combine the calling parties into a three-party conference
Conference?
> : Select and confirm.
Program/Service
Transfer?
> : Select and confirm.
or
qg Press the key. The LED lights up. Enter the code. The
LED goes out.
Connecting the other parties to each other
21
Page 22

Making Calls – Basic Functions
Step by Step
Transferring a Call
If the person you are speaking to wants to talk to
another colleague of yours, you can transfer the call that
colleague.
US: Consultation?
UK: Enquiry?
:
:
Confirm.
o Enter the number of the party to which you want to
transfer the call.
s Announce the call, if necessary.
t Replace the handset.
or
Transfer?
> : Select and confirm
1
.
22
[1] ”Different Displays (HiPath 4000 Environment)” ! Page 118)
Page 23
Step by Step
Call Forwarding
Using Variable Call Forwarding
You can immediately forward internal or external calls to
different internal or external telephones (destinations).
(External destinations require special configuration in
the system.)
Special features must be taken into consideration
if your telephone operates with HiPath 5000 (system networking via PC network) ! Page 113!
Forwarding on?
> : Select and confirm.
or
Making Calls – Basic Functions
qe Enter the code.
1=all calls?
2=external calls only?
> :
3=internal calls only?
> :
: Select and confirm.
or
or
or
e or f or g Enter the code.
o Enter the number of the telephone that is ringing.
US: Save?
UK: Save entry?
Forwarding off?
> : Select and confirm.
:
:
or
Confirm.
Deactivating call forwarding:
re Enter the code.
When call forwarding is active, a special dial tone
sounds when you lift the handset.
If DID DTMF is active (contact your service personnel), you can also forward calls to this destination. Destinations: fax = 870, DID = 871,
fax DID = 872.
If you are a call forwarding destination, your display will show the station number or the name of
the originator on the upper line and that of the
caller on the lower line.
23
Page 24
Making Calls – Basic Functions
Step by Step
Using Call Forwarding No Reply (CFNR)
Calls that are not answered after three rings (=default,
can be adjusted by service personnel) or that are received while another call is ongoing can be automatically forwarded to a specified telephone.
Program/Service
More features?
> : Select and confirm.
*495=CFNR on?
> : Select and confirm.
Press the key. The LED lights up.
or
qhmi Enter the code.
o Enter the destination number.
• Enter the internal station number for internal destinations
• Enter the external code and the external station
number for external destinations
Save entry?
: Confirm.
Deactivating Call Forwarding No Reply:
Program/Service
More features?
> : Select and confirm.
#495=CFNR off?
> : Select and confirm.
Press the key. The LED lights up.
or
rhmi Enter the code.
Delete?
24
: Confirm.
If CFNR is enabled, the following briefly appears
on the display when you replace the handset:
„CFNR to: ...“.
Page 25

Step by Step
Call Forwarding in the Carrier Network
and Forwarding Multiple Subscriber Num-
bers (MSN) (Not for U.S.)
If this function has been configured (contact your service personnel), you can forward calls to your assigned
multiple subscriber number (MSN) (DID number) directly within the carrier network.
For example, you can forward your phone line to your
home phone after business hours.
Trunk FWD on?
> : Select and confirm.
or
qjh Enter the code.
Making Calls – Basic Functions
1=immediate?
2=on no answer?
> :
3= on busy?
> :
: Select and confirm the line type you wish to use.
or
or
or
e or f or g Enter the code.
o Enter your DID number.
o Enter the destination number (without the external
code).
Save?
Forwarding - trunk off
> : Select and confirm.
: Confirm.
Deactivating call forwarding:
or
rjh Enter the code.
e or f or g Enter the activated call forwarding type.
: Confirm the displayed call forwarding type.
or
o Enter your DID number.
25
Page 26
Making Calls – Basic Functions
Step by Step
Call Forwarding in the Event of a Telephone
Malfunction
If this feature is configured (ask the service personnel),
you can define an internal or external call forwarding
destination that becomes effective when your telephone is not working.
Program/Service
*9411=CFSS on
> : Select and confirm.
Press the key. The LED lights up.
or
qmhee Enter the code.
o Enter the station number of the destination.
US: Save entry?
UK: Save?
Program/Service
#9411=CFSS off
> : Select and confirm.
: Confirm.
:
Deactivating call forwarding/deleting a destination:
Press the key. The LED lights up.
or
rmhee Enter the code.
Delete?
Delete?
> : Select and confirm to deactivate call forwarding without
Program/Service
qmhee Enter the code.
US: Change?
> :
UK: Change entry?
> :
US: Save entry?
UK: Save?
26
:
: Confirm to deactivate call forwarding and delete the for-
warding destination.
or
deleting the forwarding destination.
Changing the call forwarding destination (if forwarding is active):
Press the key. The LED lights up.
Confirm.
o Change the station number of the destination.
:
Confirm.
Page 27

Step by Step
Making Calls – Basic Functions
Using Callback
If a user is busy or is not answering, you can store an
automatic callback. This feature saves you from having
to make repeated attempts to reach the user.
You receive a callback,
• When the other party is no longer busy
• When the user who did not answer has conducted
another call.
Storing a Callback
Precondition: You have reached a busy line or no one
answers.
US: Callback
UK: Set Callback
:
:
or
Confirm.
qil Enter the code.
Answering a Callback
Precondition: A callback was saved. Your telephone
rings. "Callback: ..." appears on the display.
n Lift the handset.
or
Speaker
Press the key. The LED lights up.
You hear a ring tone.
Checking and Canceling a Saved Callback
View callbacks?
> : Select and confirm
or
1
.
ril Enter the code.
US: Next callback?
> :
UK: Display next?
> :
Select the displayed function and press the "OK" dialog
key to display additional entries.
[1] ”Different Displays (HiPath 4000 Environment)” ! Page 118)
27
Page 28

Making Calls – Basic Functions
Step by Step
Deleting a displayed entry:
Delete?
US: Exit?
> :
UK: End?
> :
: Press the "OK" dialog key to confirm your selection.
or
Program/Service
or
Speaker
Ending callback display:
Select and confirm.
Press the key. The LED goes out.
Press the key. The LED goes out.
28
Page 29

Step by Step
Making Calls – Basic Functions
Saving Repertory Dial i ng Numbers on
a Key
You can save frequently-dialed station numbers on programmable keys that are unassigned by default.
External and internal station numbers, as well as functions/procedures (comprising several operating steps)
can be stored on these keys ! Page 65.
In addition, the keys can be programmed on two separate levels if you have configured a key as the "switching" key (Shift key ! Page 65).
Depending on the key assignment and programming of
your HiPath system ("Extended Key Functionality"; refer
to relevant service personnel), dual-level key assignment permits several assignment combinations.
Corresponding displays guide you through this process
! Page 126.
If you save internal station numbers, you can choose
whether to save an LED display for the key (=Save with
LED) or not (=Save without LED).
The LED display indicates the various states
(! Page 67, ! Page 108).
Program/Service
> : Select and confirm.
91=Prog. feature key?
*
Press the key. The LED lights up.
or
qme Enter the code.
Program/Service
If applicable
+=Next layer?
> : Make a selection and confirm to save the station num-
or
US: Change key?
UK: Change feature?
Repdial key?
:
:
: Confirm.
Press the key. If the key is already in use, its assignment
appears also on the screen.
ber on the second level.
u
Confirm.
o Enter the station number.
29
Page 30
Making Calls – Basic Functions
Step by Step
If you make a mistake:
Previous?
> : Select and confirm. This deletes all digits entered.
The system telephone automatically recognizes if you
want to save an internal or an external station number.
The options "Save without LED" or "Save with LED" are
only available for internal station numbers.
Save with LED?
: Confirm.
or
Save without LED?
> : Select and confirm to save the repdial key without LED
display.
If applicable
Key label?
> : Select and confirm to update automatic key labeling.
For more information, see ! Page 120.
US: Exit?
UK: End?
:
:
Confirm.
or
US: Another key?
> :
UK: Program another key?
> :
Select and confirm.
or
US: Clear key?
> :
UK: Delete feature?
:
>
Select and confirm.
Simply press the key to dial a stored telephone
number ! Page 31.
You can do this while a call is in progress.
30
For information on display messages when saving station numbers ! Page 126.
Page 31

Step by Step
Making Calls – Basic Functions
Using Repertory Dialing Keys
Precondition: You have saved a station number on a
repertory dialing key ! Page 29.
Press the key on which the number is saved.
If the station number is located on the second level, first
press "Shift".
You can also press the repertory dial key during a
call. This automatically sets up a consultation
! Page 21.
31
Page 32

Making Calls – Basic Functions
Step by Step
u or v Press these keys while the phone is idle.
Telephone Settings
Adjusting the Ring Volume
US: Ring volume?
UK: Ringer volume?
US: Ring tone?
UK: Ringer tone?
:
:
Confirm.
u or v To raise or lower the volume: Keep pressing the keys
until the desired volume is set.
: Save.
Adjusting the Ring Tone
u or v Press these keys while the phone is idle.
:
:
Select and confirm.
u or v To adjust the ring tone: Keep pressing the keys until the
desired tone is set.
: Save.
Adjusting the Attention Ring Volume
u or v Press one of these keys while the phone is idle.
US: Attention Ring Vol?
> :
UK: Attention Ring Volume?
> :
u or v To raise or lower the volume: Keep pressing the keys
32
If you belong to a team that uses trunk keys, the telephone can alert you to other calls in the team even
when you are engaged in another call ! Page 109. You
hear the attention ring.
Select and confirm.
until the desired volume is set.
: Save.
Page 33

Step by Step
Adjusting the display contrast
The display has four contrast levels that you can set according to your light conditions.
u or v Press one of the keys while the phone is idle.
Display contrast?
> : Select and confirm.
u or v Change the display contrast (1 ... 4). Press the key re-
peatedly until the desired level is obtained.
: Save.
Adjusting the key label contrast
The key labels have four contrast levels that you can set
according to your light conditions.
Making Calls – Basic Functions
u or v Press one of the keys while the phone is idle.
Key label contrast?
> : Select and confirm.
u or v Change the display contrast (1 ... 4). Press the key re-
peatedly until the desired level is obtained.
: Save.
Adjusting the Speakerphone to the Room
Acoustics
To help the other party understand you clearly while you
are talking into the microphone, you can adjust the telephone to the acoustics in your environment: "Quiet
room", "Normal room" and "Noisy room".
u or v Press one of these keys while the phone is idle.
Speakerphone mode?
> : Select and confirm.
u or v To set the room type: Keep pressing these keys until
the setting you want appears on the screen.
: Save.
33
Page 34

Making Calls – Basic Functions
Step by Step
u or v To raise or lower the volume: Keep pressing the keys
u or v simultaneously Save.
Adjusting the Receiving Volume During a Call
You are engaged in a call.
until the desired volume is set.
Adjusting the Display to a Comfortable Read-
ing Angle
You can swivel the display unit. Adjust the display unit
so that you can clearly read the screen.
Display backlight
When operating optiPoint 420 advance, e.g. when dialling a call number, a display backlight switches on automatically. The backlight switches off automatically a few
seconds after the last action is completed.
Selecting the Language of Screen Prompts
Program/Service
More features?
> : Confirm.
> : Confirm.
48= Select language?
*
qhl Enter the code.
15=Spanish?
> : Select the language you wish to use (such as "Spanish")
Press the key. The LED lights up.
or
and press the "OK" dialog key to confirm.
34
Page 35
Step by Step
Making Calls – Convenience Functions
Making Calls – Convenience
Functions
Answering Calls
Accepting a Specific Call for Your Colleague
You hear another telephone ring.
Program/Service
> : Select and confirm
59=Pickup - directed?
*
Press the key. The LED lights up.
or
qim Enter the code.
The called station appears on the screen.
If applicable If several parties are called, a list of the called parties
will be displayed (list display ! Page 11).
u or v Press these keys to select another party.
Accept call?
: Confirm.
or
o If you know the number of the telephone that is ringing,
enter it directly.
or
1
.
Press the flashing key.
Accepting calls in a team ! Page 99.
[1] ”Different Displays (HiPath 4000 Environment)” ! Page 118
35
Page 36
Making Calls – Convenience Functions
Step by Step
Rejecting Calls
You can reject calls which you do not wish to take. The
call is then signaled at another definable telephone
(contact your service personnel).
The telephone rings. The caller is displayed.
Mute off?
Release
Mute
Press the key.
If a call cannot be rejected, your telephone will continue to
ring. The message "currently not possible" (UK) or "Feature
not available" (US) is displayed (e.g in the case of recalls).
Using the Speakerphone
A colleague addresses you directly over the speaker
with a speaker call. You hear a tone before the announcement. The other party’s name or station number
appears on the screen.
You can conduct the call with the handset or in speakerphone mode.
n Lift the handset and answer the call.
or
: Press the "OK" key to confirm your selection and answer
the call.
or
Press the key and answer the call.
HF answerback on?
> : Select and confirm.
HF answerback off?
> :
qmj or rmj Enter the code for "on" or "off".
36
If handsfree answerback is enabled (see below),
you do not need to switch on the microphone you can answer directly. You can answer immediately in speakerphone mode.
If handsfree answerback is disabled (default setting), follow the procedure described above.
Placing a speaker call to a colleague ! Page 49.
Enabling and Disabling Handsfree Answerback
or
or
Page 37

Step by Step
Making Calls – Convenience Functions
Answering a Call With a Headset
Precondition: Your telephone rings.
Answer?
Release
: Confirm.
or If the "Headset" key has been configured ! Page 65:
Press the key. The LED lights up.
Ending the call:
Press the key.
or If the "Headset" key has been configured ! Page 65:
Press the key. The LED goes out.
37
Page 38

Making Calls – Convenience Functions
Step by Step
n Lift the handset within thirty seconds. You are connect-
Answering Calls from the
Entrance Telephone and Opening the Door
If an entrance telephone has been programmed, you
can use your telephone to speak to someone at the
entrance telephone and to activate a door opener.
If you have the proper authorization (contact your service personnel), you can activate the door opener, en-
abling visitors to open the door themselves by entering
a 5-digit code (using a DTMF transmitter or installed
keypad).
Speaking to visitors via the entrance telephone:
Precondition: Your telephone rings.
ed to the entrance telephone immediately.
or
n Lift the handset after more than thirty seconds.
o Dial the entrance telephone number.
Opening the door from your telephone during a call
from the entrance telephone:
Open door?
Program/Service
> : Select and confirm.
61=Open door?
*
: Confirm.
Opening the door from your telephone without
calling the entrance telephone:
Press the key. The LED lights up.
or
qje Enter the code.
o Dial the entrance telephone number.
38
Special features must be taken into consideration if your telephone operates with
HiPath 5000 (system networking via PC network) ! Page 117!
Page 39

Step by Step
Making Calls – Convenience Functions
Opening the door with a code (at the door):
o After ringing the bell, enter the five-digit code (using the
keypad or a DTMF transmitter). Depending on how the
door opener has been programmed, a doorbell call signal may or may not be forwarded.
Activating the door opener:
Program/Service
> : Select and confirm.
89=Door opener on?
*
Press the key. The LED lights up.
or
qlm Enter the code.
o Dial the entrance telephone number.
o Enter the five-digit code. Default code = "00000".
or
3=change password?
> : Select the displayed function and press the "OK" dialog
key to change the code.
1=enable with ring?
> : Select and confirm.
or
2=enable w/o ring?
> : You can also open the door without a doorbell ring.
Deactivating the door opener:
Program/Service
Press the key. The LED lights up.
#89=Door opener off?
> : Select and confirm.
rlm Enter the code.
or
Accepting a Call From an Answering
Machine
You can accept a call from any answering machine if the
machine is connected to your system (contact your service personnel) and you have programmed the answering machine number on a key ! Page 65.
The LED lights up. Press the key.
39
Page 40
Making Calls – Convenience Functions
Step by Step
o Internal: enter station number.
n Lift the handset.
or
Dial?
: Confirm.
Dialing/Making Calls
En-Bloc Sending / Correcting Numbers
If this feature is configured (contact your service personnel), a connection is not attempted immediately
when a station number is entered. This means that you
can correct the number if necessary.
The station number is only dialed at your specific request.
External: enter external code and station number.
Dialing entered/displayed numbers:
Correcting numbers entered:
Delete number?
: Select and confirm.
The last digit entered in each case is deleted.
o Enter the required digit(s).
Canceling en-bloc sending:
End?
> : Select and confirm.
or
Speaker
Release
Press the key. The LED goes out.
or
Press the key.
A station number can only be corrected as it is
being entered. Station numbers stored for number redial, for example, cannot be corrected.
40
Page 41

Step by Step
Making Calls – Convenience Functions
Using a Caller List
If you are unable to accept an external or internal call,
the call attempt is stored in the caller list.
You can store answered calls either manually (both internal and external calls) or automatically (external calls
only; contact your service personnel for details).
Your telephone stores up to ten calls in chronological order. Each call is assigned a time stamp. The most recent
entry not yet answered in the list is displayed first. Multiple calls from the same caller do not automatically
generate new entries in the caller list. Instead, only the
most recent time stamp for this caller is updated and its
number incremented.
Retrieving the Caller List
Precondition: Service personnel has set up a caller list
for your telephone.
> : Select and confirm
Caller list?
or
rlf Enter the code.
The last three calls will be listed and displayed (list display ! Page 11).
u or v Press these keys to select another entry.
Ending Retrieval
US: Exit?
> :
UK: End?
:
>
Program/Service
Speaker
Select and confirm.
or
Press the key. The LED goes out.
or
Press the key. The LED goes out.
1
.
[1] ”Different Displays (HiPath 4000 Environment)” ! Page 118
41
Page 42
Making Calls – Convenience Functions
Step by Step
Displaying the Call Time and Additional Call Information
Precondition: You have retrieved the caller list and the
selected call is displayed (black square at the beginning
of line).
Add'l information?
> : Select and confirm.
Information about caller name, call number and call time
will be displayed.
Dialing a Station Number from the Caller List
Precondition: You have retrieved the caller list and the
selected call is displayed.
Call?
> : Select and confirm.
The caller is automatically deleted from the caller
list when a connection is finally set up.
Removing an Entry from the Caller List
Precondition: You have retrieved the caller list and the
selected call is displayed.
Delete?
> : Confirm.
Saving the Other Party’s Station Number
in the Caller List (Redial)
Precondition: You are engaged in a call or have called
an external party.
Save number?
> : Confirm.
or
Program/Service
qlf Press the key. The LED lights up. Enter the code.
42
Page 43

Step by Step
Making Calls – Convenience Functions
Speed-dial
Using Station and System Speed-Dial Numbers
Precondition: You have stored station speed-dial num-
bers ! Page 43 or your service personnel has stored
system speed-dial numbers.
Program/Service
> : Confirm
7=Use speed-dialing?
*
Press the key. The LED lights up.
or
qk Enter the code.
o Enter a speed-dial number.
0" to *9" = station speed-dialing.
"
*
"000" to "999" = system speed-dialing (contact your service personnel).
If applicable Suffix-Dialing
o If necessary, you can suffix-dial additional digits (for ex-
ample, the user’s extension) at the end of the saved station number.
If this feature is configured, a suffix is automatically dialed (for example, "0" for the exchange) if no entries are
made within 4 or 5 seconds.
Storing Station Speed-Dial Numbers
1
.
Program/Service
> : Select and confirm
92=Change Speed-dial?
*
qmf Enter the code.
US: Change?
UK: Change entry?
You can store the ten numbers which you use the most
and dial them using your own station speed-dial numbers:
Press the key. The LED lights up.
or
o Enter the speed-dial number you wish to use (
9). If the speed-dial number is already in use, the pro-
*
grammed station number appears on the screen.
:
:
Confirm.
0 through *9 ! Page 43.
*
1
.
*
0 to
o First enter the external code and then the external sta-
tion number.
[1] ”Different Displays (HiPath 4000 Environment)” ! Page 118
43
Page 44

Making Calls – Convenience Functions
Step by Step
US: Save?
UK: Save entry?
:
:
Confirm.
or If you make a mistake:
Previous?
> : Select and confirm. This deletes all entered digits.
US: Next?
UK: Next entry?
:
:
Confirm.
or
US: Change?
> :
UK: Change entry?
> :
Select and confirm.
or
Delete?
> : Select and confirm.
or
US: Exit
> :
UK: End
:
>
Select and confirm.
44
Page 45

Step by Step
Making Calls – Convenience Functions
Dialing a Number From the Internal Directory
The internal directory contains all station numbers and
system speed-dial numbers assigned to a name. Contact your service personnel to find out if one was configured for your system.
Precondition: Names have been assigned to the station numbers stored in the system.
n Lift the handset.
or
Speaker
US: Directory?
UK: Phonebook?
1=internal?
Press the key. The LED lights up.
:
:
Confirm.
or
qih Enter the code.
If applicable If several directories have been configured:
: Confirm.
The internal telephone directory list will be displayed
(list display ! Page 11).
u or v Press these keys to select another entry.
or
o Enter the name you want to find, or just the first few let-
ters, using the alphanumeric keypad.
You can use the keypad with the digits as an alphanumeric keypad in this case and enter the names by
pressing the appropriate keys one or more times as
needed.
For example, you can enter the letter "r" by pressing the
"7" three times or the letter "e" by pressing the "3" twice.
The first name with the entered letters is displayed.
Enter the following letters by using the same method.
If no entry exists for the entered letters, you will hear
three short beeps.
To enter a space, press the "0".
Pressing "1" or "#" automatically displays the first entry
in the internal directory.
The "
" key has no function here.
*
45
Page 46

Making Calls – Convenience Functions
Step by Step
If applicable
Delete Character?
> : Select and confirm each letter to be deleted. The last
letter entered is deleted. If all letters are deleted, the
first entry in the directory will be displayed again.
If applicable
Delete Line?
> : Select and confirm. All entered letters are deleted, and
the first entry in the internal directory is displayed again.
The entry you wish to dial appears on the screen.
Call?
> : Select and confirm.
or
Add'l information?
> : Select and confirm.
Information about caller name, call number and/or central speed dial number will be displayed.
46
Page 47

Step by Step
Making Calls – Convenience Functions
Dialing from the Tele phone Database (LDAP)
If configured (ask your service personnel), you can
search for directory data in the LDAP database and dial
the number of any subscriber you find there.
Precondition: The LDAP search feature has been configured in the system.
n Lift the handset.
or
Speaker
US: Directory?
UK: Phonebook?
:
:
Press the key. The LED lights up.
Confirm.
or
qih Enter the code.
If applicable If several directories have been configured:
2=LDAP?
> : Select and confirm.
o Enter the name you wish to search for using the keypad
(max. 16 characters).
You can enter an incomplete name, e.g. "mei" for "Meier".
You can use the keypad with the digits as an alphanumeric keypad in this case and enter the names by
pressing the appropriate keys one or more times as
needed.
For example, you can enter the letter "r" by pressing the
"7" three times or the letter "e" by pressing the "3" twice.
If applicable If configured (ask your service personnel), you can also
If applicable
Delete Character?
> : Select and confirm. The letter entered last is deleted.
search for surname and first name.
To separate surname and first name by a space, enter
"0". You can enter incomplete names, e.g. "mei p" for
"Meier Peter".
In large databases, the results of the search may
be incomplete if too few characters are entered
! Page 48.
47
Page 48
Making Calls – Convenience Functions
Step by Step
Search?
Call?
: Confirm.
The name is searched for. This may take a few seconds.
The result is displayed:
If only one name is found, it is displayed.
: Confirm.
If several names are found (max. 50), the first three
names will be listed and displayed (list display
! Page 11).
u or v Scroll to the next or the previous entry to select another
name from the result list.
Call?
> : Select and confirm.
If no name is found:
If your search does not yield any name corresponding to
your query, you can extend the range of the search, e.g.
by deleting characters.
Change search string?
> : Select and confirm.
For further procedure, see above.
If too many names are found:
If more than the maximum of 50 names are found corresponding to your query, only an incomplete list of results can be displayed.
You can view these results, select any of the names, or
change the search string (e.g. narrow the search by entering more characters).
In this case it is advisable to narrow down the
search so that all corresponding names can be
displayed.
Show results?
> : Confirm, to view the incomplete list.
For further procedure, see above
or Narrow the search down.
Change search string?
> : Select and confirm, in order to change the search string.
For further procedure, see above
48
Page 49
Step by Step
Making Calls – Convenience Functions
Using Mailboxes
If you have programmed the "Mailbox" key ! Page 65,
the associated LED lights up when messages have arrived for you.
If your telephone is connected to a voice mail system
(e.g. Entry Voice Mail), the "Mailbox" key will also light
up to alert you to any messages that have arrived.
Corresponding information is also shown on the display
(e.g. in the case of Entry Voice Mail: "<x> new messages").
Accessing the Mailbox
Mailbox
or
US: View messages?
UK: Display Messages?
US: Message sent?
> :
UK: Text?
> :
:
:
or
US: Call voice mail?
> :
UK: Call Voice Mail?
> :
Program/Service
Press the illuminated "Mailbox" key.
Confirm.
Select and confirm.
Follow the user prompts.
Talking to Your Colleague With a Speaker Call
You can make a loudspeaker announcement through a
loudspeaker if connected (ask your service personnel),
or to an internal user with a system telephone without
any action on their part.
Press the key. The LED lights up.
> : Select and confirm
80=Speaker call?
*
qld Enter the code.
1
.
or
o Enter the station number.
Responding to a speaker call ! Page 36.
[1] ”Different Displays (HiPath 4000 Environment)” ! Page 118
49
Page 50

Making Calls – Convenience Functions
Step by Step
n Lift the handset.
qmhi Enter the code.
o Enter your internal station number.
Talking to Your Colleague with
Discreet Calling
If this function has been configured (ask your service
personnel), you can join an ongoing call conducted by
an internal user at a system telephone with display. You
can listen in unnoticed and speak to the internal user
without being overheard by the other party (discreet
calling).
Your service personnel can protect your telephone against discreet calling.
Reserve trunk?
Automatic Connection Setup (Hotline)
If this function is configured (contact your service personnel), the system automatically sets up a connection
to a preset internal or external destination.
n Lift the handset.
Depending on the setting, the connection is either set
up immediately or only after a preset period of time
(hotline after a timeout).
Reserve Trunk
If this feature is configured (contact your service personnel), you can reserve a busy trunk for your own use.
When the trunk is free, you receive a call and a message
appears on the display.
Precondition: The message "US:Currently busy
UK:busy at the moment" appears on your screen.
: Confirm.
50
When the reserved trunk becomes free:
Your telephone rings. The display shows " Trunk is free".
n Lift the handset. You hear the CO dial tone.
o Enter the number of the external station.
Page 51

Step by Step
Making Calls – Convenience Functions
Assigning a Station Number (Not for U.S.)
If this function has been configured (contact your service personnel), you can selectively assign a specific
number (DID number) to your telephone before making
an external call. The assigned number then appears on
the called party’s display.
Program/Service
> : Select and confirm
41=Temporary MSN?
*
Press the key. The LED lights up.
or
qhe Enter the code.
o Enter the DID number you wish to use.
o Dial the external number.
Associated Dialing/Dialing Aid
If this function has been configured (contact your service personnel), you can use a dialing aid to dial numbers and set up calls for your telephone.
The operating procedure depends on whether the dialing aid is connected to the S
You can also use your system telephone as a dialing aid
for other telephones.
Dialing aid on the S
1
.
bus:
0
bus or the a/b (T/R) port.
0
On the PC, select a destination and start dialing.
n The speaker on your telephone is switched on. Lift the
handset when the other party answers.
Dialing aid at the a/b (T/R) port:
On the PC select a destination and start dialing.
"Lift the handset" appears on the PC screen.
n Lift the handset.
[1] ”Different Displays (HiPath 4000 Environment)” ! Page 118
51
Page 52

Making Calls – Convenience Functions
Step by Step
Dialing aid from your telephone for another telephone:
Program/Service
> : Select and confirm.
67=Associated dial?
*
Press the key. The LED lights up.
or
qjk Enter the code.
o Enter the internal station number ("Dial for:").
o Enter the number you wish to dial.
52
Page 53

Step by Step
Making Calls – Convenience Functions
During a Call
Using Call Waiting
Callers can still reach you while you are engaged in another call. A signal alerts you to the waiting call.
You can either ignore or accept the waiting call.
When you accept the waiting call, you can either end
the first call or place it on hold and resume the call later
on.
You can also bar call waiting or the call waiting tone
! Page 54.
Accepting a Waiting Call (Camp-On)
Precondition: You are engaged in a phone call and hear
a tone (every six seconds).
Ending the first call and answering the waiting call:
t Replace the handset. Your telephone rings.
n Answer the second call. Lift the handset.
Placing the first call on hold and answering the second call:
Call waiting?
> : Select and confirm.
or
Program/Service
Press the key. The LED lights up. Enter the code.
qii You are connected to the call waiting party immediately.
The first party is placed on hold.
Ending the second call and resuming the first one:
Quit and return?
: Confirm.
Program/Service
or
qd Press the key. The LED lights up. Enter the code.
or
t n Replace the handset. "Recall: ..." appears on the screen.
Lift the handset.
53
Page 54

Making Calls – Convenience Functions
Step by Step
Preventing and Allowing Call Waiting
(Automatic Camp-On)
If this function has been configured (ask your service
technician), you can prevent or allow a second call
! Page 53 from being signaled by automatic camp-on
during an ongoing call.
Program/Service
and
#490=Call wait.trm.off?
> : Select and confirm
> :
490=Call wait.term.on?
*
Press the key. The LED lights up.
1
.
or
or
rhmd or qhmd Enter the code for "off" or "on".
Turning the Call Waiting Tone On and Off
You can suppress the call waiting tone (every six seconds) for external calls. A one-time special dial tone
then alerts you to the waiting call.
Waiting tone off?
> : Select and confirm.
or
Waiting tone on?
> :
or
qlk or rlk Enter code for "tone off" or "tone on".
54
[1] ”Different Displays (HiPath 4000 Environment)” ! Page 118
Page 55
Step by Step
Making Calls – Convenience Functions
Parking a Call
You can park up to ten calls, either internal, external, or
both. Parked calls can be displayed on and picked up
from another telephone. This feature is useful if you
want to continue a call at another phone.
Precondition: You are conducting a call.
Program/Service
> : Select and confirm.
56=Park a call?
*
Press the key. The LED lights up.
or
qij Enter the code.
d ... m Enter the number of the park slot (0 - 9) and make a note
of it. If the park slot number you entered is not displayed, it is already in use; enter another one.
Retrieving a Parked Call
Precondition: One or more calls have been parked. The
telephone is idle.
Program/Service
Retrieve call?
> : Select and confirm
Press the key. The LED lights up.
or
rij Enter the code.
d ... m Enter the park slot number you noted earlier.
If the park slot number you enter is not in use, you cannot retrieve the call.
1
.
If a parked call is not picked up, after a specific
period of time the call is returned to the telephone from where it was parked (recall).
[1] ”Different Displays (HiPath 4000 Environment)” ! Page 118
55
Page 56
Making Calls – Convenience Functions
Step by Step
Placing External Calls on Hold
If you have programmed a key on your telephone as a
hold key ! Page 65, you can place external calls on
hold.
This enables all other parties to retrieve the call on the
assigned line.
Press the "US:Hold UK:Common Hold" key.
Held on line: 801
If applicable
t or Replace the handset or press the key.
> : Select and confirm.
63=Retrieve line?
*
Release
Program/Service
A message appears showing which line is on hold
(e.g. 801); make a note of the line number.
If a trunk key has been assigned, the LED flashes slowly.
Depending on your system configuration, this may be
necessary so other users can also pick up the held call.
Picking up (Retrieving) a Held Call
Precondition: One or more calls have been parked. The
telephone is idle.
Press the key. The LED lights up.
or
qjg Enter the code.
or
56
If the "Line retrieved" key ! Page 65 has been configured, press the key.
o Enter the line number you noted earlier.
or
If a "Trunk key" was assigned to this line ! Page 65:
LED flashes slowly. Press the key.
Page 57

Step by Step
Conducting a Conference
In a conference call, you can talk to as many as four
other parties at the same time. These may be internal
or external users.
o Call the first party.
Start conference?
> : Select and confirm.
o Call the second station. Announce the conference.
Conference?
> : Select and confirm.
or
Program/Service
qg Press the key. The LED lights up. Enter the code. The
LED goes out.
Making Calls – Convenience Functions
A tone sounds every 30 seconds to indicate that a conference is in progress. Contact your service personnel
for instructions on how to turn it off.
If the second party does not answer:
Return to held call?
: Confirm.
or
qd Enter the code.
Adding Up to Five Parties
to the Conference (Initiator Only)
Add party?
: Confirm.
o Call the new party. Announce the conference.
Conference?
> : Select and confirm.
or
Program/Service
qg Press the key. The LED lights up. Enter the code. The
LED goes out.
View conf parties?
> : Select and confirm.
u or v Press these keys to select another party.
Exit list?
> : To exit the list: Select and confirm.
Checking Which Parties Are in the Conference
(Initiator Only)
The parties will be listed and displayed (list display
! Page 11).
57
Page 58

Making Calls – Convenience Functions
Step by Step
Removing Parties From the Conference (Initiator
Only)
View conf parties?
> : Select and confirm.
The parties will be listed and displayed (list display
! Page 11).
u or v Press these keys to select another party.
Remove party?
US: Leave conference?
> :
UK: Withdraw?
> :
: Select and confirm.
Leaving a Conference
Select and confirm.
or
t Replace the handset, if this feature is configured (con-
tact your service personnel).
Ending a Conference (Initiator Only)
End conference?
> : Select and confirm.
or
Program/Service
r g Press the key. The LED lights up. Enter the code. The
LED goes out.
or
t Replace the handset, if this feature is configured (con-
tact your service personnel).
Removing the ISDN Central Office Party
From the Conference (Only for U.S.)
Drop last conf. party?
> : Select and confirm.
Program/Service
qhme
58
or
Press the key. The LED lights up. Enter the code. The
LED goes out.
Page 59

Step by Step
Making Calls – Convenience Functions
Activating Tone Dialing/DTMF Suffix-Dialing
You can transmit dual-tone multifrequency (DTMF) sig-
nals to control devices such as an answering machine
or automatic information system.
Program/Service
> : Select and confirm
53=DTMF dialing?
*
Press the key. The LED lights up.
or
qig Enter the code.
o You can use the keys "0" through "9", "
mit DTMF signals.
Ending the call also deactivates DTMF suffix
dialing.
Your system may be configured so that you can
start DTMF suffix-dialing immediately after
setting up a connection.
1
.
", and "#" to trans-
*
[1] ”Different Displays (HiPath 4000 Environment)” ! Page 118
59
Page 60
Making Calls – Convenience Functions
Step by Step
Recording Calls
If configured (ask your administrator), you can record
calls.
Precondition: You are conducting a call, the "Recording" key is configured ! Page 65.
Press the illuminated "Recording" key. The LED lights
up.
An announcement notifies you and the person you are
speaking with that recording has begun. A beep will
also sound every 15 seconds until recording has concluded.
While a call is being recorded, a third party cannot be added to the call.
Ending Recording
Press the illuminated "Recording" key. The LED goes
out.
Playback
The steps required for playing back a recording depend
on the voice memory system (see the corresponding
Operating Manual or ! Page 49).
60
Page 61
Step by Step
Making Calls – Convenience Functions
Transferring a Call after a Speaker Call
(Announcement) in a Group
If this function has been configured (contact your service personnel), you can use a speaker call (announcement, ! Page 49) to announce a call in progress to a
group of users ! Page 97.
After a member of the group has accepted the call request, you can transfer the waiting party.
Precondition: You are conducting a call.
US: Consult?
UK: Enquiry?
Program/Service
> : Select and confirm.
80=Speaker call?
*
:
:
or
Confirm. The other party is placed on hold.
Press the key. The LED lights up.
qld Enter the code.
o Enter the group’s station number.
s Announce the call.
When a member of the group accepts the call
! Page 36, you are connected to this party.
t Replace the handset.
or
Transfer?
> : Select and confirm
If the connection between the two other parties
is not established within 45 seconds, the call
from the first part returns to you (recall).
1
.
[1] ”Different Displays (HiPath 4000 Environment)” ! Page 118
61
Page 62

Making Calls – Convenience Functions
Step by Step
Trunk Flash
To activate ISDN-type services and features through the
network carrier’s analog trunks or those of other communications platforms (such as "consultation hold"), you
must send a signal to the trunks before dialing the service code or telephone number.
Precondition: You have set up an external connection.
Program/Service
> : Select and confirm
51=Trunk flash?
*
Press the key. The LED lights up.
or
qie Enter the code.
o Enter the service code and/or telephone number.
1
.
62
[1] ”Different Displays (HiPath 4000 Environment)” ! Page 118
Page 63

Step by Step
Making Calls – Convenience Functions
Camp-on
If You Cannot Reach a Destination
...
Call Waiting (Camp-On)
Precondition: You have dialed an internal number and
hear a busy signal. It is important that you reach the
called party.
Wait (approx. 5 seconds) until "Camp-on" appears on the
display and the busy tone is followed by the ring tone.
The called party can then respond ! Page 53
The called party can prevent automatic call
waiting ! Page 54.
If this feature is configured (contact your service
personnel), you will hear the ring tone and the
message "Camp-on" is immediately displayed.
Busy Override - Joining a Call in Progress
This function is only available if it has been configured
by the service technician (contact your service personnel).
Precondition: You have dialed an internal number and
hear a busy signal. It is important that you reach the
called party.
Override?
> : Select and confirm.
or
qjf Enter the code.
The called party and person to whom this party is talking hear an alerting tone every two seconds.
If the called party has a system telephone with display,
the following appears on the screen: "Override: (station
no. or name)".
You can now start talking.
63
Page 64
Making Calls – Convenience Functions
Step by Step
Using Night Answer
If appropriately authorized, you can activate night answer mode to forward all external calls straight to a specific internal telephone (night station), for example, during your lunch break or after office hours. The night
station can be defined by service personnel (standard
night answer service) or by you (temporary night answer service).
Special features must be taken into consideration if your telephone operates with
HiPath 5000 (system networking via PC network) ! Page 114!
Activating this function:
Night answer on?
> : Select and confirm.
or
qhh Enter the code.
=default?
*
: Press the "OK" dialog key to confirm ( standard night an-
swer service).
or
q Enter the code ( standard night answer service).
or
o Enter the destination number (= temporary night an-
swer service).
US: Save?
> :
UK: Save entry?
> :
Night answer off?
> : Select and confirm.
Confirm.
Deactivating night answer:
or
rhh Enter the code.
64
Service personnel can also configure an "automatic
night answer service". The automatic night answer service activates at specific times for your telephone depending on how it is programmed.
You can deactivate the automatic night answer service
or replace it with a night answer service you configured
(see above).
Page 65

Step by Step
Saving Functions, Procedures and Appointments
Saving Functions, Procedures and
Appointments
You can save a frequently dialed number ! Page 29, or
frequently used functions/procedures (comprising several operating steps) on any free key on your telephone
or add-on device.
You can use dual-level key assignment if you have configured a key as the "switching" key (Shift key) and "Extended Key Functionality" is active (refer to relevant service personnel).
In addition to functions/procedures, you can save external or internal station numbers (without LED display) on
the second level ! Page 29.
Corresponding displays guide you through this process
! Page 126.
Assigning Functions to Keys
Program/Service
> : Select and confirm.
91=Prog. feature key?
*
qme Enter the code.
US: Change key?
UK: Change feature?
:
:
> : Select and confirm the function, such as "Do not
If applicable
US: Save incomplete
> :
UK: Store incomplete text
> :
If applicable
Key label?
> : Select and confirm to update automatic key labeling.
Press the key. The LED lights up.
or
Press the key. If the key is already in use, its assignment
appears on the screen.
Confirm.
disturb".
All programmable functions appear on the screen. See
Quick-Reference Operating Instructions (Appendix):
section ... about function keys.
Select and confirm.
Some functions (such as "Call forwarding") accept incomplete entries. This means you have to add more digits later on when you activate the function by pressing
a key.
For more information, see ! Page 120.
65
Page 66
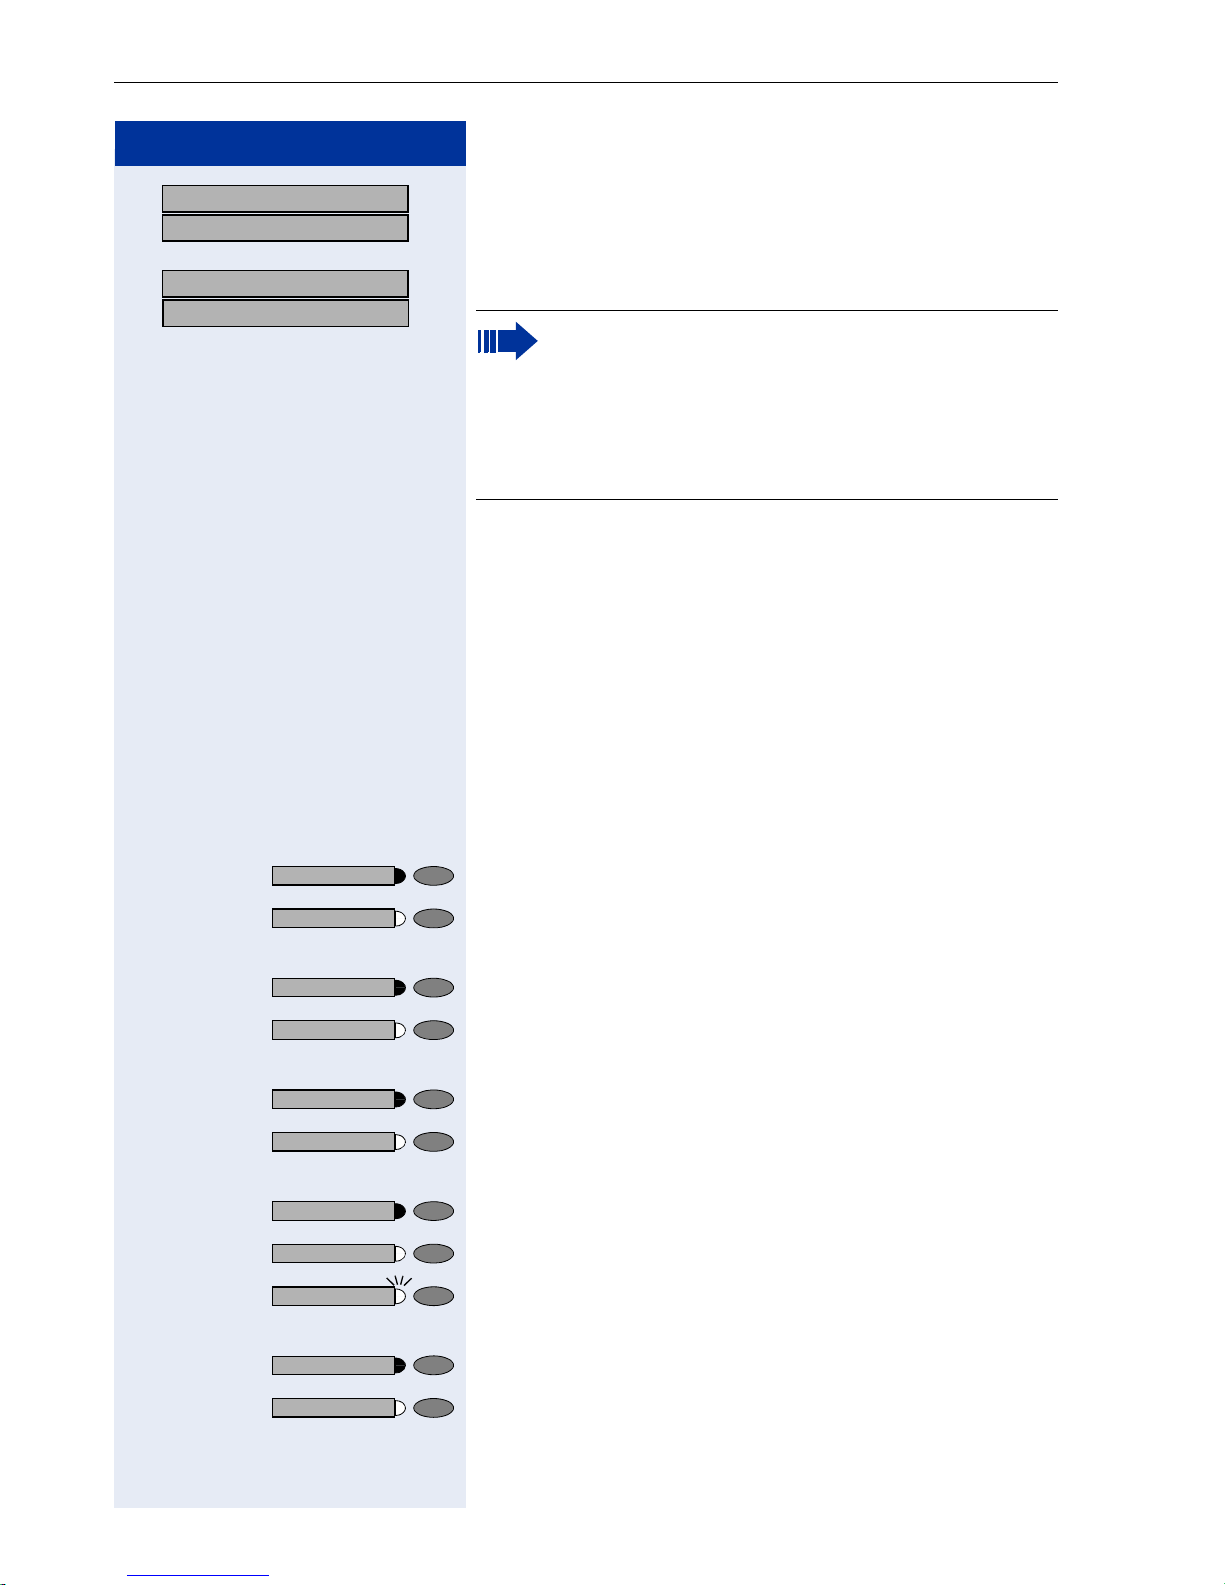
Saving Functions, Procedures and Appointments
Step by Step
US: Exit?
UK: End?
:
:
or
US: Another key?
> :
UK: Program another key?
:
>
Confirm.
Select and confirm.
Now press the key to access the function directly. If the function can be turned on and off,
such as "Do not disturb", pressing the key multiple times turns the function on and off.
For information on display messages when saving functions ! Page 126.
Meaning of LED Signals for Saved Functions:
Call forwarding, Call forward. no reply, Forwarding
- trunk, Forward Line, US:Night answer UK:Night
Service, Do not disturb, Changeover, Advisory message, Ringer cutoff, HF answerback on/off, US:Join/
leave group UK:Hunt group join/leave, Caller ID
suppression, Call wait.term., Waiting tone off, Ring
Transfer, Recording, Door opener on/off, Control Relay (not for HiPath 2000), Ringing group on, Shift
Key, UCD (Available on/off, Work on/off, Night answer on/off), US: MULAP Privacy Release UK: Privacy Release:
Saved function is not active.
Saved function is active.
Callback:
You have not set a callback.
You have set a callback.
Mute (on/off):
The microphone is switched on.
The microphone is switched off.
Headset:
The headset is switched off.
The headset is switched on.
Flashing slowly - call can be taken via headset.
Caller list:
No calls saved.
Call request saved.
66
Page 67

Step by Step
Saving Functions, Procedures and Appointments
Repdial key (internal), Direct station select:
The other party is not engaged in a call.
The other party is engaged in a call or has activated do
not disturb.
Flashing rapidly - A caller is trying to reach you, please
pick up the phone.
Flashing slowly - A caller is trying to reach another party,
who has not yet answered.
Mailbox:
No messages present.
Message(s) present.
Call key, General call key, Trunk key, MULAP Key,
Temporary MSN:
No call on assigned trunk.
Active call on assigned trunk.
Flashing rapidly- A call has arrived on this line; press the
key to pick up the call.
Flashing slowly - A call on this line was placed on hold.
Trunk group key:
At least one trunk is free.
All trunks in the trunk group are busy.
View call charges:
No chargeable calls have been made since the last time
call charges were displayed.
Chargeable calls have been made since the last time
call charges were displayed.
Call forwarding, Forward Line:
Flashing slowly - Either you or your trunk is the destination of a forwarded call.
Fax details/answering machine:
No fax received or no message on answering machine.
Fax received or message on answering machine.
View number of calls:
No callers waiting.
Flashing rapidly - Callers waiting (a certain number is exceeded).
Flashing slowly - Callers waiting (a certain number was
reached).
67
Page 68

Saving Functions, Procedures and Appointments
Step by Step
Data I/O Service:
No connection to an application.
Active connection to an application.
Flashing slowly - Connection to application temporarily
interrupted.
The following functions are assigned to keys which
have no LED:
Repdial key (external), Procedure key, Trace call, Speeddial, Release call, Clear, US:Lock all phones UK:Telephone Lock, Send message, US:Directory UK:Phonebook (1=internal, 2=LDAP), Call waiting, US:Connect/
Toggle UK:Shuttle, Conference, Speaker call, Retrieve
line, Reserve trunk, Release trunk, Temporary Phone,
Override, US:Park UK:Call Park, Pickup - directed, Pickup - group, Account code, Show call charges, Radio paging equip, Answer page, Timed reminder, Open door,
DTMF dialing, Recall key, Room monitor, Hold key,
US:Consult internal UK:Enquiry, US:Consult UK:Enquiry, Associated dial, Associated serv., Tel. data service,
Mobile Logon, Discreet Call
68
Page 69
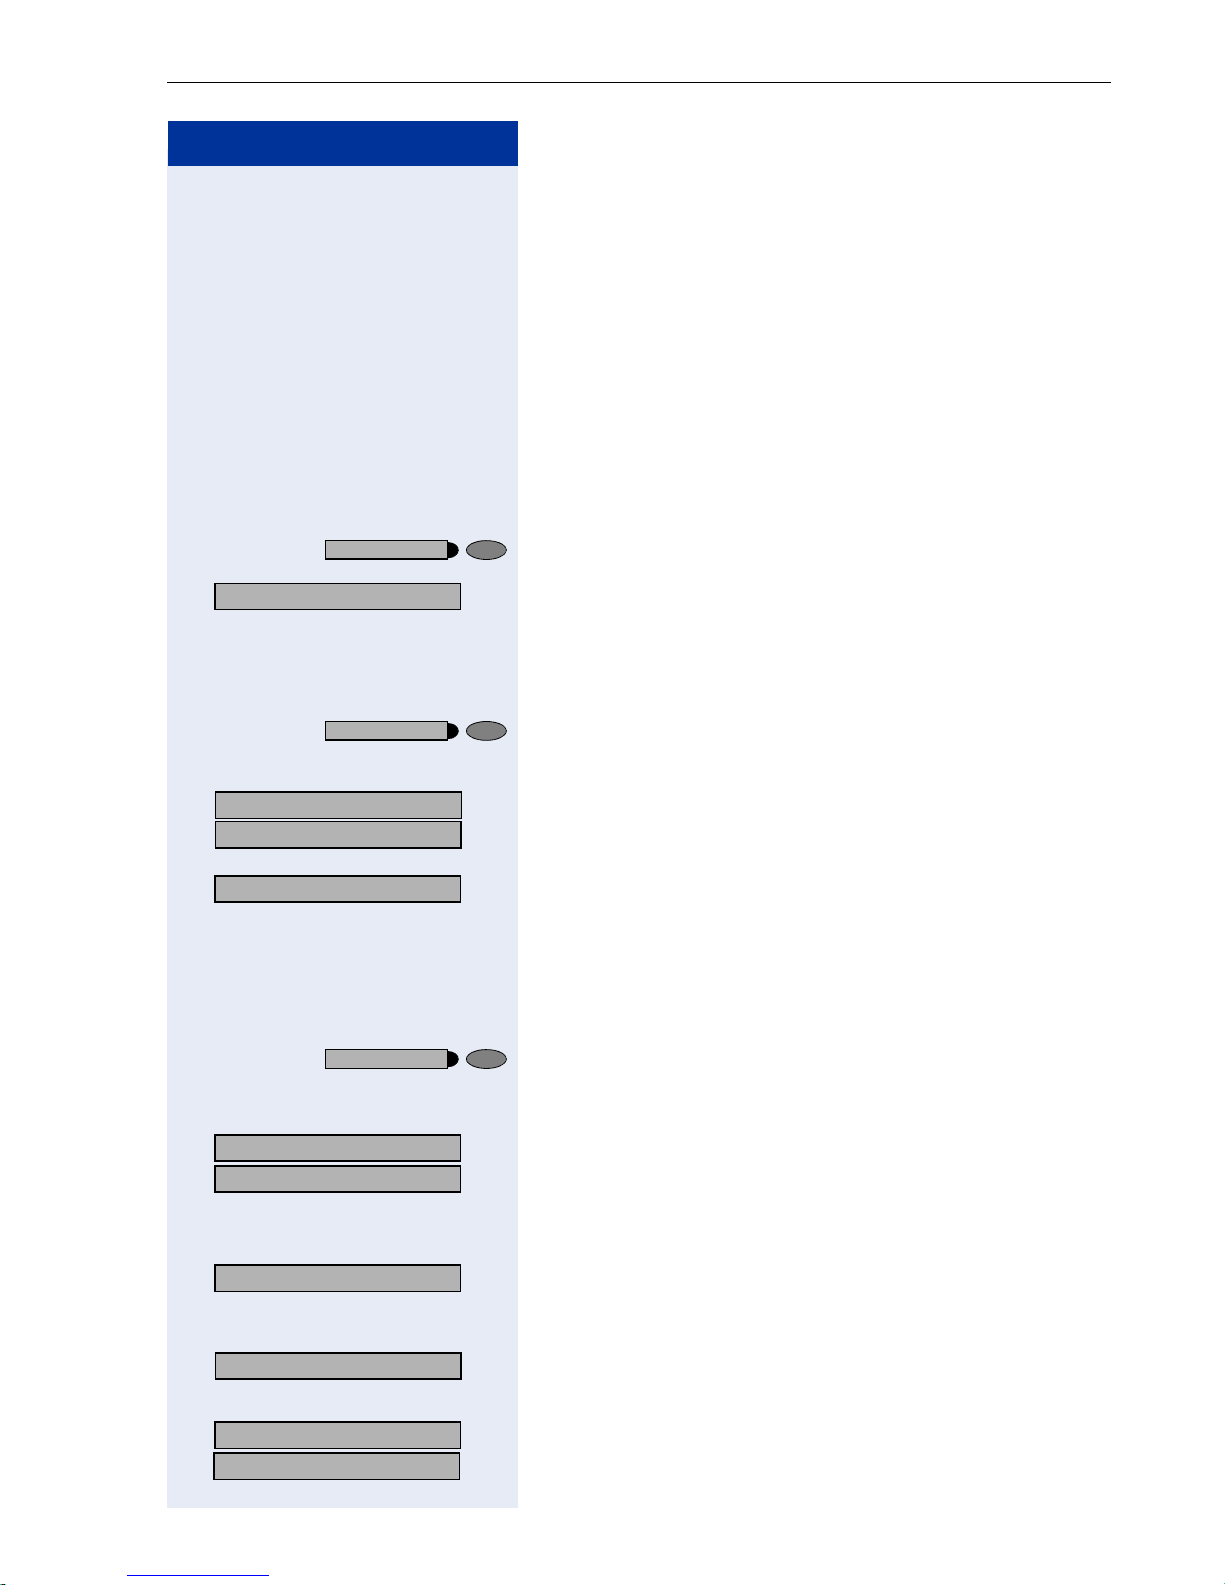
Step by Step
Saving Functions, Procedures and Appointments
Assigning a Procedure (Operating
Steps) to a Key
Station numbers and functions which require additional
inputs, i.e. comprise several operating steps, can be
saved to a single key on your telephone.
Using the associated dial function, for example
! Page 52, you can save all the remaining inputs required (station number of the calling party + the station
number to be dialed) to a single key.
Station numbers which require additional inputs but
also dial pauses can also be stored.
Program/Service
> : Select and confirm.
91=Prog. feature key?
*
Press the key. The LED lights up.
or
qme Enter the code.
US: Change feature?
UK: Change key?
Procedure key?
: Confirm.
>
: Confirm.
:
Press the key. If a function has already been assigned to
this key, a corresponding message is displayed.
o Enter the procedure, e.g. "*67 231 089123456".
*67= code for associated dial
231= station number of the calling party
089123456 = number to be dialed.
If necessary
Redial
To insert pauses, press this key (a "P" is displayed).
US: Save entry?
UK: Save?
Previous?
> : Select and confirm. This deletes all digits entered.
If applicable
Key label?
> : Select and confirm to update automatic key labeling.
US: End?
UK: Exit?
: Confirm.
:
or If you make a mistake:
For more information, see ! Page 120.
: Confirm.
:
69
Page 70

Saving Functions, Procedures and Appointments
Step by Step
or
US: Program another key?
> :
UK: Another key?
:
>
Select and confirm.
.
Select the stored procedure by pressing a key.
Procedures containing functions which can be
switched on/off can be activated by pressing the
key, and deactivated by pressing the same key
again.
You can also press a procedure key during a call.
The stored digits are automatically sent as DTMF
signals ! Page 59.
For information on display messages when saving procedures ! Page 126.
70
Page 71

Step by Step
Saving Functions, Procedures and Appointments
Appointments Function
You can tell your telephone to give you a call when you
want to be reminded of an appointment ! Page 72.
To do this, you need to save the time you want the call
to be made. You can enter a single appointment that will
take place in the next twenty four hours, or you can enter a daily recurring appointment.
Saving Appointments
Program/Service
> : Confirm.
46=Timed reminder on?
*
Press the key. The LED lights up.
or
qhj Enter the code.
o Enter a 4-digit time, such as 0905 for 9:05 (= 9.05 a.m.)
or 1430 for 14.30 (= 2.30 p.m.).
If necessary
One time only?
> : Select and confirm.
Daily?
US: Save?
UK: Save entry?
Program/Service
f or k If the selected language is "US English" (configure
! Page 34) you can enter the code 2 for "am" or 7 for
"pm" (standard = "am").
: Confirm.
or
:
:
Confirm.
Deleting and checking a saved appointment:
Press the key. The LED lights up.
#46=Timed reminder off?
> : Confirm.
rhj Enter the code.
Delete?
US: Exit
> :
UK: End
:
>
or
: Confirm.
or
Select and confirm.
71
Page 72

Saving Functions, Procedures and Appointments
Step by Step
Using Timed Reminders
Precondition: You must have saved a timed reminder
! Page 71. The current time is the time stored.
US: Reminder:
UK: Reminder at:
Speaker
The telephone rings. The timed reminder appears on
the screen.
Press the key twice.
or
n t Lift the handset and replace it again.
If you fail to answer the timed reminder, it repeats five times and is then erased.
72
Page 73

Step by Step
Displaying and Assigning Call Charges
Displaying and Assigning Call
Charges
Displaying Call Charges (Not for U.S.)
For the current call:
The display usually shows call charges at the end of a
call (default setting).
If you wish to display charges continuously during a call
in progress, your service personnel must request this
feature from your carrier.
Indication of the cost of a telephone call has to be requested from the service provider and has to be installed by an authorized technician.
Depending on the setting, during or after the call, the
display will show the cost of the telephone call.
Some carriers also let you display toll-free external calls.
The message "Free of Charge" appears on the screen either before or during the call.
If the cost indication facility has not been installed, the
display will show the dialled number and/or the length
of the telephone call.
If a call is transferred, the charges are assigned to
the telephone to which the call was transferred.
For all calls and the last one conducted:
The connection charges for the last chargeable call conducted are displayed first. Five seconds later, the total
accumulated connection charges appear.
Program/Service
> : Select and confirm
65=Show call charges?
*
Press the key. The LED lights up.
or
qji Enter the code.
1
.
[1] ”Different Displays (HiPath 4000 Environment)” ! Page 118
73
Page 74

Displaying and Assigning Call Charges
Step by Step
Displaying Call Charges for Another
Telephone (Not for U.S.)
If this function is configured (contact your service personnel), you can display and print the chargeable calls
for other telephones (such as a pay phone).
Precondition: You have programmed the function
"View call charges" on a key ! Page 65.
The LED lights up to indicate that a you have conducted
chargeable call since the last time you viewed the
charges.
Press the "View call charges" key.
A list with chargeable calls will be displayed ! Page 11.
u or v Press key to change to an other connection.
Print?
> : Select and confirm.
or
Delete?
> :
or
Add'l information?
> :
or
US: Exit?
> :
UK: End?
> :
74
Page 75
Step by Step
Displaying and Assigning Call Charges
Dialing with Call Charge Assignment
You can assign external calls to certain projects.
Precondition: Service personnel has set up account
codes for you.
Program/Service
> : Select and confirm
60=Account code?
*
Press the key. The LED lights up.
or
qjd Enter the code.
o Enter the account code.
and r Press this key.
or
US: #=Save?
UK: #=Save entry?
:
:
Confirm.
May be necessary, depending on how your system is
configured; contact your service personnel for details.
o Enter the number of the external station.
You can also enter the account code during an
external call.
1
.
[1] ”Different Displays (HiPath 4000 Environment)” ! Page 118
75
Page 76

Private Sphere/Security
Step by Step
Private Sphere/Security
Turning Ringer Cutoff On and Off
You can activate the ringer cutoff function if you do not
want the receive any calls. Calls are only identified by
one ring signal, an indication on the display, and a key
which has been programmed to flash (such as a trunk
key).
Ringer cutoff on?
> : Select and confirm
or
Ringer cutoff off?
> :
or
1
.
qml or rml Enter the code for "on" or "off".
Turning Do Not Disturb On and Off
You can activate the do not disturb function if you do not
want the receive any calls. When do not disturb is activated, internal callers hear a busy signal and external
callers are rerouted to a telephone assigned for this purpose (contact your service personnel).
DND on?
> : Select and confirm.
or
DND off?
> :
or
qmk or rmk Enter the code for "on" or "off".
When you lift the handset, a special dial tone
(continuous buzzing tone) reminds you that do
not disturb is active.
Authorized internal callers can automatically
override the do not disturb function after five seconds.
76
[1] ”Different Displays (HiPath 4000 Environment)” ! Page 118
Page 77

Step by Step
Caller ID Suppression
You can prevent your station number or name from appearing on the displays of external parties you call. The
feature remains active until you deactivate it.
Suppress call ID?
> : Select and confirm.
or
Restore caller ID?
> :
or
qlj or rlj Enter code for "suppress" or "restore".
Your service personnel can turn caller ID suppression on and off for all telephones.
Private Sphere/Security
77
Page 78

Private Sphere/Security
Step by Step
Monitoring a Room
A telephone can be used to monitor a room. The function must be activated on the telephone that you want
to monitor.
Calling this telephone lets you hear what is going on in
the room.
Activating the telephone to be monitored:
Program/Service
> : Select and confirm.
88=Room monitor?
*
Press the key. The LED lights up.
or
qll Enter the code.
You can either leave the telephone in speakerphone
mode or lift the handset and leave it directed towards
the noise source.
Deactivating the telephone to be monitored:
Program/Service
Press the illuminated key. The LED goes out.
or
t Replace the handset.
Monitoring the room:
o Enter the internal number if the telephone in the room
you wish to monitor.
78
Page 79

Step by Step
Private Sphere/Security
Trace Call: Identifying Anonymous
Callers (Not fo r U.S.)
You can have the carrier identify malicious external callers. You can save the caller’s station number during the
call or for 30 seconds after the call ends. However, it is
essential that you do not replace your handset during
this time.
Program/Service
and
> : Select and confirm.
84=Trace call?
*
Press the key. The LED lights up.
or
qlh Enter the code.
After you have finished tracing the call, the data
is stored on the carrier’s system. Now contact
your service personnel.
79
Page 80

Private Sphere/Security
Step by Step
Locking the Telephone to Prevent
Unauthorized Use
You can prevent unauthorized persons from using your
telephone and its electronic notebook during your absence.
Precondition: You must have configured a personal
identification number (PIN) for your telephone
! Page 82.
To lock and unlock the telephone:
Changeover on?
> : Select and confirm.
or
Changeover off?
> :
or
qjj or rjj Enter the code for "on" or "off".
o Enter the telephone lock PIN ! Page 82.
While the telephone is locked, a special dial tone
sounds when you lift the handset. You can continue to dial internal numbers as usual.
Your telephone can also be locked or unlocked
again by an authorized party ! Page 81.
80
Page 81

Step by Step
Private Sphere/Security
Locking Another Telephone to Prevent
Unauthorized Use
If this function has been configured (contact your
service personnel), you can lock other telephones to
prevent unauthorized use and then unlock them again
later.
You can use this function to unlock the telephone for users who have locked their telephones and then forgotten their PINs.
Program/Service
US:*943=Lock all
> :
UK:*943=Telephone
:
>
Press the key. The LED lights up.
Confirm
or
qmhg Enter the code.
o Enter the internal number of the telephones that you
want to lock or unlock.
> : Confirm.
> :
=Lock phone?
*
#=Unlock phone?
or
or
q or r Enter the code.
1
[1] ”Different Displays (HiPath 4000 Environment)” ! Page 118
81
Page 82

Private Sphere/Security
Step by Step
Saving Your PIN
To use the functions
• to prevent unauthorized persons from using your
telephone ! Page 80
• to use another telephone like your own ! Page 86
you need to enter a personal identification number,
which you can save yourself.
Program/Service
> : Confirm
93=Change PIN?
*
Press the key. The LED lights up.
or
qmg Enter the PIN.
o Enter the current five-digit PIN.
If you have not yet assigned a PIN, use the PIN "00000"
the first time you enter it.
o Enter the new PIN.
o Repeat the new PIN.
1
.
If you forget your PIN, contact your service personnel, who can reset your PIN to "00000".
82
[1] ”Different Displays (HiPath 4000 Environment)” ! Page 118
Page 83

Step by Step
US: Send message?
> :
UK: Send Message?
:
>
or
qjl Enter the code.
Using Other Functions
Using Other Functions
Sending a Message
You can send short text messages (infotexts) to single
users or groups of users who have system telephones.
On system telephones with no display (e.g.
optiPoint 500 entry), on ISDN, pulse or tone dialling
telephones, transmitted text messages will be saved as
a callback request.
Creating and Sending a Message
Select and confirm.
o Enter the internal station number of the recipient or
group.
0=Please call back
> : Select and confirm the preprogrammed message
(which can be changed by service personnel).
or
d ... m Enter the code directly.
The codes appear on the screen, next to the messages
to which they are assigned.
or
Enter message text?
> : Select and confirm, to enter different text (up to 24 cha-
racters). For information about text entry, see
! Page 121.
Send?
: Confirm.
83
Page 84
Using Other Functions
Step by Step
Displaying and Deleting Messages You Have
Sent
View sent message?
> : Select and confirm.
or
rjl Enter the code.
> : Follow the display prompts.
Texts sent to groups can be deleted only by the
originator.
Answering Messages
"Messages received:" appears on your screen, along
with an indication of the length.
US: View messages?
UK: Display Messages?
:
:
Confirm.
> : Follow the display prompts.
84
Page 85
Using Other Functions
Step by Step
Leaving an Advisory Message
You can leave an advisory message on your telephone
screen for internal callers who want to reach you while
you are away from your desk.
When another party calls you, the message appears on
the caller’s screen.
Advisory msg. on?
> : Select and confirm.
or
qjm Enter the code.
0=Back at:
> : Select and confirm the preprogrammed message
(which can be changed by service personnel).
or
d ... m Enter the code directly.
The codes appear on the screen, next to the messages
to which they are assigned.
You can add numeric input to preprogrammed
messages that end in a colon.
or
Enter message text?
> : Select and confirm, to enter different text. For informa-
tion about text entry, see ! Page 121.
US: Save?
UK: Save entry?
:
:
Confirm.
Deleting Advisory Messages
Advisory msg. off
> : Select and confirm.
or
rjm Enter the code.
or
If you have programmed an "Advisory message" key
! Page 65: The LED lights up. Press the key.
85
Page 86
Using Other Functions
Step by Step
Display Number of Waiting Calls and
Overload Indication
You can show the number of external waiting calls on
the display by pressing the "View number of calls" key
! Page 65.
Press the "Waiting calls" key.
If the number of waiting calls exceeds a preset limit
while you are engaged in another call (overload), the
LED on the key lights up. Contact your service personnel to find out the waiting call limit.
• LED off:
No callers waiting.
• LED flashes slowly:
You have reached the programmed threshold.
• LED flashes rapidly:
You have exceeded the threshold value (overload).
Using Another Telephone Like Your
Own for a Call
Other people can temporarily use your telephone for
outgoing calls as though it were their own.
Program/Service
> : Select and confirm
508=Temporary Phone?
*
Press the key. The LED lights up.
or
1
.
qidl Enter the code.
If applicable
Change password
86
o Enter the other user’s station number.
o Enter the other user’s telephone lock PIN ! Page 82.
Users who have not yet selected a personal identification number are prompted to do so on their own telephones.
o Dial the external number.
This state is canceled at the end of the call.
[1] ”Different Displays (HiPath 4000 Environment)” ! Page 118
Page 87

Step by Step
Using Other Functions
Using Another Telephone Like your
Own for an Extended Period
of Time (Mobility)
If this feature is configured, you can use a random
optiPoint 420 as your own telephone. Your station number including all settings (for example, programmed
keys) are transferred.
Precondition: You have received a mobile station number and, where applicable, a password (ask the service
personnel).
Program/Service
> : Select and confirm.
9419=Mobile Logon
*
Press the key. The LED lights up.
or
qmhem Enter the code.
o Enter your mobile station number.
If applicable
If applicable
Entry complete?
#9419=Mobile Logoff
> : Select and confirm.
o Enter the logon password.
r Press the key.
or
: Confirm.
Logging off
rmhem Enter the code.
or
87
Page 88
Using Other Functions
Step by Step
Fax Details and Message on Answer-
ing Machine
If a fax or answering machine is connected to your system and you have assigned the "Fax details" function to
a programmable key ! Page 65, the key lights up when
a fax or a message has been received.
Deactivating indication:
Press the illuminated "Fax details" key. The LED goes
out.
Resetting Services and Functions
(System-Wide Cancellation for a Tele-
phone)
There is a general reset procedure for activated functions. The following functions are canceled, if they were
activated:
• Forwarding on
• Advisory msg. on
• Ringing group on
• Hunting group off
• Suppress call ID
• Waiting tone off
• DND on
• Ringer cutoff on
• Messages received:
• View callbacks
Program/Service
#0=Reset services?
> : Select and confirm
rd Enter the code.
88
Press the key. The LED lights up.
1
.
or
[1] ”Different Displays (HiPath 4000 Environment)” ! Page 118
Page 89

Step by Step
Program/Service
Using Other Functions
Activating Functions for Another Tele-
phone
If this function has been configured (contact your service personnel), you can turn the following functions on
and off for other telephones. This feature is also known
as associated service.
• Do not disturb,
code:
• Call forwarding,
code: *11, *12, *13/#1 ! Page 23
• Locking and unlocking telephone,
code: *66/#66 ! Page 80
• Group ringing,
code:
• Leaving an advisory message,
code: *69/#69 ! Page 85
• Group call,
code: *85/#85 ! Page 97
• Reset services and functions,
code: #0 ! Page 88
• Control relay,
code:
• Night service,
code: *44/#44 ! Page 64
• Timed reminders,
code
Press the key. The LED lights up.
97/#97 ! Page 76
*
81/#81 ! Page 97
*
90/#90 ! Page 95
*
65 ! Page 71
*
> : Confirm.
83=Associated serv?
*
qlg Enter the code.
or
o Enter the internal number of the telephone for which
you want to activate the function.
o Enter the code, such as
Follow the prompts on the screen for any further input.
97 for do not disturb.
*
89
Page 90

Using Other Functions
Step by Step
Using System Functions from the Outside
(DISA: Direct Inward System Access)
If this function has been configured (contact your service personnel), you can set up external outgoing calls
from outside the system, just like an internal user. You
can also activate and deactivate the following functions
in your system:
• Reset services and functions,
code: #0 ! Page 88
• Call forwarding, code:
• Lock and unlock all phones,
code: *66/#66 ! Page 80
• Save PIN,
code:
• Send a message,
code: *68/#68 ! Page 83
• Leave an advisory message,
code: *69/#69 ! Page 85
• Group ringing, code:
• Group call, code:
• Suppress caller ID,
code: *86/#86 ! Page 77
• Waiting tone, code:
• Open door, code:
• Door opener on/off, code:
• Control relay, code:
• Do not disturb, code:
• Ringer cutoff function, code:
• Speed-dialing, code:
• Associated service, code:
Precondition: You have a telephone that uses tone dialing (DTMF dialing) or you can switch your telephone
to tone dialing. The telephone is not connected to the
system.
93 ! Page 82
*
*
*
1/#1 ! Page 23
*
81/#81 ! Page 97
*
85/#85 ! Page 97
87/#87 ! Page 54
*
61 ! Page 38
89/#89 ! Page 39
*
90/#90 ! Page 95
*
97/#97 ! Page 76
*
7 ! Page 43
*
98/#98 ! Page 76
*
83 ! Page 89
*
90
o Set up a call to the system. Enter the station number
(contact your service personnel).
o Wait for a continuous tone (if necessary switch the tele-
phone to tone dialing), then enter the internal number
that has been assigned to you and the associated PIN.
r Enter the code (necessary only if programmed in the
system).
Page 91

Step by Step
Using Other Functions
Wait for a dial tone and then enter the code, such as
o
97 for Do not disturb on. Make other inputs as neces-
*
sary; (refer to the operating instructions for pulse and
DTMF telephones).
or
o Dial the external number.
You can only execute one function at a time, or
set up only one outgoing connection.
The connection is immediately released after
successful activation of a function.
In the case of an external-external call, the connection is released as soon as either of the parties ends the call.
91
Page 92

Using Other Functions
Step by Step
Using functions in ISDN via code dial-
ing (keypad dialing)
If authorized (contact your service personnel), you can
set ISDN functions via code dialing in some countries.
Program/Service
> : Confirm.
503=Keypad dialing?
*
Press the key. The LED lights up.
or
qidg Enter the code.
o Enter the number of the trunk you wish to use (contact
your service personnel).
o Entering a code for required ISDN function (contact your
service personnel).
Contact your network provider to find out which
ISDN functions can be code-controlled in your
country.
Siemens AG shall not be liable for damages/
costs which may be incurred by fraudulent activities or remote operation (e.g. toll fraud).
92
Page 93

Step by Step
Using Other Functions
Controlling Connected Computers or
Other Programs
and Telephone Data Service
(HiPath 3500/3550/3700/3750/3800 Only)
If this function has been configured (contact your service personnel), you can control connected computers
or programs running on them, such as hotel services or
information systems, from your telephone.
Precondition: You have set up a connection.
Program/Service
> : Confirm.
42=Tel. data service?
*
Press the key. The LED lights up.
or
qhf Enter the code.
The connected computer now prompts you to enter the
data, which you can do in one of two ways. Contact
your service personnel to find out which option is programmed in your system:
• Input in en-bloc mode.
d ... m Enter data.
r Press this key at the end of the entry.
or
Entry complete?
: Confirm.
or • Input in online mode:
The connected computer processes your entries directly.
d ... m Enter data.
r Enter the code.
93
Page 94

Using Other Functions
Step by Step
qhmh Enter the code.
Communicating with PC Applications
over a CSTA Interface
If this function has been configured (ask your service
personnel), you can use your telephone to communicate with PC applications (CSTA = Computer Supported
Telecommunications Applications). You send informa-
tion to the application and receive information from the
application, for example, on your telephone's display.
or
Press the "Data I/O Service" key.
(configuring keys ! Page 65).
o Enter the three-digit ID for the application you want to
operate.
u v d ... m < : > Use the relevant keys to communicate with the applica-
tion.
Temporarily interrupting communication with the
application:
n The telephone rings. You accept the call.
The "Data I/O Service" key flashes: communication with
the application was automatically interrupted.
Resuming communication with the application:
Press the flashing "Data I/O Service" key. The LED lights
up.
Ending communication with the application:
> : Select and confirm the appropriate CSTA message.
or
n t Lift and replace the handset.
94
Page 95

Step by Step
Controlling Relays (not for HiPath 2000)
If this function has been configured (contact your service personnel), you can turn up to four relays on and off
to control different facilities (such as a door opener).
Depending on how they are programmed, you can
switch the relays on and off or switch them on and have
them switched off automatically after a timeout.
Special features must be taken into consideration if your telephone operates with
HiPath 5000 (system networking via PC network) ! Page 116!
*90=Control Relay On?
> : Select and confirm.
or
#90=Control Relay Off?
> :
or
qmd or rmd Enter the code for "on" or "off".
Using Other Functions
e ... h Enter the relay.
Sensors (HiPath 3300/3350/3500/3550
Only)
If this function has been configured (contact your service personnel), sensors detect signals, causing your
phone to ring and a message to appear on your screen.
95
Page 96

Using Other Functions
Step by Step
Radio Paging (Not for U.S.)
If paging equipment is connected to your system (contact your service personnel), you can contact people via
their pocket receivers.
The pocket receiver indicates to the person you are
looking for that someone is trying to get in touch. The
person you page can then go to the nearest telephone
and call you.
Paging:
To be paged, you must have activated a call ringing
group ! Page 100, call forwarding ! Page 23, or call
redirection to the internal station number of your paging
equipment.
A call request is then signaled automatically.
Answering the page from the nearest telephone:
n Lift the handset.
qim Enter the code.
o Enter your own station number.
96
Page 97

Step by Step
Using Other Team Functions
Using Other Team Functions
Turning Group Call On and Off
If this function has been configured (contact your service personnel), you belong to one or more groups of
users who can each be reached under a hunt group or
group call number.
Incoming calls are signaled on all group member telephones in the order in which they are received ( hunt
group) or simultaneously (= group call) until one member of the group accepts the call.
You can also belong to a team (including executive/secretary ones) in which station numbers are programmed
on trunk keys ! Page 103.
Each member of the group remains available under his
or her own station number.
You can activate and deactivate the audible signal for a
hunt group, group call or individual trunks in a group (including an executive/secretary team).
If the LED on a programmed "US:Join/leave group
UK:Hunt group join/leave" key ! Page 65 is illuminated,
this means that the audible tone was activated for at
least one group.
Special features must be taken into consideration if your telephone operates with
HiPath 5000 (system networking via PC network) ! Page 112!
97
Page 98
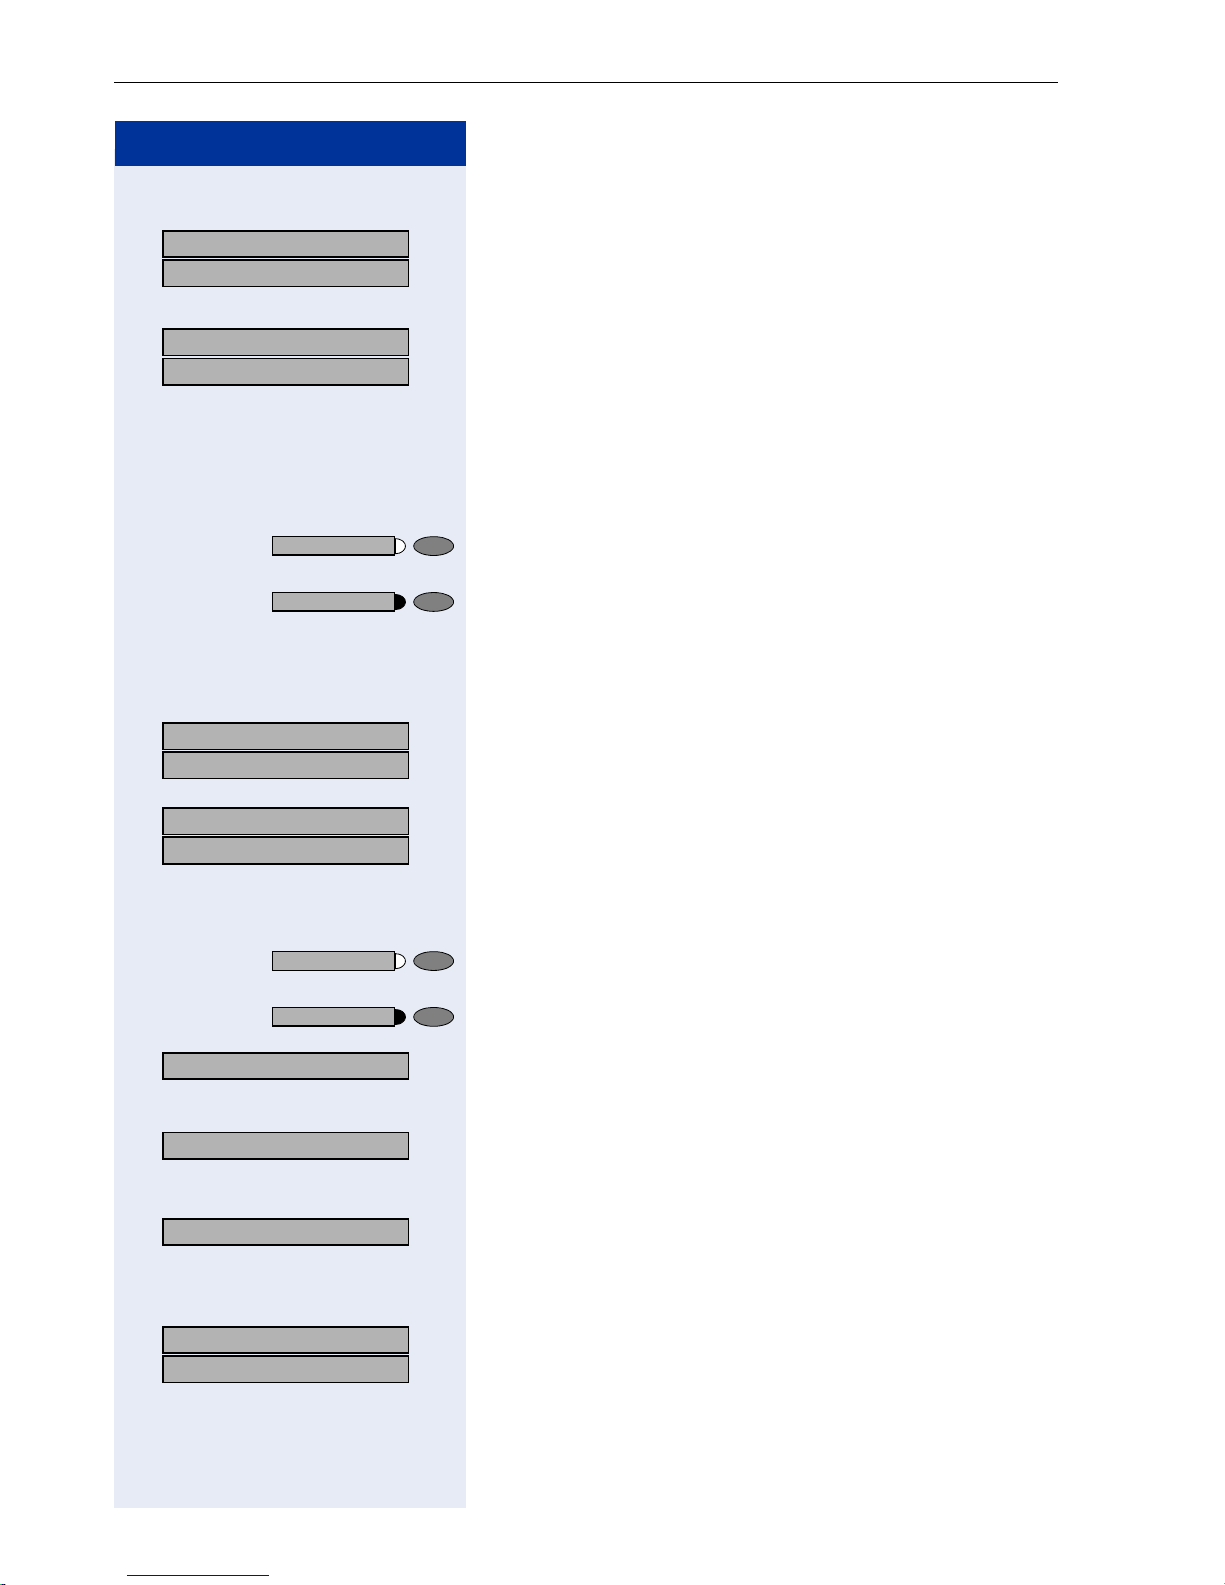
Using Other Team Functions
Step by Step
US: Leave group?
> :
UK: Leave hunt group?
:
>
or
US: Join group?
> :
UK: Join hunt group?Join
> :
or
rli or qli Enter the code for "leave" or "join".
or
You belong to a hunt group or a group call:
Select and confirm1.
or
US: Leave group?
> :
UK: Leave hunt group?
> :
or
US: Join group?
> :
UK: Join hunt group?
> :
or
rli or qli Enter the code for "leave" or "join".
or
or
301 x group name
or (such as 301) and group name, the audible tone is active
301 group name
Press the Hunt group join/leave key.
You belong to multiple groups or to one group with
trunk keys (including executive/secretary teams).
Select and confirm1.
Press the "Hunt group join/leave" key.
If an "x" appears between group/trunk number
for this group or trunk.
No "x" means that the audible tone was deactivated.
Next?
US: Leave group?
> :
UK: Leave hunt group?
> :
98
: Press the "OK" dialog key to confirm your selection and
display the next group or trunk number and group
name.
or
Select and confirm1.
This turns off the audible tone for the displayed group or
trunk.
[1] ”Different Displays (HiPath 4000 Environment)” ! Page 118
Page 99
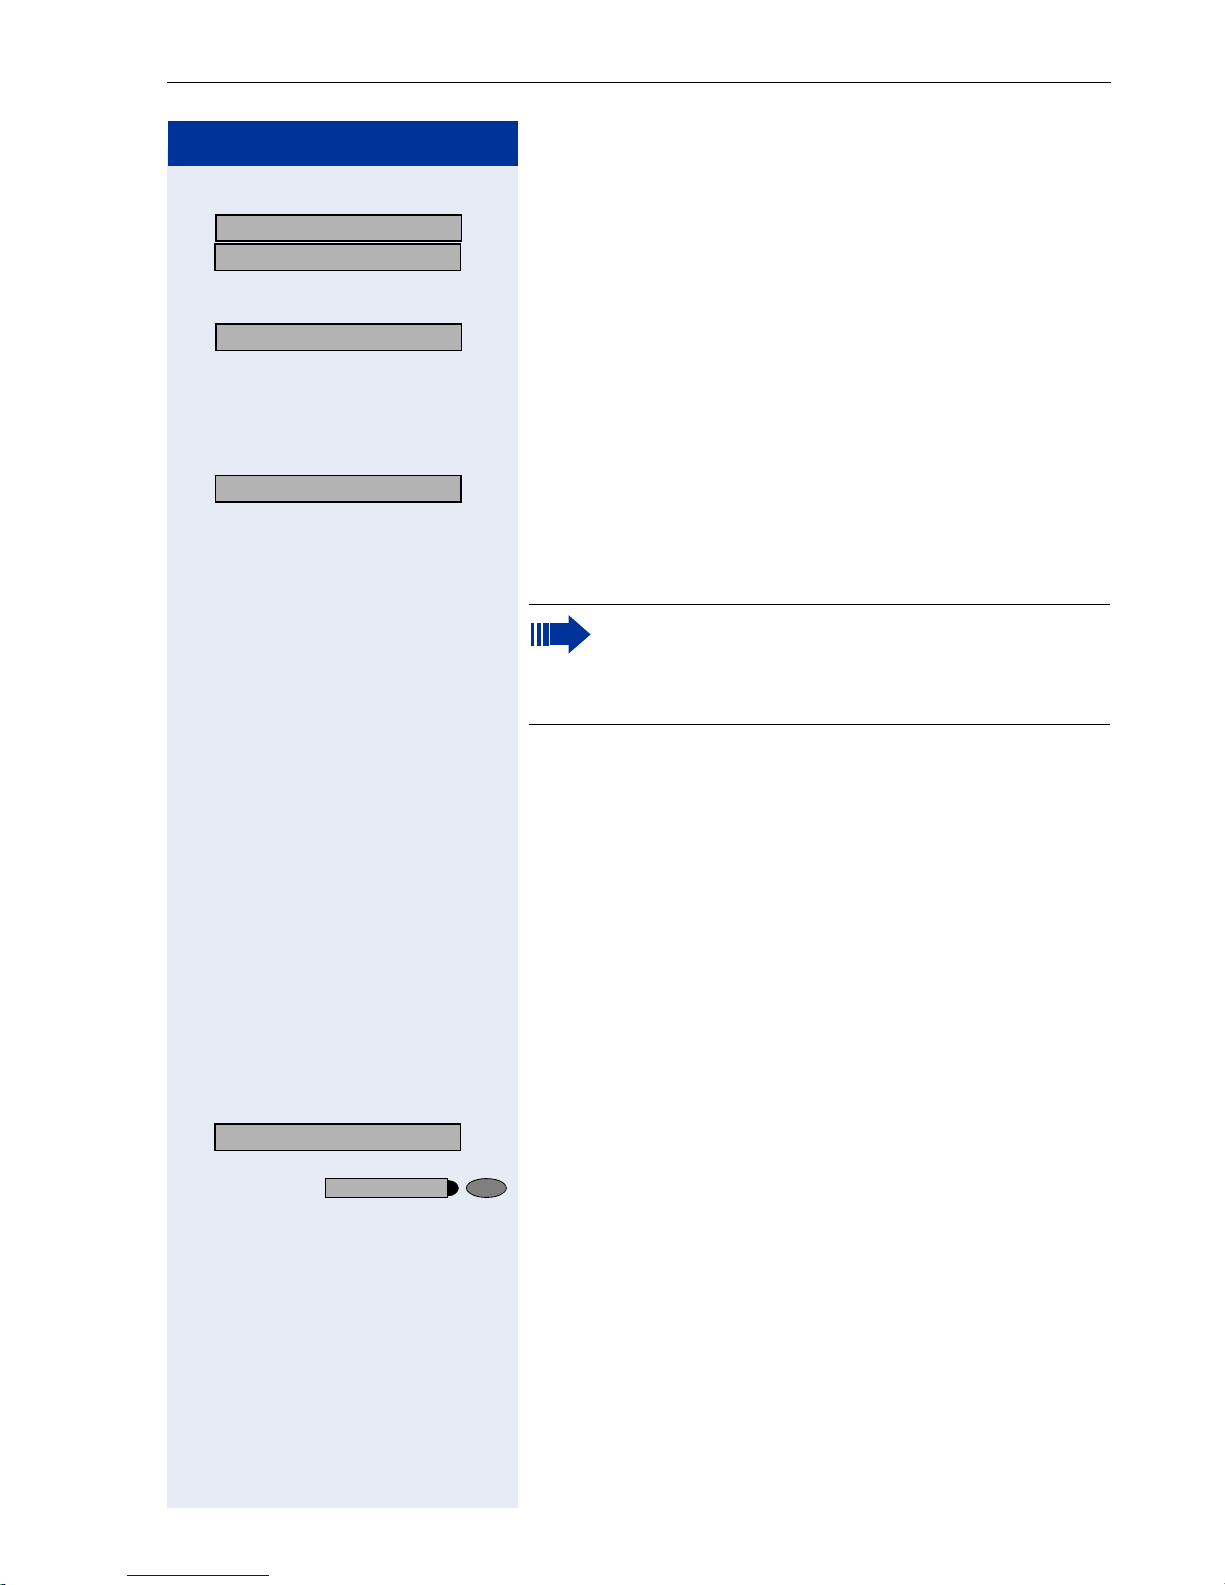
Step by Step
or
US: Join group?
> :
UK: Join hunt group?
:
>
#=Leave all groups?
> : Select and confirm.
Select and confirm1.
This turns off the audible tone for the displayed group or
trunk.
or
This turns off the audible tone for all groups and trunks.
or
r Enter the code for "Leave all groups".
or
Using Other Team Functions
> : Select and confirm.
=Rejoin all groups
*
This turns off the audible tone for all groups and trunks.
or
q Enter the code for "Join all groups".
If you deactivate the audible tone for another
group or trunk, or deactivate it for all groups and
trunks to which you belong, a special dial tone
sounds when you lift the handset.
Accepting a Call for Another Member
of Your Team
You can accept calls for other telephones in your team
from your telephone even while engaged in another
call. To do this, contact your service personnel to find
out if a pickup group has been configured.
Precondition: Your telephone rings briefly. "Call for: "
appears on the upper display line with the station number or name of the originator; the station number or
name of the caller appears on the lower line.
Pickup - group?
Program/Service
qik Enter the code.
: Confirm.
or
Press the key. The LED lights up.
[1] ”Different Displays (HiPath 4000 Environment)” ! Page 118
99
Page 100
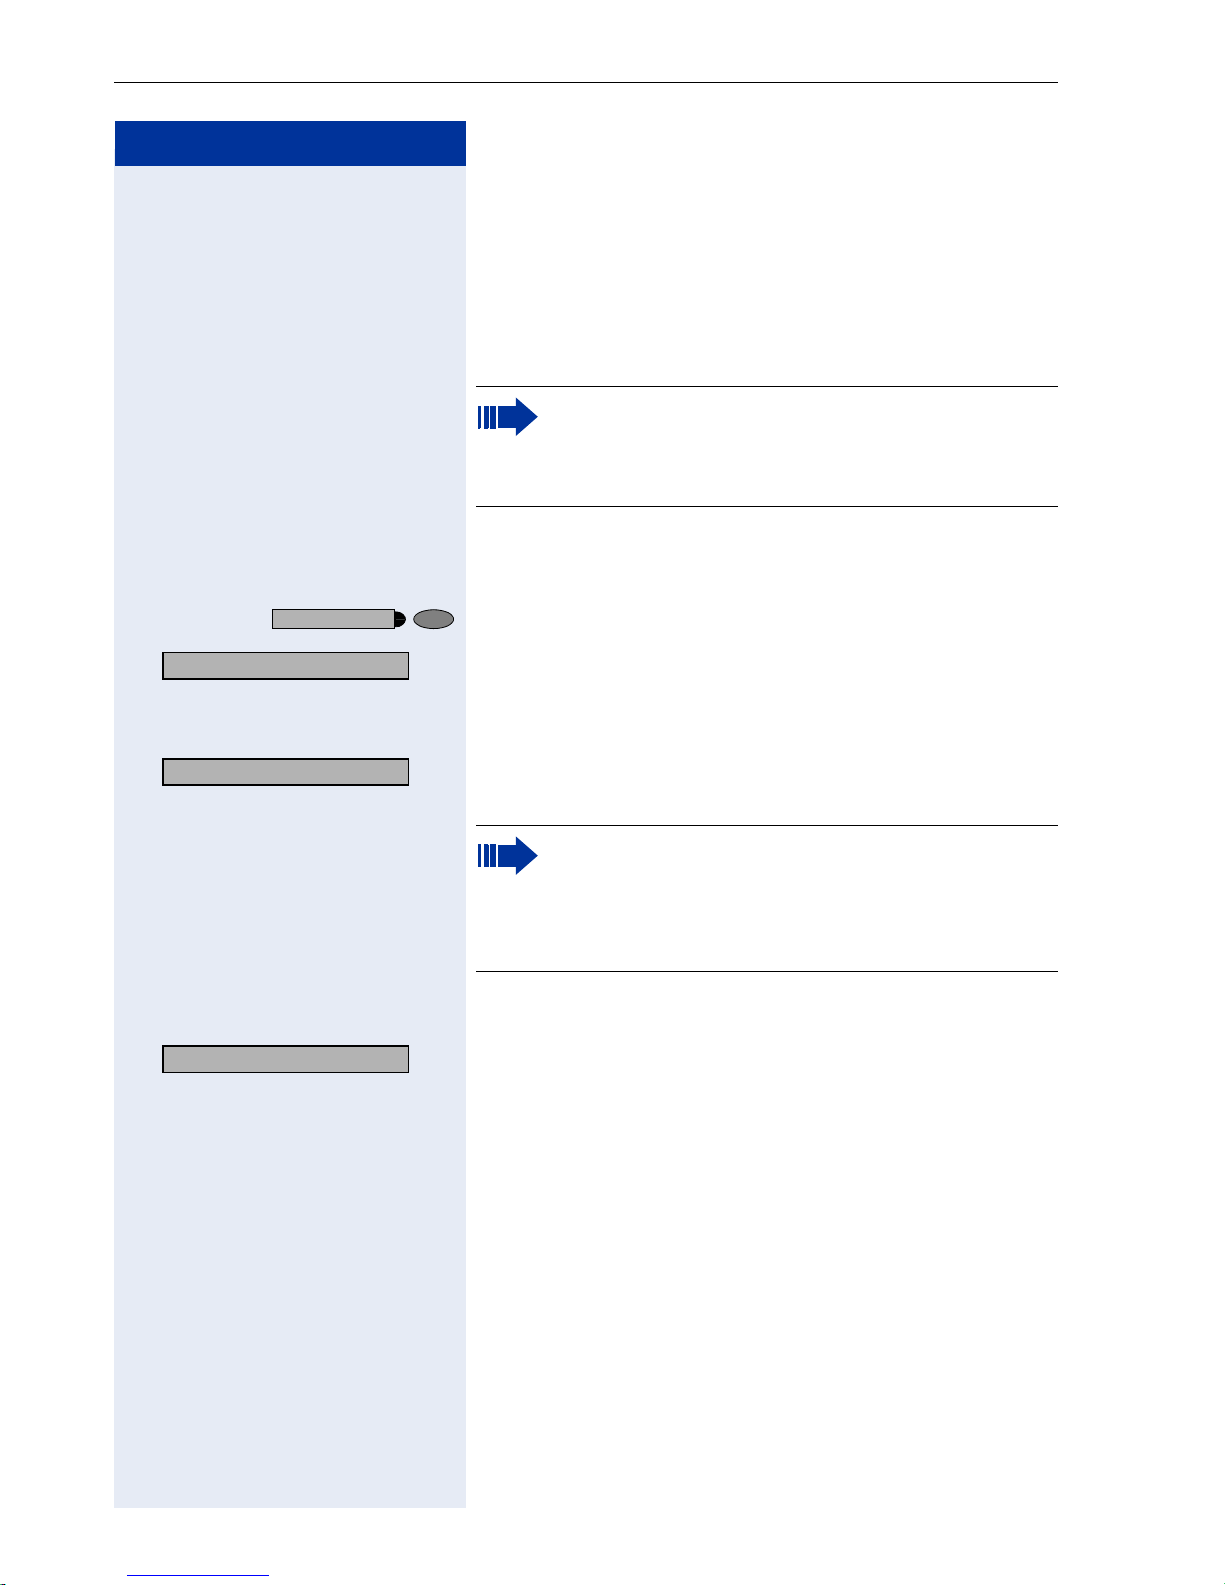
Using Other Team Functions
Step by Step
Activating and Deactivating a Ringing
Group
You can have calls for your telephone signaled audibly at
up to five other internal phones. The person who answers first receives the call.
Special features must be taken into consideration if your telephone operates with
HiPath 5000 (system networking via PC network) ! Page 115!
Saving, displaying, and deleting telephones for the
ringing group:
Program/Service
> : Select and confirm
81=Ringing group on?
*
Press the key. The LED lights up.
1
.
or
qle Enter the code.
> : Follow the display prompts (enter the internal station
number).
Is your telephone a member of a ringing group,
the station number or name of the originator appears on the upper display line and the station
number or name of the caller appears on the lower line.
Removing all telephones in call ringing group:
Ringing group off?
> : Select and confirm.
or
rle Enter the code.
100
[1] ”Different Displays (HiPath 4000 Environment)” ! Page 118
 Loading...