

Siemens Nitro micon BTE User Manual
Life sounds brilliant.
www.bestsound-technology.co.uk
Nitro micon™ BTE
User Guide

2 Content
Content
Welcome 4
Your hearing instruments 5
Getting to know your hearing instruments 5
Components and names 6
Controls 7
Settings 9
Battery size 10
Service information 11
Batteries 12
Replacing non-rechargeable batteries 13
Child lock (optional) 15
Daily use 18
Turning on and off 18
Inserting 20
Removing 21
Adjusting the volume 22
Changing the hearing program 22
Further adjustments (optional) 23
Locking the controls (optional) 24
Using two hearing instruments (optional) 25
On the phone 26
Telephone program 26
Automatic program switch (AutoPhone) 27

3Content
Audio induction loops 29
Telecoil program and remote control 29
Audio input 30
Attaching the audio shoe 31
Removing the audio shoe 32
Maintenance and care 34
Cleaning 34
Drying 35
Storage 35
Troubleshooting 36
Important information 37
Intended use 37
Explanation of symbols 37
Transport and storage conditions 38
Disposal information 38
Technical information 39
Conformance information 41
Important safety information 42
Personal safety 42
Product safety 45
Tinnitus noiser 47
Country-specific information 50

Welcome4
You have chosen one of our hearing instruments, a
reliable partner to accompany you through everday life.
Like everything new, it will take you a little while to
become familiar with it.
This document, along with support from your Hearing
Care Professional, will help you. You will quickly come to
appreciate the advantages and greater quality of life your
hearing instrument offers.
CAUTION
Read this user guide thoroughly and completely
and follow the safety information in this document
to avoid damage or injury.
To benefit most from your hearing instrument, wear it
daily and all day long. Especially after longer periods of
living with hearing loss, a dedicated hearing training is
recommended - with a Hearing Care Professional or at
home.
Welcome

Your hearing instruments 5
Getting to know your hearing instruments
It is recommended to familiarize yourself with your new
hearing instruments. With the instruments in your hand
try using the controls and note their location on the
instrument. This will make it easier for you to feel and
press the controls while wearing the hearing instruments.
If you have problems pressing the controls of your
hearing instruments while wearing them, you can
ask your Hearing Care Professional about a remote
control option.
Your hearing instruments
Your hearing instruments6
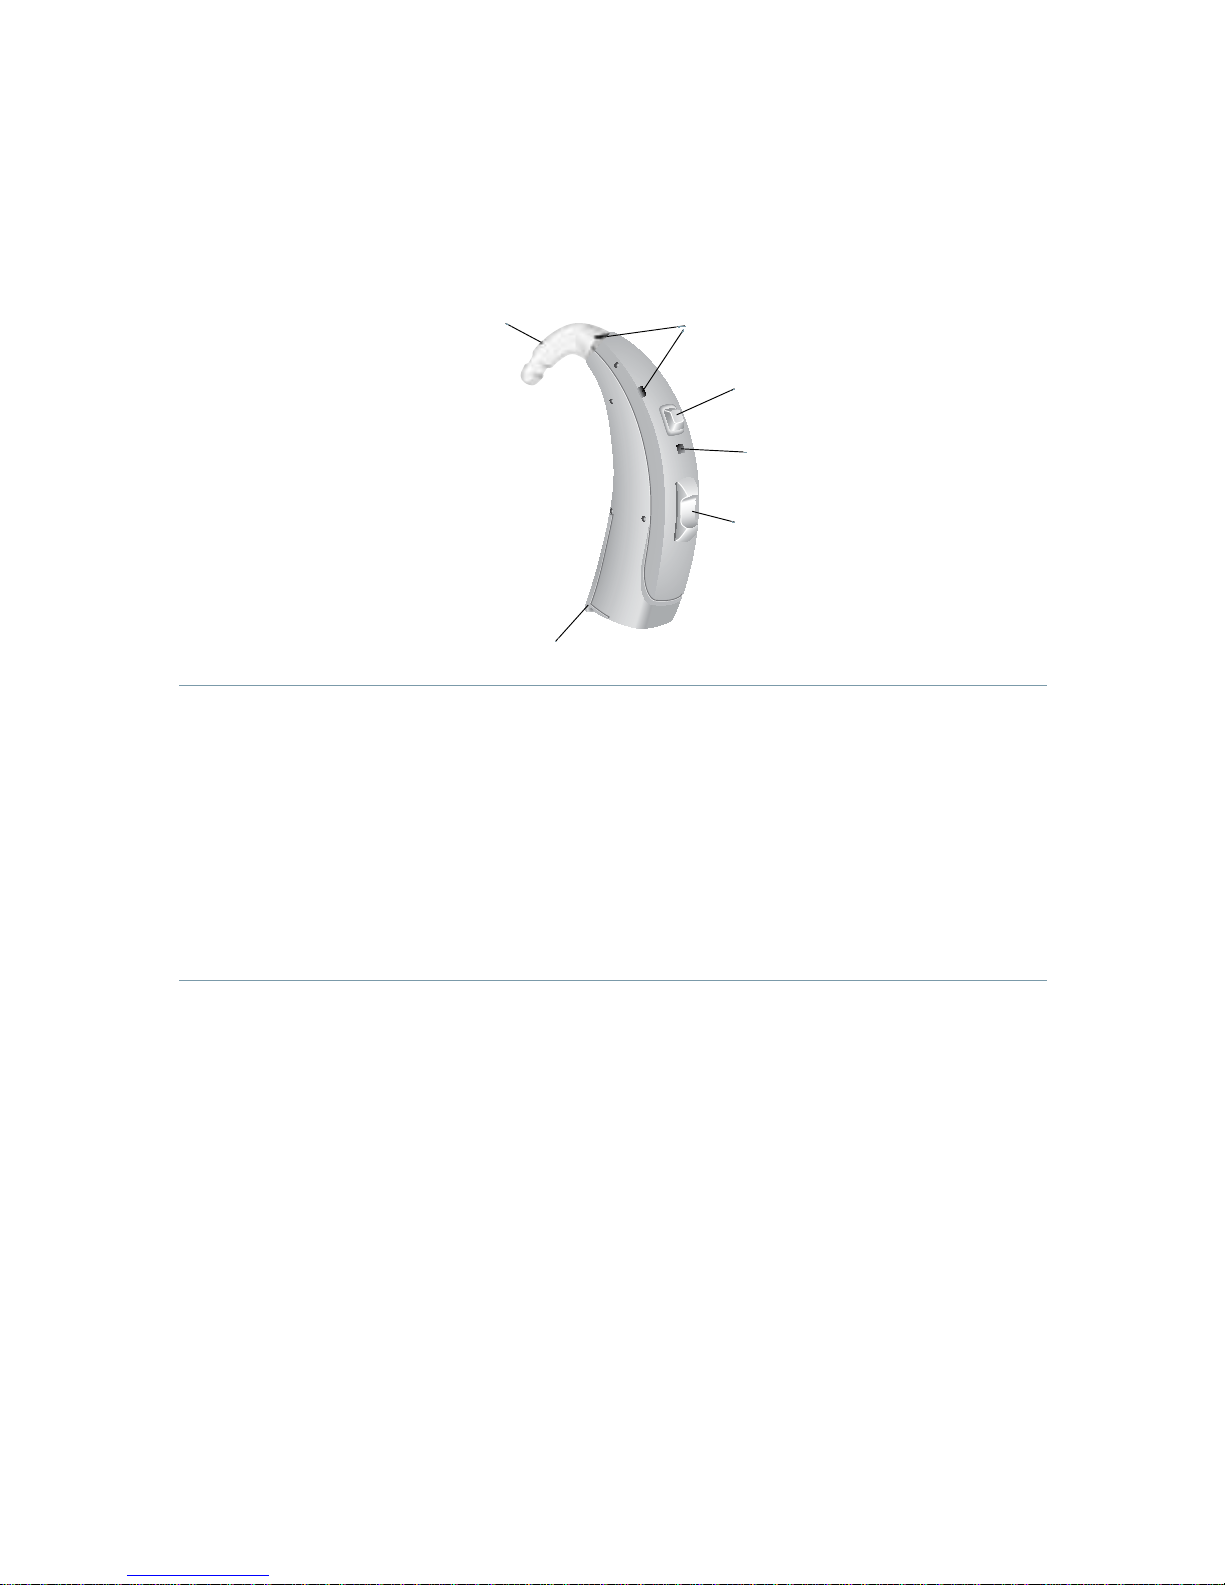
Components and names
➊ Earhook
➋ Microphone
openings
➌ Push button
➍ LED status indicator
➎ Rocker switch (standard) or
flat cover for pediatric use
(optional)
➏ Battery compartment
Your hearing instruments 7
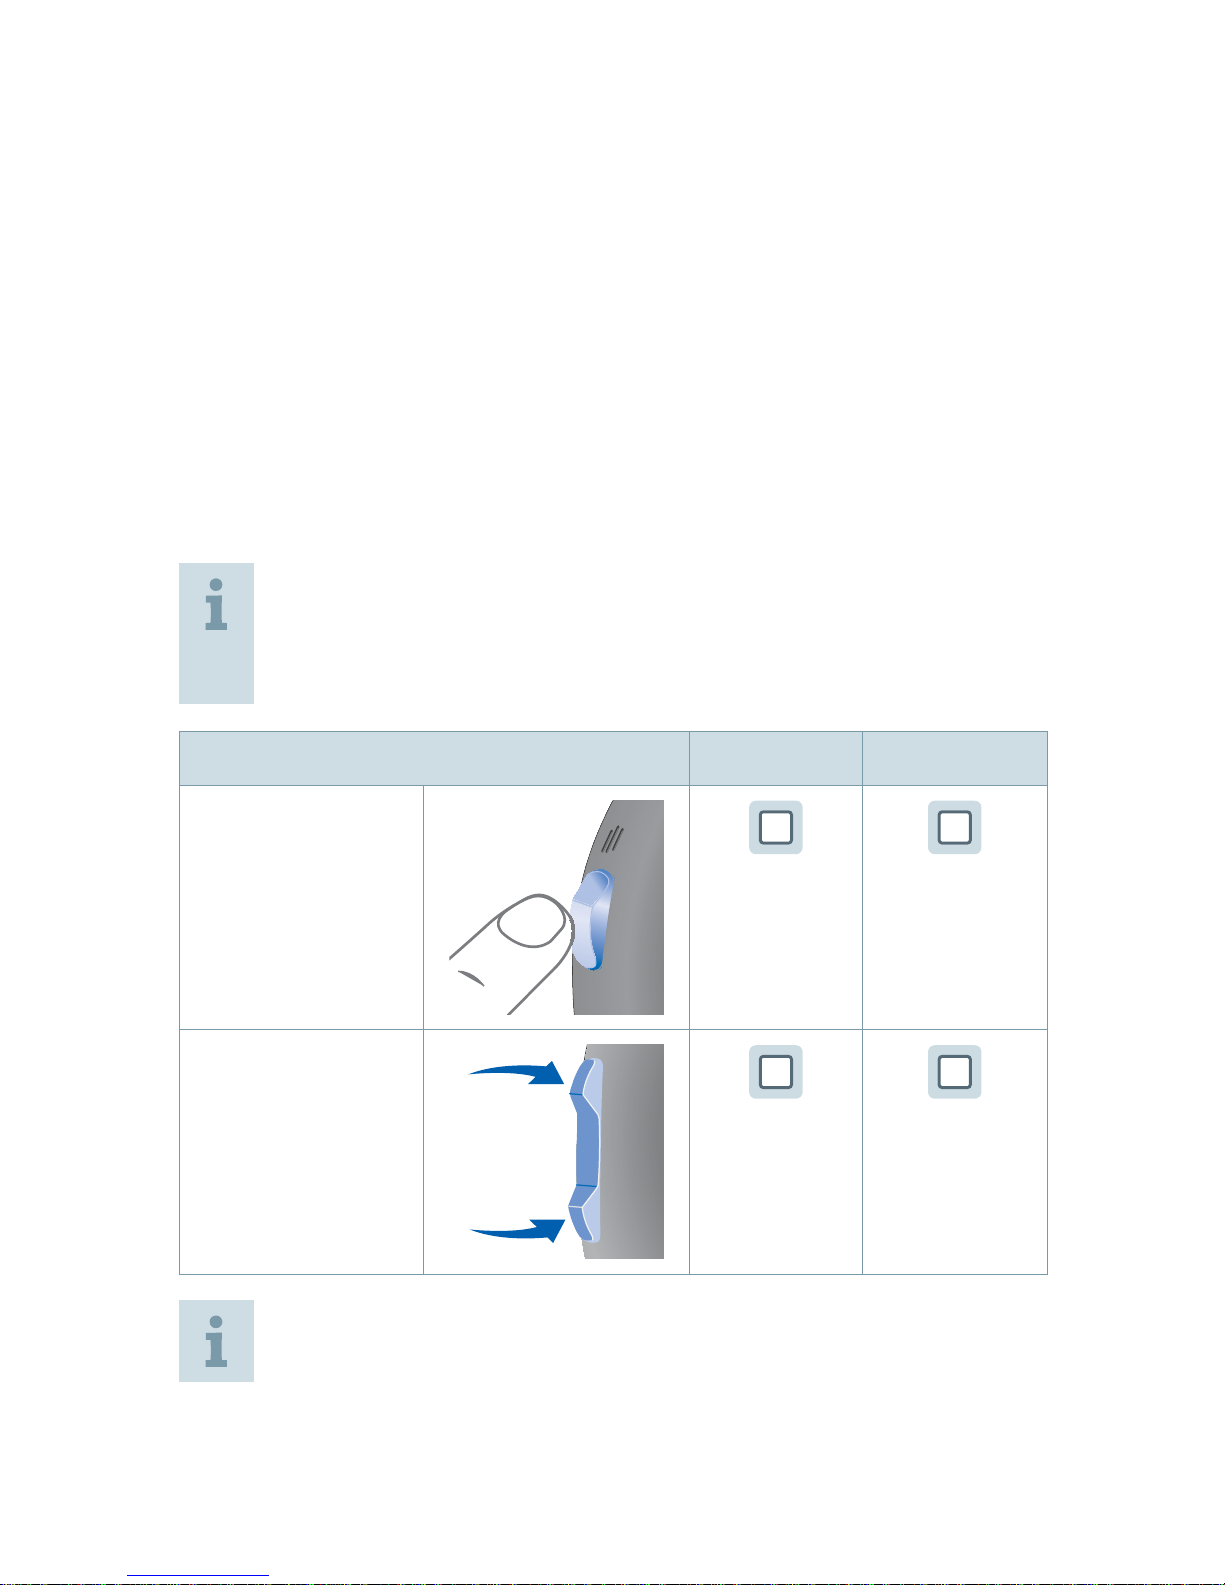
Controls
With the controls you can, for example, adjust the volume
or switch hearing programs. Your hearing instruments
either have a push button and a rocker switch or a
push button only.
The Hearing Care Professional has assigned your desired
functions to the controls.
Ask your Hearing Care Professional to mark your
controls and their functions on the following
pages.
Control Left Right
Push button
Rocker switch
You can also use a remote control.
Your hearing instruments8
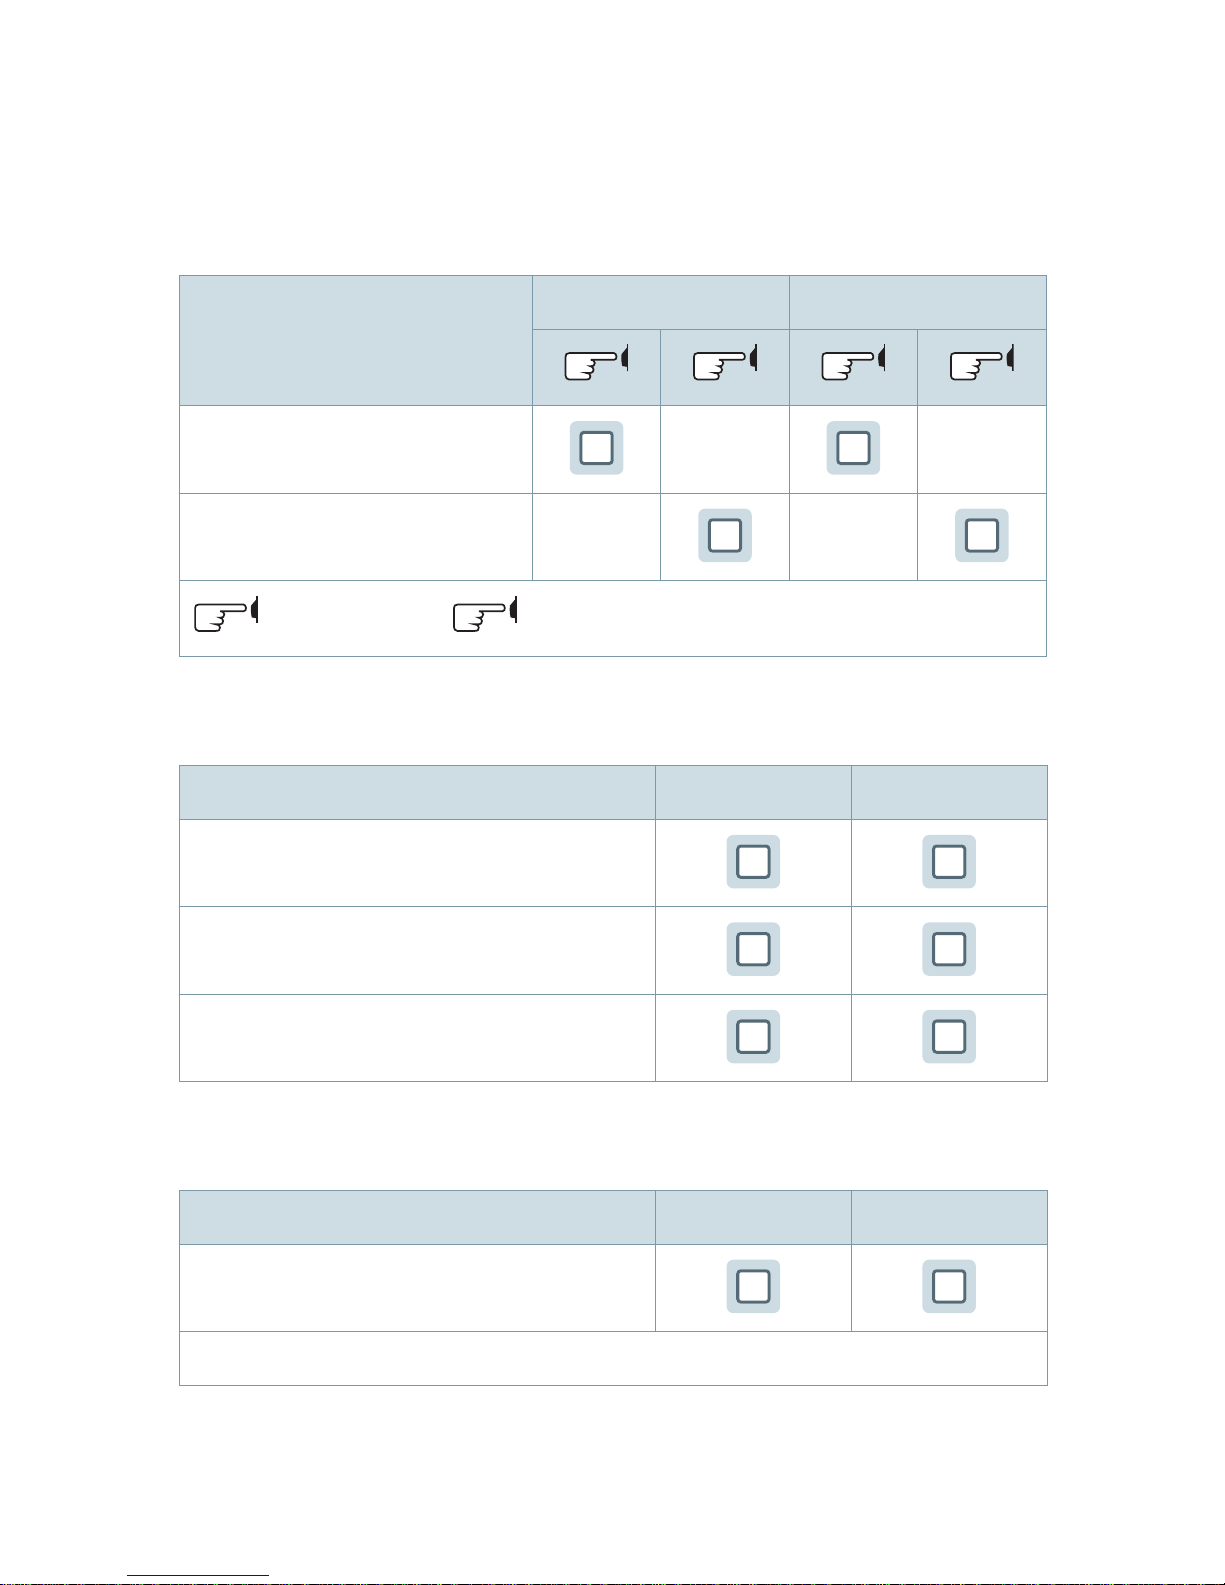
Push button
Function Left Right
Program change
Standby/turn on
press briefly,
press 2 seconds
Rocker switch
Function Left Right
Volume up/down
Tinnitus noiser level up/down
Sound balance
Push button and rocker switch
Function Left Right
Lock / Unlock the controls
Read more in section "Locking the controls".
Your hearing instruments 9
Settings
Ask your Hearing Care Professional to mark your
individual settings on the following pages.
Hearing programs
1
2
3
4
5
6
Read more in section "Changing the hearing program".
Features
Power-on delay enables whistle-free insertion of
hearing instruments.
Read more in section "Turning on and off".
e2e wireless enables simultaneous control of both
hearing instruments.
Read more in section
"Using two hearing instruments".
AutoPhone automatically switches to the telephone
program when the telephone receiver approaches the
ear.
Read more in section "On the phone".

Your hearing instruments10
Accessories
Remote control Audio streamer
Battery size
Batteries
Non-rechargeable (size 675)

Your hearing instruments 11
Service information
Serial numbers
Left:
Right:
Service dates
1:
2:
3:
4:
5:
6:
Your Hearing Care Professional
Date of purchase:

Batteries12
When the battery is low the sound becomes weaker or
you will hear an alert signal. It depends on the battery
type how long you have until you have to replace the
battery.
Your Hearing Care Professional can configure the LED
to indicate the battery status. However, the hearing
instrument must be turned on to indicate the status:
■ When the battery is full, the LED shines constantly.
■ When the battery is low, the LED flashes repeatedly,
approximately every 5 seconds until the battery is
empty.
■ When the battery is empty, the LED goes out.
When the battery compartment is locked, you
need a tool to open it. Read more in section
"Child lock".
Batteries
Batteries 13
Replacing non-rechargeable batteries
Remove empty batteries immediately and dispose of
according to local regulations.
Remember to have your replacement batteries
with you at all times.
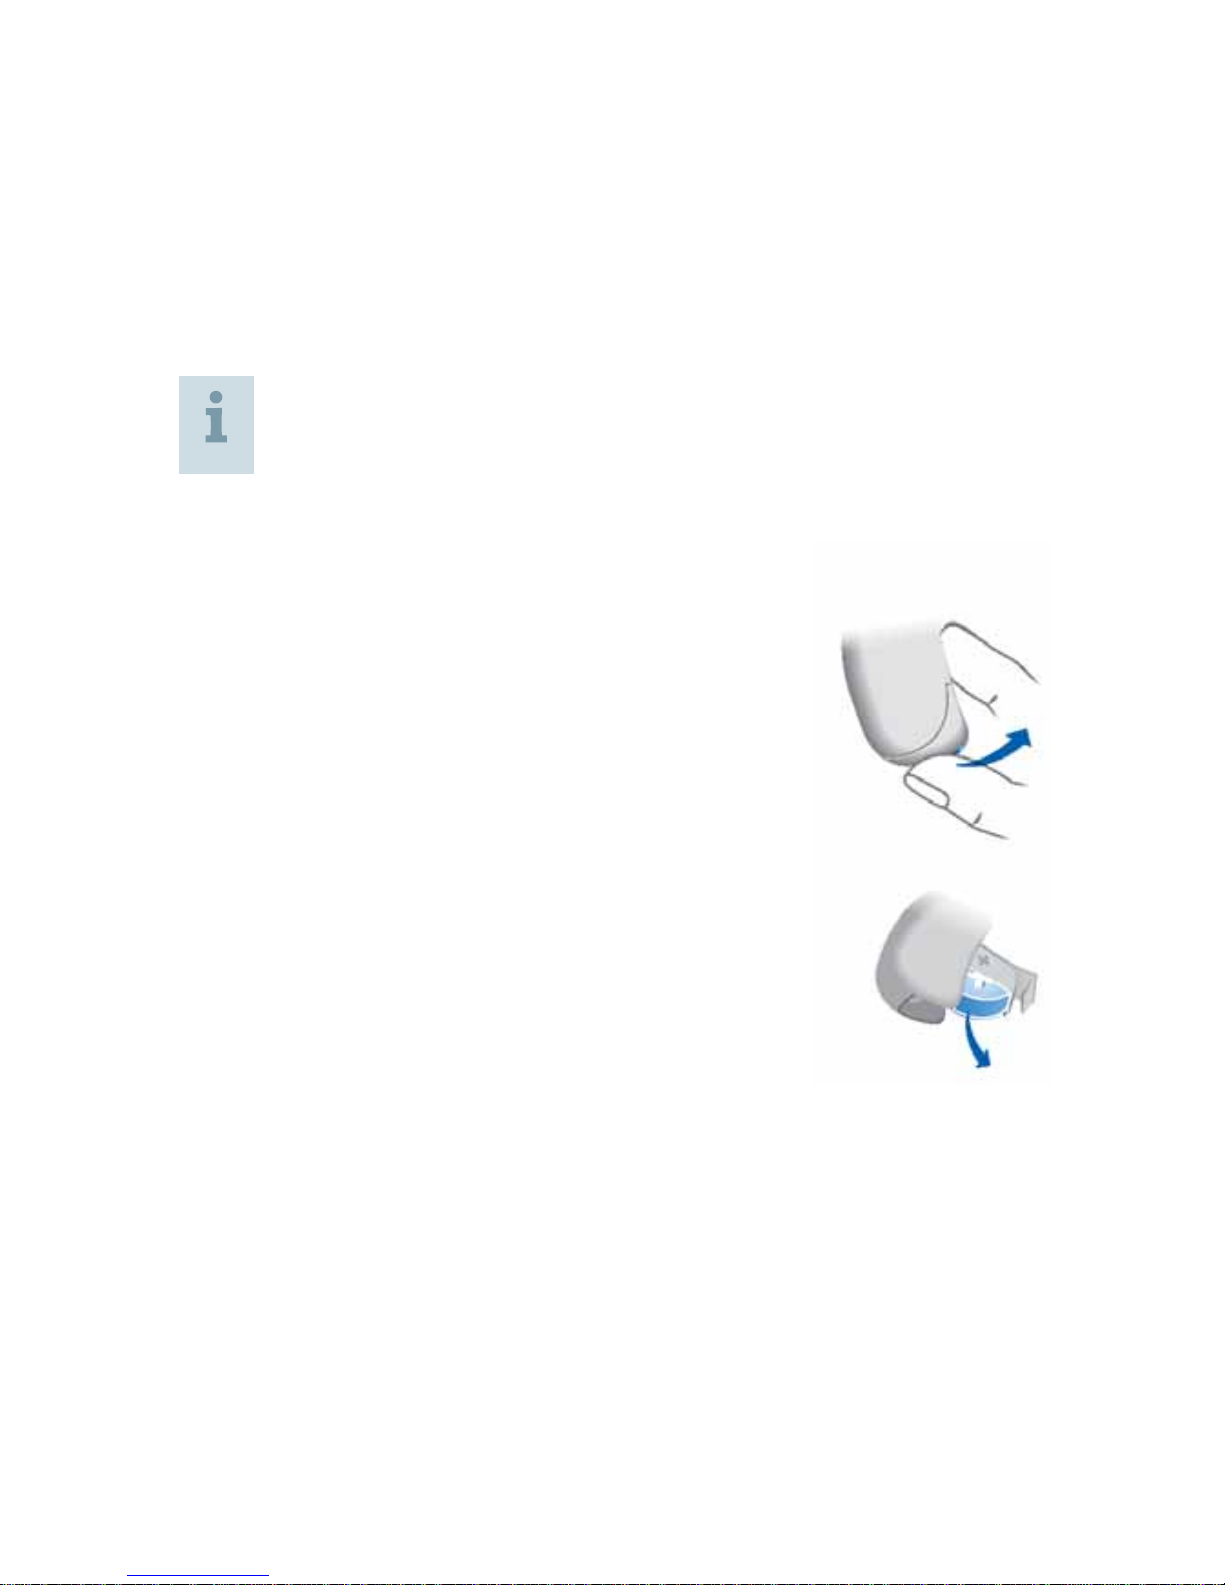
Removing:
X Open the battery compartment.
X Pull the battery out.
Batteries14
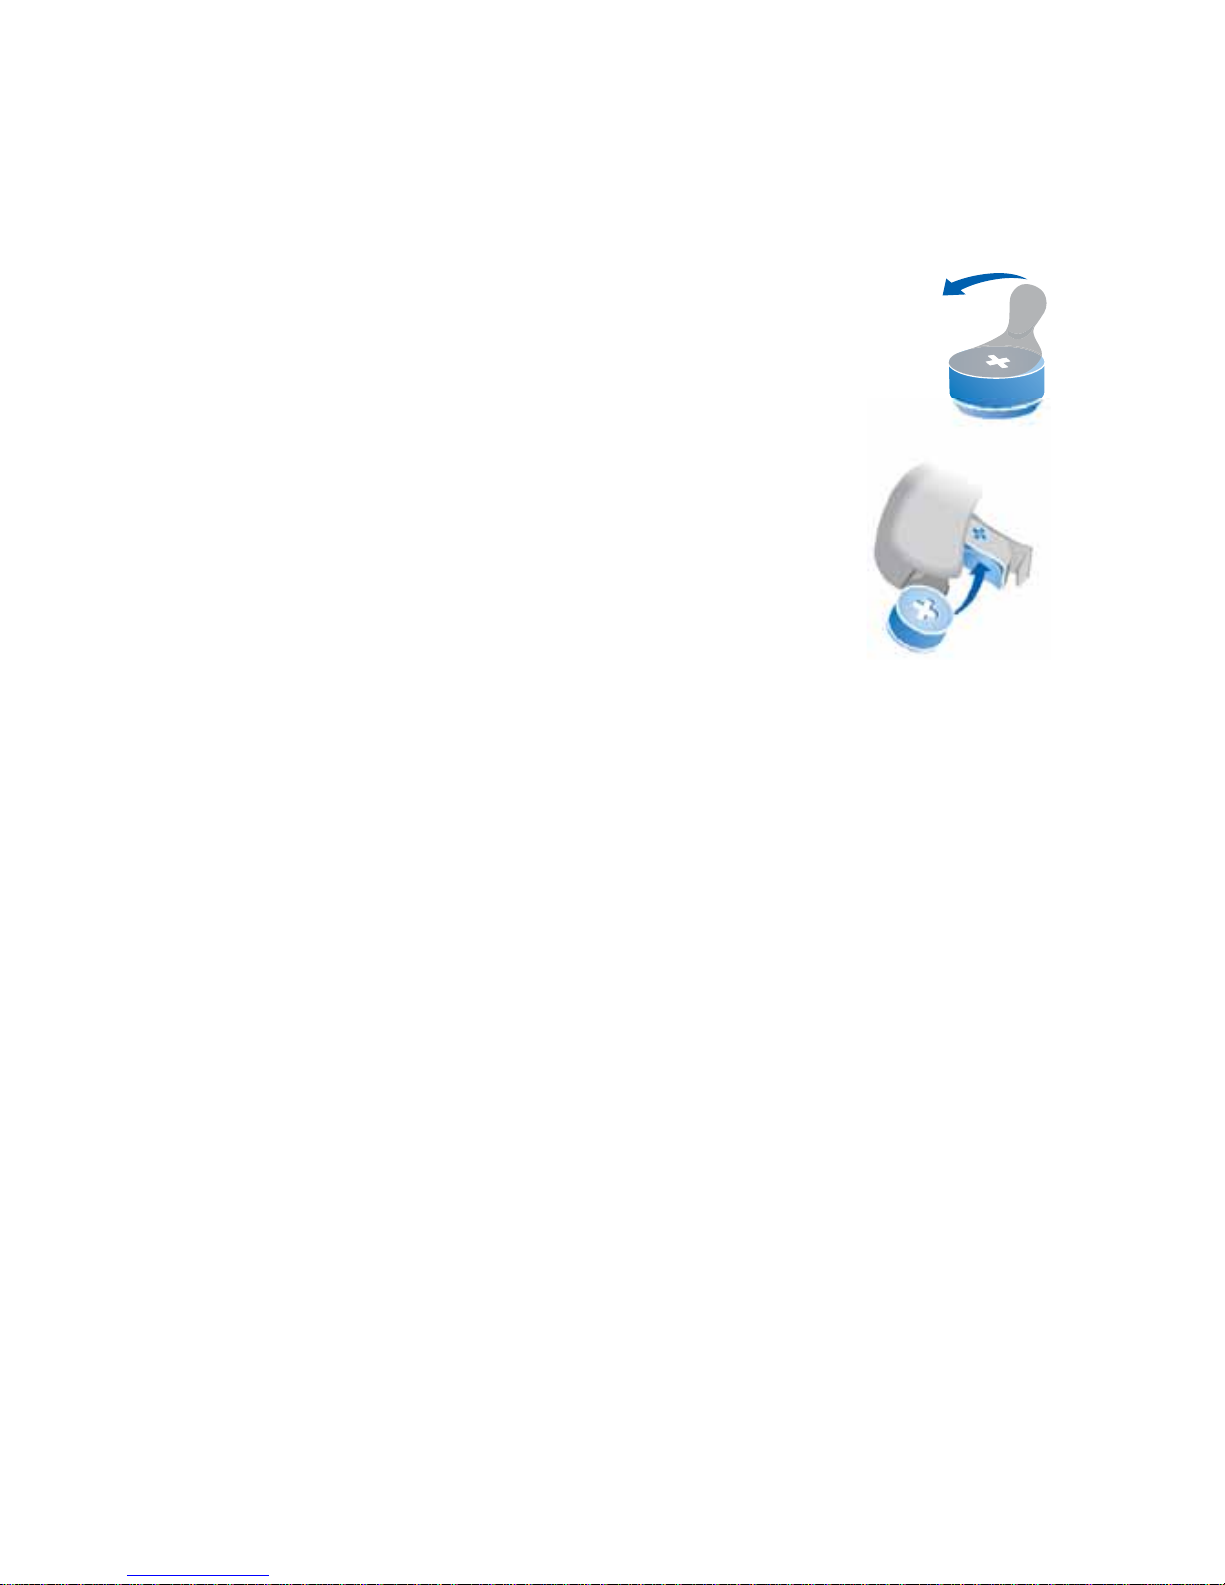
Inserting:
X Remove the protective film from
the new battery.
X Slide the battery into the compartment.
Make sure the "+" symbols on
the battery and compartment
are aligned (refer to the picture).
A magnet in the battery compartment
ensures that the battery snaps noticeably
into place.
X Carefully close the battery compartment. If you feel
resistance, the battery is not inserted correctly.
Do not attempt to close the battery compartment by
force. It can be damaged.
Batteries 15
Child lock (optional)
Your hearing instruments can be modified to provide a
child-safe battery compartment, which can be locked
(child lock). The child lock has to be activated by the
Hearing Care Professional.
With the child lock enabled, the battery compartment will
automatically lock when closed. This prevents e.g. a child
from removing and swallowing the battery.
To open the locked battery compartment, you need a
tool. The tool is included with delivery of any child-lock
battery compartment set.
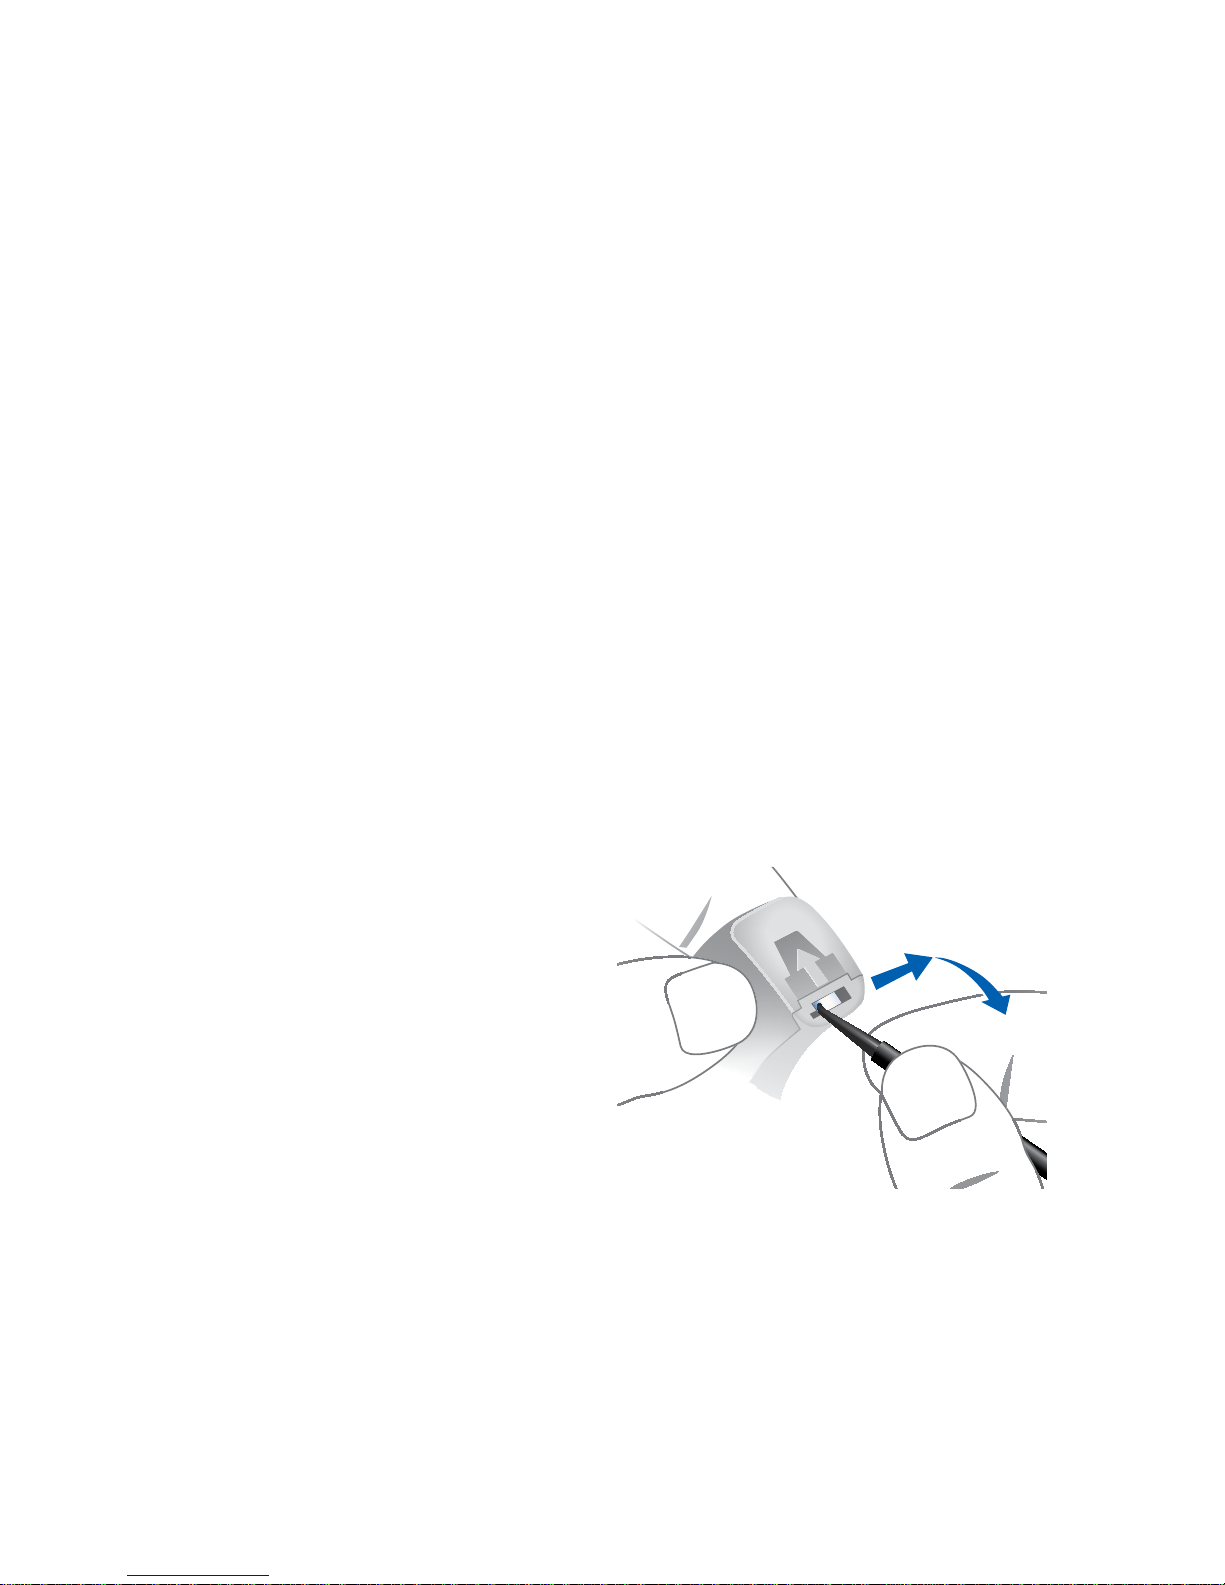
Opening a locked battery compartment:
X Use the tool to push
the white locking bar
to the opposite side.
X Hold it in place and
at the same time
open the battery
compartment.

Batteries16
Locking / Unlocking the battery compartment
To lock or unlock the battery compartment,
a special tool is required. Your Hearing Care
Professional will lock or unlock the battery
compartment for you.
The following instructions are for your Hearing
Care Professional only.
The position of the locking bar in the battery
compartment indicates whether the battery compartment
is locked.
The upper image shows an unlocked battery
compartment. To lock it, the Hearing Care
Professional has to remove the highlighted
part.
The lower image shows a locked battery
compartment. To unlock it, the Hearing
Care Professional has to install a child lock
disabler.
 Loading...