

Siemens Nitro BTE, Nitro 700 SP, Nitro 300 SP User Manual

Nitro BTE
User Guide

2

1
Introduction
Dear customer,
Congratulations! You have selected a hearing instrument
from Siemens. This hearing instrument was individually
designed for your hearing impairment and is fitted
specially to your personal hearing profile.
These instructions, together with guidance from your
Hearing Care Professional, will help you understand how
your new hearing instrument works.
If you have any further questions, please contact your
Hearing Care Professional.
3
Your Nitro hearing instrument 6
Intended use 7
General notes on safety 8
Handling batteries 10
Low battery indicato
- r
Inserting the batter
- y
Removing the batter
- y
Inserting and removing your hearing instrument 13
Inserting your hearing instrumen
- t
Removing your hearing instrumen
- t
Turning your hearing instrument on and off 14
Via push butto
- n
Via volume contro
- l
Via remote contro
- l
Power-on dela
- y
Checking the hearing instrument's performance
-
Changing the hearing program 16
Via push butto
- n
Via remote contro
- l
Changing the volume 17
Via volume contro
- l
Via remote contro
- l
Contents
2
3
4
5
6
7
8
9
10
4
2
Audio input 18
Attaching the audio sho
- e
Removing the audio sho
- e
Telephoning 20
AutoPhone
-
TM
function
Manual telephone progra
- m
e2e wireless 2.0 22
Maintenance and care 23
Accessories 24
SafeFit Ki
- t
Remote contro
- l
Tek wireless enhancemen
- t
Troubleshooting tips 27
Technical information 29
Disposal information 31
Your hearing instrument configuration 32
11
12
13
14
15
16
17
18
19
5
3
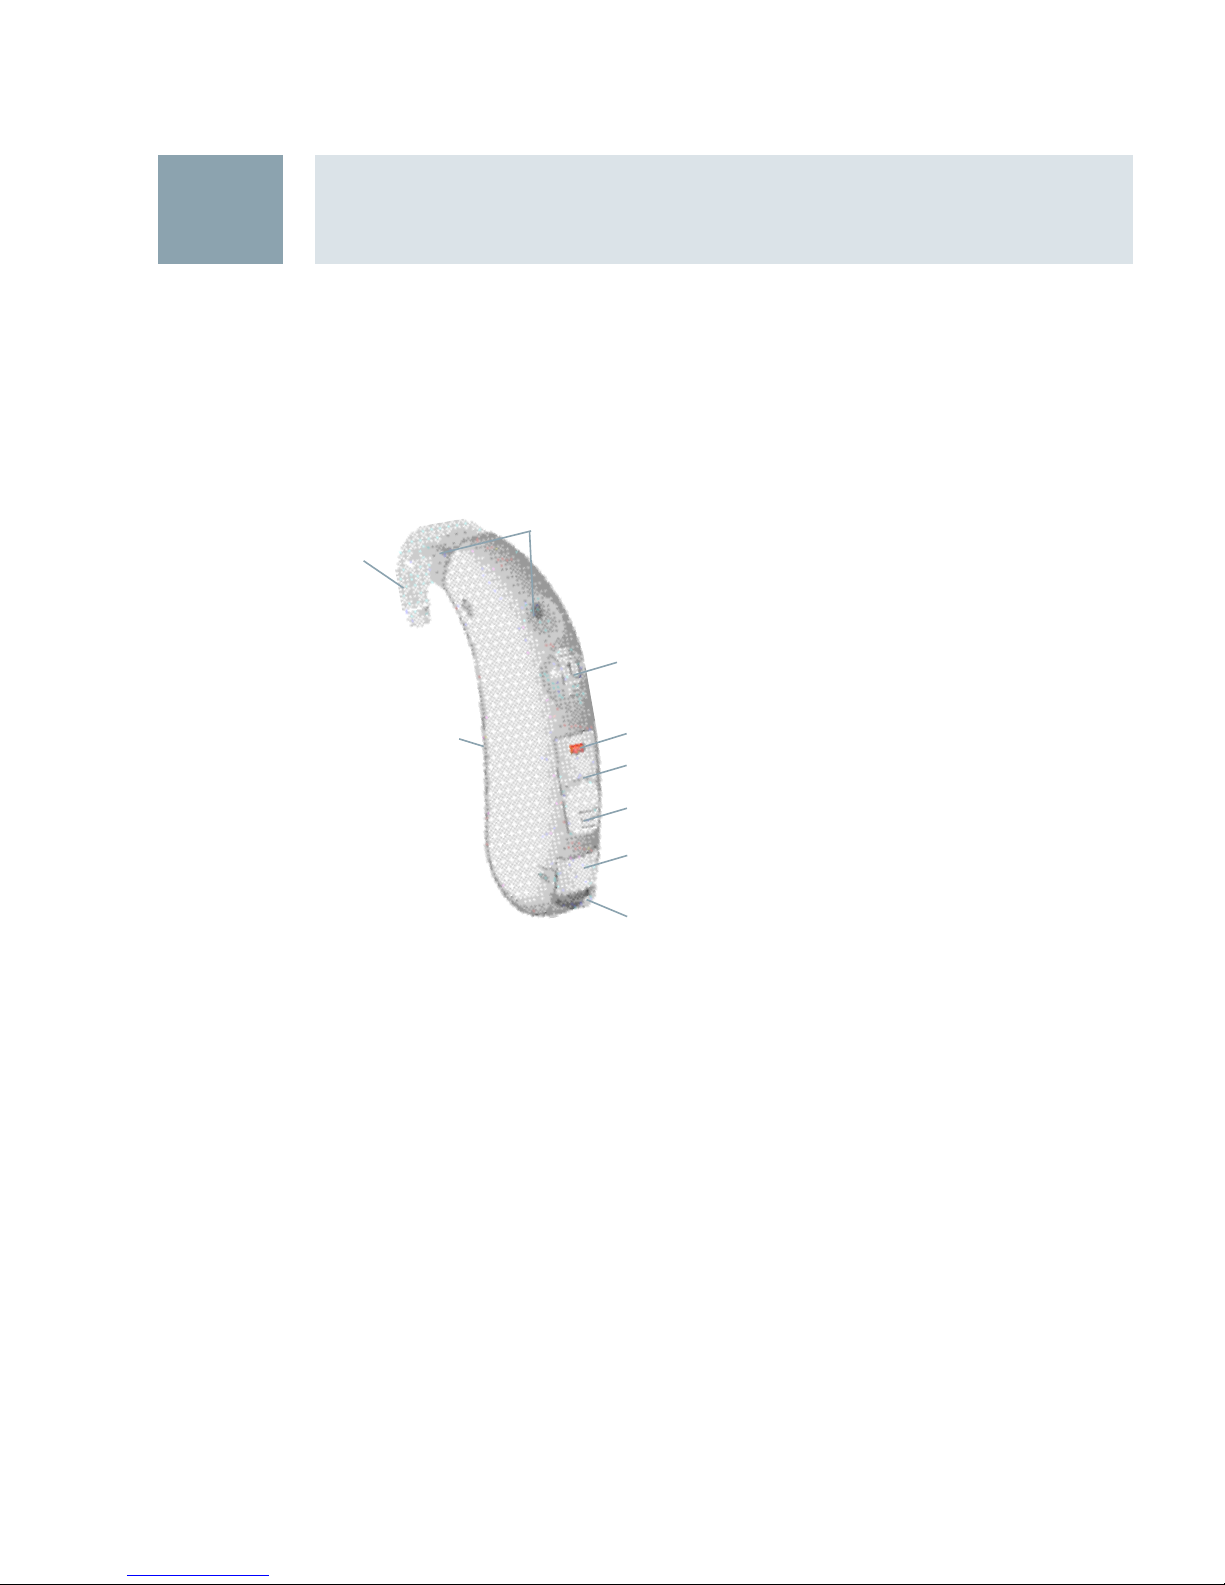
Your Nitro hearing instrument
① Earhook
② Battery compartment
③ Microphone openings
④ Audio input
⑤ Volume control with
on/off function
⑥ Program button with
on/off function
Nitro SP
(battery type: 675)
⑦ LED
⑧ Cover for program-
ming socket
⑨ Typeplates
red = right hearing
instrument
blue = left hearing
instrument
①
②
③
④
⑤
⑥
⑧
⑨
⑦
6

4
Intended use
Hearing instruments are intended to improve the hearing
of hearing impaired persons. Diagnosis and prescription
of a hearing instrument must be performed by hearing
health specialists, e.g. ENT doctors, audiologists or acousticians.
Read and follow the instructions of this user guide to
avoid injuries or damage to the hearing instruments.
Symbols:
Be aware of information marked with the warning symbol WARNING, CAUTION or NOTICE!
WARNING points out a situation that could
lead to serious injuries,
CAUTION indicates a situation that could
lead to minor and moderate injuries.
NOTICE
NOTICE indicates possible property
damage.
Advice and tips on how to handle your
hearing instruments better.
Instruction. Indicates that something has
to be done.
7

General notes on safety
5
NOTICE
Your hearing instruments are sensitive to extreme heat,
high humidity, strong magnetic fields (> 0.1T), X-rays and
mechanical stress.
Do not expose your hearing instruments to extreme
X
temperature or high humidity.
Do not leave them in direct sunlight.
X
Do not wear your hearing instruments in the shower or X
when you apply make-up, perfume, aftershave, hairspray or suntan lotion.
Do not wear your hearing instruments when you are
X
exposed to short-waves, a strong magnetic field, a high
frequency field or X-rays.
Do not place your hearing instruments in a microwave
X
oven.
WARNING
Choking hazard posed by small parts.
Keep hearing instruments, batteries and accessories
X
out of children‘s reach.
If swallowed consult a physician or hospital immedi-
X
ately.
If small children or mentally disabled persons need to
X
wear hearing instruments ensure adequate
supervision.
8

General notes on safety
5
WARNING
Risk in explosive environments, e.g. mining areas!
Don't use your hearing instruments (and remote con-
X
trol) in areas where there is a danger of explosions.
NOTICE for batteries
Leaking batteries damage the hearing instruments.
Remove batteries when the hearing instruments are
X
not in use for a prolonged period of time.
Turn your hearing instruments off when not in use to
X
preserve the battery.
In some countries restrictions for the usage of wireless
equipment exist.
Refer to local authorities for further information.
X
9
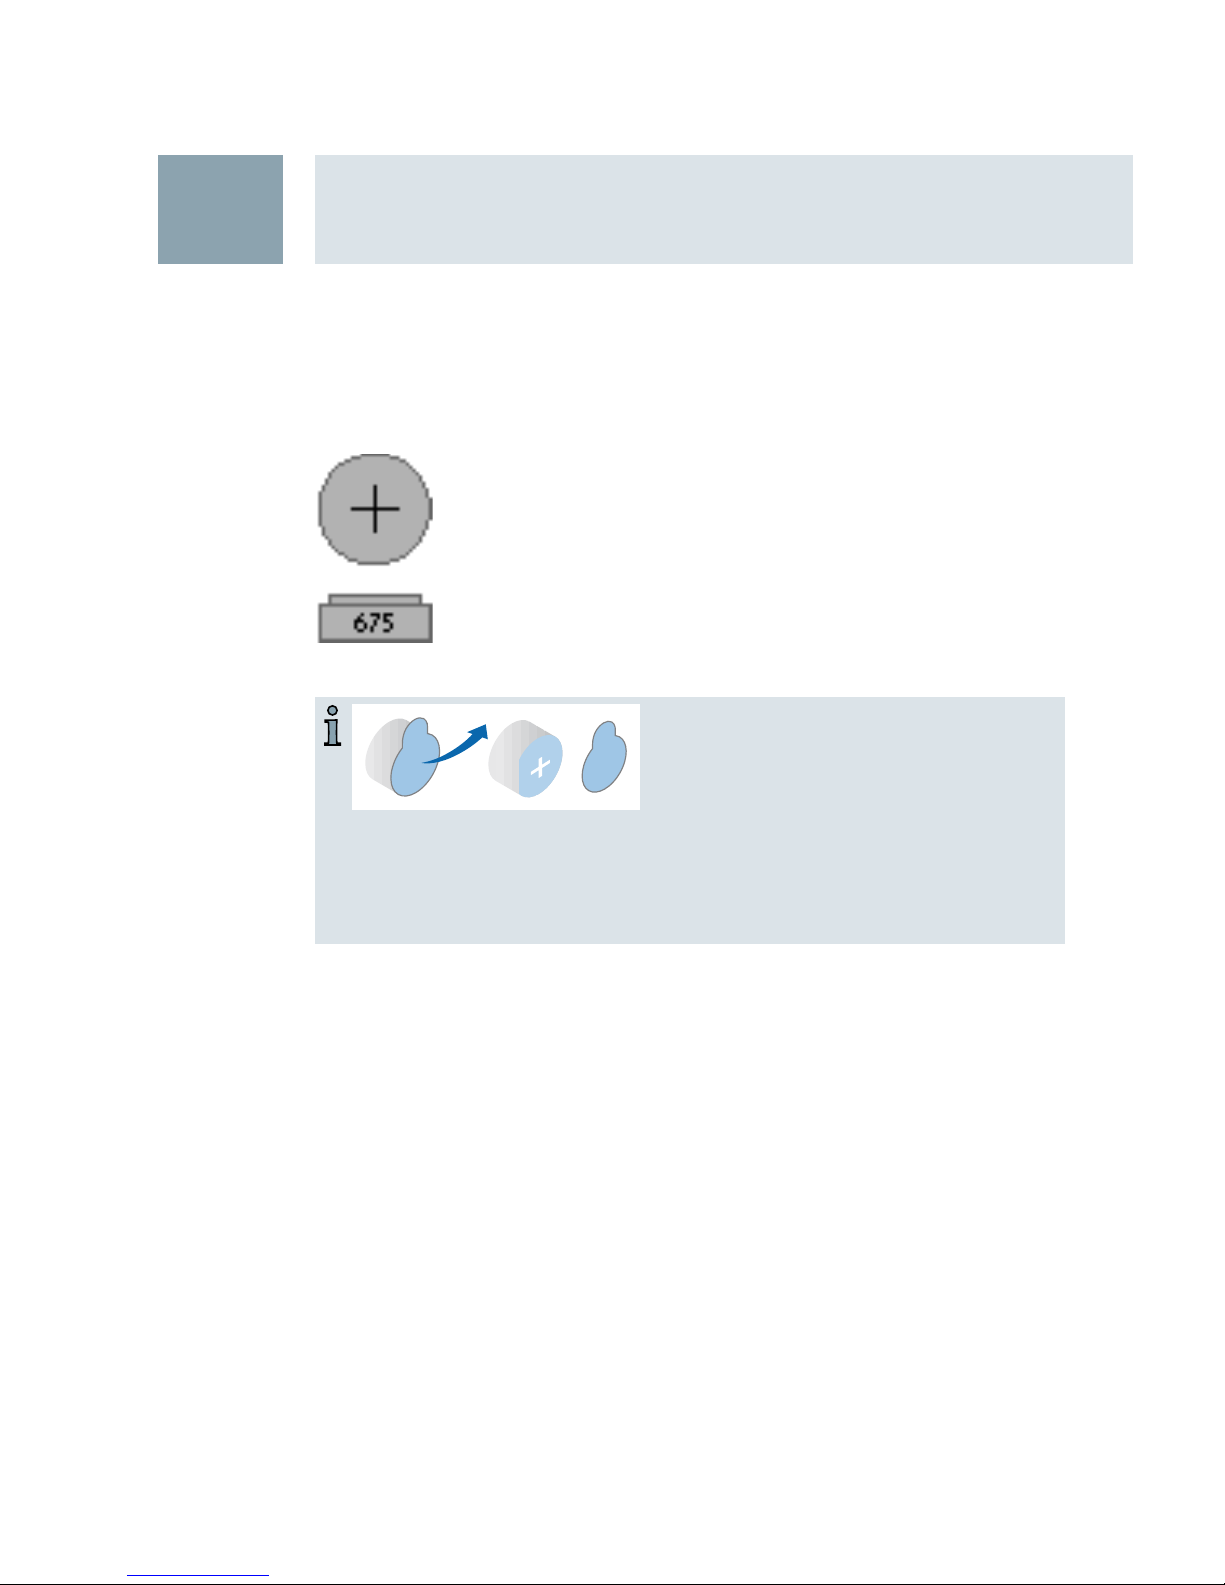
Handling batteries
6
Remove the tab on your X
batteries only when you
are ready to use them.
The positive (+) side of the batteries is always the
X
smooth side.
Always keep spare batteries with you.
X
Low battery indicator
Your Hearing Care Professional can activate an acoustic
signal to inform you when the battery is nearly empty.
If you hear an acoustic signal or experience low amplification power, replace the battery.
original size
Use standard batteries in your hearing in- X
struments.
Always use the right size batteries.
X
10
Handling batteries
6
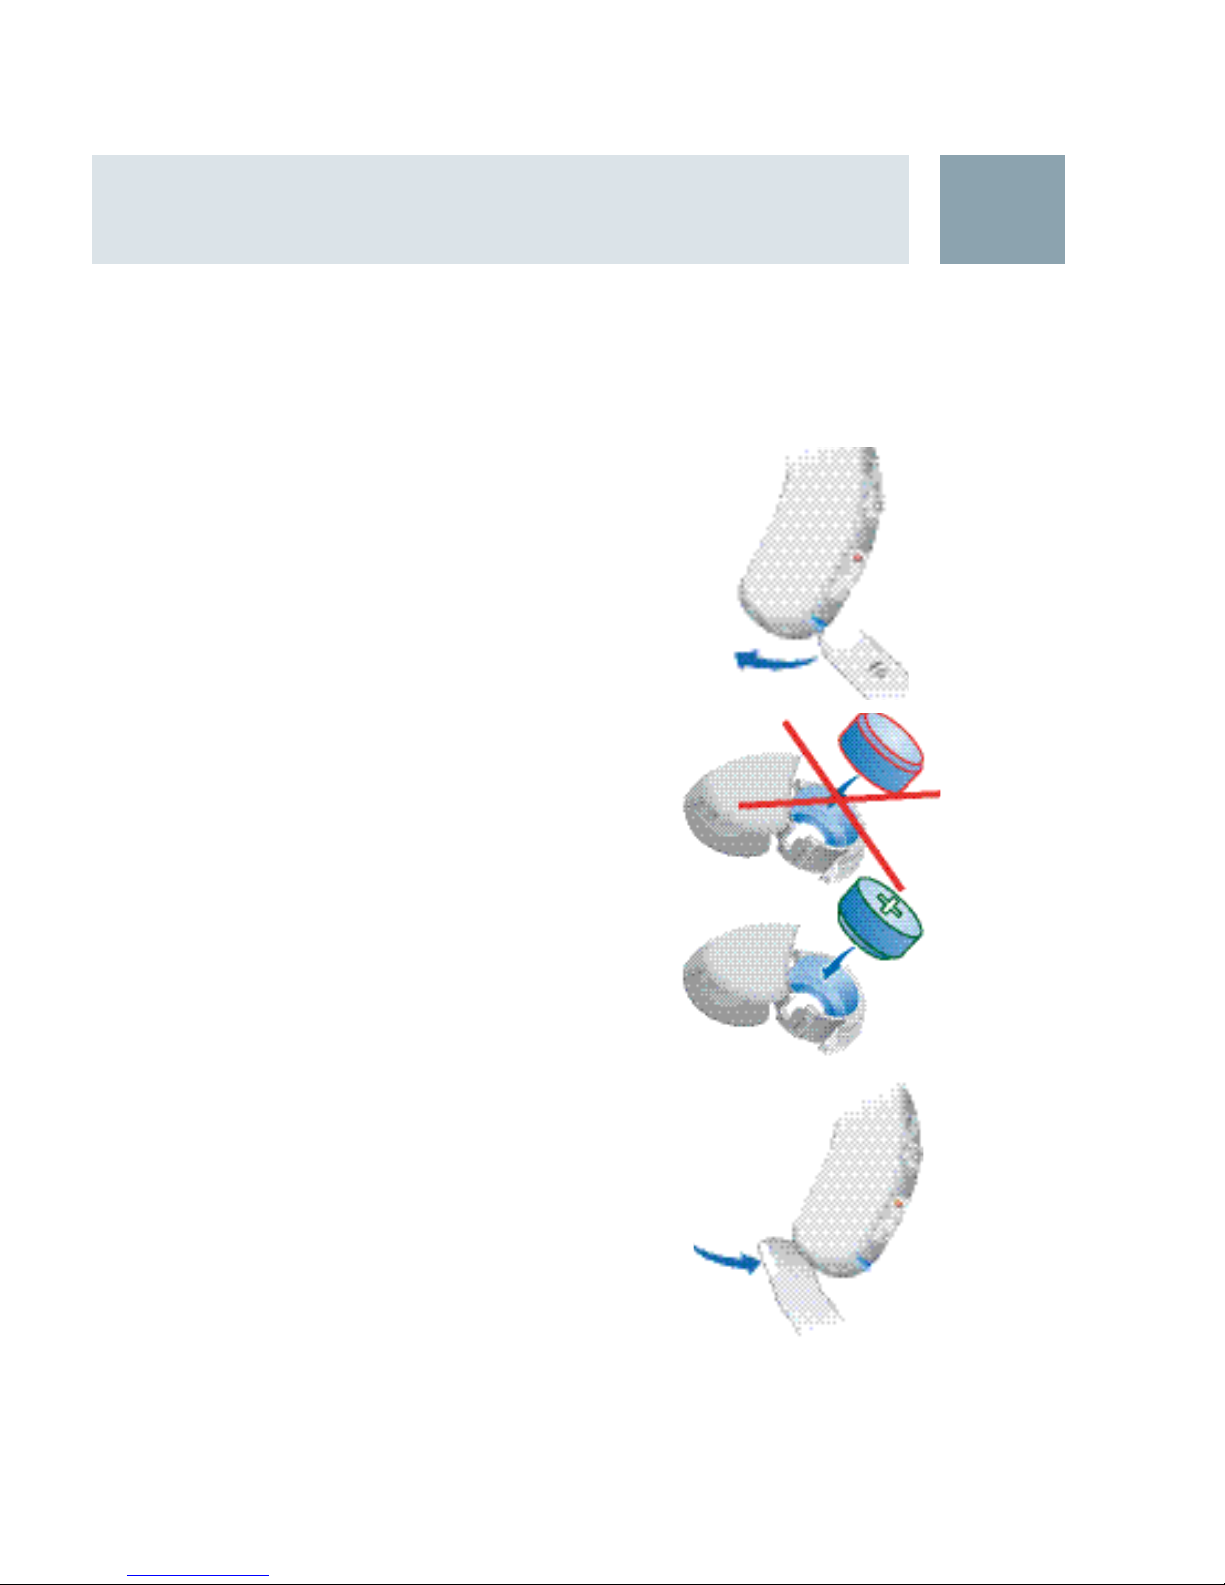
Inserting the battery
Open the battery compartment X
completely using your fingernail as
shown in the illustration.
Insert the proper size battery so that
X
the "+" symbol on the battery aligns
with the "+" marked on the battery
compartment.
Close the battery compartment by
X
gently pressing the bottom of the door
upward with your finger tip.
Do not force the door shut. If it does
not close easily, check to see if the battery was inserted properly.
When the battery door is completely
closed, your hearing instrument is ready
for use.
11
 Loading...