

Page 1
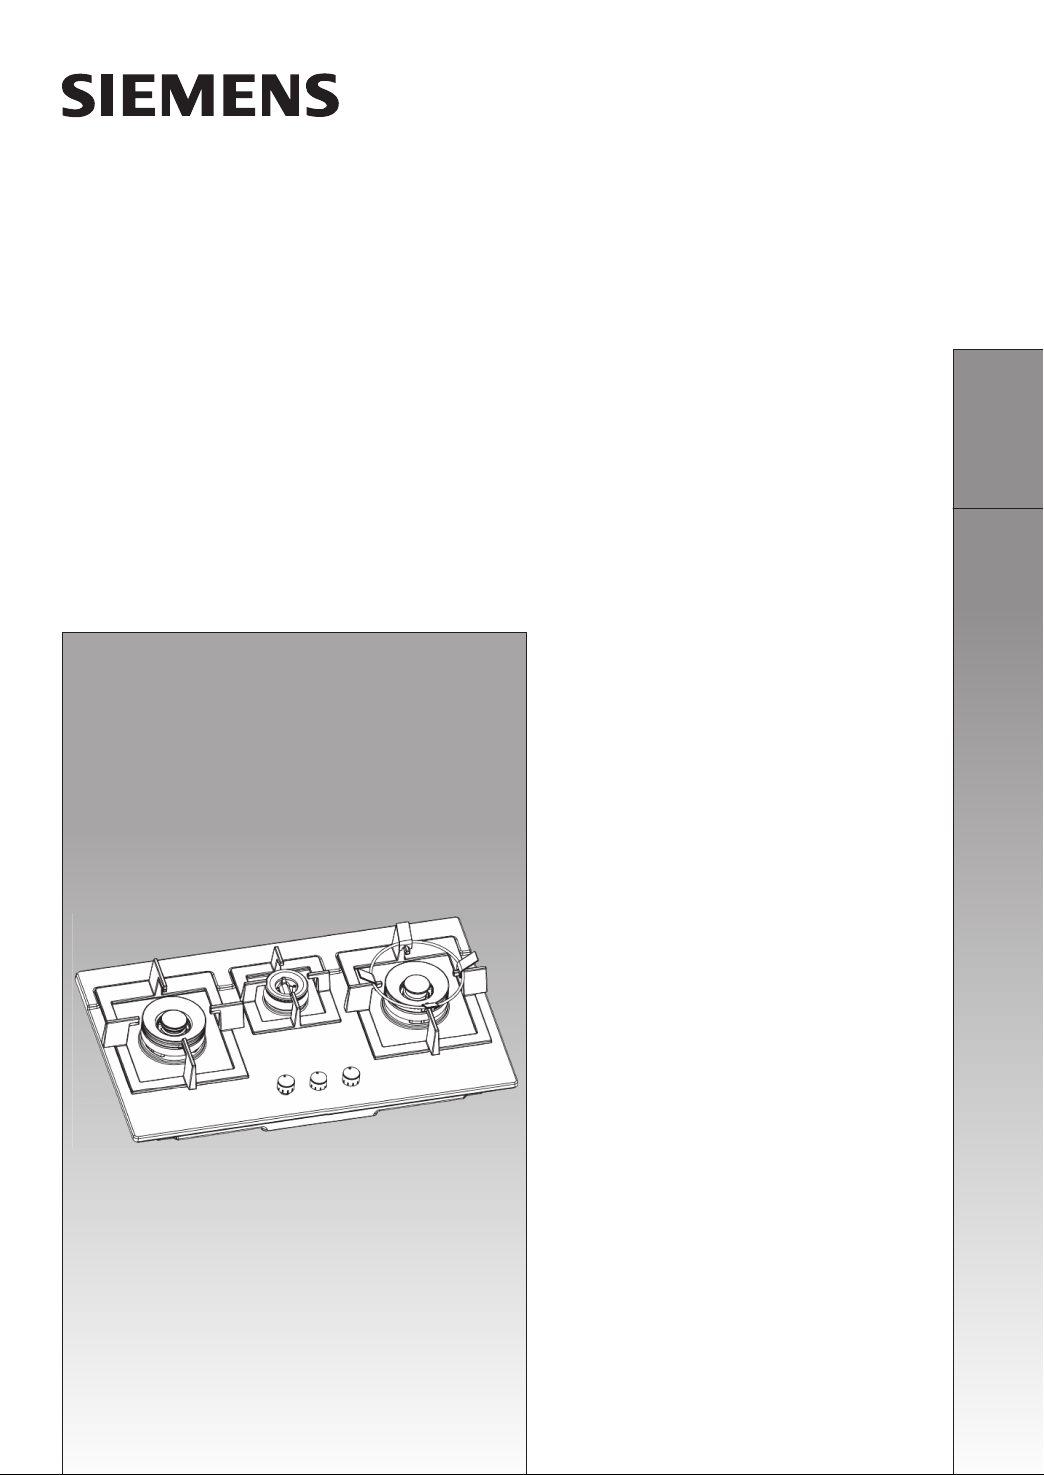
BUILT-IN GAS HOBS
INSTALLATION AND OPERATION INSTRUCTION
en
ER74357HK
ER74253HK
ER74333HK
ER74232HK
Page 2

Page 3

Preface
Dear customer,
Congratulations on your choice and thank you for purchasing one of our appliances. This practical,
modern and functional appliance is manufactured using materials of the highest quality which are
subject to strict Quality Control checks throughout the entire manufacturing process. The appliance
is meticulously tested to ensure that it meets your demands and produces perfect cooking results.
Do not remove the appliance from its protective packaging until it is installed in the unit.
Please read these instructions carefully before proceeding to install and use the appliance. The
information contained in these instructions is essential for the correct operation of the appliance
and, more importantly, for your safety.
The packaging of your appliance has been manufactured using only the materials which are strictly
necessary to guarantee efcient protection during transport.
These materials are 100% recyclable, thus reducing the environmental impact. You can also
contribute to caring for the environment, by following the advice below:
- dispose of the packaging in the appropriate recycling bin.
- before you get rid of an old appliance, make sure you disable it. Contact your local authority to nd
out the address of your nearest recycling centre to dispose of your appliance.
- do not pour used oil down the sink. Collect it in a sealed container and take it to an appropriate
collection point or, failing that, place it in the rubbish bin (it will end up in a controlled dump; this is
probably not the best option, but it will avoid contaminating ground water).
IMPORTANT:
In the unlikely event that the appliance should be damaged or not meet your expectations in terms
of quality, please inform us as soon as possible. For the warranty to be valid, the appliance must not
have been tampered with, or used inappropriately.
Page 4
Table of Contents
Safety Precautions
Your new appliance
Installation
The gas burner operation
Cleaning and Maintenance
Packaging of the new hob
Disposal of the old hob
Safety precautions
Placement location
Countertop tapping
Connect to gas pipeline
Gas leak detection
Plug into the socket
Pan supports, caps and burner
Getting familiar with your new hob
Before rst use
Adjusting power
Operation method
Unsuitable products
Maintenance
2
2
2
8
9
11
12
13
13
14
16
17
17
18
19
20
20
Faults
Technical Assistance
Service
Used appliances and
packaging
Technical data
1
Warranty condition
Environmentally-friendly waste management
21
22
22
22
22
23
Page 5
Safety precautions
Packaging of the new hob
Disposal of the old hob
Safety precautions
All the packaging material are environmental friendly and
recyclable. When you are disposing of these packaging
materials, please do so in such a way that protects the
environment and minimizes waste.
Do not allow children to play with the thin lm or packaging
case to avoid suffocation or accidents.
The old hob should be taken to a recycling center where it
can be disposed of in a way which protects the environment.
Old hobs contain useful materials that can be recycled.
Discarded old electrical appliances can be hazardous to the
environment.
Read these instructions carefully. Reading these instructions
will enable you to use your appliance safely and effectively.
Use approved gas tubing bearing EMSD approval
marking (such as :
GTXXXX) for connection to appliances, or other
appropriate methods accepted by EMSD.
機電工程署批准
EMSD APPROVAL
Nameplate
HK Town Gas connection
The operating pressure of this gas hob is 15mbar, therefore
no governor is required.
Attention! According to the Gas Safety Regulations of
Hong Kong, any gas installation works including the
installation of appliances and connection tubing, must
be undertaken by registered gas installers who are
registered for that appropriate classes and be employed
by registered gas contractors.
When installing built-in gas hob on top of stove cabinet,
please check that there is provision for ventilation at the
cabinet to ensure proper operation of the gas hob.
Do not store any ammable materials, sprays or
pressurized containers inside the stove cabinet.
2
Page 6
Safety precautions
The panel of this built-in hob (on selected model) is
made of tempered glass which is safer than normal
glass for this application. However, the following safety
precautions for using built-in hob with glass top panel
should also be noted in order to prevent the glass top
panel from breaking:
1. Clean the burner assembly frequently to maintain a
clear gas passage on the flame distributor. Clean and
tidy up the flame distributor after spillage of food and
liquid once the burner assembly cooled down.
2. Turn off the gas appliance immediately if abnormal
noise propagates from the gas appliance and contact
gas supply company or gas hob importer for inspection.
3. Do not use oversized utensils for cooking.
4. Do not impact the glass surface with hard objects or
place heavy objects on the glass surface.
Despite using the "TIMER" function (on selected model)
for cooking, user should not leave the gas stove unattended.
Please do not use additional fitting, such as aluminum cover.
All operations relating to installation and regulation must be
carried out by a registered gas installer, respecting
applicable regulations, standards and the specifications of
the local gas and electricity providers.
Before installing your new hob, ensure that it is being
installed according to the assembly instructions.
The Towngas model of this built-in cooker has been
exempted from the mandatory requirement for the installation
of external gas governor.
3
Page 7
Safety precautions
This appliance has been designed for home use only, not for
commercial or professional use. This appliance cannot be
installed on yachts or in caravans. The warranty will only be
valid if the appliance is used for the purpose for which it was
designed.
The place in which the appliance is installed must have fullyfunctioning ventilation, in accordance with the regulations.
Do not subject the appliance to draughts. These might blow
out the burner.
This appliance leaves the factory set to the type of gas that is
indicated on the specications plate. It must not be changed
to another type of gas.
Do not tamper with the appliance’s interior. If necessary, call
our Technical Assistance Service.
These operating and installation instructions should be
retained, and passed onto the buyer if the appliance is sold.
Do not switch on the appliance if it is damaged in any way.
Contact our Technical Assistance Service.
The surface of cooking appliances will be heated up during
use. Care must be taken when using these appliances. Keep
children well away from the appliance.
This appliance is only intended for cooking purposes, not as
a heating system.
Fat or oil which is overheated can catch re easily. Do not
leave oil or fats to heat up unattended. If oil or fats do catch
re, never use water to put the re out. Risk of burns! Put the
re out by covering the pan with a lid and switch off the hob.
4
Page 8
Safety precautions
In the event of a malfunction, turn off the appliance’s gas and
electricity supply. For repairs, call our Technical Assistance
Service.
If one of the controls will not turn, do not force it. Call the
Technical Assistance Service immediately, so that they can
repair or replace it.
Never place unstable pans on the hob or the burners, as
they may accidentally tip over.
Do not clean the hob using a steam cleaner. Risk of
electrocution!
This appliance design and manufactured according to
GB16410-2007 standard for gas appliances: built-in
appliance.
Do not store or use corrosive chemicals, steamers,
ammable materials or non-food products below or near this
domestic appliance.
This appliance is not intended for use by persons (including
children) with reduced physical, sensory or mental
capabilities, or lack of experience and knowledge, unless
they have been given supervision or instruction concerning
use of the appliance by a person responsible for their safety.
Never let children play with the appliance.
Never leave the appliance unattended during operation.
The graphics in this instruction manual are given as a guide
only.
The manufacturer is exempt from all responsibility if the
requirements of this manual are not complied.
The rst ignition (or ignition after it has been left unused for a
long time) may be difcult, as there is residual air in the gas
pipeline, it may be difcult to light the burner.
5
Page 9
Safety precautions
Warning: Gas Poisoning
When using the hob, make sure to open the windows or
turner on the exhaust fan of the range hood so as to keep
good ventilation around the gas hob. The gas hob may cause
carbon monoxide poisoning if you are using the gas hob in a
closed kitchen with no ventilation for an extended time.
Warning: Explosion
If you detect a gas leakage while operating the Gas hob,
you should turner off the indoor main gas valve immediately,
and then open windows and doors for ventilation. Do not
use matches or any lighters at this time. Creating a ame at
this time may ignite the residual gas in the room and, cause
an explosion. In the case of a leak, please contact our local
service center immediately.
Warning: Fire
Do not ignite the gas hob for heating when no pan is
placed on it or there is no food in the pan. This may cause
the extraction hood over the gas hob to be damaged by
overheating, or cause a re if the residual grease in the
extraction hood is ignited.
Warning: Risk of burning
Do not let unattended children use or stand next to the gas
hob while it is in use. Once the gas hob has been turned off,
it remains very hot and dangerous for several minutes. At
this time to avoid burn injury, avoid touching the hot burners,
supports and the faceplate around the burners with your
hands or other part of your body.
When using the gas hob, please protect it from external air,
which may cause uneven heating or even extinguish the
ame.
When cooking food with vegetable oil and animal fats, you
should be careful to avoid res caused by overheating oil in
the pan.
6
Page 10

Safety precautions
If re is caused by overheated oil, immediately use an iron
pot lid or other large metal object to cover the re, in order to
cut off the air needed for burning, and then turn off the indoor
gas valve. In order to avoid accidents, never use water to put
out oil or grease re.
Whenever the burner is extinguished for any reason, you
should turn it off and wait for at least 1 minute before reigniting the burner.
Normal operation of gas hob should not cause any unusual
noise. If you have any doubts, please contact our local
service center.
7
Page 11

Your new appliance
Production specication
ER74357HK
ER74253HK
ER74333HK
Product features
ER74232HK
Safety design
Each burner of this gas hob is equipped with a safety device
for the quick cut-off of the gas.
Personal-friendly design
This product inherits and carries forward the precise
processing and manufacturing techniques of Germany, as
well as a human-oriented design concept. Besides the hobs’
convenience and practicality, the gas hob also gives the user
a sense of beauty.
8
Page 12

Installation
Placement location
ER74232HK
ER74253HK
This appliance has been designed for home use only. It cannot
be installed on yachts or in caravans.
Do not place the gas hob in the bathroom, bedroom, basement,
corrosive material in close proximity.
Do not place ammable or explosive objects on or around the
gas hob, e.g. curtains.
The distance between the side walls and the back wall with
the edge of the gas hob should be at least 100mm and 50mm
respectively. Otherwise if there are ammable materials around
the gas hob, e.g. wooden wall and plastic wall etc, then the gas
hob should be installed at a distance of at least 150mm to the
side wall and 100mm to the back wall.
The distance between the hob to the ammable ceiling should
be 1m, otherwise there is no limit.
The use of the gas hob will result in temperature rising and
humidity increasing in the room where the hob is installed.
Therefore, please ensure there are good ventilation openings.
If the gas hob operates at a high ame for a long time , then
good ventilation is required. To accomplish this ventilation, you
may open a window, door, or use an efcient range hood with
an exhaust fan.
ER74333HK
ER74357HK
9
Installing the gas hob over other appliances such as oven,
steam oven and microwave etc should be according to the
requirements specied in the manufacturer’s manual to ensure
it meets the ventilation requirement.
If a drawer is installed under the hob, it is recommended to use
a non-ammable intermediate support to isolate the objects
stored in the drawer from circulating air coming from the hob’s
ventilation system. Please do not put any heat-sensitive or
ammable products under the drawers, which include spraying
agent or shoes polishing.
If the gas hob is installed in a cupboard, the plastic cooking
and adhesive bonded panel in it should be subjected to the
re-resistant glue treatment (heat resistant glue); otherwise,
deformation or scaling of the surface-layers will likely result,
especially on the sides of the cupboard.
The gas hob should be installed on a solid, at worktop. The
minimum thickness of the worktop should be 16mm and the
depth should be more than 550mm.
The cupboard should have a tapping size which meets the
ventilation requirements and is open to the air. The stove
ventilation pipe opening should be a minimum of 100cm
Otherwise , the lack of ventilation might cause an explosion
resulting from the leakage of gas.
2
.
Page 13

Installation
Gas hob
Shutter
Gas hob
Shutter
According to the Gas Safety Regulations of Hong Kong, any
gas installation works including the installation of appliances
and connection tubing, must be undertaken by registered
gas installers who are registered for that appropriate classes
and be employed by registered gas contractors.
Before installation, please carefully check the nameplate on
your gas hob. Make sure that the gas hob type specied on
the nameplate (which is stuck to the back shell) is consistent
with the gas that you are currently using. If you have any
doubts on whether the gas you are using is consistent,
please contact our Customer Care Hotlines.
Install a special gas valve between the indoor gas connecting
hose and the gas hob, in order to switch on and off the gas.
It should be installed in such a way that in the event an
accident occurs during operation period, the user will be able
to immediately shut of the gas. In addition, please ensure
this gas valve can be accessed at all times.
Gas hob
Ventilation pipe
Please install the domestic range hood with an exhaust pipe
in accordance with the local gas hob installation specication
and guides. This type of range hood should have a distance
of at least 650mm to the gas hob.
The gas hob has already received a strict gas leakage
performance test before leaving the factory. Do not dismantle
the faceplate or inner parts during the installation of the gas
hob, to avoid later gas poisoning and re risk resulting from
the gas leakage during the operation.
Please ensure that when the installation is completed, the
gas hose connected to the gas hob does not touch any
movable object in the cupboard, e.g. drawer, roller etc.
Please conrm the ashboard are safe and grounded.
If you move house and intend to reinstall the gas hob to your
new house, please contact our Customer Care Hotlines.
10
Page 14

Installation
Countertop tapping
Please perform the tapping on the countertop according to
the tapping template (keeping to the installation size of all
the ve types of products). To ensure the proper connection
of the gas hose, a space of at least 100mm height should be
kept available below the gas hob.
To ensure the stable placement of the gas hob, please
ensure that after the tapping, the vertical sides of the
installation site are smooth.
Follow the method shown in the illustration on the left and
clamp the four spring sheets supplied with the product to the
corresponding four installation positions on the back shell.
11
After installing the spring sheets, push the entire gas
hob rmly into the cutout opening in the countertop, until
the outside rim of the gas hob is seated closely on the
countertop.
Page 15

Installation
Connect to gas pipeline
hose clip
red line
multi-directional air inlet
According to the Gas Safety Regulations of Hong Kong, any
gas installation works including the installation of appliances
and connection tubing, must be undertaken by registered
gas installers who are registered for that appropriate classes
and be employed by registered gas contractors.
The indoor gas hose behind the gas meter and the air inlet at
the bottom of the gas hob should be connected with a metal
bellows and a rubber hose approved by EMSD whose length
should not exceed 1.5m.
We recommend you to use the metal bellows to attach
the connecting hose. Especially, if the other appliances
are installed under the hob such as a disinfecting cabinet,
backing oven and microwave oven etc, a gas rubber hose
must not be used for the gas connection.
Using a gas rubber hose for the gas connection
-The multi-directional air inlet used for connecting the hose is
provided in the packing case of gas hob.
-The two ends of the gas hose are connected to the gas hob
and the indoor gas valve (the inside diameter of the gas hose
is 9.4mm).
-When connecting the gas hose, you must insert the gas
hose until it reaches the red line on the multi-directional air
inlet, and secure it firmly in position with a hose clip.
-After the connection is completed, please make sure that
the gas hose is not flattened, twisted or bent by any other
objects. Then smear soap suds all over the hose connection
part; and check each part of the connection hose carefully to
see if there is any leakage.
-We recommend that you perform an airtight test for the gas
hob periodically while it is in use, or else replace the gas
hose annually.
-Do not leave the gas hose in a high temperature area or put
it contact with any high temperature section of the gas hob.
12
Page 16

Installation
Gas leak detection
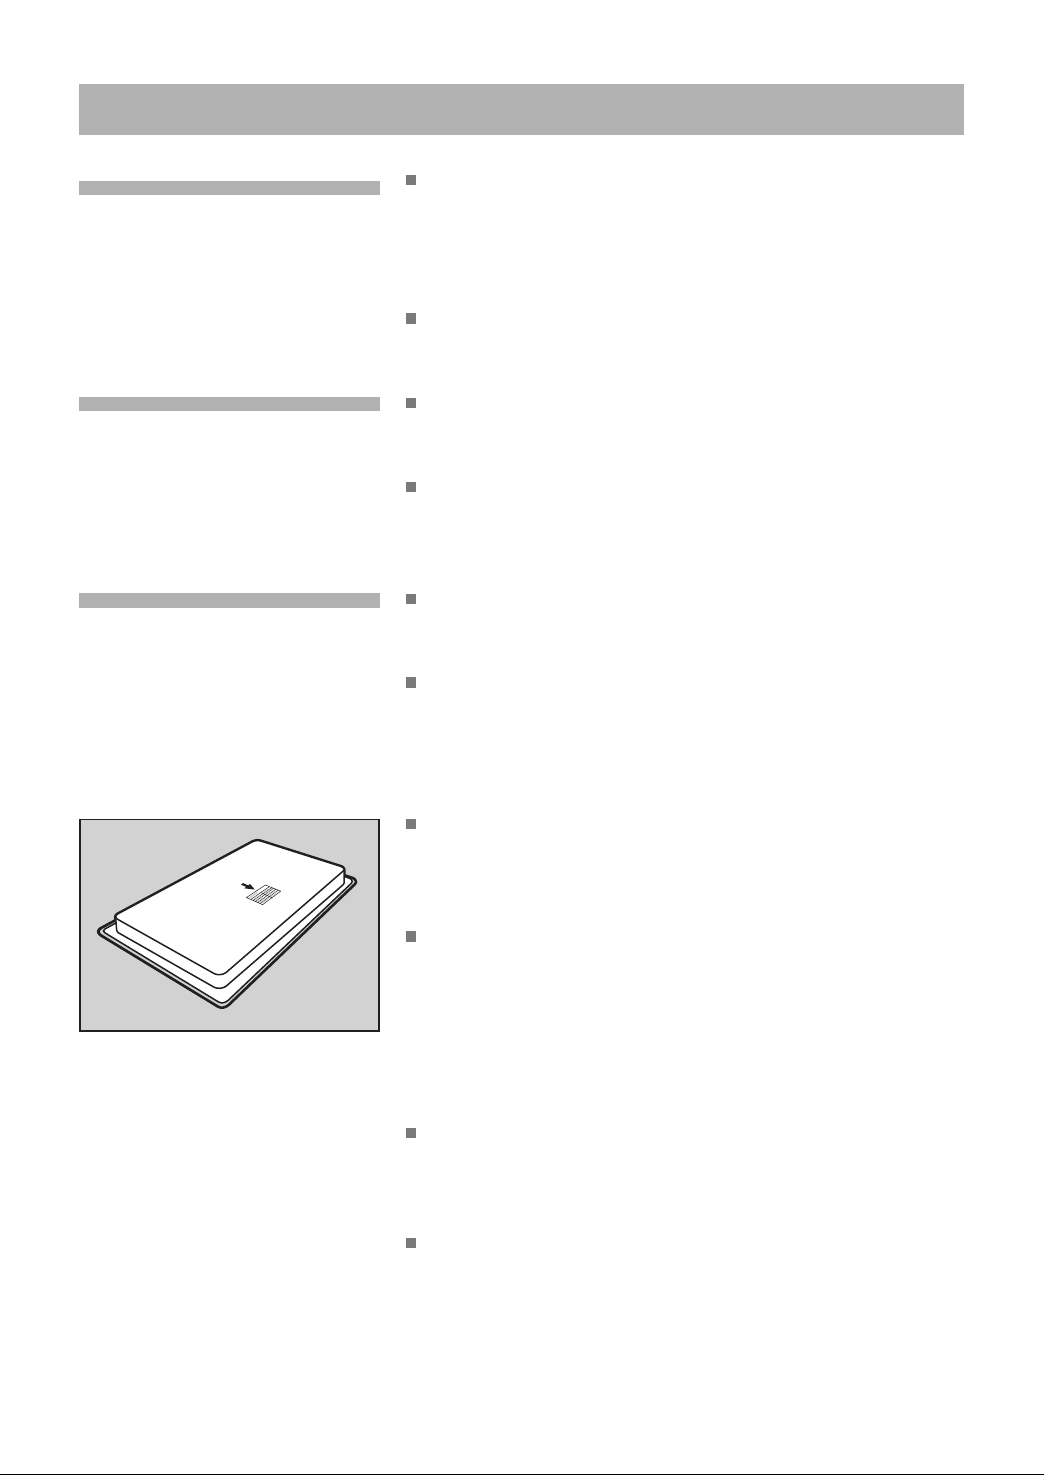
Plug into socket
Leak detection
Attention !
After the gas pipeline connection has been completed, the
leak detection test must be performed by registered gas
installer who employed by registered gas contractor.
Smear the suds on each connection part with a soft brush,
and then open the gas valve to check carefully if bubbles
appear, please close the gas valve immediately, and adjust
the air inlet connection until no bubbles appear.
Connection electrical source
The electrical source is xed in the middle of bottom, when
you use it, please conrm it is safety and grounded.
Please conrm the hob wire are grounded, it is used attached
a tri-pins, and the tri-pins are grounded, when it is creepage,
the setting can prevent human from getting an electric shock.
We suggest the ashboard is xed on the right underside, be
far away from the gas and air inlet.
13
size of tapping 700±2mm
surface
≈100mm
≈900mm
Page 17

Installation
Pan supports,
caps and burners
As shown in the below picture, please make sure that the
knobs, burner heads, caps and supports have been installed
correctly. Incorrect installation will seriously affect the normal
use of the product and shorten its life-span.
When installing the supports and burners, the user should
pay attention that the protruding objects on the bottom of the
supports and burners are aligned with the stretching slot on
the faceplate, which is used for maintenance. If you place the
components randomly or rotate them for hob placement, the
stainless steel faceplate may be scratched. The appearance
damage of the gas hob resulting from such installation
operations is not covered by our warranty.
Hole
Spark Plug
Thermocouple
14
Page 18

Installation
ER74357HK
ER74253HK
15
ER74333HK
ER74232HK
Page 19

Gas burner operation
Getting familiar with your new hob
Top view of product
ER74357HK
ER74253HK
ER74333HK
Outer burner cap
Inner burner cap
Outer burner cap
Inner burner cap
Outer burner cap
Small Pan support
burner cap
burner cap
Small Pan support
cap base
cap base
Faceplate
Faceplate
Double-ring cap
Wok trivet
Pan support
Knob
Wok trivet
Pan support
Knob
Double-ring cap
Wok trivet
Pan support
Back view of product
ER74232HK
EasyFix
Inner burner cap
burner cap
Outer burner cap
Inner burner cap
burner cap
TM
spring sheet
Knob
Faceplate
Wok trivet
Pan support
Knob
Faceplate
Foam seal
Installation warning
Name plate
16
Page 20

Gas burner operation
Fig.1
hole
These instructions apply to several appliance models. It is
possible that individual features are described which do not
apply to your appliance.
It is essential to ensure that all the burner parts and the pan
supports are correctly installed for the appliance to work
correctly. Fig.1+2.
Fig.2
Before rst use
Adjusting power
Please clean the hob and its accessories thoroughly. This
will remove the ‘new’ smell of the hob.
Before using, ensure the gas pipeline, knob, burner heads
and caps, and supports have been mounted correctly. Then,
open the indoor gas valve.
The rst ignition (or ignition after it has been left unused for a
long time) may be difcult, as there is residual air in the gas
pipeline, it may be difcult to light the burner. This is a normal
phenomenon. Please repeat the igniting operations, until the
hob has ignited properly.
To adjust the ame properly, refer to the following ve-stage
ame power indication chart and function descriptions. Select
your ame as desired.
17
Page 21

Gas burner operation
Operation method
To ignite the burner, when the knob is turned to OFF (0 degree),
press it down and turn it to the ignition position (30-40 degrees
counterclockwise). The flame of the internal ring should ignite;
while the flame of the external ring is not yet ignited. Press
the knob down, turn it and hold it down for 3-5 seconds before
releasing. If the flame goes out after the release, return the knob
to the vertical OFF (0 degree) position and repeat the above
ignition operations.
Special instructions:
Do not ignite the gas hob for heating when no pan is placed on
it or there is no food in the pan. This may cause the extraction
hood over the gas hob be damaged by overheating, or cause a
fire if the residual grease in the extraction hood is ignited.
When the knob is turned counterclockwise from the maximum
flame position (90 degrees) to the medium flame position
(170 degrees), the small flame of the internal ring will remain
unchanged, but the flame of the external ring will gradually be
extinguished.
When the knob is turned counterclockwise from the medium
flame position (170 degrees) to the minimum flame position (230
degrees), the small flame of the internal ring will gradually be
reduced to the lowest setting.
The innovative 230-degree dial wide range of flame power
adjustment ensures the flame power can be adjusted
conveniently and accurately to suit your needs.
After you are finished using the gas hob, please turn the knob
clockwise to OFF (0 degree), the flame will then go out. For your
safety, please close the gas valve on the indoor pipeline after
using the gas hob.
Using a pan with a thick base can improve heat distribution,
especially for small flames when the gas is on a low setting.
Each time you move the pan away for a short time, turner the
burner to the small-flame position or off. Even when you do other
operations near the hob this is a good rule of thumb. Turning the
flame down will also reduce the risk of burning, save gas, and
reduce pollution.
When you use a big stove, ensure there is a distance of at least
25mm between the stove and the surrounding combustible
materials. In addition the distance between the knob and the
stove should be at least 50mm.
18
Page 22

Cleaning and maintenance
Once the appliance is cool, use a sponge to clean it with
please make sure that
burner heads and caps
have been installed
correctly.
hole
soap and water. When cleaning, do not dismantle the safety
device or sealed parts of the hob.
Do not use a granular cleanser or steel wool to clean the
faceplate. These may cause scratches on the surface of
the hob. Please use soft gauze and soap suds to clean and
maintain the hob faceplate.
After each use, clean the surface of the respective burner
parts once they have cooled down. If any bits are left
(overcooked food, drops of grease etc.), however few, they
will become stuck to the surface and more difcult to remove
later. The holes and grooves must be clean for the ame to
ignite properly.
It is recommended to clean the caps of the gas hob at least
once a month.
When you are using the hob, you may nd that the ame is
not uniform or some burner openings have no ame. In this
case, please turn off the hob, wait unit it cool down before
taking off the cap and use an iron slice and steel needle to
remove the dirt and carbon blocking the burner openings. As
shown in the picture, please make sure that burner heads
and caps have been installed correctly.
19
The movement of some pans may leave metal residue on
the pan supports.
If the pan supports are tted with rubber rests, ensure that
these are also cleaned. The rests may come loose and the
pan support may scratch the hob.
Always dry the burner and pan supports completely. Water
droplets or damp patches on the hob at the start of cooking
may damage the enamel. Do not wash the cap directly with
water as the bubbles may temporarily block the re holes.
After cleaning and drying the burner, make sure the burner
covers are correctly placed on the burner ame diffuser.
Warning: When dismantling the cap parts prior to cleaning and
reassembling them after cleaning, take care when touching
the ignition needle as it is made of ceramic material which
can be easily damaged. Once the surface of the products are
cleaned, please ensure they are put back correctly, otherwise
the electronic device may not operate correctly.
Page 23

Cleaning and maintenance
Unsuitable products
Maintenance
Never slide pans across the glass surface, as you may
scratch it. In addition, try not to drop heavy or sharp objects
on the glass. Never strike any part of the hob.
Do not use steam cleaners. This could damage the hob.
Never use abrasive products, steel scourers, sharp
implements, knives, etc. to remove bits of hardened food
from the hob.
Never use a knife, scraper or similar to clean the point where
it joins the metal.
Do not use knives, scrapers or similar implements to clean
the point where the glass meets the burner trims, the metal
frames or the glass/aluminum panels, if tted.
Always clean off any liquid as soon as it is spilt: you will save
yourself any unnecessary effort.
Grains of sand that may come from cleaning fruits and
vegetables will scratch the glass surface.
Melted sugar, or foods which contain a lot of sugar
which may have spilt, should be cleaned off the hotplate
immediately, using the glass scraper.
20
Page 24

Faults
Sometimes certain faults detected can be easily resolved.
Before calling the Technical Assistance Service, bear in mind
the following advice:
Symptom
Ignition electrode does not
spark
Flame goes out when the
ignition knob is released
When you are using the
pulse ignition, the hob is
not ignited or has difculty
igniting
Flame out when using
Cause Solution
Electrical source
Burner
Ignition electrode
Safety valve
Gas valve
Burner
Burner
Ignition electrode
Thermal couple
Electrical source
The source not installed,
poor contact
Not installed properly
The ignition is wet,
especially in the rainy
season; or due to food
overows
The pressing and holding
time was too short for the
safety solenoid valve to
work properly
Not open or not completely
open
Caps or other components
are not installed correctly
The burner holes on the
cap are blocked so that
the gas can not ow out
normally
It is wet, or dirty due to the
overowing food
The protection sensor is
dirty
Was shut off
Contact our Customer Care
Hotlines
Re-install correctly
Use a dry, soft cloth to dry
the ignition electrode
gnite again and hold the
knob down for 3-5 seconds
after the ame has ignited
Ensure the gas valve is
fully open
Re-install these
components correctly
Clean the dirt out of the
burner holes
Dry the ignition electrode
and remove any dirt
Contact our Customer Care
Hotlines
Switch on electrical source
Unstable burning
Smell
If the faults continue / reoccur, please turn off the gas valve and contact our Customer Care Hotlines.
Cap
Leakage
Not installed properly
The gas rubber hose is
aging, cracked, fractured or
falling off
The main burner is not
igniting
Re-install correctly
Contact our Customer Care
Hotlines
Call our Customer Care
Hotlines
21
Page 25

Page 26

Technical Data
Model
Specication
ER74357HK ER74253HK ER74333HK ER74232HK
Gas type
Inlet pressure
Rated heat input
Left / Right
Middle
Dimension (W×D×H)
Cut-out Dimensions (W×D)
Net Weight
Gross Weight
Voltage
Connected load
Town Gas
1.5 kPa
6.3kW
2.6kW
760X450X150 785X450X150
(700±2)X(400±2)mm 4XR20
16kg
18kg
2.0W
14kg
17kg
220-240 V
1.8W
2.6kW
17kg
19kg
2.0W
15kg
17.5kg
1.8W
23
Page 27

Page 28

Material Number : 9000834944
Version : 03
Production License Code : XK21-007-00819
 Loading...