

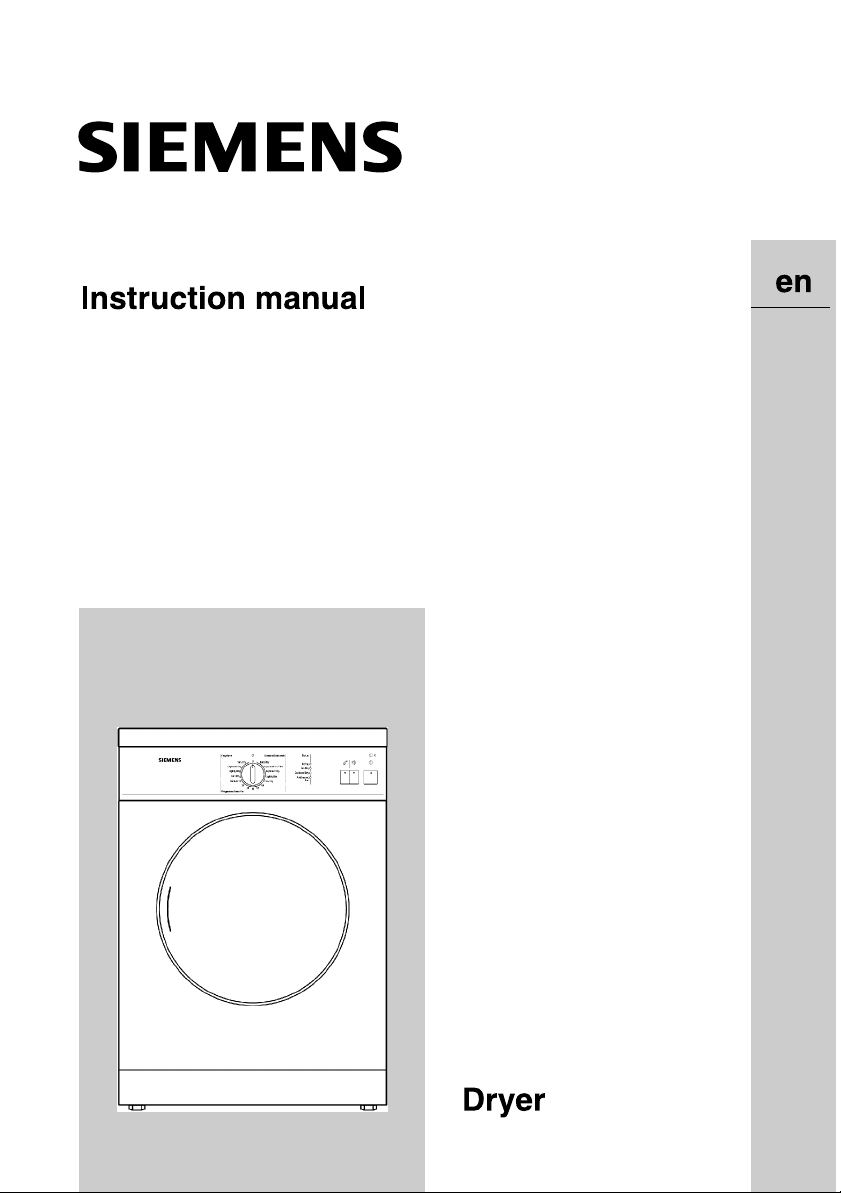
Page 1
Page 2

Table of contents
Instruction manual
Your new dryer ...................................................... 4
Notes on disposal ..................................................5
Disposing of packaging ....................................5
Disposing of old dryers.................................... 5
Safety notes........................................................... 6
Using the dryer correctly .................................. 6
Before using the dryer..................................... 6
Observe when drying........................................ 7
Observe at the end of the program .................. 7
Notes on protecting the dryer........................... 7
Environmental protection / notes on economy...... 8
Drying in an economical and environmentally-
aware manner................................................... 8
Dryer description.................................................... 9
Brief instructions............................................... 9
Door operation.................................................. 9
Setting up the dryer........................................ 10
2
Control panel ..................................................11
Notes on laundry.................................................. 12
Labelling of fabrics......................................... 12
Tips on drying................................................. 13
First use............................................................... 14
Drying .............................................................14
Selecting a program ............................................ 15
Selecting......................................................... 15
Page 3

Program sequence .........................................15
Standard programs......................................... 16
Program Time................................................. 17
Additional function ............................................... 17
Delicates button J........................................... 17
Signal button K ...............................................17
Cleaning and care................................................ 18
Cleaning the dryer .........................................18
Fluff filter......................................................... 18
Changing the light bulb................................... 19
Troubleshooting................................................... 20
After-sales service............................................... 22
Technical data ..................................................... 23
Setting up and connecting................................... 24
Safety notes.................................................... 24
Setting up the dryer........................................ 25
Washer-dryer stack connection set................ 26
Assembling the exhaust air hose ................... 26
Electrical connection....................................... 27
3
Page 4

Your new dryer
With the purchase of your new dryer, you have
chosen a modern, high-quality domestic
appliance.
A distinctive feature of your dryer is its lo w energy
consumption.
Every dryer which leaves our factory is carefully
checked to ensure that it functions correctly and
is in perfect condition. Our after-sales service is
available should you have an y questio ns ,
particularly on how to set up your dryer.
You will find further information and a selection of
our products on our website:
http://www.siemens.de/hausgeraete
Read and observe this instruction manual and all
other accompanying information for your dryer.
Keep all the documents in a safe place for future
reference or to pass on to the next owner.
4
Page 5
Notes on disposal
!
Disposing of
packaging
Disposing of
old dryers
Risk of suffocation!
There is a risk of suffocation from the cardboard
box and plastic film.
Do not allow children to play with the packaging.
All our packaging materials are environmentally
friendly and recyclable. Please dispose of the
packaging in an environmentally-responsible
manner.
Any retailer or your local authority will be able to
advise you on the disposal methods curr entl y
available.
!
Danger of death!
Danger of death from electrical voltage or
suffocation.
Your old dryer:
Disconnect it from the mains.
Cut through the mains cable and discard
along with the plug.
Break the door lock. This prevents children
from locking themselves in the dryer.
Environmentally-friendly disposal cons er ves
valuable raw materials.
Any retailer or your local authority will be able
to advise you on the disposal methods
currently available.
!
This appliance is marked according to the
European directive 2002/96/EC on Waste
Electrical and Electronic Equipment (WEEE).
This guideline is the frame of a European-wide
validity of return and recycling on Waste
Electrical and Electronic Equipment.
5
Page 6

Safety notes
Using the dryer
correctly
Before using
the dryer
Only for domestic use.
Only for drying fabrics which have been
washed in water.
Do not leave children unsupervised near the
dryer –
!
Risk of explosion/fire!
Solvent danger.
Do not use the dryer if:
the laundry has been treated with a
solvent or has been colour-treated
(e.g. stain remover, petroleum ether).
Dust danger
Do not use the dryer if:
the laundry contains dust, e.g. coal dust or
flour
the laundry contains foam/rubber
the laundry contains traces of hairspray, nail
varnish remover or similar substances.
Install the dryer in accordance with the
installation instructions (see page 24).
Do not connect the dryer if it has visible
signs of damage. If in doubt, contact your
local dealer.
!
Risk of explosion/fire!
Do not discharge exhaust air through an outlet pipe
used for waste gas from appliances which burn gas
or fuels.
6
Page 7
Observe when
drying
Observe at the
end of the
program
Notes on
protecting the
dryer
Do not leave children unsupervised near
the dryer.
Keep pets away from the dryer.
Remove all objects from pockets. Look out
for fires in particular –
!
Risk of explosion!
Switch off the dryer when the program has
ended.
Do not climb onto the dryer.
Do not lean or sit on the door –
!
Risk of tipping!
Do not lift the dryer by an y protruding
components.
!
Risk of breakage and injury!
Do not use detergent boosters containing
solvents or dirt and stain removers in the
dryer. These substances may damage the
dryer.
Empty the dryer completely when it is to
be transported or stored.
i
Do not set up the dryer in a room
susceptible to frost.
7
Page 8

Environmental protection /
notes on economy
Drying in an
economical and
environmentallyaware m anner
Spin the laundry thoroughly before
drying.
Spin the laundry thoroughly in the washing
machine before drying. The higher the spin
speed, the shorter the drying time and the
lower the energy consumption. You should
also spin easy-care laundry.
Fill to full capacity
Fill the dryer to its maximum
recommended capacities. Do not exceed
the capacities:
White and coloureds max. 5.0 kg
Easy-care fabrics max. 2.5 kg
Ensure sufficient room ventilation
Open a window or door while drying
laundry.
Clean the fluff filter
Clean the filter after each drying cycle
(see page 18).
Do not obstruct the cooling air supply
Do not position or affix anything over the
cool air inlet on the rear of the dryer.
8
Page 9
Dryer description
Brief
instructions
Before drying
Open the door.
Place the laundry in the drum.
Close the door.
Turn the program selector to a program
(see the program table on page 16).
Set the additional function if required
(see page 17).
Press Start button M .
Adding laundry
Open the door.
The drying cycle is halted.
Add or remove laundry.
Close the door.
Select a different program if necessary
using the program selector (see the table
of programs from page 16 onwards).
Press Start button M .
After drying
Open the door.
Remove the laundry.
Turn the program selector to Off.
Clean the fluff filter (see page 18).
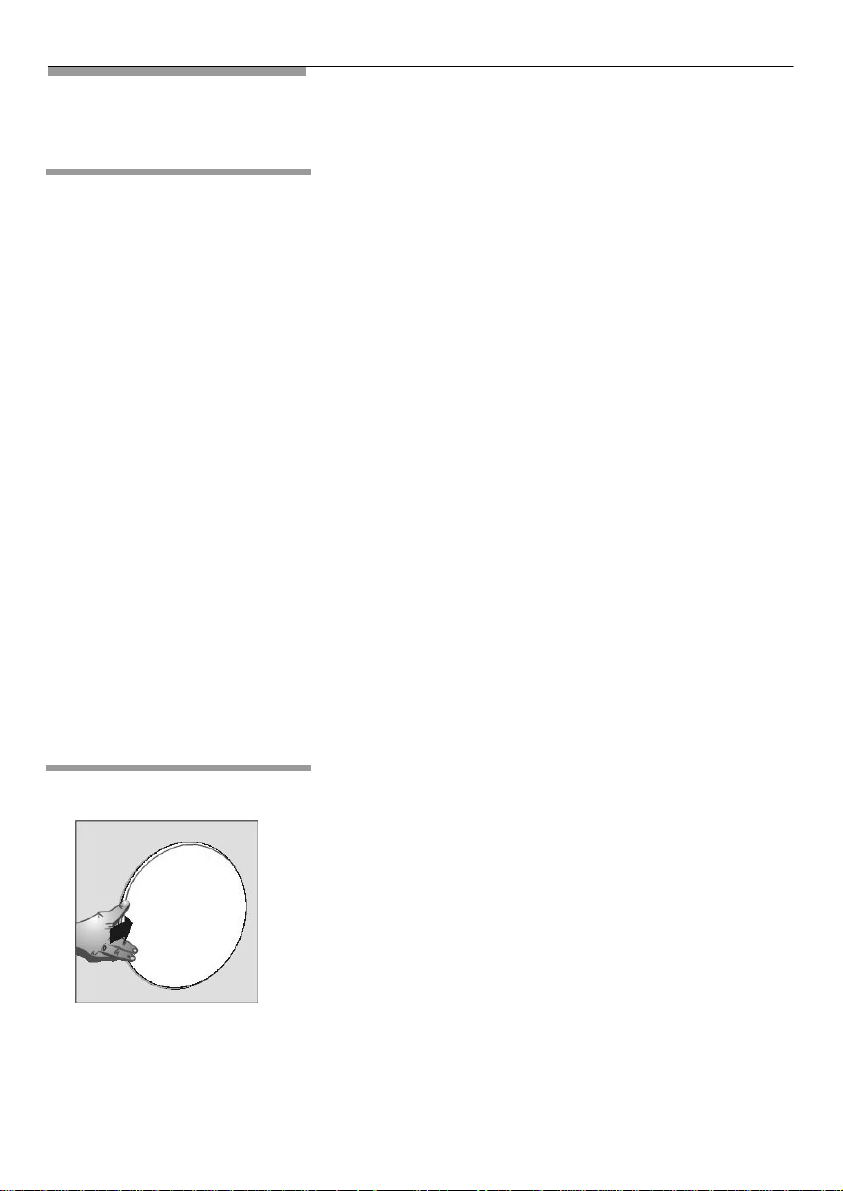
Door operation
Press the door to open.
Close the door (you will hear a clicking
noise).
9
Page 10

Setting up the dryer
1
2
10
3
1 Control panel
2 Door with internal filter
3 Adjustable dryer feet
Page 11

Control panel
Program selector /
time selector switch
To switch the dryer on and off and to
select a program or a drying time
Can be turned in both directions
Status indicator
(LED) indicator lamp
for program status
The indicator lamp
lights up when the
dryer is switched on
Buttons for additional
functions
(in addition to the program
if desired)
Delicates
For drying delicate fabrics
Signal
The audible signal is switched
on when you press this button
J
K
Start button M
To start the
program
11
Page 12
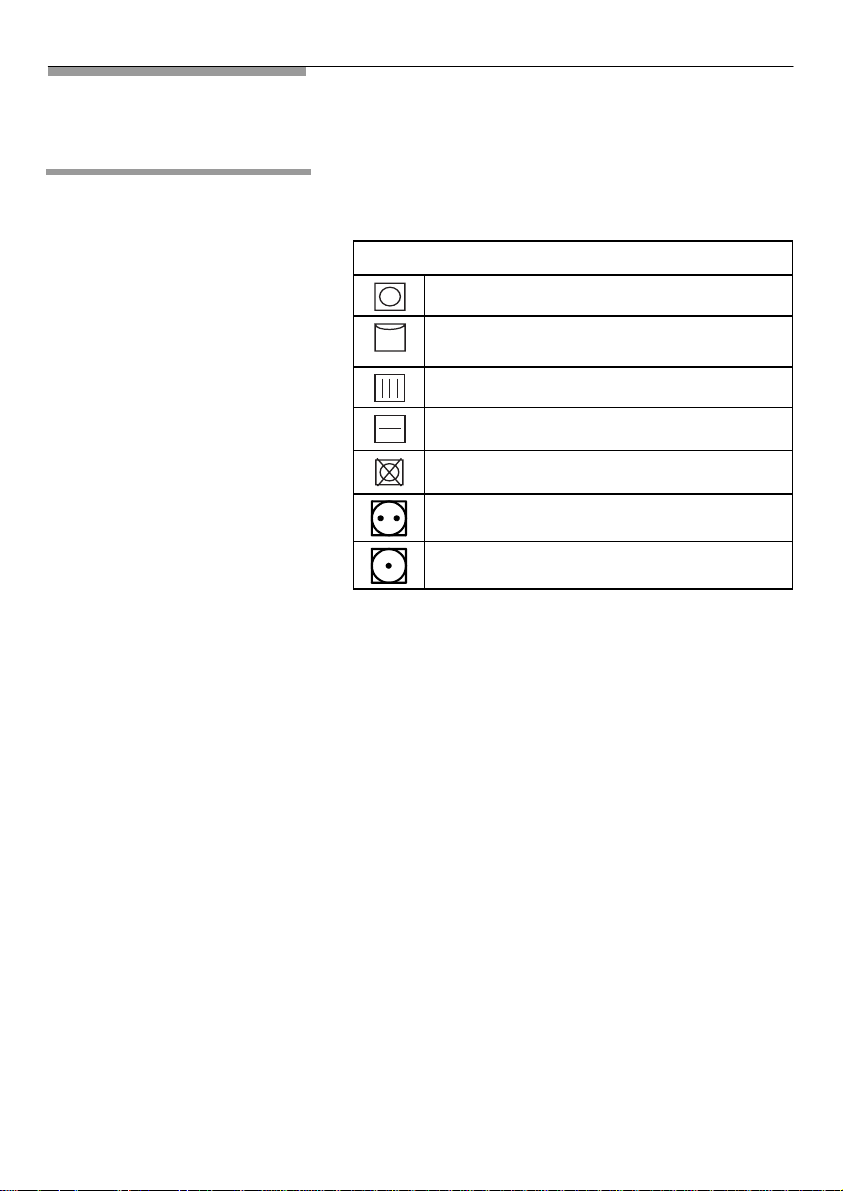
Notes on laundry
Labelling
of fabrics
Check the following fabric symbols:
Can be dried in a tumble-dryer
Wring out and hang on a washing line
to dry
Do not wring, hang out wet to dry
Wring out, lay on a flat surface to dry
Do not dry in a tumble-dryer
Dry at normal temperatures
Dry at low temperatures
DRYING
Do not tumble-dry the following fabrics:
Airtight fabrics (e.g. rubber-coated fabrics).
Delicate materials (silk, curtains made from
12
synthetic material) – they may crease!
Dripping-wet laundry – high energy
consumption.
Wool or fabrics containing wool.
Observe the manufacturer's instructions.
Page 13

Tips on drying
Important for all drying cycles:
To obtain a uniform drying result: sort the
laundry by fabric type and drying program.
F as ten zips, hooks and eyes. Tie loose belts,
apron strings etc, together.
Do not over-dry easy-care laundry:
Risk of creasing. Allow laundry to finish
drying in the air.
Do not over-dry laundry.
Do not iron laundry immediately after drying.
Leave laundry folded up for a short while. This
helps the residual moisture to distribute evenly.
Knitted fabrics (e.g. T-shirts, jerseys) often
shrink slightly the first time they are tumbledried. Do not use the "Extra Dry" program.
13
Page 14

First use
Drying
Please read this instruction manual before using
the dryer for the first time:
1. Open the door.
2. Place the laundry into the empty drum.
Ensure that the drum contains
i
only laundry.
3. Close the door.
4. Select a program using the program selector.
5. Set additional functions if required
(see page 17).
6. Press Start button M .
Note
You can interrupt the drying program by opening
the door.
Close the door to continue the program.
Press Start button M.
It is possible to change the drying program during
drying.
1. Turn the program selector to "off"
(to clear the program).
14
2. Turn the program selector to the desired
program.
3. Press Start button M .
Page 15

Selecting a program
Selecting
Program
sequence
Your dryer offers different programs and the
additional Delicates J function (see page 17) for
optimum drying results.
Our drying programs are designed to protect your
laundry with minimum energy consumption. Due
to residual heat after drying, your laundry feels
damper than it really is.
If the dryness of the laundry is not sufficient after
cooling down, use the next highest dr ying
program and/or program time.
In standard programs, the dryer works using an
electronic sensor system which continually
controls the dampness in the washing. The drying
cycle automatically stops as soon as the level of
dryness set has been reached. The indicator
lamps (LEDs) display the program status.
The dryer is equipped with an automatic anticrease function (anti-crease/End). It is effective if
the laundry is not taken out of the drum
immediately.
The drum rotates at specific time intervals for 1
hour. The laundry should be removed after this
time at the latest, if you have not already done so.
The laundry remains loose and soft until it is
removed.
15
Page 16

Standard programs
Whites and coloureds/cotton or linen 3-5 kg.
Press Delicates button
Bed linen, table linen and towels
Bed linen, table linen, towels,
T-shirts, polo shirts, work clothes
T-shirts, polo shirts, dresses,
trousers, work clothes, underwear
Terry towels, tea towels, hand
towels,
bed linen, underwear,
cotton socks
Terry bath robes and bed linen
No underwear or socks
Easy-care (drip-dry) laundry made of synthetic and mixed
fabrics and cotton e.g. viscose, cuprorayon, modal and
polyester up to 2.5 kg
Trousers, dresses, skirts and shirts
Trousers, dresses, skirts and shirts
Blouses, corsetry, leggings,
sportswear with a large proportion
of synthetic fibres
Shirts, blouses and sportswear which do not need to be
Bed linen, table linen,
tracksuits, anoraks, blankets
cotton socks
J for temperature sensitive fabrics.
For laundry:
which needs to be pressed Iron Dry
which need to be ironed Iron Dry
which do not need to be
ironed or
need to be lightly ironed
which do not need to be
ironed with thick,
quilted areas
which are particularly
thick or quilted
For laundry:
which needs to be ironed
which do not need to be
ironed or
need to be lightly ironed
ironed
which does not need to be
ironed – thick, quilted
fabrics
Standard
Cottons /
Coloureds
program
Cupboard Dry
Cupboard Dry
Plus
Extra Dry
Program time
Easy Care
Iron Dry
Lightly Dry
Cupboard Dry
Very dry
16
Page 17

Program Time
Fabrics which have already been pre-dried and are slightly
damp, individual laundry items such as bath towels, bath robes,
dishcloths and quilted fabrics made of acrylic.
Press the Delicates button
sensitive.
J for fabrics which are temperature
Freshening up and airing items of clothing which have not been
worn recently.
For all types of fabric.
Additional function
Delicates button J
Signal button K
Press the Delicates butt on J for temperature
sensitive fabrics (e.g. acrylics).
Observe the fabric care instructions .
The temperature is reduced and the drying time
increased.
The function remains active until the button
i
is pressed again.
Press the K button to switch on the audible signal.
Hot
(adjustable in
10 minute
intervals up to 60
minutes)
Cold
(can be set once
for 10 minutes)
17
Page 18

Cleaning and care
Cleaning
the dryer
Fluff filter
!
Risk of explosion!
There is a risk of explosion from solvents.
Never use solvents for cleaning.
The dryer may be damaged if it is not cleaned
correctly. Do not spray the dryer with a water jet.
Do not use abrasive agents or general-purpose
cleaners.
Clean the housing and the control panel with
a mild detergent and a soft cloth.
Clean the fluff filter after each drying cycle.
Bobbling (fluff) occurs fabrics become worn.
These bobbles come off during the drying cycle
and collect in the fluff filter.
A clogged filter results in longer drying times and
higher energy consumption.
1. Open the door.
2. Pull the filter out towards the top.
3. Remove the fluff (by drawing your hand
across the filter).
18
4. Replace the filter (it can only be inserted one
way round).
5. Close the door.
Page 19

Changing the
light bulb
!
Risk of electrical shock!
Before replacing the bulb disconnect the plug
from the socket or switch Off the fuse/circuit
breaker.
!
Never operate the tumble dryer
without the light cover!
Open the door.
Remove the bulb cover.
Replace the bulb.
!
Max. permissible power is 10 W!
Put the cover back over the bulb.
!
Risk of short circuit!
Cover and gasket must rest tightly in bearing
to prevent ingress of moisture.
19
Page 20

Troubleshooting...
Troubleshooting... Cause Solution
The “on” indicator
lamp does not light
up.
The dryer is not plugged
in.
No drying program has
been set.
Plug in the dryer.
Turn the program selector to
the program required.
The household fuse has
tripped.
Reset/replace the fuse.
The dryer does not
start.
Start button M has not
been pressed.
No drying program has
been set.
Press the button.
Select the program you
require using the program
selector.
The humidity in the
room has
increased
significantly.
The door is not shut. Close the door.
The ambient
temperature is below
5°C.
The room is not
sufficiently ventilated.
Increase the room
temperature.
Ensure sufficient ventilation.
The door opens by
itself.
Drying is not
satisfactory or the
drying time is too
long.
The locking pins are not
engaged.
The filter is blocked. Clean the filter (page 18).
Push the door closed until you
hear the locking pins click into
place.
20
Page 21

Troubleshooting... Cause Solution
Drying is not
satisfactory
Laundry is not
dried evenly
Condensation in
the exhaust air
hose.
Ambient temperature above
30° C.
The wrong program was
selected.
Power cut for several hours Restart the program by
The laundry feels damper
than it really is.
- Too much laundry
- Only large items of
laundry
- Items of laundry
with different fibre
constructions
are being dried.
The exhaust air hose is too
long.
Make sure that the dryer has
sufficient ventilation.
Set the drying program using
the program information
(from page 16).
pressing the Start button again.
Reset the drying time if the
laundry has not been dried
sufficiently after cooling down.
Dry
- small amounts of
- large and small items
- Items according to their
Arrange the dryer so that the
exhaust air hose is no more
than 2 m long.
!
Danger, electrical current!
laundry
together.
fibre construction.
Repairs must only be carried out by the aftersales
service or an authorised expert.
If you cannot rectify a fault yourself or a repair is
necessary:
Turn the program selector to Off.
Remove the plug from the socket.
Contact the af ter sales serv ic e
(see page 22).
21
Page 22

After-sales service
Before you contact the after-sales service, please
check that you cannot rectify the malfunction
yourself.
(see page 20 onwards)
If you contact the after-sales service, even within
the warranty period, you will be liable for labour
costs.
Please inform the aftersales service of the
product number (E-Nr.) and the manufacture
number (FD) of the appliance.
You will find this information in the thick edged
area of the rating plate on the door frame (visible
when the door is open).
E-Nr. _________________ FD ______
Product number Manufacture number
22
Note the numbers for your appliance here.
Please help us to avoid unnecessary journeys by
quoting the product and manufacture numbers.
This will also save you the related additional
costs.
Further information can be found on our
website:http://www.siemens.de/hausgeraete
or
at our aftersales service centres.
You can still use our after-sales service even
after your warranty has expired if no other repair
workshops are available to you.
Page 23

Technical data
Size Load
Height 85 cm (adjustable)
Width 60 cm
Depth 59 cm
Weight approximately 45 kg
Nominal capacity 5 kg
A.C. voltage, connected load, fuse see the rating plate
Consumption rates
Cottons/coloureds 5 kg
Cupboard Dry
The information shown represents average values under standard conditions only.
Deviations of up to 10% are possible.
Spin speed in rpm
(residual moisture)
800
1,000
1,200
1,400
1,600
(approx. 70%)
(approx. 62%)
(approx. 55%)
(approx. 50%)
(approx. 47%)
Energy consumption in
kWh
3.35
3.00
2.70
2.35
2.30
23
Page 24

Setting up and connecting
!
Safety notes
Risk of injury!
The dryer is very heavy.
Do not attempt to lift it on your own.
Do not lift the dryer by any of the protruding
parts (e.g. the door) – they may break off.
!
Risk of tripping!
There is a risk of tripping due to cables or
hoses hanging down.
Secure loose cables or hoses.
Check the dryer for damage caused during
transportation. Do not connect the dryer if it
has visible signs of damage. If in doubt,
contact a specialist retailer.
Empty the dryer completely before
transporting.
24
Page 25

r
Setting up the drye
!
Never place the appliance behind a
lockable door, a sliding door or a door
with the hinge on the opposing side to
the appliance.
!
Position the appliance so that the door of
the tumble dryer can be opened
unimpeded.
!
That exhaust air must not be discharged
into a flue which is used for exhausting
fumes from appliances burning gas or
other fuels.
The dryer must be positioned so it is level on
the floor. Use a spirit level to ensure that this
is the case. The height of the feet can be
adjusted. If necessary, use these to line the
dryer up, as described below:
Loosen the counter nuts.
Turn the feet so that they compensate for the
height of the machine.
Retighten the counter nuts.
Do not trap the mains cable between the
dryer and the wall.
Leave a minimum distance of 10 cm between
the ventilation support and the wall.
!
Make sure that there is easy access at all
times to the earth contact socket.
!
The dryer cannot be assembled and
disassembled.
25
Page 26

Washer-dryer
stack
connection set
Order no.: WZ 20260
Assembling the
exhaust air hose
Exhaust air hose:
Adapter: 494355
(optional)
Order no.: WZ 20180
The dryer can be placed on top of a Siemens
washing machine of the same dimensions to
save space.
!
Risk of injury!
For reasons of safety, the dryer must be
installed by an expert. Always use a
connection set to secure the dryer to the
washing machine.
There are exhaust air outlets in the left side
wall and the rear panel of the dryer.
Select the most suitable exhaust air outlet
after installing the dryer.
Turn the exhaust air hose (see Special
accessories) or the adapter directly to the
required exhaust air outlet. Turn the hose or
adapter clockwise to do so.
Seal off the other exhaust air outlet with the
plastic cover.
26
1 Plastic cover
2 Exhaust air hose
Place the end of the exhaust air hose in the
open air without bending it. The exhaust air
hose should only be positioned horizontally
or vertically and never left to sag.
The exhaust air hose should not be more
than 2m long.
Position the exhaust air hose so that there is
no counter pressure (e.g. from wind) on the
exhaust outlet.
Page 27

Electrical
connection
Only connect the dryer to an earth contact
socket installed in accordance with
regulations.
Make sure that the voltage details on the
rating plate (visible when the door is open)
correspond with the mains voltag e wh ere the
appliance is set up. The connected load and
the fuse or LS machine are also specified on
the rating plate.
Make sure that the plug and the socket
match, the cross section of the cable is
sufficient and the earthing system has been
installed in accordance with regulations.
Do not use multiple plugs/couplings or an
extension cable.
Only pull the mains plug out of the socket
using the grip on the plug. Do not use wet
hands to connect the appliance to the mains.
Only have the mains cable replaced by the
after-sales service.
If the power cable for the dryer is damaged,
have it replaced by the manufacturer or its
after-sales service.
27
Page 28

SIEMENS
ELECTROGERÄTE G MBH
WTXL1100/9000182352
141131/en (04-06)
 Loading...