

Siemens 4075 Operating Instructions Manual

s
Be inspired
Operating instructions
and Safety Precautions
!

Safety precautions
Use only the USB cable supplied to connect your Gigaset 4070/4075isdn to a
PC. Do not connect the USB cable until requested to do so by the “Launcher”.
Do not insert or remove the USB cable during a storm. You run the risk of
receiving an electric shock. Do not extend the USB cable. This may increase
EMC radiation.
Only the
of base station).
Sensitive electronic equipment may be affected. Please comply with local
technical requirements (e.g. in a doctor's surgery).
The equipment may cause an unpleasant hum in hearing aids.
Do not install in bathrooms or shower rooms.
Do not use the base station in environments where there is a risk of explosion
(e.g. paint shops).
Please dispose of old equipment in accordance with relevant environmental
legislation.
Only commercially available terminals may be connected to the TAE sockets.
Install only in covered areas with a temperature range of +5°C to +45°C.
plug-in power supply unit provided
should be used (see underside
II
This Gigaset device should only be passed on to third parties complete with
the operating instructions.

Installation notes
O
A 220/230Vac mains socket and an ISDN telephone socket must be available
at the installation site.
O
Install in a central location, e.g. in a hallway.
O
The installation site should not be located in the immediate vicinity of other
devices such as stereo systems, televisions, office equipment or
microwaves, as this could result in interference.
O
The base station is also suitable for wall mounting. The device is attached
using two 5 mm screws which are not screwed in fully. The base station is
then hung onto these screws.
O
The maximum outdoor range between the base station and the handset is
300 m. A range of up to 50 m can be achieved indoors.
O
If wall mounting is not required, simply stand the base station on a level,
non-slip surface. The device feet do not normally leave marks on the
installation surface. However, due to the variety of varnishes and polishes in
use, marks could be left at the points of contact.
Contents of packaging
O
1 base station
O
1 mains connection cable with a plug-in power supply unit
O
1 ISDN connection cable
O
1 USB cable
O
1 set of operating instructions
O
1 CD-ROM “talk & surf”
O
1 set of “talk & surf” installation instructions
Gigaset 4075isdn Comfort also includes:
O
1 Gigaset 4000 Comfort telephone
O
1 Gigaset 4000 L telephone charger
III
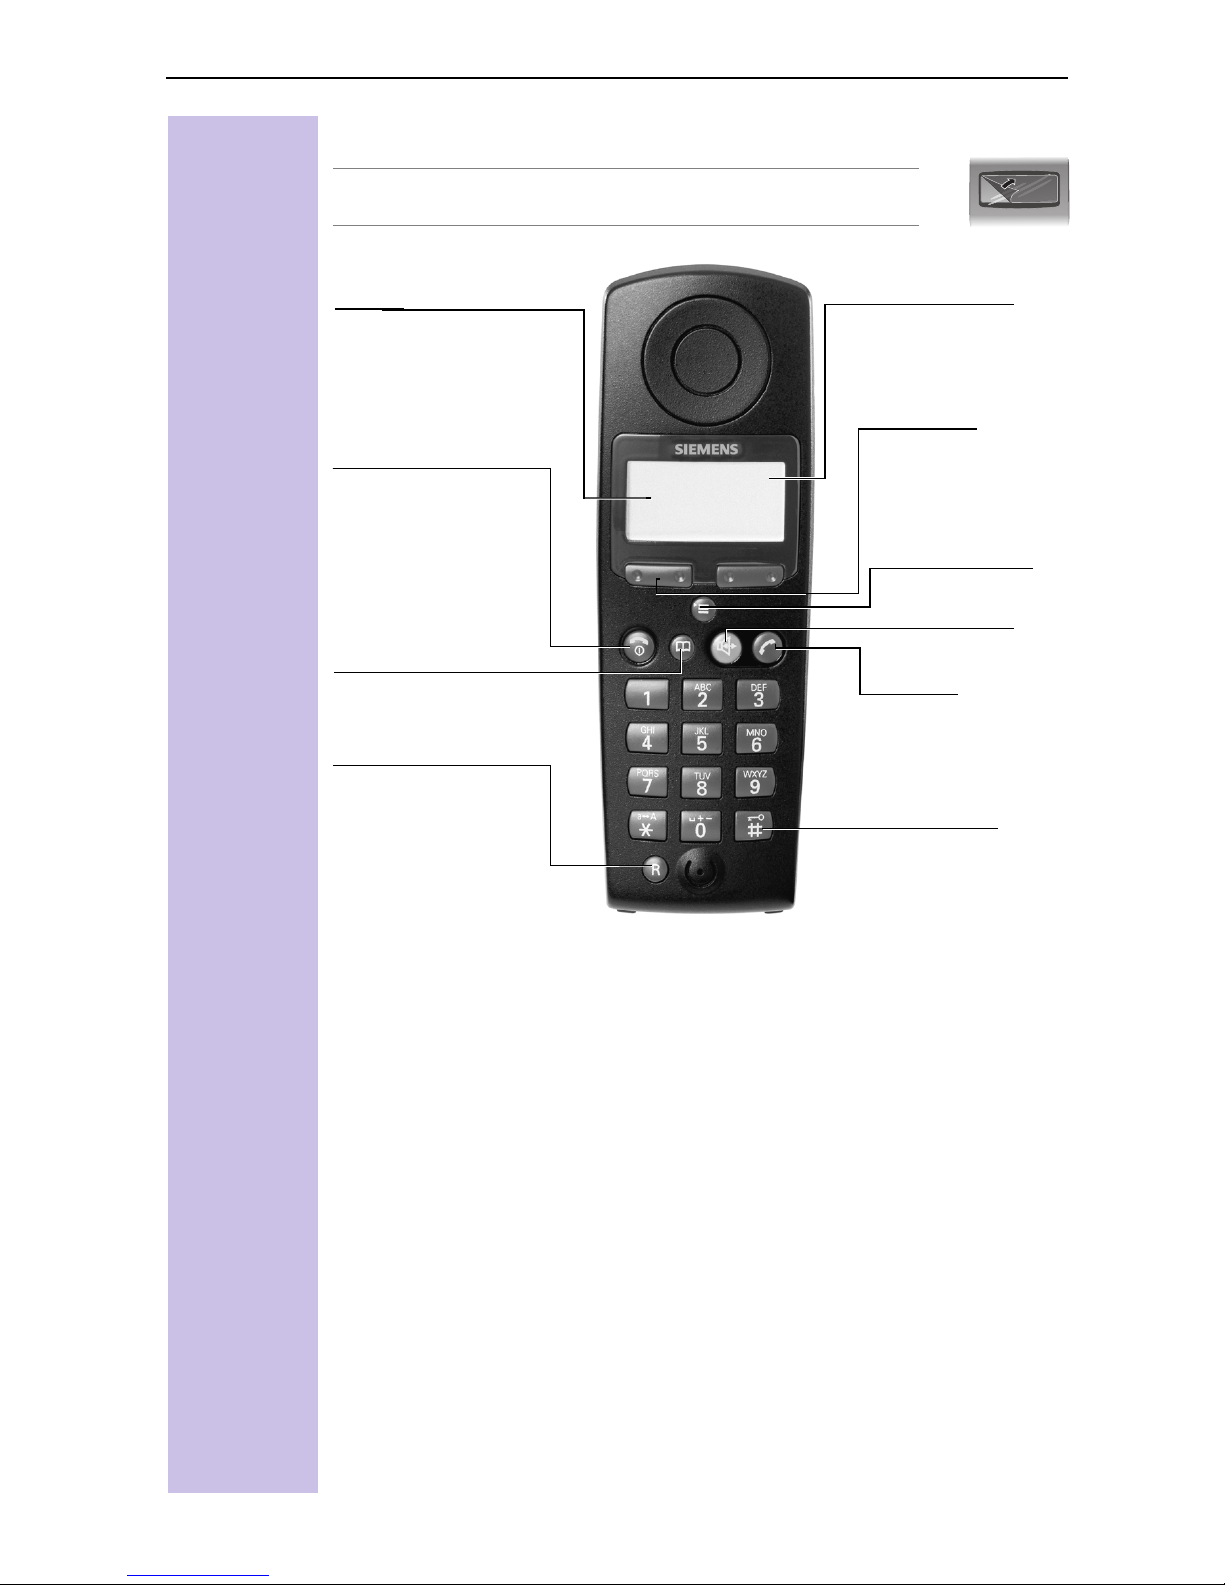
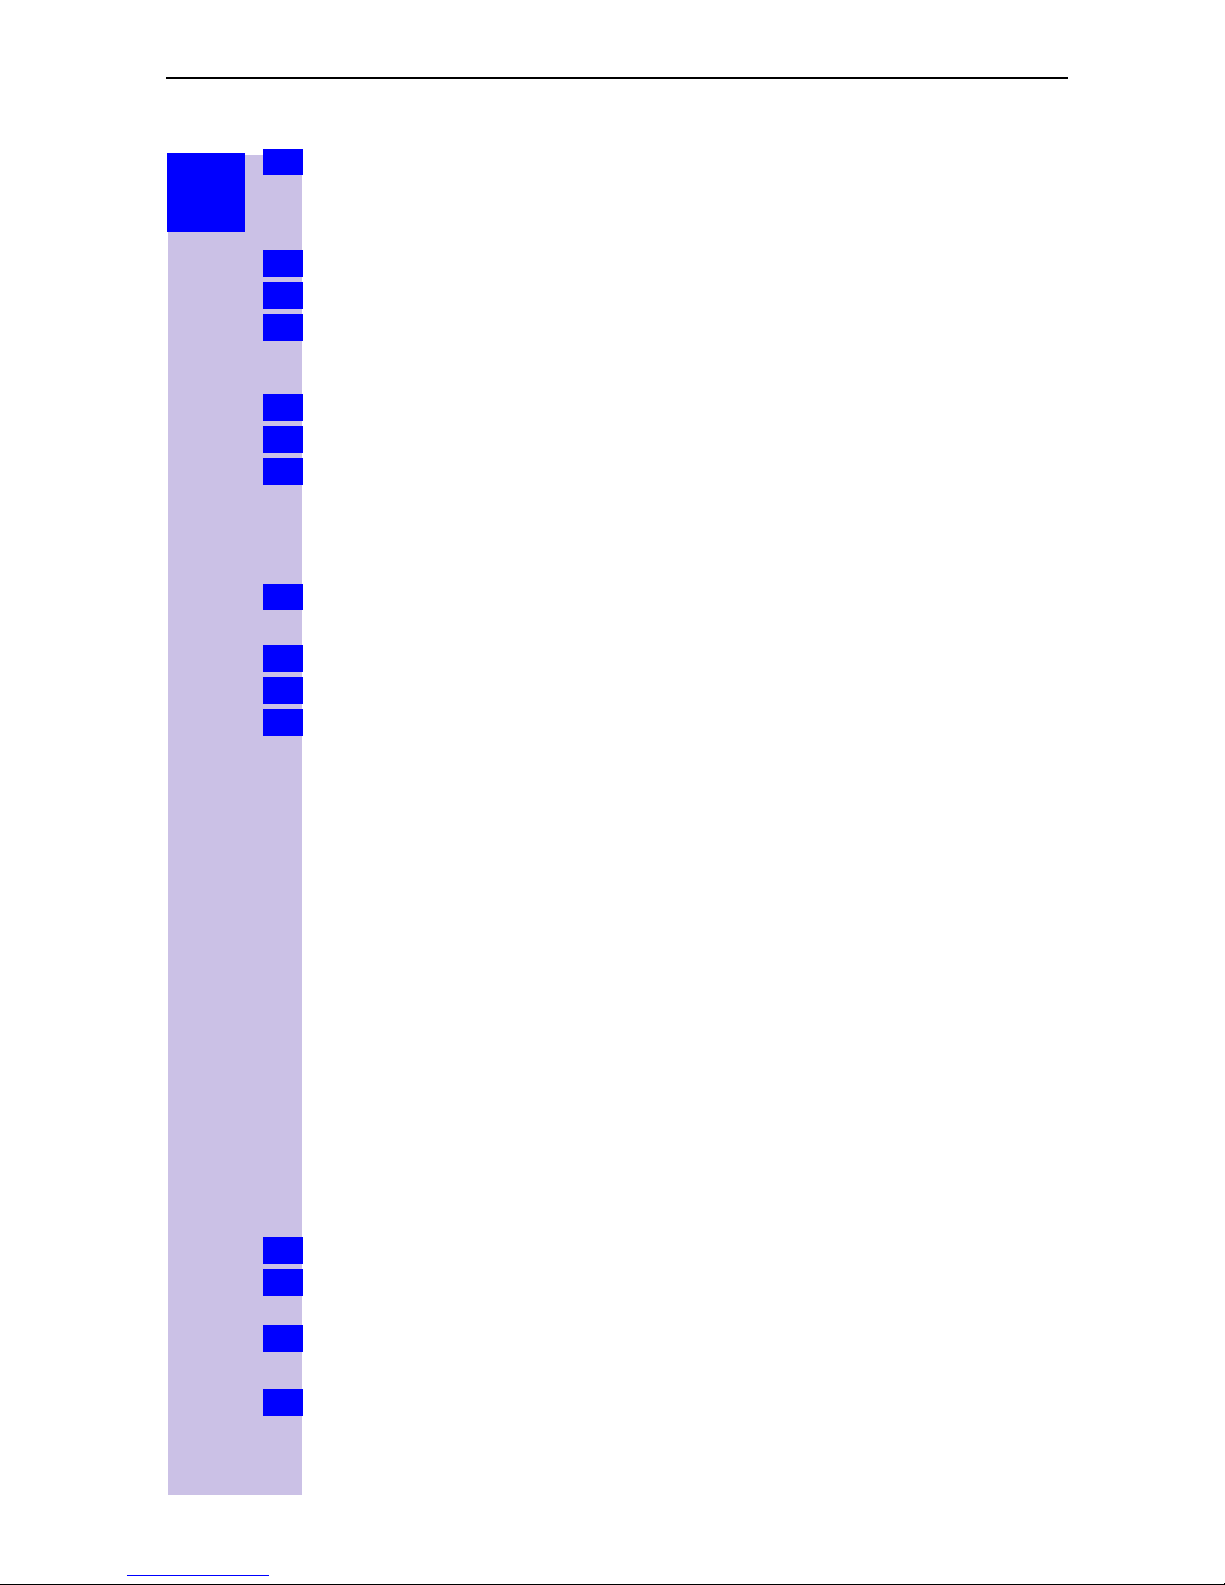
Brief overview - Gigaset 3000 Comfort
±
This protective film should be removed before use.
Base name
–
Constant:
dial/receive call
–
Flashing:
with base station
End call key
– End call.
– Cancel
function
–
Handset on/off:
long press
Directory
Call up
Recall key
The display is protected by a plastic film.
ready to
no contact
8
2QcUcdQdY_^
!
M, +[
Battery level
full
7
flat
Softkeys
See below
Activate menu
Speakerphone
– Switch on
Tal k k ey
– Accept call
– Dial call number
– Speakerphone off
– for PABXs
& select carrier
services
– Insert pause:
long press
Keypad protection
On/off:
long press
IV
Softkeys and symbols for Gigaset 3000 Comfort
%$&.
Softkey symbols Symbols
+
[
,
<
;
\
=
Activate internal connection
Open redial list
1.
This symbol appears if
the missed calls list
contains new messages
or entries.
2.
Press the softkey to call
up new messages or the
missed calls list.
Go to the next menu line or
to the last line
Go to the previous menu
line or to the first line
Return to the previous
menu
- Call a menu command
- Confirm and save entries/
settings
§
¦
¥
¤
Battery run down + warning
tone
Battery 1/3 charged.
Flashes during charging
process
Battery 2/3 charged.
Flashes during charging
process
Battery fully charged
Signal quality: none or poor
Signal quality: average
Signal quality: good
:
N
_ _ _ _ _
4
.
Backspace
Cursor control: left
Cursor control: right
Call up supplementary
menu: this contains
important additional
functions.
End of a menu
Move up one menu level
Select answering machine
after pressing
,
£
M
Keylock active
No dial tone
Volume setting (e.g. 1)
Ring tone crescendo
(increasing volume)
Volume of melody
Call up list of network
providers
V

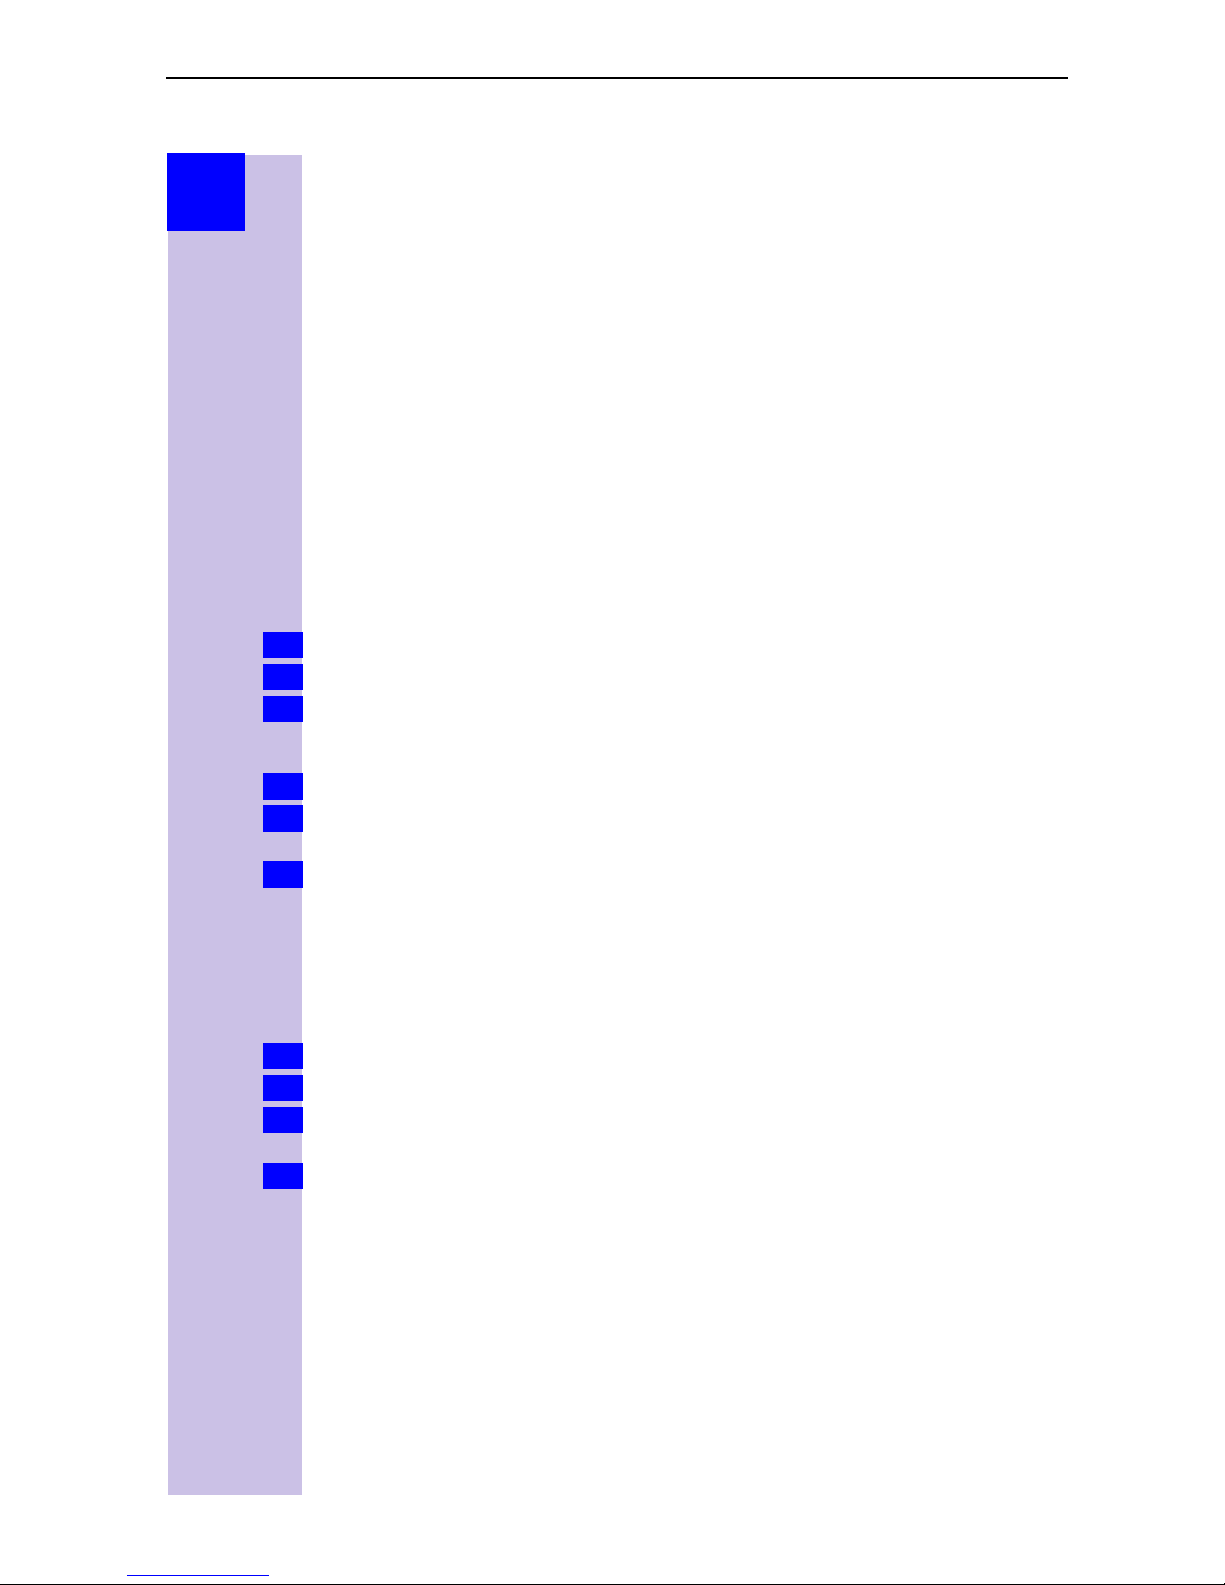
Brief overview - Gigaset 4000 Comfort
Status LED (light-emitting
lights up during a call;
Flashes for:
– incoming call
– new messages
– alarm calls,
reminders,
anniversaries
Reception strength
Control key
Tal k k ey
– Accept call
– Dial call number
– Switch from hands-
free to handset
mode
hands-free
talking button
Open PhoneBook
1 key
Long press: call up
answering machine
Star key
Long press to switch
ringer on and off
Keylock
On/off
long press
G
1^^QRU\\Q
!) ' ! !#*!#
\
1
4
7
|
ABC
2
JKL
5
TUV
8
DEF
3
MNOGHI
6
WXYZPQRS
9
0
Microphone
Display
Battery level
flat (flashes)
8
full
Current functions
and softkeys
The softkeys give you
access to the current
functions.
End call and on/off
key
– Ending the call
– Abort function
– Press briefly: Back
one menu level;
long press: return to
main menu
– Handset on/off
(long press)
Message key
Access to message
lists
Provider key
– Open provider list:
press briefly
– R key function
(flash):
long press
Relationship between control key and softkeys
Softkeys
Control key
VI
softkeys
The
can be used to
perform functions, some of
which can also be controlled
with the
control key
.
The operating instructions
show you which side of the
control key
you need to
press:
H/ I
V/ Z
(left/right)
(up/down)

Functions of the control key
The control key has different functions in different situations.
Contr
ol key
(
'
*
)
On standby In lists and menus In an input field
Up Cursor one
line up
Open PhoneBook Down Cursor one
line down
Activate menu Select entry (OK) Cursor right
Dialling internal
subscribers
One menu level
back (cancel)
Cursor left
Display symbols
Depending on the situation you will see the following symbols above the
softkeys:
Symbol Meaning
|
>
Menu key: On standby, opens the general menu. During a call,
opens a context-sensitive menu.
Confirms and selects the menu function, terminates and saves
entries.
;
\
,
-
Delete key (backspace): Deletes entries from right to left.
Last number redial: Opens a list of the last five numbers called.
Shown only in the connection status for dialling an internal user.
Shown only in the connection status for the answering machine,
T-Net box and missed calls list.
One menu level back, cancel (locally and in the connection status)
Navigating the menus to set the hands-free volume
1.
2.
3.
4.
5.
6. Save Save the volume.
|
'
*
*
*
or
or
or
*
Scroll down to
Select
Select
Set the volume you prefer.
or press right softkey
Audio
.
Audio
.
Tele ph on e v ol um e
.
.
VII

Table of contents
Safety precautions . . . . . . . . . . . . . . . . . . . . . . . . . . . . . . . . . . . . . . . . . . . . . . II
Brief overview - Gigaset 3000 Comfort . . . . . . . . . . . . . . . . . . . . . . . . . . . . IV
Softkeys and symbols for Gigaset 3000 Comfort . . . . . . . . . . . . . . . . . . V
Brief overview - Gigaset 4000 Comfort . . . . . . . . . . . . . . . . . . . . . . . . . . . . VI
Relationship between control key and softkeys. . . . . . . . . . . . . . . . . . . VI
Functions of the control key. . . . . . . . . . . . . . . . . . . . . . . . . . . . . . . . . . VII
Display symbols . . . . . . . . . . . . . . . . . . . . . . . . . . . . . . . . . . . . . . . . . . . VII
Navigating the menus to set the hands-free volume . . . . . . . . . . . . . . . VII
Setting up the telephone. . . . . . . . . . . . . . . . . . . . . . . . . . . . . . . . . . . . . . . . 15
Connecting the base station. . . . . . . . . . . . . . . . . . . . . . . . . . . . . . . . . . . . . 15
Connecting supplementary devices . . . . . . . . . . . . . . . . . . . . . . . . . . . . . . . 16
Overview of cordless functions . . . . . . . . . . . . . . . . . . . . . . . . . . . . . . . . . . 17
Registering handsets . . . . . . . . . . . . . . . . . . . . . . . . . . . . . . . . . . . . . . . . . . 17
Registering a new Gigaset 4000/3000 Comfort handset . . . . . . . . . . . . 17
Registering the Gigaset 3000 Classic handset. . . . . . . . . . . . . . . . . . . . 18
Registering the Gigaset 4000 Classic handset. . . . . . . . . . . . . . . . . . . . 18
Registering other devices . . . . . . . . . . . . . . . . . . . . . . . . . . . . . . . . . . . 18
Deregistering devices. . . . . . . . . . . . . . . . . . . . . . . . . . . . . . . . . . . . . . . . . . 18
Getting into the ISDN world is easy . . . . . . . . . . . . . . . . . . . . . . . . . . . . . . 19
What is an MSN? . . . . . . . . . . . . . . . . . . . . . . . . . . . . . . . . . . . . . . . . . . . . . 19
Configuring Gigaset 4070/4075isdn and MSNs . . . . . . . . . . . . . . . . . . . . . . 19
Ring delay per incoming MSN . . . . . . . . . . . . . . . . . . . . . . . . . . . . . . . . . . . 20
Allocating numbers. . . . . . . . . . . . . . . . . . . . . . . . . . . . . . . . . . . . . . . . . . . . 20
The Installation Assistant (Comfort handsets only) . . . . . . . . . . . . . . 21
Starting the Installation Assistant . . . . . . . . . . . . . . . . . . . . . . . . . . . . . . . . . 21
Entering the date and time. . . . . . . . . . . . . . . . . . . . . . . . . . . . . . . . . . . 21
Programming own call numbers (MSNs) . . . . . . . . . . . . . . . . . . . . . . . . 21
Setting the device type . . . . . . . . . . . . . . . . . . . . . . . . . . . . . . . . . . . . . 22
Selecting the incoming MSN . . . . . . . . . . . . . . . . . . . . . . . . . . . . . . . . . 22
Selecting the outgoing MSN . . . . . . . . . . . . . . . . . . . . . . . . . . . . . . . . . 22
Connecting to a PABX . . . . . . . . . . . . . . . . . . . . . . . . . . . . . . . . . . . . . . 22
Configuring ISDN call numbers (MSNs). . . . . . . . . . . . . . . . . . . . . . . . 23
Modifying own call numbers (MSNs). . . . . . . . . . . . . . . . . . . . . . . . . . . 23
Assigning call numbers (MSNs) . . . . . . . . . . . . . . . . . . . . . . . . . . . . . . . 23
Assigning an incoming MSN . . . . . . . . . . . . . . . . . . . . . . . . . . . . . . . . . 23
Assigning an outgoing MSN. . . . . . . . . . . . . . . . . . . . . . . . . . . . . . . . . . 24
Answering machine (Gigaset 4075isdn only) . . . . . . . . . . . . . . . . . . . . . . . . 24
Access options for the answering machine . . . . . . . . . . . . . . . . . . . . . . 24
Assigning an incoming MSN to the AM. . . . . . . . . . . . . . . . . . . . . . . . . 24
ISDN features . . . . . . . . . . . . . . . . . . . . . . . . . . . . . . . . . . . . . . . . . . . . . . . . . 25
Transferring calls – ECT . . . . . . . . . . . . . . . . . . . . . . . . . . . . . . . . . . . . . . . . 25
Call waiting - activating/deactivating CW . . . . . . . . . . . . . . . . . . . . . . . . . . . 25
8

Busy signal when MSN is engaged (Busy on Busy). . . . . . . . . . . . . . . . . . . 25
Setting external/internal enquiry calls. . . . . . . . . . . . . . . . . . . . . . . . . . . . . . 26
Rejecting calls for entire MSN group . . . . . . . . . . . . . . . . . . . . . . . . . . . . . . 26
Configuring “reject” for the entire MSN group . . . . . . . . . . . . . . . . . . . 26
System settings. . . . . . . . . . . . . . . . . . . . . . . . . . . . . . . . . . . . . . . . . . . . . 27
Configuring music-on-hold . . . . . . . . . . . . . . . . . . . . . . . . . . . . . . . . . . . . . . 27
Answering machine - activating/deactivating automatic call pickup . . . . . . . 27
Audio settings. . . . . . . . . . . . . . . . . . . . . . . . . . . . . . . . . . . . . . . . . . . . . . . . 27
Assigning a ringer melody to an MSN . . . . . . . . . . . . . . . . . . . . . . . . . . 27
Configuring an internal ringer melody for a handset . . . . . . . . . . . . . . . 28
Changing long-distance codes . . . . . . . . . . . . . . . . . . . . . . . . . . . . . . . . . . . 28
Restoring the factory setting . . . . . . . . . . . . . . . . . . . . . . . . . . . . . . . . . . . . 29
Querying the status . . . . . . . . . . . . . . . . . . . . . . . . . . . . . . . . . . . . . . . . . . . 29
Making calls using comfort features . . . . . . . . . . . . . . . . . . . . . . . . . . . . . 30
Making internal calls free of charge . . . . . . . . . . . . . . . . . . . . . . . . . . . . . . . 30
Collective call/Group call. . . . . . . . . . . . . . . . . . . . . . . . . . . . . . . . . . . . . . . . 30
Configuring internal collective call groups . . . . . . . . . . . . . . . . . . . . . . . 30
Starting a collective call to all internal subscribers . . . . . . . . . . . . . . . . . 30
Ring delay. . . . . . . . . . . . . . . . . . . . . . . . . . . . . . . . . . . . . . . . . . . . . . . . . . . 31
Setting ring delay . . . . . . . . . . . . . . . . . . . . . . . . . . . . . . . . . . . . . . . . . . 31
Picking up calls during ring delay . . . . . . . . . . . . . . . . . . . . . . . . . . . . . . 31
Conducting calls with more than one subscriber . . . . . . . . . . . . . . . . . . . . . 31
Internal enquiry call . . . . . . . . . . . . . . . . . . . . . . . . . . . . . . . . . . . . . . . . 31
Toggle . . . . . . . . . . . . . . . . . . . . . . . . . . . . . . . . . . . . . . . . . . . . . . . . . . 32
Ending an enquiry call/toggle . . . . . . . . . . . . . . . . . . . . . . . . . . . . . . . 32
Conference circuit . . . . . . . . . . . . . . . . . . . . . . . . . . . . . . . . . . . . . . . . . 32
Setting up three way calling . . . . . . . . . . . . . . . . . . . . . . . . . . . . . . . . 32
Ending three-way calling . . . . . . . . . . . . . . . . . . . . . . . . . . . . . . . . . . . 32
Setting up an external enquiry call . . . . . . . . . . . . . . . . . . . . . . . . . . . . . 32
Ending an external enquiry call. . . . . . . . . . . . . . . . . . . . . . . . . . . . . . . . 32
Transferring calls on/before answer – ECT (Explicit Call Transfer) . . . . . 32
Entering numbers in the telephone directory . . . . . . . . . . . . . . . . . . . . . . . . 33
Picking up a call while the answering machine is operating. . . . . . . . . . . . . 33
Automatic call pickup activated (default) . . . . . . . . . . . . . . . . . . . . . . . . 33
Automatic call pickup deactivated . . . . . . . . . . . . . . . . . . . . . . . . . . . . . 33
Rejecting calls. . . . . . . . . . . . . . . . . . . . . . . . . . . . . . . . . . . . . . . . . . . . . . . . 33
Performing a “reject” for the entire MSN group . . . . . . . . . . . . . . . . . . 33
Performing a “reject” for your own handset . . . . . . . . . . . . . . . . . . . . . 33
Missed calls list . . . . . . . . . . . . . . . . . . . . . . . . . . . . . . . . . . . . . . . . . . . . . . 34
,
Dialling from the “Missed calls list” using [
Dialling from the “Missed calls” list via the menus. . . . . . . . . . . . . . . . 34
Copying numbers from the “Missed calls” list to the directory. . . . . . . 34
Checking, deleting or modifying numbers in the missed calls list . . . . . 35
Internal call forwarding . . . . . . . . . . . . . . . . . . . . . . . . . . . . . . . . . . . . . . . . . 35
Configuring a forwarding destination . . . . . . . . . . . . . . . . . . . . . . . . . . . 35
Activating/deactivating internal call forwarding . . . . . . . . . . . . . . . . . . . 35
Defining the number of ring cycles . . . . . . . . . . . . . . . . . . . . . . . . . . . . 35
] or ?. . . . . . . . . . . . . . . . 34
9

External call forwarding - CF . . . . . . . . . . . . . . . . . . . . . . . . . . . . . . . . . . . . 36
Configuring a new call forwarding destination . . . . . . . . . . . . . . . . . . . . 36
Activating/deactivating external call forwarding . . . . . . . . . . . . . . . . . . . 36
Edit entry . . . . . . . . . . . . . . . . . . . . . . . . . . . . . . . . . . . . . . . . . . . . . . . . 36
Deleting external call forwarding . . . . . . . . . . . . . . . . . . . . . . . . . . . . . . 36
Switching internal/external call forwarding. . . . . . . . . . . . . . . . . . . . . . . . . . 37
Transferring incoming calls - CD (Call Deflection). . . . . . . . . . . . . . . . . . . . . 37
Transferring incoming external calls manually . . . . . . . . . . . . . . . . . . . . 37
Predefining the forwarding destination . . . . . . . . . . . . . . . . . . . . . . . . . 37
Automatic external callback . . . . . . . . . . . . . . . . . . . . . . . . . . . . . . . . . . . . . 37
Activating callback . . . . . . . . . . . . . . . . . . . . . . . . . . . . . . . . . . . . . . . . . 37
Accepting a callback. . . . . . . . . . . . . . . . . . . . . . . . . . . . . . . . . . . . . . . . 38
Deleting a callback . . . . . . . . . . . . . . . . . . . . . . . . . . . . . . . . . . . . . . . . . 38
Checking or deleting the callback number . . . . . . . . . . . . . . . . . . . . . . . 38
Call waiting - CW . . . . . . . . . . . . . . . . . . . . . . . . . . . . . . . . . . . . . . . . . . . . . 38
Accepting/rejecting external call waiting . . . . . . . . . . . . . . . . . . . . . . . . 38
Ending an active call . . . . . . . . . . . . . . . . . . . . . . . . . . . . . . . . . . . . . . 38
Forwarding waiting calls internally . . . . . . . . . . . . . . . . . . . . . . . . . . . 38
Holding calls (Call Hold) . . . . . . . . . . . . . . . . . . . . . . . . . . . . . . . . . . . . . . . . 38
Putting external subscribers on hold . . . . . . . . . . . . . . . . . . . . . . . . . . . 38
Putting internal subscribers on hold. . . . . . . . . . . . . . . . . . . . . . . . . . . . 39
Parking/continuing calls (“unpark”). . . . . . . . . . . . . . . . . . . . . . . . . . . . . . . . 39
Unparking a call before answering . . . . . . . . . . . . . . . . . . . . . . . . . . . . . 39
“Cancel CallPark” after answering a call . . . . . . . . . . . . . . . . . . . . . . . . 39
Calling line identification restriction (CLIR) . . . . . . . . . . . . . . . . . . . . . . . . . . 39
Temporary calling line identification restriction . . . . . . . . . . . . . . . . . . . 39
Permanent calling line identification restriction . . . . . . . . . . . . . . . . . . . 39
Set MSN for next call . . . . . . . . . . . . . . . . . . . . . . . . . . . . . . . . . . . . . . . . . . 40
Automatic call forwarding due to inaccessible handset . . . . . . . . . . . . . . . . 40
Enter a number and activating/deactivating automatic call forwarding . 40
Tracing switch . . . . . . . . . . . . . . . . . . . . . . . . . . . . . . . . . . . . . . . . . . . . . . . 41
During or immediately after the call . . . . . . . . . . . . . . . . . . . . . . . . . . . . 41
System functions . . . . . . . . . . . . . . . . . . . . . . . . . . . . . . . . . . . . . . . . . . . 42
Copying telephone directory entries. . . . . . . . . . . . . . . . . . . . . . . . . . . . . . . 42
Configuring an external destination call number for the room monitor . . . . 42
Night service. . . . . . . . . . . . . . . . . . . . . . . . . . . . . . . . . . . . . . . . . . . . . . . . . 42
Setting an internal/external Night Service forwarding destination . . . . . 42
Entering an automatic start/end time for night service . . . . . . . . . . . . . 43
Activating/deactivating all-day night service for Saturday/Sunday . . . . . 43
Activating/deactivating night service . . . . . . . . . . . . . . . . . . . . . . . . . . . 43
Displaying costs and call duration. . . . . . . . . . . . . . . . . . . . . . . . . . . . . . . . . 43
Call charge display . . . . . . . . . . . . . . . . . . . . . . . . . . . . . . . . . . . . . . . . . 43
Configuring determination of costs . . . . . . . . . . . . . . . . . . . . . . . . . . . . 43
Setting up “Costs from CO” . . . . . . . . . . . . . . . . . . . . . . . . . . . . . . . 43
Setting up “Units from CO” . . . . . . . . . . . . . . . . . . . . . . . . . . . . . . . . 44
Entering the price per unit . . . . . . . . . . . . . . . . . . . . . . . . . . . . . . . . . 44
Displaying a cost overview. . . . . . . . . . . . . . . . . . . . . . . . . . . . . . . . . . . 45
Deleting the cost overview total . . . . . . . . . . . . . . . . . . . . . . . . . . . . . 45
Call by Call . . . . . . . . . . . . . . . . . . . . . . . . . . . . . . . . . . . . . . . . . . . . . . . . . . 45
10

Answering machine (4075isdn only) . . . . . . . . . . . . . . . . . . . . . . . . . . . . . . 46
Access options for the answering machine . . . . . . . . . . . . . . . . . . . . . . . . . 46
Selecting an answering machine . . . . . . . . . . . . . . . . . . . . . . . . . . . . . . . . . 46
Activating/deactivating the answering machine . . . . . . . . . . . . . . . . . . . . . . 46
Activating an announcement . . . . . . . . . . . . . . . . . . . . . . . . . . . . . . . . . . . . 46
Recording/modifying announcements . . . . . . . . . . . . . . . . . . . . . . . . . . . . . 47
Playing back/deleting announcements . . . . . . . . . . . . . . . . . . . . . . . . . . . . . 47
Checking/deleting announcements . . . . . . . . . . . . . . . . . . . . . . . . . . . . 47
Recording memos . . . . . . . . . . . . . . . . . . . . . . . . . . . . . . . . . . . . . . . . . . . . 47
Recording a call . . . . . . . . . . . . . . . . . . . . . . . . . . . . . . . . . . . . . . . . . . . . . . 47
Listening to messages . . . . . . . . . . . . . . . . . . . . . . . . . . . . . . . . . . . . . . . . . 48
Listening to memos . . . . . . . . . . . . . . . . . . . . . . . . . . . . . . . . . . . . . . . . . . . 48
Deleting messages and memos. . . . . . . . . . . . . . . . . . . . . . . . . . . . . . . . . . 48
Deleting individual messages or memos . . . . . . . . . . . . . . . . . . . . . . . . 48
Deleting all messages or memos. . . . . . . . . . . . . . . . . . . . . . . . . . . . . . 48
Callback during playback . . . . . . . . . . . . . . . . . . . . . . . . . . . . . . . . . . . . 48
Modifying settings . . . . . . . . . . . . . . . . . . . . . . . . . . . . . . . . . . . . . . . . . . . . 49
Defining the number of rings . . . . . . . . . . . . . . . . . . . . . . . . . . . . . . . . . 49
Activating/deactivating voice output of the date and time . . . . . . . . . . . 49
Defining recording length. . . . . . . . . . . . . . . . . . . . . . . . . . . . . . . . . . . . 49
Setting recording quality . . . . . . . . . . . . . . . . . . . . . . . . . . . . . . . . . . . . 49
Activating automatic pause . . . . . . . . . . . . . . . . . . . . . . . . . . . . . . . . . . 49
Locking the answering machine. . . . . . . . . . . . . . . . . . . . . . . . . . . . . . . . . . 50
Activating/deactivating the answering machine . . . . . . . . . . . . . . . . . . . 50
Setting a timer . . . . . . . . . . . . . . . . . . . . . . . . . . . . . . . . . . . . . . . . . . . . . . . 50
Activating/deactivating the timer . . . . . . . . . . . . . . . . . . . . . . . . . . . . . . 50
Setting the start time (Monday - Friday). . . . . . . . . . . . . . . . . . . . . . . . . 50
Setting “Saturday - Sunday” mode . . . . . . . . . . . . . . . . . . . . . . . . . . . . 50
Automatic listening in on the handset . . . . . . . . . . . . . . . . . . . . . . . . . . . . . 50
Assigning a handset . . . . . . . . . . . . . . . . . . . . . . . . . . . . . . . . . . . . . . . . 50
Activating/deactivating listening-in . . . . . . . . . . . . . . . . . . . . . . . . . . . . . 50
Picking up a call from an answering machine. . . . . . . . . . . . . . . . . . . . . . . . 51
Activating/deactivating automatic AM pickup . . . . . . . . . . . . . . . . . . . . 51
Picking up a call . . . . . . . . . . . . . . . . . . . . . . . . . . . . . . . . . . . . . . . . . . . 51
Direct (setting AM Auto. Pickup is active) . . . . . . . . . . . . . . . . . . . . . 51
Indirect (setting AM Auto. Pickup is not active) . . . . . . . . . . . . . . . . . 51
Querying the answering machine status . . . . . . . . . . . . . . . . . . . . . . . . . . . 51
Remote control of the answering machine . . . . . . . . . . . . . . . . . . . . . . . . . 51
Modifying the answering machine PIN . . . . . . . . . . . . . . . . . . . . . . . . . 52
Setting remote functionality. . . . . . . . . . . . . . . . . . . . . . . . . . . . . . . . . . 52
Operating the answering machine on the move . . . . . . . . . . . . . . . . . . 52
Controlling the answering machine from the handset (internal) . . . . . . 52
Comfort and standard handset . . . . . . . . . . . . . . . . . . . . . . . . . . . . . . 52
Third-party handset (GAP mode) . . . . . . . . . . . . . . . . . . . . . . . . . . . . 52
Cordless telephone adapter and a normal telephone . . . . . . . . . . . . . 52
Key sequences for remote control. . . . . . . . . . . . . . . . . . . . . . . . . . . . . 53
Playing back messages and memos . . . . . . . . . . . . . . . . . . . . . . . . . . 53
Skipping messages and memos . . . . . . . . . . . . . . . . . . . . . . . . . . . . . 53
Deleting messages and memos . . . . . . . . . . . . . . . . . . . . . . . . . . . . . 53
Recording an announcement . . . . . . . . . . . . . . . . . . . . . . . . . . . . . . . 53
11

Playing back an announcement . . . . . . . . . . . . . . . . . . . . . . . . . . . . . 53
Selecting an announcement . . . . . . . . . . . . . . . . . . . . . . . . . . . . . . . . 54
Recording internal memos . . . . . . . . . . . . . . . . . . . . . . . . . . . . . . . . . 54
Activating/deactivating the answering machine . . . . . . . . . . . . . . . . . 54
Help . . . . . . . . . . . . . . . . . . . . . . . . . . . . . . . . . . . . . . . . . . . . . . . . . . 54
Security settings . . . . . . . . . . . . . . . . . . . . . . . . . . . . . . . . . . . . . . . . . . . . 55
Change system PIN . . . . . . . . . . . . . . . . . . . . . . . . . . . . . . . . . . . . . . . . . . . 55
Defining authorizations . . . . . . . . . . . . . . . . . . . . . . . . . . . . . . . . . . . . . . . . 55
Emergency Nos. . . . . . . . . . . . . . . . . . . . . . . . . . . . . . . . . . . . . . . . . . . . . . . 56
Configuring new emergency numbers. . . . . . . . . . . . . . . . . . . . . . . . . . 56
Dialling an emergency number with active DSS and/or active telephone
lock. . . . . . . . . . . . . . . . . . . . . . . . . . . . . . . . . . . . . . . . . . . . . . . . . . . . . 56
Dial options . . . . . . . . . . . . . . . . . . . . . . . . . . . . . . . . . . . . . . . . . . . . . . . . 57
Centrex features. . . . . . . . . . . . . . . . . . . . . . . . . . . . . . . . . . . . . . . . . . . . . . 57
Signalling options . . . . . . . . . . . . . . . . . . . . . . . . . . . . . . . . . . . . . . . . . . 57
In conjunction with a PABX . . . . . . . . . . . . . . . . . . . . . . . . . . . . . . . . . . . . . 57
Prefixes (access codes) . . . . . . . . . . . . . . . . . . . . . . . . . . . . . . . . . . . . . 57
Entering a prefix (access code) . . . . . . . . . . . . . . . . . . . . . . . . . . . . . . 57
Activating automatic ECT (Explicit Call Transfer) . . . . . . . . . . . . . . . . . . 58
Reserving a line . . . . . . . . . . . . . . . . . . . . . . . . . . . . . . . . . . . . . . . . . . . . . . 58
Reserving a line . . . . . . . . . . . . . . . . . . . . . . . . . . . . . . . . . . . . . . . . . . . 58
Accepting a free line . . . . . . . . . . . . . . . . . . . . . . . . . . . . . . . . . . . . . . . 58
Deleting a line reservation . . . . . . . . . . . . . . . . . . . . . . . . . . . . . . . . . . . 58
Dialling procedures. . . . . . . . . . . . . . . . . . . . . . . . . . . . . . . . . . . . . . . . . . . . 58
Activating/deactivating automatic tone dialling . . . . . . . . . . . . . . . . . . . 58
Using the keypad protocol . . . . . . . . . . . . . . . . . . . . . . . . . . . . . . . . . . . 59
Activating/deactivating automatic keypad switchover . . . . . . . . . . . . 59
Activating the keypad protocol during a call only . . . . . . . . . . . . . . . . 59
Activating the keypad protocol for the next connection . . . . . . . . . . . 59
Activating/deactivating the dialling of * and # . . . . . . . . . . . . . . . . . . . . 59
Operation with other devices . . . . . . . . . . . . . . . . . . . . . . . . . . . . . . . . . 60
Registering a Gigaset 3000 Classic handset. . . . . . . . . . . . . . . . . . . . . . . . . 60
Registering the Gigaset 2000S handset . . . . . . . . . . . . . . . . . . . . . . . . . . . . 60
Analogue terminal. . . . . . . . . . . . . . . . . . . . . . . . . . . . . . . . . . . . . . . . . . . . . 60
Registering third-party GAP handsets . . . . . . . . . . . . . . . . . . . . . . . . . . . . . 60
Activating and deactivating the repeater capability . . . . . . . . . . . . . . . . . . . 60
Registering cordless Gigaset 1000TAE . . . . . . . . . . . . . . . . . . . . . . . . . . . . 61
Setting the device type for cordless TAE. . . . . . . . . . . . . . . . . . . . . . . . 61
Registering the Gigaset M101 Data and M105 Data modules (optional) . . . 61
Making calls . . . . . . . . . . . . . . . . . . . . . . . . . . . . . . . . . . . . . . . . . . . . . . . . . 62
Activating/deactivating automatic line seizure . . . . . . . . . . . . . . . . . . . . 62
Making external calls . . . . . . . . . . . . . . . . . . . . . . . . . . . . . . . . . . . . . . . 62
Making internal calls. . . . . . . . . . . . . . . . . . . . . . . . . . . . . . . . . . . . . . . . 62
Making internal calls with GAP handsets. . . . . . . . . . . . . . . . . . . . . . . . 62
Collective calls to all internal subscribers. . . . . . . . . . . . . . . . . . . . . . . . 62
Call waiting. . . . . . . . . . . . . . . . . . . . . . . . . . . . . . . . . . . . . . . . . . . . . . . 62
Switching to waiting subscribers - toggle . . . . . . . . . . . . . . . . . . . . . . . 62
12

Conducting external enquiry calls. . . . . . . . . . . . . . . . . . . . . . . . . . . . . . 62
Call transfer on/before answer. . . . . . . . . . . . . . . . . . . . . . . . . . . . . . . . 63
Accepting an entrance telephone call . . . . . . . . . . . . . . . . . . . . . . . . . . 63
Accepting an entrance telephone call and opening the door . . . . . . . . . 63
Making calls with a corded telephone at the TAE connection . . . . . . . . . . . 63
Dialling internal and external numbers . . . . . . . . . . . . . . . . . . . . . . . . . . 63
Dialling internal numbers . . . . . . . . . . . . . . . . . . . . . . . . . . . . . . . . . . 63
Dialling external numbers . . . . . . . . . . . . . . . . . . . . . . . . . . . . . . . . . . 63
Answering calls . . . . . . . . . . . . . . . . . . . . . . . . . . . . . . . . . . . . . . . . . . 63
Call waiting . . . . . . . . . . . . . . . . . . . . . . . . . . . . . . . . . . . . . . . . . . . . . 63
Internal collective call . . . . . . . . . . . . . . . . . . . . . . . . . . . . . . . . . . . . . 64
Calling another party during an external call. . . . . . . . . . . . . . . . . . . . . . 64
External enquiry . . . . . . . . . . . . . . . . . . . . . . . . . . . . . . . . . . . . . . . . . 64
Ending the call . . . . . . . . . . . . . . . . . . . . . . . . . . . . . . . . . . . . . . . . . . 64
Internal enquiry . . . . . . . . . . . . . . . . . . . . . . . . . . . . . . . . . . . . . . . . . . 65
Toggling between two external callers . . . . . . . . . . . . . . . . . . . . . . . . 65
Ending the call . . . . . . . . . . . . . . . . . . . . . . . . . . . . . . . . . . . . . . . . . . 65
Call transfer . . . . . . . . . . . . . . . . . . . . . . . . . . . . . . . . . . . . . . . . . . . . . 65
Picking up a call while the answering machine is operating . . . . . . . . 66
Automatic call pickup activated (default) . . . . . . . . . . . . . . . . . . . . . . 66
Automatic call pickup deactivated . . . . . . . . . . . . . . . . . . . . . . . . . . . 66
Operation with the entrance telephone . . . . . . . . . . . . . . . . . . . . . . . . 67
Configuring the entrance telephone . . . . . . . . . . . . . . . . . . . . . . . . . . . . . . . 67
Assigning internal users to the entrance telephone call group . . . . . . . 67
Forwarding the entrance telephone externally. . . . . . . . . . . . . . . . . . . . 67
Entering/modifying a destination call number for external call forwarding
67
Deleting a destination call number for external call forwarding . . . . . 67
Activating/deactivating call forwarding . . . . . . . . . . . . . . . . . . . . . . . . 68
Doorbell call, doorbell connection . . . . . . . . . . . . . . . . . . . . . . . . . . . . . 68
Gigaset Comfort . . . . . . . . . . . . . . . . . . . . . . . . . . . . . . . . . . . . . . . . . 68
Gigaset Classic . . . . . . . . . . . . . . . . . . . . . . . . . . . . . . . . . . . . . . . . . . 68
Supplementary devices . . . . . . . . . . . . . . . . . . . . . . . . . . . . . . . . . . . 68
About your system . . . . . . . . . . . . . . . . . . . . . . . . . . . . . . . . . . . . . . . . . . . . . 69
Troubleshooting . . . . . . . . . . . . . . . . . . . . . . . . . . . . . . . . . . . . . . . . . . . . . . 70
Technical data. . . . . . . . . . . . . . . . . . . . . . . . . . . . . . . . . . . . . . . . . . . . . . . . 70
Contacts . . . . . . . . . . . . . . . . . . . . . . . . . . . . . . . . . . . . . . . . . . . . . . . . . . . . 71
Approval . . . . . . . . . . . . . . . . . . . . . . . . . . . . . . . . . . . . . . . . . . . . . . . . . . . . 71
Menu Displays . . . . . . . . . . . . . . . . . . . . . . . . . . . . . . . . . . . . . . . . . . . . . . . . 72
Gigaset 3000 Comfort menu . . . . . . . . . . . . . . . . . . . . . . . . . . . . . . . . . . . . 72
Einstellungen . . . . . . . . . . . . . . . . . . . . . . . . . . . . . . . . . . . . . . . . . . . . . 72
Base stations . . . . . . . . . . . . . . . . . . . . . . . . . . . . . . . . . . . . . . . . . . . . . 72
Device user options (short cuts) > Selecting . . . . . . . . . . . . . . . . . . . . . 73
Handset user options (short cuts) > Programming . . . . . . . . . . . . . . . . 73
Handset user options (short cuts) > Contents . . . . . . . . . . . . . . . . . . . . 73
Room monitor-Settings . . . . . . . . . . . . . . . . . . . . . . . . . . . . . . . . . . . . . 73
Service . . . . . . . . . . . . . . . . . . . . . . . . . . . . . . . . . . . . . . . . . . . . . . . . . . 73
13

Gigaset 4000 Comfort menu . . . . . . . . . . . . . . . . . . . . . . . . . . . . . . . . . . . . 74
Menu of the Gigaset 4070/4075isdn base station . . . . . . . . . . . . . . . . . . . . 75
Service or Basis einstellen > Status. . . . . . . . . . . . . . . . . . . . . . . . . . . . 76
Service or Basis einstellen > Anruferliste . . . . . . . . . . . . . . . . . . . . . . . 77
Service or Basis einstellen > Anrufvorbereit.. . . . . . . . . . . . . . . . . . . . . 77
Service or Basis einstellen > Umleitung Ext. . . . . . . . . . . . . . . . . . . . . . 77
Service or Basis einstellen > Umleitung Int. . . . . . . . . . . . . . . . . . . . . . 77
Service or Basis einstellen > Nachtschaltung . . . . . . . . . . . . . . . . . . . . 78
Service or Basis einstellen > Einstellungen > Sicherheit . . . . . . . . . . . . 78
Service or Basis einstellen > Einstellungen > Teiln.einrichten. . . . . . . . 78
Service or Basis einstellen > Einstellungen > System-Einstell. . . . . . . . 79
Service or Basis einstellen > Einstellungen > ISDN-Einstell. . . . . . . . . . 80
ISDN Glossary. . . . . . . . . . . . . . . . . . . . . . . . . . . . . . . . . . . . . . . . . . . . . . . . . 81
Index . . . . . . . . . . . . . . . . . . . . . . . . . . . . . . . . . . . . . . . . . . . . . . . . . . . . . . . . . 89
14
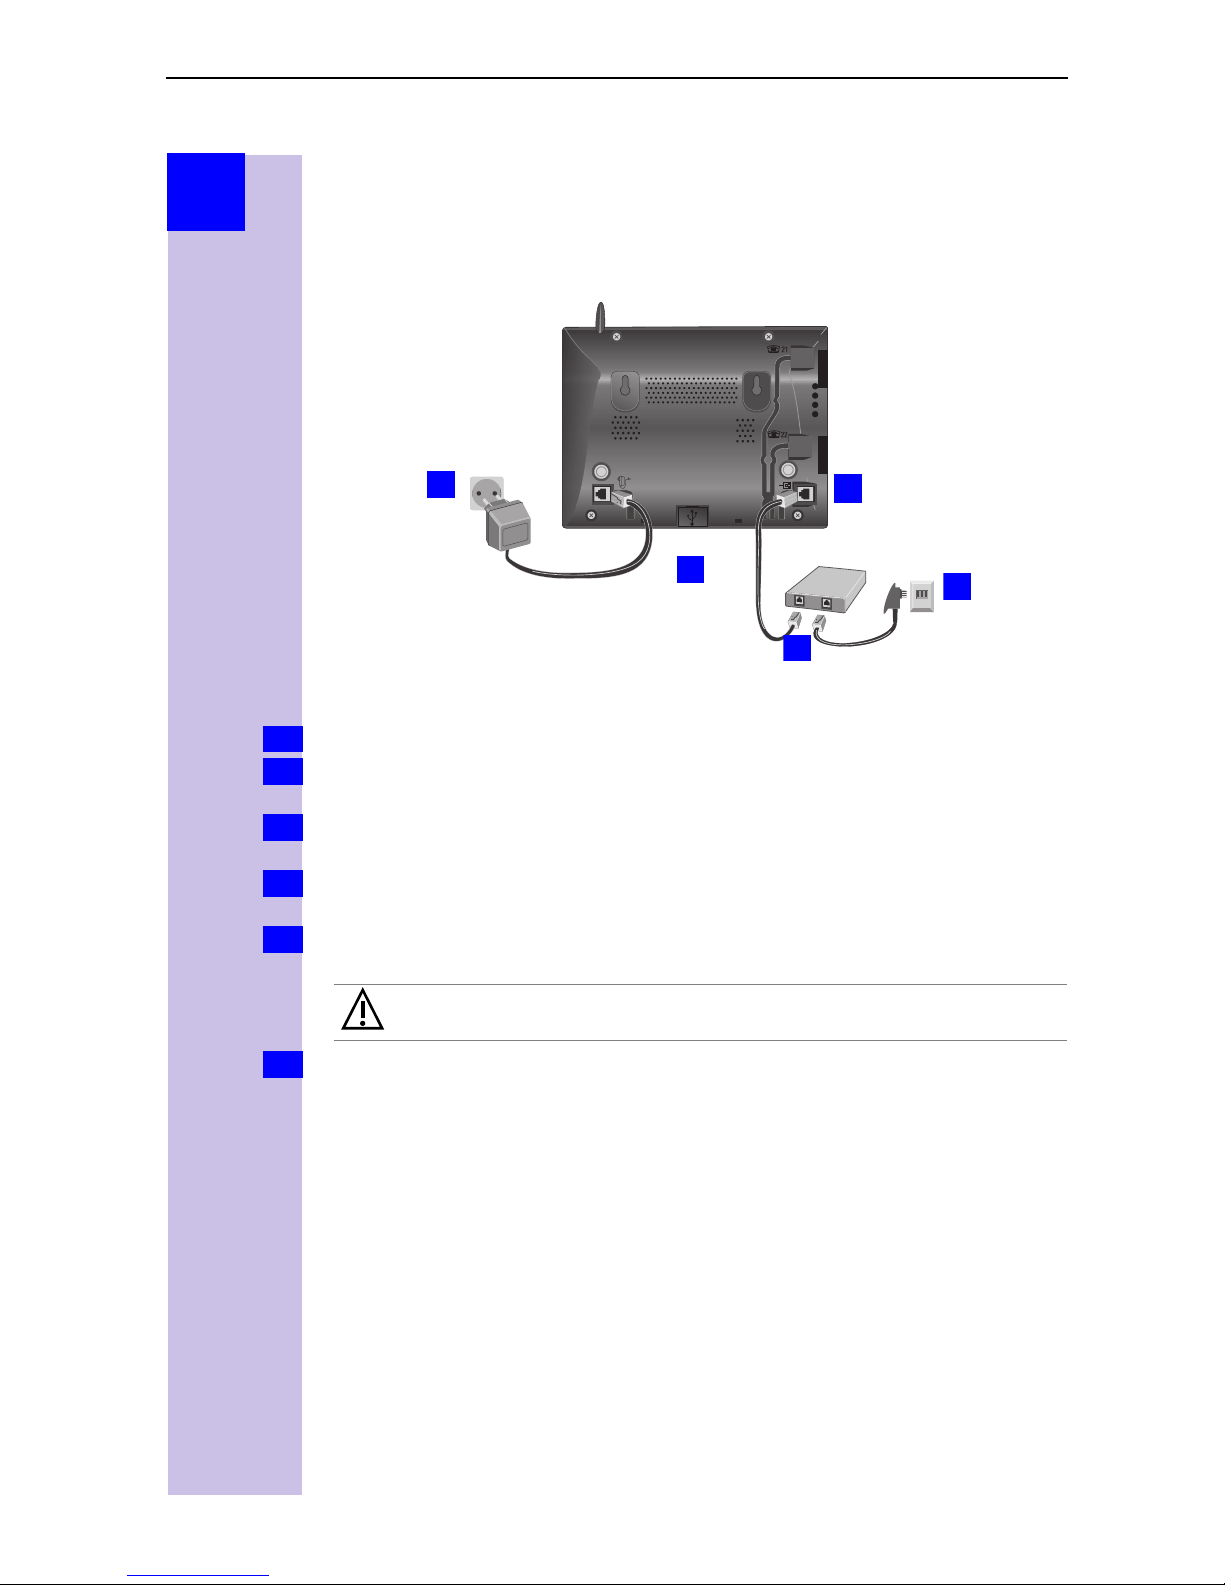
Step
2.
3.
by
Step
Setting up the telephone
Connecting the base station
1.
2.
3.
4.
5.
Info
4.
5.
V
S0 socket: insert in the ISDN connection cable until the plug locks into place.
Insert in the ISDN connection cable in the ISDN socket until the plug locks into
place.
In the case of NTBA with self-assembly, insert the cable between the NTBA
and the TAE (old telephone socket) until both plugs lock into place.
socket: Insert mains connection cable until the plug locks into place, and
insert in the socket.
Do not connect the USB cable until requested to do so by the launcher
(possible only in Windows 98 and higher).
Only the
underside of base station).
Power failure:
In the event of a power failure, your base station, the handsets which are
registered at it and any corded terminals are
saved information (messages, directory entries) are retained for an unlimited
period.
Profiset talk&surf:
It is
not possible
simultaneously on the same PC. Otherwise, problems will occur as both
programs attempt to access the same interface. You must therefore choose
either
program version must first be uninstalled.
Gigaset talk&surf or Profiset Talk&surf. When upgrading, the old
plug-in power supply unit provided
not
to install Profiset talk&surf and Gigaset talk&surf
1.
should be used (see
operational. All settings and
15
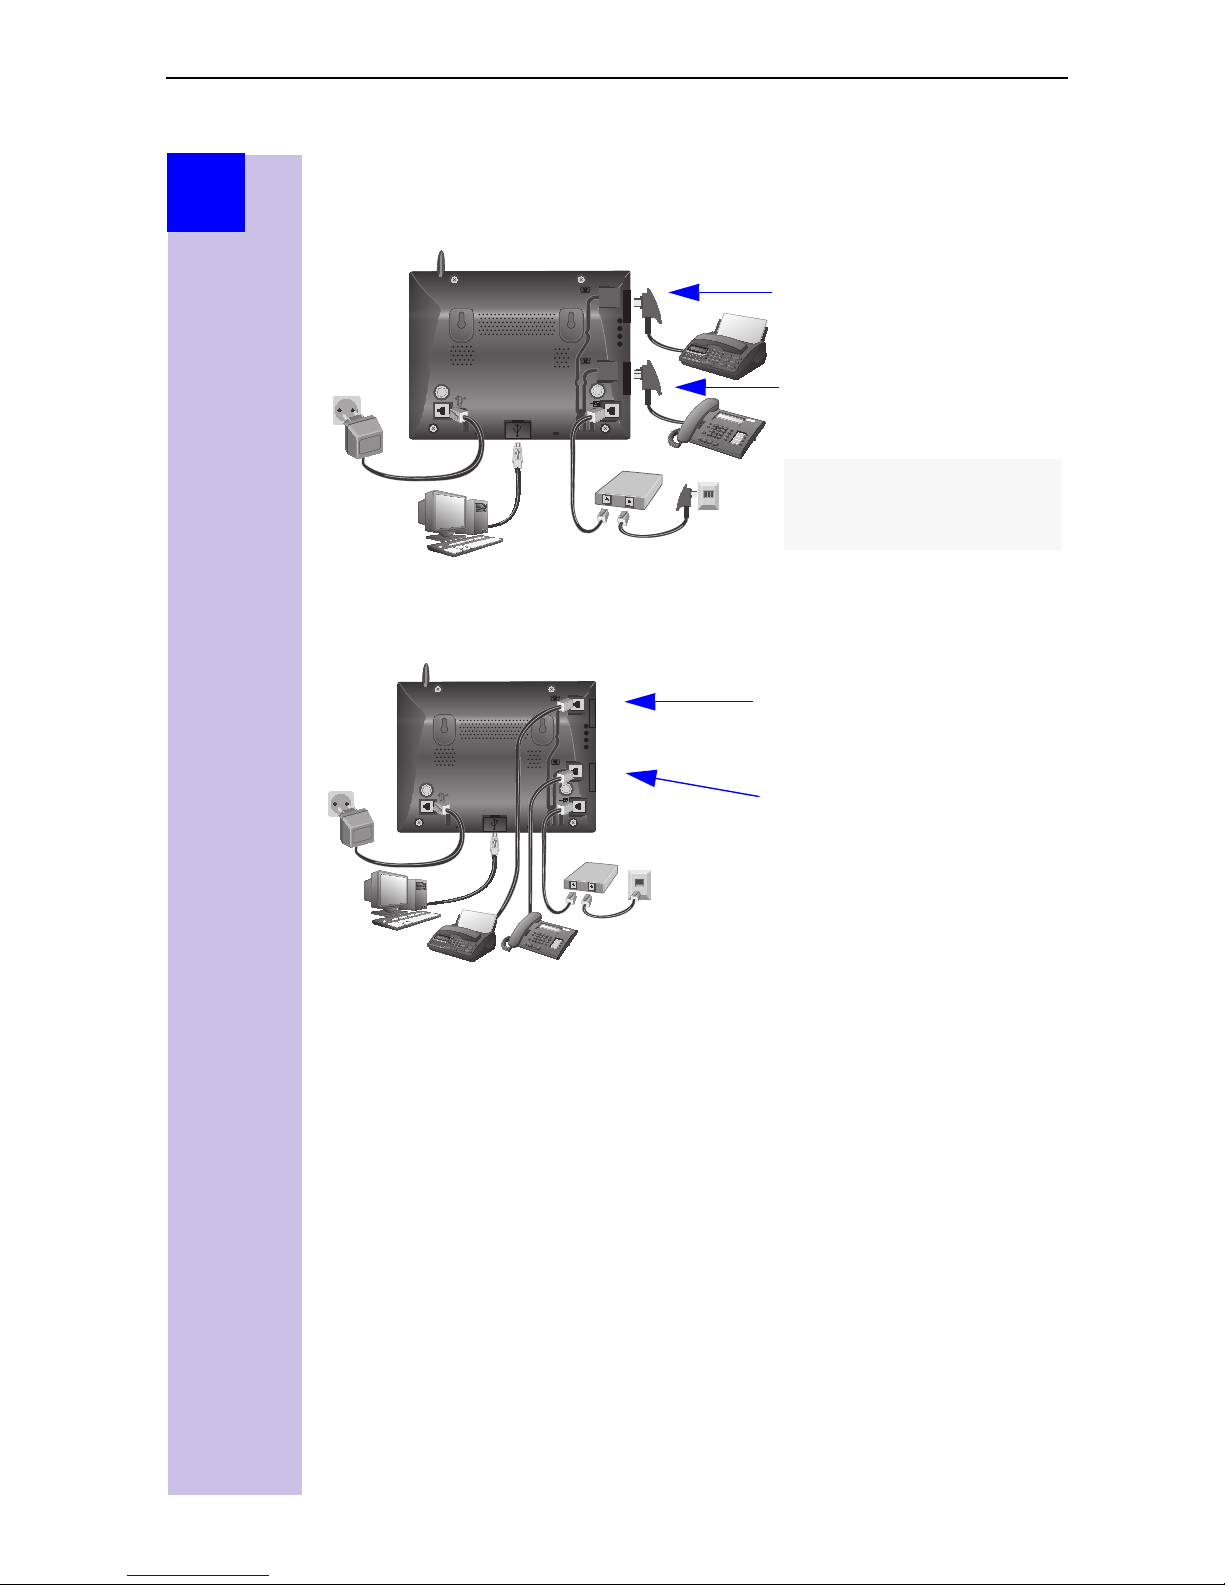
Step
by
Step
Connecting supplementary devices
Connection in Germany
21
22
Schematic diagram
Connection in other countries
21
22
Connection for the
corded terminal
with internal number 21
Connection for the
corded terminal
with internal number 22
The connections are provided
for analogue terminals with
TAE connectors.
Connection for the
corded terminal
with internal number 21
Connection for the
corded terminal
with internal number 22
The connections are
intended for normal
terminals with Mini-Western
connectors.
16

Step
by
Step
Overview of cordless functions
Handset Operated in the same way as:
Gigaset 4000 Comfort Gigaset 4000 Comfort
Gigaset 3000 MOBILE Gigaset 3000 Comfort
Gigaset 3000 Comfort
Gigaset 3000 Micro
Gigaset 2000 pocket
Gigaset 2000 C/T
Gigaset 3000 Classic Gigaset 3000 Classic
Gigaset 2000 S GAP devices
Gigaset 1000 C/S/TAE
Gigaset 4000 Classic
Gigaset M 101 DATA PC data link
Gigaset M 105 DATA
or
or
Registering handsets
You can register a maximum of eight cordless devices (handsets, data boxes,
cordless TAEs and SimPad).
Press this green illuminated key
Registering a new Gigaset 4000/3000 Comfort handset
Switch on the handset with a
1.
Confirm “Register?” new handset with [YES] on the handset.
2.
Gigaset 3000 Comfort
Existing handset: press
2.
9
] and select o Register and confirm with [OK].
[
Gigaset 4000 Comfort
Existing handset: press
2.
a baseand confirm with [OK].
Enter the system PIN of the base station (factory setting: 0000) and confirm
3.
with [OK].
Press the green illuminated key on the base station, the key flashes steadily.
4.
The base station is only ready for registration as long as the key flashes.
*
o
press on or
long
o
Stations o Station1 - 4 select a station, press
Settings oRegister handset oBase 1-4 Select
C
17
Step
by
Step
Select an unassigned internal call number (11 -18) with [
5.
[OK]. Successful registration is confirmed on the display.
] and confirm with
Registering the Gigaset 3000 Classic handset
Switch on the handset with a
1.
z { ~
Press
2.
Enter the base station number, generally 1, and confirm with [OK]. The
3.
symbol initially flashes, but then remains steadily lit when the connection to
the base station has been established.
Enter the PIN of the base station (factory setting: 0000) and confirm with [OK].
4.
Press the green illuminated key on the base station, the key flashes steadily.
5.
Select an unassigned internal call number (11 -18). The handset is then
6.
successfully registered (the symbol indicating readiness for registration stops
flashing).
in sequence.
long
press on thekey
.
Registering the Gigaset 4000 Classic handset
Press the green illuminated key on the base station, the key flashes steadily.
1.
The base station is only ready for registration as long as the key flashes.
Switch on the handset with a
2.
Confirm “Register?” with [YES].
3.
Enter the system PIN of the base station (factory setting: 0000) and confirm
4.
with [OK].
The handset is registered. The next internal number is automatically assigned
to the Gigaset 4000 Classic handset.
long
press
on the
C
key
Registering other devices
If you also wish to register other handsets (such as Gigaset 2000S or GAP
handsets) or cordless devices (such as Gigaset 1000 TAE or STA) please select
internal call numbers 11 to 15. These devices are not called on numbers
16 to 18.
Please refer to the relevant operating instructions for information on the
registration procedures.
A Gigaset repeater for increasing the range of the handsets does not require a
free registration location. You can register up to 6 Gigaset repeaters at a single
base station.
Deregistering devices
A cordless device can be deregistered from any registered Comfort handset
from Gigaset 2000 C on. All devices that remain registered retain their previous
internal call numbers.
Press
1.
Select using [
2.
Teiln.einrichten
This opens a list of internal numbers.
3.
Select using [
Press [OK] to deregister the device with the chosen internal number.
4.
or *for selection menus.
] and [OK]:
o
Gerät abmelden
(required internal number)
]:
Service or Base Set up
.
o
Einstellungen
.
o
18

Step
by
Step
Getting into the ISDN world is
easy
What is an MSN?
MSN stands for multiple subscriber number. You can apply for a maximum of
ten different telephone numbers for the ISDN multiple device connection. An
MSN is one of the telephone numbers assigned to you
without
Configuring Gigaset 4070/4075isdn and MSNs
Your telephone system in the Gigaset 4070/4075isdn uses the MSN
specifically according to your requirements. In this regard, the following
distinctions are made:
– Incoming MSN. This is the number that can also be answered by one of the
three answering machines in the case of incoming calls to specific internal
numbers or in the case of Gigaset 4075isdn.
– Outgoing MSN. This is the number an internal subscriber places before the
number he is dialling when making outgoing calls; it is then also used by the
network provider to calculate charges.
– In addition to the above options you can also set the required MSN for the
next outgoing call on the Comfort handset.
the area code.
Possible internal subscribers are:
11- 18 H an ds et s
21, 22 Corded analog devices
*
40
41- 48
91- 93 Integrated answering machine (AM) 91 = AM 1, 92 = AM 2, 93 =
* The numbers 40 - 48 are assigned automatically
An example: five MSNs were applied for; two for business use, a fax number
and two for personal use.
business 11111 11, 12, 91 1 11111 22222
Fax 33333 21 - 33333 ---
PC via USB connection
M105 Data
AM 3 (Gigaset 4075isdn only)
Use Incoming
22222 11, 12, 91 1 11111 22222
*
MSN
Cordless PC via Gigaset M101 Data or
Where
does it
ring?
Answering
machine
Outgoing
MSN
MSN
nächst.Wahl
Personal 44444 13, 92 2 44444 ---
55555 14, 92 2 55555 ---
19

Step
by
Step
You can use the
handsets 11 and 12 and switch to the MSN 22222 for this dialling procedure in
the process. This is not possible for handsets 13 and 14 as an alternative MSN
was not set up.
Answering machine (AM) 1 was allocated to business use and AM 2 to
personal use.
MSN nächst.Wahl
feature by allocating two MSNs to the
Ring delay per incoming MSN
Using the ring delay feature you can configure a handset for each individual
incoming MSN to delay response to the call signal. However, during this ring
delay time the Comfort handset can accept the call using the “call pickup”
function without a call signal queuing. When this feature is being configured,
the time allowed by the answering machine for recording a message (default:
Automatisch 2/4) must be taken into account. When the ring delay that has
been set is higher than the setting on the active AM, there is no call signal as
the answering machine accepts the call beforehand. Setting ring delay see
page 31.
Allocating numbers
The Installation Assistant makes it very easy to perform the initial configuration.
After initial installation you can call up the Installation Assistant at any time; to
skip programming of the feature use the [NEIN] key and the next feature will
be displayed.
20
Step
by
Step
The Installation Assistant
(Comfort handsets only)
The Installation Assistant can be called up any time to help you set the most
important functions. The following settings can be completed in sequence:
O
date and time
O
Own call number (MSN)
O
Device type (e.g. telephone, fax)
O
Incoming MSN = internal call allocation to MSN; for possible subscriber
numbers see also page23.
O
Outgoing MSN = the telephone number assigned to external calls; can be
set individually for each device.
O
Exchange code (with installation behind a PABX)
Starting the Installation Assistant
Press or *for selection menus.
1.
Select using [
2.
Confirm the prompt for starting the Installation Assistant with [JA].
3.
] and [OK]:
Service or Base Set up
o
Installation
.
Entering the date and time
Confirm the prompt for entering the time with [JA].
1.
Enter the date in the format " - - . - - . - - " (day, month, year) and the time in the
2.
format " - - : - - " (hour, minute) and confirm with [
Select using [
3.
] and [OK]:
Eintrag sichern
.
9
].
Programming own call numbers (MSNs)
The network provider will have notified you of your MSNs when they sent you
the order confirmation for the ISDN line. The first time it is switched on, the
base station attempts independently to determine the MSNs itself. The result
is displayed. You can save up to 10 call numbers.
Confirm the prompt for entering the call number with [JA].
1.
Confirm the prompt for entering the first MSN with [JA].
2.
<
Enter the name and with
3.
and confirm with [9].
Select using [] and [OK]:
4.
move to
Eintrag sichern
Change call number, Enter call number
.
21
Step
by
Step
Setting the device type
[Telephone] is preset for the analog connections Internal 21 and Internal 22 and
the GAP devices. You can make and receive calls once a telephone is
connected. If you connect an additional corded device (e.g. fax), the device
type must be modified again accordingly. The entry “No function“ blocks any
additional input for this device in the case of MSN and answering machine
configurations.
Confirm the prompt for setting the device type for subscribers with [JA].
1.
Confirm the prompt for assignment with [JA].
2.
Select using [
3.
] and [OK]:
(required device)
.
The assignments for additional internal subscribers are offered.
Selecting the incoming MSN
This is the call number used to contact your terminal. You can select several
MSNs.
Confirm the prompt for incoming MSN references with [JA].
1.
Confirm the prompt for assignment with[JA] if the required internal call number
2.
is displayed, otherwise select [NO] to go to the next internal call number.
Select using [
3.
] and [OK]:
(one or more MSN)
.
The selection is confirmed with .
Selecting the outgoing MSN
You are conducting an outgoing call via this call number. This call number is
transmitted to the called party. The provider calculates the call charges incurred
using this MSN. You can only select one outgoing MSN.
Confirm the prompt for outgoing MSN references with [JA].
1.
Confirm the prompt for assignment with[JA] if the required internal call number
2.
is displayed, otherwise select [NO] to go to the next internal call number.
Select using [
3.
] and [OK]:
(one MSN)
.
Connecting to a PABX
If you require a PABX connection:
Answer the prompt for the PABX with [JA].
1.
Confirm the prompt for the prefix (exchange code) with [JA].
2.
Enter the exchange code and confirm with [
3.
Select using [] and [OK]:
4.
The installation is terminated with the aid of the Installation Assistant.
22
Eintrag sichern
9
].
.
Step
by
Step
Configuring ISDN call numbers
(MSNs)
Your ISDN connection provides you with two telephone lines that you can use
simultaneously. You can configure up to 10 own call numbers (MSNs) at your
base station. You can also use some call numbers for additional devices on the
ISDN connection (S
page 21) to store all the call numbers, you can do this now.
numbers stored subsequently are automatically assigned to all the
registered handsets
Modifying own call numbers (MSNs)
Each newly assigned MSN is automatically assigned its own ringer melody.
This setting enables you to change the type of melody.
Press
1.
Select using [
2.
settings
Select using [
3.
Select using [] and [OK]:
4.
In this menu you can also display or delete an MSN, or configure another ring
melody.
Enter new or modified MSN and/or names and confirm with [
5.
Select using [] and [OK]:
6.
or *for selection menus.
o
Set up MSN
bus). If you did not use the Installation Assistant (see
0
.
] and [OK]:
.
] and [9]:
Service Set up or Base Set up
(required MSN)
Edit entry
Save entry
.
.
.
All these call
o
Settings
9
].
o
ISDN
Assigning call numbers (MSNs)
Specific own call numbers (MSNs) can be assigned to registered devices. In
this way you can define
O
the call number under which a registered terminal will ring (incoming MSN)
and
O
the call number from which an internal subscriber should dial (outgoing
MSN). You can set one outgoing MSN for each internal subscriber. This MSN
is displayed to the called party and any call charges incurred are assigned to
the appropriate subscriber.
Assigning an incoming MSN
A newly registered handset will ring under all configured call numbers. If you
want to assign a specific incoming MSN to the handset:
Press
1.
Select using [
2.
user
Select using [
3.
Select using [] and [OK]:
4.
or *for selection menus.
] and [OK]:
o
Set up device
.
] and [9]:
Service Set up or Base set up
(required internal subscriber)
Receive MSN
o
(relevant MSN)
.
o
Settings
.
o
Set up
23

Step
by
Step
Assigning an outgoing MSN
Press
1.
Select using [] and [OK]:
2.
user
Select using [] and [9]:
3.
Select using [
4.
or *for selection menus.
o
Set up device
.
] and [OK]:
Service Set up or Base set up
(required internal subscriber)
Outgoing MSN
o
(required MSN)
.
o
Settings
.
Answering machine (Gigaset 4075isdn only)
The Gigaset 4075isdn has three answering machines (AMs). Any MSN can be
assigned to any answering machine. However, an individual MSN cannot be
assigned to more than one answering machine at a time. Only one message
can be recorded at a time.
Access options for the answering machine
No MSN configured (default configuration):
– In this case all the connected devices have access to the three AMs. On
activation, AM 1 receives calls to all the MSNs.
One or more MSNs have been assigned:
– The relevant AM can only be set and accessed by devices with the same
MSN.
– Exception: an answering machine which is the only device in the system to
be assigned to a particular MSN can be operated from all connected devices.
o
Set up
Assigning an incoming MSN to the AM
Press
1.
Select using [] and [OK]:
2.
user
Select using [] and [9]:
3.
93 AM 93
Select using [
4.
or *for selection menus.
o
Set up device
for AM 3).
.
] and [OK]:
Service Set up or Base set up
(Int: 91 AM 91
Receive MSN
for AM 1,
o
Int: 92 AM 92
(relevant MSN)
o
Settings
.
o
Set up
for AM 2,
Int:
24
Step
by
Step
ISDN features
Transferring calls – ECT
This function is only required for ECT (Explicit Call Transfer) behind PABXs.
Press
1.
Select using [] and [OK]:
2.
settings
Call waiting - activating/deactivating CW
This feature can be set up separately for each subscriber. When call waiting is
activated, the caller hears the on-hook signal if you are already conducting a
call.
If call waiting is deactivated, the caller hears the ring tone if you are
already conducting a call and additional devices are assigned to this MSN.
If call waiting is deactivated, the caller hears the busy signal if you are already
conducting a call, and are either the only user assigned this MSN, or if the
feature Busy signal when MSN is engaged (Busy on Busy) see page 25 has
been activated.
Press
1.
Select using [
2.
user
or *for selection menus.
Service Set up or Base Set up
o
Transition (ECT)
or *for selection menus.
o
Set up device
] and [OK]:
Service Set up or Base Set up
o
(required internal subscriber)
o
Settings
.
o
Settings
9
o
] o
[
Call waiting
o
o
ISDN
Set up
.
Busy signal when MSN is engaged (Busy on Busy)
With this setting, the caller immediately hears the busy tone when a subscriber
in the same MSN group is conducting a call.
Subscriber Incoming MSN Subscriber Caller
A 11111 is conducting a call is conducting a call
B 11111 is called hears busy tone
Press
1.
Select using [] and [OK]:
2.
settings
Select using [] and [OK].
3.
The selection is confirmed with .
or *for selection menus.
Service Set up or Base Set up
o
Busy on Busy
.
o
Settings
o
ISDN
25
Step
by
Step
or
Info
1.
2.
2.
3.
Setting external/internal enquiry calls
You can set your telephone so that:
O
when conducting an enquiry with an external subscriber arising from an
external call, the original caller is held in the central office so that your
second ISDN line remains free
O
when conducting an enquiry with an external subscriber arising from an
external call, the original caller is held in the base station which means that
both ISDN lines are busy (see also „Configuring music-on-hold“ on page 27)
Int. Enq. Call
If “
automatically placed on hold in the central office.
The default setting is “Ext. Enq. Call”.
Press
Select using [
settings
Select using [
settings
Confirm with [OK].
or *for selection menus.
o
o
” is set and the second B channel is in use, calls are
] and [OK]:
Int. Enq. Call
] and [OK]:
Ext. Enq. Call
Service Set up or Base Set up
o
'
in front of menu item = ON / no = OFF).
(
Service Set up or Base Set up
o
'
in front of menu item = ON / no = OFF).
(
o
Settings
o
Settings
o
o
ISDN
ISDN
Rejecting calls for entire MSN group
You can reject an external call. The call is signalled acoustically and displayed
for all members of this MSN group. If “REJECT” is pressed the caller will hear
the busy tone instead of ringing tone. The call is no longer signalled for any
group member. A displayed call number is entered in the “Missed calls”.
Configuring “reject” for the entire MSN group
Press or *for selection menus.
1.
Select using [] and [OK]:
2.
o
settings
Select using [] and [OK].
3.
The selection is confirmed with .
Reject All
Service Set up or Base Set up
.
o
Settings
o
ISDN
26
Step
by
Step
System settings
Configuring music-on-hold
The caller hears music-on-hold when put on hold by the base station rather
than the exchange (e.g. in the case of internal transfer). Please see „Setting
external/internal enquiry calls“ on page 26. The following settings can be
selected:
Internal Integrated default melody
From
external
Off No music on hold
Press
1.
Select using [
2.
settings
Select using [] and [OK]: required type.
3.
Answering machine - activating/deactivating automatic call
pickup
By default, automatic AM call pickup is activated.
If automatic call pickup is activated, you can pick up a call from an answering
machine (announcement or call recording active) directly by pressing the talk
key (handset) or by lifting the handset (corded telephone).
However, it is possible to initiate a new call while the answering machine is
active without deactivating the recording process (provided the second line is
free).
Press
1.
Select using [
2.
settings
Confirm with [OK].
3.
Music-on-hold via connection 21 or 22. This menu item only
appears if you selected “Ext. music/hold” for these connections
when you set the device type.
or *for selection menus.
] and [OK]:
o
Music on Hold
or *for selection menus.
] and [OK]:
o
AM Auto.Pickup
Service Set up or Base Set up
.
Service Set up or Base Set up
o
(
'
before menu item = ON / no = OFF).
o
Settings
o
Settings
o
System
o
System
Audio settings
With this setting you can define a ringer melody for each MSN, valid for all
called handsets.
Assigning a ringer melody to an MSN
Each newly assigned MSN is automatically assigned its own ringer melody.
This setting enables you to change the type of melody.
Press
1.
Select using [
2.
settings
Select using [
3.
Select using [] and [OK]:
4.
Select using [] or [ ] one melody from 0 to 9 and confirm with [OK].
5.
or *for selection menus.
] and [OK]:
o
Set up MSN
] and [9]:
Service Set up or Base Set up
.
(required MSN)
Ringer Melody
o
Settings
.
.
o
ISDN
27
Step
by
Step
Configuring an internal ringer melody for a handset
Press or *for selection menus.
1.
For Gigaset 3000 Comfort
Select using [
2.
] and [OK]:
Settings
o
Audio
o
Ringer Melody
.
for Gigaset 4000 Comfort
Select using [
2.
] and [OK]:
Audio
o
Set call tone
For Gigaset 3000 Comfort
Select using [] or [ ] one melody – this melody is generated in the handset
3.
self and played back directly – confirm your selection with [OK].
for Gigaset 4000 Comfort
Set volume andmelody with *, ',),and(. As this melody is generated
3.
in the handset you can listen to it immediately. Confirm setting with [Save].
Changing long-distance codes
The long-distance codes are the first digits in the prefix for dialling another city
(national) or country (international). Default settings:
0 for connections to other local networks (national)
00 for connections to other countries (international)
If the long-distance codes are different in your country you need to change the
settings. Otherwise you will not be able to use the callback function for all calls
in the missed calls list.
Press
1.
Select using [] and [OK]:
2.
settings
Select using [] and [9]:
3.
Select using [
4.
Enter the new or changed code and confirm with [9].
5.
Select using [
6.
or *for selection menus.
Service Set up or Base Set up
o
Lg.-dist. Code
.
(national or international)
] and [OK]:
] and [OK]:
Change number
Save entry
o
Settings
.
.
.
o
ISDN
28
 Loading...