

Page 1

s
Be inspired
Operating instructions
and safety precautions
!
English
Page 2
Gigaset 4000 Classic, IM1 eng, A31008-G4000-B001-2-
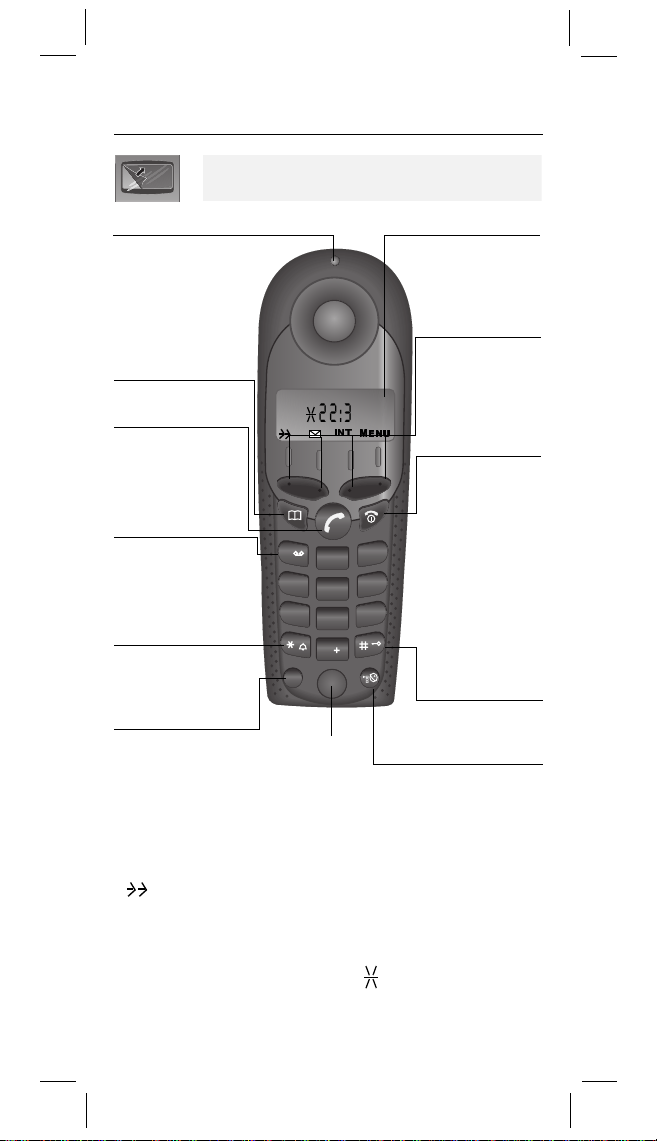
Brief overview
The display is protected by a plastic film.
Remove the plastic film.
4000ClaU.fm
23.05.010
Status LED
Lights up during
a call
and flashes for:
– incoming calls
– new messages
– alarm calls
Directory key
Open the directory
Ta l k key
– Accept
a call
– Dial
a number
Key 1
–Hold down to
select the
answering
machine/mailbox
Ringer on/off
Hold down to switch
the ringer on/off
Recall key
–Pause:
– Recall key function
Hold down
,17
1
ABC
2
4
JKL
5
PQRS
7
TUV
8
0
R
Microphone
Charging status
flat
full
flashes: Caution
Current functions and display
keys
The display keys
give you access to
the functions
shown in the dis-
H
0
0(1
9
6
play.
(18
8
End call and On/
Off key
– End call
– Cancel function
– Back one menu
level (press
DEF
3
MNOGHI
WXYZ
briefly)
– Return to idle
state (hold
down)
– On/off in idle
status (hold
down)
Keypad
protection
on/off
Hold down
Sel Services key
Open network access
list
1/3
2/3
Display symbols
Automatic redial
INT
MENU
OK
2
Mailbox icon
INT key
Menu key Alarm clock
Confirm
I
Scroll left, right
Scroll up, down
Delete key
signal
Charging status
Page 3
Gigaset 4000 Classic, IM1 eng, A31008-G4000-B001-2-
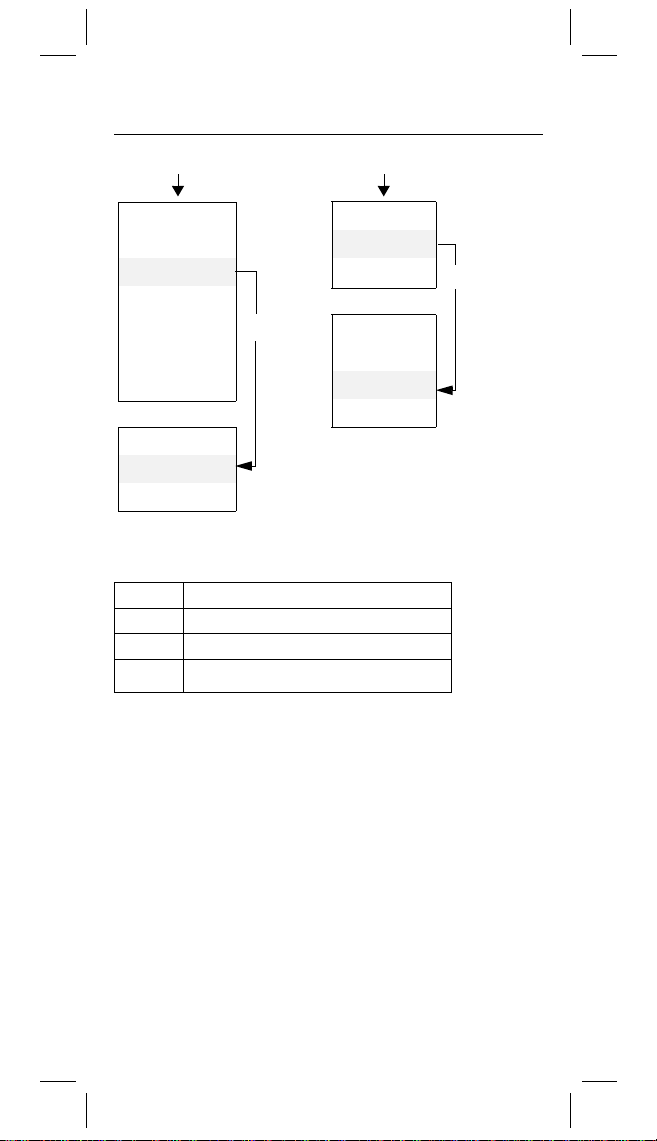
Important menus
4000ClaU.fm
23.05.01
MENU
SEL SERVICES
ALARM CLOCK
AUDIO SET
CALL CHARGES
BASE SET
ANS MACHINE
REGISTER HS
H/SET VOL
RINGER
MELODY
MENU
OK
key
ANNE
BARBARA
CHRIS
OK
Open main menu
Scroll through the menus, directory
Confirm function/entry
Cancel/end functions
EDIT ENTRY
NEW ENTRY
SHOW ENTRY
DEL ENTRY
MENU
3
Page 4
Gigaset 4000 Classic, IM1 eng, A31008-G4000-B001-2-
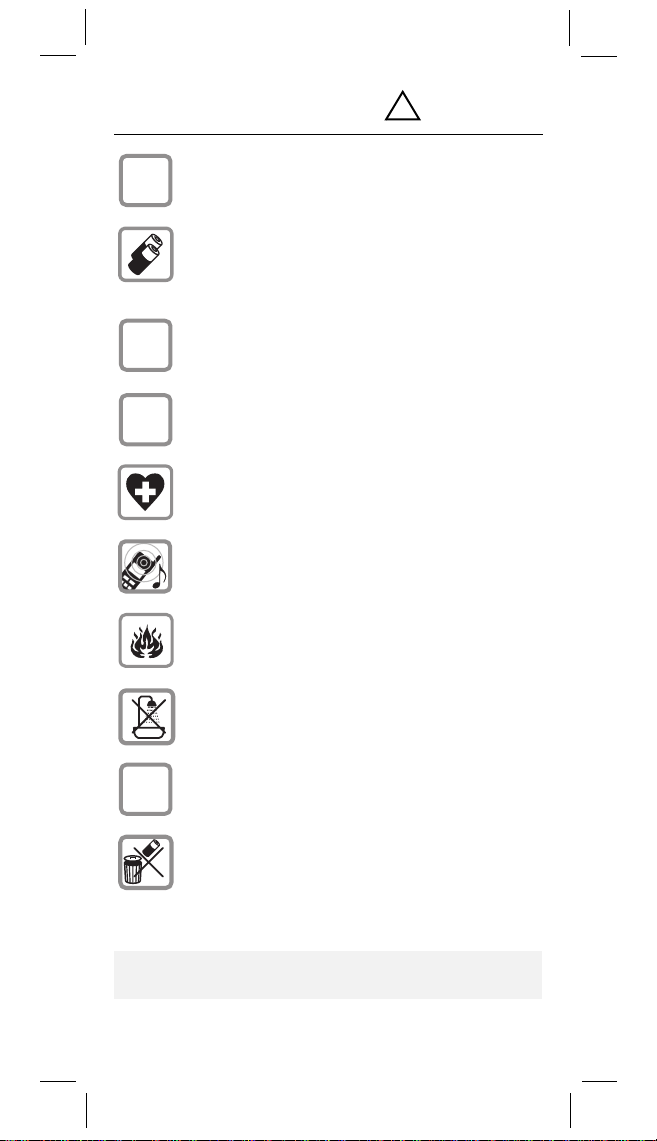
!
Safety precautions
Only use the power supply unit sup-
as indicated on the underside of the
+
,
plied
device.
Only insert
teries of the same type.
nary (non-rechargeable) batteries as they
may pose a health hazard or cause injury.
Make sure the rechargeable batteries are
inserted the right way round (as indicated in
the battery compartment).
Use the batteries specified in these operating instructions (as indicated in the battery
compartment).
The phone may affect medical equipment
so always switch your phone off before entering hospitals or doctors’ practices.
The handset may cause an unpleasant
humming noise in hearing aids.
approved rechargeable bat-
4000ClaU.fm
Never use ordi-
23.05.010
Do not operate the phone in places where
there is a risk of explosion (such as paint
workshops).
The handset is not splash-proof.
If you give your Gigaset to someone else
)
Not all the functions described in these operating instructions are available in all countries.
4
you should also give them the operating instructions.
Dispose of batteries and the phone carefully. Do not pollute the environment.
Page 5

Gigaset 4000 Classic, IM1 eng, A31008-G4000-B001-2-
4000claivz.fm
Contents
Brief overview . . . . . . . . . . . . . . . . . . . . . . . . . . . . . 2
Display symbols . . . . . . . . . . . . . . . . . . . . . . . . . . 2
Important menus . . . . . . . . . . . . . . . . . . . . . . . . . . 3
Safety precautions . . . . . . . . . . . . . . . . . . . . . . . . . 4
Preparing the handset . . . . . . . . . . . . . . . . . . . . . . 6
Delivery package. . . . . . . . . . . . . . . . . . . . . . . . . . 6
Inserting the batteries. . . . . . . . . . . . . . . . . . . . . . 6
Charging the batteries. . . . . . . . . . . . . . . . . . . . . . 6
Attaching the belt clip . . . . . . . . . . . . . . . . . . . . . . 7
Switching the handset on and off . . . . . . . . . . . . . 7
Activating/deactivating the keypad lock . . . . . . . . 7
Changing the display language . . . . . . . . . . . . . . . 8
Registering the handset. . . . . . . . . . . . . . . . . . . . . 9
Making calls . . . . . . . . . . . . . . . . . . . . . . . . . . . . . 10
Making an external call . . . . . . . . . . . . . . . . . . . . 10
Making internal calls . . . . . . . . . . . . . . . . . . . . . . 10
Answering a call . . . . . . . . . . . . . . . . . . . . . . . . . 11
Forwarding an external call, enquiry call . . . . . . . 11
Automatic redial . . . . . . . . . . . . . . . . . . . . . . . . . . 12
Directory and network access list. . . . . . . . . . . . 13
Settings . . . . . . . . . . . . . . . . . . . . . . . . . . . . . . . . . 17
Setting the alarm clock . . . . . . . . . . . . . . . . . . . . 17
Handset volume . . . . . . . . . . . . . . . . . . . . . . . . . 18
Ringer volume (“ring tone”) . . . . . . . . . . . . . . . . 18
Ringer melody. . . . . . . . . . . . . . . . . . . . . . . . . . . 18
Activating/deactivating battery low beep . . . . . . 19
Auto talk feature on/off . . . . . . . . . . . . . . . . . . . . 19
Resetting to the factory defaults . . . . . . . . . . . . 19
Appendix . . . . . . . . . . . . . . . . . . . . . . . . . . . . . . . . 20
Looking after your phone . . . . . . . . . . . . . . . . . . 20
Range . . . . . . . . . . . . . . . . . . . . . . . . . . . . . . . . . 20
Guarantee . . . . . . . . . . . . . . . . . . . . . . . . . . . . . . 21
Service: . . . . . . . . . . . . . . . . . . . . . . . . . . . . . . . . 21
23.05.01
5
Page 6
Gigaset 4000 Classic, IM1 eng, A31008-G4000-B001-2-6Z19
4000Cla.fm
17.11.0 0
Preparing the handset
Delivery package
Gigaset 4000 Classic handset, two batteries, charging
unit, belt clip, operating instructions.
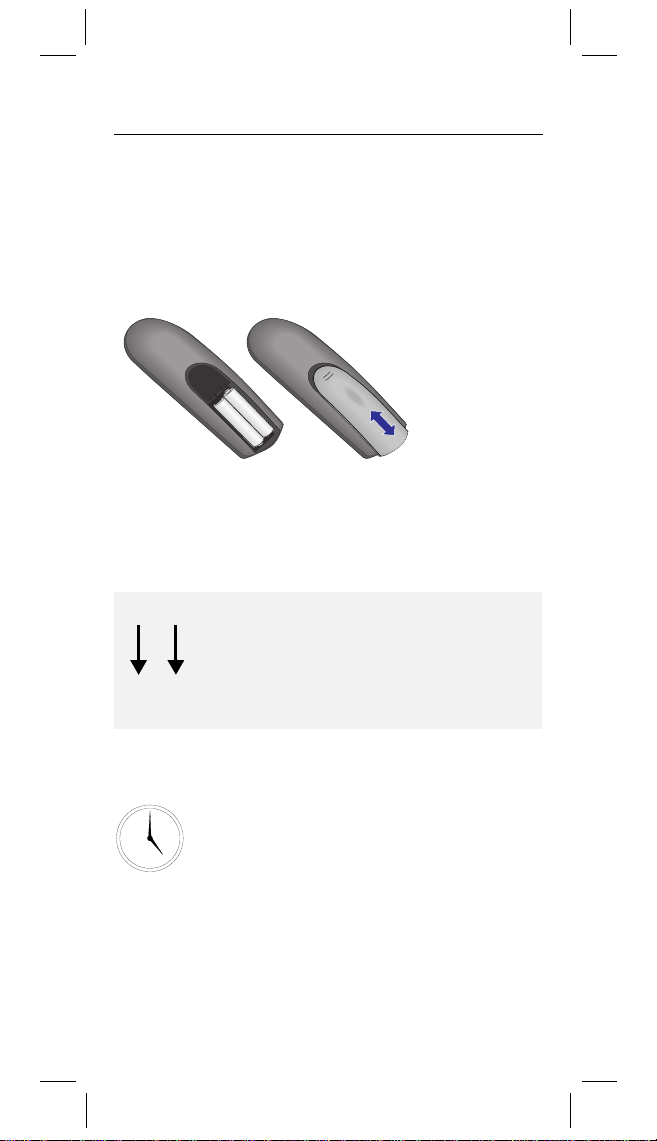
Inserting the batteries
–
+
–
+
–
+
Make sure to insert the batteries
●
– see diagram on the left.
round
Replace the cover and push gently
●
clicks into place.
●
To o p e n ,
;
press the grooved area and slide
Before activating your handset, place it
in the
Gigaset 4010/4015 Classic
station
with the display facing up-
. After about one minute the
wards
handset's internal number will be displayed (e.g. “2”).
the right way
upwards
until it
back
base
.
Charging the batteries
Leave the handset for approx. five hours in
the base station/charging unit to charge the
5 h
batteries, as they are not charged when
they leave the factory. The charging status
icon flashes on the handset to indicate that
the batteries are being charged:
Batt. flat
(battery symbol flashes)
Batteries 1/3 charged
See the appendix for a list of recommended batteries.
6
Battery 2/3 charged
Batteries full
Page 7
Gigaset 4000 Classic, IM1 eng, A31008-G4000-B001-2-6Z19
Once the initial charging process is completed you
●
can replace your handset into the base station/
charging unit after each call. Charging is controlled
electronically. This ensures optimum charging and
prolongs battery life.
The batteries heat up during charging. This is nor-
●
mal and not dangerous.
Opening the battery compartment unnecessarily
●
may cause the wrong charging status to be displayed.
4000Cla.fm
17.11.0 0
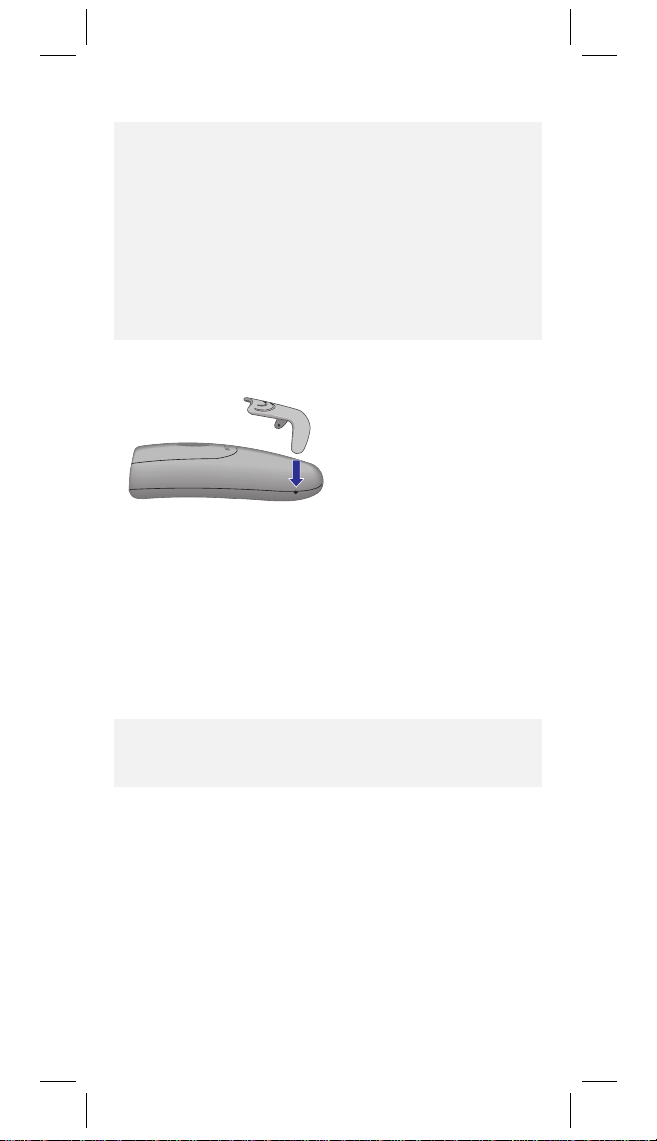
Attaching the belt clip
Push the belt clip onto the back of the handset until
the lugs at the side click into place.
Switching the handset on and off
The handset is switched on as soon as you insert the
batteries and place the handset in the base station/
charging unit.
To switch the handset on and off,
hold
you hear a confirmation beep (rising tone sequence).
the end call key until
down
Activating/deactivating the keypad lock
You can disable the handset keypad to protect the keypad against inadvertent use. If there is an incoming
call, the key lock is automatically deactivated and reactivated after the call has ended.
4
Accepting a call: Press the talk key
To activate/deactivate, hold
key. You will hear a beep
down
(rising tone sequence).
.
7
Page 8

Gigaset 4000 Classic, IM1 eng, A31008-G4000-B001-2-6Z19
4000Cla.fm
Changing the display language
17.11.0 0
MENU
6-
L
LL
L/
L0
L1
L2
L3
L6
L
/
Open the menu.
First press 9, then 2 and then:
German
English
French
Italian
Spanish
Portuguese
Dutch
Danish
Norwegian
Swedish
Finnish
Czech
Polish
Tu rk i sh
8
Page 9

Gigaset 4000 Classic, IM1 eng, A31008-G4000-B001-2-6Z19
VHWWLQJV
V\VWHPVHWWLQJV
UHJLVWHUKDQGVHW
2.
4000Cla.fm
17.11.0 0
Registering the handset
To make calls with your handset, you must “intro-
duce” it to its base station (registering)
if your handset has already been registered at a
●
ferent base station (steps 1, 2
if you want to register the handset as a new hand-
●
set at a
range (steps 1
Step 1:
Gigaset base station of an older Gigaset
and 3).
On the
base station
and 3),
or
base telephone
Gigaset On the base station/base telephone
4010/4015
Hold down the key on the underside
of the base station.
3010/3015
Hold down the paging-key# of the
base station (for about 10 seconds) un-
3020/25
3030/35
4030/35
3070/75
4070/75
Non-Siemens base
stations
til you hear
Select
signal tones
,
and
the base station telephone and confirm with
.
Press the LED – it will flash during
registration.
To register at “GAP base stations”, fol-
low the relevant operating instructions
(step 2 and 3).
.
in the menu at
dif-
Step 2: On the handset
MENU
REGISTER HS
Step 3: On the handset
OK
Once you have entered the system PIN the handset
will search for a base station with this PIN. During the
search, will flashes on the display. When
it has been registered successfully, the handset will
revert to its idle status.
for operation.
OK
REGISTER HS
:
Open the menu.
Select the menu item and confirm.
The PIN is
displayed.
:
Enter the 4-digit system PIN and
confirm.
Your handset is now ready
9
Page 10

Gigaset 4000 Classic, IM1 eng, A31008-G4000-B001-2-6Z19
4000Cla.fm
Making calls
Making an external call
External calls are calls to the public telephone network.
Enter the telephone number
If you make a mistake use the
display keyto correct individ-
ual digits.
Press the talk key.
17.11.0 0
You can also press the talk key
●
enter the telephone number – each digit will be dialled immediately.
You can cancel the dialling operation by pressing
●
the end call key
You can insert a pause with the recall key (hold
●
down). Pauses may be required to make international calls.
Press the end call key to end the
call.
and then
first
.
Making internal calls
Internal calls are calls to other registered handsets. Internal calls are free of charge (from your living room to
your kitchen for example).
INT
INT
or
or
INT
or
CALL ALL
e. g.
-
<
Enter the internal number of the
handset.
Select the handset you want and
press the talk key.
Press.
All handsets are called.
Press the end call key to end the
call.
10
Page 11

Gigaset 4000 Classic, IM1 eng, A31008-G4000-B001-2-6Z19
4000Cla.fm
17.11.0 0
Answering a call
Your telephone will ring (ringer) and the status LED will
flash.
or
F
Press the talk key.
Simply remove the handset from
the base station/charging unit
(factory setting: “Auto talk”).
Forwarding an external call, enquiry call
You can forward an external call to another handset or
make an internal enquiry call.
INT
-
e. g.
If the internal user answers:
●
Connect the call:
Announce the call and then press the end call
key
or
●
End the enquiry call:
Reconnect to the waiting user.
MENU
GO BACK
Press the display key – the external user will hear music on hold.
Enter the internal number of the
handset. You are now connected
to the second handset.
Open menu.
Confirm.
OK
You are reconnected to the waiting external user.
11
Page 12

Gigaset 4000 Classic, IM1 eng, A31008-G4000-B001-2-6Z19
4000Cla.fm
Automatic redial
Your handset automatically saves the last five telephone numbers or names dialled.
$
Deleting the redialling list
$
MENU
1
Copying a telephone number to the directory
$
OK
DEL ENTRY?
MENU
COPY TO DIR
Display the telephone number/
name.
Select the telephone number/
name you want.
Press the talk key – the telephone number will be dialled.
Open the redialling list.
Open the menu.
Press digit 6 and confirm.
OK
Displays the telephone number.
Select the telephone number and
open the menu.
The input field of the directory
OK
opens.
The telephone number is already
entered.
You can change the telephone
number or enter a name if you
want. (For information on entering letters and characters, see
the character map).
Confirm input
17.11.0 0
12
Page 13

Gigaset 4000 Classic, IM1 eng, A31008-G4000-B001-2-6Z19
4000Cla.fm
17.11.0 0
Directory and network access list
With the
phone numbers and then dial them at the push of a
button.
To reduce call charges you can save the prefixes (Callby-Call) of telephone companies in the
cess list
.
directory
you can store up to 20 tele-
network ac-
Storing an entry
MENU
OK
/
NEW ENTRY
OK
Open the directory/network
access list.
Open the menu.
Select the menu item and con-
OK
firm.
Enter the
and confirm.
Enter the
For information on entering letters and characters see the character map.
Confirm input.
telephone number
.
name
Dialling with the directory
e. g.
D
Open the directory.
Enter the first letter of the name
(“E” for Emma for example):
Press the
scroll with the
names are listed in alphabetical
order.
Press the talk key. The telephone
number is dialled.
keytwice and
key. The
After selecting the number, you can also open the
menu, select , extend/change the number
and dial with the talk key
EDIT ENTRY
.
13
Page 14

Gigaset 4000 Classic, IM1 eng, A31008-G4000-B001-2-6Z19
4000Cla.fm
17.11.0 0
Dialling with the network access list
(Call-by-Call)
You can use this function to put a network provider's
prefix in front of the telephone number (“linking”).
OK
Open the network access list.
Select call-by-call number and
confirm.
P
Enter the telephone number for
“linking”.
or
J
OK
Select the telephone number for
“linking” and confirm.
D
Press.
Speed dialling from the network access
list
You can store eight numbers for speed dialling from
the network access list. To do so, you must enter the
number (2–9) for speed dialling
provider's name.
Store a new entry and simply enter the number for
speed dialling as the first character of the network
provider's name.
Example
the
: Press speed dial number 2 and then enter
network provider's name
.
before
the network
MENU
SHOW ENTRY
OK
e. g. 4 x
14
-
OK
Open the network access list.
Select the network provider and
open the menu.
Select the menu item and con-
OK
firm.
Confirm the telephone number.
Move the cursor to the first position of the name.
Enter the speed dial key 2 and
confirm.
Page 15

Gigaset 4000 Classic, IM1 eng, A31008-G4000-B001-2-6Z19
4000Cla.fm
Speed Dialling
e. g.
-
Hold
The stored network provider prefix is displayed.
e. g.
Enter the telephone number for
“linking”
or
OK
Select an entry in the
directory and confirm.
Press.
Character map
Press the relevant key repeatedly or hold down:
1 x 2 x 3 x 4 x 5 x 6 x
T
/
0
1
2
3
6
L
5
4
1
A B C 2
DEF3
G H I 4
JKL5
M N O 6
PQRS7
T U V 8
WXYZ9
+ 0 – | ? _
/(),
*
down
the key:
17.11.0 0
Control the cursor with
with
. Letters are always inserted to the left of the
. Delete characters
cursor.
Sort sequence
1. Blank (
Digits (0–9)
2.
)
T
Letters (alphabetical)
3.
Other characters
4.
Inserting a blank Tbefore a name takes that name to
the top of the directory (for example: “
Karla ”).
T
15
Page 16

Gigaset 4000 Classic, IM1 eng, A31008-G4000-B001-2-6Z19
4000Cla.fm
Displaying and changing an entry
e. g.
MENU
SHOW ENTRY
P
OK
P
OK
Open the directory.
Enter the first letter of the name.
Open the menu.
Select the menu item and con-
OK
firm. The entry is displayed.
You can change the telephone
number. For information on entering letters and characters see the
character map.
Confirm input.
Change the name.
Confirm input.
Deleting a single entry from the directory
e. g.
MENU
DEL ENTRY
Open the directory.
Enter the first letter of the name.
Open the menu.
Select the menu item and
OK
5confirm.
17.11.0 0
Deleting a single entry from the network access
list
MENU
DEL ENTRY
Open the network access list.
Select the telephone number and
open the menu.
Select the menu item and
OK
confirm.
Deleting all entries
MENU
1
16
/
DEL ENTRY?
Open the directory/network
access list.
Open the menu.
Press digit 6 and confirm.
OK
Page 17

Gigaset 4000 Classic, IM1 eng, A31008-G4000-B001-2-6Z19
4000Cla.fm
17.11.0 0
Settings
Setting the alarm clock
You can use your handset as an alarm clock.
Activating the alarm clock
If activated, the alarm clock (asterisk icon) on your
handset will ring every day at the time entered.
With the handset idle.
MENU
ALARM CLOCK
L10
OK
When the handset is idle an asterisk is displayed before the time. This indicates that the alarm clock is set.
Open the menu.
Select the menu item and con-
OK
firm.
Enter the hours/minutes.
The example here is: 6.15.
If you make a mistake, go to the
mistake and correct it.
Save the setting and terminate
the function.
Deactivating the alarm clock
The alarm clock is set but you do
MENU
ALARM CLOCK
Open the menu.
Select the menu item and
OK
confirm.
The alarm call is deactivated and
there is no longer an asterisk in
front of the time.
want it to ring.
not
Turning off the alarm call
An alarm call is signalled like an incoming call.
The handset will ring and the status LED will flash
(for about 30 seconds). Press any key to turn it off.
17
Page 18

Gigaset 4000 Classic, IM1 eng, A31008-G4000-B001-2-6Z19
4000Cla.fm
Handset volume
You can set the handset volume to one of three
levels –
MENU
AUDIO SET
even during a call
OK
.
Open the menu.
Select the menu item and
confirm.
Confirm.
OK
You will hear the current volume
H/SET VOL
OK
and its level will be displayed.
Select the required level and
confirm.
Ringer volume (“ring tone”)
You can choose from
Five ringer volumes (1–5)
●
“Crescendo” ring (increasing volume; 6)
●
No ringer (ringer off; 0).
●
MENU
AUDIO SET
seven
Open the menu.
Select the menu item and
OK
confirm.
Select the menu item and
RINGER
OK
confirm.
OK
You will hear the current volume
and its level will be displayed.
Select the required level and
confirm.
options:
17.11.0 0
Ringer melody
You can choose from ten melodies (1–10) .
MENU
18
AUDIO SET
MELODY
OK
Open the menu.
Select the menu item and
OK
confirm.
Select the menu item and
OK
confirm.
You will hear the current melody
and its number will be displayed.
Set the required melody and
confirm.
Page 19

Gigaset 4000 Classic, IM1 eng, A31008-G4000-B001-2-6Z19
4000Cla.fm
17.11.0 0
Activating/deactivating battery low beep
If this function is activated (factory setting) a beep will
sound to tell you that the battery is almost flat.
MENU
6/
or
6/L
Open the menu.
Activate the function.
Deactivate the function.
Auto talk feature on/off
If this function is activated you can remove the handset from the charging unit without pressing the handset key
MENU
6
6L
or
to accept a call (factory setting).
D
Open the menu.
Activate the function.
Deactivate the function.
Resetting to the factory defaults
The directory, the network access list and the caller
list are not deleted when you reset the handset. Registration at the base station is not affected.
MENU
Open the menu.
6
RESET?
Function Factory setting
Handset volume 1
Ringer volume (“ring tone”,) 5
Ringer melody 1
Auto talk On
Battery low beep On
Display language english
First press 9 and then 3 to activate the procedure.
Confirm.
OK
19
Page 20

Gigaset 4000 Classic, IM1 eng, A31008-G4000-B001-2-6Z19
4000Cla.fm
17.11.0 0
Appendix
Looking after your phone
Wipe the base station and handset with a
or an antistatic wipe.
use a dry cloth as this can
Never
cause static discharge.
Recommended batteries:
Nickel cadmium (NiCd) Nickel metal hydride (NiMH)
Sanyo N-3U (700 mAh) Saft VHAAH 1300 (1300 mAh)
Mobile Power 700
(700 mAh)
Panasonic P-60AA DT (600
mAh)
Emmerich 700 (700 mAh) GP GP130 AA HC (1300 mAh)
Always replace both batteries at the same time and
only use batteries of the same type/manufacturer.
YDT 1200 (1200 mAh)
Panasonic HHR-110 AA
(1100 mAh)
Sanyo HR-3U (1600 mAh)
Emmerich 1300 (1300 mAh)
damp cloth
Operating times/charging time of the handset:
Capacity
(mAh)
700 up to 200 (8 days) more than 10 about 5.5
1200 up to 320 (13 days) more than 17 about 9
1600 up to 400 (18 days) more than 23 about 12
The charge capacity of the battery reduces after a
number of years. This is quite normal.
Standby time in
hours
(days)
Ta l k t i m e
(hours)
Charging
time
(hours)
Range
The handset will operate away from the base station
up to about 300 m outdoors and up to 50 m indoors.
20
Page 21

Gigaset 4000 Classic, IM1 eng, A31008-G4000-B001-2-6Z19
4000Cla.fm
17.11.0 0
Guarantee
If the telephone fails during the guarantee period because of poor workmanship or faulty materials Siemens AG will repair or replace it.
The guarantee period for Europe is at least 24 months
(12 months up to 31.12.2001).
The guarantee does not cover damage caused by improper use, wear and tear or unauthorised repairs. The
guarantee does not cover consumables or defects
that have only a negligible effect on the value or operation of the telephone.
Service:
Siemens Service should be contacted if problems
arise with the unit. Your specialist dealer will be happy
to answer any questions on unit operation. Contact
your network provider for questions concerning telephone connections.
The CE symbol indicates that the telephone complies
with the essential requirements of the R&TTE directive.
Service telephone number
see back cover.
The 4000 Classic handset is approved for use in
Switzerland and throughout the EU.
21
Page 22

Gigaset 4000 Classic, IM1 eng, A31008-G4000-B001-2-
Index
A
Alarm clock
Answering a call
Appendix
Auto talk
Automatic redial
17
11
20
19
12
B
Batteries
charging
charging time
inserting
operating times
recommended batter-
ies
Battery low beep
Belt clip
6
20
6
20
20
19
7
C
Call-by-Call
Changing the display language
Character map
Charging status icon
Charging time of the batteries
Connecting
(external call)
Cursor
8
20
15
14
15
6
11
D
Delivery package
Directory
13
6
deleting an entry
dialling with the Dir.
Display language
E
Enquiry call
Entry (directory)
F
Factory setting
Forwarding (external call)
11
G
Guarantee
H
Handset
activating/deactivating
7
charging time
master reset
operating times
registering
Handset volume
K
Keypad protection
L
Looking
M
Making calls
4000clasix.fm
11
21
20
10
23.05.01
16
13
8
16
19
20
19
20
9
18
7
22
Page 23

Gigaset 4000 Classic, IM1 eng, A31008-G4000-B001-2-
Index
N
Network access list
deleting an entry
dialling with
14
P
Pause (when dialling)
R
Range
20
Recall key
Registering (handset)
Ring tone
10
18
16
Ringer volume
13
S
Service
Settings
Speed dialling
Storing an entry
10
T
Telephone number
Transferring
(external call.)
9
4000clasix.fm
21
17
23.05.01
18
14
13
12
11
23
 Loading...