

Shure MUSIC EDUCATORS, SM81, PG81, KSM109, Beta 58A User Manual
...
MUSIC EDUCATORS
By Gino Sigismondi
A Shure Educational Publication

Gui
d
Educators

index
e
Introduction . . . . . . . . . . . . . . . . . . . . . . . . 4
Recording . . . . . . . . . . . . . . . . . . . . . . . . . . 5
The Parts of a Recording System . . . . . . . . 5
Microphones . . . . . . . . . . . . . . . . . . . . . 5
Recording Devices . . . . . . . . . . . . . . . . 9
Mixers . . . . . . . . . . . . . . . . . . . . . . . . . . 11
Hooking it up . . . . . . . . . . . . . . . . . . . . . 11
Sound Reinforcement for Music . . . . . . . 11
A Basic Sound System . . . . . . . . . . . . . 11
Microphones . . . . . . . . . . . . . . . . . . . . . 12
Mixers, Amplifiers and Loudspeakers . . 16
Signal Processors . . . . . . . . . . . . . . . . . 18
Hooking it up . . . . . . . . . . . . . . . . . . . . . 21
Sound Reinforcement for Theater . . . . . . 22
The Realities of Theater Sound . . . . . . . . . . 22
Lavalier Microphone Techniques for Theater 24
Summary . . . . . . . . . . . . . . . . . . . . . . . . . . 27
Appendix . . . . . . . . . . . . . . . . . . . . . . . . . . . 28
Glossary . . . . . . . . . . . . . . . . . . . . . . . . . . . 29
About the Author . . . . . . . . . . . . . . . . . . . . 31

Introduction
An often overlooked yet vital part of modern musical performances is the sound
reinforcement (PA) system. In a perfect world, a trained professional would always
be available to purchase, setup, and operate the school’s sound system. In reality,
most educational facilities do not have the available funds for such a luxury.
The responsibility then falls to the next most likely person at school to run the sound
system, the music director. After all, you just need a few microphones and a couple
of loudspeakers, and it’s time to go on tour! And we want it recorded as well!
Unfortunately , sound system setup is not quite that simple. It doesn’t, however, need
to be overly complicated. While the extreme quantity of choices available at your
local music shop may seem daunting (Cardioid? Dynamic? Low Impedance! Help!),
with a few basic guidelines, you can learn what you need, how to connect it, and
even how to make it sound good.
This guide will help you choose equipment for a variety of applications.
For simplicity sake, we will make recommendations of the Shure microphones you
might consider for each application. For those interested in the more technical aspects
of audio equipment, Shure publishes several booklets on a variety of audio topics,
including specific microphone techniques and wireless microphone operation.
Typical scenarios for school music applications include:
• Sound Reinforcement for Large Ensembles
(Concert Band, Orchestra, Choir)
• Sound Reinforcement for Small Ensembles
(Jazz Combo, Vocal Jazz or "Swing" Choir, Rock bands)
• Recording small ensembles
• Recording large ensembles
• Sound for theatrical productions
Recording will be discussed first, due to the smaller number of required
components, and reduced complexity. Feedback and room acoustics play a small
(or even non-existent) role in basic ensemble recording. Additionally, many of the
microphone, and possibly mixer, choices made for recording are equally applicable
in live sound reinforcement. Remember, there are few rules in audio – if it sounds
good to you, it is good. For every application, there will be a good, better, and best
option. A little knowledge and some common sense will allow you to choose a good
system with a reasonable budget and a minimum of frustration.
4

Recording
What do I need?
The parts of a recording system.
To make a decent recording there are two or
three components to consider:
1. The first, and most important, is the microphone. Choosing the right micro-
phone ensures accurate pickup of the desired sounds.
2. Next, consider the recording device. Recording equipment comes in many
shapes and sizes, from simple cassette tape recorders to advanced digital
multitrack machines.
3. Lastly, depending on the capabilities of the recording device, you may need a
mixer. A mixer’s purpose is two-fold; they are used to combine (or "mix")
multiple microphones together, and to properly interface microphones to the
recording device. Most consumer-quality cassette tape recorders, for example,
do not allow a microphone to be directly connected to the record inputs.
A microphone has an extremely low output level that would result in little or no
signal actually making it to tape. A mixer provides gain, which raises the
signal level from the microphone to a level that is acceptable to recorders that
don’t have microphone inputs.
Microphones
The most important questions to ask when choosing microphones are:
a) what are you recording? and
b) what are you using to record?
First, a little about microphones. Microphones are basically simple devices designed
to do one thing: convert sound waves in the air to their electrical equivalent. One
of the first questions you may encounter is, "Do you want a dynamic or condenser
microphone?" These are the two most popular types of microphones in the world.
• Dynamic microphones are typically inexpensive and rugged, with fairly low
sensitivity. In layman’s terms, this means they are good for handheld or
"close-miked" applications. Dynamics are commonly used for solo vocalists
and on drum kits.
• Condenser microphones, on the other hand, are typically (but not always) much
more sensitive than dynamics. Make a good quality condenser microphone your
first choice for miking ensembles, or other applications where the microphone
will be placed at a distance (> 2 ft.) from the sound source. Condensers are
typically used for recording orchestras, choirs, and in other applications where
you wish to capture the sound of the ensemble, versus individual sounds.
Music
Guide
Educators
5
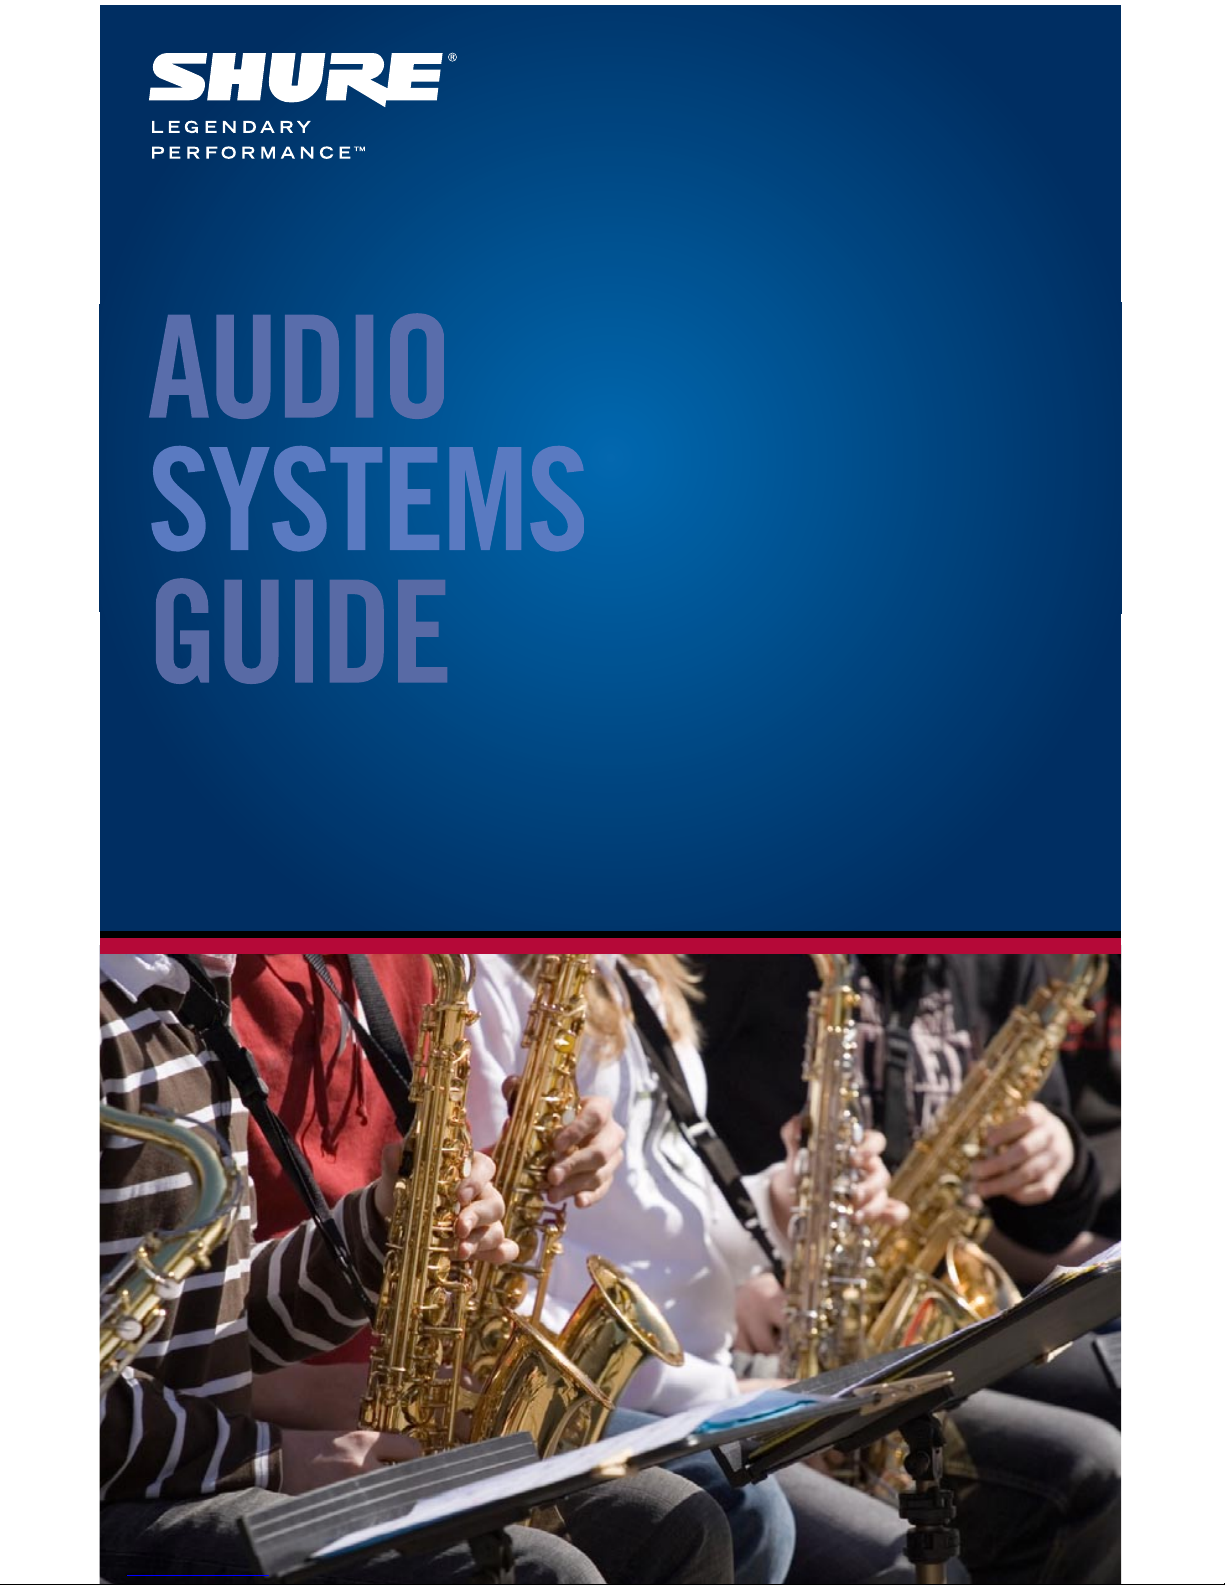
Large ensembles (band, orchestra, choir)
Use a stereo microphone setup to most accurately
capture the sound of a large ensemble. Stereo
recording is not as complicated as it sounds. For
simplicity sake, we’ll use the most basic type of stereo
microphone techniques, the X-Y pattern. Use two
microphones of the same model with the two mic
capsules placed as close as possible, and facing each
other at an angle ranging from 90 – 135 degrees,
depending on the size of the sound source. (see
figure 1). For a wider coverage area, the larger angles
should be used. The X - Y pattern results in good stereo
separation and excellent mono compatibility.
A second, somewhat simpler way to record in stereo uses what is known as a
"single-point" stereo microphone, such as the VP88. The VP88 has a single microphone housing that contains two microphone elements, electrically combined to
produce a stereo output. The advantage to this type of microphone is simplicity; put
the microphone on a stand and point it at what you want to record.
When recording a large ensemble, you may choose to use more than two microphones
to adequately cover each section. A technique known as "area" coverage uses multiple
microphones to cover small sections of the ensemble. Using a choir as an example,
use one microphone for each 6-9 foot wide section, and aim the microphone capsule
towards the last row . Microphones should be placed 2-3 feet in front of the first row of
the choir (see figure 2). The same technique can be applied to concert band or
orchestra, by using one microphone per section.
6
0.6 - 1m
(2 - 3 ft)
0.6 - 1m
(2 - 3 ft)
Figure 2: Area miking - side view
Figure 1: Choir microphone positions - stereo
top view

Recommended Equipment/
Suggested Models:
• 2 cardioid-pattern
condenser microphones
(SM81, PG81, KSM109)
• Microphone stand(s)
• Shure A27M – an accessory that allows you
to mount two microphones on one stand.
• Microphone cables with XLR connectors
• Stereo microphone mixer with at least
2 microphone inputs
• Recording device (see next section)
• Cables to connect mixer to recording device
Small ensembles (jazz combos, string quartet, vocal jazz groups)
The stereo techniques described above can also be successfully applied to smaller
ensembles, but to achieve a more "pop" sound, use multiple close microphones,
generally one per instrument. On the following page are some simple techniques for
getting good sounds for a variety of instruments or vocals.
Recommended Equipment/Suggested Models:
• Vocal microphone (Beta 58A, SM58, PG58)
• Guitar amplifier microphone (SM57, PG57)
• Drum microphones (Beta 52 or PG52, SM57,
two PG81 or SM81)
• Piano microphone (PG81, SM81, or KSM27)
• Woodwinds (SM57, PG57)
• Brass (SM57, PG57)
• Microphone stands
• Microphone cables with XLR connectors
• Microphone mixer with enough inputs to handle
the desired number of microphones
• Recording device (see next section)
• Cables to connect mixer to recording device
Music
Guide
Educators
7
Connectors commonly
used for audio
(from left to right:
3-Pin XLR female,
3-Pin XLR female – black,
3-Pin XLR male,
1/4” mono plug,
1/4” mono plug – black
PG57
Dynamic
Microphone
KSM109
Condenser
Microphone
Vocals – T ry using a handheld style (although mounted on
a stand to reduce handling noise) dynamic microphone,
such as the SM58 or Beta 58A. Place the microphone
roughly 3-4 inches away, and pointed somewhere
between the nose and mouth. If possible, try to isolate the
vocalist from any unwanted sounds – in another room
would be ideal (see figure 3).
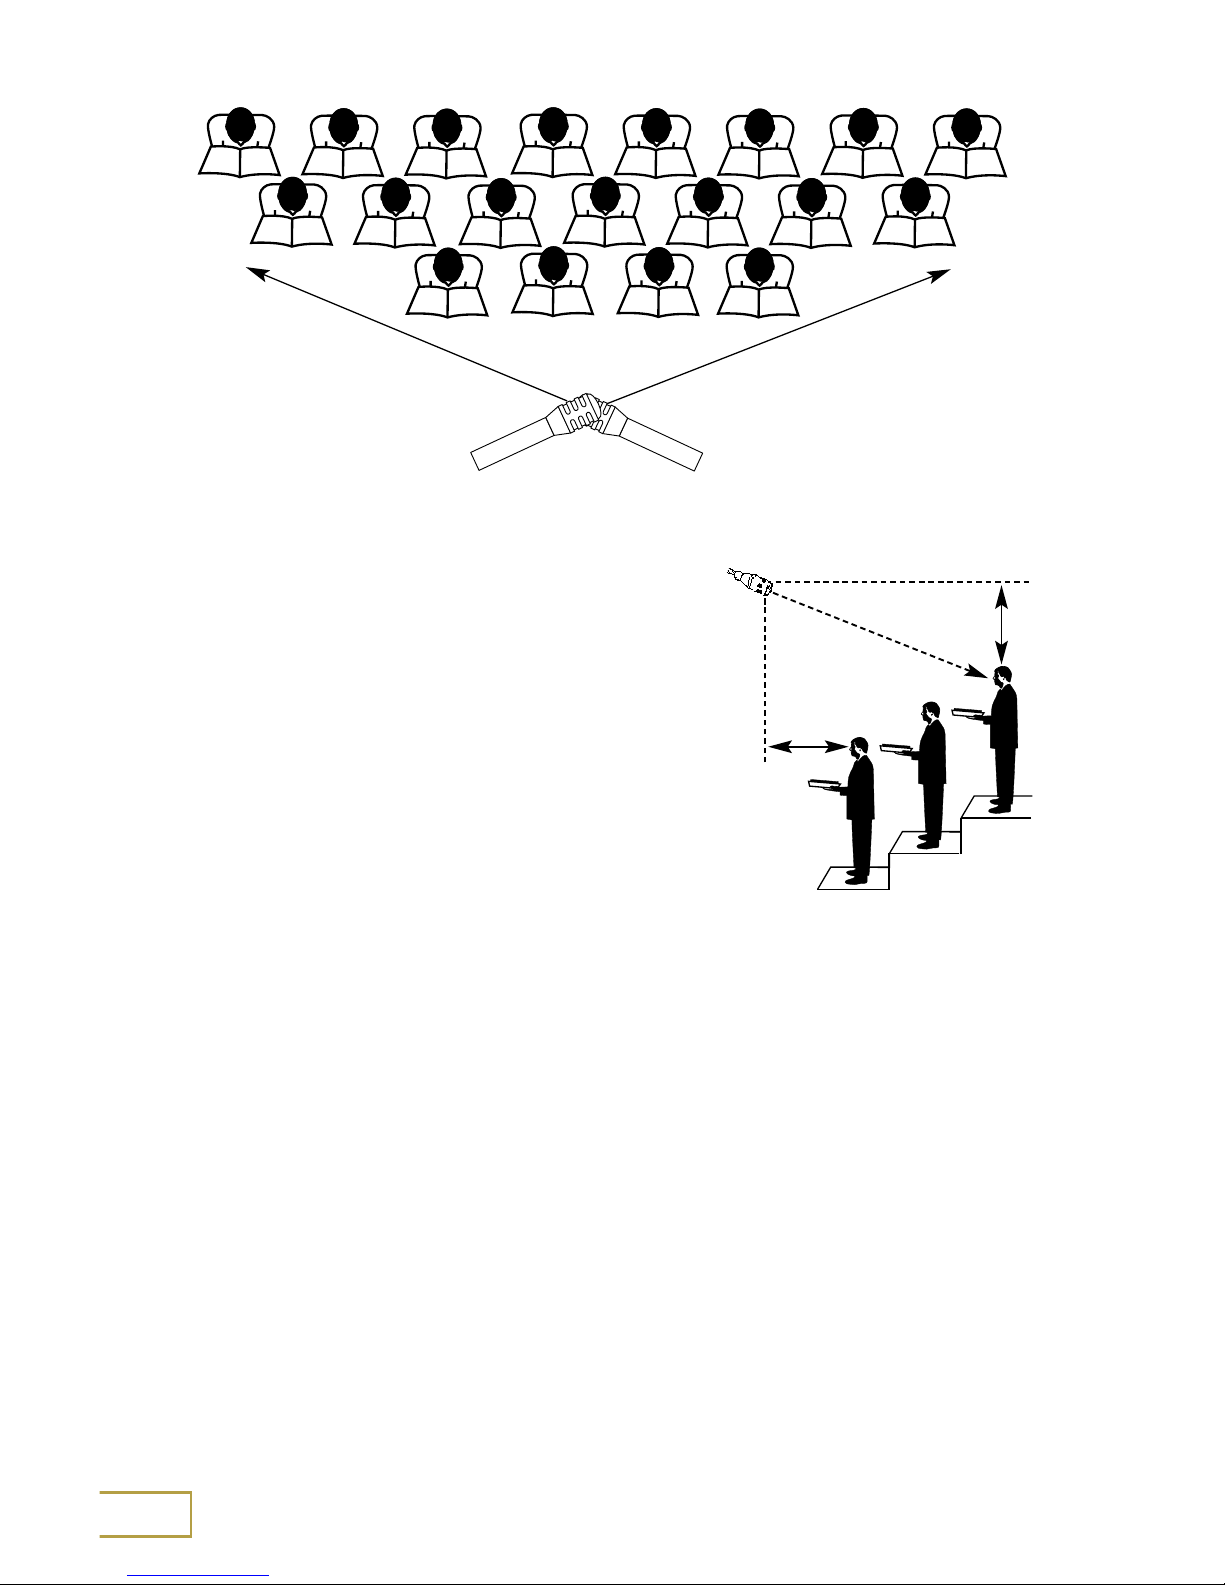
Electric Guitar Amplifier –
Use an SM57 microphone roughly 1-4 inches
from the loudspeaker, pointed toward the center
of the speaker cone (see figure 4).
Drums (see figure 5) – While seemingly complex, you can achieve a relatively decent
drum sound with only four microphones:
– Kick Drum – Place a
Beta 52 (or PG52) inside
the drum, approximately
1-6 inches from the
beater head.
– Snare Drum – Use an
SM57 to mike the top
head, placed at a 45
degree angle.
– Toms and cymbals –
Use a pair of condenser
microphones (PG81 or
SM81) suspended over
the drum kit, either
spaced apart or using one of the stereo
microphone techniques described earlier.
If you have a limited number of microphones, use the following chart:
8
Top
Side
Number of Microphones Positioning
One Use an "overhead"
Two Kick drum and overhead
Three Kick drum, snare, and overhead
Four Kick drum, snare, and two overheads
Figure 3
Figure 4
Figure 5
PG81
PG52
SM57
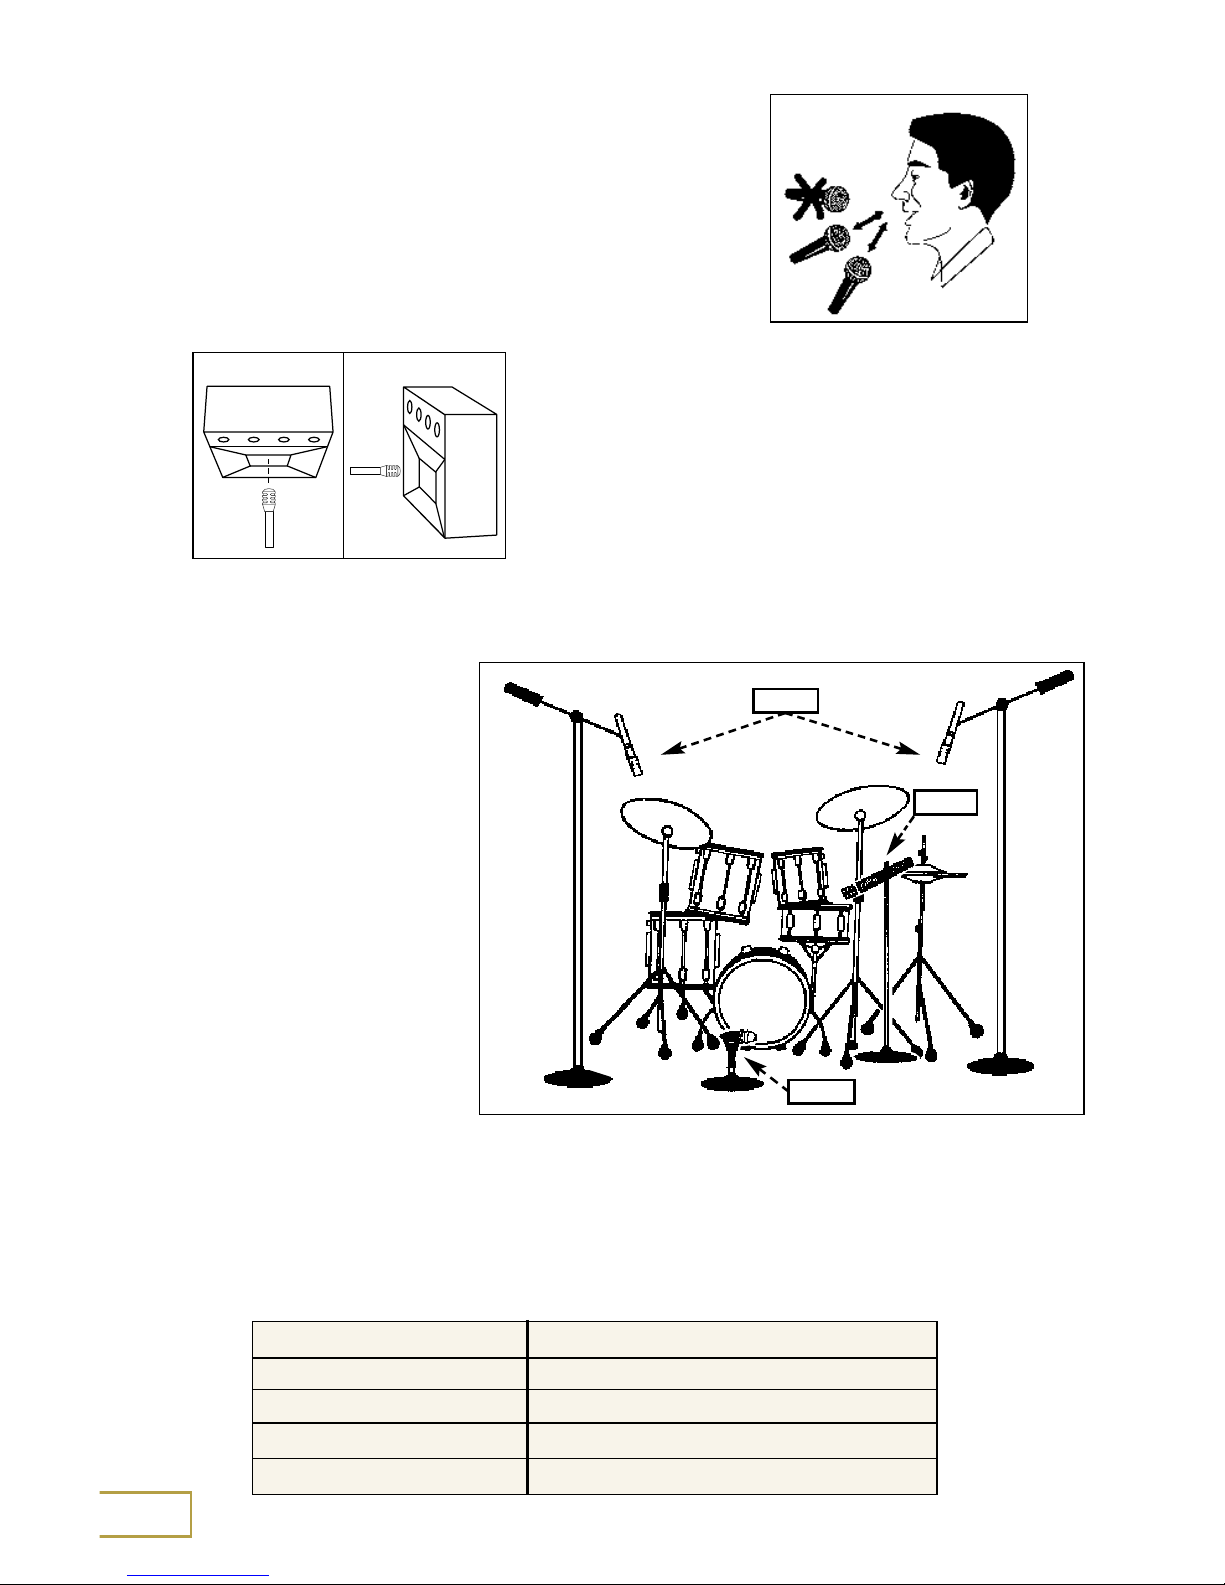
Piano – For a grand or baby grand, place
a PG81 or KSM27 roughly 12 inches
above the middle strings, and 8 inches
from the hammers. The lid should be at full
stick to allow enough clearance for the
microphone. For an upright, place a
similar microphone just over the open top,
above the treble strings (see figure 6).
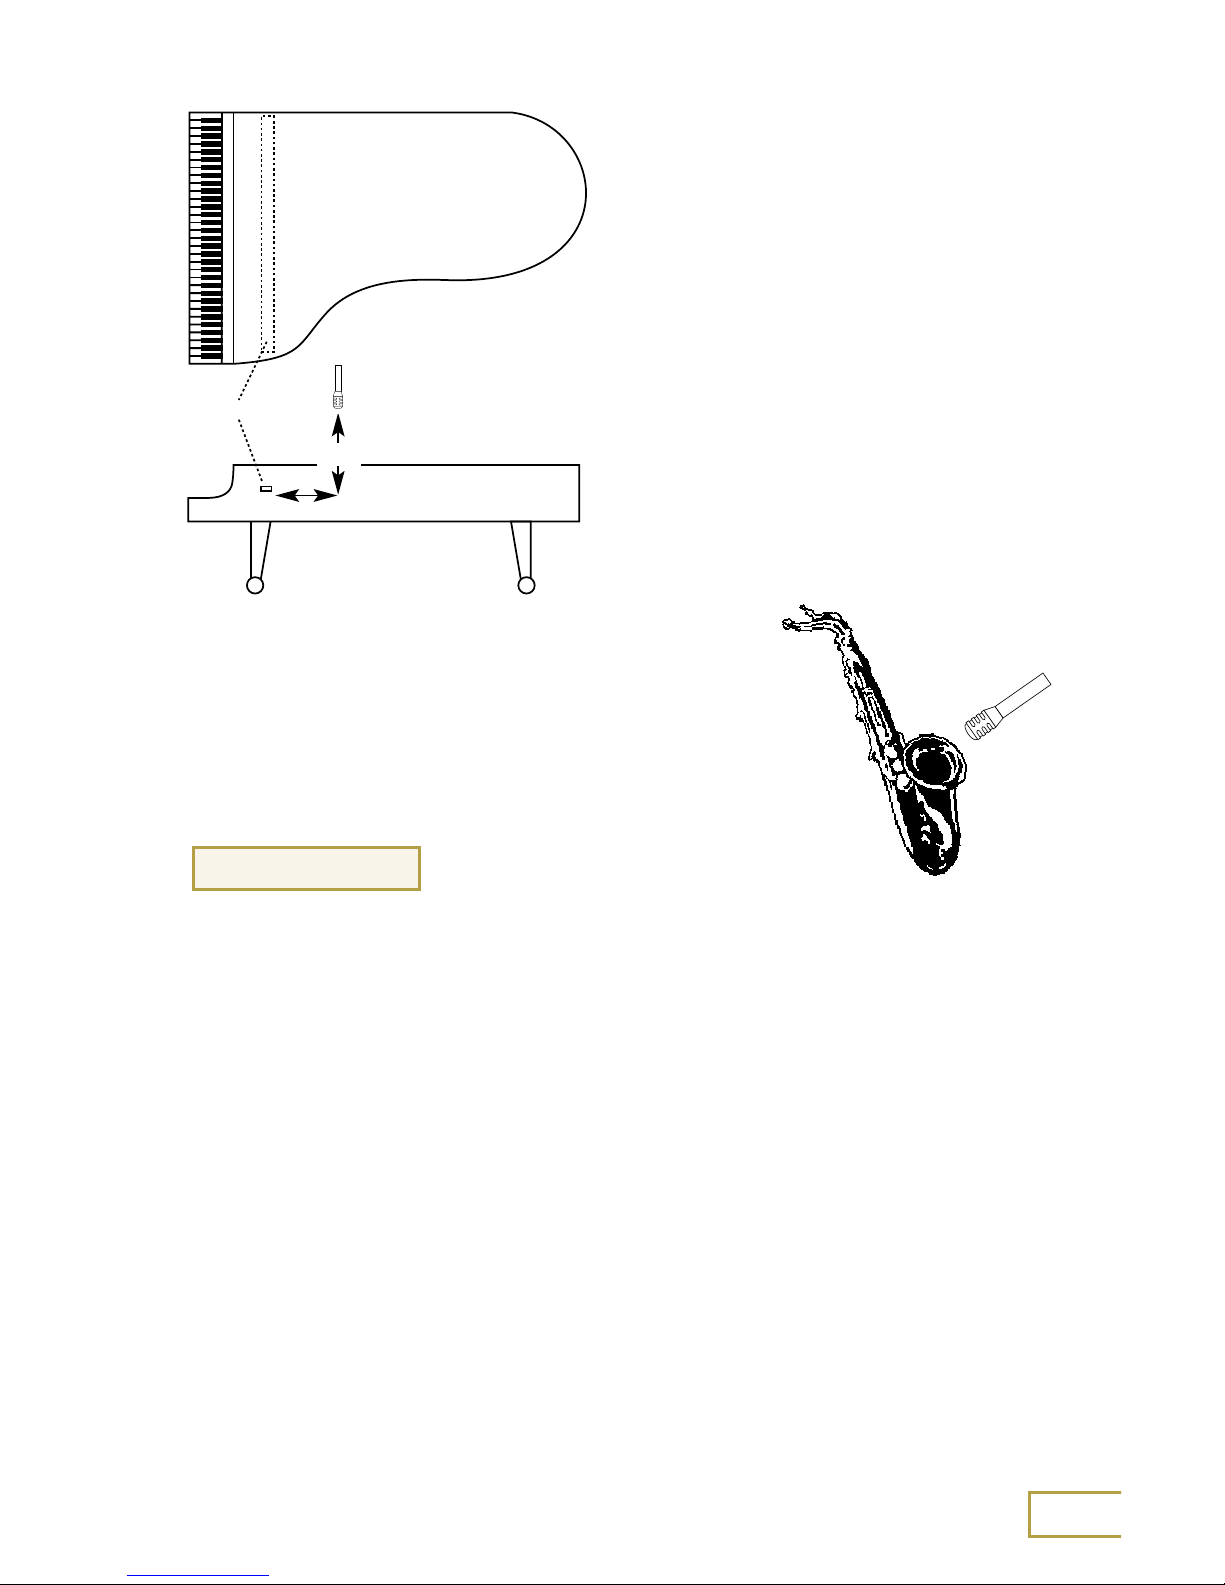
Woodwinds – Use an SM57 placed a few inches above
the bell and aimed at the sound holes (see figure 7).
Brass – Place an SM57 1 to 2 feet in front of the bell.
The closer the microphone, the brighter the sound.
Recording devices
Two things to consider when choosing a recording format are sound quality and ease
of use. While it may be tempting to buy the same gear that the local recording studio
has, keep in mind your abilities, and how much time you are willing to devote to
pouring over manuals and pushing little buttons. Let’s take at look at some of the more
popular formats.
Cassette
Everyone has operated a cassette tape recorder at some point in their life, making
this a good choice for simple, straight ahead recording. Cassettes are inexpensive
and readily available. Cassette recorders can be purchased at your local electronics
superstore for attractively low prices, or more professional units are usually available
through music and sound retailers. Cassettes, however, rate near the bottom of
the sound quality totem pole. While cassette recordings are perfectly appropriate
for rehearsal or demo tapes, this is not the format to choose if you are looking for a
more "professional" sound, especially if you intend to make the finished product
available for sale.
Music
Guide
Educators
9
Hammers
6”-12”
8”
Figure 6
Figure 7

Most consumer-level tape recorders will not accept a microphone directly. A mixer
(see the next section) will be required to properly interface microphones with a
cassette deck. Certain models of professional level cassette recorders have
microphone inputs on them, but they are often considerably more expensive.
Minidisc
Introduced in the early 1990s, the minidisc format combines the ease of cassette
recording with near-CD quality results. Sound is digitally recorded onto a disk
smaller than a computer’s floppy disk. Minidiscs also allow extensive editing of
the recorded material. Tracks can be moved, divided, combined, named, and
erased, tasks that are impossible with tape (unless you are really good with a
razor blade!) Consumer minidisc recorders are very similar to cassette recorders
in terms of their operation and audio interface, so any of the recording
techniques described above will apply to both formats.
PC-based Recording
With the price of hard disk storage continuing to plummet, PC-based recording
is quickly becoming a relatively inexpensive way to record high quality audio.
Computers are very useful for making multitrack recordings, which requires
several tracks of audio recorded and later combined into a stereo mix.
Unfortunately, a full discussion of multitrack recording techniques is beyond the
scope of this booklet. (For more information on multitrack recording, see the
Shure/Tascam publication "Microphones and Multitracks". This booklet also
introduces stand-alone multitrack recorders.)
Interfacing a microphone with a computer can be a tricky proposition. Most computer
sound cards have microphone inputs that are designed for low-cost "stick" microphones that are only useful in voice recognition or internet telephony applications.
Better results are obtained with an interface that accepts professional microphones. A
computer recording interface that has microphone inputs will result in better sound
and less time spent fooling around with adapters.
Personal computers also offer an inexpensive way to produce CDs. By recording your
music into a computer, a CD recorder can take those files and "burn" them onto
a recordable CD. Even if the PC isn’t used as the main recording device, the other
formats discussed above can easily be transferred into a computer. Stand-alone CD
recorders are also available, and work on basically the same principle.
10
 Loading...