

Page 1

A Shure Educational Publication
MICROPHONE
TECHNIQUES
DRUMS
1
Page 2
Page 3

Microphone Techniques
for
DRUMS
GENERAL RULES
Microphone technique is largely a matter of personal taste — whatever method
sounds right
microphone to use on any particular instrument. There is also no one ideal way to place a
microphone. Place the microphone to get the sound you want. However, the desired sound
can often be achieved more quickly and consistently by understanding basic microphone
characteristics, sound-radiation properties of musical instruments, and acoustic
fundamentals.
reinforcement.
for the particular instrument, musician, and song is right. There is no one ideal
Here are some suggestions to follow when miking musical instruments for sound
• Try to get the sound source (instrument, voice, or amplifier) to sound good acoustically
(“live”) before miking it.
• Use a microphone with a frequency response that is limited to the frequency range
of the instrument, if possible, or filter out frequencies below the lowest fundamental
frequency of the instrument.
• To determine a good starting microphone position, try closing one ear with your finger.
Listen to the sound source with the other ear and move around until you find a spot
that sounds good. Put the microphone there. However, this may not be practical (or
healthy) for extremely close placement near loud sources.
• The closer a microphone is to a sound source, the louder the sound source is
compared to reverberation and ambient noise. Also, the Potential Acoustic Gain is
increased — that is, the system can produce more level before feedback occurs.
Each time the distance between the microphone and sound source is halved, the
sound pressure level at the microphone (and hence the system) will increase by 6 dB.
(Inverse Square Law)
Drums
3
Page 4

Microphone Techniques
for
DRUMS
• Place the microphone only as close as necessary. Too close a placement can color the
sound source’s tone quality (timbre), by picking up only one part of the instrument.
Be aware of Proximity Effect with unidirectional microphones and use bass rolloff if
necessary.
• Use as few microphones as are necessary to get a good sound. To do that, you can
often pick up two or more sound sources with one microphone. Remember: every
time the number of microphones doubles, the Potential Acoustic Gain of the sound
system decreases by 3 dB. This means that the volume level of the system must be
turned down for every extra mic added in order to prevent feedback. In addition, the
amount of noise picked up increases as does the likelihood of interference effects
such as comb-filtering.
• When multiple microphones are used, the distance between microphones should be
at least three times the distance from each microphone to its intended sound source.
This will help eliminate phase cancellation. For example, if two microphones are each
placed one foot from their sound sources, the distance between the microphones
should be at least three feet. (3 to 1 Rule)
• To reduce feedback and pickup of unwanted sounds:
1) place microphone as close as practical to desired sound source
2) place microphone as far as practical from unwanted sound
sources such as loudspeakers and other instruments
3) aim unidirectional microphone toward desired sound source (on-axis)
4) aim unidirectional microphone away from undesired sound source
(180 degrees off-axis for cardioid, 126 degrees off-axis for supercardioid)
5) use minimum number of microphones
• If the sound from your loudspeakers is distorted even though you did not exceed a
normal mixer level, the microphone signal may be overloading your mixer’s input.
To correct this situation, use an in-line attenuator (such as the Shure A15AS), or use
the input attenuator on your mixer to reduce the signal level from the microphone.
4
Page 5

Microphone Techniques
for
DRUMS
Seasoned sound engineers have developed favorite microphone techniques through
years of experience. If you lack this experience, the suggestions listed on the following pages
should help you find a good starting point. These suggestions are not the only possibilities;
other microphones and positions may work as well or better for your intended application.
Remember — Experiment and Listen!
MICROPHONE POSITIONS
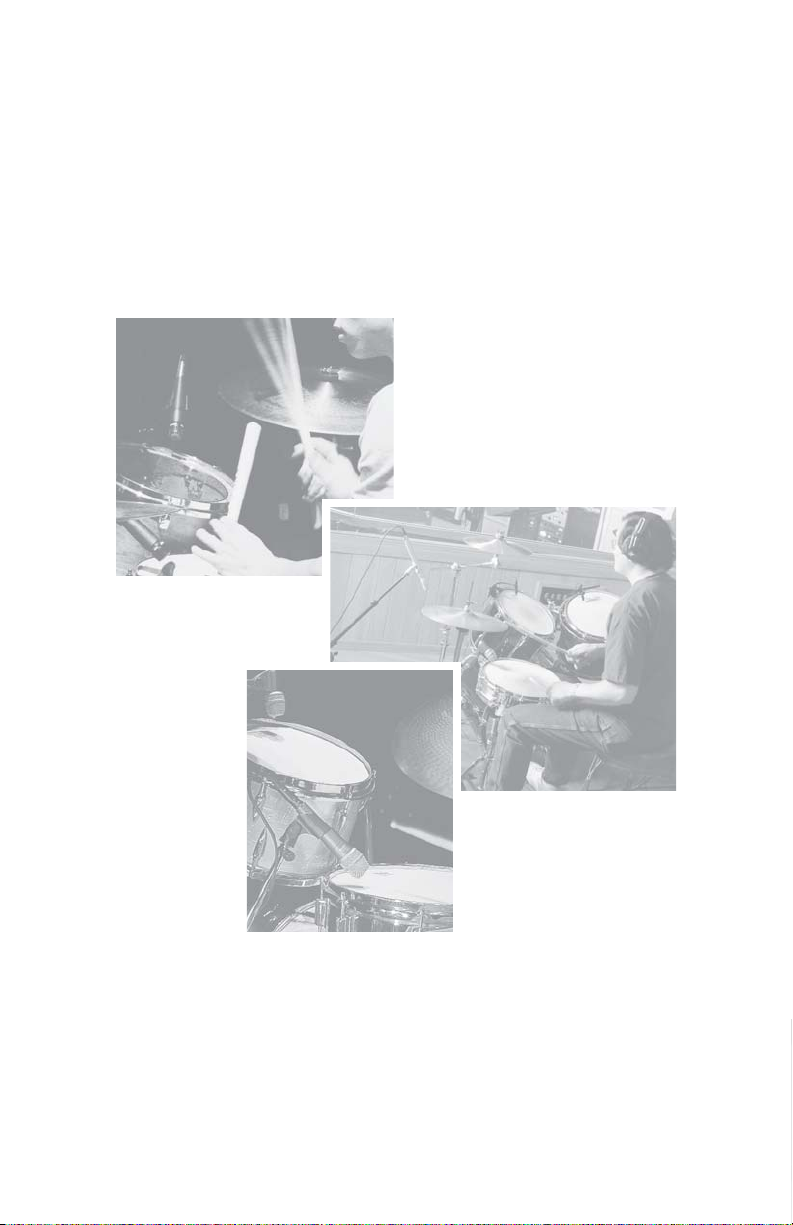
In most sound reinforcement systems, the drum set is miked with each drum having
its own mic. Using microphones with tight polar patterns on toms helps to isolate the sound
from each drum. It is possible to share one mic with two toms, but then, a microphone with
a wider polar pattern should be used. The snare requires a mic that can handle very high
SPL, so a dynamic mic is usually chosen. To avoid picking up the hi-hat in the snare mic,
aim the null of the snare mic towards the hi-hat. The brilliance and high frequencies of
cymbals are picked up best by a flat response condenser mic.
Front View Top View
5
Page 6

Microphone Techniques
for
DRUMS
Microphone Placement Tonal Balance Comments
Overhead-Cymbals:
1
One microphone over center
of drum set, about 1 foot above
drummer’s head (Position A);
or use two spaced or crossed
microphones for stereo
(Positions A or B).
Snare drum:
2
Just above top head at edge
of drum, aiming at top head.
Coming in from front of set on
boom (Position C); or miniature
microphone mounted directly
on drum.
Natural;
sounds like
drummer
hears set
Full,
smooth
Picks up ambience and
leakage. For cymbal pickup
only, roll off low frequencies.
Boost at 10,000 Hz for
added sizzle. To reduce
excessive cymbal ringing,
apply masking tape in
radial strips from bell to rim.
Tape gauze pad or
handkerchief on top
head to tighten sound.
Boost at 5,000 Hz for
attack, if necessary.
Bass drum (kick drum):
3
Placing a pad of paper towels where the beater hits the drum will lessen boominess.
If you get rattling or buzzing problems with the drum, put masking tape across the
drum head to damp out these nuisances. Placing the mic off center will pick up
more overtones.
Remove front head if necessary.
Mount microphone on boom arm
inside drum a few inches from
beater head, about 1/3 of way in
from edge of head (Position D); or
place surface-mount microphone
inside drum, on damping
material, with microphone
element facing beater head.
Full,
good impact
Put pillow or blanket on
bottom of drum against
beater head to tighten beat.
Use wooden beater, or
loosen head, or boost
around 2,500 Hz for more
impact and punch.
6
Page 7

Microphone Techniques
Microphone Placement Tonal Balance Comments
Tom-toms:
4
One microphone between every
two tom-toms, close to top heads
(Position E); or one microphone
just above each tom-tom rim,
aiming at top head (Position F);
or one microphone inside each
tom-tom with bottom head
removed; or miniature microphone
mounted directly on drum.
Hi-hat:
5
Aim microphone down
towards the cymbals, a few
inches over edge away
from drummer (Position G).
Or angle snare drum
microphone slightly toward
hi-hat to pick up both
snare and hi-hat.
Full,
good impact
Natural,
bright
Inside drum gives best
isolation. Boost at 5,000 Hz
for attack, if necessary.
Place microphone or adjust
cymbal height so that puff
of air from closing hi-hat
cymbals misses mike. Roll off
bass to reduce low-frequency
leakage. To reduce hi-hat
leakage into snare-drum
microphone, use small cymbals
vertically spaced 1/2” apart.
for
DRUMS
Snare, hi-hat and hi-tom:
6
Place single microphone a
few inches from snare drum
edge, next to hi-tom, just
above top head of tom.
Microphone comes in from
front of the set on a boom
(Position H).
Natural
In combination with
Placements 3 and 7,
provides good pickup
with minimum number
of microphones. Tight
sound with little leakage.
7
7
Page 8

Microphone Techniques
for
DRUMS
Microphone Placement Tonal Balance Comments
Cymbals, floor tom and hi-tom:
7
Using single microphone,
place its grille just above
floor tom, aiming up toward
cymbals and one of hi-toms
(Position I).
One microphone: Use Placement 1. Placement 6 may work if the
drummer limits playing to one side of the drum set.
Two microphones: Placements 1 and 3; or 3 and 6.
Three microphones: Placements 1, 2, and 3; or 3, 6, and 7.
Four microphones: Placements 1, 2, 3, and 4.
Five microphones: Placements 1, 2, 3, 4, and 5.
Natural In combination with
Placements 3 and 6,
provides good pickup
with minimum number
of microphones. Tight
sound with little leakage.
More microphones: Increase number of tom-tom microphones as needed.
Use a small microphone mixer to submix multiple drum microphones into one channel.
Timbales, congas, bongos:
One microphone aiming
down between pair of drums,
just above top heads.
Natural Provides full sound with
good attack.
Tambourine:
One microphone placed
6 to 12 inches from instrument.
8
Natural Experiment with distance
and angles if sound is too
bright.
Page 9

Microphone Techniques
Microphone Placement Tonal Balance Comments
Steel Drums:
Tenor, Second Pan, Guitar
One microphone placed
4 inches above each pan.
Bright,
with plenty
of attack
Allow clearance for
movement of pan.
for
DRUMS
Microphone placed
underneath pan.
Cello, Bass
One microphone placed
4 - 6 inches above each pan.
Xylophone, marimba, vibraphone:
Two microphones aiming down
toward instrument, about 1 1/2
feet above it, spaced 2 feet apart,
or angled 135
touching.
0
apart with grilles
Glockenspiel:
One microphone placed
4 - 6 inches above bars.
Natural
Natural
Bright,
with lots
of attack
Decent if used for tenor or
second pans. Too boomy
with lower voiced pans.
Can double up pans
to a single microphone.
Pan two microphones to
left and right for stereo.
For less attack, use rubber
mallets instead of metal
mallets. Plastic mallets will
give a medium attack.
9
Page 10

Microphone Techniques
for
DRUMS
Reference Information
Glossary
3-to-1 Rule – When using multiple
microphones, the distance between
microphones should be at least 3 times
the distance from each microphone to
its intended sound source.
Ambience – Room acoustics or natural
reverberation.
Feedback – In a PA system consisting of a
microphone, amplifier, and loudspeaker
feedback is the ringing or howling sound
caused by amplified sound from the
loudspeaker entering the microphone
and being re-amplified.
Frequency Response – A graph showing
how a microphone responds to various
sound frequencies. It is a plot of electrical
output (in decibels) vs. frequency (in Hertz).
Interference – Destructive combining of
sound waves or electrical signals due to
phase differences.
Inverse Square Law – States that direct
sound levels increase (or decrease) by
an amount proportional to the square
of the change in distance.
Isolation – Freedom from leakage; ability to
reject unwanted sounds.
Leakage – Pickup of an instrument by a
microphone intended to pick up another
instrument. Creative leakage is artistically
favorable leakage that adds a “loose” or
“live” feel to a recording.
Noise – Unwanted electrical or acoustic
interference.
PAG – Potential Acoustic Gain is the
calculated gain that a sound system can
achieve at or just below the point of
feedback.
Polar Pattern (Directional Pattern, Polar
Response) – A graph showing how the
sensitivity of a microphone varies with the
angle of the sound source, at a particular
frequency. Examples of polar patterns are
unidirectional and omnidirectional.
Proximity Effect – The increase in bass
occurring with most unidirectional
microphones when they are placed close
to an instrument or vocalist (within 1 ft.).
Does not occur with omnidirectional
microphones.
Rolloff – A gradual decrease in response
below or above some specified frequency
10
Page 11

Reference Information
Shure Microphone Selection Guide
Shure Microphone Selection Guide
Drums
Microphone Techniques
for
DRUMS
Kick Drum
Beta52A
Beta91
PG52
Beta57A
SM57
Snare Drum
Beta57A
Beta56A
SM57
PG56
PG57
Rack/Floor Toms
Beta98 D/S
Beta57A
Beta56A
SM57
PG56
PG57
*
*
*
*
*
*
*
*
Congas
Beta98D/S
Beta56A
Beta57A
SM57
PG56
PG57
Cymbals
KSM141
KSM137
KSM109
KSM44
KSM32
KSM27
SM81
SM94
PG81
Mallets
*
*
*
*
KSM44
KSM32
KSM27
KSM141
KSM137
KSM109
SM81
SM94
PG81
Percussion
KSM141
KSM137
KSM109
KSM44
KSM32
KSM27
Beta57A
SM57
PG57
*
Requires drum mount accessory to mount on rim.
This guide is an aid in selecting microphones for various applications.
Microphone sound quality and appearance are subject to specific acoustic
environments, application technique, and personal taste.
11
Page 12

Additional Shure Publications Available:
United States, Canada, Latin America, Caribbean:
Shure Incorporated, 5800 West Touhy Ave, Niles, IL 60714-4608, USA
Phone: 847-600-2000 US Fax: 847-600-1212 Int’l Fax: 847-600-6446
Europe, Middle East, Africa:
Shure Europe GmbH, Phone: 49-7131-72140 Fax: 49-7131-721414
Asia, Pacifi c:
Shure Asia Limited, Phone: 852-2893-4290 Fax: 852-2893-4055
www.shure.com
©2007 Shure Incorporated AL0000
Printed and electronic versions of the following guides are available
free of charge. To obtain your complimentary copies, call one of the
phone numbers listed below or visit www.shure.com.
• Microphone Techniques for Live Sound Reinforcement
• Microphone Techniques for Studio Recording
Our Dedication to Quality Products
Shure offers a complete line of microphones and wireless
microphone systems for everyone from first-time users to
professionals in the music industry–for nearly every possible
application.
For over eight decades, the Shure name has been synonymous
with quality audio. All Shure products are designed to provide
consistent, high-quality performance under the most extreme
real-life operating conditions.
©2008 Shure Incorporated
AL1437E
 Loading...