


Foreword
and CD etc.
Thank you for purchasi ng this digi tal video cam era. Before us e, please re ad this
user manual carefully and keep it in a safe and convenient place for future
reference where necess ary.
The information c ontained in thi s manual is t he latest for the camera whe n it is
compiled. The screen displays and illustrations in this manual are used to
specifically and vividly describe how to operate the camera. Due to technical
development and different production batch, they may be somewhat different from
the actual digital video camera yo u pu r chas e.
Notice
Please use this camera according to the following order:
Check power supply Insert and format memory card Record/ Capture
Install driver
Note: The memory card newly purchased or used on other digital
cameras must be formatted before its use on this camera. Before formatting,
please back up the im portant data on other media such as fl oppy disk, HD
Connect PC
Use Notice
This camera has no NAND FLASH internal memory. Use memory card for
actual use.
This camera can use SD memory card and MMC card (mul ti med ia m emory
card).
The SD card has write-protect switch, which can prevent deleting or formatting the
image files.
1

Memory card pin
Write-protect switch
Push the switch on the SD memory card to the bottom, then the data on it
can be protected; push the switch on the SD memory card to the top, then
the data on it will lose protection. Before shooting, please remember push
the switch on it to the top.
Notices for memory card use
● When a newly purchased memory card is used or the camera cannot identify
the data or other images taken by oth er camer as on the mem or y card, ple ase
firstly format it.
● Before inserting or taking out the memory card, please power off the camera.
● The memory card, after used for many times, will have lowered performance. If
the memory card has low performance, i t is necessary to buy a new memory
card.
● The memory card is precise electronic device; so do not bend, fall or press it.
● Never place the memory card in the environment with strong electric field or
magnetic field, such as close to speaker or TV receiver.
● Never use or place the memory card in the too hot or cold environment.
● Please keep the memory card clean and prevent it touching with any liquid. If it
touches any liquid, please wipe it dry.
● When the memory card is not used, please place it into the sheath.
● Please note that the memory card will become hot for long use. This case is
normal.
● Do not use the memory card that has been used on other digital cameras. To
use it on this camera, please format it.
● Do not use the memory card that has been formatted on other digital cameras or
memory card readers.
● In any of the following cases, the data recorded may be damaged:
- When the memory card is not used properly;
- When the power supply is shut off or the memory card is taken out during
recording, deletion (formatting) or reading.
● It is recommended to back up important data on other media such as floppy disk,
hard disk and CD etc.
Maintenance and Care
When leaving the cam era idle for long, keep the digital video camera with th e
battery taken out in dry and dark place.
● In use, always wear the wrist band so as to prevent slip.
● Use proper protection sheath to avoid scratching the lens and screen.
●To clean the lens, firstly blow away the dust on its surface, then use proper cloth
or tissue for optical devices to clean the lens. If necessary, use lens cleanser.
Never use organic cleanser to clean the digital video camera.
● Do not touch the lens surface with finger.
2

Table of Contents
System Requirements…………………………………………………………………4
Features…………………………………………………………………………………4
Accessories………………………………………………………………………………4
Profile…………………………………………………………………………………5
Functions of Keys and Indicator L amps………… ……………… ……………… ……6
Start to Use………………………………………………… ……………………………6
Install Battery………………………………………………………………………6
Install SD/MMC Card……………………………… ……………………… ………7
Open Screen………………………………………………………………………8
Power on……………………………………………………………………………8
Select Focus………………………………………………………………………8
Switch Modes………………………………………………………………………8
Record………………………………………………………………………………8
Capture……………………………………………………………………………8
Playback……………………………………………………………………………8
Power off……………………………………………………………………………8
Set Date/Time……………………………………………………………………8
Menu Settings…………………………… ………………………………………… 8
Set Date/Time……………………………………… ………………………………9
Connect to PC……………………………………………………………………10
Operation Step by Step………………………………………… ……………………10
Record Mode……………………………………………………………………10
Capture Mode……………………………………………………………………14
Playback Mode…………………………………………………………………14
Connect PC to Download Photos/Videos………………………………………20
Use PC Camera Function…………… …………………………………………20
Install Driver and Software……………………… ……………………………… ……21
Installation Interface………………………………………………………………21
Install Driver………………………………………………………………………22
Install Software Attached free of Charge………………………………………22
Specifications…………………………………… …… ……… ……… …… …………2 4
Troubleshooting………………………………… …… ……… ……… …… ……… …25
3
System Requirements
Sound card, displa y
When operating or using this digital video camera, please refer to minimum
system requiremen ts of PC for this camera. W e strongly recom mend you to use
good PC to operate the camera in order to bring its performance into full play . The
minimum system requirements are as follows:
OS Microsoft Windows 98 SE,Me,2000,XP,VISTA
CPU Intel PIII667 above or equivalent CPU
Internal memory 128 MB above
card
CD-ROM 4x speed above
HD 1 GB above
Others One standard USB 1.1 or USB 2.0 interface
System Requirements
DirectX8 or above supported
Features
This camera has multiple characteristics and functions:
Digital video camera;
Digital camera (1.30mega pixels);
Mass Storage;
PC camera;
4x digital zoom.
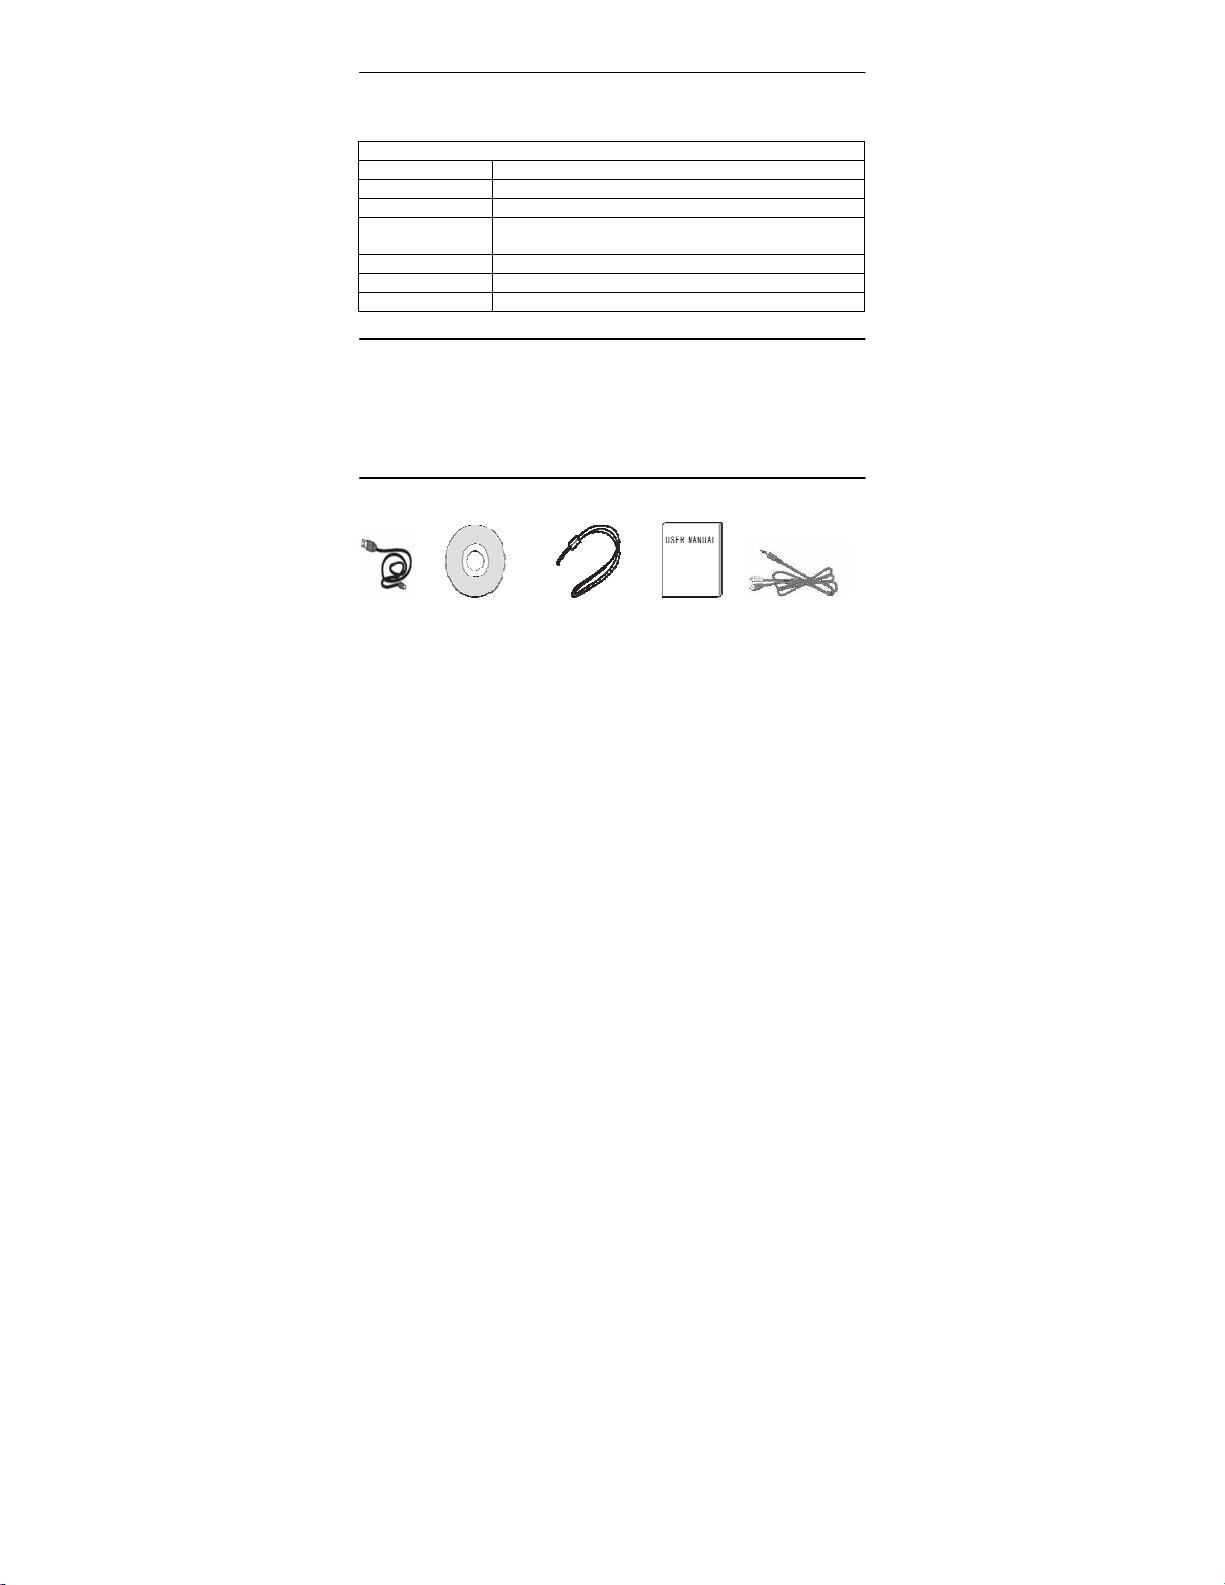
Accessories
The packing list contains the following main accessories:
USB cable Installation CD Wrist strip User manual TV cable
Note: The USB extended cable with ferrite bead and the TV cable extended
cable with ferrite ring is designed for exclusive use with this product. Don’t use
others for this product.
4
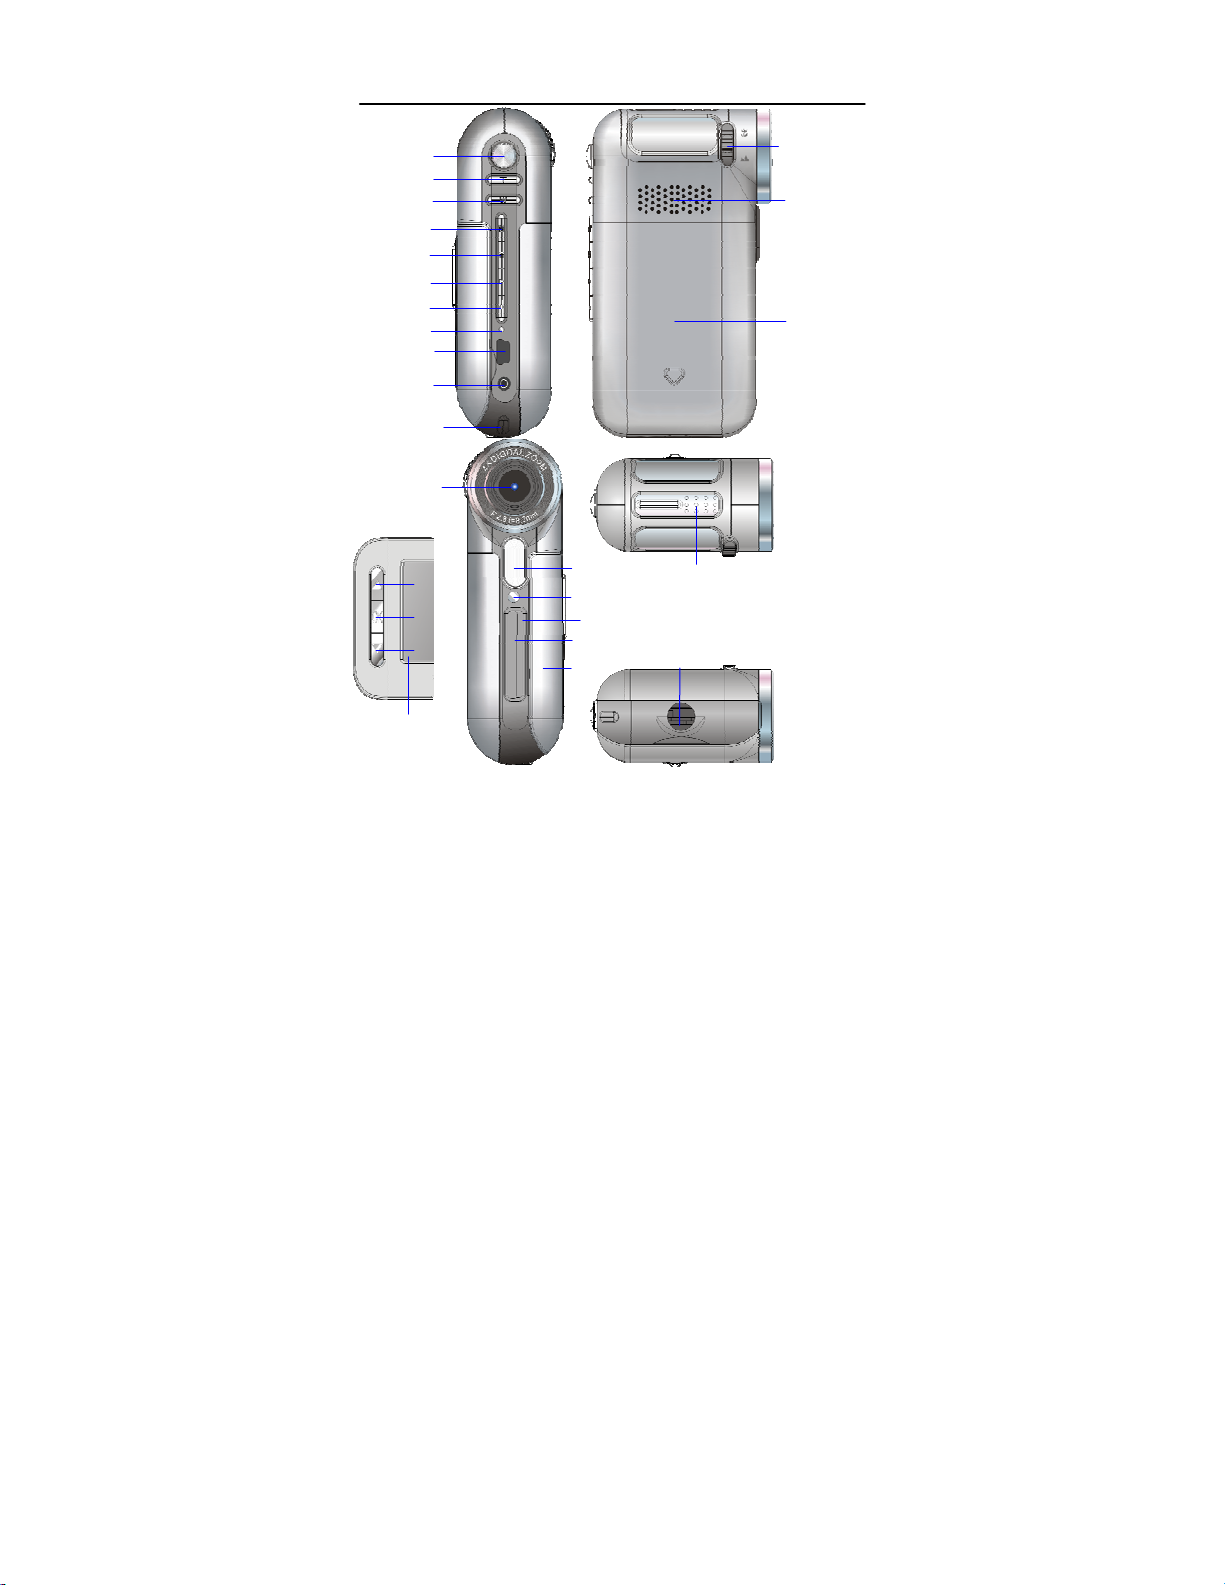
Profile
Shutter key
T key
W key
Mode key
Menu key
Playback key
Power key
USB port
AV output port
BUSY
lamp
Wrist strip sport
Macro
switch
Speaker
Battery cover
Lens
LED fill light
Self-timer
indicator lamp
Cover
Microphone
Tripod jack
Display
Display
Up key
OK key
Down key
Card slot
5

Functions of keys and indicator lamps:
Keys/Indicator
Lamps
Power key Power on/off.
Shutter key Record, capture.
T key
W key
Menu key Menu on/off.
Mode key Switch modes (capture/record)
Playback key Enter/exit playback mode.
Up key
Down key
OK key Confirm, play and switch screen display states.
BUSY lamp Busy work.
Self timer
indicator lamp
Macro switch Switch between macro mode and normal mode.
Digital zoom enlargement, zoom in (pl ayback ); select an d
move photos rightward.
Digital zoom reduction, zoom out (playback); select and
move photos leftward.
Select files and menus; switch capture modes
(continuous/self-timer/single), move photos (when @
zoom-out); records/pauses.
Select files and menus; switch capture modes
(continuous/self-timer/single), move photos (when
@zoom-out); turns on/off LED fill light.
Flashing indication during self timer countdown.
Functions
Start to Use
Install battery
This camera uses 3pcs of A AA battery. To replace t he batter y, it is necessary to
power the camera off.
As indicated in the foll owing photo s, open the batt ery cover, install the batter y in
according to the polarity indication then restore the battery cover.
6
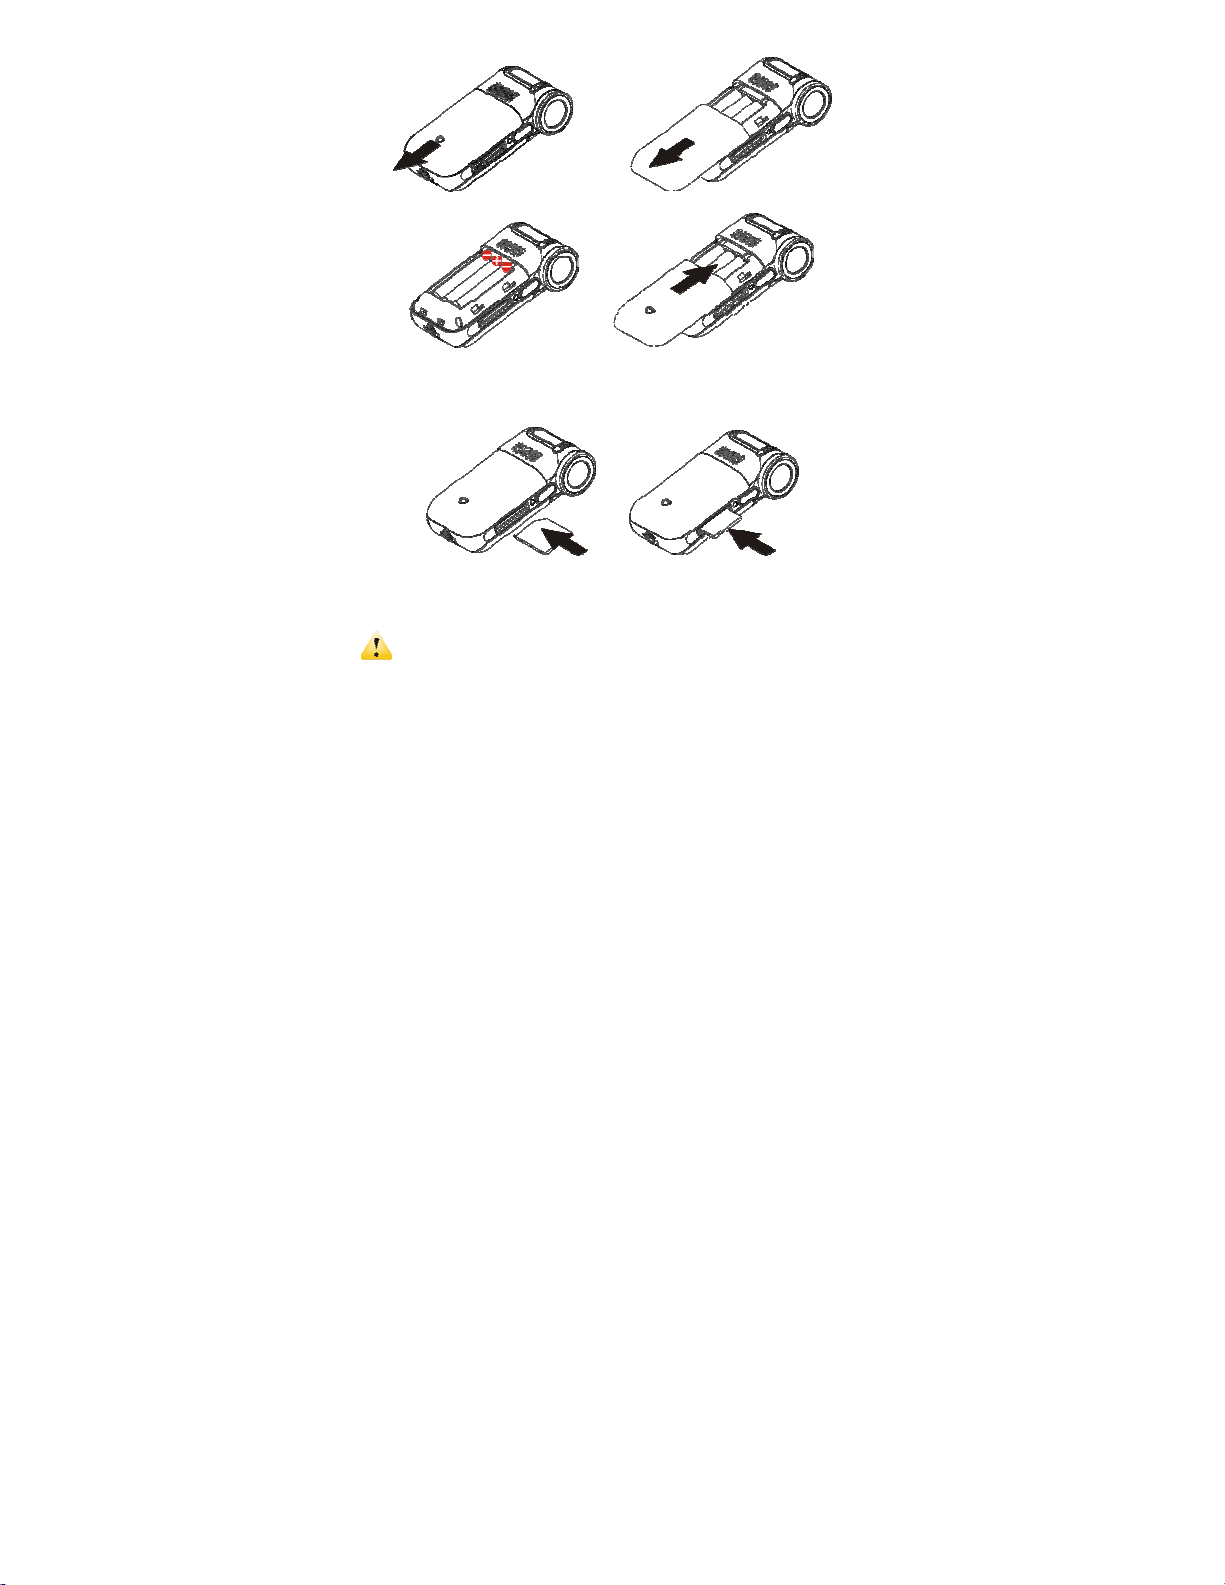
Install SD/MMC Card
As indicated in the follo wing figure, according to the hint besi de the card slot,
insert the SD/MMC card with the metal pin inward into the memory card slot.
To take out SD/MMC card, press it downward.
─────────────────── ───────────────────── ──────────
Note: Before replacing the memory c ard , be sure to power off the came ra .
Insert the card in the direction as indicated. Do not impose much force on
it to avoid damaging the ca rd or cam er a compo nents. If it do es not work ,
please check if the direction is correct.
If the memory card is us ed for t he first tim e or it has been used on other
cameras, it is necessary to format it.
─────────────────── ───────────────────── ──────────
7

Open Screen
ˉ
ˉ
|
ˉ
ˉ
Unfold the LCD screen outward and then turn it
toward the user.
Power on
Push the power key of the camera for 2s to power it
on.
Select Focus
Press the macro switch to adjust the focus as Normal ( ) or Macro ( ).
Switch Modes
After power-on, the camera can enter the rec ord mode.
Press the mode to switch between record mode and capture mode.
Record
In record mode press the shutter key to start recordin g and again to stop.
During recording, press the up key to pause, again to continue.
Capture
In capture mode, press the shutter key to take photos.
Playback
In playback mode, you can bro wse pho tos and pl ay th e videos r ecord ed with t his
camera.
Browse photos: Press the up/down key to search the desired photo and press the
T key to zoom in photos. A fter zoom-i n, p ress the up/down/T /W key to mov e the
photo; press the OK key to exit.
Play movies: Press the up/d own key to search the desired movie, pres s the OK
key to start to play, again to stop, during play, press the up key to pause; press the
up key again to continue.
Power off
In power-on state, press the power key to power off the camera.
If the camera is in idle state for more than the set power-off time (1min/3min/5min),
the camera will automatically power off in order to save power.
!!
!!
ˉˉ
ˉˉ
ˉ
ˉˉˉ
ˉˉ
ˉˉˉ|ˉ
ˉˉ
ˉˉˉˉˉ
ˉˉˉ
Menu Settings
8
 Loading...