

SHUOYING DVH198 User Manual

Foreword
Thank you for choosing our digital video. Please read this
manual carefully before using, and keep it in a safe place for
future reference.
The content involved in this manual is the latest information
during compilation. The screen display and figures adopted by
this manual are used to introduce the operation of the digital
video in a more detailed and intuitive way, which may vary from
the one in actual use due to the difference of technical
development and production batches.
Introduction
Please use the digital video pursuant to the following sequence:
Check the digital video
power
Insert and format the memory
card
Record video/
Shoot
Install the drivers
Connect computers
Note: Any new memory card or the one used in other digital videos/cameras before should
be formatted by the digital video if such card will be used in the digital video. Please backup the
important data on other media, such as soft disks, hard disks or optical disks, etc.
1

Operation Instructions
There is write-protection switch on SD card. It can
prevent deleting or formatting saved data.
Metal Pin of Storage Card
Write-Protect Switch
Push write-protection switch to the bottom. Saved data in
SD card will be protected. Push the switch to the top, the
data will be unprotected.
Operations on Storage Card
● If use any new memory card, or the one with data
unable to be recognized by the digital video or
photos shot by other digital videos, please format the
memory card before using.
• Turn off the digital video power before inserting or
removing the memory card.
• Using the memory card for many times may
reduce its performance. If so, please replace it
with new ones.
• The memory card is a precise electronic device.
2

Please do not bend the card, and prevent it from
falling down or being pressed heavily.
• Please do not expose the memory card in strong
electronic/ magnetic fields, such as speakers or
near TV receivers.
• Please don’t use or keep the memory card in
extra hot/cold circumstances.
• Please keep the memory card clean and avoid
touching it with any liquid. If so, dry it with soft
cloth.
• Keep the memory card in the card holder when
not using.
• Please note that it is normal for the memory card
to become warm after using for a long time.
• Do not use any memory card that used in other
digital videos/cameras before. Please format any
memory card to be used in the digital video.
• Do not use any memory card formatted by other
digital video or memory card reader.
• Under any of the following conditions, data stored
on the memory card may be damaged:
- Use of the memory card inappropriately.
3

- Turn the power off or remove the memory card
while recording, deleting (formatting) or reading.
• Recommend to backup important data in other
media, such as soft disks, hard disks and optical
disks.
Maintenance for Digital Video
Keep the digital video at dry place and remove its
battery when not using.
• Wear the wrist strap to avoid sliding it off while
using.
• Use proper protective film to avoid scratching the
lens or display screen.
• To clean the lens, firstly, move dust on it, and
then use proper cloth or tissue fit for cleaning
optical devices to wipe the lens softly. If
necessary, use lens detergents. Do not use
organic solvent to clean the digital video.
• Do not touch the surface of lens by fingers.
4

System Requirements
When operating the digital video, please refer to the
computer system with minimum requirements. We
strongly recommend you to use better computer
system for best performance of the digital video. The
minimum system requirements are as follows:
System Requirements
Operating Microsoft Windows 7 2000,XP,VISTA
Operating
system
Above Intel PIII667 or other CPU with
equivalent performance
RAM Above 128 MB
Audio card
Support DirectX8 or higher versions
Video card
CD-ROM Above 4 times speed
Hard disk More than 1 GB free space
Others One standard USB 1.1 or USB 2.0
port
Functions & Features
The digital video has various features and functions:
Digital Video
Digital camera (5 million pixels)
5

Mass Storage (Removable disk)
PC Digital video (Camera)
4 times digital zoom
Appearance Introduction
MENU
Left
Up
down
Busy lamp
Playbac
mode
right
OK
6
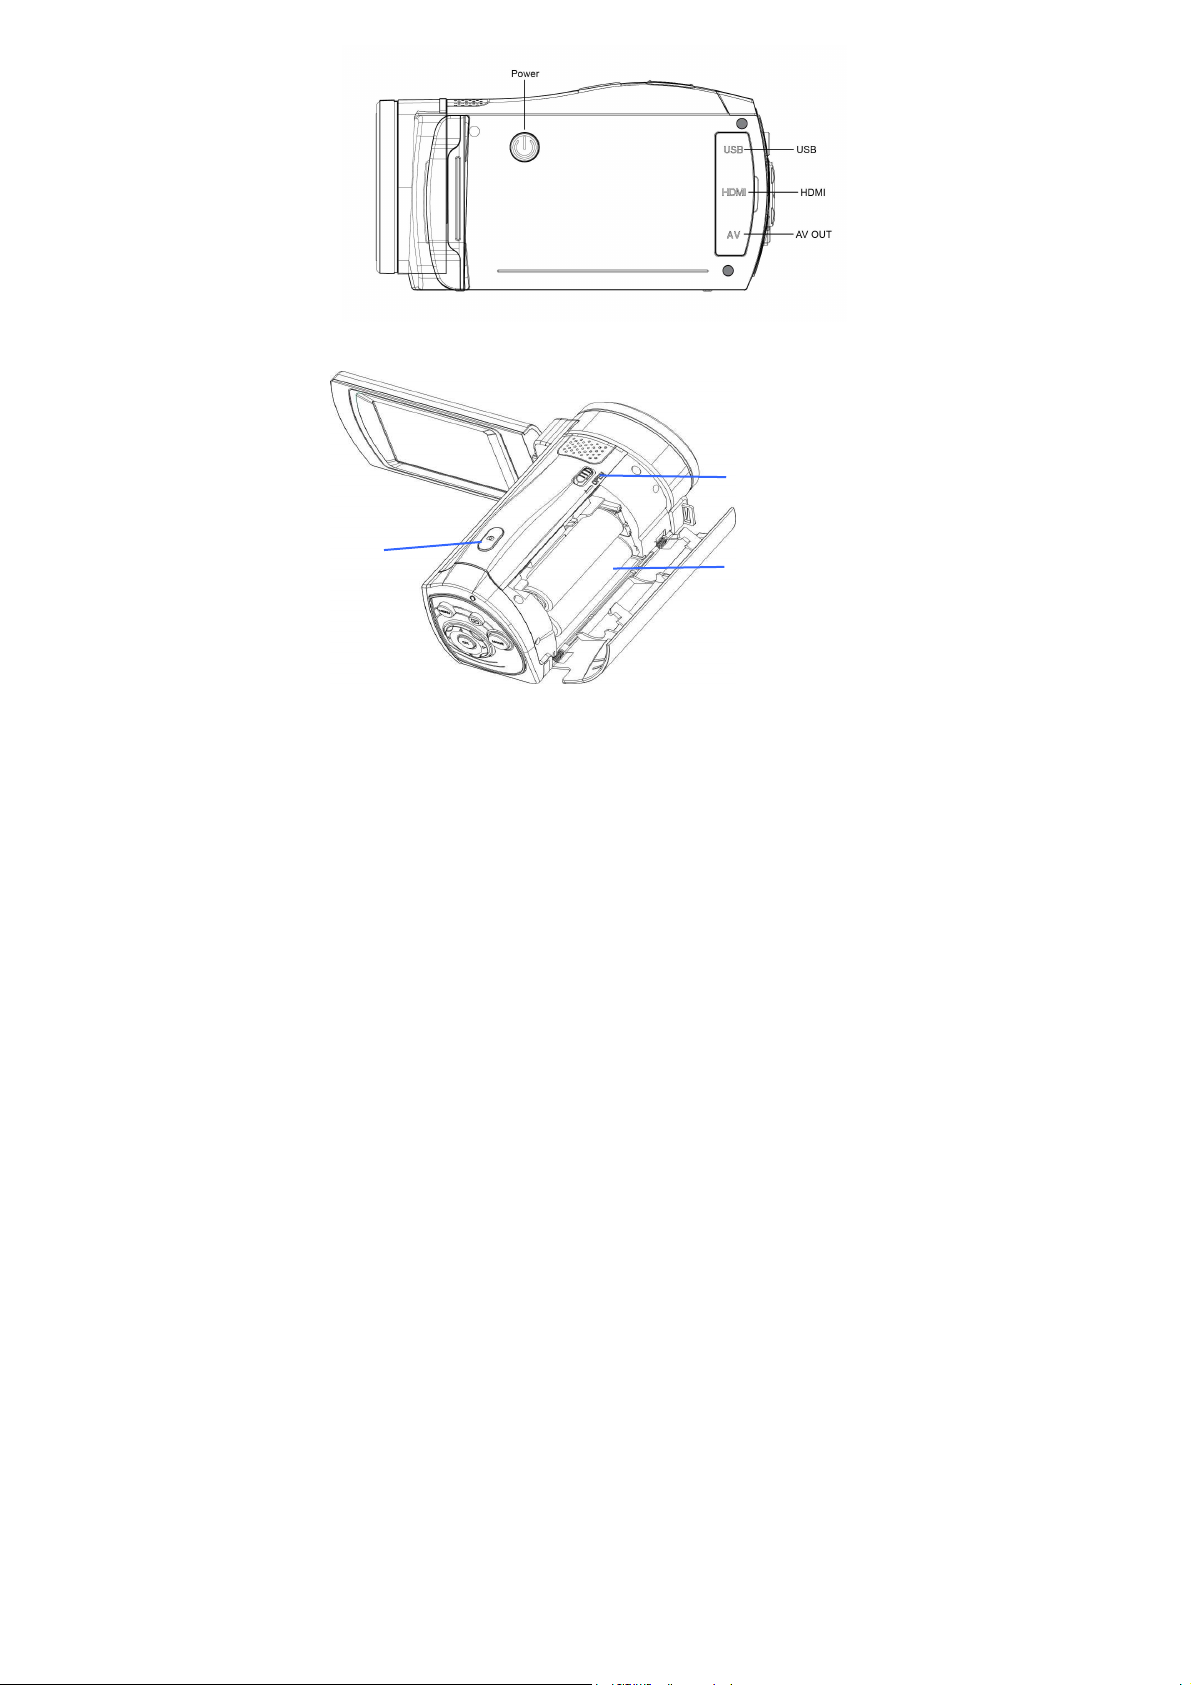
Shooting
Battery cover switch
Battery
7
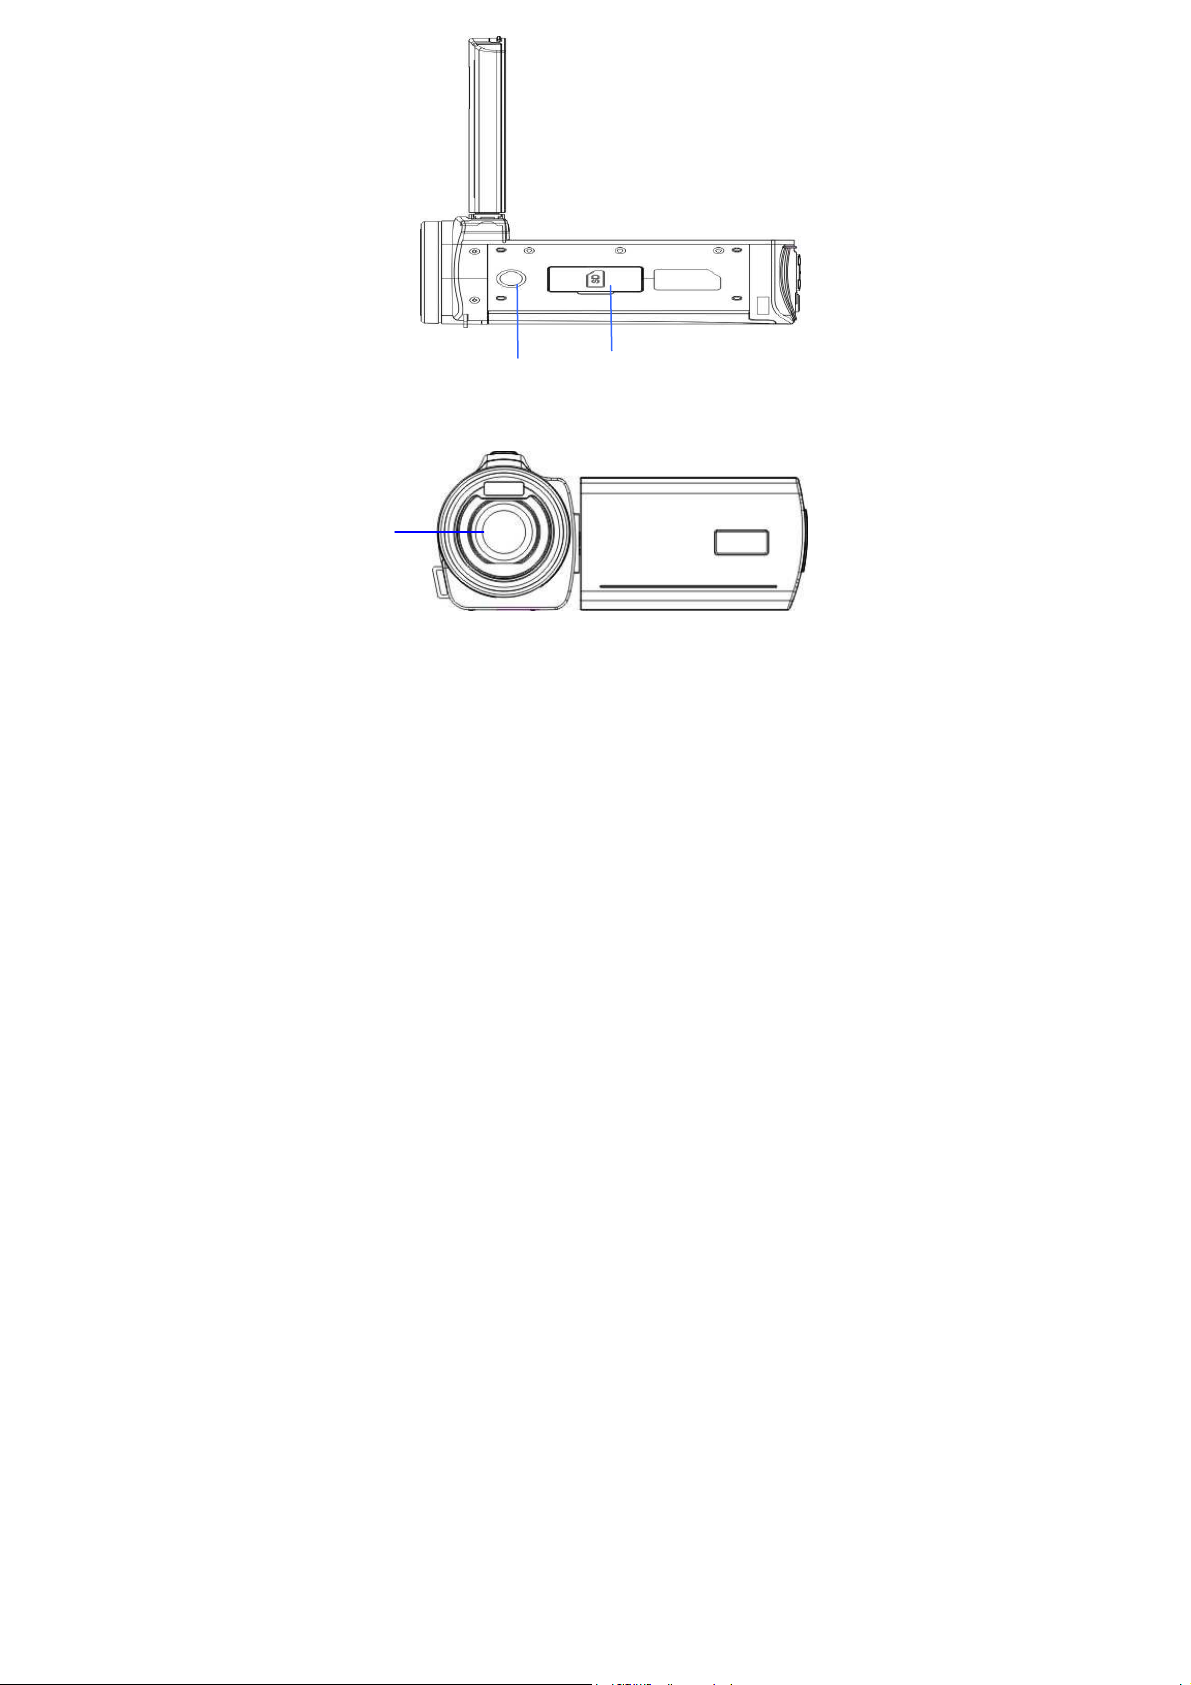
Tripod
SD card slot
Lens
8

Digital Video’s Key Functions and Indicators
Press/
Functions
Indicator
Power key Turn the digital video on/off
Shooting key
1.Shooting
2.Recording/Stop
MENU key Open/exit the menu. Stop playing
(while playing video)
MODE key
Switch among picture, video and
preview mode (press this key to
switch to PCCAM after connecting to
PC)
Playback key
Enter/exit playing mode.
Select menu. Zoom in and move the
Up key
picture (when the picture is zoomed
in)
Select menu. Zoom out and move
Down key
the picture (when the picture is
zoomed in). In preview mode, press
this key to enter grid screen.
Left key
Move the picture (when the picture is
zoomed in). Turn on/off flash. While
9

playing video, press and hold to
reverse fast.
In picture mode, adjust the shooting
mode (self portrait \2S \10S
Right key
\continuous). Move the picture
(when the picture is zoomed in).
While playing video, press and hold
to forward fast.
Press this button to enter menu and
OK key
Busy lamp
start setting. Confirm and return to
upper menu. Pause/play video.
The indicator is constantly lit when
the camera is turned on.
Start Using
Insert Battery
This digital video uses 2 AA batteries. Before replacing
batteries, please turn it off.
Open the battery cover, and then insert batteries
according to the prompt of the positive/negative poles
in the battery compartment. Replace the battery cover.
10

Insert SD/MMC Memory Card
Insert a SD/MMC memory card in the memory card
slot with the metal pins towards inside in light of the
prompts next to the card slot.
To remove the memory card, press the SD/MMC
memory card downwards, and then remove it.
───────────────────────────────────
Note: Turn the power off before replacing the
memory card.
Insert cards in correct direction. Do not insert
cards with large force to avoid damaging cards
or any part of the digital video. If failed, check
whether the direction is correct.
Format any new memory card or the one used in
other digital videos before using it in your digital
video
───────────────────────────────────
Open Screen
Open the LCD to let it face towards yourself.
Turn Digital Video on
11

---
---
|
Press Power key to turn the digital video on.
Switch mode
In picture/video mode, press the Play key to switch to
playback mode; in playback mode, press the Play key to
exit.
Video recording
In video recording mode, press the shutter key to start
video recording, and press the shutter key again to stop
recording.
Taking picture
In picture mode, press the shutter key to take a picture.
Playback
Press the Play key to enter the playback mode, browse
the pictures and play the recorded video.
Browse picture: press the LEFT/RIGHT key to select a
picture and press the Zoom key to zoom in the picture.
When the picture is amplified, press the
UP/DOWN/LEFT/RIGHT key to move the picture.
Play video: press the LEFT/RIGHT key to select a video,
press and hold the LEFT/RIGHT key to forward/reverse
fast, and release the key to play normally. Press OK to
start playing, and press MENU to stop playing; while
12

playing, press OK to pause, and press it again to resume
playing.
HDMI output
To output video and sound from the video recorder to
HDTV, insert the common terminal of the HDMI cable
to the HDMI interface of the video recorder, and insert
the input port of the HDMI cable into the HD input
interface of the HDTV. Before inserting/pulling out the
HDMI cable, stop the video recording/playing first.
TV Out
To output video and sound of digital video to TV, please
insert common terminal of TV cord into the TV port of the
digital video. Yellow terminal should be connected to
input port of video equipment. Red/White port should be
connected with sound input port of the video equipment.
Note: Before inserting/pulling out the TV cable, stop the
video recording/playing first.
Power-off
When digital video is on, press Power button once to turn
it off.
If digital video is idle, and the idle time without operation
is beyond automatic power-off time (1 minute/ 3
13
 Loading...