

Page 1
ACCESSORY
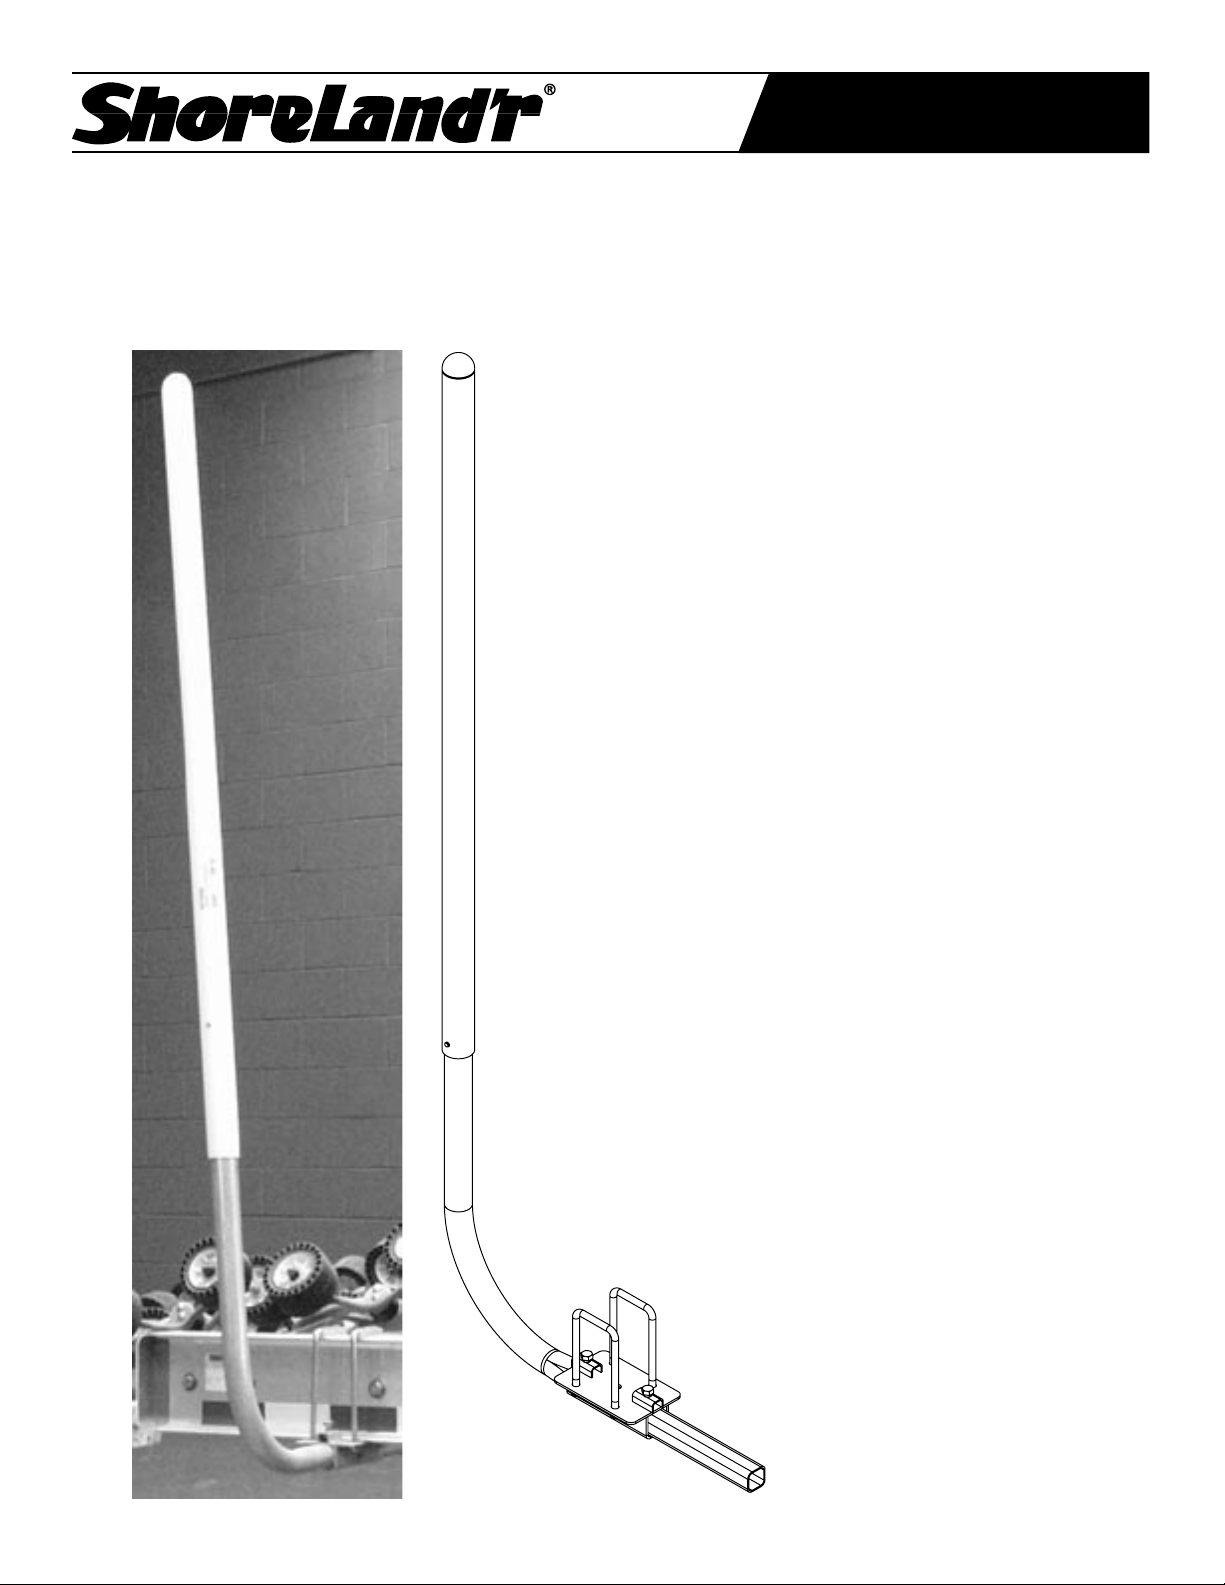
SS1200G & SS1201G
SS1200G - Loadguide Kit for the 9,500 and 15,000 lbs. Aluminum Trailers
SS1201G - Loadguide Kit for the 6,000 and 8,300 lbs. Aluminum Trailers
SS1200G
Post Loadguide Kit for 9,500 and 15,000
aluminum trailers.
Available in galvanized only.
SS1201G
Post Loadguide Kit for 6,000 and 8,300
aluminum trailers.
Available in galvanized only.
(For aluminum i-beam side frame mount
only.)
Midwest Industries, Inc. Ida Grove, IA 51445 800.859.3028 www.shorelandr.com 0002943
REV A 10/27/04
Page 2
SS1200G
Midwest Industries, Inc. Ida Grove, IA 51445 800.859.3028 www.shorelandr.com 0002943
REV A 10/27/04
Page 3

SS1201G
Midwest Industries, Inc. Ida Grove, IA 51445 800.859.3028 www.shorelandr.com 0002943
REV A 10/27/04
Page 4

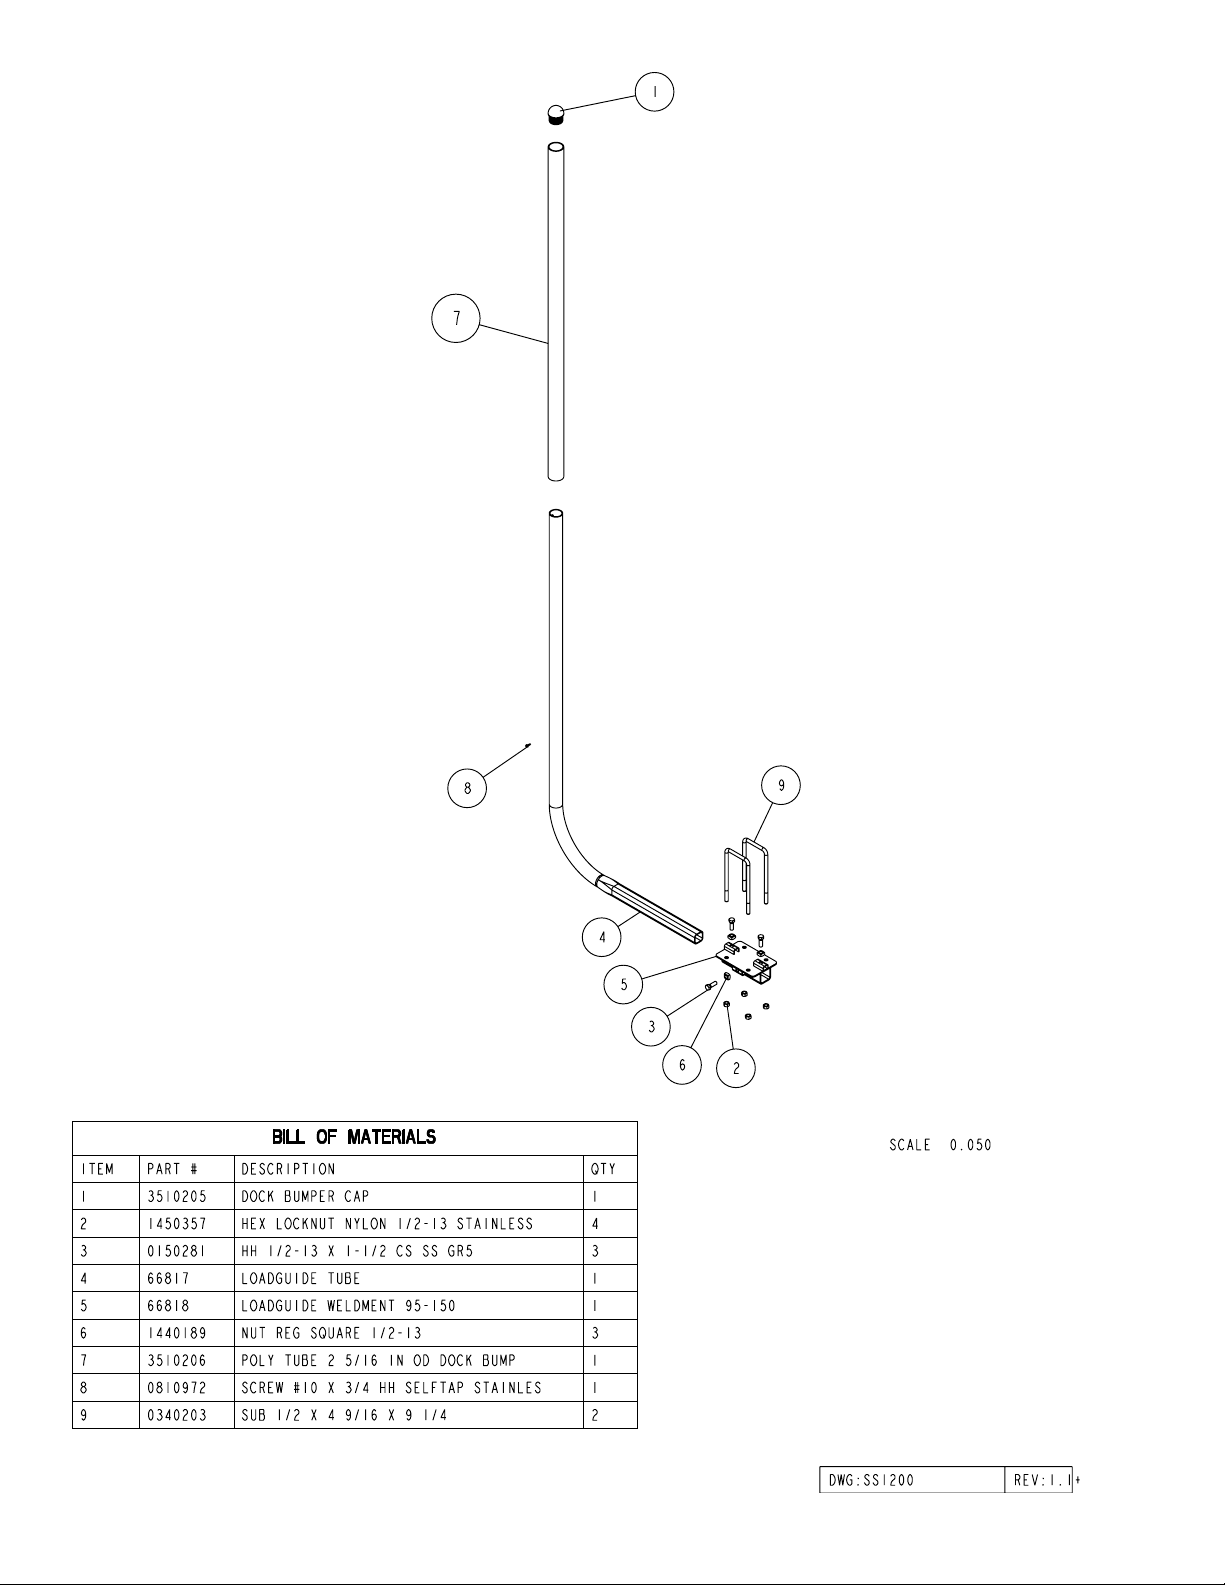
SS1200G & SS1201G Loadguide Mounting Instructions
Break the bundle and sort all items.
Locate the load guide weldment mounting bracket. Note that
it has three pockets welded to it, one on the side and two on
top. Locate a ½” square nut and insert it into the inside of
one of the pockets. Push it in until the hole in the nut aligns
with the hole in the pocket. Thread a ½” x 1 ½” hex bolt
into the square nut just installed. Thread the bolt into the nut
until the bolt is flush with the other side of the nut. Repeat
this process on the other pockets on the weldment mounting
bracket.
Locate the U-bolts for attaching the weldment mounting
bracket to the frame. Drop the U-bolts down over the frame
from the top as shown in the picture. Raise the weldment
mounting bracket up under the bottom side of the frame,
align the U-bolts with the holes in the weldment mounting
bracket and secure with ½” lock nuts provided. Position the
load weldment mounting bracket in the desired location and
tighten.
Place the load guide tube into the weldment mounting
bracket as shown and slide it in until the desired clearance
is achieved between the load guide and your boat. This may
need more adjusting to obtain proper loading and unloading. Once located, tighten the ½” x 1 ½” hex bolts installed
in the pockets earlier starting with the bolt in the side of the
weldment bracket first. This will straighten the load guide up
so it is perpendicular to the frame. Then tighten the two remaining ½” x 1 ½” bolts on the top of the weldment mounting
bracket. These are used to keep the load guide from moving
in and out during loading.
Repeat the above process on the other load guide for the
other side of the trailer. Installation is complete.
Midwest Industries, Inc. Ida Grove, IA 51445 800.859.3028 www.shorelandr.com 0002943
REV A 10/27/04
 Loading...