

Page 1
Installation and
Operation Manual
SSI2 SSI2-2
Previously designated as
SI2 SI2-2
MINI SHAKING INCUBATORS
Page 2

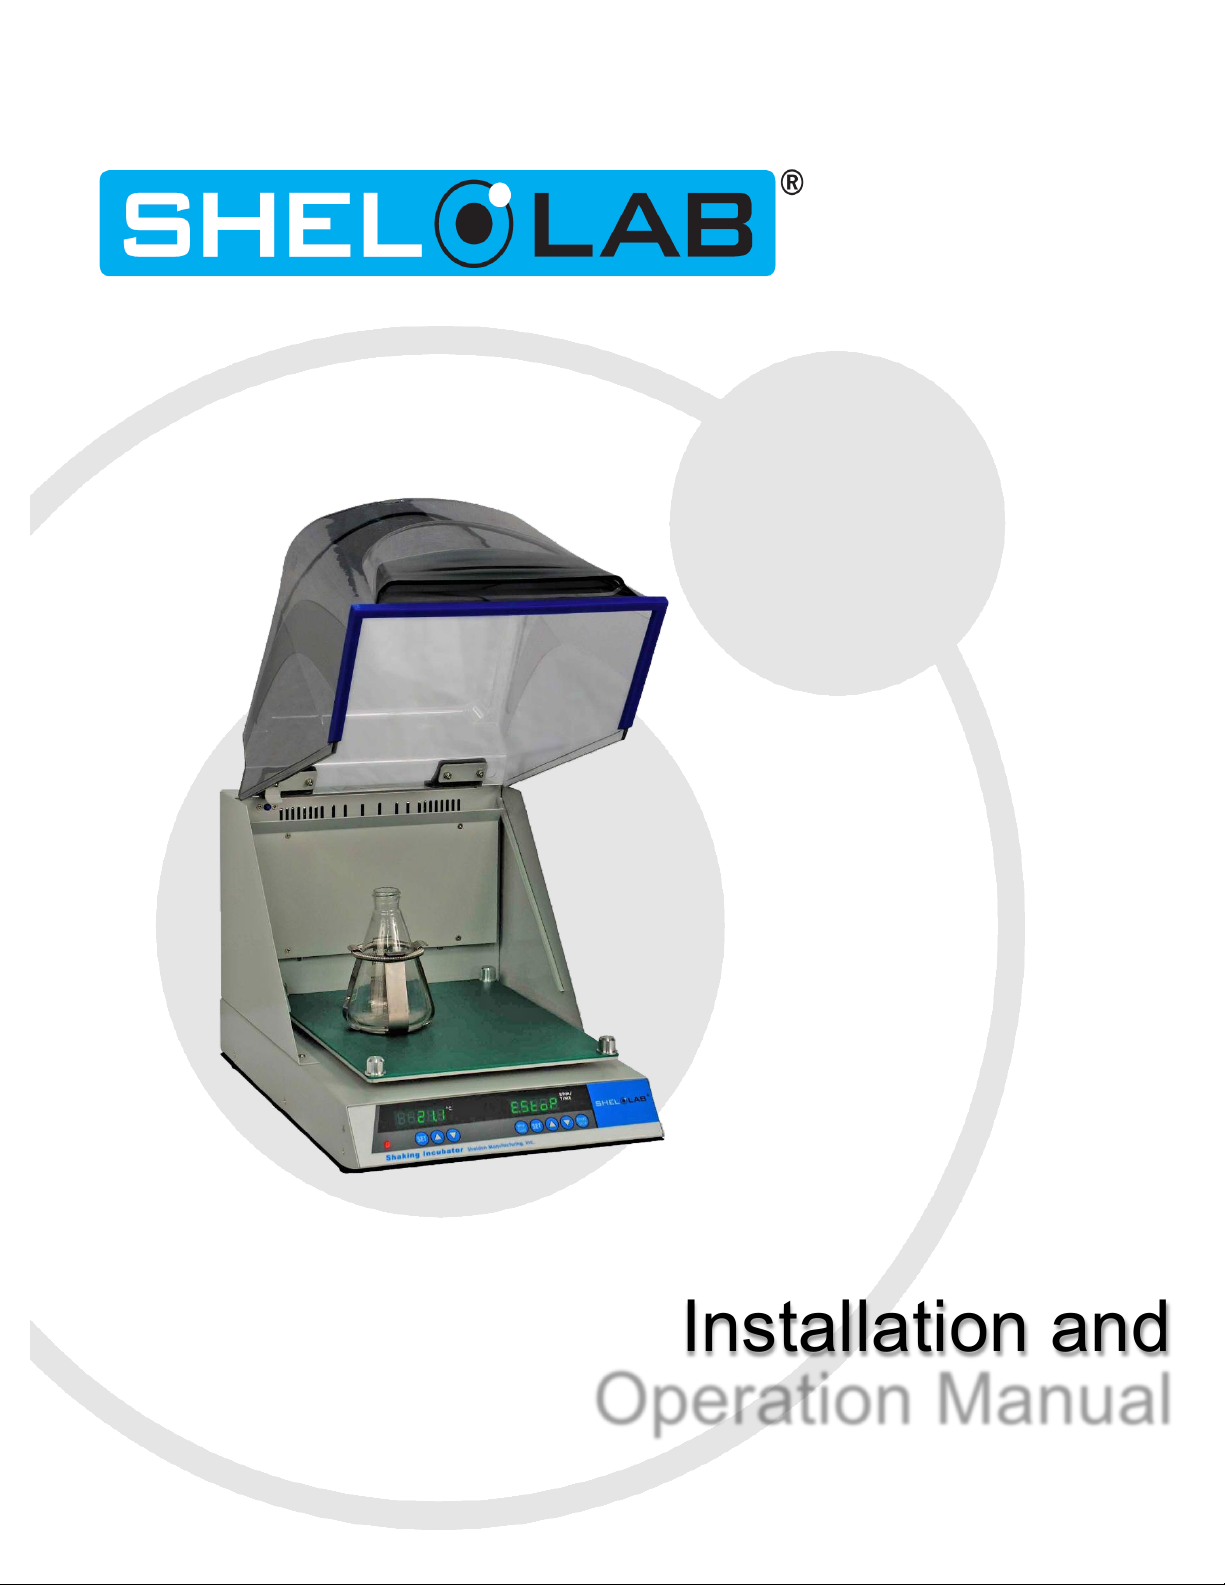
Sheldon Shaking Incubator 2
SSI2 110 - 120 AC Voltage
SSI2-2 230 AC Voltage
Installation and Operation Manual
Part Number (Manual): 4861655
Revision: June 11, 2014
Page | 2
Page 3

TABLE OF CONTENTS
INTRODUCTION ........................................................................................................................................... 4
General Safety Considerations ................................................................................................................. 4
Engineering Improvements ....................................................................................................................... 5
Contacting Assistance ............................................................................................................................... 5
RECEIVING YOUR INCUBATOR ................................................................................................................ 6
Inspecting the Shipment ............................................................................................................................ 6
Recording Data Plate Information ............................................................................................................. 6
GRAPHIC SYMBOLS ................................................................................................................................... 7
INSTALLATION ............................................................................................................................................ 8
Location ..................................................................................................................................................... 8
Lifting and Handling .................................................................................................................................. 8
Leveling ..................................................................................................................................................... 8
Platform Installation ................................................................................................................................... 9
Power Source ............................................................................................................................................ 9
Cleaning .................................................................................................................................................... 9
OPERATION ............................................................................................................................................... 10
Features .................................................................................................................................................. 10
Powering Up ............................................................................................................................................ 10
Setting the Temperature ......................................................................................................................... 10
Setting the Runtime ................................................................................................................................. 10
Setting the Mixing Speed ........................................................................................................................ 11
Run Interrupted Alert ............................................................................................................................... 11
Error Messages ....................................................................................................................................... 11
Display Failure ......................................................................................................................................... 12
Cleaning .................................................................................................................................................. 13
Disinfecting .............................................................................................................................................. 13
UNIT SPECIFICATIONS ............................................................................................................................. 15
Weight ..................................................................................................................................................... 15
Unit Dimensions ...................................................................................................................................... 15
Osculation Rate ....................................................................................................................................... 15
Shaking Weight ....................................................................................................................................... 15
Temperature ............................................................................................................................................ 16
Power ...................................................................................................................................................... 16
ACCESSORIES .......................................................................................................................................... 17
3 | P a g e
Page 4

INTRODUCTION
Thank you for purchasing a Sheldon Shaking Incubator 2. We know that in today’s competitive
marketplace, customers have many choices when it comes to constant temperature equipment. We
appreciate you choosing ours. Our continued reputation as a leading laboratory product
manufacturer rests with your satisfaction. Sheldon Manufacturing, Inc. stands behind our products,
and we will be here if you need us.
These incubators are intended for professional, industrial, or educational use. They are not
designed for use in hazardous or household locations.
Before using the incubator read this entire manual carefully to understand how to install, operate,
and maintain the unit in a safe manner. Keep this manual available for use by all workstation
operators. Ensure that all operators are given appropriate training prior to using the incubator.
GENERAL SAFETY CONSIDERATIONS
Note: Failure to follow the guidelines and instructions in this manual may create a protection
impairment by disabling or interfering with the unit’s safety features. This can result in injury
or death.
Your shaking incubator and its recommended accessories are designed and tested to meet strict
safety requirements. Only use this equipment for its intended application; any alterations or
modifications void the warranty.
For continued safe operation of your incubator, always follow basic safety precautions including:
Follow all local or regional ordinances in your area regarding the use of this unit. If you
have any questions about local regulations, please contact the appropriate local agency.
Use only approved accessories. Do not modify system components. Any alterations or
modifications to your incubator can be dangerous and void your warranty.
Always plug the incubator power cord into an earth grounded electrical outlet that conforms
to national and local electrical codes. If the incubator is not grounded properly, parts such
as knobs and controls can conduct electricity and cause serious injury.
Avoid damaging the power cord. Do not bend it excessively, step on it, or place heavy
objects on it. A damaged cord can be a shock or fire hazard. Never use a power cord if it is
damaged.
Do not position the incubator in such a manner as to make it difficult to unplug the unit in
the event of an emergency.
Do not attempt to move the incubator while in operation.
Page | 4
Page 5

INTRODUCTION (CONTINUED)
ENGINEERING IMPROVEMENTS
Sheldon Manufacturing continually improves all of its products. As a result, engineering changes
and improvements are made from time to time. Therefore, some changes, modifications, and
improvements may not be covered in this manual. If your unit’s operating characteristics or
appearance differs from those described in this manual, please contact your Shel Lab dealer or
distributor for assistance.
CONTACTING ASSISTANCE
If you are unable to resolve a technical issue with your incubator, please contact Sheldon Technical
Support. Phone hours for Sheldon Technical Support are 6am – 4:30pm Pacific Coast Time (west
coast of the United States, UTC -8). Please have the following information ready when calling or
emailing Technical Support: the model number and the serial number (see page 6).
EMAIL: tech@shellab.com PHONE: 1-800-322-4897 extension 2, or (503) 640-3000 FAX: (503)
640-1366
Sheldon Manufacturing INC.
P.O. Box 627
Cornelius, OR 97113
5 | P a g e
Page 6

Model Number
Serial Number
RECEIVING YOUR INCUBATOR
Before leaving the factory, all incubators are packaged in high-quality shipping materials to provide
protection from transportation-related damage.
When an incubator leaves the factory, safe delivery becomes the responsibility of the carrier.
Damage sustained during transit is not covered by the warranty.
When you receive your incubator, inspect it for concealed loss or damage to its interior and
exterior. If you find any damage to the incubator, then follow the carrier’s procedure for claiming
damage or loss.
INSPECTING THE SHIPMENT
Carefully inspect the shipping carton for damage. Report any damage to the carrier service that
delivered the incubator. If the carton is not damaged, open the carton and remove the contents.
The incubator comes with a power cord and manual.
Carefully check all packaging before discarding. Save the shipping carton until you are sure
everything works properly.
If you must return the incubator for any reason, first contact your service representative for
authorization (RMA). You must provide the unit’s data plate information. See Recording Data Plate
Information below.
RECORDING DATA PLATE INFORMATION
Locate the data plate on the back of the incubator. The data plate contains the incubator model
number and serial number. Enter this information below for future reference.
Date Plate Information
Page | 6
Page 7

Symbol
Definition
Indicates that you should consult your service manual for further instructions.
Indique que l'opérateur doit consulter le manuel d'utilisation pour y trouver les instructions
complémentaires.
Indicates protective earth ground
Repère terre électrique
Indicates UP and DOWN respectively
Touches de déplacements respectifs vers le HAUT et le BA
Indicates: Caution hot surface
Indique: Avertissement symbole de surface chaude
Indicates Potential Shock Hazard
Signale danger électrique
GRAPHIC SYMBOLS
The shaking incubator is provided with graphic symbols on its interior and exterior surfaces. The
symbols identify hazards and the functions of the adjustable components, as well as important
notes in the user manual.
7 | P a g e
Page 8

INSTALLATION
This incubator is intended for use indoors, at room temperatures between 5C and 60C (41F and
140F), at no greater than 80% Relative Humidity at 25C (77F). Allow a minimum of 2 inches
(5cm) between the rear and sides of the incubator and walls or partitions.
Operating the unit outside of these conditions may adversely affect the temperature range
and stability.
For conditions outside of those listed above, please contact your distributor or Sheldon Sales to
explore other incubator options suited to your laboratory or production environment.
LOCATION
When selecting a location to install the incubator, consider all environmental conditions that can
affect unit’s effective temperature range, uniformity, and stability. For example:
Ovens, autoclaves, and any device that produces significant radiant heat
Heating and cooling ducts, or other sources of fast moving air currents
High-traffic areas
Direct sunlight
LIFTING AND HANDLING
The incubator is heavy and bulky. Care should be taken to use appropriate lifting assistance
devices that are sufficiently rated for these loads. Follow these guidelines when lifting and handling
the incubator.
Remove all samples and media containers.
The lid should be closed.
Lift the incubator only from its bottom surface.
LEVELING
For safe use, the incubator must be level and stable.
Page | 8
Page 9

INSTALLATION (CONTINUED)
PLATFORM INSTALLATION
The SSI2 and SSI2-2 come with a flat non-stick platform for low speed operation with common
vessels, including trays and dishes. To install an optional platform the user must:
Unscrew the four aluminum, platform thumb screws from the corners of the internal
platform and remove the green rubber mat.
Clean any dirt or debris from the metal base-platform and apply the desired optional
platform so that the four corner holes are aligned.
Screw in the four aluminum, platform thumb screws tightly by hand.
POWER SOURCE
Always position the unit so the end-user has access to the power plug.
Check the data plate for voltage and ampere requirements before making a connection. If the
requirements match your power source, plug the power cord into an earth grounded outlet.
Supplied voltage must not vary more than 10% from the data plate rating. Damage to the
incubator may result if supplied voltage varies more than 10%.
These incubators are intended for a 50/60 Hz application. Use a separate circuit to prevent loss of
product due to overloading or circuit failure.
Note: Electrical supply to the incubator must conform to all national and local electrical codes.
CLEANING
The incubator interior was cleaned at the factory but not sterilized. See the Cleaning topic in the
User Maintenance section for more information.
9 | P a g e
Page 10

OPERATION
FEATURES
Constant Monitoring System (CMS) ensures precise control over speed and temperature.
Extremely compact.
Acryl lid allows internal viewing without disturbance.
Brushless DC motor and beltless drive system minimizes noise and vibration.
Digital control panel displays temperature, speed, time.
A circulation fan helps to ensure even air heating within the closed incubation space.
Optional accessories available for most common laboratory vessels.
POWERING UP
Push the power switch located on the rear of the machine to the ( I ) ON position. The display will
illuminate.
SETTING THE TEMPERATURE
To enter a temperature for the incubator, press the SET key located underneath the °C temperature
display. An adjustable temperature set point will be displayed and will blink continuously. The set
point can be adjusted by using the UP (▲) and DOWN (▼) keys. Once the desired temperature set
point is displayed, press the SET key to confirm save.
Note: If the SET key is not pressed, the incubator will revert to the previous temperature.
SETTING THE RUNTIME
To enter a runtime, press and hold the RPM / TIME key for until LED display reads "t 00.00". Press
the SET key located underneath the RPM / Time display. An adjustable runtime will be displayed
and will blink continuously. The runtime can be adjusted by using the UP (▲) and DOWN (▼) keys.
Once the desired runtime is displayed, press the SET key again to confirm and save.
Note: If the SET key is not pressed, the incubator will revert to the previous runtime setting.
Page | 10
Page 11

OPERATION (CONTINUED)
SETTING THE MIXING SPEED
To select a mixing speed, press and hold the RPM / TIME key for approximately 2 seconds until
LED display shows the current set mixing speed in RPMs. Press the SET key located underneath
the time/speed display. The set speed is displayed and will blink continuously. It can be adjusted by
using the UP (▲) and DOWN (▼) keys. Once the desired speed in RPMs is displayed, press the
SET key to confirm and save.
Note: If the SET key is not pressed, the incubator will revert to the previous RPM setting.
Note: The speed should never be set below 30 rpm.
RUN INTERRUPTED ALERT
“STOP” will appear in the display when the unit is powered up, if the prior run was interrupted and
did not finish. This alert will appear if the START / STOP button was pressed prior to completion of
a run.
ERROR MESSAGES
Low Speed Error
“rErrL” indicates a low speed error.
1. Check to ensure that nothing is obstructing the platform movement.
2. Check the set speed to make sure that it is within the acceptable range (30 to 300 rpm)
Solution: Manually move the platform. While the platform is moving, press and simultaneously hold
the START / STOP key and SET key located below the RPM / TIME display.
11 | P a g e
Page 12

OPERATION (CONTINUED)
High Speed Error
This “rErrH” message denotes a high speed error. Typically, excessive speeds happens when most
or all of the containers are removed from the shaker while it is in operation.
Solution: If a container has been removed, replace the container or restart the machine.
Electrical Error
The “Error” message indicates an electrical error. This occurs if the unit has lost power during a
run.
Solution: Check that the power cord is properly installed, check that the power supply circuit has
not been interrupted, and restart.
DISPLAY FAILURE
If the display will not illuminate, check the following:
Electrical connection - disconnect main power cord and connect again.
Voltage supply - check the voltage.
Verify voltage on the data plate on the back of the incubator.
Blown fuse - check the fuse.
Defective power switch - check the voltage at switch.
Page | 12
Page 13

USER MAINTENANCE
Warning: Prior to any maintenance or service on this unit, disconnect the power cord from the power
supply.
Avertissement: Avant d'effectuer toute maintenance ou entretien de cet appareil, débrancher le
cordon secteur de la source d'alimentation.
If a hazardous material/substance has spilled in the incubator immediately initiate your site’s
Hazardous Material Spill Containment protocol. Contact your local Site Safety Officer and follow
instructions per the site policy and procedures.
In the event of a non-hazardous spill: Power down the unit, remove the platform and dry the internal
chamber with a soft cloth. Do not operate the unit until the spillage had been properly dried.
Periodic cleaning and disinfection are required to prevent microbiological contamination.
CLEANING
Note: The incubator chamber should be cleaned and disinfected prior to use.
Perform the following steps to clean incubator.
1. Remove all of the interior parts (shelves, racks, and any additional items), if assembled.
2. Clean the incubator with a mild soap and water solution, including all corners.
3. Rinse with distilled water and wipe dry with a soft cloth. Do not use deionized water.
4. Take special care when cleaning around the door alarm and temperature sensor heads,
and the chamber’s electrical outlet to prevent damage.
Warning: Never clean the unit with alcohol or flammable cleaners.
Avertissement: Ne jamais nettoyer l'appareil à l'alcool ou avec des nettoyants inflammables.
Note: Do not use spray cleaners or disinfectants that might leak through openings and cracks and
coat electrical components, or that contain solvents that will harm coatings. Do not use
chlorine-based bleaches or abrasives; they will damage the chamber liner and acryl lid.
DISINFECTING
Disinfect the incubator on a regular basis. Perform the below steps to disinfect the incubator:
1. Remove all of the interior parts (shelves, racks, and any additional items), if assembled.
Disinfect the Incubator, including all corners and the access port, using a suitable
disinfectant. Take special care when cleaning around sensing heads to prevent damage
and around the door gasket so as not to impair the positive seal.
2. Disinfect the incubator using commercially available disinfectants that are non-corrosive,
non-abrasive, and suitable for use on stainless steel, aluminum, painted steel surfaces.
Contact your local Site Safety Officer for detailed information for the proper disinfectants
suitable for your operation and laboratory protocol.
13 | P a g e
Page 14

USER MAINTENANCE (CONTINUED)
Electrical components do not require maintenance. If the incubator fails to operate as specified,
please contact Sheldon Technical Support for help.
Page | 14
Page 15

Model
Weight
SSI2 SSI2-2
45 lbs / 20.4 kg
Model
Exterior W × D × H
Platform W x D
SSI2 SSI2-2
11.3 x 15.8 x 11.5 in
9.5 x 11.5 in
Model
Exterior W × D × H
Platform W x D
SSI2 SSI2-2
28.6 x 40.01 x 29.3 cm
23.5 x 29.2 cm
Model
RPMs
SSI2 SSI2-2
30 to 400 RPMs in 1 RPM increments
Model
RPMs
SSI2 SSI2-2
9 lbs / 4 kg
UNIT SPECIFICATIONS
Each incubator is a 110 - 120 or 230 AC voltage unit. Please refer to each incubator’s data plate for
its electrical specifications.
Technical data specified applies to units with standard equipment at an ambient temperature of
25°C and a voltage fluctuation of ±10%. The temperatures specified are determined in accordance
to factory standard following DIN 12880 respecting the recommended wall clearances of 10% of the
height, width, and depth of the inner chamber. All indications are average values, typical for units
produced in the series. We reserve the right to alter technical specifications at all times.
WEIGHT
UNIT DIMENSIONS
In inches
In Centimeters
OSCULATION RATE
SHAKING WEIGHT
15 | P a g e
Page 16

Model
Temp Range
Uniformity
SSI2 SSI2-2
Ambient +5 to 70C
±0.25 @ 20C
Model
Voltage
Frequency
SSI2
110 -120VAC
50/60 Hz
SSI2-2
230VAC
50/60 Hz
UNIT SPECIFICATIONS (CONTINUED)
TEMPERATURE
POWER
Page | 16
Page 17

Description
Part Number
Image
Magnetic Flask Clamp, 50ML 5lbs / 2.28 kg
1150523
Magnetic Flask Clamp, 125ML 5lbs / 2.28 kg
1150512
Flask Clamp, 250ML 5lbs / 2.28 kg
1150511
Flask Clamp, 20ML 5lbs / 2.28 kg
1150510
Dedicated Platform, 12 X 125ML 5lbs / 2.28 kg
6420503
Dedicated Platform, 8 X 250ML 5lbs / 2.28 kg
6420502
Dedicated Platform, 5 X 500ML 5lbs / 2.28 kg
6420501
Dedicated Platform, 4 Microplates 5lbs / 2.28
kg
6420504
ACCESSORIES
Continued on next page
17 | P a g e
Page 18

Description
Part Number
Image
Universal Spring Platform 5lbs / 2.28 kg
6420505
Universal Magnetic Platform 5lbs / 2.28 kg
6420500
Tube Rack 15ML x 50ML Conical Tubes 5lbs
/ 2.28 kg
1150513
Tube Rack 15ML x 500ML Conical Tubes
5lbs / 2.28 kg
1150533
Tube Rack 32ML x 15ML Conical Tubes 5lbs
/ 2.28 kg
1150532
Rack for 3 x 500ML Bottles 5lbs / 2.28 kg
1150534
Magnetic Microplate Clamp 5lbs / 2.28 kg
1150538
ACCESSORIES (CONTINUED)
Page | 18
Continued on next page
Page 19

Description
Part Number
Image
Horizontal Tube Rack 12 x 1.5 / 2ML 5lbs /
2.28 kg
1150535
Horizontal Tube Rack 2 x 50ML 5lbs / 2.28 kg
1150537
Horizontal Tube Rack 4 x 15ML 5lbs / 2.28 kg
1150536
ACCESSORIES (CONTINUED)
19 | P a g e
Page 20

 Loading...