

Page 1

ELECTRONIC ORGANIZER
OPERATION MANUAL
Instrucciones abreviadas en español
CONTENTS
Using the Organizer for the First Time ................................................ 1
Auto Shut OFF ............................................................................. 2
Backlight ....................................................................................... 2
Adjusting the LCD Contrast ......................................................... 2
Tu r ning the key sound On and Off ............................................... 2
Memory Check ............................................................................. 2
Display Symbols and Part Names ...................................................... 3
Entering Characters ............................................................................ 5
Built-in Calendar and Clock ................................................................ 6
Clock Mode .......................................................................................... 6
Alarm ................................................................................................... 8
Telephone Mode .................................................................................. 9
Calendar Mode .................................................................................. 12
YO-270
Schedule Mode ................................................................................ 13
Anniversary Mode ............................................................................ 15
To Do Mode ...................................................................................... 16
Memo Mode ...................................................................................... 17
Expense Mode ................................................................................. 18
Calculator Mode ............................................................................... 21
Conversion Mode ............................................................................. 22
Secret Function ................................................................................ 24
Using the included Backup/Restore Utility ...................................... 25
Battery Replacement ........................................................................ 29
Specifications ................................................................................... 30
Instrucciones abreviadas en espanõl ............................................ S-1
39
Page 2

NOTICE
• SHARP strongly recommends that separate permanent written records be kept of all important data. Data may be lost or altered in virtually any
electronic memory product under certain circumstances. Therefore, SHARP assumes no responsibility for data lost or otherwise rendered
unusable whether as a result of improper use, repairs, defects, battery replacement, use after the specified battery life has expired, or any other
cause.
• SHARP assumes no responsibility, directly or indirectly, for financial losses or claims from third persons resulting from the use of this product and
any of its functions, such as stolen credit card numbers, the loss of or alteration of stored data, etc.
• The information provided in this manual is subject to change without notice.
CAUTIONS
• Do not carry the Organizer in the back pocket of slacks or trousers.
• Do not drop the Organizer or apply excessive force to it.
• Do not subject the Organizer to extreme temperatures.
• Since this product is not waterproof, do not use it or store it where fluids can splash onto it. Raindrops, water spray, juice, coffee, steam,
perspiration, etc. will also cause malfunction.
• Clean only with a soft, dry cloth.
• Use only a SHARP approved service facility.
NOTES
• All company and/or product names are trademarks and/or registered trademarks of their respective manufactures.
40
Page 3

Using the Organizer for the First Time
Be sure to perform the following operations before using the Organizer
for the first time.
1. Pull out the battery insulation sheets
from the battery compartment.
The Organizer starts operation.
(The battery insulation sheets were
inserted at the factory to prevent battery
wear.)
2. Press the RESET switch.
A message, “CLEAR ALL DATA OK?” is displayed.
j
3. Use
4. Select “Yes” using
Note
• Press the RESET switch with a ball-point pen or similar object.
or l to select “Yes” and press
The message will appear as "Do you really want to initialize the
organizer's memory?"
j
or l and press
The Organizer is now initialized. Proceed to set the date and time of
the clock (Refer to page 6).
Do not use an object with a breakable or sharp tip.
x
x
.
.
If a malfunction occurs under abnormal conditions
If the organizer is subjected to strong extraneous electrical noise or
shock during use, on rare occasions, all the functions will not work
properly and data may be displayed incorrectly. In such cases, follow
the procedures as shown below.
1. Press RESET.
2. When a message, "CLEAR ALL DATA OK?" is displayed, select "No"
and press
If the first procedure doesn't work, follow the next procedure to
initialize the organizer's memory. In this case, all the stored data will
be deleted.
1. Press RESET.
2. When a message, "CLEAR ALL DATA OK?" is displayed, select
"Yes" and press
x
.
x
.
1
Page 4
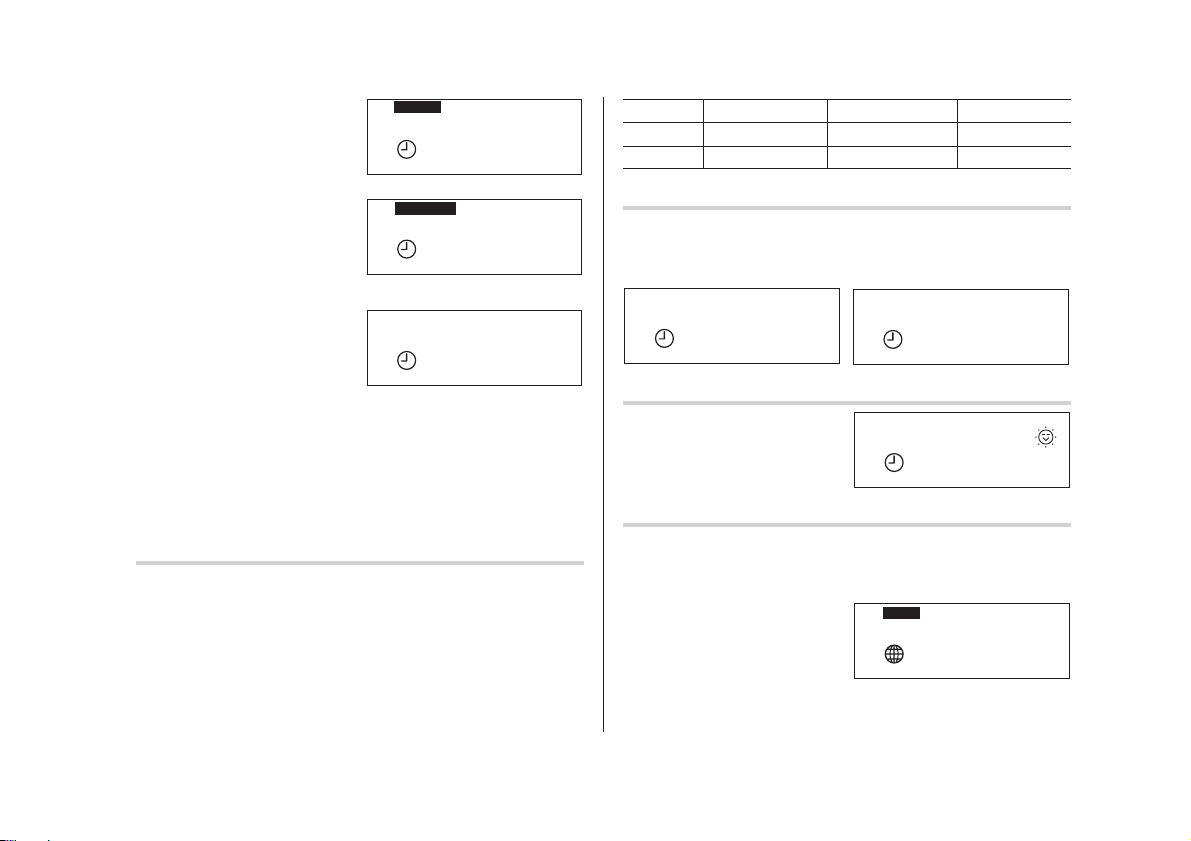
Auto Shut Off Function
Memory Free
100 %
When none of the keys has been pressed for approximately 7
minutes (initial setting), the Organizer automatically turns the power
off to save the batteries.
Setting the Auto Shut Off time
(Default: 7 minutes)
1. If the display is in another
Auto Shut Off
1 Min.
2 Min.
3 Min.
5 Min.
7 Min.
9 Min.
mode or World Clock mode,
h
press
2. Press
to enter the Home Clock mode.
W
.
The Auto Shut Off time setting window will appear.
3. Press an appropriate number key (
to 3, 5, 7,
9
) to select
1
the Auto Shut Off time.
Backlight
The Backlight allows you to view the display and use the Organizer
even in low-light conditions. Pressing
z
the display for as long as you continue to use the Organizer, or until
no key is pressed for 15 seconds.
•To turn the Backlight off, press
z
• The Backlight may remain on for less than the preset interval or it
may not function if the battery level is low.
• The Backlight does not function during data transfer.
once illuminates
again.
Do not use the Backlight unnecessarily.
• Since the Backlight drains power from the operating batteries,
excessive use of the Backlight will significantly reduce the life of
your batteries.
Adjusting the LCD Contrast
Press > or < in the Home Clock mode.
The LCD display will become brighter each time
<
darker each time
is pressed.
>
is pressed and
Adjust the contrast to the level you find best for viewing.
Tur ning the key sound On and Off
Press } in Home Clock mode to set the key sound On and Off.
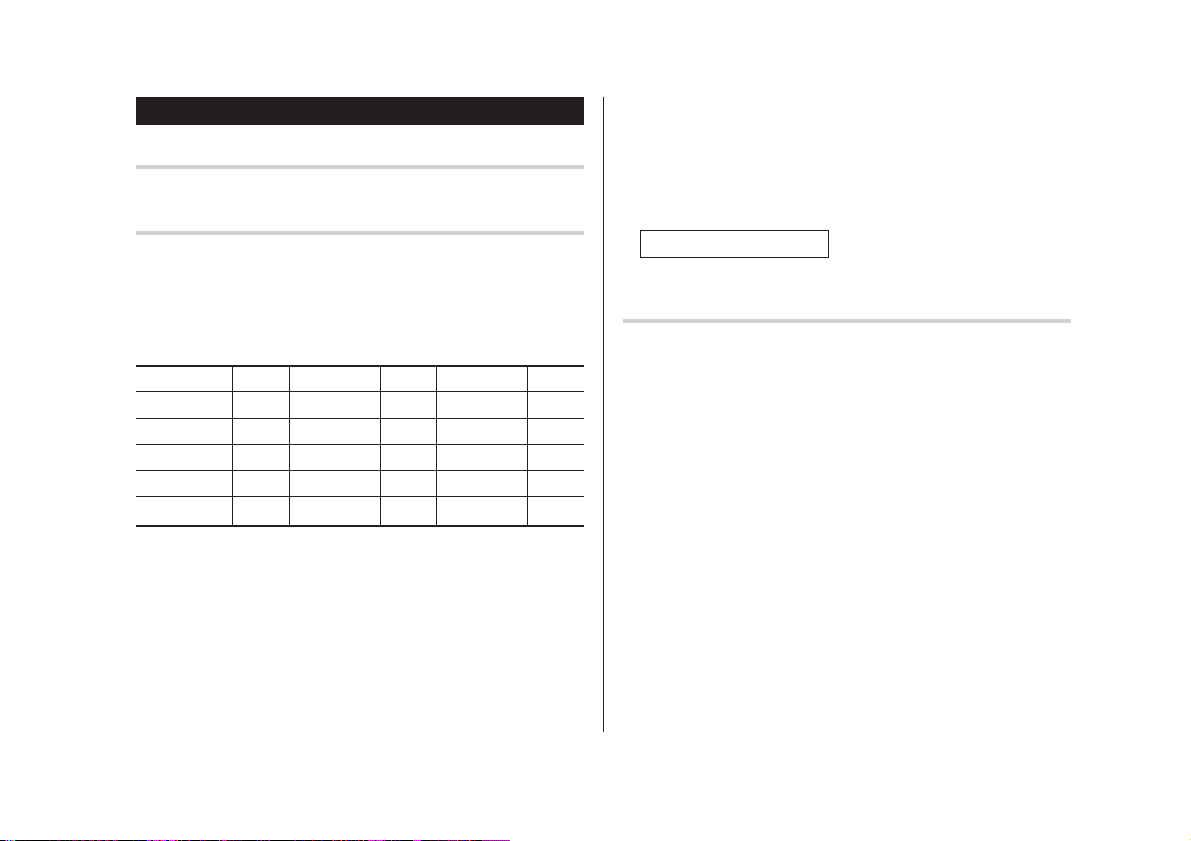
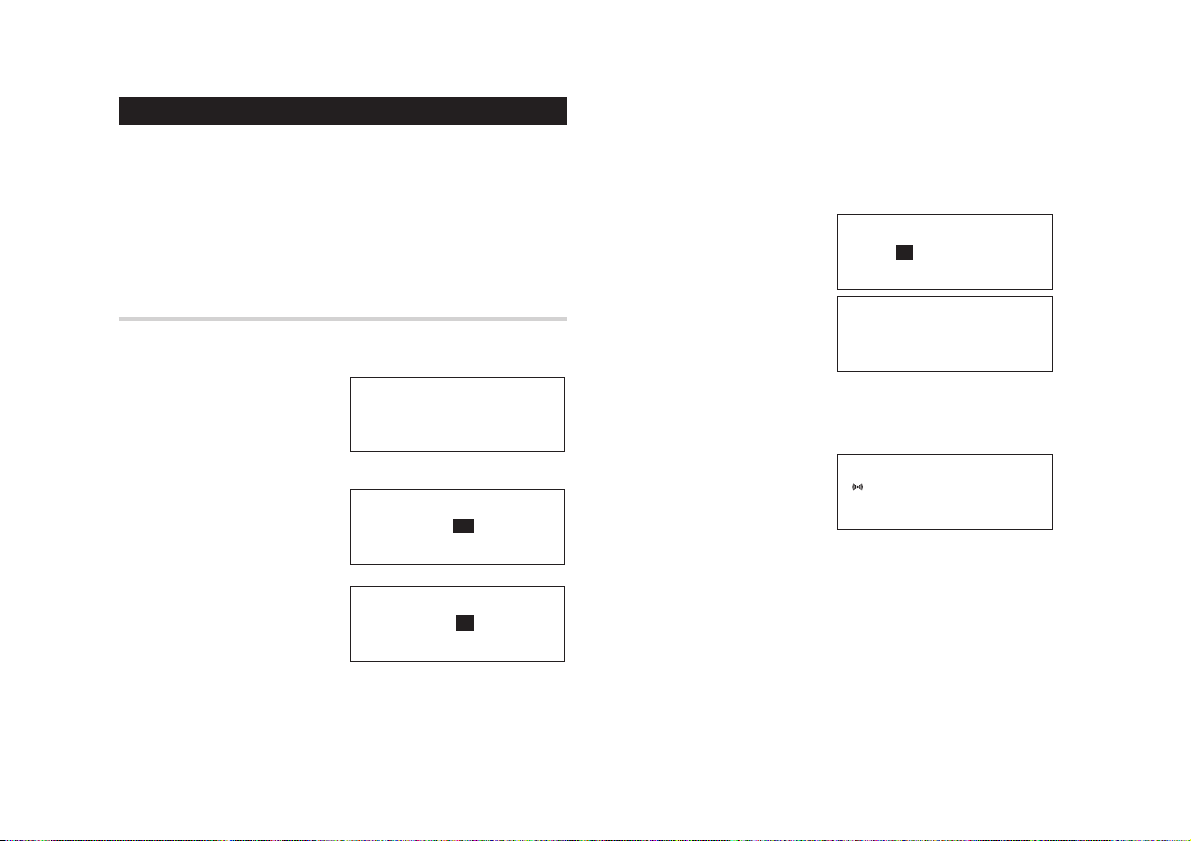
Memory Check
Press K in Home Clock
mode.
The memory check window will
appear.
Press any key to return to Home Clock mode.
2
Page 5

Display Symbols and Part Names
Display Symbols
Alarm sound: The Alarm Clock is ON.
Alarm sign: Appears on the display when the alarm sounds.
Schedule Alarm: The schedule alarm is ON.
Schedule Alarm sign: Appears on the display when the
schedule alarm sounds.
Anniversary sign: Indicates that a special day will arrive within
days as set in Reminder.
>
UP sign: More information exists above the current display.
k
(Press
<
DOWN sign: More information exists below the current display.
(Press
C
CAPS LOCK sign: Capital (uppercase) letters will be entered.
To enter small (lowercase) letters, press
“CAPS” off.
b
Beep sound: Key touch sound (beep) is ON.
E
EDIT function: The listing on the display can be edited.
.)
m
.)
$
to turn
2
2nd function: Indicates that f has been pressed.
Alarm sign: The daily alarm is ON.
B
Low Battery sign: Indicates that the battery level is extremely
low.
• The display examples in this manual show only the symbols required
for each explanation.
3
Page 6
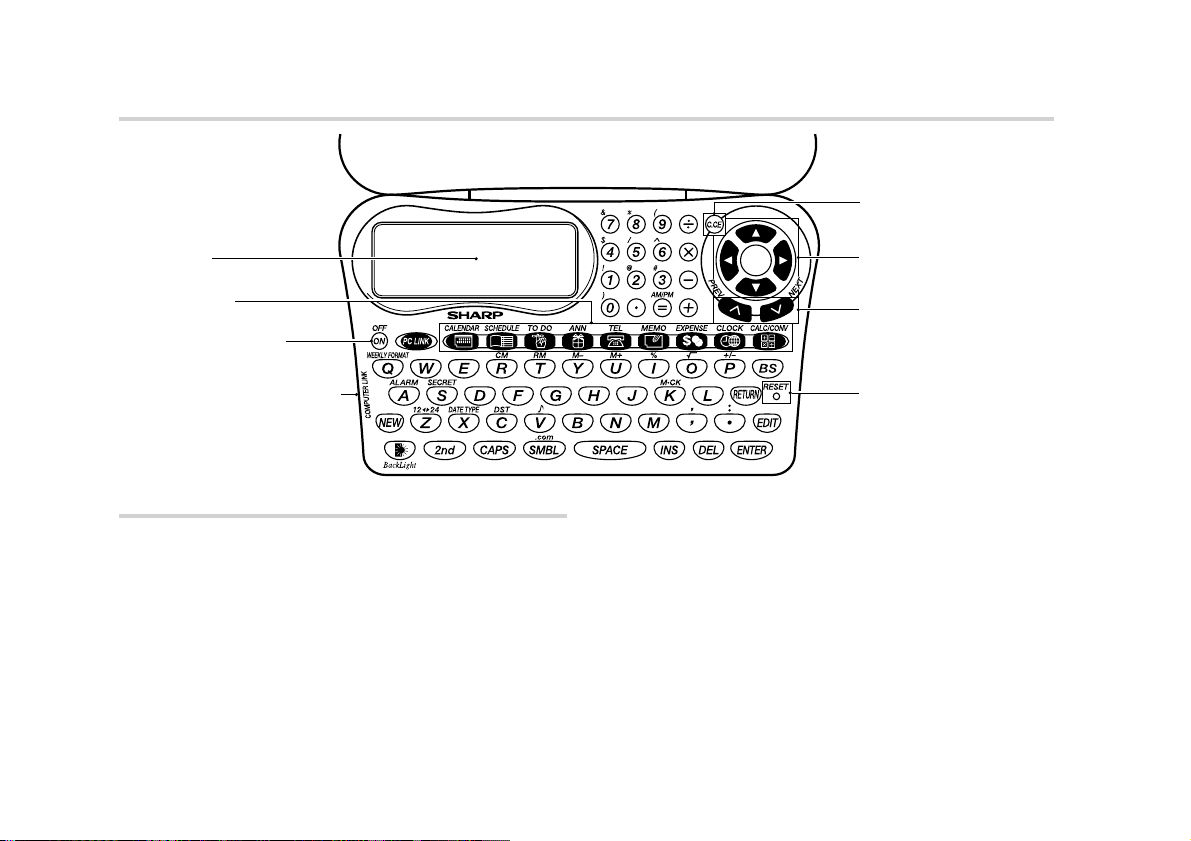
Part Names
Clear/Clear entry key
Display
Mode keys
Power ON/OFF key
Option port (3-pin option jack)
Key Assignments
x
: ENTER key
n
: NEW entry key
e
: EDIT key
d
: DELETE key
i
: INSERT key
r
: RETURN key
Used to exit the current mode.
4
Cursor navigation keys
Search keys
RESET switch
f
: 2nd Function key
Activate the second function specifically assigned to the next key pressed.
Also functions for special characters assigned to the number keys.
$
: CAPS key
Functions as CAPS LOCK. It is used to select capital (uppercase) or small
(lowercase) letters.
In this manual the keys are represented by symbols, for example:
&
→&
7
: Indicates the “&” key.
→7
: Indicates the numeric “7” key.
Page 7
Entering Characters
Moving the Cursor
Move the cursor by pressing j, l, k, or m .
Entering Characters
1. Entering letters and numbers
The initial setting for entering letters is small (lowercase) letters. To
enter capital (uppercase) letters, turn “CAPS” on by pressing
2. Entering graphic symbols and special characters
Key map for special characters
Key Display Key Display Key Display
f 0
f 3
f 6
f 9
f s
)
#
^
(
.com
f 1
f 4
f 7
f ,
!
$
&
’
f 2
f 5
f 8
f ~
$
@
Other characters
Press
s
to display the symbol entry mode, allowing a total of
11 symbols and characters to be selected. To select the desired
s
symbol/special character, press
times at the position where you would like to insert it.
Characters assigned to
? ; ” %_ L ¥ \ = ~ ^
.
Making Corrections
s
the appropriate number of
:
1. Inserting or Replacing characters
Press i, once or twice, to insert or replace characters.
2. Deleting characters
c
/
*
:
can be used for deletion of data in Calculator mode and Rate
figure in Conversion mode.
d
and b can be used for deletion of characters
d
can also be used to delete listings
• Entering characters
*
and / by themselves is not possible.
5
Page 8
a h
New York
U.S.A.
TUE DEC 24, 2002
2
:
34 : 56
PM
New York
U.S.A.
TUE 01 01, 2002
12
: 34 :
00
PM
New York
U.S.A.
TUE 01 01, 2002
03
:
34 : 00
PM
New York
U.S.A.
TUE 01 01, 2002
03
:
30 : 00
PM
New York
U.S.A.
TUE 12 01, 2002
03
:
30 : 00
PM
Built-in Calendar and Clock
Precautions
• Calendar, Schedule, Expense, and Clock modes allow you to
enter the desired date and time between Jan. 1, 1950 and Dec.
31, 2150.
• If an attempt is made to store an invalid time or date, you will not
be able to move the cursor to date entering, or store the time and
x
date by pressing
x
again.
h
Clock Mode
The Organizer has both Home Clock and World Clock modes. The
display switches between Home and World clock each time
is pressed.
Home Clock Mode
. Enter the correct value and press
h
London
United Kingdom
TUE DEC 24, 2002
7
: 34 :
56
PM
World Clock Mode
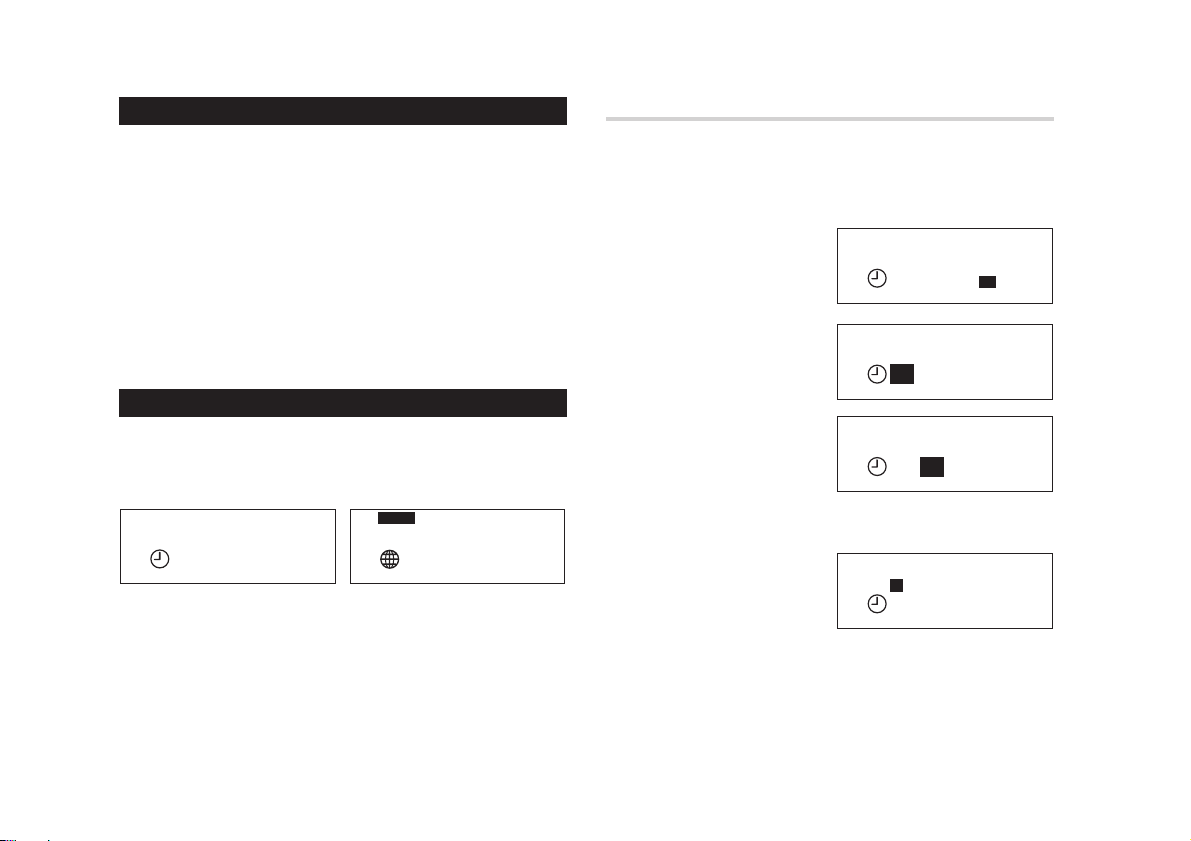
Setting the Home Clock
1. If the display is in other mode or World Clock mode, press
to enter the Home Clock mode.
e
2. Press
.
The organizer will enter the clock setting mode.
3. Select AM or PM using
(
(or k m).
l
4. Press
to move the cursor
to the Hour position.
5. Enter the appropriate hour.
l
6. Press
to move the cursor.
Enter the minutes in the same
way.
The seconds position can not
be edited. Timekeeping starts from 00 immediately after you set the
clock.
l
7. Press
to move the cursor
to the Month position.
8. Enter the appropriate month.
l
to move the cursor
Press
to the Day position. Enter the day and then year in the same way.
h
6
Page 9
9. Press j or l to move the
Los Angeles
U.S.A.
TUE DEC 24, 2002
3
: 30 :
01
PM
cursor to the City position.
10
.Select your Home city using
k
or m.
The Organizer has 96 time
zone cities. If your city is not
New York
U.S.A.
TUE 12 24, 2002
03
: 30 :
Los Angeles
U.S.A.
TUE 12 24, 2002
:
03
30 :
00
00
PM
PM
listed, use the nearest city in
the same time zone as your Home city.
11
.Press
x
to set the
Clock.
The clock starts from exactly
Los Angeles
U.S.A.
TUE DEC 24, 2002
3
: 30 :
01
PM
the set time (xx:xx:00).
Note
•To select your Home city quickly at Step 10, move the cursor to the
l
Country position using
m
. Then move the cursor back to the City position using j and
select a city name using
and select the desired country using k or
k
or m.
Selecting the date format (Default: Month-Day-Year)
1. Press
X
desired date format.
Month-Day-Year ➠ Year-Month-Day ➠ Day-Month-Year
Note
• There may be differences in month display between input/edit mode
and search mode. Refer to the following table.
the appropriate number of times to select the
Mode Month-Day-Year Year-Month-Day Day-Month-Year
Input/Edit 01 24 2002 2002 01 24 24 01 2002
Search JAN 24, 2002 2002 JAN 24 24 JAN 2002
Selecting the 12- or 24-hour time systems (Default: 12 hour)
1. Press
Z
the appropriate number of times to select the 12
hour or 24 hour systems.
12 hour 24 hour
Los Angeles
U.S.A.
TUE DEC 24, 2002
15
: 30 :
01
Setting Daylight Saving Time (DST) ON/OFF
1. Press C once to switch
the DST setting.
Los Angeles
U.S.A.
THU AUG 8, 2002
:
3
34 :
56
PM
Changing the World Clock zone to the Home time zone
When traveling abroad, you can easily change Home Clock settings by
changing the time zone.
1. Press
h
to enter the World Clock mode.
2. Select the desired city using
k
or m .
London
United Kingdom
TUE DEC 24, 2002
:
7
34 : 56
PM
7
Page 10
c
–Alarm 1–
MM/DD
7 : 30 AM
Notes:
Morning Call
I
–Alarm 1–
MM/DD
7 : 30 AM
Morning Call
–Alarm 1–
7 : 30
11/10
Alarm
The organizer has the following three Alarm modes. Once you set
an alarm, a beep sounds for 1 minute at the set time every day or
for a specific date.
Alarm 1: sounds beep two times then interval, repeatedly
Alarm 2: sounds beep three times then interval, repeatedly
Alarm 3: sounds beep four times then interval, repeatedly
Setting the alarm time (and date)
1. If the display is in another mode or World Clock mode, press
h
to enter the Home Clock mode.
2. Press
A
to enter the
Alarm Mode.
Alarm 1 mode will appear.
3. Select an Alarm mode from 1 to 3 using
4. Press
e
.
Alarm setting mode appears
and the cursor flashes on the
hour field.
5. Enter the hour.
Note
• Enter the numbers in 24-hour
format.
–Alarm 1–
MM/DD
<
- - : - -
or >, if required.
–Alarm 1–
MM/DD
- - : - -
–Alarm 1–
MM/DD
07 : - -
• An alarm setting may not be possible for certain days in the next
year.
6. Move the cursor using
7. Enter the minutes.
Continue to enter the date you wish to set in the same manner.
If you wish an everyday alarm
such as a morning call, keep
the date/month field empty.
8. Press
x
9. Enter some comment for your
reminder.
Note
• Up to 40 characters can be entered.
10.
Press
x
The Alarm icon will appear on
the display.
Note
• Once the Alarm is set, the set data cannot be deleted.
j
or l to the minute field.
.
.
8
Page 11
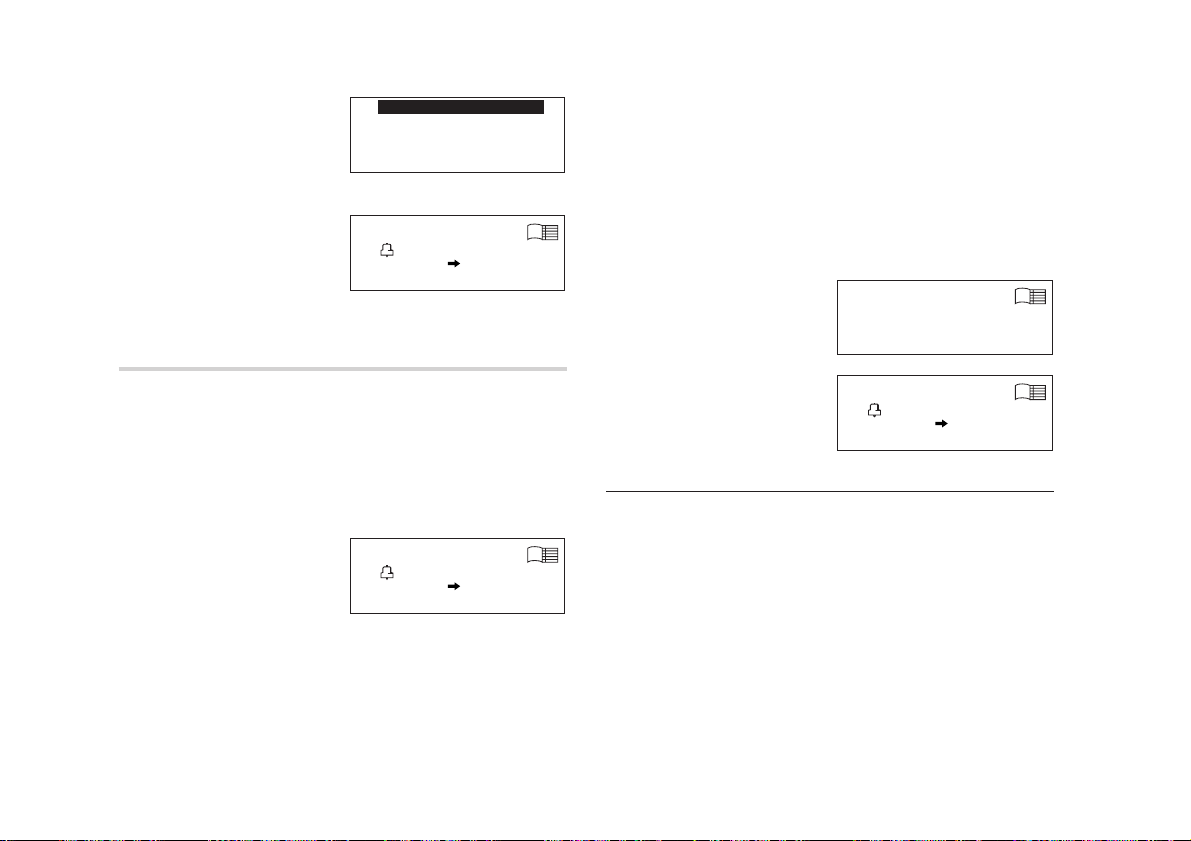
Switching the alarm OFF (or ON)
Others
Search Name?
I
Personal
Search Name?
I
1. If the display is in another mode or World Clock mode, press
h
to enter the Home Clock mode.
2. Press
A
to enter the
Alarm Mode.
Alarm 1 mode will appear.
3. Select an Alarm mode from 1 to
<
3 using
4. Press
The alarm icon will disappear
and the alarm will be set to
OFF.
Press
or >, if required.
A
again.
A
again to set the alarm ON.
–Alarm 1–
MM/DD
7 : 30 AM
Morning Call
–Alarm 1–
MM/DD
- - : - -
To stop the Alarm
Press any key to stop the alarm.
v
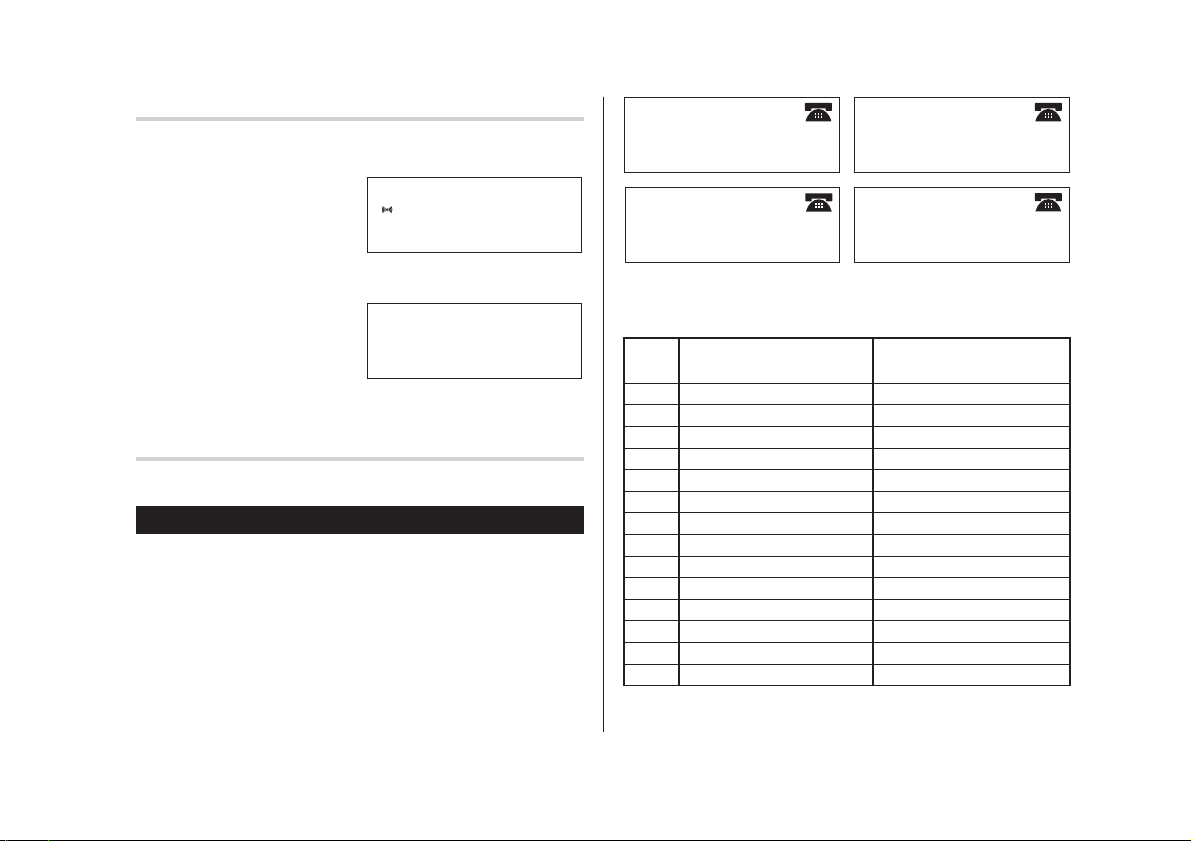
Telephone Mode
There are three telephone entry categories, Personal, Business,
and Others. Each entry can be simply classified for easy access to
the data. All can be used to search for listings from the three
telephone categories.
v
Each time you press
manner:
, the display will change in the following
Business
Search Name?
I
All
Search Name?
I
Each entry has the following 14 fields.
Maximum number of
Field Name alphanumeric characters
1 Last name: 48
2 First name: 48
3 Company: 96
4 Home#: 48
5 Office#: 48
6Fax#: 48
7 Other#: 48
8 Address: 96
9 City: 48
10 State: 48
11 Zip code: 48
12 Country: 48
13 E-mail: 48
14 Notes: 96
9
Page 12
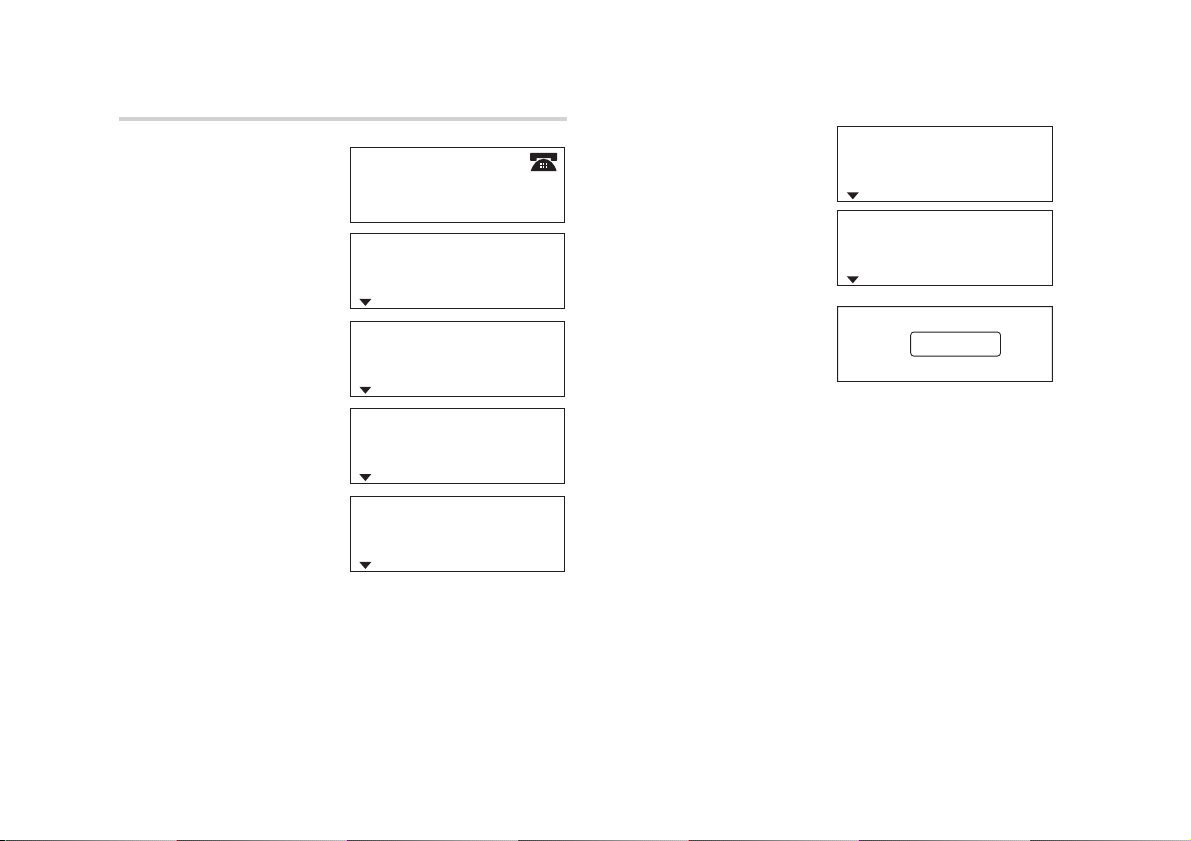
Entry
First name
Company
Home#
Office#
Fax#
John
ABC Interna..
585-4280
I
Last name Smith
First name
Company
Home#
Office#
Fax#
John
ABC Interna..
585-4280
619-542-732. .
I
Last name Smith
Stored !
<Example>
v
1. Press
2. Press
The display will change to the
record input mode.
3. Enter the Last name.
For example, “Smith”
4. Press
then enter the First name. For
example, “John”
5. Press
the cursor to the Company and
enter “ABC International Co.”
to select Business.
n
.
x
or m ,
x
or m to move
Business
Search Name?
I
Last name
I
First name
Company
Home#
Office#
Fax#
Last name Smith
First name
Company
Home#
Office#
Fax#
Last name Smith
First name
Company
Home#
Office#
Fax#
Last name Smith
First name
Company
Home#
Office#
Fax#
I
John
I
John
ational Co.
I
6. Press
x
or m to move the cursor to the Home #.
7. Enter “585-4280”.
x
8. Press
or m to move
the cursor to the Office # and
enter “619-542-7320#33”.
f 3
*Press
to enter #.
9. Enter each category in the
same manner.
10.
At the Notes field, Press
x
to store the data.
The Business Search display will appear.
Note:
• The data cannot be stored unless Home#, Office#, Fax# or Other#
field is entered.
10
Page 13
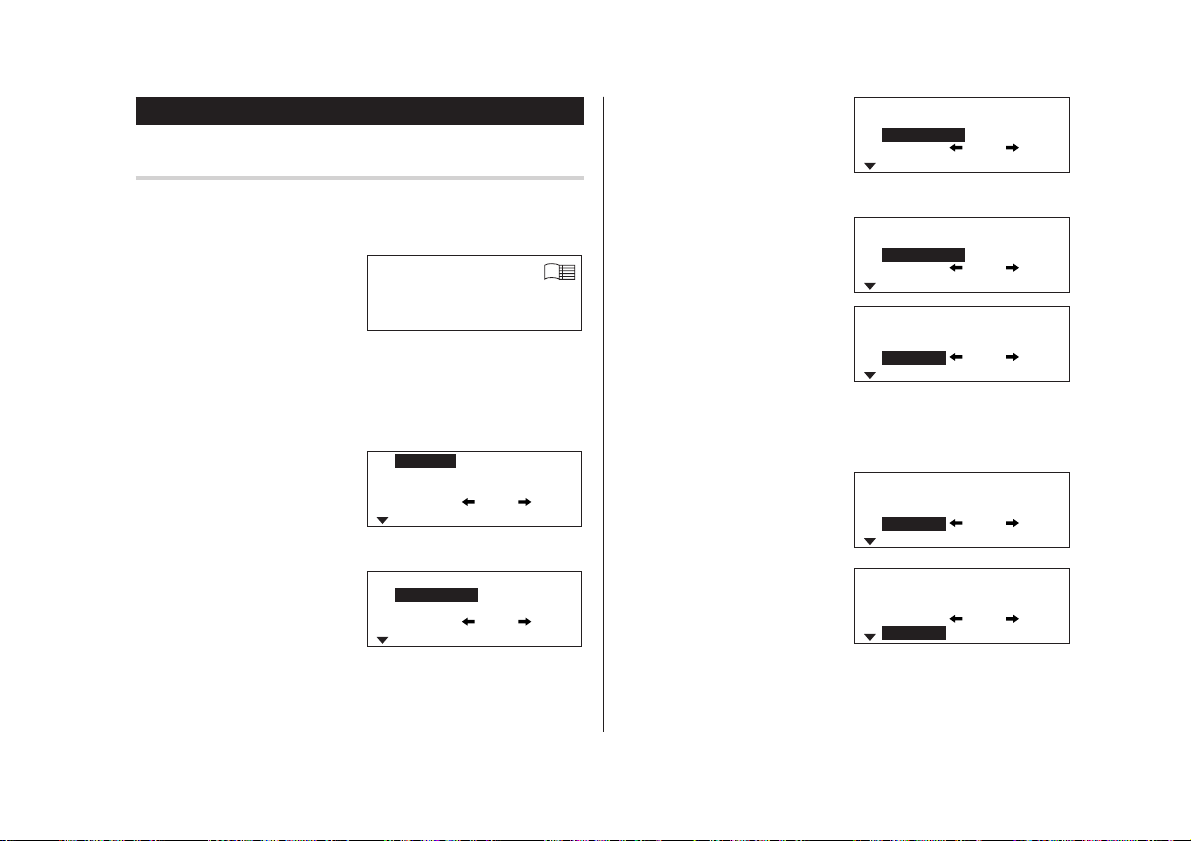
Search
Last Name Alphabetical Search
1. Press v the appropriate number of times to enter the desired
Telephone mode.
The Search window will appear.
<
2. Press
order.
Last Name Direct Search
1. Press v the appropriate number of times to enter the desired
Telephone mode (in this case Business).
The search window will appear.
2. Enter some of the last name
letters in order.
Up to 10 letters can be
entered.
3. Press
If there is no data matched, “Not Found!” will appear, and then the
screen will return to the initial display.
or > to search for the target record in alphabetical
Business
Search Name?
Smith
I
<
or > key to search for the target record.
Company Name Direct Search
1. Press v the appropriate number of times to enter the desired
Telephone mode.
The search window will appear.
m
2. Press
3. Enter some of the company
4. Press
or k to change the search mode to “Search Company?”.
name letters in order.
Up to 10 letters can be
entered.
<
or > key to search for the target record.
Business
Search Company?
ABC
I
See also
Entering Characters ................................................... 5
Editing Listings ......................................................... 20
Deleting Listings ....................................................... 20
11
Page 14
a
S2002
2
JUN
9
16
23
30
M
3
10
17
24
T
4
11
18
25
W
5
12
19
26
T
6
13
20
27
F
7
14
21
28
S
8
15
22
29
1
Search Date?
Calendar
01-01-2002
Calendar Mode
Navigating the Monthly Calendar Display
1. Press
a
to enter the Calendar Mode.
The monthly calendar of the current month will appear.
The current day will be highlighted.
Navigate the calendar using the following keys:
< >
j
: Go to previous day
l
: Go to next day
k
: Go to the same day of the
previous week
m
: Go to the same day of the next week
•
j, l, k
: displays the following or previous month.
S2002
JUN
2
9
16
23
30
and m cursors can move only within the month
displayed.
Changing the weekly display format
The organizer has two weekly formats:
1. Press
a
below.
and then { to change between the formats
M
2002
JUN
3
10
17
24
Directly go to the target month
1. At the Calendar Mode, press
n
.
Data input screen will appear.
2. Enter the target date.
3. Press
x
.
The monthly calendar of the target date will appear.
Note: In the Calendar Mode, monthly calendars from January 1950
M
T
W
T
F
S
3
4
5
10
11
12
17
18
19
24
25
26
T
W
T
4
5
6
11
12
13
18
19
20
25
26
27
1
6
7
8
13
14
15
20
21
22
27
28
29
F
S
S
1
2
7
8
9
14
15
16
21
22
23
28
29
30
to December 2150 are available.
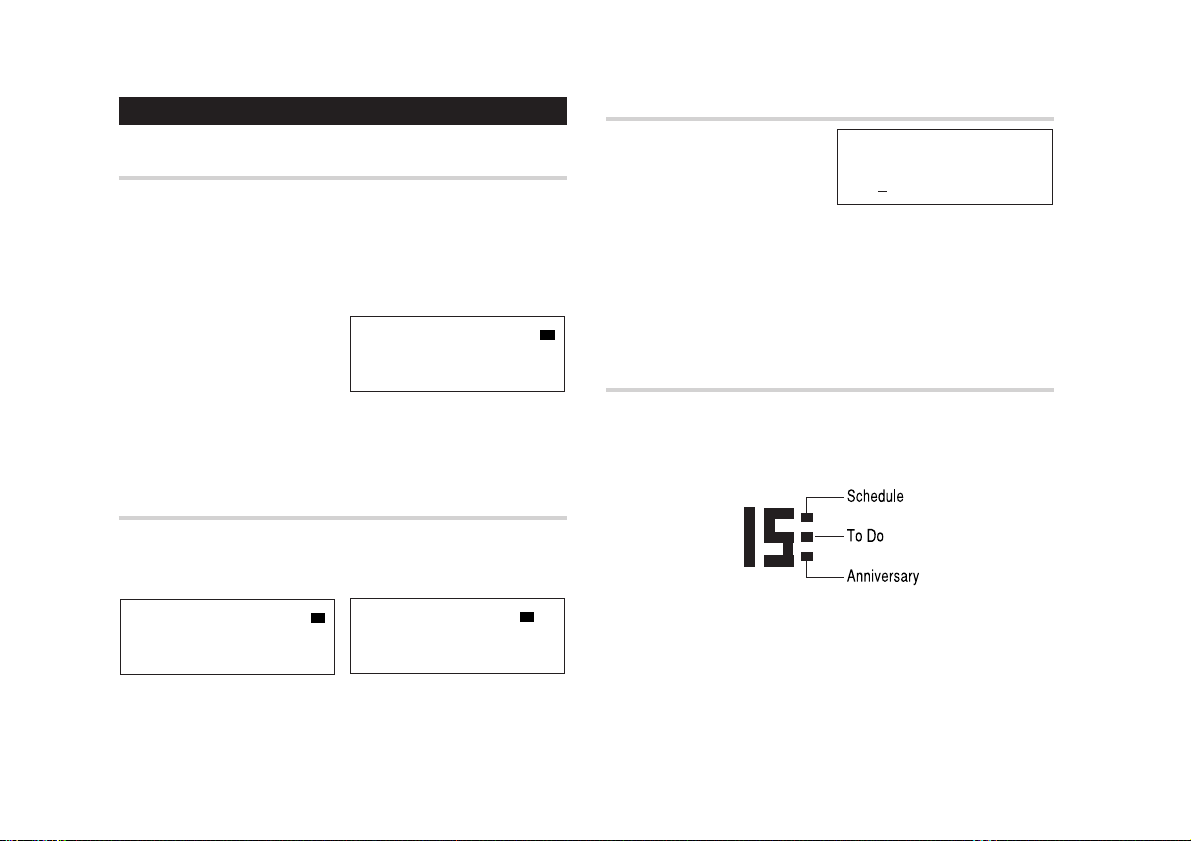
Confirmation of the Schedule, To Do, and Anniversary
Mode entries
You can see the dates to which you assigned a Schedule, To Do or
Anniversary on the monthly calendar display.
The indication marks are displayed as follows:
12
Page 15
g
Schedule Mode
Entry
<Example>
A project meeting will be held from 10:00 AM to 11:00 AM on
Setember 11, 2002
g
1. Press
Schedule Mode.
The Schedule Search window
will appear.
The current date will be displayed and the cursor under the first
number flashes.
The first number depends on your Date Format selection. These
examples are in the MM/DD/YYYY format.
n
2. Press
Entry display will appear and
Date will be highlighted. Enter
09 for month.
3. Move the cursor to the day/year field by using
target day/year in the same
manner.
x
4. Press
for Start Time.
to enter the
. The Schedule
, and enter 10:00
Schedule
Search Date?
0_8-08-2002
Date
Start Time
End Time
Alarm
Reminder
Date
Start Time
Start Time
End Time
End Time
Alarm
Reminder
09-11-2002
9:00 AM
9:00 AM
Yes
0 Min. Before
j
or l and enter the
SEP 11,2002
10:00_
9:00 AM
Yes
0 Min. Before
5. Press
x
.
“End Time” will be highlighted
and the time will automatically
change to 30 minutes after the
Date
Start Time
End Time
Alarm
Reminder
SEP 11,2002
10:00 AM
10_:30
Yes
0 Min. Before
Start Time.
6. Enter 11:00 for End time, and
x
press
7. Press
.
j
or l to select “Yes” or
“No” for Alarm setting, and
x
press
.
Date
Start Time
End Time
Alarm
Reminder
Date
Start Time
End Time
Alarm
Reminder
SEP 11,2002
10:00 AM
11:00_
Yes
0 Min. Before
SEP 11,2002
10:00 AM
11:00 AM
Yes
0 Min. Before
If you select “Yes”, the Schedule
Alarm will sound at the time set in Reminder minutes before the
Start time. If you select “No”, Schedule Alarm will not sound.
Note:
• If you select “No” in step 7,
“Description” will appear instead.
Go step 9 to continue.
Date
Start Time
End Time
Alarm
Reminder
SEP 11,2002
10:00 AM
11:00 AM
No
–––––
8. Enter the appropriate time for
x
Reminder and press
Schedule Alarm will sound at
the entered time before the
Start Time. You can select any
.
Date
Start Time
End Time
Alarm
Reminder
SEP 11,2002
10:00 AM
11:00 AM
Yes
05_ Min Before
number from 00 to 99.
Note:
• Enter the number in two-digit format
13
Page 16
9. Enter the name of the
Search Date?
Schedule
0_9-11-2002
Schedule
SEP 11, 2002
B
11:00 AM10:00 AM
Project Meeting
E
scheduled item into the
Description field. (Project
Date
Description:
SEP 11, 2002
Project Mee
I
ting
meeting).
Up to 96 alphanumeric
characters can be entered.
10.
Press
x
.
The data will be stored. Press
x
again, and the
Schedule
SEP 11, 2002
B
Project Meeting
E
11:00 AM10:00 AM
confirmed display will appear.
Search
Search today’s schedule
1. Press
g
The Schedule display will appear.
The current date will be displayed and the first number flashes.
The first number depends on your Date Format selection. These
examples are in the “MM/DD/YYYY” format.
2. Press
<
for the target schedule item.
to enter the Schedule Mode.
or > to search
Schedule
AUG 8, 2002
B
Project presentation
E
5:30 PM 3:00 PM
Search a schedule on a future (or past) date
1. Press
g
to enter the Schedule Mode.
The Schedule display will appear.
The current date will be displayed and the cursor under the first
number flashes.
The first number depends on your Date Format selection. These
examples are in the “MM/DD/YYYY” format.
2. Set the desired date.
Select the month, day and year
j
field using
or l and enter
the desired number.
3. Press
x
to search for the
target schedule item of the
specific date.
See also
Entering Characters ................................................... 5
Editing Listings ......................................................... 20
Deleting Listings ....................................................... 20
14
Page 17

u
Anniversary Mode
In Anniversary mode, you can specify the month and date (such as
wedding anniversaries and birthdays).
Once data is stored as an anniversary, a flag appears on the date
set in the calendar.
The maximum number of characters for each description is 96
alphanumeric characters.
Entry
<Example>
“Nancy’s Birthday” on February 12th.
1. Press
u
to enter the
Anniversary mode.
2. Press n.
The Anniversary entry mode
will be displayed and Date will be highlighted.
3. Enter the date, 02 for month
and 12 for day.
x
4. Press
.
Reminder will be highlighted.
Anniversary
Search Date?
0_8-08
Anniversary
Date
Reminder
02-12
_
5 Days Before
5. Enter the Reminder date from 0
to 9.
6. Press 3 then
x
.
Anniversary
Date
Reminder
FEB 12
3_ Days Before
7. Enter “Nancy’s Birthday”.
Use
f ,
for “ ’ (apostrophe)”.
x
8. Press
to store.
The anniversary icon (
A
) will
Anniversary
Description: Nancy's Birt
hday
I
not appear until the day set in Reminder.
Note:
• After entering the date, you cannot return to the date field from other
fields. Exit the Anniversary mode and reenter from the beginning.
Search
1. Press u to enter the Anniversary mode.
<
2. Press
For direct search
Enter the date to go to the target date and then press
See also
Entering Characters ................................................... 5
Editing Listings ......................................................... 20
Deleting Listings ....................................................... 20
or > to search for the record.
x
.
15
Page 18

t
To Do
Description: Visit HK Ex
hibition
I
To Do
Priority: 2 Pending
Due Date: DEC 10, 2002
Description: Visit HK Ex
To Do Mode
In the To Do mode, you can store your important To Do items with a
priority index.
Entry
<Example>
You have to visit the HK Exhibition on December 10 , 2002
t
1. Press
To Do mode.
2. Press
The To Do Entry display will
appear.
3. Enter 12 into the month field.
4. Move the cursor to the day/year
field using
10 and 2002 respectively.
5. Press
Priority number from 1 (High) to
9 (Low) using
press
Note:
• After entering the date, you cannot return to the date field from other
fields. Exit the To Do Mode and reenter from the begining.
to enter the
n
.
j
or l and enter
x
and select the
j
x
.
or l, then
To Do
Search Date?
08-08-2002
To Do
Date 08_-08-2002
Priority
To Do
Date 12-10-2002
Priority 1
To Do
Date: DEC 10, 2002
Priority
1
2
6. “Description” will appear.
Enter what you have to do on
the target day.
Enter “Visit HK Exhibition”
Up to 96 alphanumeric characters can be entered.
x
7. Press
to store the data.
Search
Sequential search
1. Press
t
to enter the To Do mode.
The To Do Search Screen will appear.
The current date will be displayed and the cursor under the first
number flashes.
The first number depends on your Date Format selection. These
examples are in the MM/DD/YYYY format.
16
Page 19

2. Press < or > to search for the target To Do items of the
nearest date.
Date search
1. Press
t
to enter the To Do mode.
2. Select the month, day or year
field using j or l and enter
the desired date.
x
3. Press
target To Do item of a specific
date.
to search for the
To Do
Search Date?
12-10-2002
To Do
Priority: 2 Pending
Due Date: DEC 10, 2002
Description: Visit HK Ex
See also
Entering Characters ................................................... 5
Editing Listings ......................................................... 20
Deleting Listings ....................................................... 20
w
Memo Mode
You can store memos using the Memo Mode. Up to 96 alphanumeric characters can be entered per one record.
Entry
<Example>
Enter your passport number: 12AB34567
1. Press
w
to enter the
MEMO Mode.
n
2. Press
follows.
Passport No. 12AB34567
3. Press
The screen will display the
saved information.
and enter as
x
.
Memo
Memo
Passport No. 12A I
Memo
Passport No. 12AB3456
7
Search
1. Press
w
to enter the MEMO Mode.
The Memo mode display will appear.
2. Press < or > to search for the record.
See also
Entering Characters ................................................... 5
Editing Listings ......................................................... 20
Deleting Listings ....................................................... 20
17
Page 20

y
Category
Amount
Payment
Receipt
Memo
0_8 -18- 2002
0.
Cash
YES
Meals
Date
Date
Amount
Payment
Receipt
Memo
AUG 18, 2002
Cash
YES
Fares
Category
Date
Payment
Receipt
Memo
AUG 18, 2002
Cash
1200_.
YES
Amount
Fares
Category
Date
Receipt
Memo
AUG 18, 2002
Check
1200.
YES
Fares
Amount
Payment
Category
Expense Mode
The Expense function is an easy-to-use method of tracking personal
and business expense information. The Expense Report allows you
to see the total expenses for a single day or for a certain period.
1 Expense: Item-by-item expense entry and view mode
2 Report: Display the total expenses for a single day or
a certain period
Change the category:
3
Assign a new category name (up to 7
characters for each)
Entry
<Example>
The date is August 18, 2002.
You bought flight tickets for a business trip costing $1,200.
y
1. Press
Expense mode.
1
2. Press
1. Expense.
3. Press
n
The Expense record entry
mode will appear. The current
date will be displayed.
to enter the
to select
Expense
1.Expense
2.Report
3.Change the Category
Date
Category
Amount
Payment
Receipt
Memo
0_8 -18- 2002
Meals
Cash
YES
0.
The first number depends on your Date Format selection. These
examples are in the MM/DD/YYYY format.
4. Enter the date if necessary.
5. Press
x
.
6. Select the expense category
j
or l.
using
There are 8 preset categories
to select.
Meals
➠
Hotel ➠ Car ➠ Phone ➠ Fares
➠
(Enter’t ) Entertainment ➠ Tips ➠ Misc
7. Press
x
, and enter 1200.
Up to 12 digits can be entered.
x
8. Press
9. Select the payment using
l
.
.
j
or
There are 4 preset payment
systems to select.
Cash
➠
Check ➠ Card ➠ Others
18
Page 21

10.
Press
x
, and select
j
“YES” or “NO” using
11.
Press
x
or l.
, and enter
“Flight ticket”.
12.
Press
x
to store the
data.
Recall
1. Press
y
2. Press
1
3. Enter the date you wish to
search.
4. Press
x
Scroll the page using
Press
<
record,
previous record.
.
to select 1. Expense.
.
k
or m.
to view the next
>
to view the
Date
Category
Amount
Payment
Receipt
Memo
Date
Category
Amount
Payment
Receipt
Memo
AUG 18, 2002
Check
AUG 18, 2002
Check
Flight ticket
Expense
Search Date:
0_8 - 18 - 2002
Date
Category
Amount
Payment
Receipt
Memo
AUG 18, 2002
Fares
Check
YES
Flight ticket
Fares
Fares
YES
YES
1200.
1200.
1200.
Summary Report
1. Press
y
Expense mode.
2. Press
2
3. Enter the first date from you
wish to summarize the expense.
(July 10, 2002)
k, m, j
• Press
4. Enter the last date at you wish to summarize the expense. (August
10, 2002)
5. Press
x
Total amount report during the
period will be displayed.
Scroll the page using
to enter the
Expense
1.Expense
2.Report
3.Change the Category
to select 2. Report.
Expense
From : 07 - 10 - 2002
To
or l to move the cursor to set the dates.
.
k
or m.
Total
Meals
Hotel
Car
Phone
Report
: 08 - 10 - 2002_
1230.5
53.5
40.
200.
20.5
19
Page 22

Change the Category
You can change the category name for your convenience.
1. Press
y
2. Press
3
3. Change the Category.
The change category display
will appear.
3. Select the category you wish to change using
4. Press
x
5. Delete the preset category name using
6. Enter the new category name.
(e.g. Books)
Up to 7 characters can be
entered for the Category name.
x
7. Press
All the revisions are stored.
Note:
• Entries previously stored under the former category will appear
under the new category after the revisions are made.
See also
Entering Characters ................................................... 5
Editing Listings ......................................................... 20
Deleting Listings ....................................................... 20
to enter the Expense mode.
to select
.
.
- Change the Category -
Category: 1.Meals
d
- Change the Category -
Category: 5.Fares
k
or m.
or b.
2.Hotel
3.Car
4.Phone
6.Books I
7.Tips
8.Misc
Editing Listings
1. Edit
1. Recall a listing in the desired mode.
2. Press
e
.
The display will change to the entry mode.
3. In TEL mode, move the cursor to the appropriate field using k or
m
.
• Skip step 3 in other modes.
4. Edit the data.
j l k m
d b
i: changes between the INSERT mode and the OVERWRITE mode
5. Press
: move the cursor to left, right, up or down, respectively
: can be used to delete characters
x
to store.
Deleting Listings
Delete
1. Recall a listing in the desired mode.
2. Press
d
.
The confirmation display will appear.
j l
3. Select YES using
If you wish to exit, select NO and press
4. Press
x
.
.
x
.
20
Page 23

q
Calculator Mode
The Organizer’s built-in calculator can perform the 3 arithmetic
calculations in up to 12 digits.
Calculator mode is selected by
pressing
q
the
appropriate number of times.
Calculator
0.
Each time you press the key,
the display switches as follows:
➠
Calculation Mode ➠ Metric Conversion Mode ➠ Currency
➠
Conversion Mode
Calculations Mode
➠
Before performing any calculations, press c twice to clear the
display.
• An error occurs if the integer section of the calculation result
exceeds 12 digits, if the memory exceeds 12 digits, or a number
is divided by zero. (“Error!” is displayed.)
c
Press
to clear the error message.
Example Operation Display
(–24+2) ÷ 4=
34 + 57 = 34 + 57
45 + 57 = 45
68 x 25 = 68 * 25
68 x 40 = 40
10% of 200 200 * 10
Percentage 9 of 369 /
10% mark-up 200 + 10
20% discount 200 - 20
√
25 – 9 25 - 9 =
3
4
1/8 8 /
25 x 5 =
–) 84 ÷ 3 = 84 / 3
+) 68 +17 68 + 17
(Total) =
123456789098 x
145 = 123456789098 * 145
17901234419210 17.9012344192
Mixed calculation
-
24 + 2 / 4
Constant/repeat calculation
The second figure is a constant value
(+ addition, - subtraction, / division)
=
The first figure is a constant value
(* multiplication)
=
Percentage
36
Root
n
A
4 * =
Unit division
=
Memory function
R
25 * 5
T
(17.9012344192 x 1012 = 17901234419200)
I
=
Y
=
=
U
=
I
I
I
O
U
=
– Error! –
–5.5
91.
102.
1700.
2720.
20.
25.
220.
160.
4.
64.
0.125
M 125.
M 28.
M 85.
M 182.
21
Page 24

q
USD
Rate=1
USD 0.
$1
Unit 1? USD I
Unit 2?
Rate=
Conversion Mode
Each time you press
➠
Calculation Mode ➠ Metric Conversion Mode ➠ Currency
Conversion Mode
Conversion Table
Unit 1 Unit 2
feet (ft)
°
F (Fahrenheit)
ounce (oz)
pound (lb)
US gallon (gal)
UK gallon (l.gal)
q
➠
Calculation Mode
Conversion Pattern
5 currency conversions are available.
Metric Conversion Patterns
inch
yard
yard
mile
, the display switches as follows:
➠
⇔
⇔
⇔
⇔
⇔
⇔°
⇔
⇔
⇔
⇔
centimeter (cm)
kilometer (km)
kilogram (kg)
meter (m)
feet (ft)
meter (m)
C (Celsius)
gram (g)
liter (l)
liter (l)
Currency Conversion Mode
Currency conversion has 5 stages of programmable conversion.
Each mode is capable of 12-digit calculation.
Setting a new currency conversion rate
<Example> Set the following rate: $1 = £0.6
1. Press
q
appropriate number of times to
select the Currency Conversion
mode.
<
2. Press
stage.
3. Press
n
The setting mode will appear.
Note:
e
is selected, “USD”, “$1” to “$5” and “Rate=1” are already set
If
on the display. Before entry, use
characters. Use
4. Enter “USD” and press
Note:
Up to 3 characters can be
entered for the name of the
currency unit.
5. Enter “PND” and press
the
or > to select the appropriate currency conversion
.
b
and d to clear the preset
c
to clear the Rate figure.
x
.
x
.
22
Page 25

6. Enter the rate; 0.6.
Up to 8 numeric characters can
be entered for the rate.
If you need to clear the rate
c
number, press
7. Press
x
.
to store the setting.
Unit 1? USD
PNDUnit 2?
Rate=0.6
I
Currency conversion
<e.g. $ ➠ £>
q
1. Press
Currency Conversion mode.
2. Press < or > to select the appropriate currency conversion
stage.
3. Enter the amount. (e.g. $50)
=
4. Press
<e.g. £
5. Press
6. Enter the amount. (e.g. £75)
7. Press
or
➠
$>
j
.
The arrow on the top will change direction.
=
or
j
or l to change the
Use
conversion direction.
Press c to clear the calculation result.
the appropriate number of times to select the
USD PND
x
x
.
.
Rate=0.6
USD 50.
PND
USD PND
Rate=1.666666
30.
USD 125.
PND
75.
Metric Conversion Mode
Metric conversion is capable of 12-digit calculation.
Convert metric unit
<Example>
Calculate 68
1. Press
Metric Conversion mode.
2. Press < or > to select
the appropriate conversion
units.
3. Change the conversion
direction using
4. Enter the amount, “68”.
5. Press
Press
calculation result.
• The conversion result may have
a slight calculation error as a result of rounding off the number. Use
the result for reference only.
°
F to °C
q
j
=
or
x
c
to clear the
the appropriate number of times to select the
°
C
°
C
or l.
.
°
F
Rate=(F-32) x 5/9
°
F0.
°
C
°
F
Rate=(F-32) x 5/9
°
F 68.
°
C 20.
23
Page 26

Secret Function
Enter Secret Number
4_567
Remember Secret No.
Enter Secret Number
-_---
Enter Secret Number
-_---
The secret function allows you to protect confidential listings with a
Secret Number, so that no unauthorized person can reach them.
You can use up to a 4-digit number as a Secret Number.
Registering a Secret Number (Password)
As a safeguard, make a written record of the password.
1. Press
2. Enter the 4-digit number you
3. Press
S
in the Home
Clock mode.
The Secret Number entry
window will appear.
wish to use.
The initial number "0000" can
be used as the secret number.
x
.
The organizer will display the
message “Secret No. is now
set!”.
Remember Secret No.
Enter Secret Number
0_000
Remember Secret No.
Enter Secret Number
1_234
Secret No. is now set!
Accessing Secret Entries
If the Secret Function is on, when you press v ,
g
entry display will appear.
,
t
,
y
or u , the Secret Number
1. Enter the Secret Number, then
x
press
The screen of the target mode
will be displayed.
.
Changing the Secret Number
1. In the Home Clock mode, press
S
.
The Secret Number entry
window will appear.
2. Enter the current secret number.
3. Press
x
.
4. Press
m
to select Edit Secret Number then
5. Enter a new secret number.
x
6. Press
.
x
w
.
,
24
Page 27

Turning the Secret Function Off
1. In the Home Clock mode, press
The secret Number entry window will appear.
2. Enter the current secret number, then press
x
3. Press
at “Unlock Data”.
S
.
x
p
Using the included Backup/ Restore Utility
With SHARP PC Interface software and cable package, you can
.
Backup data with an IBM compatible personal computer.
What Does PC Interface Software Do?
Backup ............... Backs up all data in the Organizer to your PC.
Restore .............. Restores data from a backup file into the Organizer.
System Requirements
Windows® 2000 Professional, Windows® Me, Windows® 98
• 100% IBM Compatible PC
•Pentium 150 MHz or higher
•8 MB free hard disk space
• 32 MB RAM (64 MB for Windows 2000 Professional)
•VGA monitor or better
• Microsoft
• 3.5" (90 mm) disk drive
• One available serial port with D-sub 9-pin connector
Caution:
• PC-LINK may not be available when the battery level is low.
®
Mouse or compatible Pointing Device
25
Page 28

Before You Begin
Connecting Your Organizer to a PC
1. Turn off your PC and the Organizer.
2. Connect the standard 9-pin connector of the PC interface cable to a
COM port on your PC.
• Using a 25-pin connector instead of the standard 9-pin connector
requires an additional adaptor. (Commercially available.)
3. Connect the other end of the PC Interface Cable to the PC interface
connector located on the left side of the Organizer.
PC Interface Cable
Installing
1. Insert the PC Interface Software disk into your disk drive.
2. Click on the Windows [Start] button and then click [Run].
3. Type in a:\Setup.exe and click on [OK].
•Type in your disk drive name (a:\ in this example).
4. Follow the on-screen instructions.
The software is installed into the following location and can be
accessed in the following directory:
C:\Program Files\Sharp YOZQ-270\
Application:
➠
[Program] ➠ [Sharp YOZQ-270] ➠ [EO-Utility]
[Start]
ReadMe:
➠
[Program] ➠ [Sharp YOZQ-270] ➠ [ReadMe]
[Start]
You are recommended not to change the default folder name:
[Sharp YOZQ-270].
5. Click [Finish].
Note:
•For Windows 2000, install the software after logging on authorized as
system administrator.
26
Page 29

Getting Started
Known Incompatibilities
• While you are backing up or restoring data, a transfer error may
occur with certain 3D screen saver utility programs enabled. Before
transferring data, disable any 3D screen saver utility programs you
may be running.
• PC Interface Software may not run reliably with certain virus
scanning programs enabled. If you have problems in transferring data
with your Organizer, disable any virus checking software you may be
running.
• PC Interface Software may not run reliably with certain power
management features enabled. If you have problems in transferring
data with your Organizer, disable any power management features
you may have turned on.
For additional information, refer to the Readme file on the supplied
floppy disk.
(1) PC Interface Software Main Screen
All operations can be accessed from the Main Screen.
➠
To access the Main Screen, click [Start]
YOZQ-270]
➠
[EO-Utility].
[Program] ➠ [Sharp
(2) Setting the COM port
1. Connect your Organizer to a PC.
➠
2. Click [Start]
The PC Interface Software Main Screen appears.
[Program] ➠ [Sharp YOZQ-270] ➠ [EO-Utility].
3. Click [COM port].
The COM port setting dialog box
appears.
• Click the radio button to select
an appropriate port or click [Auto
Detect...] to allow an appropriate
port to be selected automatically.
• An error message may be
displayed when you click [Auto Detect...]. Check the BIOS setting
on your notebook PC and set it to the serial port. Even when the
BIOS setting is correctly made, you may need to select an
appropriate port manually.
Backup and Restore
Making a Backup File
1. Connect your Organizer to a PC.
➠
2. Click [Start]
[Sharp YOZQ-270] ➠ [EOUtility]
The PC Interface Software
Main Screen appears.
3. Click [Backup].
The dialog box appears asking
you to enter the backup file
name, if necessary.
[Program]
➠
27
Page 30

• The default name is determined according to the PC clock
system, in the format of “YYYYMMDD.BKF”, for example,
20020805.BKF.
• Click [Save] to start the backup process. The instruction screen
appears.
• When the COM port has not been selected, the warning
message dialog box appears. Click [OK]. Then click [COM port...]
on the Main Screen
•To cancel the backup process, click [Abort] on the instruction
screen.
4. On your Organizer:
o
Press
p
a
to turn the power on, then press
key is effective at the initial display of all modes except in
and
q
modes.
p
.
Restoring a Backup File
• Restore function replaces all the data in the Organizer with the
backup file saved on a PC.
• Make sure you really want to delete all the data in your Organizer
before executing the Restore function. Once you start the
restoration process, all the data in the Organizer will be deleted,
even if you cancel the restoration process.
1. Connect your Organizer to a PC.
➠
2. Click [Start]
The PC Interface Software Main Screen appears.
[Program] ➠ [Sharp YOZQ-270] ➠ [EO-Utility].
3. Click [Restore].
The dialog box appears asking
you to choose the backup file
name.
• Click [Open] to start the
restoration process.
The confirmation dialog box
appears.
•To cancel the restoration
process, click [NO].
4. Click [YES].
The instruction screen
appears.
•To cancel the restoration
process, click [Abort] on
the instruction screen.
5. On your Organizer:
o
Press
on, then press
The data transfer is started.
to turn the power
p
.
28
Page 31

Battery Replacement
Operating Batteries Replacement
Batteries used
Type Model Quantity
Lithium battery CR2032 3
• Be sure to write down any important information stored in the
memory before replacing the batteries.
Precautions
Since improper use of the batteries may cause leakage or
explosion, strictly observe the following instructions:
• Insert the battery with its positive side (+) correctly orientated.
•Never throw batteries into a fire because they might explode.
•Keep batteries out of reach of children.
• When batteries become near exhaustion, remove them from the
Organizer immediately to avoid battery leakage and corrosion
inside the Organizer.
Because the batteries in the Organizer were installed at the factory,
they may become exhausted before the specified expiration time is
reached.
Battery replacement time
When “
B
” is displayed, immediately replace the batteries with
new ones. If the battery level is low, the alarm may not sound, or
similarly the Backlight may not function or remain on for less than
the set interval. Continued use of the Organizer with low batteries
can alter or clear the memory contents. Memory contents may be
lost if the batteries are improperly replaced or if the following
instructions are disregarded.
Caution:
• PC-LINK may not be available when the battery level is low.
• Expense Report (Summary Report) may not be available when the
battery level is low.
• Under the low battery condition, new data entry and editing of
existing data may not be performed in some modes. Also Clock and
other settings may not be made.
29
Page 32

Replacing the batteries
• Make sure the power is turned off before replacing the batteries.
• Do not press
completed.
• Do not remove all of the batteries at once. Remove and replace
batteries one by one.
o
1. Press
2. Loosen the screw (turn counterclockwise) and
remove the battery holder cover on the back of
the unit.
3. Remove one used battery using a ball-point pen
or similar object.
• Do not use a mechanical pencil or sharp
pointed object.
4. Install one new battery with the positive side (+)
facing up.
5. Repeat step 3 and 4 for replacing each battery.
6. Replace the holder cover and secure with the
screw.
7. The power will be turned on 2 to 3 seconds after ON is pressed.
8. Set the clock to the correct time.
Caution:
• Clock settings may be lost when batteries are removed for a long
time.
• Make sure to confirm all settings are set correctly after replacing the
batteries.
o
until the battery replacement procedure is
to turn the power off.
Model: YO-270
Product name: Electronic Organizer
Display: 48 X 111 dot matrix and other icons
Memory capacity: 256 Kbytes
User area: Approx. 235 Kbytes
Clock mode
Telephone mode: Entry and recall of Last name, First name,
Calendar mode: From Jan.,1950 to Dec., 2150, Confirmation of
Schedule mode: Entr y and recall of schedule (year, month, day,
To Do mode: Entry and recall of To Do listings (Due Date,
Memo mode: Entry and recall of memo listings
Specifications
±
Accuracy:
Display: Year, month, day, day of the week, hour, minute,
Clock system: 12-hour/24-hour format (switchable)World clock
60 seconds/month (at 25°C/77°F)
AM/PM, city name, time zone
function, daylight saving time/summer time
display function, schedule alarm function
Company, Home#, Office#, Fax#, Other#,
Address, City, State, Zip code, Country, E-mail,
Notes
the Schedule, To Do, and Anniversary mode
entries can be made by the indication marks
seen on the right side of the date
hour and minute), schedule alarm and
Description
Priority and Description)
30
Page 33

Expense mode: Entry and recall of Expense Listings (Date,
Category, Amount, Payment, Receipt and
Memo) and Summary Report during a specified
period to display the total amount spent in a
preset category, Meals, Hotel, Car, Phone,
Fares, Entertainment, Tips and Misc, that can
be changed with the selection of Change
Category.
Anniversary mode: Entry and recall of month, day and description
Calculator mode:
Currency/Unit conversion mode:
Power consumption:
Operating temperature
Power supply:
Operating battery: 9V ...
Battery life:
Operating batteries (at 25
of anniversaries
12 digits (with calculation status symbol) Addition,
subtraction, multiplication, division, percentage,
square root, memory calculation, etc.
12 digits, 30 kinds of currencies (10) and metric
(20) conversions
0.3 W
:0°
C ~ 40°C (32°F ~ 104°F)
–
(DC) (Lithium battery CR2032 x 3)
°
C/77°F)
• Approx. 170 hours
When data is continuously displayed without backlight.
• Approx. 120 hours
When data is continuously displayed with Backlight for 2
minutes per hourly use.
• Approx. 120 hours
When data is searched for 5 minutes and displayed for
55 minutes per hourly use and backlight is on for 2
minutes per hourly use.
• Approx. 1 year
When turned off and the clock is running.
Weight: Approx. 125 g (0.28 lb.) (Including batteries)
Dimensions:
Open: 154 mm (W) x 179.7 mm (D) x 9.5 mm (H)
6-1/16" (W) x 7-1/16" (D) x 3/8" (H)
Closed: 154 mm (W) x 92.5 mm (D) x 13 mm (H)
6-1/16" (W) x 3-21/32" (D) x 1/2" (H)
Accessories: 3 lithium batteries (installed), one 3.5” floppy disk,
PC interface cable, operation manual
31
Page 34

Declaration of Conformity
Electronic Organizer : YO-270
This device complies with Part 15 of the FCC Rules. Operation is subject
to the following two conditions: (1) This device may not cause harmful
interference, and (2) this device must accept any interference received,
including interference that may cause undesired operation.
Responsible Party:
SHARP ELECTRONICS CORPORATION
Sharp Plaza, Mahwah, New Jersey 07430-2135
TEL: 1-800-BE-SHARP
Tested To Comply With FCC Standards
FOR HOME OR OFFICE USE
WARNING – FCC Regulations state that any unauthorized changes or
modifications to this equipment not expressly approved by the manufacturer could void the user's authority to operate this equipment.
Note: This equipment has been tested and found to comply with the limits
for a Class B digital device, pursuant to Part 15 of the FCC Rules.
These limits are designed to provide reasonable protection against
harmful interference in a residential installation. This equipment
generates, uses, and can radiate radio frequency energy and, if not
installed and used in accordance with the instructions, may cause harmful
interference to radio communications.
However, there is no guarantee that interference will not occur in a
particular installation. If this equipment does cause harmful interference
to radio or television reception, which can be determined by turning the
equipment off and on, the user is encouraged to try to correct the
interference by one or more of the following measures:
– Reorient or relocate the receiving antenna.
– Increase the separation between the equipment and receiver.
– Connect the equipment into an outlet on a circuit different from that to
which the receiver is connected.
– Consult the dealer or an experienced radio/TV technician for help.
Note: A shielded interface cable is required to ensure compliance with
FCC regulations for Class B certification.
PRODUCT SUPPORT
If you have read the ORGANIZER operation manual, but you still require
product support, you can:
Call a Sharp Customer Assistance Center
630-378-3590
(7am to 7pm CST M – F)
Visit our Web Site
http://www.sharp-usa.com
Send an E-mail
pdasupport@sharpsec.com
Write to our Customer Assistance Center
Sharp Electronics Corp.
Customer Assistance Center
Att: WIZARD HELP
1300 Naperville Drive
Romeoville, IL 60446
32
Page 35

Instucciones abreviadas en español
ÍNDICE
Empleo del organizador por primera vez ................................... S-1
Función de desconexión automática ....................................... S-2
Luz de fondo............................................................................. S-2
Ajuste del contraste de la pantalla LCD .................................. S-2
Activación y desactivación del sonido de pulsación de teclas S-2
Liberación de la memoria ........................................................ S-2
Modo de reloj ........................................................................... S-3
Modo de teléfono ..................................................................... S-3
Modo de calendario ................................................................. S-4
Modo de programa de actividades .......................................... S-5
Modo de aniversario ................................................................ S-6
Modo de cosas a hacer (“To Do”) ............................................ S-7
Modo de notas ......................................................................... S-8
Modo de gastos ........................................................................ S-8
Edición de las listas ................................................................. S-9
Borrado de las listas .............................................................. S-10
Modo de conversión ............................................................... S-10
Reemplazo de las pilas .......................................................... S-11
ESPAÑOL
Empleo del Organizador por primera vez
Asegúrese de realizar las operaciones siguientes antes de emplear el
Organizador por primera vez.
1. Saque las hojas de aislamiento de las
pilas del compartimiento de las pilas.
El Organizador empieza a funcionar.
(Las láminas aisladoras de las pilas fue
insertada en la fábrica para evitar que
dichas pilas se agoten.)
2. Pulse el interruptor RESET.
Se visualizará el mensaje “CLEAR ALL DATA OK?”.
j
3. Utilice
El mensaje aparecerá como “Do you really want to initialize the
Organizer’s memory?”
Vaya al paso siguiente.
4. Seleccione “Yes” utilizando
El organizador se inicializará. Introduzca la fecha y la hora del reloj.
(Consulte la página S-3.)
Nota
• Pulse el interruptor RESET con un bolígrafo u otro objeto similar. No
utilice un objeto cuya punta pueda romperse o esté muy afilada.
o l para seleccionar “Yes” y pulse
j
o l y pulse
x
x
.
.
S-1
Page 36

Función de desconexión automática
Memory Free
100 %
Cuando no pulse ninguna tecla durante aproximadamente 7
minutos (ajuste inicial), la alimentación del Organizador se
desconectará automáticamente para ahorrar las pilas.
Ajuste del tiempo de
desconexión automática de la
alimentación (Valor
predeterminado: 7 minutos)
1. Si la visualización es la de otro modo o la del modo del reloj
h
mundial, pulse
2. Pulse
W
.
Aparecerá la ventana de ajuste del tiempo de desconexión
automática de la alimentación.
3. Pulse una tecla numérica aproximada (
seleccionar el tiempo de desconexión automática de la
alimentación.
para entrar en el modo de reloj local.
Auto Shut Off
1 Min.
2 Min.
3 Min.
1
a 3, 5, 7,
Luz de fondo
La luz de fondo le permitirá ver el visualizador y utilizar el
Organizador en condiciones de baja iluminación. Si pulsa
z
utilizando el organizador, o mientras no pulsa una tecla durante 15
segundos.
•Para desactivar la luz de fondo, vuelva a pulsar
• La luz de fondo puede permanecer activada durante el intervalo
• La luz de fondo no funcionará durante la transferencia de datos.
S-2
una vez, el visualizador se iluminará mientras esté
z
preajustado por lo menos o puede no funcionar si el nivel de las
pilas es bajo.
5 Min.
7 Min.
9 Min.
9
) para
.
No utilice innecesariamente la luz de fondo.
• Dado que la luz de fondo consume energía de las pilas de
funcionamiento, su abuso podrá reducir considerablemente la
vida útil de sus pilas.
Ajuste del contraste de LCD
Pulse > o < en el modo de reloj local.
El visualizador LCD se hará más brillante cada vez que se pulse
>
, y más oscuro cada vez que se pulse < .
Ajuste el contraste al nivel que le resulte más cómodo de ver.
Activación y desactivación del sonido de pulsación de
teclas
Pulse } en el modo de reloj
local para activar y desactivar el
sonido de las teclas.
Liberación de la memoria
Pulse K en el modo de reloj local
Aparecerá la ventana de comprobación de la memoria. Para volver al
modo de reloj local, pulse cualquier tecla.
Page 37

h
Modo de reloj
Ajuste del reloj local
1. Si el visualizador está en otro modo que no sea el de reloj mundial,
h
pulse
2. Pulse
El Organizador entrará en el modo de ajuste del reloj local.
3. Seleccione AM o PM
utilizando
4. Pulse
hasta la posición de la hora.
5. Seleccione la hora apropiada.
6. Pulse
forma.
7. Pulse
8. Seleccione el mes apropiado.
Pulse
día y después el año de la misma forma.
9. Pulse
10.
Seleccione su ciudad de
residencia utilizando
El Organizador posee 96
ciudades de zonas horarias.
Si su ciudad no está en la
lista, utilice la ciudad más
cercana de la misma zona horaria que la de su ciudad.
11.
Pulse
El reloj comenzará exactamente desde de la hora ajustada
(xx:xx:00).
para entrar en el modo de reloj local.
e
.
New York
(
(o k m).
l
para mover el cursor
l
para mover el cursor. Ajuste los minutos de la misma
l
para mover el cursor hasta la posición del mes.
l
para mover el cursor hasta la posición del día. Ajuste el
j
o l para mover el cursor a la posición de la ciudad.
k
o m.
x
para ajustar el reloj.
U.S.A.
TUE 01 01, 2002
12
: 34 :
Los Angeles
U.S.A.
TUE 12 24, 2002
:
03
30 :
00
00
PM
PM
Nota
•Para seleccionar rápidamente la ciudad en el paso 10, mueva el
cursor hasta la posición del país utilizando
k
deseado utilizando
posición de la ciudad utilizando
ciudad utilizando
v
Modo de teléfono
o m. Después devuelva el cursor a la
j
k
o m.
l
y seleccione el país
y seleccione el nombre de la
Entrada
<Ejemplo>
v
1. Pulse
2. Pulse
La pantalla cambiará al modo
de introducción de registro.
3. Introduzca el último nombre.
Por ejemplo, “Smith”
4. Pulse
después introduzca el primer nombre. Por ejemplo, “John”
5. Pulse
introduzca “ABC International Co.”
6. Pulse
(Home) #.
7. Introduzca “585–4280”.
8. Pulse
mover el cursor hasta oficina
(Office) # e introduzca “619–
542–7320#33”.
* Pulse
parea seleccionar Business.
n
.
Business
Search Name?
I
x
o m,
x
o m para mover el cursor hasta la compañía e
x
o m para mover el cursor hasta la posición inicial
x
f 3
o m para
para introducir “#”.
Last name Smith
First name
John
Company
ABC Interna..
Home#
585-4280
Office#
619-542-732. .
Fax#
I
S-3
Page 38

9. Introduzca cada categoría de la misma forma.
Business
Search Company?
ABC
I
S2002
2
JUN
9
16
23
30
M
3
10
17
24
T
4
11
18
25
W
5
12
19
26
T
6
13
20
27
F
7
14
21
28
S
8
15
22
29
1
10.
En el campo de Notas, pulse
x
datos.
Búsqueda
Búsqueda alfabética del último nombre
1. Pulse v el número apropiado de veces para entrar en el modo de
teléfono deseado.
Aparecerá la ventana de búsqueda.
2. Pulse las tecla
Búsqueda directa del último nombre
1. Pulse v el número apropiado de veces para entrar en el modo de
teléfono deseado (en este caso Negocios (Business)).
Aparecerá la ventana de búsqueda.
2. Introduzca, por orden,
algunas letras del último
nombre.
Se puede introducir un
máximo de 10 letras.
3. Pulse las tecla
Si no hay concordancia de datos, aparecerá “Not Found!”, y la
pantalla volverá a la visualización inicial.
S-4
parea almacenar los
<
o > para buscar el registro deseado.
<
o > para buscar el registro deseado.
Stored !
Business
Search Name?
Smith
I
Búsqueda directa de nombre de compañía
1. Pulse v el número apropiado de veces para entrar en el modo de
teléfono deseado.
Aparecerá la ventana de búsqueda.
2. Pulse m o k para cambiar el modo de búsqueda a “Search
Company?”.
3. Introduzca en orden algunas
de las letras del nombre de la
compañía.
Se puede introducir un
máximo de 10 letras.
4. Pulse la tecla
<
o > para buscar el registro deseado.
Consulte también
Edición de las listas ................................................ S-9
Borrado de las listas ........................................... S–10
a
Modo de calendario
Navegación por la pantalla del calendario mensual
1. Pulse
a
Aparecerá el calendario mensual del mes actual. El día actual
aparecerá resaltado.
Navegue por el calendario usando las teclas siguientes:
< >
j
: Para ir al día anterior
l
: Para ir al día siguiente
k
: Para ir al mismo día de la
semana anterior
m
: Para ir al mismo día de la semana siguiente
para entrar en el modo de calendario.
: visualiza el mes anterior.
Page 39

• Los cursores j, l, k y m solamente podrán moverse dentro
del mes visualizado.
Cambio del formato de la pantalla semanal
El Organizador tiene dos formatos semanales:
1. Pulse
a
y luego { para cambiar los formatos.
Confirmación de las entradas del modo de programa de
actividades, cosas a hacer y aniversario
En la pantalla de calendario mensual podrá ver las fechas a las que
ha asignado un programa de actividades, cosas a hacer, o
aniversario.
Las marcas de indicación se visualizarán de la forma siguiente:
g
Modo de programa de actividades
Entrada
<Ejemplo>
Se celebrará una reunión de proyecto de las 10:00 AM a las 11:00
AM el 11 de septiembre de 2002.
g
1. Pulse
en el modo de Programa de
actividades.
Aparecerá la ventana de
para entrar
Schedule
Search Date?
0_8-08-2002
búsqueda de programa de actividades.
2. Pulse
n
, e introduzca 09 para el mes.
3. Mueva el cursor hasta el campo del día/año utilizando
j
o l e
introduzca el día/año deseados de la misma forma.
4. Pulse
x
, y después introduzca 10:00 para la hora de
comienzo.
x
5. Pulse
.
“La “hora de finalización” se resaltará y la hora cambiará
automáticamente a 30 minutos después de la hora de comienzo.
6. Introduzca 11:00 para la hora de finalización, y después pulse
x
.
7. Pulse j o l para seleccionar “Yes” o “No” para el ajuste de la
x
alarma, y después pulse
.
Nota:
• Si selecciona “No” en el paso 7, aparecerá “Description”.
Vaya al paso 9 para continuar.
x
8. Introduzca el tiempo apropiado para el Recordador y pulse
.
La alarma del programa de actividades sonará a la hora introducida
antes del tiempo de comienzo. Usted podrá seleccionar cualquier
número entre 00 y 99.
Nota:
• Introduzca el número en el formato de dos dígitos.
9. Introduzca el nombre del elemento planeado en el campo de
“Description”. (Project
Meeting).
10.
Pulse
x
para almacenar
Date
Description:
SEP 11, 2002
Project Mee
I
ting
los datos.
S-5
Page 40

Búsqueda
Anniversary
Search Date?
0_8-08
Anniversary
Date
Reminder
FEB 12
3_ Days Before
Anniversary
Description: Nancy's Birt
hday
I
Búsqueda del programa de actividades actual
1. Pulse
g
actividades.
Aparecerá la pantalla del
programa de actividades.
<
2. Pulse
buscar el elemento del
actividades deseado.
Búsqueda de la fecha de un actividades futuro (o pasado)
1. Pulse
g
actividades.
Aparecerá la pantalla del
programa de actividades.
2. Adjuste la fecha deseada.
Seleccione el campo del mes,
del día, y del año utilizando
o l e introduzca la fecha
específica.
3. Pulse
x
elemento del programa de
actividades deseado de la
fecha específica.
Consulte también
Edición de las listas ............................................... S-9
Borrado de las listas ........................................... S–10
para entrar en el modo de programa de
Schedule
AUG 8, 2002
o > para
B
Project presentation
para entrar en el modo de programa de
Schedule
Search Date?
0_9-11-2002
j
Schedule
para buscar el
SEP 11, 2002
B
Project Meeting
5:30 PM 3:00 PM
11:00 AM10:00 AM
u
Modo de aniversario
Entrada
<Ejemplo>
“Cumpleaños de Nancy” 12 de febrero.
u
1. Pulse
modo de aniversario.
2. Pulse n.
Se visualizará el modo de
introducción en el aniversario y se resaltará la fecha.
3. Introduzca la fech, 02 para el mes y 12 para el día.
4. Pulse
El recordador se resaltará.
5. Introduzca la fecha del
recordatorio de 0 a 9.
Nota:
• Después de haber introducido la fecha, no podrá volver al campo de
la fecha desde otros. Salga del modo de aniversario y vuelva a
comenzar desde el principio.
6. Pulse
7. Introduzca “Nancy’s Birthday”.
Utilice
“ ‘ (apóstrofe)”.
8. Pulse
aparecerá en el lado izquierdo de la pantalla.
para entrar en el
x
.
3
y después
f ,
x
x
.
para
para almacenar. El icono (A) de aniversario
S-6
Page 41

Búsqueda
1. Pulse u para entrar en el modo de aniversario.
2. Pulse
<
o > para buscar el registro.
Para la búsqueda directa
Introduzca la fecha que desee buscar y después pulse
x
.
Consulte también
Edición de las listas ............................................... S-9
Borrado de las listas ........................................... S–10
t
Modo de cosas a hacer (“To Do”)
Entrada
<Ejemplo>
Usted tendrá que visitar HK Exibition el 10 de diciembre de 2002.
t
1. Pulse
de cosas a hacer
2. Pulse n.
Aparecerá la pantalla de cosas a hacer.
3. Introduzca 12 en el campo del mes.
4. Mueva el cursor hasta el campo de día/año utilizando
introduzca 10 y 2002 receptivamente.
5. Pulse
(baja) utilizando
para entrar en el
x
y selección el número de prioridad de 1 (alta) a 9
j
o l, y después pulse
To Do
Search Date?
08-08-2002
x
.
j
o l e
Nota:
• Después de haber introducido la fecha, no podrá volver al campo de
la fecha desde otros. Salga del modo de aniversario y vuelva a
comenzar desde el principio.
6. Aparecerá la “Description”.
Introduzca las cosas que tiene
que hacer en el día deseado.
To Do
Description: Visit HK Ex
hibition
I
Introduzca “Visit HK Exhibition”.
x
7. Pulse
los datos.
para almacenar
To Do
Priority: 2 Pending
Due Date: DEC 10, 2002
Description: Visit HK Ex
Búsqueda
Búsqueda secuencial
1. Pulse
t
para entrar en el modo de cosas a hacer.
Aparecerá la pantalla de búsqueda de cosas a hacer.
Se visualizará la fecha actual, y parpadeará el cursor del primer
número.
<
2. Pulse
cercana.
o > para buscar cosas a hacer de la fecha más
S-7
Page 42

Búsqueda de fecha
Memo
Passport No. 12AB3456
7
Expense
3.Change the Category
1.Expense
2.Report
1. Pulse
t
para entrar en el modo de cosas a hacer.
2. Seleccione el campo del mes,
del día, o del año utilizando
o l e introduzca la fecha
deseada.
3. Pulse
x
para buscar el
elemento de cosas a hacer de
la fecha específica.
j
To Do
Search Date?
12-10-2002
To Do
Priority: 2 Pending
Due Date: DEC 10, 2002
Description: Visit HK Ex
Consulte también
Edición de las listas ............................................... S-9
Borrado de las listas ........................................... S–10
3. Pulse
x
.
La pantalla visualizará la
información guardada.
Búsqueda
1. Pulse
w
para entrar en el modo MEMO.
Aparecerá la pantalla del modo de apuntes.
<
2. Pulse
Consulte también
Edición de las listas ............................................... S-9
Borrado de las listas ........................................... S–10
y
o > para buscar el registro.
Modo de gastos
w
Entrada
<Ejemplo>
Introduzca su número de pasaporte: 12AB34567
1. Pulse
modo MEMO.
2. Pulse
siguiente.
Pasaporte Núm. 12AB34567
S-8
Modo de notas
w
para entrar en el
n
e introduzca lo
Memo
Entrada
<Ejemplo>
La fecha es 18 de agosto de 2002.
Usted ha adquirido billetes de avión para un viaje de negocios, cuyo
importe es 1.200 $.
y
1. Pulse
el modo de gastos.
1
2. Pulse
1. Expense (Gastos).
para entrar en
para seleccionar
Page 43

3. Pulse
n
Aparecerá el modo de
introducción de registro de
gastos. La fecha actual se
Date
Category
Amount
Payment
Receipt
Memo
0_8 -18- 2002
Meals
Cash
YES
visualizará y parpadeará el cursor del primer número.
4. Introduzca la fecha si es necesario.
x
5. Pulse
.
6. Seleccione la categoría de gastos utilizando j o l.
Existen 8 categorías preajustadas para seleccionar.
Comidas
➠
Hotel ➠ Automóvil ➠ Teléfono ➠ Impuestos
Entretenimiento ➠ Propinas ➠ Var ios
7. Pulse
x
, y después introduzca 1200. Usted podrá introducir
hasta 12 dígitos.
8. Pulse
x
.
9. Seleccione el pago utilizando
j
o l.
Hay 4 sistemas de pago preajustados para seleccionar
Efectivo
➠
Cheche ➠ Tarjeta ➠ Otros
10.
Pulse
x
, y seleccione “YES” o “NO” utilizando j o l.
11.
Pulse
x, e introduzca
“Flight ticket (Pasaje de avión)”.
12.
Pulse
x
.
Date
Category
Amount
Payment
Receipt
Memo
AUG 18, 2002
Fares
1200.
Check
YES
Flight ticket
Búsqueda
1. Pulse
y
2. Pulse 1 para seleccionar 1. Expense (Gastos).
3. Introduzca la fecha que desee buscar.
para entrar en el modo de gastos.
4. Pulse
x
.
0.
<
Pulse
para ver el
siguiente registro,
>
para
ver el registro anterior.
Date
Category
Amount
Payment
Receipt
Memo
AUG 18, 2002
Fares
1200.
Check
YES
Flight ticket
Consulte también
Edición de las listas ............................................... S-9
Borrado de las listas ........................................... S–10
➠
Edición de las listas
Edición
1. Recupere un listín en el modo deseado.
2. Pulse e.
La pantalla cambiará al modo de introducción.
3. En el modo TEL, mueva el cursor hasta el campo apropiado
utilizando
• Salta el paso 3 en otros modos.
4. Edite los datos.
j l k m
respectivamente.
d b
i : cambia entre el modo de inserción y el modo de reescritura.
5. Pulse
k
o m.
: mueva el cursor a la izquerda, derecha, arriba o abajo
: puede utilizarse para borrar caracteres.
x
para almacenar.
S-9
Page 44

Borrado de los listas
Unit 1? USD I
Unit 2?
Rate=
Unit 1? USD
PNDUnit 2?
Rate=0.6
I
Borrar
1. Recupere un listín en el modo deseado.
2. Pulse d.
(Aparecerá la visualización de confirmación.)
j
3. Seleccione YES utilizando
Si desea salir, seleccione NO y pulse
4. Pulse
x
.
q
Modo de conversión
Modo de conversión de divisas
La conversión de divisas tiene 5 etapas de conversión programable.
Cada modo es capaz de hacer cálculos con 12 dígitos.
Ajuste de una nueva tasa de conversión de divisas
<Ejemplo> Ajuste de la tasa siguiente: $ 1 = £ 0,6)
q
1. Pulse
apropiado de veces para
seleccionar el modo de
conversión de divisas.
<
2. Pulse
divisas apropiada.
o > para seleccionar la etapa de conversión de
o l.
el número
x
.
USD
Rate=1
USD 0.
$1
3. Pulse n.
Aparecerá el modo de ajuste.
Nota:
Si selecciona
“$1” a “$5” y “Rate=1”. Antes de realizar la introducción, utilice
d
cifra de la cotización. Si necesita borrar la cifra de la cotización,
presione
4. Introduzca “USD” y pulse
x
Note:
Usted podrá introducir hasta 3
caracteres para el nombre de la
unidad de la divisa.
5. Introduzca “PND” y pulse
x
6. Introduzca la tasa; 0.6.
Para la tasa, podrá introducir hasta 8 caracteres numéricos. Si
necesita borrar el número de tasa, pulse
7. Para almacenar el ajuste, pulse
e
, En el visualizador ya estarán ajustados “USD”,
para borrar los caracteres anteriores. Utilice b para borrar la
c
.
.
.
c
.
x
.
b
y
S-10
Page 45

Conversión de divisas
<p. ej. $ → £>
q
1. Pulse
el modo de conversión de divisas.
<
2. Pulse
divisas apropiada.)
3. Introduzca la cantidad.
(ejemplo, $50)
=
4. Pulse
<p. ej. £
5. Pulse
6. Introduzca la cantidad.
7. Pulse
o
→
$>
j
.
La flecha de la parte superior
cambiará el sentido de
conversión.
(ejemplo, £75)
=
o
j
o l para cambiar el sentido de conversión.
Utilice
Pulse
c
el número apropiado de veces para seleccionar
o > para seleccionar la etapa de conversión de
x
.
x
.
para borrar el resultado del cálculo.
USD PND
Rate=0.6
USD 50.
PND
USD PND
Rate=1.666666
30.
USD 125.
PND
75.
Reemplazo de las pilas
Pilas utilizadas
Tipo Modelo Calidad
Pilas de litio CR2032 3
• Cerciórese de escribir la información importante almacenada en
la memoria antes de reemplazar las pilas.
Precauciones
Como el uso inapropiado de las pilas puede producir fugas o
explosión, observe al pie de la letra las instrucciones siguientes:
• Inserte la pila con su lado positivo (+) colocado correctamente.
• No tire nunca las pilas al fuego porque podrían explotar.
• Mantenga las pilas alejadas del alcance de los niños.
• Cuando las pilas estén a punto de agotarse, extráigalas
inmediatamente del Organizador para evitar que se fugue su
electrolito, lo que podría causar la corrosión de dicho
Organizador.
Debido a que las pilas entregadas con el Organizador han sido
instaladas en fábrica, éstas pueden descargarse antes de
transcurrir el tiempo de duración especificado.
S-11
Page 46

Cambio de las pilas de funcionamiento
Intervalo de cambio de las pilas
Cuando se visualice “
por otras nuevas. Si el nivel de las pilas es bajo, la luz de fondo no
funcionará, o permanecerá activada durante menos tiempo del
ajustado. La utilización prolongada del Organizador con las pilas
débiles puede alterar o borrar el contenido de la memoria. El
contenido de la memoria puede perderse si reemplaza
inadecuadamente las pilas o si no toma en cuenta las instrucciones
siguientes.
Precaución:
• PC-LINK puede no estar disponible si las pilas están débiles.
• Cuando el nivel de las pilas sea bajo quizás no pueda utilizar el
informe de gastos (informe resumido)
• Con las pilas débiles, la introducción de nuevos datos y la edición
de los existentes puede resultar imposible en algunos modos.
Además, quizás resulte imposible ajustar el reloj.
B
”, reemplace inmediatamente las pilas
Cambio de las pilas
• Asegúrese de desconectar la alimentación antes de cambiar las
pilas.
• No presione ON hasta después de haber finalizado el
procedimiento de reemplazo de las pilas.
• No reemplace las pilas de una vez.
Reemplácelas una tras otra.
o
1. Pulse
2. Afloje el tornillo (girándolo hacia la izquierda) y
extraiga la tapa de las pilas de la parte posterior
de la unidad.
3. Retire una pila usada con un bolígrafo u otro
objeto similar.
• No emplee un lápiz mecánico ni un objeto
puntiagudo.
4. Instale una nueva pila con el lado positivo (+)
encarado hacia arriba.
5. Repita los pasos 3 y 4 para reemplazar cada pila.
6. Vuelva a instalar la tapa del compartimiento de
las pilas y asegúrela con el tornillo.
7. La alimentación se conectará 2 a 3 segudos después de pulsar ON.
8. Ajuste el reloj a la hora correcta.
Precaución:
• Los ajustes del reloj pueden perderse cuando extraiga las pilas
durante mucho tiempo.
• Confirme si todos los ajustes están realizados correctamente
después de haber cambiado las pilas.
para desconectar la alimentación.
S-12
Page 47

MEMO
33
Page 48

MEMO
34
Page 49

QUICK REFERENCE GUIDE
Clock SettingClock Setting
1. Press
h
then e.
(
2. Select AM or PM using
3. Press
l
and enter the hour.
4. Press
l
and enter the minutes, month, day and year.
5. Press
l
then select your Home city using k or m.
x
8. Press
.
(or k m).
Telephone ModeTelephone Mode
1. Press v to select the desired category from Personal,
Business or Others.
2. Press n.
x
3. Enter each entry field and press
Entry fields are as shown below.
Last name
Office# → Fax# → Other# → Address → City
State → Zip code → Country → E-mail → Notes
4. Press
→
First name → Company → Home#
x
.
.
→
→
Schedule ModeSchedule Mode
1. Press
g
2. Enter the date then press
3. Enter Start Time then press
4. Enter End Time then press
5. Use
j
or l to select Yes for alarm setting.
x
6. Press
7. Enter the time for Reminder and press
8. Enter the Description then press
then n.
.
x
x
x
.
.
.
x
x
.
.
Anniversary ModeAnniversary Mode
1. Press u then n.
2. Enter the date then press
3. Enter Reminder date from 0 to 9 then press
4. Enter the Description then press
x
.
x
x
.
.
35
Page 50

QUICK REFERENCE GUIDE
To Do ModeTo Do Mode
1. Press
t
then press n.
x
2. Enter the date then press
3. Use
j
or l to select the priority number from 1 (High) to 9
(Low) then press
4. Enter what you have to do on the target day then press
x
.
x
.
.
Expense ModeExpense Mode
1. Press
y
2. Press
n
j
3. Use
4. Enter the amount then press
5. Use
6. Use
7. Enter the Memo then press
or l to select the expense category then press
x
j
or l to select Payment then press
j
or l to select the availability of the Receipt then
x
press
then press 1 or E to select Expense
and enter the date then press
.
x
.
.
x
.
x
x
.
.
Searching for InformationSearching for Information
To view the Listings in the Telephone Mode
v
1. Press
2. Press
To view the Listings in the Schedule mode.
1. Press
2. Enter the target date.
3. Press
the appropriate number of times.
<
or >.
g
x
.
.
36
Page 51

LIMITED WARRANTY
SHARP ELECTRONICS CORPORATION warrants to the first consumer
purchaser that this Sharp brand product (the “Product”), when shipped
in its original container, will be free from defective workmanship and materials,
and agrees that it will, at its option, either repair the defect or
replace the defective Product or part thereof with a new or remanufactured
equivalent at no charge to the purchaser for parts or labor for the period(s)
set forth below.
This warranty does not apply to any appearance items of the Product nor
to the additional excluded item(s) set forth below nor to any Product the
exterior of which has been damaged or defaced, which has been subjected
to improper voltage or other misuse, abnormal service or handling, or
which has been altered or modified in design or construction.
In order to enforce the rights under this limited warranty, the purchaser
should follow the steps set for th below and provide proof of purchase to
the servicer.
The limited warranty described herein is in addition to whatever implied
warranties may be granted to purchasers by law. ALL IMPLIED
WARRANTIES INCLUDING THE WARRANTIES OF
MERCHANTABILITY AND FITNESS FOR USE ARE LIMITED TO THE
PERIOD(S) FROM THE DATE OF PURCHASE SET FORTH BELOW.
Some states do not allow limitations on how long an implied warranty
lasts, so the above limitation may not apply to you.
Neither the sales personnel of the seller nor any other person is authorized
to make any warranties other than those described herein, or to extend
the duration of any warranties beyond the time period described herein
on behalf of Sharp.
The warranties described herein shall be the sole and exclusive warranties
granted by Sharp and shall be the sole and exclusive remedy available
to the purchaser. Correction of defects, in the manner and for the period
of time described herein, shall constitute complete fulfillment of all liabilities
and responsibilities of Sharp to the purchaser with respect to the Product,
and shall constitute full satisfaction of all claims, whether based on
contract, negligence, strict liability or otherwise. In no event shall Sharp
be liable, or in any way responsible, for any damages or defects in the
Product which were caused by repairs or attempted repairs performed
by anyone other than an authorized servicer. Nor shall Sharp be liable or
in any way responsible for any incidental or consequential economic or
property damage. Some states do not allow the exclusion of incidental
or consequential damages, so the above exclusion may not apply to you.
THIS WARRANTY GIVES YOU SPECIFIC LEGAL RIGHTS. YOU MAY
ALSO HAVE OTHER RIGHTS WHICH VARY FROM STATE TO STATE.
Your Product : Electronic Organizer
Warranty Period for this One (1) year parts and labor from date
Product : of purchase.
Additional Items Excluded Any consumable items such as paper,
from Warranty Coverage : maintenance cartridge, ink cartridges
Where to Obtain Service : At a Sharp Authorized Servicer located
What to do to Obtain Service : Ship (prepaid) or carry in your Product to
supplied with the Product or to any
equipment or any hardware, software,
firmware, fluorescent lamp, power cords,
covers, rubber parts, or peripherals other
than the Product.
in the United States. To find out the
location of the nearest Sharp Authorized
Servicer, call Sharp toll free at 1-800-BESHARP.
a Sharp Authorized Servicer. Be sure to
have proof of purchase available. If you
ship or mail the Product, be sure it is
packaged carefully.
TO OBTAIN SUPPLY, ACCESSORY OR PRODUCT INFORMATION, CALL 1-800-BE-SHARP.
37
Page 52

38
SHARP ELECTRONICS CORPORATION
Sharp Plaza, Mahwah, New Jersey 07430-2135
PRINTED IN CHINA/IMPRESO EN CHINA
01DGK (TINSE0456EH01)
 Loading...