

Page 1

ELECTRONIC ORGANIZER
OPERATION MANUAL
Instrucciones abreviadas en español
CONTENTS
Using the Organizer for the First Time .................................................. 1
When Abnormal Conditions Cause a Malfunction ................................. 1
Auto Power Off Function ...................................................................... 1
Backlight .............................................................................................. 1
Adjusting the LCD Contrast .................................................................. 2
Turning the Key Sound On and Off ....................................................... 2
Freeing Up Memory .............................................................................. 2
Display Symbols and Part Names ............................................................... 2
Entering Characters .................................................................................... 4
Note on the Description of the MENU Key Operations ................................ 4
Notes for the Built-in Calendar and the Time .............................................. 5
Clock Mode ................................................................................................ 5
Note on Storing the Listings in Each Mode ................................................ 7
Telephone/E-mail Mode .............................................................................. 7
WWW Mode ............................................................................................... 9
Calendar Mode ......................................................................................... 10
Schedule Mode ......................................................................................... 10
To Do Mode .............................................................................................. 13
Memo Mode ............................................................................................. 13
Expense Mode .......................................................................................... 14
Anniversary Mode .................................................................................... 15
Checking the Memory Storage ................................................................. 16
Freeing Up Memory .................................................................................. 16
Recalling the Listings ............................................................................... 16
Editing the Listings ...................................................................................18
Deleting the Listings .................................................................................19
Calculator Mode ....................................................................................... 20
Conversion Mode ..................................................................................... 20
Secret Function ........................................................................................ 22
Transferring the Data ................................................................................ 24
Exchanging Data with a PC .......................................................................26
Battery Replacement ................................................................................ 30
Shortcuts .................................................................................................. 31
Specifications ........................................................................................... 32
Instrucciones abreviadas en español ...................................................... S-1
YO-190
Page 2

NOTICE
• SHARP strongly recommends that separate permanent written records be kept of all important data. Data may be lost or altered in virtually any
electronic memory product under certain circumstances. Therefore, SHARP assumes no responsibility for data lost or otherwise rendered
unusable whether as a result of improper use, repairs, defects, battery replacement, use after the specified battery life has expired, or any other
cause.
• SHARP assumes no responsibility, directly or indirectly, for financial losses or claims from third persons resulting from the use of this product
and any of its functions, such as stolen credit card numbers, the loss of or alteration of stored data, etc.
• This Organizer is not designed to visit Web sites or transfer/receive e-mails by using the URL or E-mail addresses you will store.
• The information provided in this manual is subject to change without notice.
CAUTIONS
• Do not carry the Organizer in the back pocket of slacks or trousers.
• Do not drop the Organizer or apply excessive force to it.
• Do not subject the Organizer to extreme temperatures.
• Since this product is not waterproof, do not use it or store it where fluids can splash onto it. Raindrops, water spray, juice, coffee, steam,
perspiration, etc. will also cause malfunction.
• Clean only with a soft, dry cloth.
• Use only a SHARP approved service facility.
NOTES
• All company and/or product names are trademarks and/or registered trademarks of their respective manufactures.
Page 3
1
Using the Organizer for the First Time
Be sure to perform the following operations before using the Organizer for
the first time.
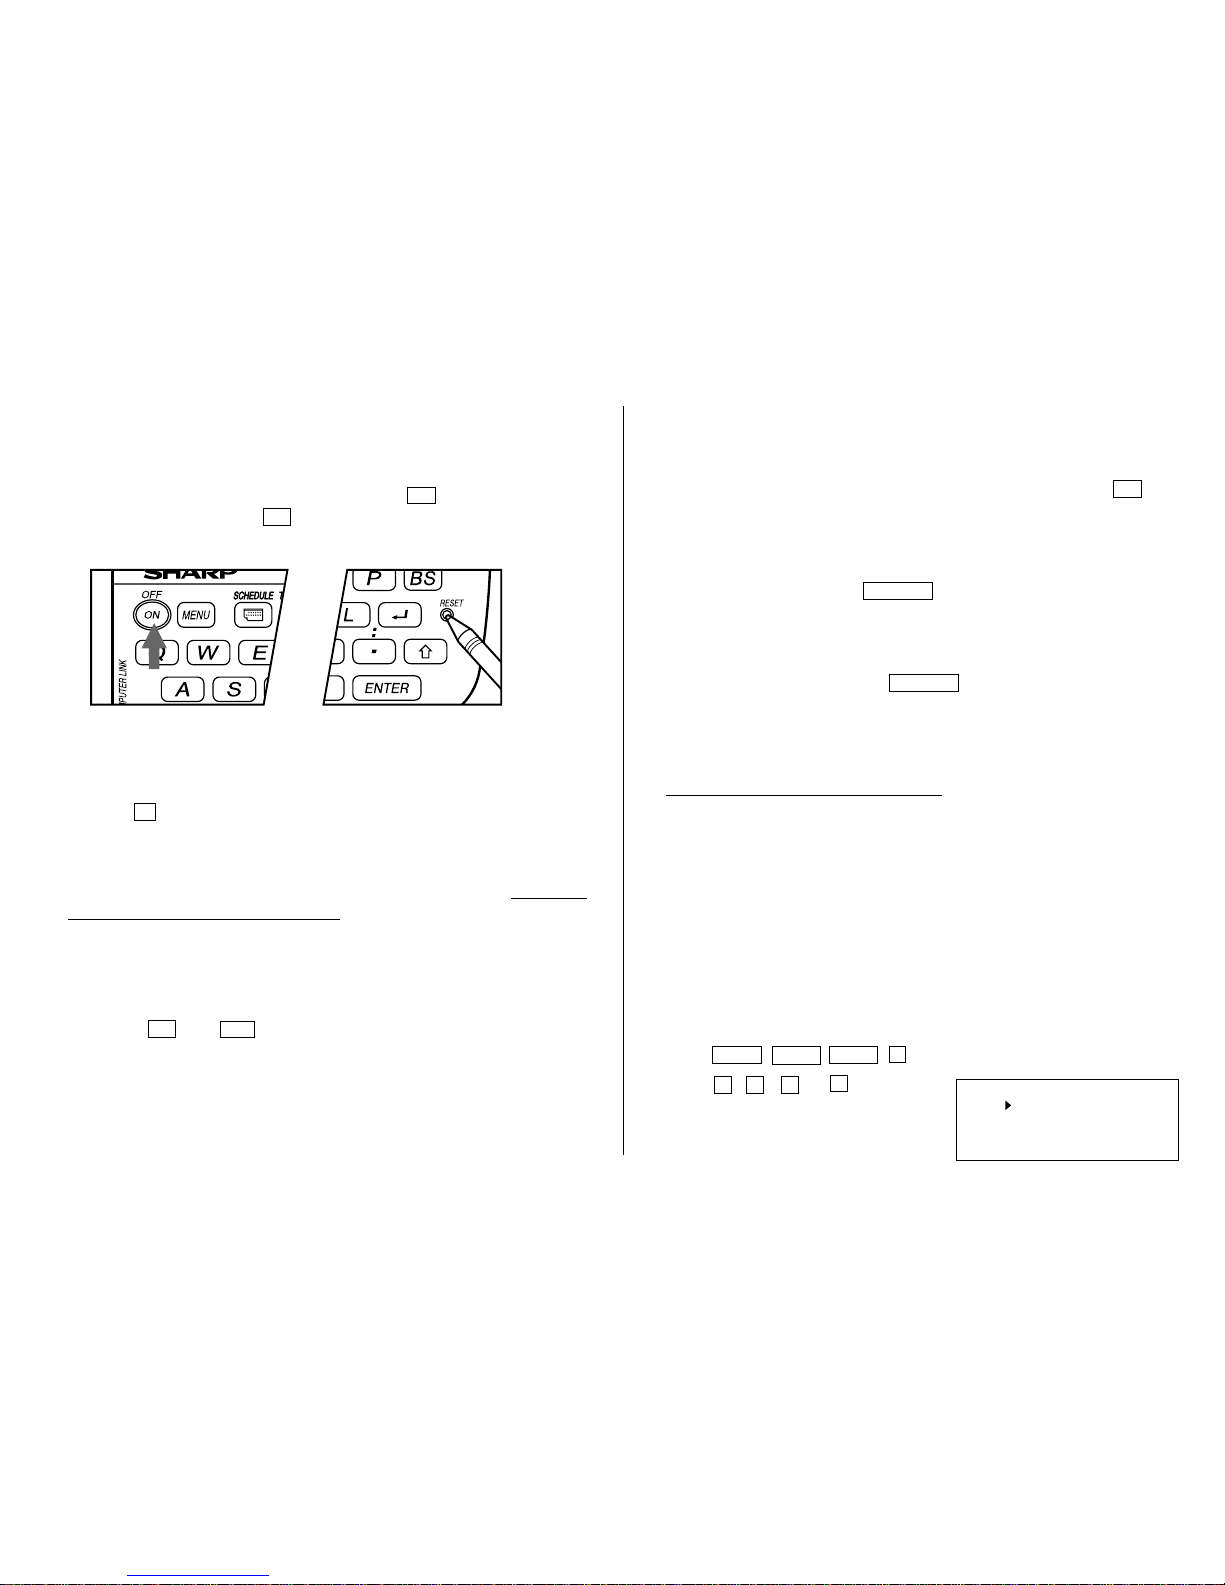
1. Press the RESET switch while holding down ON. Release the RESET
switch and then release ON.
“CLEAR ALL DATA OK (Y/N) ?” is displayed.
• Under certain conditions the message may appear as “Data has been
impaired ! Press [Y] to CLEAR ALL memory”. Proceed to the next step
in either case.
2. PressY.
3. The Organizer is now initialized. Proceed to set the date and time of the
clock. (Refer to page 5.)
Press the RESET switch with a ball-point pen or similar object. Do not use
an object with a breakable or sharp tip.
When Abnormal Conditions Cause a Malfunction
If the Organizer is subjected to strong, extraneous electrical noises or
shocks during use, an abnormal condition may occur in which no keys
(including ON and
OFF
) will respond. If this happens, press the RESET
switch. Noises or shocks may erase some or all of the Organizer’s memory.
Auto Power Off Function
When none of the keys has been pressed for approximately 7 minutes, the
Organizer automatically turns the power off to save the batteries. (The
actual time may vary depending upon the condition of use.) PressON to
resume operation.
Backlight
The Backlight allows you to view the display and use the Organizer even in
low-light conditions. Pressing
BackLight
once illuminates the display for
as long as you continue to use the Organizer, until you have not typed any
key for the interval you set. (See the following section, “Setting up the
Backlight”.)
• To turn the Backlight off, press
BackLight
again.
• The Backlight may remain on for less than the set interval or it may not
function if the battery level is very low.
• The Backlight does not function during data transfer.
★ Do not use the Backlight unnecessarily.
• Since the Backlight drains power from the operating batteries,
excessive use of the Backlight will significantly reduce the life of your
batteries.
• Do not continue using the Organizer after it has automatically turned
itself off while the backlight was being used. Even if it can be turned
on again, the clock time will be incorrect and other functions may not
work properly until the batteries are replaced.
Setting up the Backlight
You can change the interval after which the Backlight turns off
automatically.
1. Press
MENU
PREV
PREV
4
to select “4: BACKLIGHT SETUP”.
2. Press 1,2,3 or 4to select the
interval (15 – 60 seconds).
TURN OFF AFTER:
3: 45 SECONDS
1: 15 SECONDS
2: 30 SECONDS
4: 60 SECONDS
Page 4

2
< LCD CONTRAST
>
–DARK
–LIGHT
FREE UP MEMORY ?
DO YOU WANT TO
(
Yes/No
)
< KEY SOUND
>
1: ON
2: OFF
•A “” mark moves to your selection and you return to the mode in
which you were before pressing
MENU
.
Adjusting the LCD Contrast
1. Press
MENU
NEXT
2
to select “2: LCD CONTRAST”.
2. Press or to darken or lighten
the display.
3. Press
C•CE
after adjusting the
contrast.
Turning the Key Sound On and Off
1. Press
MENU
PREV
1 to select “1:
KEY SOUND”.
2. Press 1 to turn the key sound on, or
press2 to turn it off.
Freeing Up Memory
When you turn the power on, the following message may be displayed,
asking you to free up memory by deleting unnecessary space.
Press Yto delete space. Freeing up
memory needs a maximum of
approximately 2 minutes.
PressN when you wish to start
operation immediately.
(Refer to page 16.)
Display Symbols
:A “beep” will sound when a key is pressed.
:The schedule alarm will sound.
CAPS
:Capital (uppercase) letters will be entered. To enter small
(lowercase) letters, turn “CAPS” off by pressing
CAPS
.
EDIT
:The listing on the display can be edited.
2nd
:Indicates that
2nd
has been pressed. Pressing another key in
succession, to which the special function is assigned, performs
the function, for example as introduced on page 31, “Shortcuts”.
:More information exists above the current display. (Press .)
:More information exists below the current display. (Press .)
S
:Secret function is in effect. (Secret listings cannot be recalled
without a password.)
:Indicates that the recalled listing is secret.
BATT
:Indicates that the operating battery level is low.
• In the display examples of this manual, only the symbols necessary for
explanation will be shown.
NOTES:
• The symbol “ ” shown by setting the LCD contrast to DARK is not
used in this product.
• The “ ” mark indicates the alarm sound for the scheduled listings is
turned on.
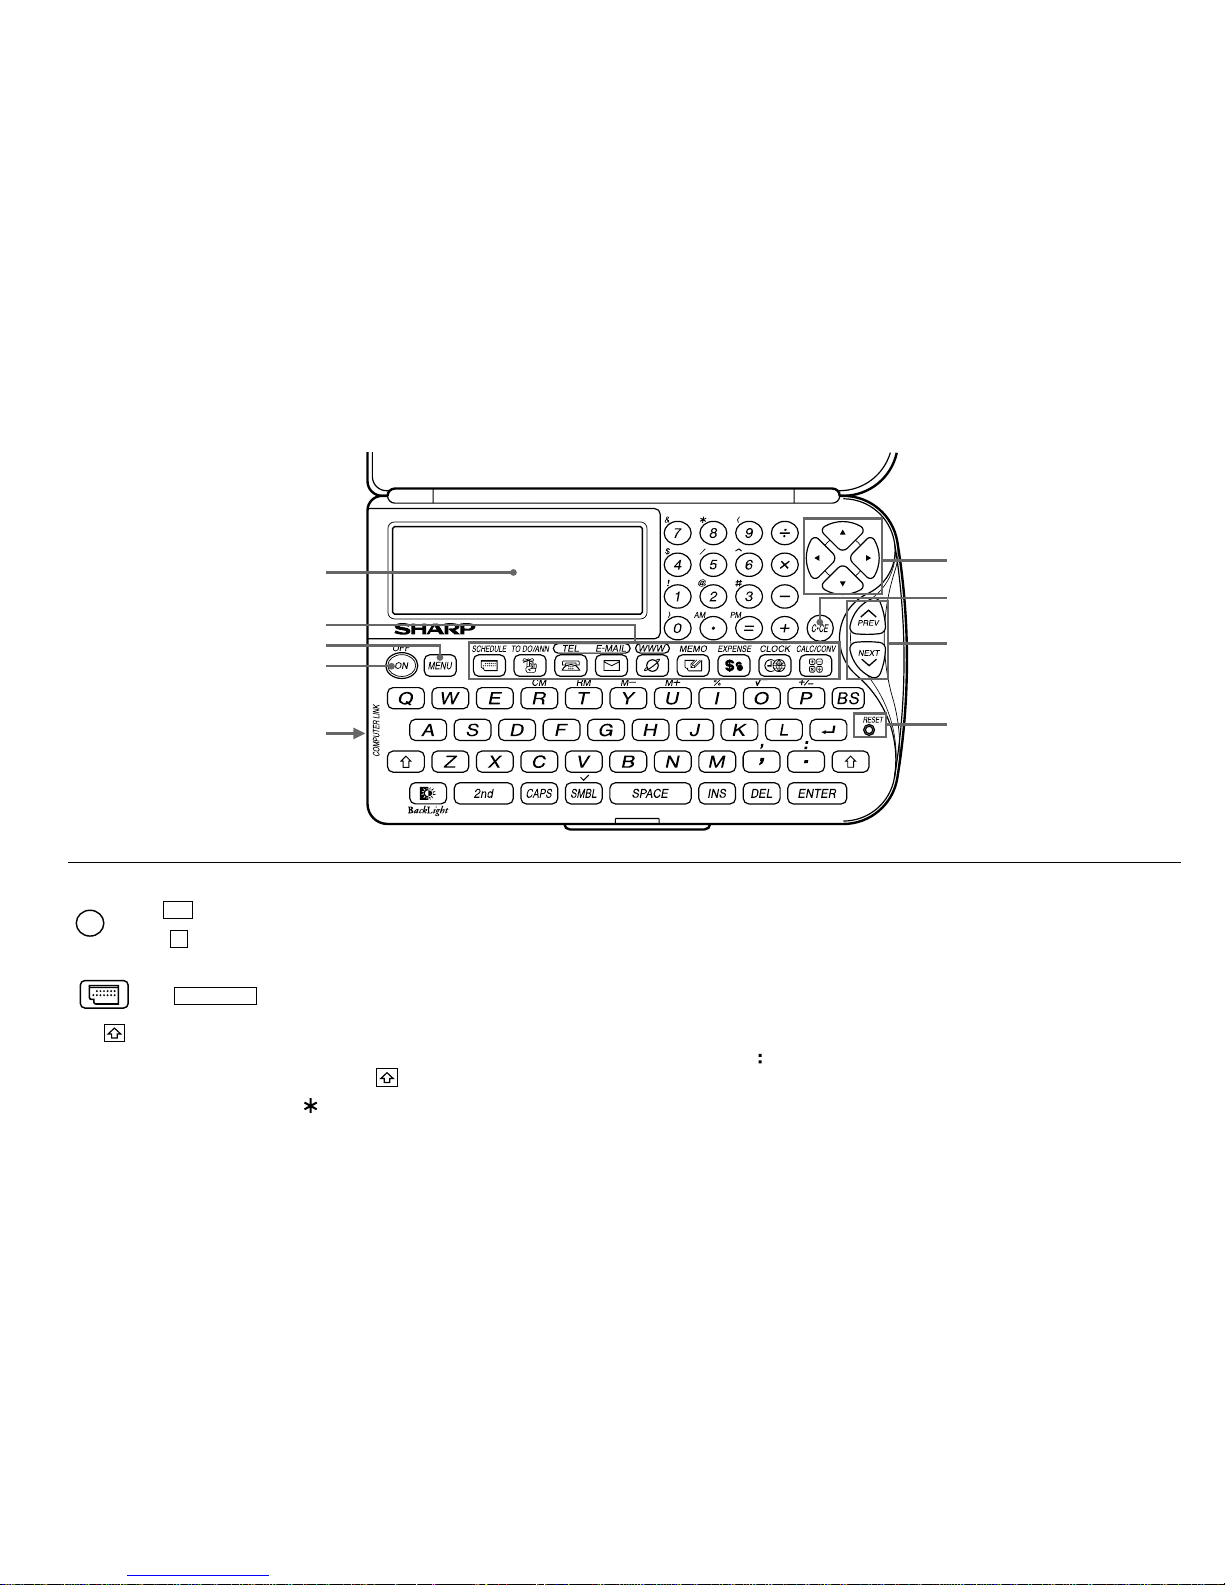
Display Symbols and Part Names
Page 5
3
: Indicates the & key.
: Indicates the numeric 7 key.
: Mode key with only one function.
The key : These keys are used to select capital (uppercase) or small (lowercase)
letters or to access the symbols above the number key
(
*
1
)
and “,” and “ ”.
While holding down , press the desired key to be entered.
*
1 … &, , (, $, /, ^ , !, @, #, )
The italic and bold type style numbers and letters and space between
them for operation are shown as unboxed numbers and letters.
In this manual the keys are represented by symbols, for example:
Cursor movement keys
Power ON/OFF key
MENU key
Mode keys
RESET switch
Search keys
7
&
SCHEDULE
7
&
→
→
SCHEDULE
→
Option port
(3-pin option jack)
Clear/Clear entry key
Display
Part Names
Page 6
4
Note on the Description of the MENU Key Operations
This Organizer offers a variety of functions which you choose from the 4
kinds of menus (see the following table).
To switch or scroll the menu screens displayed by pressing
MENU
, press
NEXT
(or ) to move to the next screen, or
PREV
(or ) to move to
the previous screen.
Menu See page...
<MODIFY>
Editing the Listings 18
Displaying the Index of the Listing 17
Deleting the Listings 19
Designating the File Names 8
<TOOLS>
Checking the Memory Storage 16
Adjusting the LCD Contrast 2
Using the Secret Function 22
Designating the Listings as Secret 23
Setting the Schedule Alarm 12
Summarizing the Expense Report 14
Freeing Up Memory 16
<UNIT TO UNIT>
Transferring the Data 24
<SETUP>
Setting the Home/World Clock 5
Selecting the Time System 7
Selecting the Date Format 7
Setting Up the Backlight 1
Turning the Key Sound On and Off 2
Turning the Alarm Sound On and Off 12
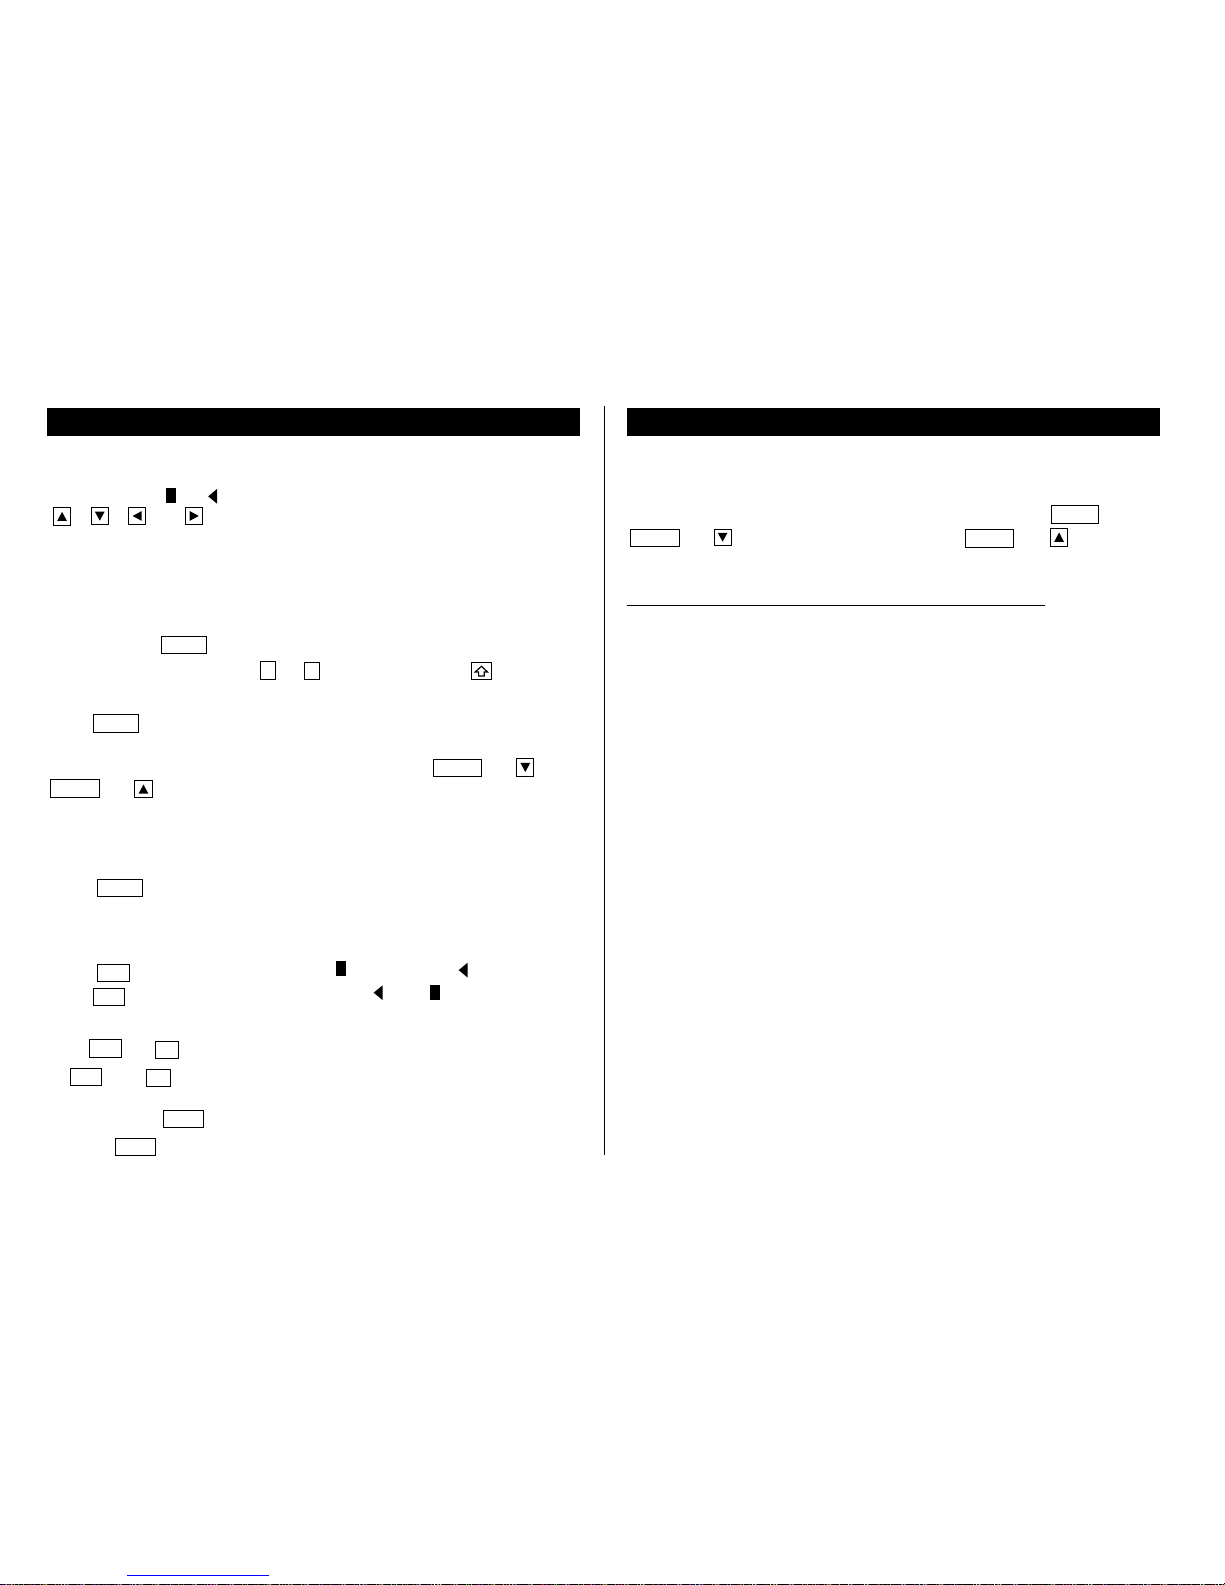
Entering Characters
1.Moving the Cursor
The cursor ( _ , or ) can be moved by pressing (or holding down)
, , , or .
2.Entering Characters
(1) Entering letters and numbers
After initializing the Organizer, the default setting for entering letters will be
capital (uppercase) letters. To enter small (lowercase) letters, turn “CAPS”
off by pressing
CAPS
.
• To enter “ ’ ” or “ : ”, press,or : while holding down .
(2) Entering graphic symbols and special characters
Press
SMBL
to display the symbol entry mode, allowing a total of 90
symbols and characters to be selected. To select the symbol display
containing the desired symbol/special character, press
NEXT
(or ) or
PREV
(or ), then press the corresponding number.
• The first display is determined by your previous choice. The 6 most
recently used symbols/special characters are stored and displayed on
this display.
Press
SMBL
to exit the symbol entry mode.
3.Making Corrections
(1) Inserting characters
Press
INS
to change the cursor from “ ” (replace) to “ ” (insert).
Press
INS
again to change the cursor from “ ” to “ ”.
(2) Deleting characters
Press
DEL
or BSto delete the character.
•
DEL
and BS will not operate in some cases such as when you input
the time in Schedule mode or you are in Calculator mode. In these
cases, press
C•CE
and reenter.
• Press
C•CE
to clear all characters on the current display.
Page 7

5
Notes for the Built-in Calendar and the Time
• Calendar, Schedule, Expense, and Clock modes allow you to enter the
desired date and time between Jan. 1, 1901 and Dec. 31, 2099.
• If an attempt is made to store an invalid time or date, you cannot move
the cursor to date entering, or store the time and date by pressing
ENTER
. Enter the correct value and press
ENTER
again.
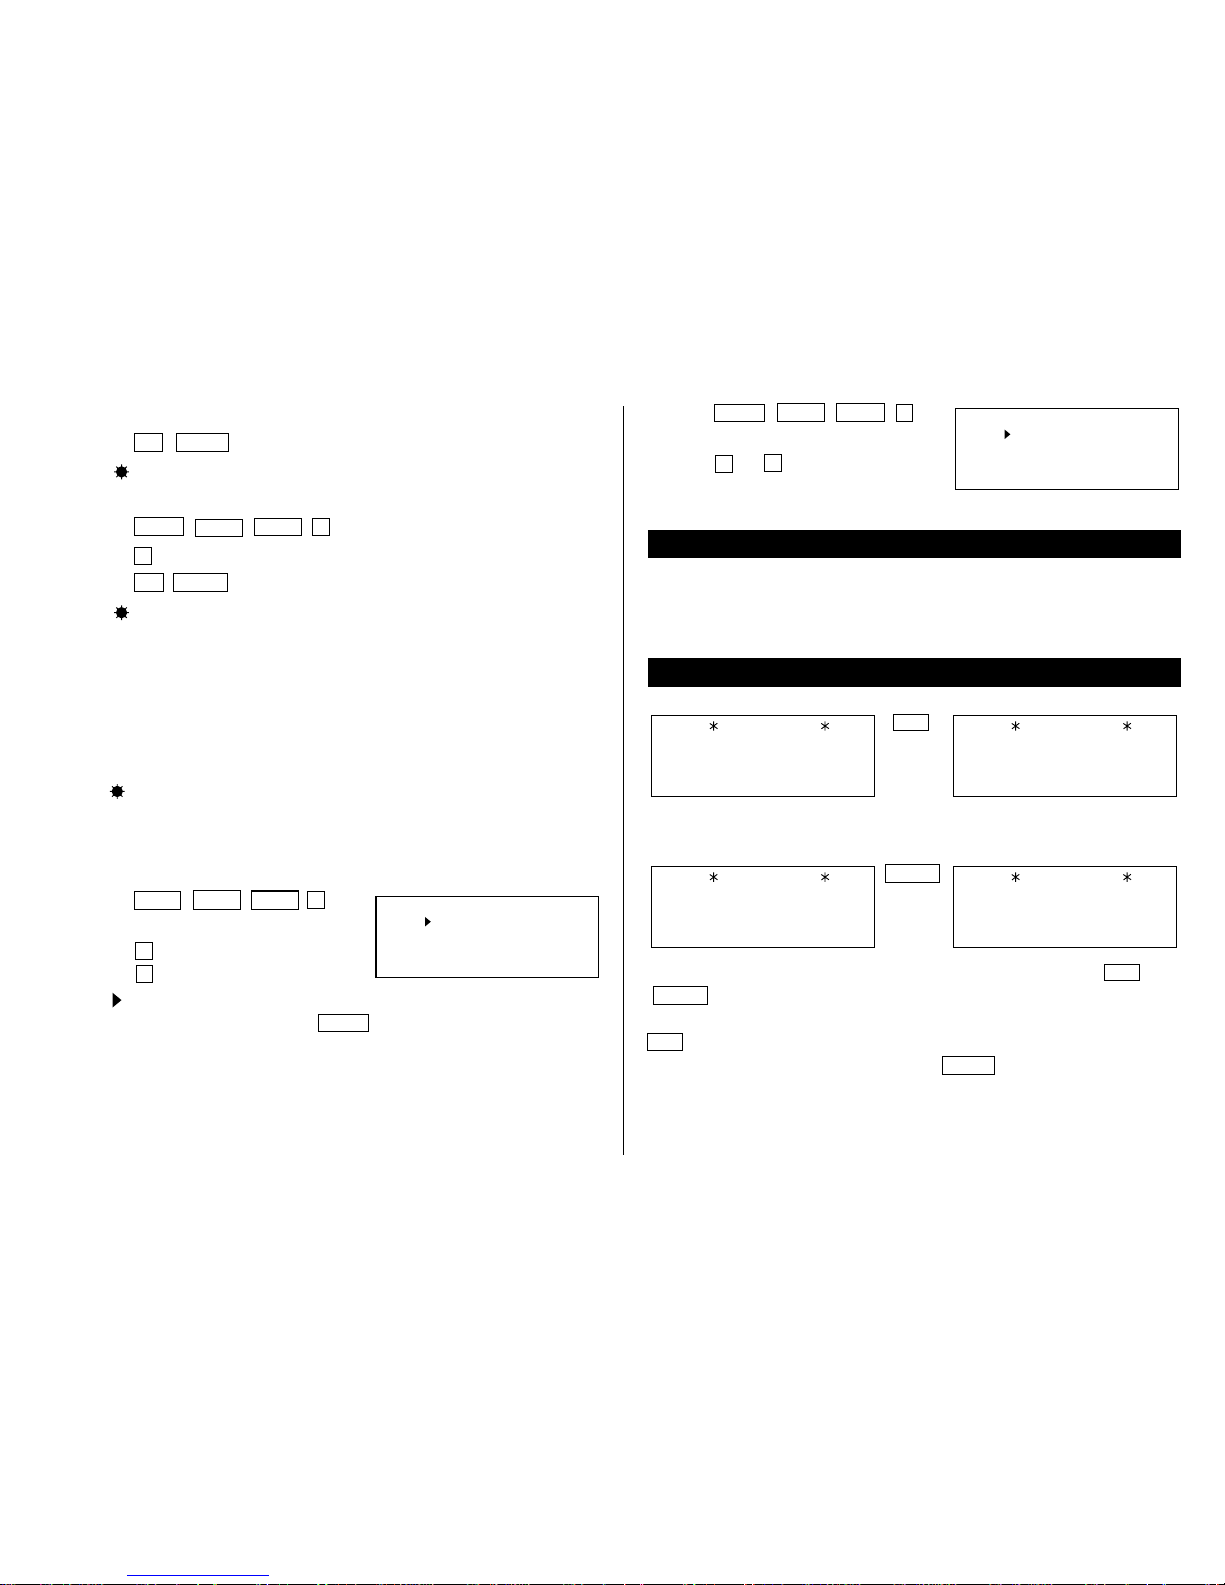
Clock Mode
The Organizer has both Home and World clocks. The display switches
between Home and World clock each time
CLOCK
is pressed.
Home clock World clock
“(+ 5:00)” indicates the time difference from the Home city.
1.Setting the Home Clock
(1) Setting and changing the Home city
Set your local city as the Home city by selecting its zone number.
Zone numbers are based on the distance of the zones from the international
date line (zone number zero). For example, there is a 13-hour difference
between the date line and London (London is 13 hours behind), so the zone
number for London is 13. Honolulu is 23 hours behind the date line, so its
zone number is 23.
The names and zone numbers of 27 cities are stored in the Organizer's
memory. (See the following table.)
Day of the week/
Month/Day/Year
World
city
Time
Time
Day of the week/
Month/Day/Year
Home
city
1. Press
CLOCK
once or twice to display the Home clock.
• The initial Home city after initialization of the Organizer is New York.
2. Press
MENU
PREV
PREV
1
to select “1: CLOCK SETTING”.
3. Press1 to select “1: HOME CLOCK”.
• “18.0” on the display indicates the time zone.
4. Press
NEXT
or
PREV
to display the desired city which corresponds
to your local zone from the cities stored in the Organizer.
5. Press
ENTER
to set the Home city.
• Some city names are abbreviated on the display as follows:
HONG KONG → HONGKONG
NEW DELHI → DELHI
RIO DE JANEIRO → RIO
LOS ANGELES → L.A.
ANCHORAGE → ANC.
• Zone numbers 0, 14, and 15 have no city name on the display.
Zone
City
Zone
City
number number
0 10 MOSCOW
1 AUCKLAND 11 CAIRO
2 NOUMEA 12 PARIS
3 SYDNEY 13 LONDON
3.3 ADELAIDE 14
4 TOKYO 15
5 HONG KONG 16 RIO DE JANEIRO
6 BANGKOK 17 CARACAS
6.3 YANGON 18 NEW YORK
7 DHAKA 19 CHICAGO
7.3 NEW DELHI 20 DENVER
8 KARACHI 21 LOS ANGELES
8.3 KABUL 22 ANCHORAGE
9 DUBAI 23 HONOLULU
9.3 TEHRAN 24 MIDWAY
NEW YORK
12:00
AM
HOME
SAT JAN 1,2000
LONDON
(
+
5:00
)
5:00
AM
WORLD
SAT JAN 1,2000
Page 8

6
(2) Setting the Clock
<Example>
Set the date and time to April 12, 2001, 10:05 PM.
1. Press
MENU
PREV
PREV
1
to select “1: CLOCK SETTING”.
2. Press 1 to select “1: HOME CLOCK ”.
• The cursor will flash.
3. Enter the hour and minutes.
1005
PM (For the 24-hour clock,
press 2205.)
(Enter 2 digits each for both hour and minutes.)
4. Enter the month, day, and year.
04122001
Use to skip entering a number that needs no change.
5. Press
ENTER
. The clock starts from 0 second.
• The time can be displayed using either the 12-hour AM/PM system
(default) or the 24-hour system. To change the time system, refer to
page 7, “Selecting the Time System”. In this example, set the 12-hour
clock. (Note: 12:00PM: noon, 12:00AM: midnight)
2.Using the World Clock
Changing the city for the World clock
1. Press
MENU
PREV
PREV
1
to select “1: CLOCK SETTING”.
2. Press2to select “2: WORLD CLOCK”.
3. Press
NEXT
or
PREV
to display the city which corresponds to the
desired zone.
4. Press
ENTER
.
3.Registering a City Name not Found in the List
If you want to set the city for the World clock to Rome, for example (Rome
belongs to zone number 12, but is not included in the city list):
1. Press
MENU
PREV
PREV
1
to select “1: CLOCK SETTING”
2. Press2to select “2: WORLD CLOCK”.
3. Press
NEXT
(or
PREV
) to set the zone number to 12.
(Initially the city is Paris.)
4. Enter the city name (up to 8 characters).
ROME
(Press
DEL
to delete
unnecessary character(s), if necessary.)
5. Press
ENTER
to store the new name.
• To register a city name for the Home clock, first display the Home clock
then press
MENU
PREV
PREV
1
1
to select “1: HOME
CLOCK” and press to move the cursor to the city name line.
• Only one changed city name can be stored in each of the Home and
World clocks.
• Each changed name is stored until you next change the zone number.
4.Setting Daylight Saving Time/Summer Time
If DST (daylight saving time/summer time) is used, the local time is
advanced one hour during the summer. Both the Home clock and World
clock can be set for DST as follows:
• DST can be set independently in either the Home or the World clock. For
example, if DST is set for the Home clock, it does not have to be set for
the World clock.
(1) Home clock
1. Press
MENU
PREV
PREV
1
to select “1: CLOCK SETTING”.
2. Press1 to select “1: HOME CLOCK ”.
ROME [12.0
]
4:05
AM
WORLD
FRI APR 13,2001
12:00
AM
HOME
SAT JAN 1,2000
NEW YORK
[
18.0
]
Page 9
7
3. Enter the correct daylight saving time/summer time.
4. Press
2nd
ENTER
to set the time as DST.
A “ ” appears on the display and DST is now set.
(2) World clock
1. Press
MENU
PREV
PREV
1
to select “1: CLOCK SETTING”.
2. Press2to select “2: WORLD CLOCK”.
3. Press
2nd
ENTER
.
A “ ” appears on the display and DST is now set. Setting DST in the
World clock automatically sets the time one hour ahead.
• When DST is set for one World city, it is used for all cities displayed in
the World clock.
(3) Clearing DST
To clear DST, follow steps 1 to 4 for Home clock, or follow steps 1 through
3 for World clock.
The “ ” disappears.
5. Selecting the Time System
The time system can be switched between 12-hour (default) and 24-hour
format.
1. Press
MENU
PREV
PREV
2
to
select “2: TIME SYSTEM”.
2. Press1to select “12” (12-hour) or
press2to select “24” (24-hour).
•A “” mark moves to your selection and you return to the mode in
which you were before pressing
MENU
.
6. Selecting the Date Format
The date format can be switched between MONTH/DAY/YEAR and DAY.
MONTH. YEAR.
< TIME SYSTEM
>
1: 12
2: 24
1. Press
MENU
PREV PREV
3 to
select “3: DATE FORMAT”.
2. Press1or2to select “MONTH/
DAY/YEAR” or “DAY. MONTH. YEAR”.
< DATE FORMAT
>
2: DAY.MONTH.YEAR
1: MONTH/DAY/YEAR
Note on Storing the Listings in Each Mode
• If the memory is full, “MEMORY FULL” will be displayed briefly and the
listing cannot be stored. Delete unnecessary data and free up memory to
make enough space to store new listings. (Refer to page 16, 19.)
Telephone/E-mail Mode
TEL/MAIL 1
NAME ?
(
TEL MODE
)
TEL/MAIL 2
NAME ?
(
TEL MODE
)
TEL/MAIL 1
NAME ?
(
E–MAIL MODE
)
TEL/MAIL 2
NAME ?
(
E–MAIL MODE
)
135
the same stored listing
TEL
↔
135
the same stored listing
↔
E-MAIL
Telephone/E-mail listings can be accessed by pressing either the
TEL
or
E-MAIL
. Both keys recall the same stored listings in their respective order
on the display.
TEL
recalls and displays the listing in the following order: NAME →
NUMBER → ADDRESS → E-MAIL, while
E-MAIL
does the same in the
following order: NAME → E-MAIL → NUMBER → ADDRESS.
Page 10
8
Number entry
Address entry
→
E-mail address entry
→
Johns, Pat
NUMBER ?
Johns, Pat
201–265–5600
ADDRESS ?
Johns, Pat
201–265–5600
E–MAIL ?
Box G, Sharp Plaza,
Name entry
TEL/MAIL 1
NAME ?
(
TEL MODE
)
←
1:[TEL/MAIL 1
]
3:[ URL
]
2:[TEL/MAIL 2
]
< FILE NAME
>
Further, Telephone/E-mail listings provide 2 files (TEL/MAIL1, TEL/MAIL2).
You can switch them for convenience by using one for business and one
for personal use. The files are cycled each time you press
TEL
or
E-MAIL
.
In Telephone/E-mail mode, a listing consists of 4 entries: name, number,
postal address, and E-mail address. The maximum number of characters
that can be entered for each listing is 512 in all.
1.Designating the File Names
You can change each file name in up to 10 characters long as follows:
1. Press
MENU
4
to select “4: FILE
NAME”.
2. Enter the new name for TEL/MAIL1,
then press
ENTER
.
• You can skip changing a file name by
pressing
ENTER
.
• To cancel entering the file names, press
C•CE
twice.
3. Perform the same procedure as step 2 for TEL/MAIL2 and URL.
4. Press
TEL
,
E-MAIL
, or
WWW
to check the new file name(s).
Johns, Pat
–
Johns, Pat
F 265–1234
–
201–265–5600
Johns, Pat
Box G, Sharp Plaza,
m–
201–265–5600
johns–P@sharpsec.co
2.Storing the Telephone Listings
1. Press
TEL
to display the TEL/MAIL1 entry prompt.
2. Enter the name. For example,
Johns, Pat
3. Press
ENTER
.
The number entry prompt is displayed.
4. Enter the phone and fax numbers.
For example,
201-265-5600
F 265-1234
5. Press
ENTER
, then enter the
address. For example,
Box G, Sharp Plaza, Mahwah,
New Jersey, 07430-2135, U.S.A.
6. Press
ENTER
, then enter the E-mail
address. For example,
johns-P@sharpsec.com
7. Press
ENTER
.
“STORED !” will be displayed briefly, then the listing will be displayed.
• To skip entering the number, address, or E-mail address, press
ENTER
when “NUMBER ?”, “ADDRESS ?”, or “E-MAIL ?” is displayed. However,
the name entry cannot be skipped.
• Regardless of the entry order, the listings in the Telephone/E-mail mode
are stored internally according to the first character of the person’s name
in the following order:
Johns, Pat
201–265–5600
Mahwah, New Jersey,
Box G, Sharp Plaza,
07430–2135, U.S.A.–
Page 11

9
Space
WWW Mode
WWW mode is used exclusively for storing name (Uniform Resource
Locator) and a remark to remind you of the URL contents. In this mode, a
WWW listing consists of 3 entries: name, URL, and remark.
1.Storing the WWW Listings
1. Press
WWW
to display the name entry
prompt.
2. Enter the name. For example,
SHARP ELECTRONICS CORP.
3. Press
ENTER
.
The URL entry prompt including
“http://www.” (you can edit) is
displayed.
4. Enter the URL. For example,
sharp-usa.com
URL
NAME ?
SHARP ELECTRONICS C
URL ?
http://www.
–
SHARP ELECTRONICS C
http://www.sharp–us
a.com
–
SHARP ELECTRONICS C
http://www.sharp–us
New Jersey
–
SHARP ELECTRONICS C
ORP.
a.com
http://www.sharp–us
New Jersey
5. Press
ENTER
.
The remark entry prompt is displayed.
6. Enter the remark. For example,
New Jersey
7. Press
ENTER
.
“STORED !” will be displayed briefly,
then the listing will be displayed.
• The maximum number of characters
(including “http://www.”) that can be entered for each listing is 512 in
all.
See also for Telephone/E-mail and WWW Mode
Recalling the Listings ................ 16 Checking the Memory Storage .. 16
Editing the Listings ....................18 Freeing Up Memory .................. 16
Deleting the Listings ..................19 Entering Characters .................... 4
Page 12
10
↔
Calendar mode Schedule mode
Calendar Mode
Calendar mode is selected by pressing
SCHEDULE
once or twice. Each
time you press this key, the display switches between Calendar and
Schedule modes.
1.Controlling the Monthly Calendar Display
The Organizer has a 5-line display and 5 weeks of a month can be
displayed. Use the following keys to control the display status.
NEXT
PREV
: displays the following or previous month.
• Hold down either of these keys for rapid recall.
:
moves the cursor or scrolls the calendar up or down one week.
1. Press
SCHEDULE
once or twice to
display the Calendar mode.
•“ ” indicates the last week of the
month is hidden below. To display the
last week, press until the cursor
scrolls into the next screen.
2. Press
NEXT
(or
PREV
) to display the calendar for the next (or
previous) month.
• In the year display, a “ ’ ” is attached to the years 1901 to 1999, while no
mark is attached to the years 2000 to 2099.
• When you reset the Organizer, the calendar defaults to Jan. 1, 2000.
2.Returning the Calendar to the Current Date
Press
2nd
SCHEDULE
in Calendar mode.
• The current monthly calendar will be displayed, and the current date will
flash.
See also ...
Recalling the Listings ................ 16
Schedule Mode
Schedule mode is selected by pressing
SCHEDULE
once or twice. Each
time you press this key, the display switches between Schedule mode and
Calendar mode.
A schedule listing consists of 3 entries: date, time, and detail. The
maximum number of characters for each detail is 512. In the date entry, 4
digits can be entered for the year and 2 digits each for the month, day, hour,
and minute.
1.Storing the Schedule Listings
There are 3 ways to enter the desired date:
(1) Enter the desired date in Calendar mode
(2) Enter the desired date with
NEXT
(or
PREV
)
(3) Enter the desired date directly
After the date has been entered, the entry of time and detail is the same for
all 3 ways.
(1) Enter the desired date in Calendar mode
<Example>
Enter the following data.
“Lunch with Tom” from 11:30 AM to 1:00 PM on June 24,
2001.
1. Press
2nd
SCHEDULE
in Calendar mode to display the calendar for
the current date (April 12, 2001).
2. Press
NEXT
NEXT
to move the cursor to June
24, 2001.
THU APR 12,2001
TIME ?
01
1
9 10 11 12 13 14 15
23 24 25 26 27 28 29
9
2 3 4 5 6 7 8
16 17 18 19 20 21 22
Year
Month
01
1 2 3 4 5 6 7
15 16 17 18 19 20 21
29 30
4
8 9 10 11 12 13 14
22 23 24 25 26 27 28
Page 13

11
• Notice the tag ( ) on the right of “24”. It indicates a scheduled item for
that date:
(2) Enter the desired date with
NEXT
(or
PREV
)
This is a convenient way of entering a nearby date. Press
NEXT
(or
PREV
) and change the display day by day until the desired date appears.
<Example>
Enter a schedule listing on April 17, 2001.
1. Press
SCHEDULE
once or twice to display the Schedule mode screen.
2. Press
2nd
SCHEDULE
to display the time entry prompt for the current
date (April 12, 2001).
3. Press
NEXT
repeatedly until the time entry prompt for April 17, 2001
appears. Enter the time and detail following the procedure for “(1) Enter
the desired date in Calendar mode” (from step 4) on page 10.
(3) Enter the desired date directly
When the date is not close to the currently displayed date, the following
method is more convenient than the previous 2 ways.
<Example>
Enter a schedule listing on June 26, 2002.
1. Press
SCHEDULE
C•CE
to display
the date entry prompt.
2. Enter the date.
06262002
3. Press
ENTER
.
The time entry prompt (or Calendar) for June 26, 2002 is displayed.
Enter the time and detail following the procedure for “(1) Enter the
desired date in Calendar mode” from step 4 (or from step 3) on page 10.
3. Press
SCHEDULE
to change to the
Schedule mode.
Time entry prompt for June 24, 2001 is
displayed.
4. Enter the starting and ending time.
1130 AM 01
PM
(For the 24-hour clock, press 1130 13 .)
“DESCRIPTION ?” is displayed.
• “:00” will be entered automatically.
• You can enter schedule details without the ending time. Press
ENTER
(or ) after entering the starting time to display the “DESCRIPTION ?”
prompt.
• You can also enter schedule details without a specified time, except
details starting with a number. Skip entering time and start to enter
letters for the details as described in step 5.
• The hour and minute should each consist of 2 digits.
• The time can be set using either the 12-hour or 24-hour format. When
you move the cursor to the next entry field, the time is displayed in the
format selected in the Time System of the MENU functions.
• If an attempt is made to store an invalid time, you cannot move the
cursor to the next entry field. Enter the correct time and follow the next
procedure.
5. Enter the schedule detail.
Lunch with Tom
• To switch between upper- and
lowercase letters, press
CAPS
.
6. Press
ENTER
to store the listing.
7. Now, press
SCHEDULE
to check if
the listing is stored in the memory.
TIME ?
SUN JUN 24,2001
01
1 2
10 11 12 13 14 15 16
24 25 26 27 28 29 30
6
3 4 5 6 7 8 9
17 18 19 20 21 22 23
SUN JUN 24,2001
11:30AM~ 1:00PM
Lunch with Tom
–
Schedule items beginning in the morning or
schedule items without a specified time
Anniversary items
Schedule items beginning in the afternoon
YEAR :2001
DAY :12
MONTH :04
MM/DD/YYYY
Page 14
12
• If an attempt is made to store an invalid date, you cannot move to the
time entry prompt. Enter the correct date and follow the next procedure.
2.Schedule Alarm
Schedule alarm sounds for approximately 20 seconds when the time set for
a schedule listing is reached. Once a schedule item has been selected for
the alarm and the alarm has been turned on, the alarm will sound
automatically and the relevant item will be displayed even if the Organizer
has been turned off. The alarm can also be set to sound for secret items
without displaying the item.
<Example>
Recall the listing for June 22, 2001 (Meeting at 10:00AM - 11:00AM).
1. Press
2nd
SCHEDULE
in Calendar mode to display the calendar for
the current date (April 12, 2001).
2. Press
NEXT
NEXT
to move the cursor to the scheduled
date, June 22, 2001.
3. Press
SCHEDULE
to change to the Schedule mode.
• When more than one schedule listings are stored for this date, press
NEXT
or
PREV
to display the desired listing in the Schedule mode.
• You cannot set the schedule alarm to the listings with no time entry.
4. Press
MENU
NEXT
NEXT
1
to select “1: SCHEDULE ALARM”.
5. Press 1 to select “1: ON”.
• You return to the mode in which you
were before pressing
MENU
.
•A “ ” is displayed on the left of the
starting time for the scheduled item,
and an alarm sound mark (“ ”) is displayed on the left of the display.
• It is possible to perform steps 4 and 5 while you are entering the
schedule item.
• Pressing 2 to select “2: OFF” makes the “ ” disappear, and turns off
the schedule alarm.
• If the alarm time you attempt to enter has already passed, the message
“ALARM TIME ELAPSED!” appears briefly. Enter the correct alarm time.
10:00AM~11:00AM
FRI JUN 22,2001
Meeting
< ALARM SOUND
>
1: ON
2: OFF
• After the alarm sounds, “ ” will disappear and the scheduled item will
remain in the memory without “ ”.
• Even if “ ” is turned off and the scheduled alarm time has passed,
“ ” will not disappear from the display.
• The schedule alarm may not sound if the time for a schedule listing
arrives while you are transferring data or freeing up memory.
• Press
C•CE
to stop the alarm sound.
Turn the alarm sound on and off
After setting the alarm, you can turn off the alarm sound while keeping the
schedule alarm turned on.
1. Press
MENU
PREV
2 to select “2: ALARM SOUND”.
2. Press 2 to select “2: OFF”.
•A “ ” disappears, and the alarm
sound is set to OFF.
• Press 1 (“1: ON”) in step 2 to set the
alarm sound to ON again, so that the
“ ” is displayed.
• Setting the alarm sound (“ ” mark status) does not affect the setting of
the schedule alarm (“ ” mark status) to each schedule listing.
• The schedule alarm set for the schedule listing will sound when the “ ”
is turned on and the time for each listing is reached. You cannot classify
or declassify each listing.
See also ...
Recalling the Listings ................ 16 Checking the Memory Storage.. 16
Editing the Listings .................... 18 Freeing Up Memory .................. 16
Deleting the Listings .................. 19 Entering Characters .................... 4
Page 15

13
To Do Mode
To Do mode is selected by pressing
TO DO/ANN
once or twice.
Each time you press this key, the display switches between To Do and
Anniversary modes.
1.Storing the To Do Listings
1. Press
TO DO/ANN
once or twice to
display the To Do entry prompt.
2. Enter the description. For example,
Call Frank about a sales meeting
3. Press
ENTER
.
4. Enter the priority. For example,
2
5. Press
ENTER
to store it in the
memory.
• Press
C•CE
twice to cancel the entry.
• To begin another entry, press
C•CE
or simply begin entering the
description for the new listing.
• The priority can be set by any number 0-9 or letter A-Z or just left blank
by pressing
ENTER
. Lowercase letters entered without
CAPS
pressed
will be changed to the uppercase letters.
• Order of priority is from 0-9, A-Z, then space.
2.Checking off Completed Items
1. Press
TO DO/ANN
once or twice to display the To Do entry prompt.
2. Press
MENU
2
to select “2: INDEX”.
3. Press and to select the item.
4. Press to mark it as done.
DESCRIPTION ?
TO DO
PRIORITY ?
Call Frank about a
MEMO
TITLE ?
• Items marked with “ ” are given the lowest priority and listed at the
end of the list.
• You can also check off the item by recalling each listing and pressing
.
See also for To Do and Memo Mode
Recalling the Listings ................ 16 Checking the Memory Storage.. 16
Editing the Listings ....................18 Freeing Up Memory .................. 16
Deleting the Listings ..................19 Entering Characters .................... 4
Memo Mode
The maximum number of characters for each memo is 512.
1.Storing the Memo Listings
1. Press
MEMO
to display the Memo
entry prompt.
2. Enter the data. For example,
UNION BANK South branch
272-0011223
3. Press
ENTER
to store it in the
memory.
South branch
UNION BANK
272–0011223
–
Page 16

14
Expense Mode
The Expense function is an easy-to-use method of tracking personal and
business expense information. The expense summaries allow you to see
the total expenses for a single day or for a certain period.
1.Creating the Expense Records
<Example>
The date is April 5, 2001.
You bought flight tickets for a business trip for $1,200.
1. Press
EXPENSE
to display the date
entry prompt.
• The month and the day must be entered
using 2 digits and the year using 4
digits. For single digit months or days, enter “0” before the single digit.
• The date can be changed by pressing either or .
2. Enter the expense date and press
ENTER
.
04052001
ENTER
3. Enter the expense amount and press
ENTER
.
1200
ENTER
• Numerical values can be input in up to
10 digits including 2 decimal places.
4. Enter the description.
Flight tickets for inspection abroad
5. Press
ENTER
to store it in the
memory.
• Press
C•CE
once or twice to clear the description, and press it again to
return to the date entry prompt.
• The description field can be skipped by pressing
ENTER
.
EXPENSE
DATE ?
M/D/Y= 4/12/2001
THU APR 5,2001
AMOUNT ?
1,200.00
DESCRIPTION ?
THU APR 5,2001
1,200.00
inspection abroad
–
Flight tickets for
THU APR 5,2001
DATE: 4/12/2001
–DAILY–
1:DAILY
2:PERIOD
<
EXPENSE REPORT
>
2.Expense Summaries
Expense summaries are a collection of records stored in Expense mode.
You can recall them for a specific day or a certain period.
(1) Summarizing an expense report for a specific day
<Example>
Specify the date, April 5, 2001.
1. Press
EXPENSE
to enter the Expense mode.
2. Press
MENU
NEXT NEXT
2
to
select “2: EXPENSE REPORT”.
3. Press1to select “1: DAILY”.
• The current date will be displayed.
4. Enter the desired date.
04052001
5. Press
ENTER
.
• Press
ENTER
to return to the date
entry prompt, when you wish to check
another daily report.
(2) Summarizing a report for a certain period
<Example>
From: April 1, 2001 To: April 30, 2001
1. Press
EXPENSE
to enter the Expense mode.
2. Press
MENU
NEXT
NEXT
2
to select “2: EXPENSE REPORT”.
3. Press2 to select “2: PERIOD”.
DATE: 04/05/2001
–DAILY–
DATE:APR 5,2001
–DAILY–
1,200.00
Page 17

15
FROM:APR 1,2001
TO : 04/30/2001
–PERIOD–
FROM:APR 1,2001
–PERIOD–
1,415.25
TO :APR 30,2001
FEB 12
–ANN–
DESCRIPTION ?
M/D=– /
M=MONTH D=DAY
4. Enter the starting and ending time.
04012001
ENTER
04302001
5. Press
ENTER
.
• Press
ENTER
to return to the date
entry prompt.
• If the integer section in the calculation
result exceeds 12 digits, “∗, ∗∗∗, ∗∗∗, ∗∗∗. ∗∗” is displayed.
See also for Expense and Anniversary Mode
Recalling the Listings ................ 16 Checking the Memory Storage .. 16
Editing the Listings ....................18 Freeing Up Memory .................. 16
Deleting the Listings ..................19 Entering Characters .................... 4
Anniversary Mode
Anniversary mode is selected by pressing
TO DO/ANN
once or twice. Each
time you press this key, the display switches between To Do and
Anniversary modes.
In Anniversary mode, you can specify the month and date (such as
wedding anniversaries and birthdays), or month, week, and day of the week
(such as Mother’s Day (second Sunday in May)).
Once a date is stored as an anniversary, the date will be an anniversary for
every year from 1901 to 2099.
The maximum number of characters for each description is 512.
Anniversaries are marked with a tag ( ) in the center right of the date (See
page 11) in the monthly calendar.
1.Storing the Anniversary Listings
<Example 1>
Enter the following data.
“Nancy’s Birthday” on February 12th.
1. Press
TO DO/ANN
once or twice to enter the Anniversary mode.
2. Press1 to select “1: MONTH/DAY”
to enter the date entry prompt.
3. Enter the date and press
ENTER
(or
).
0212
ENTER
• If an attempt is made to store an invalid
date, you cannot move to the description entry prompt. Enter the correct
date and follow the next procedure.
4. Enter the description of the
anniversary.
Nancy’s Birthday
5. Press
ENTER
to store it in the memory.
<Example 2>
Register Mother's Day (second Sunday in May).
1. Press
TO DO/ANN
once or twice to enter the Anniversary mode.
2. Press2to select “2: MONTH/WEEK” to display the date entry mode.
3. Enter the month, week, and day of the
week.
05 2 0
4. Press
ENTER
, and then enter the
description of the anniversary.
ENTER
Mother's Day
5. Press
ENTER
to store it in the
memory.
–ANN–
FEB 12
Nancy's Birthday
M=MONTH W=WEEK
M/W/D=05/2/0
D=DAY 0:S 1:M 2:T
3:W 4:T 5:F 6:S
–ANN–
MAY WEEK 2 SUN
Mother's Day
–
Page 18

16
Checking the Memory Storage
1. Press
MENU
NEXT
1
to select “1:
MEMORY CHECK”.
The number of listings stored in TEL/
MAIL1, TEL/MAIL2, and URL (WWW)
files is displayed.
2. Press
NEXT
again to display the number of listings stored in
SCHEDULE, ANN1, and ANN2 files.
3. Press
NEXT
again to display the number of listings stored in MEMO,
EXPENSE, and TO DO files.
4. Press
C•CE
to return to the mode in which you were before pressing
MENU
.
• When the amount of memory used approaches F (FULL), delete
unnecessary data and free up memory to make enough space to store
new listings.
• Since the same memory is used for all the modes other than the
Calculator and Conversion modes, the number of listings that can be
stored in each of these modes will vary depending on the situation of
each mode.
Freeing Up Memory
Deleting or modifying data during operation can produce unnecessary
space in the memory of the Organizer.
Delete unnecessary space and free up memory, when the Organizer
displays “MEMORY FULL”.
1. Press
MENU
NEXT
NEXT
.
2. Press3to start freeing up memory.
• “WORKING...” is displayed indicating that the memory is being freed up.
TEL/MAIL 1:76
TEL/MAIL 2:31
URL :6
E
–––––– F
FREE UP MEMORY ?
DO YOU WANT TO
(
Yes/No
)
• The following situations may display the message shown below.
– When the power is turned on.
– When you performed the operation,
“Deleting the Listings” on page 19.
(It is recommended to press Y to
free up memory.)
•
The indication “Replace the OPERATING batteries !” shown at the time of
freeing up memory means that the operating batteries are almost
exhausted. Replace them with new ones then try again to free up memory.
• The backlight function does not work while the memory is being freed up.
Recalling the Listings
1.Notes for Recalling the Listings
• Perform searching the listings in each mode other than Clock, Calculator,
and Conversion modes.
• The direct, keyword, and index searches are not case sensitive.
• When the symbol “ ” or “ ” is displayed, more information exists.
Pressing or scrolls up or down one line.
• When there are no more (or relevant) listings to be recalled or to be
searched, “NOT FOUND !” is displayed briefly and the display returns to
the entry prompt.
2.Sequential Search
Recalls the listings in order in each mode.
To begin searching in Anniversary mode, press
TO DO/ANN
once or twice
to enter the Anniversary mode and then press1(or2) to select the
searching type.
Press
NEXT
(or
PREV
) to recall the listings in forward (or reverse)
order. Hold down either of these keys for rapid recall.
Page 19

17
Johns, Pat
201–265–5600
F 265–1234
Mahwah, New Jersey,
Box G, Sharp Plaza,
Schedule listings
• When nothing has been entered for that day, only the time entry prompt
is displayed.
• Press
2nd
SCHEDULE
in Schedule mode to recall the scheduled
listings for the current day. Then press
NEXT
repeatedly to check if any
other listings are scheduled for the current day.
• Press
2nd
NEXT
(or
2nd
PREV
) in Schedule mode repeatedly to
recall the listings skipping empty dates. Press
C•CE
C•CE
, then press
2nd
NEXT
(or
2nd
PREV
) to display the first (or last) listing in
chronological order. After the last (or first) listing in chronological order
has been found, “NOT FOUND !” is displayed briefly.
3.Direct Search
Recalls the listings by the first character(s) of the name (or the contents) in
Telephone/E-mail, WWW, Schedule, To Do, or Memo mode.
1. Enter the first character(s) of the desired name in each mode.
2. Press
NEXT
(or
PREV
).
• The search in Schedule mode begins from the currently displayed date in
forward (or reverse) order.
• If the desired listing in Telephone/E-mail or WWW mode is not found,
the subsequent listing in sequential order will be displayed.
• Each time
NEXT
(or
PREV
) is pressed, sequential search will be
performed.
4.Keyword Search
Recalls the listings by a word contained in the desired listing in Telephone/
E-mail, WWW, Schedule, To Do, or Memo mode.
<Example>
Recall the listings containing the word “Sharp” in the TEL/
MAIL1 file.
1. Press
TEL
to display the TEL/MAIL1 file.
2. Enter the word.
Sharp
Johns, Pat
201–265–5600
F 265–1234
Mahwah, New Jersey,
Box G, Sharp Plaza,
Johns, Pat
Robert, Smith
Stevenson Dug
Shingo Nakahara
Tom Robert
3. Press
2nd
NEXT
.
• Each time
2nd
NEXT
are pressed,
subsequent listings containing the
word “Sharp” will be displayed.
5.Index Search
Recall the listings in Telephone/E-mail, WWW, Schedule, To Do, Memo,
Expense, or Anniversary mode. The listings recalled are listed one for each
line on the display.
<Example>
Display the Index in the Telephone/E-mail mode.
1. Press
TEL
to display the Telephone/
E-mail mode screen.
2. Press
MENU
2
to select “2: INDEX”.
• The index of the Telephone/E-mail
listing is displayed.
• Pressing
ENTER
returns to the screen
recalled in step 1.
• Up to five listings are displayed at a time.
• To display the first listing beginning with a particular character in the
Telephone/E-mail, or WWW mode, press the desired character key. If
there is no listing for that character, the first subsequent listing will be
displayed.
• Pressing
NEXT
and
PREV
scrolls the page forward and backward.
To see the whole listings move the pointer “ ” using and to
select the desired listing, and press
ENTER
.
Rearranging memos in the index display
In the index display, the order in which memos are recalled can be changed.
1. Press
MEMO
MENU
2
to select “2: INDEX”.
Page 20

18
2. Press and to select the listing, and press
INS
.
• The selected listing blinks.
3. Press and to move the listing to the desired position.
4. Press
ENTER
to store the new order in the memory.
• Press
C•CE
to cancel any changes.
6.Date Search
Recalls the listings by the date in Calendar, Schedule, or Expense mode.
(1) Calendar or Schedule listings
<Example>
Recall the calendar for December 25, 2001.
1. Press
SCHEDULE
.
2. Press
C•CE
to display the date entry
prompt.
3. Enter the month, day, and year.
12252001
To make a correction, move the cursor with or , or press
C•CE
to clear the displayed date.
• To enter a single-digit month or day, enter zero and the digit.
4. Press
ENTER
.
The specified calendar or schedule will be displayed.
When you start this search in Calendar mode, pressing
SCHEDULE
displays the desired date in Schedule mode. And when you start the
search in Schedule mode, pressing
SCHEDULE
displays the desired
date in Calendar mode.
(2) Expense listings
Press
C•CE
in the Expense entry prompt, then enter the date and press
NEXT
(or
PREV
).
YEAR :2001
DAY :12
MONTH :04
MM/DD/YYYY
7.Other Search in Calendar Mode
Recalling the scheduled item from the Calendar mode
The scheduled date is displayed with the tag ( ) on the right of the date
number. (See page 11)
1. Press
SCHEDULE
once or twice to display the Calendar mode.
• Pressing
2nd
SCHEDULE
displays the current date.
2. Press the cursor movement keys ( , , , ) to move to the
date with a tag.
3. Press
SCHEDULE
to display the schedule contents.
Editing the Listings
1.Editing the Listings
1. Recall a listing in the desired mode.
2. Press
MENU
1
to select “1: EDIT”
• The edit mode is entered and the cursor flashes.
3. Modify the data as desired.
4. Press
ENTER
to store it in the memory.
2.Creating a New Listing
Pressing
2nd
ENTER
instead in step 4 in the above section, “1. Editing
the Listings” creates a new listing without deleting the previously stored
listing. This operation is useful when you enter a new listing whose
contents are the same as or similar to the previously stored listing.
Page 21

19
Deleting the Listings
1.Deleting One Listing
1. Recall the listing to be deleted.
2. Press
DEL
.
“DELETE ? Y/N” will appear.
3. PressY to delete the currently displayed listing.
• To cancel the deletion operation, press N.
• You can also delete individual listing on the index display.
Press
MENU
2
in the desired mode to select “2: INDEX”, move the
pointer “ ” to select the listing you want to delete, and press
DEL
and
Y
.
2.Deleting All of the Listings in Each Mode
(1) Deleting all of the listings in each mode
If all of the listings for Telephone/E-mail, WWW (URL), Schedule, To Do,
Memo, Expense, or Anniversary mode are not necessary any more, you can
delete them all at once.
<Example>
Delete all listings in the TEL/MAIL1 files.
1. Press
MENU
3
to select “3: DATA DELETION”.
2. Press1to select “1: TEL/MAIL/URL”.
3. Press1to select “1: TEL/MAIL1”.
“DELETE ? Y/N” is displayed.
• After performing step 1, press the following keys in other modes:
SCHEDULE:
2
1
ANN1:
2 2
ANN2:
2
3
MEMO:
3
EXPENSE:
4
TO DO (ALL):
NEXT
1
1
.
TO DO (DONE):
NEXT
1
2
.
• When the Secret function is on, “SECRET ON MODE” is displayed and
the file cannot be deleted. In this case, turn the Secret function off (page
22) and repeat the above procedure.
4. Press Y.
• To cancel the deletion operation, press N.
• All of the listings (including secret listings) in the selected mode will be
deleted all at once.
(2) Deleting all of the scheduled listings for an entire month
1. Press
SCHEDULE
once or twice to recall the calendar for the desired
month.
2. Press
DEL
. “DELETE ? Y/N” will appear.
3. Press Y to delete all of the schedule listings for the currently
displayed month.
• To cancel the deletion operation, press N.
• Although all of the schedule listings for the month are deleted,
anniversaries are still retained.
(3) Deleting the password and secret listings
(Refer to page 22, “Secret Function” on registering the password and
turning the secret function on and off.)
The password and all secret listings can be deleted at the same time.
1. Press
MENU
3
to select “3: DATA DELETION”.
2. Press
NEXT
2
to select “2: SECRET DATA”.
“ALL SECRET DATA DELETE ? Y/N” is displayed.
3. PressY.
• To cancel the deletion operation, press N.
• “DELETED !” is displayed briefly and the password and all secret listings
are deleted.
Page 22

20
Calculator Mode
The Organizer’s built-in calculator can perform the 4 arithmetic calculations
in up to 12 digits.
Calculator mode is selected by
pressing
CALC/CONV
once or twice.
Each time you press this key, the display
switches between Calculator and
Conversion modes.
Before performing any calculation, press
C•CE
twice to clear the display.
• An error occurs when the integer section of the calculation result
exceeds 12 digits, if the memory exceeds 12 digits, or a number is
divided by zero. (“-E-” is displayed.)
Press
C•CE
to cancel the error.
Example Operation Display
(–24+2) ÷ 4=
–
24 +2 4
=
*
–5.5
34 + 57 =
45 + 57 =
68 × 25 =
68 × 40 =
34+57=The second figure (57)
45
=
becomes the constant.
(Subtraction and division are
performed in the same way as above.)
68 25=The first figure (68)
40=becomes the constant.
91.
102.
1,700.
2,720.
Example Operation Display
4.
4,096.
0.125
25 – 9 =
(43)2 =
1/8
25 –9
=
4
= =
=
8
=
CDDD
25 × 5 =
–) 84 ÷ 3 =
+) 68 + 17 =
(Total) =
CM
25 5
M
+
84 3
M
–
68 + 17
M
+
RM
123456789098 ×
145 =
17901234419210
– E –
123456789098 145
=
17.9012344192
C•CE
17.9012344192
(17.9012344192 × 1012 = 17901234419200)
-M- 125.
-M- 28.
-M- 85.
-M- 182.
CALC
0.
20.
25.
220.
400.
What is 10% of 200?
What percentage is 9
of 36?
200 + (200 × 10 %) =
500 – (500 × 20 %) =
200 10
%
9 36
%
200 +10
%
500 –20
%
*
–
(minus) can only be used when entering a negative number as the
first number. Use
+
/–
for following negative numbers during
calculation.
<Example>
5 × (–10) = –50
5 10
+
/–
=
Conversion Mode
Each time you press
CALC/CONV
, the display switches between
Calculator and Conversion modes.
This mode has 2 types of conversions as shown below.
The number on the top right of the conversion display indicates the
selected conversion type.
←
Conversion number
CONVERSION
1
$ £
0.
0
.
Page 23

21
1.Changing the Conversion Display
1. Press
CALC/CONV
once or twice to select the Conversion mode.
2. Press
NEXT
and
PREV
until the desired conversion number is
displayed.
2.Setting the Rate
<Example>
Set the following rate: $1 = £0.6
1. Press
CALC/CONV
once or twice to select the Conversion mode.
2. Press
NEXT
(or
PREV
) to select the conversion number 1.
3. Press
MENU
1
to select “1: EDIT”.
• The result display disappears and the rate display flashes.
4. Enter the rate. (Up to 10 digits)
0.6
ENTER
No.
Conversion pattern
No.
Conversion pattern
Unit A Unit B Unit A Unit B
1$→ £ 10 gal → l
2$→
11 I.gal → l
3$→ ¥ 12 fl.oz → ml
13 I.fl.oz → ml
4 inch → cm 14 oz → g
5 feet → m15lb→ kg
6 yard → m16°F→ °C
7 mile → km 17 cal → J
8 acre → m
2
18 hp → W
9 acre → ha 19 PS → W
3.Changing the Currency or Unit
If there is no conversion pattern you want to use, you can change the
currency or unit in the conversion patterns No. 1 to No. 3.
1. Repeat steps 1 to 3 of the above section, “Setting the Rate”.
2. Press , and to move the cursor to the currency to be
changed and enter the new currency or unit.
• Up to 7 letters can be entered each for unit A and unit B.
3. Press to move the cursor to the rate field and enter the rate.
4.Converting Currency/Unit
To convert unit A to unit B, press .
To convert unit B to unit A, press .
<Example 1>
Convert $198 to £.
1. Press
NEXT
(or
PREV
) to select the unit. (In this example, select the
conversion number 1: $1 = £0.6.)
2. Enter the value to be converted.
198
3. Press to convert it.
The conversion result is displayed.
• Once you have set each rate, you can
perform a consecutive conversion
such as from £ to $, and then from $ to .
• The previous conversion result remains on the display, when you switch
from one conversion type to another. Press
C•CE
to clean the result
and start another conversion.
CONVERSION
1
$ £
0.6
0
.
118.8
CONVERSION
1
0.6
$ £
198.
CONVERSION
1
0.6
$ £
Page 24

22
SET PASSWORD
[
–
]
PASSWORD
[
1234567
]
IS NOW SET
S
CONVERSION
16
˚F ˚C
77
.
<Example 2>
Convert 25°C to °F.
1. Press
NEXT
(or
PREV
) to select the unit. (In this example, select the
conversion number 16, which does not display the rate.)
2. Enter the value to be converted.
25
3. Press to convert it.
• The conversion result may have a slight calculation error as a result of
rounding off the number. Use the conversion result for reference.
Secret Function
The Secret function allows you to protect confidential listings with a password,
so that no unauthorized person can recall them.
1. Registering a Password
Up to 7 characters can be registered for the password.
If you forget the password, it will be necessary to clear the password
and all secret listings from the memory (see page 19). As a safeguard,
make a written record of the password.
1. Press
MENU
NEXT
3
to select “3: SECRET”.
• If “ALLOW ACCESS TO SECRET DATA”
is displayed instead, a password is
already registered.
To delete and change the password,
refer to page 23.
2. Enter the password. For example,
1234567
3. Press
ENTER
.
“PASSWORD [1234567] IS NOW SET”
and an “S” are displayed.
The “S” indicates the Secret function
is in effect.
4. Press
C•CE
to display the entry prompt.
2. Turning the Secret Function On and Off
When the Secret function is on, an “S” is displayed. When the Secret
function is off, the “S” is cleared even after the password is registered.
(1) Turning the Secret function off
1. Press
MENU
NEXT
3
to select “3:
SECRET”.
2. Enter the password and press
ENTER
.
(Enter “1234567” in this case.)
“SECRET DATA ACCESSIBLE !” is displayed briefly. The Secret function
is now off and secret listings can be recalled. The display changes into
the entry prompt without the “S”.
• If the incorrect password is entered, “INCORRECT PASSWORD !” will be
displayed briefly and the display changes into the entry prompt.
• Even after the Secret function is turned off, the Secret function will
automatically be turned on after manual or auto power off.
(2) Turning the Secret function on
1. Press
MENU
NEXT
3
to select “3:
SECRET”.
2. Press1to select “1: HIDE SECRET”.
“SECRET DATA IS HIDDEN !” is
displayed briefly. The secret function is now on and secret listings
cannot be recalled. The display changes into the entry prompt with the
“S”.
SECRET DATA
S
[
–
]
ALLOW ACCESS TO
2:DELETE THE
1:HIDE SECRET
PASSWORD
Page 25

23
3. Designating the Listings as Secret
Only one password can be registered, but many secret listings can be entered.
A “ ” next to a listing indicates it is secret. Secret listings cannot be
recalled unless the Secret function is off.
(1) Storing a listing as secret
1. Press
MENU
NEXT
4
during the data entry to select “4: SECRET
MARK( )”.
2. Press1 to select “1: ON”.
The “ ” is displayed.
3. Press
ENTER
to store it in the memory.
(2) Designating a stored listing as secret
<Example>
Designate the listing for “ABC BANK” as secret.
1. Recall the listing.
2. Press
MENU
1
to select “1: EDIT”.
3. Press
MENU
NEXT
4
to select “4: SECRET MARK ( )”.
4. Press1to select “1: ON”.
The “ ” is displayed.
5. Press
ENTER
.
The listing for “ABC BANK” is now
designated as secret.
(3) Changing a secret listing to non-secret
1. Turn the Secret function off. (Refer to page 22.)
2. Recall the desired secret listing.
3. Press
MENU
1
to select “1: EDIT”.
4. Press
MENU
NEXT
4
to select “4: SECRET MARK ( )”.
5. Press2to select “2: OFF”.
The “ ” disappears.
6. Press
ENTER
.
The secret listing is now changed to non-secret.
(4) Recalling (and editing) the secret listings
Perform recalling (or editing) the secret listings in each mode.
To recall (and edit) the secret listings, the Secret function must first be
turned off.
(5) Recalling only the secret listings
1. Turn the Secret function off. (Refer to page 22.)
2. Press the desired mode key to display the entry prompt in which you
want to recall the listing.
3. Press
MENU
NEXT
4
1
to display the " ".
4. Press
2nd
NEXT
(or
2nd
PREV
).
The secret listings only are sequentially recalled.
• If no secret listing is found, “NOT FOUND !” is displayed briefly and the
display returns to the entry prompt.
(6) Deleting and changing the password
1. Turn the Secret function off. (Refer to page 22.)
2. Press
MENU
NEXT
3
to select “3: SECRET”.
3. Press2to select “2 : DELETE THE
PASSWORD”.
4. Enter the old password to be deleted
and press
ENTER
.
“PASSWORD IS DELETED !” is displayed briefly and the display changes
into the entry prompt.
5. To register a new password, follow the procedure described in “1.
Registering a Password” on page 22.
If you forget the password
If you forget the password, you have to delete it by deleting all the secret
data.
Make sure that you really want to delete them, and see page 19, “(3)
Deleting the password and secret listings”.
ABC BANK
Chicago Branch
272–0011333
Account No.
S
ABC BANK
Chicago Branch
272–0011333
Account No.
S
EDIT
2:DELETE THE
1:HIDE SECRET
PASSWORD
Page 26

24
Transferring the Data
This Organizer can transfer data to/from the following SHARP Organizer by
using the optional communication cable. (CE-260L)
Organizers on the other end: YO-190/180/480
EL-6890/6790
Exchange data: each listing, all listings in each mode, entire
data stored in the Organizer (for a backup
and restoration process between the same
models)
1.Cautions and Special Notes for Data Transfer
• Turn off the secret function before transferring data by mode (p. 22).
• After data transfer, the data on the transferring Organizer is preserved.
• The alarm setting is ignored. The alarm will not sound during data
transfer.
• The Auto power off function is disabled in all the transfer modes.
• The Backlight is nullified during data transfer. (If the Backlight is on, it is
automatically turned off at the beginning of data transfer.)
• When the Organizers are not in the same mode before transferring data
by listing or mode, “DATA ERROR !” is displayed and no data transfer is
allowed.
However, directories in the Telephone (or E-mail) and WWW modes are
excluded from this rule. For example, data in the TEL/MAIL1 directory
can be transferred to the WWW directory.
• When the communication cable is disconnected during data transfer,
“I/O DEVICE ERROR !” is displayed. Press
C•CE
to clear the error,
check that the Organizers are connected correctly, and then start the
steps again.
• The indication “Replace the OPERATING batteries !” shown whenever
any item is selected on the “UNIT TO UNIT” menu screen means that the
operating batteries are almost exhausted. Replace them with new ones
then try again to transfer data.
• When “MEMORY FULL” is displayed and data transfer is aborted, delete
unnecessary data on the receiving Organizer.
• The indication “WORKING...” shown on the side of the receiving
Organizer at the beginning or end of the data transfer means that the
memory has begun to be freed up automatically.
2.Transferring the Data between Organizers
• Turn both of the Organizers off first before connecting them with the cable.
• When an error occurs, “I/O DEVICE ERROR !” is displayed on the
receiving or transferring Organizer, or on both ones.
1. Press the desired mode key, or recall a listing to be transferred on the
transferring Organizer.
• To transfer all the listings in each mode, press the mode key to display
the entry prompt. To transfer each listing, recall the desired listing.
2. Press
MENU
NEXT NEXT NEXT
on both the Organizers.
The following menus are displayed.
3:VERIFY
1:SEND 4:BACKUP
2:RECEIVE 5:RESTORE
<
UNIT TO UNIT
>
SCHEDULE TO DO/ANN
BackLight
OFF
CM
COMPUTER LINK
MENU
QWE
ASD
2nd
CAPS
ZXC
ON
R
SCHEDULE TO DO/ANN
BackLight
OFF
CM
COMPUTER LINK
MENU
QWE
ASD
2nd
CAPS
ZXC
ON
R
Page 27

25
3. Press2 on the receiving Organizer to
select “2: RECEIVE”.
4. Press1 on the transferring Organizer
to select “1: SEND”.
Data transfer is started.
• To interrupt data transfer, press
ON
.
Messages are displayed on the respective Organizers while data is being
transferred.
Transferring Organizer
Receiving Organizer
When these messages are no longer displayed, the data transfer is
completed.
To verify the listing after it has been
transferred, press3(“3: VERIFY”) on
the receiving Organizer in step 3.
If any discrepancies are found, “VERIFY ERROR !” is displayed.
3.Transferring Data to Make a Backup File
All data in the Organizer can be transferred to the same model of the
Organizer.
1. Press
MENU
NEXT NEXT
NEXT
on both the Organizers.
< UNIT TO UNIT
>
–SENDING–
< UNIT TO UNIT
>
–RECEIVING–
< UNIT TO UNIT
>
–VERIFYING–
< UNIT TO UNIT
>
RECEIVING
MODE
< UNIT TO UNIT
>
RECEIVING
MODE
BACKUP
< UNIT TO UNIT
>
SEND
OK ? Y/N
BACKUP
< UNIT TO UNIT
>
–SENDING–
< UNIT TO UNIT
>
–RECEIVING–
2. Press5 on the receiving Organizer to
select “5: RESTORE”.
3. Press4 on the transferring Organizer
to select “4: BACKUP”.
A confirmation message is displayed.
4. Press Y in answer to the
confirmation message on the
transferring Organizer.
Backup data transfer is started.
Messages are displayed on the
respective Organizers while the data is
being transferred. When these
messages are no longer displayed, the backup data transfer is
completed.
Make sure you really want to delete all the data in the receiving Organizer
before executing the "RESTORE" function. Once you start the restoration
process, all the data in the receiving Organizer will be deleted, even if
you cancel the restoration process.
Page 28

26
Exchanging Data with a PC
With SHARP PC Interface software and cable package, you can exchange
data with an IBM compatible personal computer.
What Does PC Interface Software Do?
Backup ................ Backs up all data in the Organizer to your PC.
Restore ................ Restores data from a backup file into an Organizer.
Address Utility ..... Allows you to type in an address, E-mail or WWW entry
on a PC and download it into your Organizer.
System Requirements
• Windows® 2000 Professional, Windows® 98, Windows® 95
• 8MB free hard disk space
• VGA monitor or better
• Microsoft® Mouse or compatible Pointing Device
• 3.5” disk drive
• One available serial port with D-sub 9-pin connector
And for Windows® 2000 Professional:
• 133MHz or higher Pentium-compatible CPU
• 64MB RAM available
And for Windows® 98, Windows® 95:
• IBM-compatible 486 or Pentium-compatible CPU (66MHz or higher)
• 24MB RAM available
1.Before You Begin
(1) Connecting Your Organizer to a PC
1. Turn off your PC and the Organizer.
2. Connect the standard 9-pin connector of the PC interface cable into a
COM port on your PC.
• Using a 25-pin connector instead of the standard 9-pin connector
requires an additional adaptor.
3. Connect the other end of the PC Interface Cable into the PC interface
connector located on the left side of the Organizer.
(2) Installing
1. Insert the PC Interface Software disk into your disk drive.
2. Click on the Windows [Start] button and then click [Run].
3. Type in a:\Setup.exe and click on [OK].
• Type in your disk drive name ("a:" in this example).
4. Follow the on-screen instructions.
The software is installed into the following location and can be accessed
in the following directory:
C:\Program Files\Sharp YOZQ_b\
Application: [Start] ➝ [Program] ➝ [Sharp YOZQ_b] ➝[EO-Utility]
ReadMe: [Start] ➝ [Program] ➝ [Sharp YOZQ_b] ➝[ReadMe]
You are recommended not to change the default folder name: [Sharp
YOZQ_b].
5. Click [Finish].
SCHEDULE TO DO/ANN
BackLight
OFF
CM
COMPUTER LINK
MENU
QWE
ASD
2nd
CAPS
ZXC
ON
R
PC Interface Cable
(supplied)
Page 29

27
• When you are using a notebook PC, an error message may be displayed
when you click [Auto Detect...]. Check the BIOS setting on your
notebook PC and set it to the serial port. Even when the BIOS setting is
correctly made, you may need to select an appropriate port manually.
3.Backup and Restore
(1) Making a Backup File
1. Connect your Organizer to a PC.
2. Click [Start] ➝ [Program] ➝ [Sharp YOZQ_b] ➝ [EO-Utility].
The PC Interface Software Main Screen appears.
3. Click [Backup].
The dialog box appears asking you
to enter the backup file name, if
necessary.
• The default name is determined
according to the PC clock
system, in the format of
"YYYYMMDD.BKE", for example,
20010101.BKE.
• [Browse...] allows you to change the backup file, its file name and its
destination.
• When the COM port has not been selected, the warning message dialog
box appears. Click [OK]. Then click [COM port...] on the Main Screen
and select the appropriate port.
4. Click [NEXT >>] to start the backup process.
The instructions screen appears.
• To cancel the backup process, click [Abort] on the instructions screen.
5. On your Organizer:
Press
MENU
NEXT NEXT NEXT
and 4 to select “4: BACKUP”.
Then press Y to start the backup process.
2.Getting Started
Known Incompatibilities
• While you are backing up or restoring data, a transfer error may occur
with certain 3D screen saver utility programs enabled. Before
transferring data, disable any 3D screen saver utility programs you may
be running.
• PC Interface Software may not run reliably with certain virus scanning
programs enabled. If you have problems in transferring data with your
Organizer, disable any virus checking software you may be running.
• PC Interface Software may not run reliably with certain power
management features enabled. If you have problems in transferring data
with your Organizer, disable any power management features you may
have turned on.
(1) PC Interface Software Main Screen
All operations can be accessed from
the Main Screen.
To access the Main Screen, click
[Start] ➝ [Program] ➝ [Sharp
YOZQ_b] ➝ [EO-Utility].
(2) Setting the COM port
1. Connect your Organizer to a PC.
2. Click [Start] ➝ [Program] ➝ [Sharp YOZQ_b] ➝ [EO-Utility].
The PC Interface Software Main Screen appears.
3. Click [COM port...].
The COM port setting dialog box
appears.
• Click the radio button to select an
appropriate port or click [Auto
Detect...] to allow an appropriate
port to be selected automatically.
Page 30

28
(2) Restoring a Backup File
"Restore" function replaces all the data in the Organizer with the backup file
saved on a PC.
• Make sure you really want to delete all the data in your Organizer before
executing the "Restore" function. Once you start the restoration process,
all the data in the Organizer will be deleted, even if you cancel the
restoration process.
1. Connect your Organizer to a PC.
2. Click [Start] ➝ [Program] ➝ [Sharp YOZQ_b] ➝ [EO-Utility].
The PC Interface Software Main Screen appears.
3. Click [Restore].
The dialog box appears asking you to choose the backup file name.
4. Click [NEXT >>] to start the restoration process.
The confirmation dialog box appears.
• To cancel the restoration process, click [NO].
5. Click [YES].
The instructions screen appears.
• To cancel the restoration process, click [Abort] on the instructions
screen.
6. On your Organizer:
Press
MENU
NEXT NEXT NEXT
and5to select “5: RESTORE”.
The data transfer is started.
4.Address Utility
Click [Address Utility] on the Main Screen to open the Address Utility window.
(1) Command Buttons
New button
Clears the input data
in all entry fields to
create new data.
Secret button
Sets this data as secret.
Click on this area.
: Secret ON : Secret OFF
Done button
Closes the dialog window.
Mode tabs
Switch the mode window
between TEL/E-mail mode and
WWW mode.
Send button
Transfers the data to
your Organizer.
Entry fields of TEL/E-mail mode
Page 31

29
Edwards Bob
Supervisor Sales de
201–265–5600
F 265–1234
pt. ABCD co. 15 Nor
(2) Entering an Address
<Example>
Enter the following data as secret data in TEL/E-mail mode.
Name Edwards Bob
Number 201-265-5600
F 265-1234
Address Supervisor Sales dept.
ABCD co. 15 North St.
E-mail edwards@abcd.efg.com
1. Connect your Organizer to a PC.
2. Click [Start] ➝ [Program] ➝ [Sharp YOZQ_b] ➝ [EO-Utility].
The PC Interface Software Main Screen appears.
3. Click [Address Utility].
4. Click [TEL/E-mail] tab.
5. Click [New] to clear the input data in all entry fields.
6. Enter the information.
• The cursor appears in the
entry field you click for
input.
7. (After entering the information), click [Send].
The instructions screen appears.
• To cancel the transferring process, click [Abort] on the instructions screen.
8. On your Organizer:
Press
MENU
NEXT NEXT NEXT
and2to select “2: RECEIVE”.
If the transferred data is displayed on
the display of the Organizer, the
transferring process is completed.
• Do not forget to fill in the Name field before clicking [Send]. Otherwise,
the data you typed in can not be sent.
• You can not enter the characters or symbols not supported by the
Organizer in the entry fields.
Entry fields of WWW mode
Page 32

30
(2) Replacing the batteries
• Make sure the power is turned off before replacing the batteries.
• Do not press ON until the battery replacement procedure is
completed.
1. Press
OFF
to turn the power off.
2. Loosen the screw (counterclockwise) and remove the
battery holder cover on the back of the unit.
3. Remove the used batteries using a ball-point pen or
similar object.
• Do not use a mechanical pencil or sharp pointed
object.
4. Install 2 new batteries with the positive sides (+) facing up.
5. Replace the holder cover and secure it with the screw.
6. The power will be turned on 2 to 3 seconds after ON is pressed. If the
power does not come on, press the RESET switch.
7. Set the clock to the correct time.
3.Memory Backup Battery Replacement
(1) Battery replacement frequency
• Replace the battery every 5 years.
When you start to use the Organizer, write down the date on the label of the
Organizer, so that you know when to replace the battery the next time.
For example:
Battery Replacement
Batteries used
Type Model Quantity Use
Lithium battery CR2032 2 Unit operation
Lithium battery CR2032 1 Memory backup
• Do not remove both the operating and memory backup batteries at
the same time. Doing so will clear the memory of its contents.
• Be sure to write down any important information stored in the
memory before replacing the batteries.
1. Precautions
Since improper use of the batteries may cause leakage or explosion, strictly
observe the following instructions.
• Insert the battery with its positive side (+) correctly positioned.
• Never throw batteries into a fire because they might explode.
• Keep batteries out of the reach of children.
• When batteries become low, remove them from the Organizer
immediately to avoid battery leakage and corrosion inside the Organizer.
Because the batteries in the Organizer were installed at the factory, they
may become depleted before the specified expiration time is reached.
2. Operating Batteries Replacement
(1) Battery replacement time
When “
BATT
” is displayed, immediately replace the batteries with new
ones. If the battery level is very low, the alarms or the key touch tone may
not sound, or similarly the Backlight may remain on for less than the set
interval or it may not function. Continued use of the Organizer with low
batteries can alter or clear the memory contents. Memory contents may be
lost if the batteries are improperly replaced or if the following instructions
are disregarded.
MEMORY BACKUP BATTERY
INSTALLATION DATE
MONTH
• YEAR
11 2001
Page 33

31
(2) Precautions when replacing the memory backup battery
If the memory backup battery is replaced when the operating batteries are
depleted, the memory contents will be lost. Make sure the operating
batteries are not depleted. If the operating batteries are depleted, first
replace these before replacing the memory backup battery.
(3) Replacing the battery
1. Press
OFF
to turn the power off.
2. Loosen the screw (counterclockwise) and remove the
battery holder cover on the back of the unit.
3. Remove the memory backup battery seal.
4. Remove the used battery using a ball-point pen or
similar object.
• Do not use a mechanical pencil or sharp pointed object.
5. Install a new battery with the positive side (+) facing up.
6. Replace the seal and the holder cover and secure the cover with the
screw.
7. The power will be turned on 2 to 3 seconds after ON is pressed. If the
power does not come on, press the RESET switch. If nothing appears on
the display again, replace the operating batteries.
Shortcut
Action See page...
12
18
17
24
22~23
23
14
12
2
Turns the Schedule alarm on and off.
Enters the edit mode.
Displays the Index.
Displays the options for the data
transfer.
Sets or deletes the password.
Sets the “ ” mark.
Displays the Expense report.
Turns the alarm sound on and off.
Turns the key sound on and off.
2nd
A
2nd
I
2nd
O
2nd
S
2nd
M
2nd
EXPENSE
*
2nd
2nd
2nd
E
* For use in Expense mode only
Shortcuts
This Organizer has 9 shortcut keys to provide rapid access to the menus.
Page 34

32
Specifications
Model: YO-190
Product name: Electronic Organizer
Display: 19 columns × 5 lines
Memory capacity: 260736 bytes
Clock mode:
Accuracy: ±30 seconds/month (at 25°C/77°F)
Display: Year, month, day, day of the week, hour, minute,
AM/PM, city name, time zone
Clock system: 12-hour/24-hour format (switchable) World clock
function, daylight saving time/summer time display
function, schedule alarm function
Telephone/E-Mail mode: Entry and recall of names, numbers, postal
addresses, and E-mail addresses
WWW mode: Entry and recall of names, URL, and remarks
Calendar mode: From Jan., 1901 to Dec., 2099, Schedule mark function
distinguishing between morning, afternoon, and anniversary.
Schedule mode: Entry and recall of schedule (year, month, day, hour and
minute), schedule alarm
To Do mode: Entry and recall of To Do listings
Memo mode: Entry and recall of memo listings
Expense mode: Entry and recall of expense listings
Anniversary mode: Entry and recall of month, day (or month, week, day),
and description of anniversaries
Calculator mode: 12 digits (with calculation status symbol) Addition,
subtraction, multiplication, division, percentage, square root, memory
calculation, etc.
Currency/Unit conversion mode: 10 digits, 19 kinds of currencies and units
Power consumption: 0.1W
Operating temperature: 0°C – 40°C (32°F – 104°F)
Power supply: Operating battery: 6V ... (DC)
(Lithium battery CR2032×2)
Memory backup battery: 3V ... (DC)
(Lithium battery CR2032×1)
Battery life:
Operating batteries (at 25°C/77°F)
• Approx. 1200 hours
When data is continuously displayed without Backlight.
• Approx. 300 hours
When data is continuously displayed with Backlight for 2 minutes
per hourly use.
• Approx. 270 hours
When data is searched for 5 minutes and displayed for 55 minutes
per hourly use and Backlight is on for 2 minutes per hourly use.
• Approx. 1.5 years
When turned off and the clock is running.
Memory backup battery
• Approx. 5 years (if operating batteries are replaced promptly when
exhausted)
• Approx. 1 year (if operating batteries are exhausted)
Weight: Approx. 130 g ( 0.29 lb.) (Including batteries)
Dimensions: Open: 148 mm (W) × 180 mm (D) × 9 mm (H)
5-13/16" (W) × 7-3/32" (D) × 11/32" (H)
Closed: 148 mm (W) × 92 mm (D) × 13 mm (H)
5-13/16" (W) × 3-5/8" (D) × 1/2" (H)
Accessories: 3 lithium batteries (installed), operation manual
Page 35

S-1
Empleo del Organizador por primera vez
1. Pulse el interruptor RESET mientras mantiene pulsado ON. Suelte el
interruptor RESET y luego suelte ON.
Aparece “CLEAR ALL DATA OK (Y/N)?”.
• Bajo ciertas condiciones, podría aparecer el mensaje “Data has been
impaired! Press [Y] to CLEAR ALL memory”.
2. Pulse Y.
3. El Organizador se ha inicializado.
Función de desactivado automático
Para ahorrar energía de las pilas, el Organizador se desactivará
automáticamente si no se pulsa ninguna tecla durante aproximadamente 7
minutos. (El tiempo real puede variar según las condiciones de utilización).
Pulse ON para reanudar la operación.
Luz de fondo
Pulsando
BackLight
una vez, se iluminará la pantalla y la luz de fondo
permanecerá iluminada mientras esté utilizando el Organizador o hasta que
no se active ninguna tecla durante el período definido por usted.
Ajuste de la luz de fondo
1. Pulse
MENU
PREV PREV
4 para seleccionar “4: BACKLIGHT
SETUP” (4: Ajuste de luz de fondo).
2. Pulse 1 , 2 , 3 o 4 para
seleccionar el lapso (15 – 60
segundos).
• Volverá a aparecer el modo en que se
encontraba antes de pulsar
MENU
.
ESPAÑOL
ÍNDICE
Empleo del Organizador por primera vez .......................................... S-1
Función de desactivado automático ................................................. S-1
Luz de fondo .................................................................................... S-1
Ajuste del contraste de LCD ............................................................. S-2
Activación y desactivación del sonido de pulsación de teclas........... S-2
Liberación de la memoria ................................................................. S-2
Empleo de los relojes LOCAL y MUNDIAL .............................................. S-2
Almacenamiento de los listines de TELÉFONO/CORREO ELECTRÓNICO ......
S-2
Almacenamiento de los listines de WWW (URL) .................................... S-3
Pantalla del CALENDARIO mensual ........................................................ S-3
Almacenamiento de los listines del PROGRAMA DE ACTIVIDADES ....... S-3
Almacenamiento de los listines de TO DO .............................................. S-3
Almacenamiento de los listines de NOTAS ............................................. S-4
Creación de los registros de GASTOS .................................................... S-4
Almacenamiento de los listines de ANIVERSARIOS ............................... S-4
Llamada de los listines ........................................................................... S-4
Llamada del ítem programado en el modo de calendario ....................... S-5
Edición de los listines ............................................................................. S-5
Borrado de un listín. ............................................................................... S-5
Borrado de todos los listines en cada modo ........................................... S-5
Ajuste del tipo de cambio (CONVERSIÓN).............................................. S-6
Conversión de monedas/unidades .......................................................... S-6
Cambio de las pilas ................................................................................ S-6
TURN OFF AFTER:
3: 45 SECONDS
1: 15 SECONDS
2: 30 SECONDS
4: 60 SECONDS
Instrucciones abreviadas en español
Page 36

S-2
FREE UP MEMORY ?
DO YOU WANT TO
(
Yes/No
)
Ajuste del contraste de LCD
1. Pulse
MENU
NEXT
2 para seleccionar “2: LCD CONTRAST” (2:
Contraste de LCD).
2. Pulse o para hacer la pantalla
más oscura o más clara.
• El grado de contraste cambia
continuamente mientras se mantiene
pulsado o .
3. Pulse
C•CE
para ajustar el contraste.
Activación y desactivación del sonido de pulsación de teclas
1. Pulse
MENU
PREV
1 para seleccionar “1: KEY SOUND” (1: Sonido
de teclas).
2. Pulse 1 para activar el sonido de las teclas, o 2 para desactivarlo.
• Volverá a aparecer el modo en que se encontraba antes de pulsar
MENU
.
Liberación de la memoria
Al conectar la alimentación, aparecerá el mensaje siguiente, preguntándole
si desea desocupar la memoria borrando datos innecesarios.
Pulse Y para borrar. La liberación de la
memoria requiere un máximo de
aproximadamente 2 minutos.
Pulse N cuando desee comenzar la
operación inmediatamente.
Empleo de los relojes LOCAL y MUNDIAL
1. Pulse
CLOCK
una o dos veces para que se visualice el reloj local.
2. Pulse
MENU
PREV PREV
1 para seleccionar “1: CLOCK SETTING”
(1: Ajuste del reloj).
3. Pulse 1 para seleccionar “1: HOME
CLOCK” (1: Reloj local).
4. Introduzca la hora y los minutos.
(10:05 PM, porejemplo)
1005
PM.
5. Introduzca el mes, el día y el año. (12 de abril de 2001, por ejemplo.)
04122001
6. Pulse
ENTER
.
7. Pulse
MENU
PREV PREV
1 para seleccionar “1: CLOCK SETTING”.
8. Pulse 2 para seleccionar “2: WORLD CLOCK” (2: Reloj mundial).
9. Pulse
NEXT
o
PREV
hasta que aparezca la ciudad correspondiente al
huso horario deseado.
10.
Pulse
ENTER
.
Almacenamiento de los listines de TELÉFONO/CORREO
ELECTRÓNICO
Podrá acceder a los listines de teléfono/correo electrónico pulsando
TEL
o
E-MAIL
. Ambas teclas visualizan los mismos listines almacenados en el
orden respectivo en la pantalla.
Asimismo, los listines de teléfono/correo electrónico proporcionan 2
archivos (TEL/MAIL1, TEL/MAIL2). Los archivos se desplazan cada vez que
pulsa
TEL
o
E-MAIL
.
1. Pulse
TEL
para visualizar el indicador
de entrada de TEL/MAIL1.
< LCD CONTRAST
>
–DARK
–LIGHT
TEL/MAIL 1
NAME ?
(
TEL MODE
)
12:00
AM
HOME
SAT JAN 1,2000
NEW YORK
[
18.0
]
Page 37

S-3
2. Introduzca el nombre, números de
teléfono y de fax, dirección, dirección
de correo electrónico.
Johns, Pat
ENTER
201-265-5600
F 265-1234
ENTER
Box G, Sharp Plaza, Mahwah, New Jersey,
07430-2135, U.S.A.
ENTER
johns-P@sharpsec.com
ENTER
Almacenamiento de los listines de WWW (URL)
1. Pulse
WWW
para visualizar el indicador de entrada de URL.
2. Introduzca el nombre, WWW (URL),
observación.
SHARP ELECTRONICS CORP.
ENTER
sharp-usa. com
ENTER
New Jersey
ENTER
Pantalla del CALENDARIO mensual
NEXT
PREV
: para visualizar el mes siguiente o anterior.
: para mover el cursor o desplazar el calendario una semana
hacia arriba o hacia abajo.
1. Pulse
SCHEDULE
una o dos veces
para visualizar el modo de calendario.
• “ ” indica que la última semana del
mes está oculta abajo. Para visualizar
la última semana, pulse hasta que
el cursor se desplace a la siguiente
pantalla.
2. Pulse
NEXT
(o
PREV
) para visualizar el calendario del mes siguiente
(o anterior).
SHARP ELECTRONICS C
ORP.
a.com
http://www.sharp–us
New Jersey
Almacenamiento de los listines del PROGRAMA DE
ACTIVIDADES
Introduzca un listin de programa para el 24 de junio de 2001 (June 24,
2001).
1. Pulse
SCHEDULE
una o dos veces para visualizar la pantalla del modo
de programa de actividades.
2. Pulse
C•CE
para visualizar el indicador
de entrada de fecha.
3. Introduzca la fecha, la hora de inicio y
la hora de fin, los detalles del
programa.
06242001
ENTER
1130 AM 01
PM
Lunch with Tom
ENTER
4. Ahora, pulse
SCHEDULE
para
comprobar que el listin ha quedado
almacenado en la memoria.
• Observe la etiqueta ( ) a la derecha
de “24”. Indica un item programado
para esa fecha.
Almacenamiento de los listines de TO DO
1. Pulse
TO DO/ANN
una o dos veces
para que se visualice el indicador de
entrada de To Do.
2. Introduzca la descripción.
Call Frank about a sales meeting
ENTER
.
Año
Mes
01
1
9 10 11 12 13 14 15
23 24 25 26 27 28 29
9
2 3 4 5 6 7 8
16 17 18 19 20 21 22
YEAR :2001
DAY :12
MONTH :04
MM/DD/YYYY
SUN JUN 24,2001
11:30AM~ 1:00PM
Lunch with Tom
Ítems de programa que comienzan a la mañana o ítems de
programa sin una hora especificada
Ítems de aniversario
Ítems de programa que comienzan a la tarde
PRIORITY ?
Call Frank about a
01
1 2
10 11 12 13 14 15 16
24 25 26 27 28 29 30
6
3 4 5 6 7 8 9
17 18 19 20 21 22 23
Johns, Pat
201–265–5600
F 265–1234
Mahwah, New Jersey,
Box G, Sharp Plaza,
Page 38

S-4
3. Introduzca la prioridad.
2
ENTER
.
• La prioridad puede ajustarse a cualquier número de 0 a 9 o letra de A a
Z, o puede dejarse en blanco pulsando
ENTER
. El orden de prioridad es
de 0 a 9, A a Z, seguido de espacio.
Verificación de los ítems realizados
1. Pulse
MENU
2 para seleccionar “2: INDEX”.
2. Pulse para seleccionar el ítem.
3. Pulse para marcarlo como ítem realizado.
• A los ítems marcados “ ” se asigna la prioridad más baja y se
clasifican al final de la lista.
Almacenamiento de los listines de NOTAS
1. Pulse
MEMO
para que se visualice el indicador de entrada de notas.
2. Introduzca los datos.
UNION BANK South branch
272-0011223
ENTER
Creación de los registros de GASTOS
1. Pulse
EXPENSE
para visualizar el
indicador de entrada de fecha.
2. Introduzca la fecha para el gasto.
04052001
ENTER
3. Introduzca el importe de los gastos.
1200
ENTER
4. Introduzca la descripción.
Flight tickets for inspection abroad
ENTER
EXPENSE
DATE ?
M/D/Y= 4/12/2001
THU APR 5,2001
AMOUNT ?
1,200.00
inspection abroad
–
Flight tickets for
THU APR 5,2001
South branch
UNION BANK
272–0011223
–
Almacenamiento de los listines de ANIVERSARIOS
En el modo de aniversario, podrá especificar el mes y el día (como los
aniversarios de bodas y cumpleaños), o el mes, la semana y el día de la
semana (como el Día de la Madre (segundo domingo de mayo)).
Mes/Día
1. Pulse
TO DO/ANN
una o dos veces para entrar al modo de aniversario.
2. Pulse 1 para seleccionar “1: MONTH/
DAY” (1: Mes/Día) y visualizar el
indicador de entrada de fecha.
3. Introduzca la fecha y la descripción.
0212
ENTER
Nancy’s Birthday
ENTER
Mes/Semana
1. Pulse
TO DO/ANN
una o dos veces para entrar en el modo de
Aniversario.
2. Pulse 2 para seleccionar “2: MONTH/WEEK” (2: Mes/Semana) para
visualizar el modo de entrada de fecha.
3. Introduzca el mes, semana y día de la
semana.
05 2 0
ENTER
4. Introduzca la descripción del
aniversario.
Mother's Day
ENTER
Llamada de los listines
Búsqueda secuencial
Permite llamar los listines en el orden de cada modo.
Pulse
NEXT
(o
PREV
) para llamar los listines en orden progresivo (o
regresivo). Mantenga pulsada una u otra tecla para una llamada rápida.
M=MONTH W=WEEK
M/W/D=05/2/0
D=DAY 0:S 1:M 2:T
3:W 4:T 5:F 6:S
–ANN–
MAY WEEK 2 SUN
Mother's Day
–
M/D=– /
M=MONTH D=DAY
–ANN–
FEB 12
Nancy's Birthday
Page 39

S-5
• En el modo de programa de actividades, pulse
2nd
NEXT
(o
2nd
PREV
) repetidas veces para llamar los listines saltando las fechas
vacantes. Pulse
C•CE, C•CE
, luego pulse
2nd
NEXT
(o
2nd
PREV
)
para visualizar el primer (o último) listín en orden cronológico.
• Cuando no hayan más listines (existentes o pertinentes) que se puedan
llamar o buscar, aparecerá “NOT FOUND!” (¡No encontrado!) por unos
instantes y volverá a visualizarse el indicador de entrada.
Búsqueda directa
1. Introduzca el primer carácter(es) del nombre deseado en cada modo.
2. Pulse
NEXT
(o
PREV
).
• La búsqueda en el modo de programa de actividades comienza a partir
de la fecha visualizada actualmente, en orden progresivo (o regresivo).
Búsqueda por palabra clave
1. Seleccione el modo deseado. (Por ejemplo, pulse
TEL
)
2. Introduzca la palabra.
Sharp
3. Pulse
2nd
NEXT
.
• Cada vez que pulsa
2nd
NEXT
, se
visualizarán los listines subsiguientes
que contengan la palabra “Sharp”.
Búsqueda por índice
Los listines llamados se visualizan en la pantalla, uno por cada línea.
1. Seleccione el modo deseado. Por ejemplo, pulse
TEL
para visualizar la
pantalla del modo de teléfono/correo electrónico.
2. Pulse
MENU
2 para visualizar “2:
INDEX”.
3. Pulsando
NEXT
y
PREV
la página se
desplaza hacia adelante y atrás. Para
ver los listines completos, mueva el
puntero “ ” usando y para seleccionar el listín deseado, y pulse
ENTER
.
Johns, Pat
201–265–5600
F 265–1234
Mahwah, New Jersey,
Box G, Sharp Plaza,
Johns, Pat
Robert, Smith
Stevenson Dug
Shingo Nakahara
Tom Robert
Llamada del ítem programado en el modo de calendario
La fecha programada aparecerá con una etiqueta ( ) a la derecha del
número de fecha.
1. Pulse
SCHEDULE
una o dos veces para visualizar el modo de calendario.
• Pulsando
2nd
SCHEDULE
se visualiza la fecha actual.
2. Pulse las teclas de desplazamiento del cursor ( , , , ) para
desplazarse a la fecha con una etiqueta.
3. Pulse
SCHEDULE
para visualizar el contenido del programa.
Edición de los listines
1. Llame un listín en el modo deseado.
2. Pulse
MENU
1 para seleccionar “1: EDIT” (1: Editar).
• Se accede al modo de edición y el cursor destella.
3. Modifique los datos según se desee.
4. Pulse
ENTER
para almacenarlo en la memoria.
Borrado de un listín
1. Llame el listín que desea borrar.
2. Pulse
DEL
.
Aparecerá “DELETE ? Y/N” (¿Borrar? Sí/No).
3. Pulse Y para borrar el listín actualmente visualizado.
• Para cancelar la operación de borrado, pulse N.
Borrado de todos los listines en cada modo
1. Pulse
MENU
3 para seleccionar “3: DATA DELETION” (3: Borrado de
datos).
2. Pulse la tecla del número de modo para borrar todos los listines. (Para
seleccionar “TO DO” o “SECRET DATA”, pulse
NEXT
.)
3. Aparecerá “DELETE ? Y/N” (¿Borrar? Sí/No).
Pulse Y.
• Para cancelar la operación de borrado, pulse N.
Page 40

S-6
Ajuste del tipo de cambio (CONVERSIÓN)
1. Pulse
CALC/CONV
una o dos veces para seleccionar el modo de
conversión.
2. Pulse
NEXT
(o
PREV
) para seleccionar el número de conversión 1.
3. Pulse
MENU
1 para seleccionar “1: EDIT” (1: Editar).
• La pantalla del resultado se borra y el tipo de cambio destella.
4. Introduzca el tipo de cambio. Por
ejemplo,
0.6
ENTER
Conversión de monedas/unidades
Para convertir la unidad A en la unidad B, pulse .
Para convertir la unidad B en la unidad A, pulse .
1. Pulse
NEXT
(o
PREV
) para seleccionar la unidad. (Por ejemplo,
seleccione el número de la pantalla de conversión 1: $1 = £0.6).
2. Introduzca el valor que desea convertir.
198
3. Pulse para convertirlo.
Aparecerá el resultado de la conversión.
• El resultado de la conversión anterior
permanece en la pantalla al cambiar de
un tipo de conversión a otro. Pulse
C•CE
para borrar el resultado y realizar otra conversión.
198.
CONVERSION
1
0.6
$ £
118.8
CONVERSION
1
0.6
$ £
CONVERSION
1
$ £
0.6
0
.
Cambio de las pilas
Pilas utilizadas
Tipo Modelo Cantidad Uso
Pila de litio CR2032 2 Funcionamiento de la unidad
Pila de litio CR2032 1 Respaldo de la memoria
• No extraiga simultáneamente las pilas de funcionamiento y de
respaldo de la memoria, pues podrá perder los datos de la memoria.
• Antes de cambiar las pilas, asegúrese de anotar toda la información
importante almacenada en la memoria.
Precauciones
Como el uso inapropiado de las pilas puede producir fugas o explosión,
observe al pie de la letra las siguientes instrucciones.
• Inserte la pila con su lado positivo (+) correctamente posicionado.
• Nunca arroje las pilas al fuego pues podrán explotar.
• Mantenga las pilas fuera del alcance de los niños.
•
Cuando se debiliten las pilas, sáquelas inmediatamente del Organizador
para evitar el riesgo de derrames y corrosión en el interior del Organizador.
Debido a que las pilas entregadas con el Organizador han sido instaladas en
fábrica, podrían agotarse antes del tiempo de vida útil especificado.
Cambio de las pilas de funcionamiento
(1) Intervalo de cambio de las pila
Cuando aparezca “
BATT
”, cambie inmediatamente las pilas por otras
nuevas. Cuando las pilas están muy descargadas, podría suceder que las
alarmas o el tono de pulsación de teclas no suenen, o que la luz de fondo
no se encienda durante el período establecido o no se encienda para nada.
Si continúa usando el Organizador con las pilas descargadas se podrán
alterar o borrar los contenidos de la memoria. También se podrán perder
los contenidos de la memoria debido a una instalación incorrecta de las
pilas o por la negligencia en la observación de las siguientes instrucciones.
Page 41

S-7
(2) Cambio de las pilas
• Asegúrese de apagar la unidad antes de cambiar las pilas.
• No pulse ON antes de finalizar el procedimiento de cambio de las
pilas.
1. Pulse
OFF
para desconectar la alimentación.
2. Afloje el tornillo (en sentido antihorario) y saque la
tapa del compartimiento de las pilas en el respaldo de
la unidad.
3. Extraiga las pilas usadas con un bolígrafo o similar.
• No emplee un lápiz mecánico ni un objeto
puntiagudo.
4. Instale las 2 pilas nuevas con el lado positivo (+)
dirigido hacia arriba.
5. Reinstale la tapa del compartimiento de las pilas y asegúrela con el
tornillo.
6. La alimentación se conectará 2 a 3 segundos después de pulsarON. Si
la alimentación no se conecta, pulse el interruptor RESET.
7. Ajuste el reloj a la hora correcta.
Cambio de la pila de respaldo de la memoria
(1) Intervalo de cambio de la pila de respaldo de la memoria
• Cambie la pila cada 5 años.
Cuando empiece a usar el Organizador, anote la fecha en la etiqueta del
Organizador para poder saber cuándo debe cambiar la pila.
Por ejemplo:
11 2001
(2) Precauciones al cambiar la pila de respaldo de la memoria
Si cambia la pila de respaldo de la memoria con las pilas de funcionamiento
agotadas, se perderán todos los datos de la memoria. Asegúrese de que las
pilas de funcionamiento no estén descargadas. Si las pilas de
funcionamiento están descargadas, primero cambie estas pilas antes de
cambiar la pila de respaldo de la memoria.
(3) Cambio de la pila
1. Pulse
OFF
para desconectar la alimentación.
2. Afloje el tornillo (en sentido antihorario) y saque la
tapa del compartimiento de las pilas del respaldo de
la unidad.
3. Extraiga el sello de la pila de respaldo de la memoria.
4. Extraiga la pila usada con un bolígrafo o similar.
• No emplee un lápiz mecánico ni un objeto puntiagudo.
5. Instale la pila nueva con su lado positivo (+) dirigido
hacia arriba.
6. Vuelva a poner el sello en su lugar y la tapa del compartimiento, y
asegure con el tornillo.
7. La alimentación se conectará 2 a 3 segundos después de pulsarON. Si
la alimentación no se conecta, pulse el interruptor RESET. Si todavía no
se visualiza nada, cambie las pilas de funcionamiento.
(Fecha de instalación de la pila de respaldo de la memoria)
MEMORY BACKUP BATTERY
INSTALLATION DATE
MONTH
• YEAR
Page 42

Declaration of Conformity
Electronic Organizer : YO-190
This device complies with Part 15 of the FCC Rules. Operation is
subject to the following two conditions: (1) This device may not cause
harmful interference, and (2) this device must accept any interference
received, including interference that may cause undesired operation.
Responsible Party:
SHARP ELECTRONICS CORPORATION
Sharp Plaza, Mahwah, New Jersey 07430-2135
TEL: 1-800-BE-SHARP
Tested To Comply With FCC Standards
FOR HOME OR OFFICE USE
WARNING – FCC Regulations state that any unauthorized changes or
modifications to this equipment not expressly approved by the
manufacturer could void the user’s authority to operate this equipment.
Note: This equipment has been tested and found to comply with the
limits for a Class B digital device, pursuant to Part 15 of the FCC Rules.
These limits are designed to provide reasonable protection against
harmful interference in a residential installation. This equipment
generates, uses, and can radiate radio frequency energy and, if not
installed and used in accordance with the instructions, may cause
harmful interference to radio communications.
However, there is no guarantee that interference will not occur in a
particular installation. If this equipment does cause harmful interference
to radio or television reception, which can be determined by turning the
equipment off and on, the user is encouraged to try to correct the
interference by one or more of the following measures:
– Reorient or relocate the receiving antenna.
– Increase the separation between the equipment and receiver.
– Connect the equipment into an outlet on a circuit different from that to
which the receiver is connected.
– Consult the dealer or an experienced radio/TV technician for help.
Note:A shielded interface cable is required to ensure compliance with
FCC regulations for Class B certification.
PRODUCT SUPPORT
If you have read the ORGANIZER operation manual, but you still require
product support, you can:
Call a Sharp Customer Assistance Center
630-378-3590
(7am to 7pm CST M–F)
Visit our Web Site
http://www.sharp-usa.com
Send an E-mail
pdasupport@sharpsec.com
Write to our Customer Assistance Center
Sharp Electronics Corp.
Customer Assistance Center
Att: WIZARD HELP
1300 Naperville Drive
Romeoville, IL 60446
Page 43

LIMITED W ARRANTY
SHARP ELECTRONICS CORPORATION warrants to the first consumer
purchaser that this Sharp brand product (the “Product”), when shipped
in its original container, will be free from defective workmanship and
materials, and agrees that it will, at its option, either repair the defect or
replace the defective Product or part thereof with a new or remanuf actured
equivalent at no charge to the purchaser for parts or labor for the period(s)
set forth below.
This warranty does not apply to any appearance items of the Product nor
to the additional excluded item(s) set forth below nor to any Product the
exterior of which has been damaged or defaced, which has been subjected
to improper voltage or other misuse, abnormal service or handling, or
which has been altered or modified in design or construction.
In order to enforce the rights under this limited warranty, the purchaser
should follow the steps set forth below and pro vide proof of purchase to
the servicer.
The limited warranty described herein is in addition to whatever implied
warranties may be granted to purchasers by law. ALL IMPLIED
WARRANTIES INCLUDING THE WARRANTIES OF
MERCHANTABILITY AND FITNESS FOR USE ARE LIMITED TO THE
PERIOD(S) FROM THE DATE OF PURCHASE SET FORTH BELOW.
Some states do not allow limitations on how long an implied warranty
lasts, so the above limitation may not apply to you.
Neither the sales personnel of the seller nor any other person is authorized
to make any warranties other than those described herein, or to extend
the duration of any warranties beyond the time per iod described herein
on behalf of Sharp.
The warranties described herein shall be the sole and exclusive w arranties
granted by Sharp and shall be the sole and exclusive remedy available
to the purchaser. Correction of defects, in the manner and for the period
of time described herein, shall constitute complete fulfillment of all liabilities
and responsibilities of Sharp to the purchaser with respect to the Product,
and shall constitute full satisfaction of all claims, whether based on
contract, negligence, strict liability or otherwise. In no event shall Sharp
be liable, or in any way responsible, for any damages or defects in the
Product which were caused by repairs or attempted repairs performed
by anyone other than an authorized servicer . Nor shall Sharp be liable or
in any way responsible for any incidental or consequential economic or
property damage. Some states do not allow the exclusion of incidental
or consequential damages, so the above e xclusion may not apply to y ou.
THIS WARRANTY GIVES YOU SPECIFIC LEGAL RIGHTS. YOU MAY
ALSO HAVE OTHER RIGHTS WHICH VARY FROM STATE TO STATE.
Your Product : Electronic Organizer
Warranty Period for this One (1) year parts and labor from date
Product : of purchase.
Additional Items Excluded Any consumable items such as paper,
from Warranty Coverage : maintenance car tridge, ink car tridges
supplied with the Product or to any
equipment or any hardware, software,
firmware, fluorescent lamp, power cords ,
covers, rubber parts, or peripherals other
than the Product.
Where to Obtain Ser vice : At a Sharp Authorized Servicer located
in the United States. To find out the
location of the nearest Sharp Authorized
Servicer, call Sharp toll free at 1-800-BESHARP.
What to do to Obtain Service : Ship (prepaid) or carry in your Product to
a Sharp Authorized Servicer. Be sure to
have proof of purchase available. If you
ship or mail the Product, be sure it is
packaged carefully.
TO OBTAIN SUPPLY, ACCESSORY OR PRODUCT INFORMATION, CALL 1-800-BE-SHARP.
Page 44

PRINTED IN CHINA/IMPRESO EN CHINA
00CTO (TINSE0395EHZZ)
SHARP ELECTRONICS CORPORATION
Sharp Plaza, Mahwah, New Jersey 07430-2135
 Loading...