

SHARR
LCD PROJECTOR
LCD-PROJEKTOR
PROYECTOR DE LCD
PROlElTORE LCD
PROJECTEUR LCD LCD-PROJEKTOR
VIDEOPROJEKTOR
OPERATION MANUAL
BEDIENUNGSANLEITUNG
MODE D’EMPLOI
BRUKSANVISNING
MANUAL DE MANEJO
MANUALE DI ISTRUZIONI
GEBRUIKSAANWIJZING
l ENGLISH
l DEUTSCH
l FRANGAlS
l SVENSKA
l ESPAfiOL
l ITALIAN0
l NEDERLANDS
This equipment complies with the requirements of Directives 89/336/EEC
and 73/23/EEC as amended by 93/68/EEC.
Dieses GerAt entsprlcht den Anforderungen der EG-Richtlinlen 89/336/EWG
und 73/23/EWG mit Anderung 93/68/EWG.
Ce mat&e1 r&pond aux exigences contenues dans les directives
89/336/CEE et 73/23/CEE modifikes par la directive 93/68/CEE.
Dit apparaat voldoet aan de elsen van de nchtlijnen 89/336/EEG en
73/23/EEG, gewljzlgd door 93/68/EEG.
Dette udstyr overholder kravene I direktlv nr. 89/336/EEC og 73/23/EEC med
tillzg nr. 93/68/EEC.
Quest’ apparecchio 6 conforme al requlsltl delle direttlve 89/336/EEC e
73/23/EEC, come emendata dalla dlretttva 93/68/EEC.
Este equipamento obedece 3s exlg&nclas das directtvas 89/336/CEE e
73/23/CEE, na sua versa0 corngida pela directiva 93/68/CEE.
Este aparato satrsface las exlgencias de las Dlrectlvas 89/336/CEE y
73/23/CEE, modlflcadas por medlo de la 93/68/CEE.
Denna utrustning uppfyller kraven enligt riktlinjerna 89/336/EEC och
73/23/EEC sA som kompletteras av 93/68/EEC.
Dette produktet oppfyller betingelsene i direktivene 89/336/EEC og
73/23/EEC i endrlngen 93/68/EEC.
Tarna lalte tayttaa direktiivlen 89/336/EEC )a 73/23/EEC vaatimukset, joita on
muutettu direktiivilla 93/68/EEC.
Dear SHARP Customer
Welcome to the SHARP Family. We are pleased that you are now the owner of a SHARP Colour
LCD Projector built for outstanding quality, reliability and performance.
Every SHARP Colour LCD Projector is adjusted for a proper picture and has passed through
the most stringent quality control tests at the factory. We have prepared this OPERATION
MANUAL so that you have the ability to adjust the picture and colour to your personal viewing
preference. We sincerely hope that you will be delighted with the quality and performance of
your Colour LCD Projector for many years to come.
Please read the instructions carefully, and keep them handy for future reference,
IMPORTANT
For your assistance in reporting the loss or
Model No.: XV-380H
theft of your Colour LCD Projector, please
record the Serial Number located on the rear
of the projector and retain this information.
Serial No.:
The model number, power rating, and
warnings are displayed on the rear of the unit.
Before disposing of the packaging, please be sure that you have checked the contents of the carton thoroughly
against the “Supplied Accessories” listed in the operation manual on page 21.
Important Information
WARNING
Intense light source, do not look into the beam or view it directly. Be especially careful that children do not look
directly into the beam.
=J%(
WARNING: TO REDUCE THE RISK OF FIRE OR ELECTRIC SHOCK, DO NOT EXPOSE THIS APPLIANCE
TO LIQUIDS.
CAUTION:
TO REDUCE THE RISK OF ELECTRIC SHOCK, DO NOT REMOVE CABINET. NO USER-SERVICEABLE PARTS
ARE INSIDE. REFER SERVICING TO QUALIFIED SERVICE PERSONNEL.
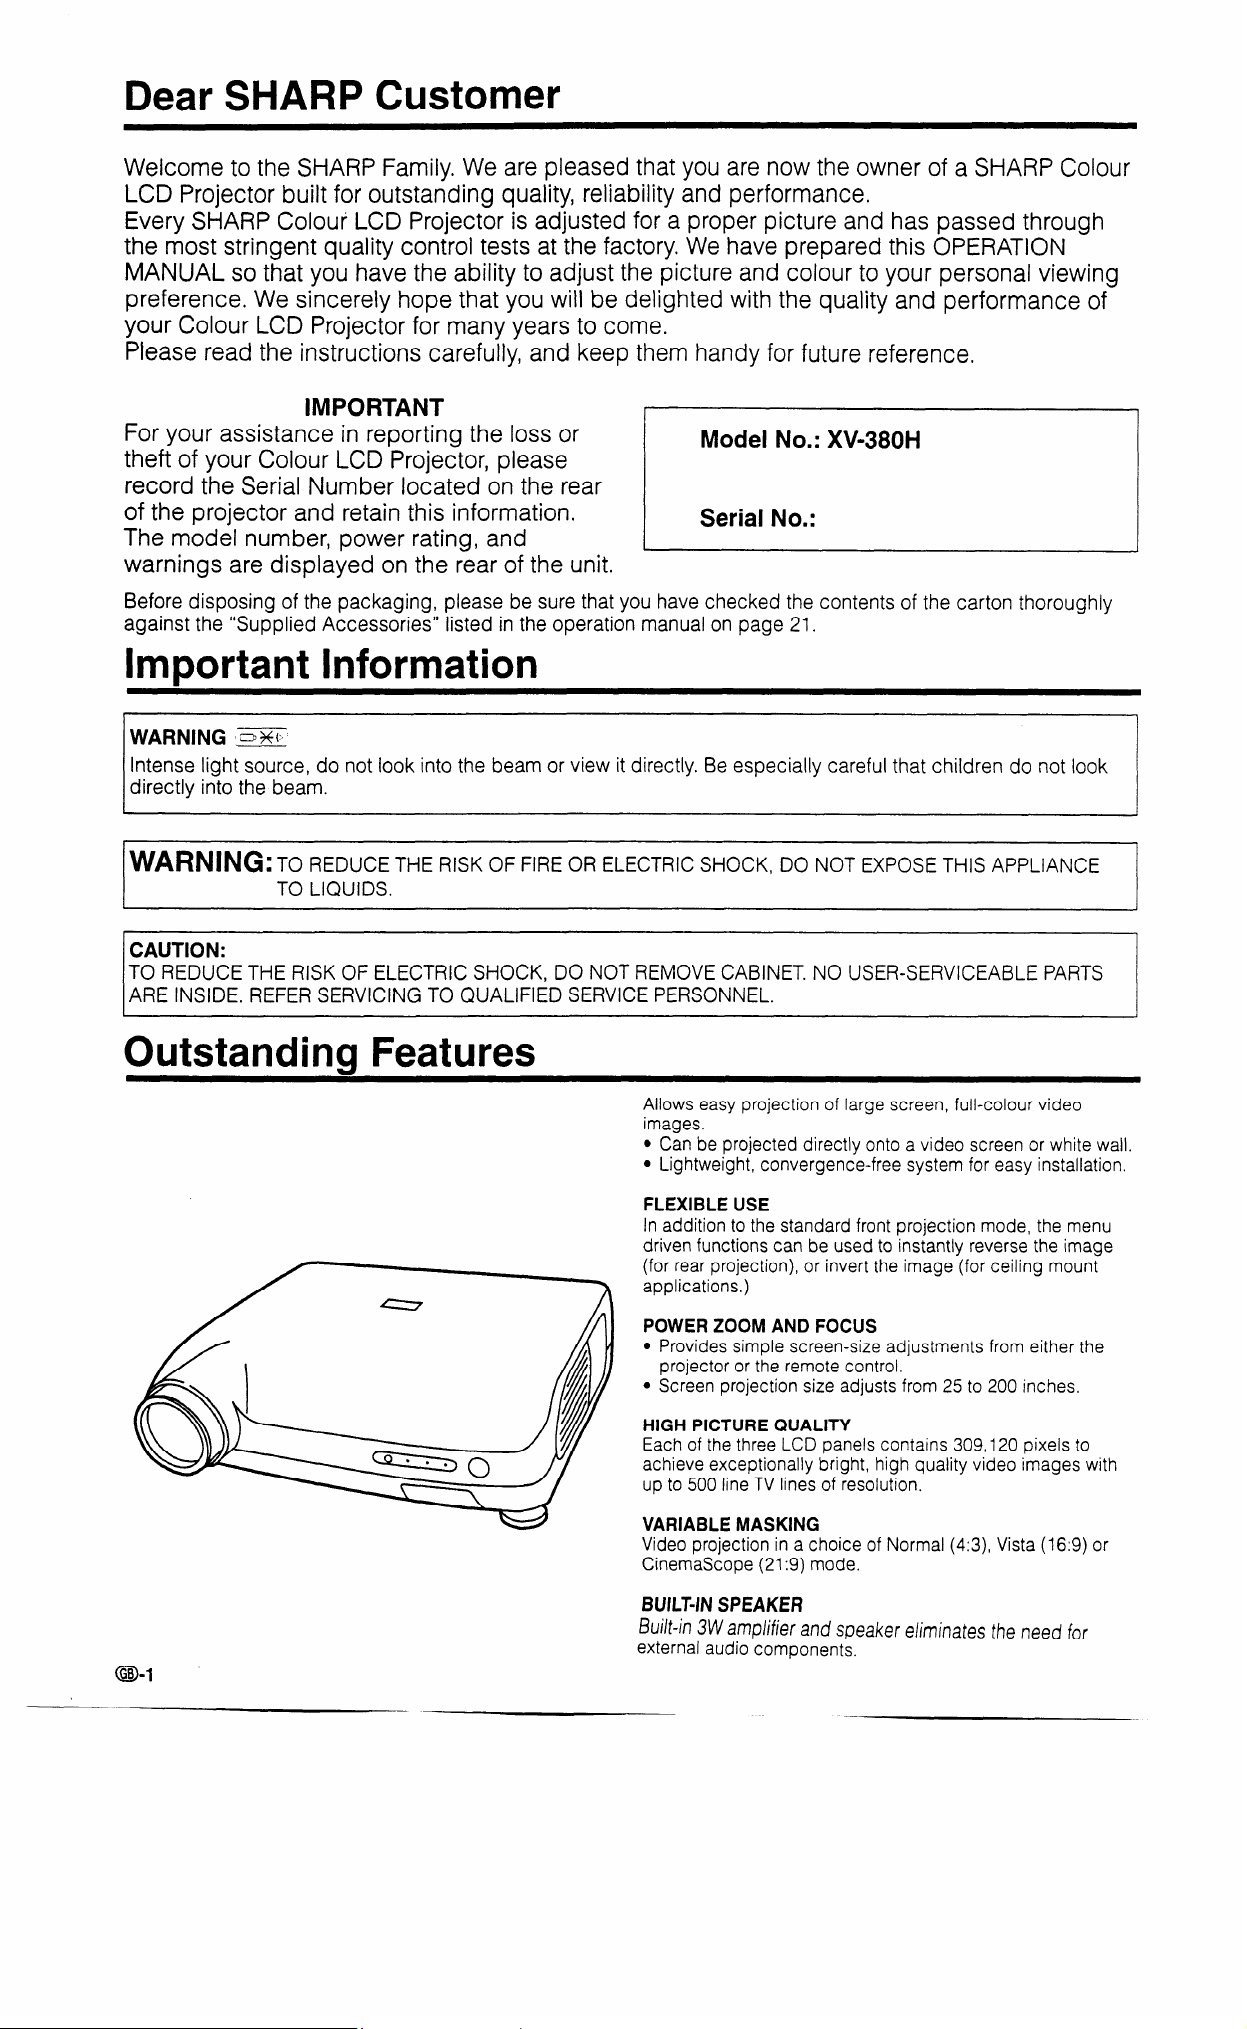
Outstanding Features
Allows easy projection of large screen, full-colour video
images.
l Can be projected directly onto a video screen or white wall.
l Lightweight, convergence-free system for easy installation.
FLEXIBLE USE
In addition to the standard front projection mode, the menu
driven functions can be used to instantly reverse the image
(for rear projection), or invert the image (for ceiling mount
applications.)
POWER ZOOM AND FOCUS
l Provides simple screen-size adjustments from either the
projector or the remote control.
l Screen projection size adjusts from 25 to 200 inches.
HIGH PICTURE QUALITY
Each of the three LCD panels contains 309,120 pixels to
achieve exceptionally bright, high quality video images with
up to 500 line TV lines of resolution.
VARIABLE MASKING
Video projection in a choice of Normal (4:3), Vista (16:9) or
CinemaScope (21:9) mode.
BUILT-IN SPEAKER
Built-in 3w amplifier and speaker eliminates the need for
external audio components.
Contents
Important Information
Outstanding Features
Important Safeguards
Location of Controls
Remote Control Operation
Setting Up the Projector
.................................................................................
.................................................................................
................................................................................
................................................................................... 4
..........................................................................
.............................................................................
Using the Image Invert/Reverse Function ..................................................
Connecting the Projector (VIDEO 1, VIDEO 2)
Basic Operation of the Projector
Adjusting the Picture
Masking Adjustment
Functions on the Projector
Air Filter Maintenance
..................................................................................
...................................................................................
..........................................................................
................................................................................
Lamp/Maintenance Indicators
Before Calling for Service
Specifications
Dimensions
............................................................................................. 21
................................................................................................. 22
...........................................................................
................................................................
...................................................................
...........................................
1
1
3
5
6
8
12
13
15
16
17
19
20
20
SPECIAL NOTE FOR USERS INTHE U.K.
The mains lead of this product is fitted with a non-rewireable (moulded) plug incorporating a 13A fuse. Should
the fuse need to be replaced, a BSI or ASTA approved BS 1362 fuse marked v or 8 and of the same rating
as above, which is also indicated on the pin face of the plug, must be used.
Always refit the fuse cover after replacing the fuse. Never use the plug without the fuse cover fitted.
In the unlikely event of the socket outlet in your home not being compatible with the plug supplied, cut off the
mains plug and fit an appropriate type.
DANGER: The fuse from the cut-off plug should be removed and the cut-off plug destroyed immediately and
disposed of in a safe manner.
Under no circumstances should the cut-off plug be inserted elsewhere into a 13A socket outlet, as
a serious electric shock may occur.
To fit an appropriate plug to the mains lead, follow the instructions below:
IMPORTANT: The wires in the mains lead are coloured in accordance with the following code:
Blue : Neutral
Brown : Live
As the colours of the wires in the mains lead of this product may not correspond with the coloured markings
identifying the terminals in your plug, proceed as follows:
l The wire which is coloured blue must be connected to the plug terminal which is marked N or
coloured black.
l The wire which is coloured brown must be connected to the plug terminal which is marked L or
coloured red.
Ensure that neither the brown nor the blue wire is connected to the earth terminal in your three-pin plug.
Before replacing the plug cover make sure that:
l If the new fitted plug contains a fuse, its value is the same as that removed from the cut-off plug.
l The cord grip is clamped over the sheath of the mains lead, and not simply over the lead wires.
IF YOU HAVE ANY DOUBT, CONSULT A QUALIFIED ELECTRICIAN.
Important Safeguards
ATTENTION: Please read all of these instructions before you operate your LCD
Projector for the first time. Save these instructions for future reference.
For your own protection and prolonged operation of your LCD Projector, be sure to read the following
“important Safeguards” carefully, before use.
This projector has been engineered and manufactured to ensure your personal safety. But IMPROPER
USE CAN RESULT IN POTENTIAL ELECTRICAL SHOCK OR FIRE HAZARDS. In order not to defeat the
safeguards incorporated into this LCD Projector, observe the following basic rules for its installation, use
and servicing.
1 Unplug the LCD Projector from the wall outlet
before cleaning.
2 Do not use liquid cleaners or aerosol cleaners.
Use a damp cloth for cleaning.
3 Do not use attachments not recommended by
the LCD Projector manufacturer, as they may cause
hazards.
4 Do not use the LCD Projector near water; for
example, near a bathtub, washbowl, kitchen sink,
laundry tub, in a wet basement, near a swimming pool,
etc. Never spill liquid into the projector.
5 Do not place the LCD Projector on an unstable
cart, stand, or table. The LCD Projector may fall, which
may cause serious injury to a child or an adult, and/or
serious damage to the unit.
6 Wall or Ceiling Mounting - The product should
be mounted to a wall or ceiling only as recommended
by the manufacturer.
7
cart combinations should be moved
with care.
Quick stops, excessive force, and
uneven surfaces may cause the
equipment and cart combination to
overturn.
8
Projector and to protect it from overheating, these
openings must not be blocked or covered. Slots and
openings in the cabinet back and bottom are provided
for ventilation.
9 The openings should never be covered with
cloth or other material. This LCD Projector should never
be placed near or over a radiator or heating vent. The
LCD Projector should not be placed in a built-in
installation such as a bookcase unless proper
ventilation is provided.
10 The LCD Projector should be operated only
from the type of power source indicated on the back of
LCD Projector equipment and
*
0
ES
To ensure reliable operation of the LCD
the projector or in the specifications. If you are not sure
of the type of power supplied to your home, consult
your LCD Projector dealer or local power company.
11
will be abused by persons walking on it.
12
the LCD Projector.
13
lightning and power-line surges, unplug the projector
from the power outlet, wher not in use.
o-3
Do not place the LCD Projector where the cord
Follow all warnings and instructions marked on
To prevent damage to the projector due to
14
cords with too many products, because this can result
in fire or electric shock.
15
Projector through the cabinet slots as they may touch
high-voltage points or cause a short circuit. This could
result in a fire or electric shock.
16 Do not attempt to service the LCD Projector
yourself. Opening or removing covers may expose you
to dangerous voltage or other hazards. Refer all
servicing to qualified service personnel.
17
wall outlet and refer servicing to qualified service
personnel under the following conditions:
A.
frayed.
6. If liquid has been spilled into the LCD Projector.
C. If the LCD Projector has been exposed to rain
or water.
D.
when you follow the operating instructions. Adjust only
those controls that are covered by the operating
instructions, as improper adjustment of other controls
may cause damage and will often require extensive
work by a qualified technician to restore the LCD
Projector to normal operation.
E.
cabinet has been damaged.
F. When the LCD Projector exhibits a distinct
change in performance - this indicates a need for
service.
18
the service technician has used replacement parts
specified by the manufacturer that have the same
characteristics as the original parts. Unauthorized
substitutions may result in fire, electric shock, or other
hazards.
About the Temperature Monitor
Function:
l If the projector starts to overheat
l The cooling fan regulates the internal temperature,
Do not overload wall outlets and extension
Never push objects of any kind into the LCD
Unplug the LCD Projector equipment from the
When the power cord or plug is damaged or
If the LCD Projector does not operate normally
If the LCD Projector has been dropped or the
When replacement parts are required, be sure
-jEMf?-
\
due to set-up problems or a dirty
air filter, “TEMP.” will flash in the
upper-left corner of the picture. If
the temperature continues to rise,
then the lamp will turn off, the
TEMPERATURE WARNING indicator will flash, and
after a 90-second cooling-off period the power will
shut off. Refer to page 20, “Maintenance Indicators”,
when the “TEMP.” warning appears in the picture.
and its performance is automatically controlled. The
sound of the fan may change during operation due to
changes in the fan speed.
E

Location of Controls
FRONT VIEW
(intake vent)
AIR FILTER
SPEAKER
POWER (ON/OFF)
POWER indicator
button
LAM’P REPLACEMENT
indicator
TEMPERATURE
WARNING indicator
REMOTE SENSOR
CAUTIONS:
l Allow at least 10 cm of space between the cooling fan
(exhaust vent) and the wall.
l If the cooling fan becomes obstructed, a protection device will
automatically turn off the projector lamp. This does not
indicate a malfunction. Remove the projector plug from the
wall outlet and wait 10 minutes. Then turn on the power by
plugging the cord back in. This will return the projector to its
normal mode.
OPERATION PANEL ON SIDE OF PROJECTOR
Phosphorescent Display
The operation controls on the right side use a phosphorescent display for easy viewing. When exposed to surrounding
light, the phosphorescent display will glow in the dark.
(Glow ratio)
When exposed to sunlight or other light of 500 Iux or more for about 10 minutes, the display will glow for about 1 hour,
(Note:-500 Iux = 1-l .5m directly under a 40W fluorescent light.)
J
I
ADJUSTMENT
(d/b) buttons
button
MUTk button
VOLUME UP-DOWN
buttons
INPUf SELECT
button
T
ADJUSTMENT
(d/b) buttons
I
I
ADJUSTMENT
(V/A) buttons
MENU button LENS ADJUSTMENT
REAR VIEW
MAIN POWER switch
COMPOSITE VIDEO
INPUT 1
Audio: RCA
Video: RCA
COMPOSITE
VIDEO INPUT 2
Audio: RCA
Video: RCA
COMPOSITE
VIDEO OUTPUT
Audio: RCA
Video: RCA
S-VIDEO INPUT 1
(4-pin mini DIN)
WIRED REMOTE
CONTROL INPUT
DC 12V OUTPUT
Note:
l If a current of 200mA or more is drawn from the DC 12V OUTPUT jack, a protection device will automatically turn off the
projector and leave it in Stand-by mode.
Remote Control Operation
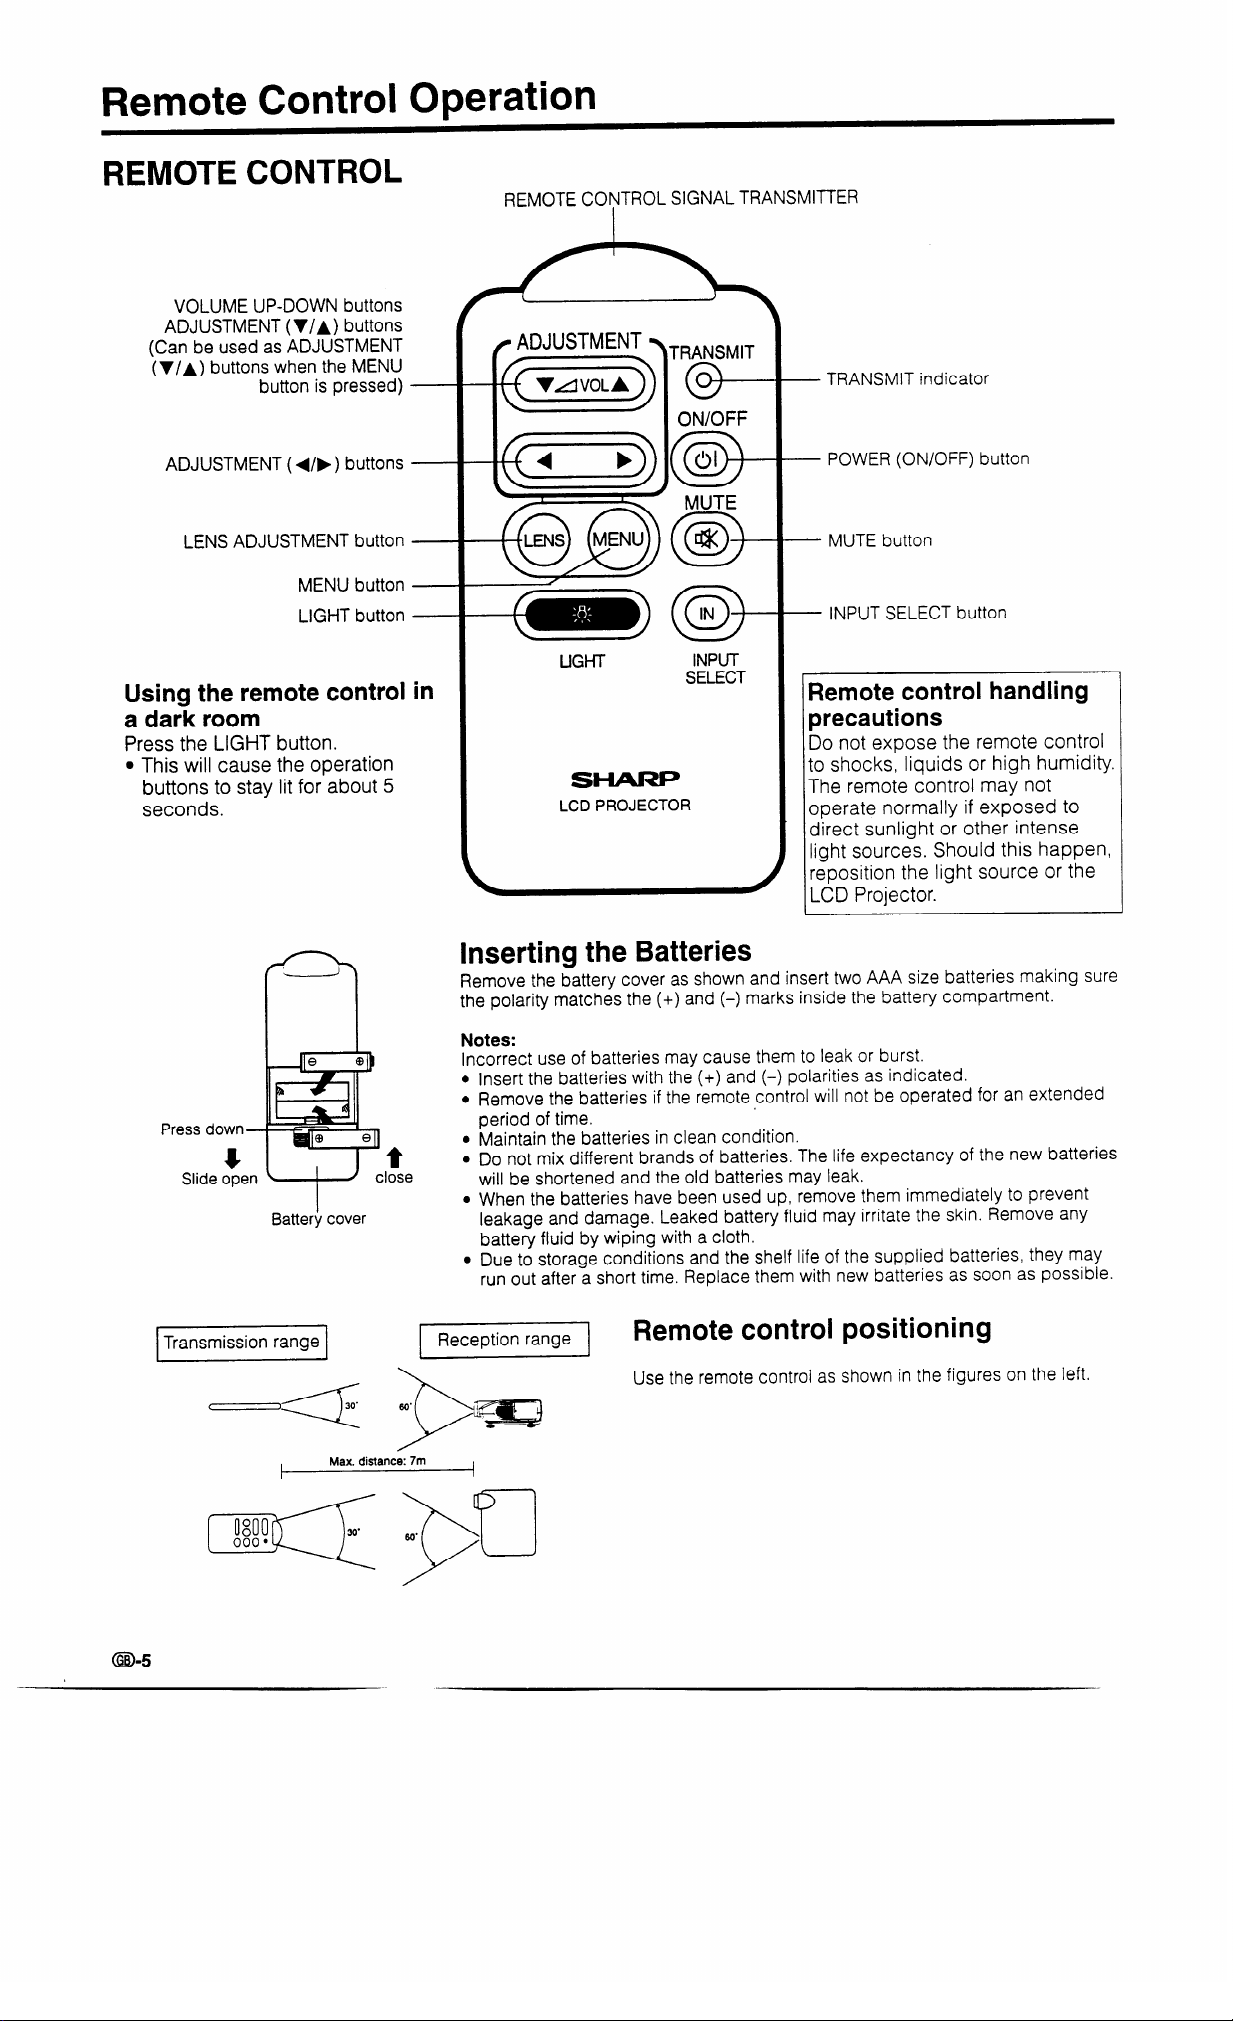
REMOTE CONTROL
REMOTE CONTROL SIGNAL TRANSMITTER
VOLUME UP-DOWN buttons
ADJUSTMENT (WA) buttons
(Can be used as ADJUSTMENT
(V/r) buttons when the MENU
button is pressed)
I
- TRANSMIT indicator
ON/OFF
ADJUSTMENT (4/b) buttons
LENS ADJUSTMENT button
MENU button
LIGHT button
Using the remote control
a dark room
Press the LIGHT button.
l This will cause the operation
buttons to stay lit for about 5
seconds.
- POWER (ON/OFF) button
I
r MUTE
- MUTE button
- INPUT SELECT button
INPUT
SELECT
SHARP
LCD PROJECTOR
Inserting the Batteries
Remove the battery cover as shown and insert two AAA size batteries making sure
the polarity matches the (+) and (-) marks inside the battery compartment.
Remote control handling
precautions
Do not expose the remote control
to shocks, liquids or high humidity.
The remote control may not
operate normally if exposed to
direct sunlight or other intense
light sources. Should this happen,
reposition the light source or the
LCD Projector.
Press down -
c
Slide open
e
2s
-air
Batterjl cover
1
in
close
Max. distance: 7m
t
Notes:
Incorrect use of batteries may cause them to leak or burst.
l
Insert the batteries with the (+) and (-) polarities as indicated.
l
Remove the batteries if the remote control will not be operated for an extended
period of time.
l
Maintain the batteries in clean condition.
l
Do not mix different brands of batteries. The life expectancy of the new batteries
will be shortened and the old batteries may leak.
0
When the batteries have been used up, remove them immediately to prevent
leakage and damage. Leaked battery fluid may irritate the skin. Remove any
battery fluid by wiping with a cloth.
Due to storage conditions and the shelf life of the supplied batteries, they may
run out after a short time. Replace them with new batteries as soon as possible.
Use the remote control as shown in the figures on the left.
Setting Up the Projector
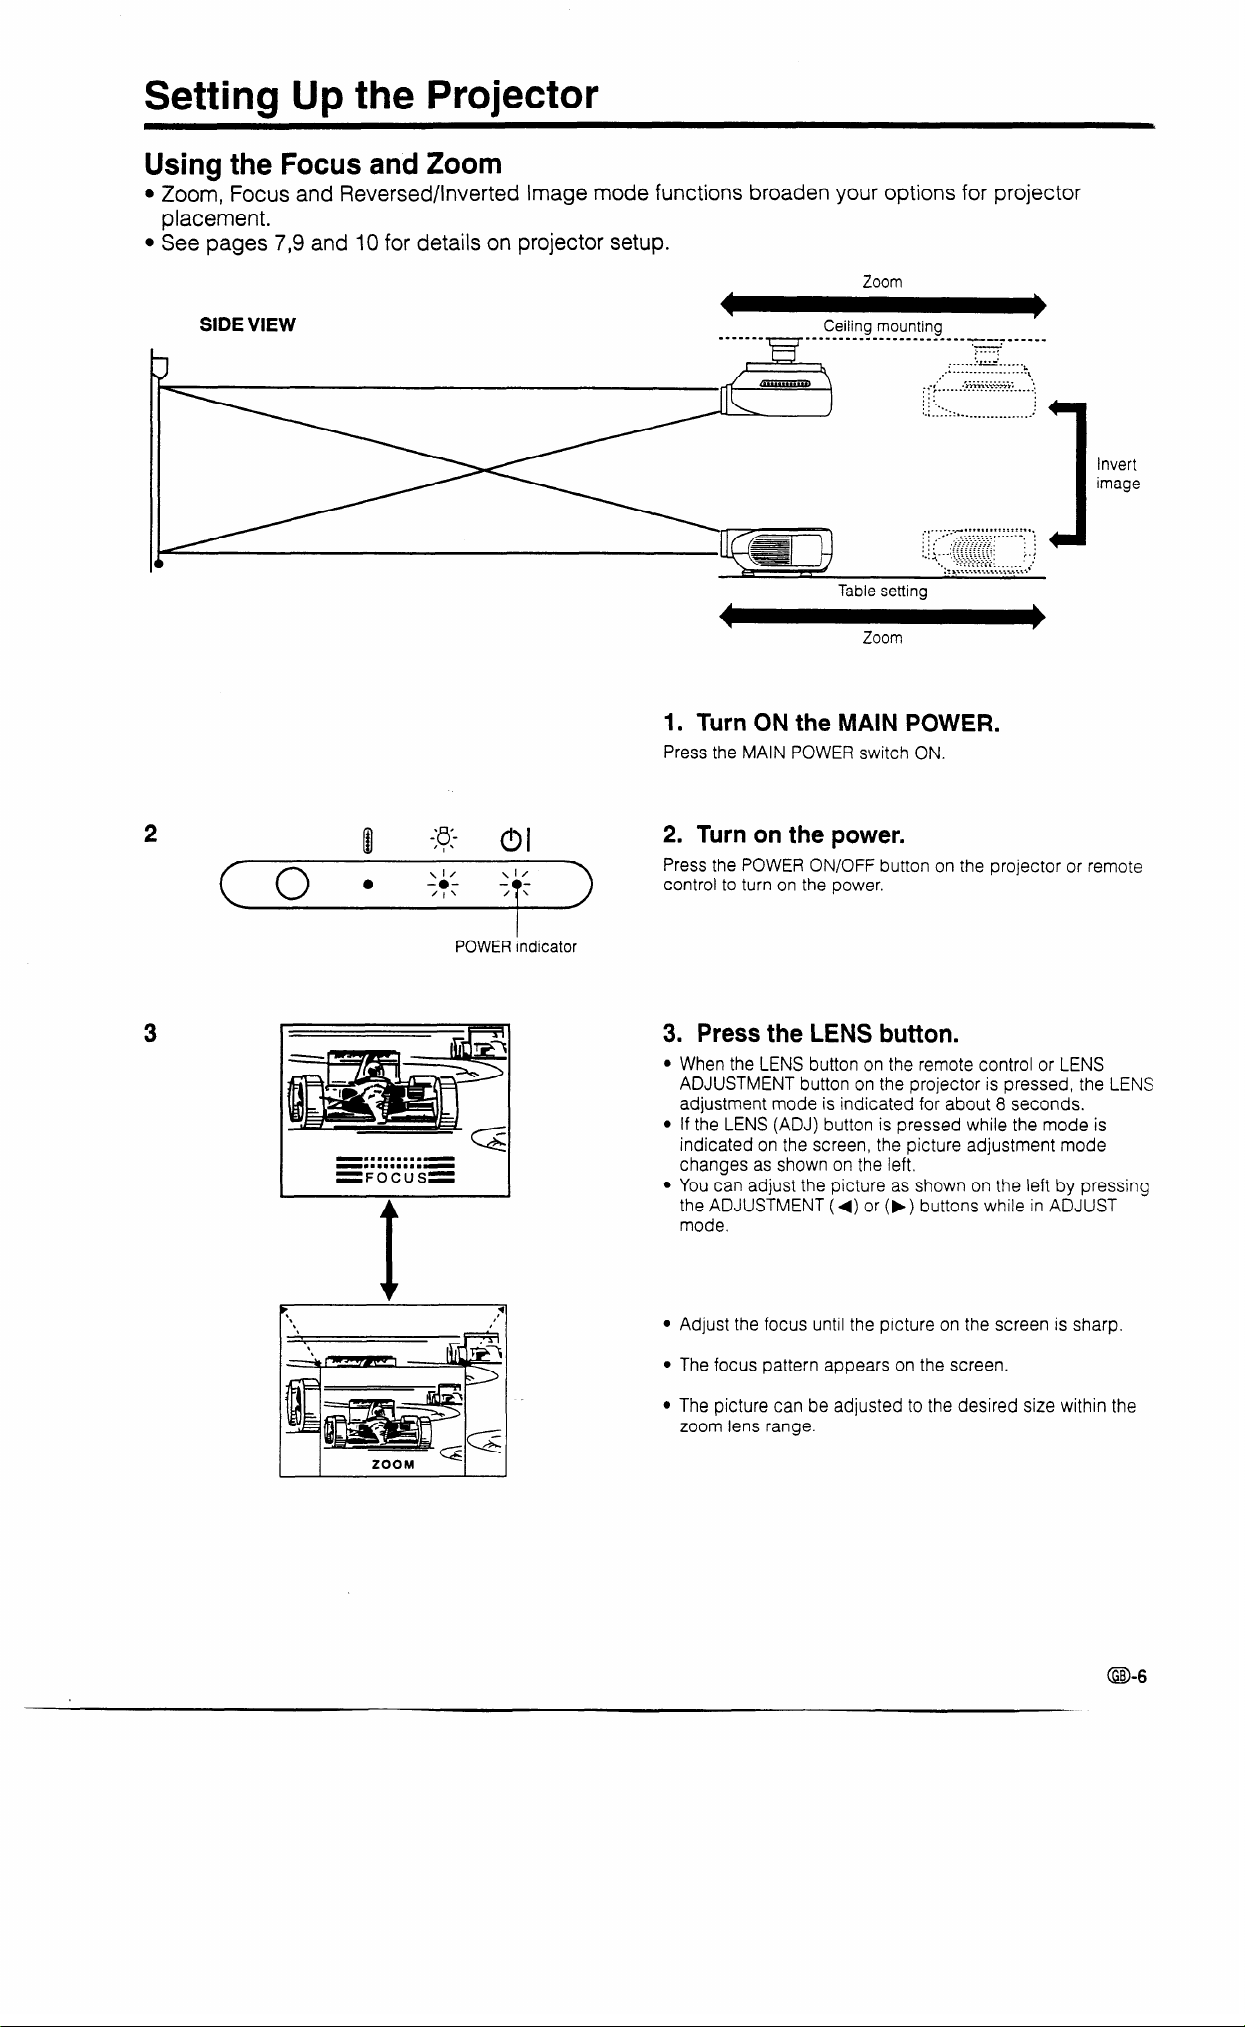
Using the Focus and Zoom
l Zoom, Focus and Reversed/Inverted Image mode functions broaden your options for projector
placement.
l See pages 7,9 and 10 for details on projector setup.
SIDE VIEW
Table setting
. r
Zoom
Invert
image
2
3
(0
0
0
-.........-
-.........-
=FOCUS=
<+I- 0 1
POWER indicator
I
1. Turn ON the MAIN POWER.
Press the MAIN POWER switch ON.
2. Turn on the power.
Press the POWER ON/OFF button on the projector or remote
control to turn on the power.
3. Press the LENS button.
l When the LENS button on the remote control or LENS
ADJUSTMENT button on the projector is pressed, the LENS
adjustment mode is indicated for about 8 seconds.
l if the LENS (ADJ) button is pressed while the mode is
indicated on the screen, the picture adjustment mode
changes as shown on the left.
l You can adjust the picture as shown on the left by pressing
the ADJUSTMENT (4) or (b) buttons while in ADJUST
mode.
l Adjust the focus until the picture on the screen is sharp.
l The focus pattern appears on the screen.
l The picture can be adjusted to the desired size within the
zoom lens range.
 Loading...