

Quick Setup
3-13
Quick Setup
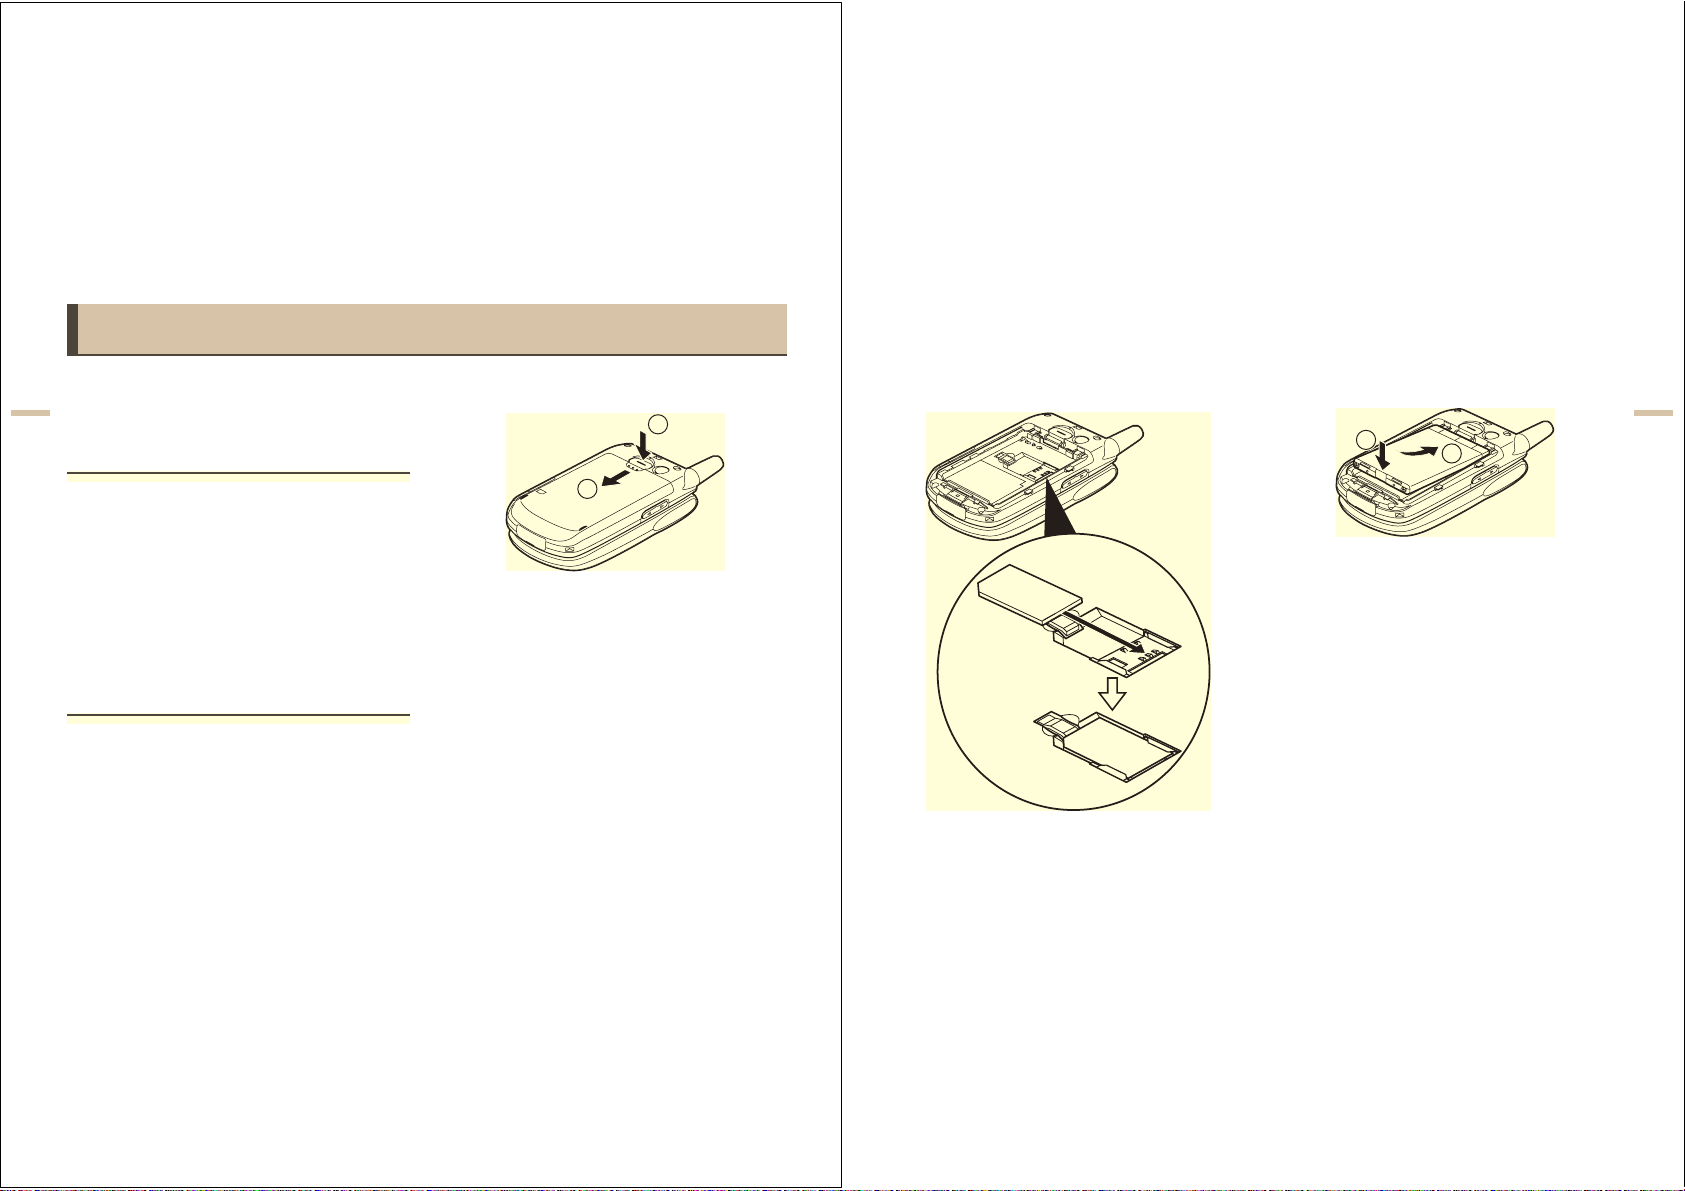
3 flip the SIM card into the SIM holder as
illustrated.
Do not touch the metal part of the SIM terminal.
4 Position the battery with the printed side up.
Insert its top end as illustrated into slot and
insert the other end into position .
5 Align the battery cover with the battery
compartment as illustrated and flip it in the
direction of the arrow until it clicks.
Removing the SIM Card
In step 3, press the back of the card, flip it in the opposite
direction and remove it from the SIM holder.
2
1
Quick Setup gives you the basic information you need to
start using your handset by simply following the steps.
Quick Setup
Step 1:
Unpacking
Check that you have the following items;
The handset
Rechargeable Li-ion battery
AC charger
Hands free EARphone & MIC
Operation Manual
Some other brochures or supplements may also be
contained.
Step 2:
Inserting the SIM Card and the
Battery
In order to access the services available, do not forget to
insert a SIM card and a battery. The SIM card carries the
user’s identity for accessing the network and also stores
personal information such as the handset directory and
received Text messages, etc. Only use a 3V SIM card
with your handset.
3-12
1 Press ( ) and flip the cover in the direction of
the arrow ( ).
1
2
2 Remove the battery cover.
Step 3:
3-15
Quick Setup
Battery Status
Check the battery indicator displayed in the upper left of
the display to estimate remaining battery power. When
the battery is empty, “ ” appears on the display and
an alarm sounds. The battery may only last for another 5
minutes. If you are using your handset, charge the battery
immediately.
Step 4:
Turning Your Handset On
Press F and hold for approximately 2 seconds.
The standby screen appears.
Turning Your Handset Off
Press F and hold for approximately 2 seconds.
Step 5:
Setting the Date and Time
Set the date and time before using the handset. If date
and time are left unset, you cannot operate some
time-based functions correctly.
1 Flip open the handset.
2 Press B.
The main menu appears.
Battery Indicators Charge Level
Sufficiently charged
Partially charged
Charging recommended
Charging required
Empty
For information on key operations, refer to
“Parts and Controls” on page 4-18.
When turning on the handse t, you will be asked
to enter a PIN (Personal Identification Number)
code. Enter it and press
B. For more
information, refer to “If You Upgrade Your
Handset” on page 3-16.
Charging the Battery
The battery is not fully charged when you purchase the
Quick Setup
handset. Charge the battery for at least 2 hours before
using the handset.
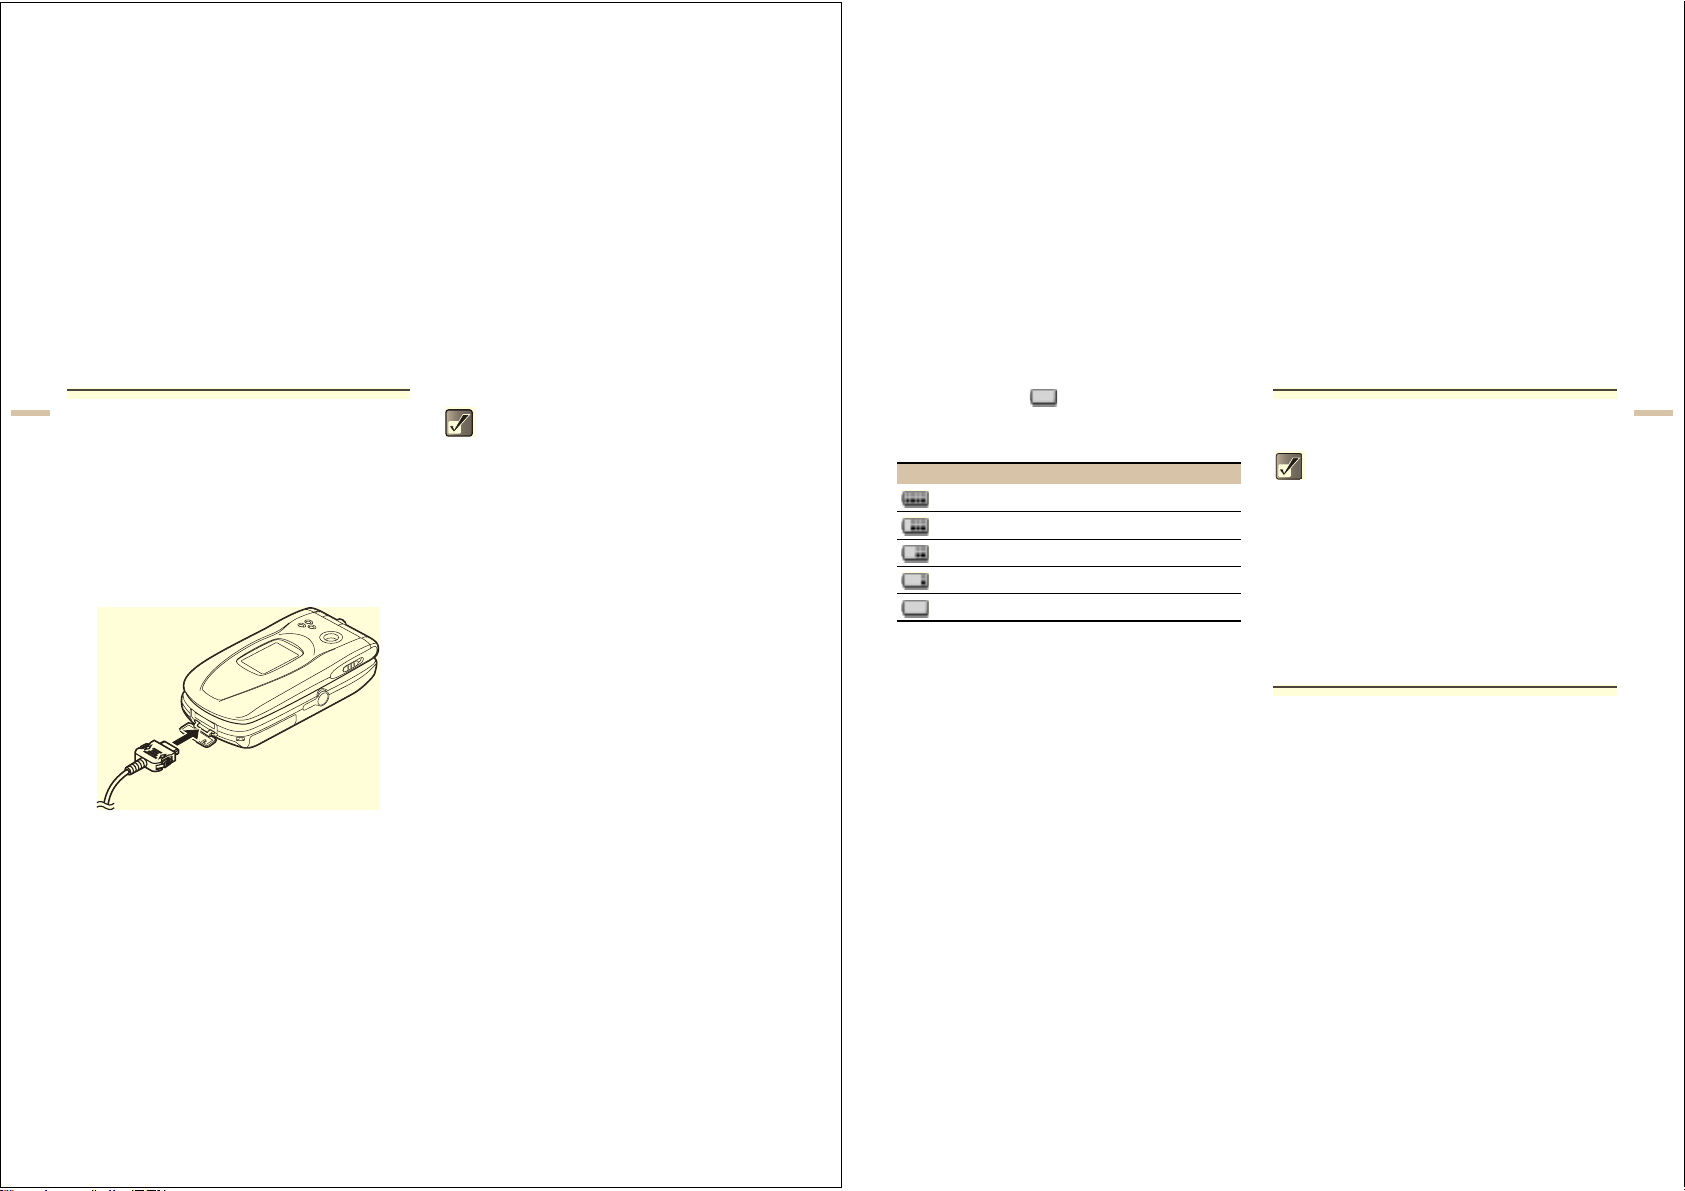
Using the Charger
1 Insert the charger plug into an AC outlet.
2 Open the external connector cap and insert
the charger (label facing up) into the USB/
Charger connector. The Indicator LED lights
red.
3-14
3 When charging is complete, the Indicator
LED turns off.
In standby mode, the Indicator LED blinks.
The standard charging time is approximately 2
hours.
Charging time may vary depending on the
state of the battery and other conditions. For
information on the battery , refer to “Battery” on
page 1-5.
Removing the charger
Disconnect the charger plug from the AC outlet and
unplug the charger from the handset.
To charge using the cigarette lighter charger
The optional cigarette lighter charger (CE-CL30) supplies
power for charging from the cigarette lighter socket of a
car.

3 Press a, b, c or d to highlight “Settings”
3-17
Quick Setup
Copying the Contacts List from the
SIM card
The first time you insert a SIM card you have used for your
previous mobile phone, you are asked whether you wish
to copy the information such as the “Contacts list” entries.
Follow the on-screen instructions, or you can do it later
using the “Contacts list” menu as follows.
1 Press B.
The main menu appears.
2 Press a, b, c, or d to highlight “Contacts”
and press
B.
3 Press a or b to highlight “Contacts list” and
press
B.
4 Press C [Options].
The “Options” menu appears.
5 Press a or b to highlight “Advanced” and
press
B.
6 Press a or b to highlight “Copy all from SIM”
and press
B.
7 Press C [Yes].
Copying starts.
To cancel, press
A [No].
and press
B.
4 Press a or b to highlight “Date & Time” and
press
Quick Setup
B.
5 Press a or b to highlight “Set date/time” and
B.
press
6 Enter the day, month, year and time using the
digit keys and press
If you enter the time in the 12-hour format,
press
P. Press P to switch between am
and pm.
For more information on how to set date and time,
refer to “Setting the Date and Time” on page 15-139.
B.
3-16
If You Upgrade Your Handset
If you have a mobile phone before purchasing this
handset, you may use your previous SIM card with the
new handset. In this case, you should keep in mind two
things for the setup.
Entering the PIN Code
If you insert a SIM card you have used for your previous
mobile phone, you may be requested to enter a PIN code
when you turn on your handset. For more information on
the PIN code, refer to “Setting Security” on page 15-140.
1 Enter your PIN code that you used for your
old mobile phone.
2 Press B.
If your PIN code is entered incorrectly three
times in a row, the SIM card is locked.
To release the lock, try entering the PUK
(Personal Unblocking Key) code (8 digits)
provided by your service provider. For more
information on the code, contact your service
provider.
 Loading...