


ENGLISH
LC-24DV510K
LCD COLOUR TELEVISION |
OPERATION MANUAL |
SHARP ELECTRONICS (Europe) GmbH
Sonninstraße 3, D-20097 Hamburg
SHARP CORPORATION
http://www.sharp-eu.com
 50186854

Contents |
|
Features ................................................................. |
3 |
Dear SHARP customer........................................... |
3 |
Introduction............................................................. |
3 |
Preparation............................................................. |
3 |
Important safety precautions .................................. |
4 |
Safety Precautions ................................................. |
5 |
Connection to a Television Distribution System |
|
(Cable TV etc.) from Tuner ................................. |
6 |
Package Contents .................................................. |
7 |
Environmental Information ..................................... |
7 |
Repair Information .............................................. |
7 |
Remote Control Buttons ......................................... |
8 |
LCD TV and Operating Buttons.............................. |
9 |
Viewing the Connections - Back Connectors ......... |
9 |
Viewing the Connections - Side Connectors ........ |
10 |
Power Connection ................................................ |
10 |
Aerial Connection ............................................. |
10 |
Using USB Inputs .................................................. |
11 |
Connecting to a DVD Player via HDMI................. |
12 |
Connecting to a DVD Player via Component |
|
Sockets (YPbPr) or Scart Cable........................... |
12 |
Connecting the LCD TV to a PC........................... |
13 |
Using Side AV Connectors ................................... |
13 |
Remote Control Handset...................................... |
13 |
Inserting Batteries............................................. |
13 |
Switching On/Off................................................... |
13 |
To Switch the TV On ......................................... |
13 |
To Switch the TV to Standby............................. |
13 |
To Switch the TV Off ......................................... |
13 |
Input Selection...................................................... |
14 |
Basic Operations .................................................. |
14 |
Operation with the Buttons on the TV............... |
14 |
Volume Setting.............................................. |
14 |
Programme Selection ................................... |
14 |
AV Mode ....................................................... |
14 |
Operation with the Remote Control .................. |
14 |
Volume Setting.............................................. |
14 |
Programme Selection (Previous or Next |
|
Programme).................................................. |
14 |
Programme Selection (Direct Access) .......... |
14 |
Viewing Electronic Programme Guide (EPG)....... |
14 |
Recording via EPG Screen............................... |
15 |
Programme Options.......................................... |
15 |
First Time Installation............................................ |
16 |
Installation ............................................................ |
17 |
Automatic Channel Scan (Retune) Menu |
|
Operation.......................................................... |
17 |
Manual Tuning ..................................................... |
18 |
Digital Manual Search....................................... |
18 |
Analogue Manual Search ................................. |
18 |
Analogue Fine Tune.......................................... |
18 |
Clear Service List (*)......................................... |
18 |
Managing Stations: Channel List.......................... |
18 |
Operating the Channel List............................... |
19 |
Moving a Channel............................................. |
19 |
Deleting a Channel ........................................... |
19 |
Renaming a Channel........................................ |
19 |
Locking a Channel............................................ |
19 |
Managing Stations: Favourites............................. |
19 |
Button Functions............................................... |
19 |
|
English |
Managing Stations: Sorting Channel List ............. |
20 |
On-Screen Information ......................................... |
20 |
Media Playback Using Media Browser................. |
20 |
Viewing Videos via USB .................................. |
20 |
Viewing Photos via USB ................................... |
21 |
Slideshow Options............................................ |
21 |
Playing Music via USB ..................................... |
21 |
Recordings Library............................................ |
22 |
Media Browser Settings.................................... |
22 |
Timeshift Recording ............................................. |
22 |
Instant Recording ................................................. |
23 |
Watching Recorded Programmes ....................... |
23 |
Changing Image Size: Picture Formats................ |
23 |
Configuring Picture Settings................................. |
25 |
Operating Picture Settings Menu Items............ |
25 |
Picture Settings Menu Items............................. |
25 |
PC Picture Settings........................................... |
25 |
Configuring Sound Settings.................................. |
26 |
Operating Sound Settings Menu Items............. |
26 |
Sound Settings Menu Items.............................. |
26 |
Configuring Your TV’s Settings............................. |
26 |
Operating Settings Menu Items ........................ |
26 |
Settings Menu Items......................................... |
26 |
Using a Conditional Access Module ..................... |
27 |
Viewing Conditional Access Menu (*) ............... |
27 |
Configuring Language Preferences...................... |
27 |
Language Settings............................................ |
28 |
Parental Control.................................................... |
28 |
Parental Settings Menu Operation ................... |
28 |
Timers................................................................... |
28 |
Setting Sleep Timer .......................................... |
28 |
Setting Programme Timers............................... |
29 |
Adding a Timer.............................................. |
29 |
Editing a Timer.............................................. |
29 |
Deleting a Timer............................................ |
29 |
Recording Configuration....................................... |
29 |
Configuring Date/Time Settings............................ |
30 |
Configuring Source Settings................................. |
30 |
Configuring Other Settings ................................... |
30 |
Operation.......................................................... |
30 |
Other Features ..................................................... |
31 |
Teletext ................................................................. |
31 |
Tips....................................................................... |
32 |
Appendix A: PC Input Typical Display Modes....... |
33 |
Appendix B: AV and HDMI Signal Compatibility |
33 |
(Input Signal Types).............................................. |
|
Appendix C: Supported DVI Resolutions.............. |
34 |
Appendix D: Supported File Formats for USB |
34 |
Mode..................................................................... |
|
Appendix E: Software Upgrade ............................ |
35 |
Specifications ....................................................... |
36 |
Dimensional Drawings.......................................... |
37 |
End of life disposal ............................................... |
38 |
Detachable Stand Uninstallation Method ............. |
39 |
Screw Dimensions................................................ |
40 |
- 1 - |
|
00_MB60_[GB]_(01_TV)_1910UK_IDTV_PVR_BRONZE17_24942LED_ |
YPBPR_ROCKER_10072636_50186854.indd 1 |
17.08.2011 14:10:04 |

SPECIAL NOTE FOR USERS IN THE U.K.
The mains lead of this product is fitted with a non-rewireable (moulded) plug incorporating a 5A fuse. Should
the fuse need to be replaced, a BSI or ASTA approved BS 1362 fuse marked |
ASA or |
|
and of the same rating |
as above, which is also indicated on the pin face of the plug, must be used. |
|
|
|
Always refit the fuse cover after replacing the fuse. Never use the plug without the fuse cover fitted.
In the unlikely event of the socket outlet in your home not being compatible with the plug supplied, cut off the mains plug and fit an appropriate type.
DANGER:
The fuse from the cut-off plug should be removed and the cut-off plug destroyed immediately and disposed of in a safe manner.
Under no circumstances should the cut-off plug be inserted elsewhere into a 5A socket outlet, as a serious electric shock may occur.
To fit an appropriate plug to the mains lead, follow the instructions below:
IMPORTANT:
The wires in the mains lead are coloured in accordance with the following code:
Blue: Neutral
Brown: Live
As the colours of the wires in the mains lead of this product may not correspond with the coloured markings identifying the terminals in your plug, proceed as follows:
•The wire which is coloured blue must be connected to the plug terminal which is marked N or coloured black.
•The wire which is coloured brown must be connected to the plug terminal which is marked L or coloured red.
Ensure that neither the brown nor the blue wire is connected to the earth terminal in your three pin plug. Before replacing the plug cover make sure that:
•If the new fitted plug contains a fuse, its value is the same as that removed from the cut-off plug.
•The cord grip is clamped over the sheath of the mains lead, and not simply over the lead wires.
IF YOU HAVE ANY DOUBT, CONSULT A QUALIFIED ELECTRICIAN.
English - 2 -
00_MB60_[GB]_(01_TV)_1910UK_IDTV_PVR_BRONZE17_24942LED_ |
YPBPR_ROCKER_10072636_50186854.indd 2 |
17.08.2011 14:10:06 |
Features
•Remote controlled colour LCD TV.
•Fully integrated Terrestrial digital TV (DVB-T - MPEG2)
•HDMI connectors for digital video and audio. This connection is also designed to accept high definition signals.
•USB input.
•Programme recording
•Programme timeshifting
•1000 programmes (analogue+digital).
•OSD menu system.
•Integrated tuner MPEG2 compatible.
•Scart socket for external devices (such as video, video games, audio set, etc.).
•Stereo sound system. (German+Nicam)
•Teletext, fastext, TOP text.
•Headphone connection.
•Automatic programming system.
•Forward or backward manual tuning.
•Sleep timer / Child lock.
•Automatic sound mute when no transmission.
•NTSC playback.
•AVL (Automatic Volume Limiting).
•Auto power down.
•PLL (Frequency Search).
•PC input.
•Plug&Play for Windows 98, ME, 2000, XP, Vista, Windows 7.
•Game Mode
•The illustrations and the OSD in this operation manual are for explanation purposes and may vary slightly from the actual operations.
•The examples used throughout this manual are based on the LC-24DV510K model.
Dear SHARP customer
Thank you for your purchase of the SHARP LCD colour TV product. To ensure safety and many years of trouble-free operation of your product, please read
Important safety precautions carefully before using this product.
Introduction
Please read the corresponding instructions of this handbook prior to the first usage of the device, even when the usage of electronic devices is familiar to you. Please take notice of the chapter SAFETY
PRECAUTIONS. Carefully keep the handbook as future reference. When selling the device or giving it away, provide these direction for use.
Thank you for choosing this product. This manual will guide you for the proper operation of your TV. 
Before operating the TV, please read this manual thoroughly. Please do keep this manual in a safe place for future references.
This device is intended to receive and display TV programs. The different connection options make an additional expansion of the reception and display sources possible (receiver, DVD player, DVD recorder, VCR, PC etc.). This device is only suitable for the operation in dry interiors. This appliance is intended solely for private domestic use and may not be used for industrial and commercial purposes. We exclude liability in principle, if the device is not used as intended, or unauthorized modifications have been made. To operate your LCD TV in extreme ambient conditions may cause the damage of the device.
Preparation
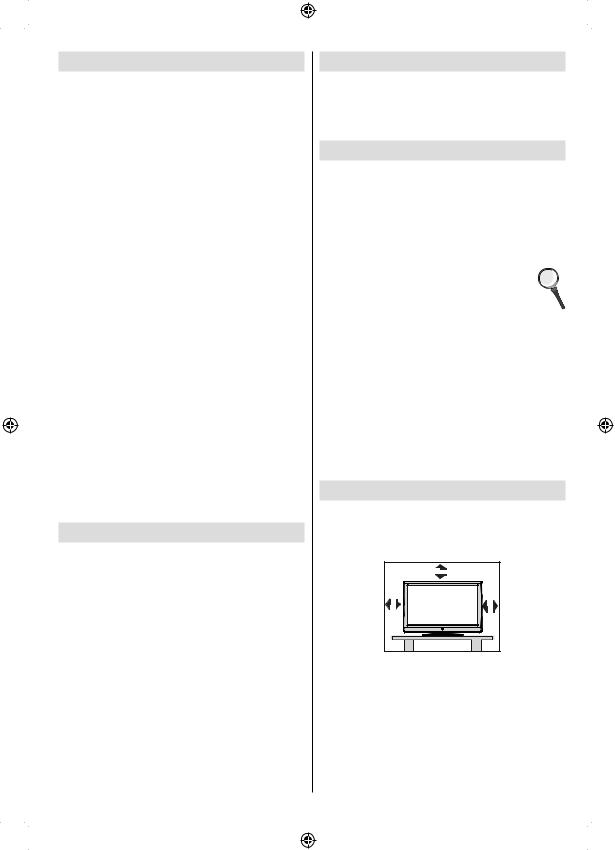
For ventilation, leave a free space of at least 10 cm all around the set. To prevent any fault and unsafe situations, please do not place any objects on top of the set. Use this device in moderate climates.
|
10 cm |
10 cm |
cm 10 |
English - 3 -
00_MB60_[GB]_(01_TV)_1910UK_IDTV_PVR_BRONZE17_24942LED_ |
YPBPR_ROCKER_10072636_50186854.indd 3 |
17.08.2011 14:10:06 |
Important safety precautions
•Cleaning—Unplug the AC cord from the AC outlet before cleaning the product. Use a damp cloth to clean the product. Do not use liquid cleaners or aerosol cleaners.
•Use a soft damp cloth to gently wipe the panel when it is dirty. To protect the panel, do not use a chemical cloth to clean it. Chemicals may cause damage or cracks in the cabinet of the TV.
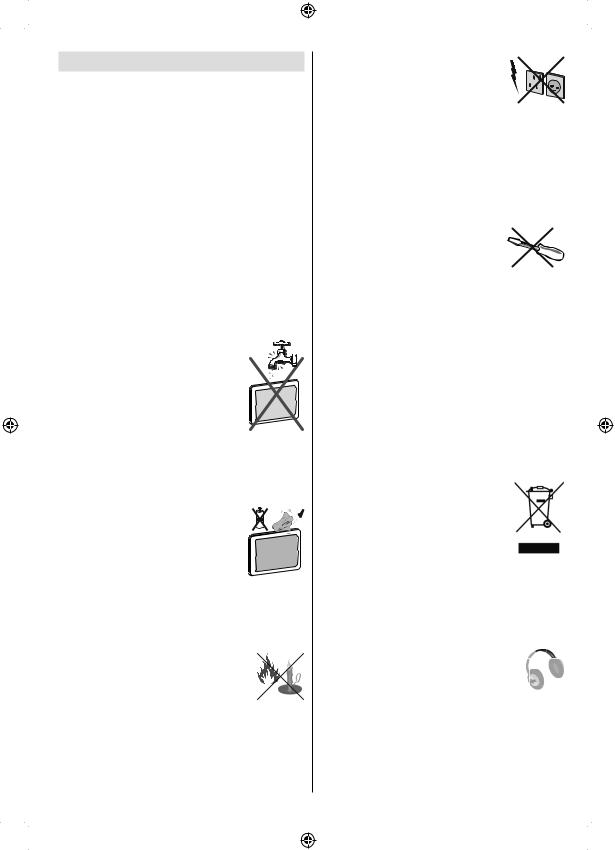
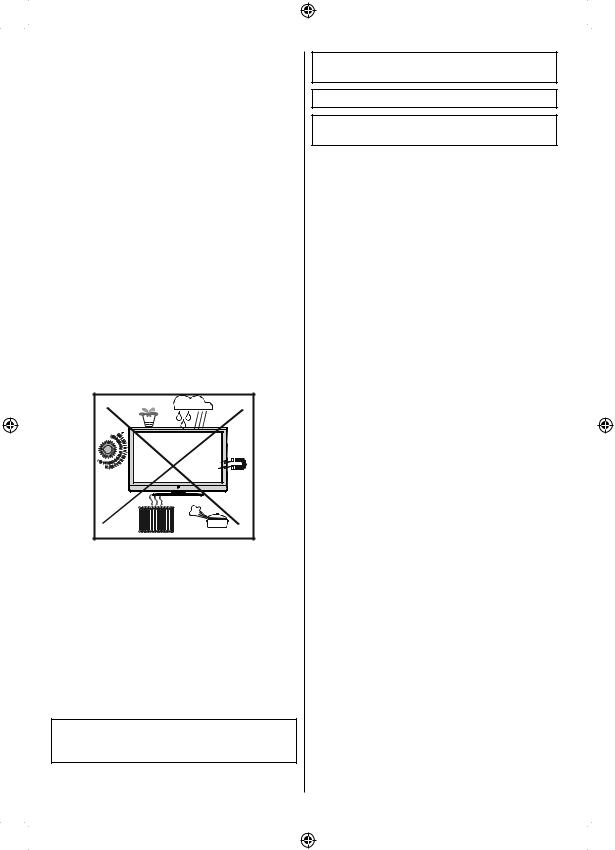
•Water and moisture—Do not use the product near water, such as bathtub, washbasin, kitchen sink, laundry tub, swimming pool and in a wet basement.
•Do not place vases or any other water-filled containers on this product. The water may spill onto the product causing fire or electric shock.
•Stand—Do not place the product on an unstable cart, stand, tripod or table. Doing so can 

cause the product to fall, resulting in serious personal injuries as well as damage to the product.
Use only a cart, stand, tripod, bracket or table recommended by the manufacturer or sold with the product. When mounting the product on a wall, be sure to follow the manufacturer’s instructions. Use only the mounting hardware recommended by the manufacturer.
•When relocating the product placed on a cart, it must be moved with utmost care. Sudden stops, excessive force and uneven floor surface can cause the product to fall from the cart.
•Ventilation—The vents and other openings in the cabinet are designed for ventilation. Do not cover or block these vents and openings since insufficient ventilation can cause overheating
and/or shorten the life of the product. Do not place the product on a bed, sofa, rug or other similar surface, since they can block ventilation openings. This product is not designed for built-in installation; do not place the product in an enclosed place such as a bookcase or rack, unless proper ventilation is provided or the manufacturer’s instructions are followed.
•The LCD panel used in this product is made of glass. Therefore, it can break when the product is dropped or impact applied. If the LCD panel is broken, be careful not to be injured
by broken glass.
• Heat sources—Keep the product away from heat sources such as radiators, heaters, stoves and other heat-generating products (including amplifiers).
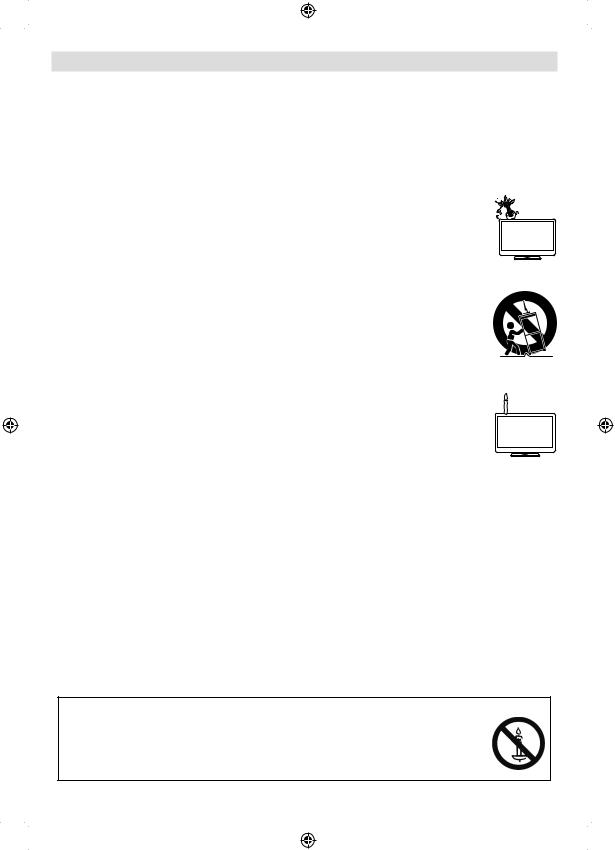
• To prevent fire, never place any type of candle or naked flames on the top or near the TV set.
•To prevent fire or shock hazard, do not place the AC cord under the TV set or other heavy items.
•Headphones—Do not set the volume at a high level. Hearing experts advise against extended listening at high volume levels.
•Do not display a still picture for a long time, as this could cause an afterimage to remain.
•There is power consumption always if main plug is connected.
•Servicing—Do not attempt to service the product yourself. Removing covers can expose you to high voltage and other dangerous conditions. Request a qualified person to perform servicing.
The LCD panel is a very high technology product, giving you fine picture details.
Due to the very large number of pixels, occasionally a few non-active pixels may appear on the screen as a fixed point of blue, green or red. This is within product specifications and does not constitute a fault.
Precautions when transporting the TV
When transporting the TV, never carry it by holding onto the speakers. Be sure to always carry the TV by two people holding it with two hands—one hand on each side of the TV.
WARNING
To prevent the spread of fire, keep candles or other open flames away from this product at all times.
English - 4 -
00_MB60_[GB]_(01_TV)_1910UK_IDTV_PVR_BRONZE17_24942LED_ |
YPBPR_ROCKER_10072636_50186854.indd 4 |
17.08.2011 14:10:06 |
Safety Precautions
Read the following recommended safety precautions carefully for your safety.
Power Source
The TV set should be operated only from a 220-240V AC, 50Hz outlet. Ensure that you select the correct voltage setting for your convenience.
Power Cord
Do not place the set, a piece of furniture, etc. on the power cord (mains lead) or pinch the cord. Handle the power cord by the plug. Do not unplug the appliance by pulling from the power cord and never touch the power cord with wet hands as this could cause a short circuit or electric shock. Never make a knot in the cord or tie it with other cords. The power cords should be placed in such a way that they are not likely to be stepped on. A damaged power cord can cause fire or give you an electric shock. When it is damaged and needs to be replaced, it should be done by qualified personnel.
Moisture and Water
Do not use this device in a humid and damp place (avoid the bathroom, the sink in the kitchen, and near the washing
machine). Do not expose this device to rain or water, as this may be dangerous and do not place objects filled with liquids, such as flower vases, on top. Avoid from dripping or splashing.
If any solid object or liquid falls into the cabinet, unplug the TV and have it checked by qualified personnel before operating it any further.
Cleaning
Before cleaning, unplug the TV set from the wall outlet. Do not use liquid
or aerosol cleaners. Use soft and dry
cloth.
Ventilation
The slots and openings on the TV set are intended for ventilation and to ensure reliable operation. To prevent overheating, these openings must not be blocked or covered in anyway.
Heat and Flames
The set should not be placed near to open flames and sources of intense heat such as an electric heater. Ensure that no open flame sources, such as lighted
candles, are placed on top of the TV. Batteries should not be exposed to excessive heat such as sunshine,
fire or the like.
English
Lightning
In case of storm and lightning or when going on holiday, disconnect the power cord from the wall outlet.
Replacement Parts
When replacement parts are required, make sure that the service technician has used replacement parts, which are specified by the manufacturer or have the same specifications as the original one. Unauthorized substitutions may result in fire, electrical shock or other hazards.
Servicing
Please refer all servicing to qualified personnel. Do not remove the cover yourself as this may result in an electric shock.
Waste Disposal
•Packaging and packaging aids are recyclable and should principally be recycled. Packaging materials, such as a foil bag should be kept away from children
•Batteries, including those which are heavy metal free, should not be disposed of with household waste. Please dispose of used batteries in an environmentally friendly manner. Find out about the legal regulations which apply in your area.
•Do not try to recharge batteries, there is a danger of explosion. Replace batteries only with the same or equivalent type.
This symbol on the product or on its packaging means that your electrical and electronic device
should be disposed at the end of its service life separately from your household wastes. There are separate collection systems for recycling in the EU. For more information, please contact the local authority or the dealer where you purchased the product.
Disconnecting the Device
The mains plug is used to disconnect the TV set from the mains and therefore it must remain readily operable.
Headphone Volume
Excessive sound pressure from earphones and headphones can cause hearing loss.
Installation
To prevent injury, this device must be securely attached to the wall in accordance with the installation instructions when mounted to the wall (if the option is available).
- 5 -
00_MB60_[GB]_(01_TV)_1910UK_IDTV_PVR_BRONZE17_24942LED_ |
YPBPR_ROCKER_10072636_50186854.indd 5 |
17.08.2011 14:10:07 |
LCD Screen
The LCD panel is a very high technology product with about a million thin film transistors, giving you fine picture details. Occasionally, a few non-active pixels may appear on the screen as a fixed blue, green or red point. Please note that this does not affect the performance of your product.
Warning! Do not leave your TV in standby or operating mode when you leave your house.
Connection to a Television Distribution System (Cable TV etc.) from Tuner
Device connected to the protective earthing of the building installation through the mains connection or through other apparatus with a connection to protective earthing-and to a television distribution system using coaxial cable, may in some circumstances create a
fire hazard.
Connection to a cable distribution system has therefore to be provided through a device providing electrical isolation below a certain frequency range (galvanic isolator, see EN 60728-11).
Note:The HDMI connection between PC and TV may cause radio interference in which case it is recommended to use VGA(DSUB-15) connection.
The Standby Off/On button doesn´t separate this device completely from mains. Moreover the device consumes power in the standby operation. In order to separate the device completely from mains, the mains plug has to be pulled from the mains socket. Because of that the device should be set up in a way, that an unobstructed access to mains socket is guaranteed, so that in case of emergency the mains plug can be pulled immediately. To exclude the danger of fire, the power cord should principally be separated from the mains socket prior to a longer period of non-usage, i.e. during vacations.
•“HDMI, the HDMI logo and High-Definition
Multimedia Interface are trademarks or registered trademarks of HDMI Licensing LLC.”
English
•Manufactured under license from Dolby
Laboratories.
•The “HD TV 1080p” Logo is a trademark of EICTA.
•The DVB logo is the registered trademark of the
Digital Video Broadcasting—DVB—project.
Electrical device not in the hands of children
Never let children use any electrical device unsupervised. Children cannot always recognise possible dangers. Batteries / accumulators can be life threatening when swallowed. Store batteries out of the reach of small children. In case of swallowing a battery medical aid has to be sought immediately.
Also keep the packaging foils away from children as there is danger of suffocation.
- 6 -
00_MB60_[GB]_(01_TV)_1910UK_IDTV_PVR_BRONZE17_24942LED_ |
YPBPR_ROCKER_10072636_50186854.indd 6 |
17.08.2011 14:10:07 |
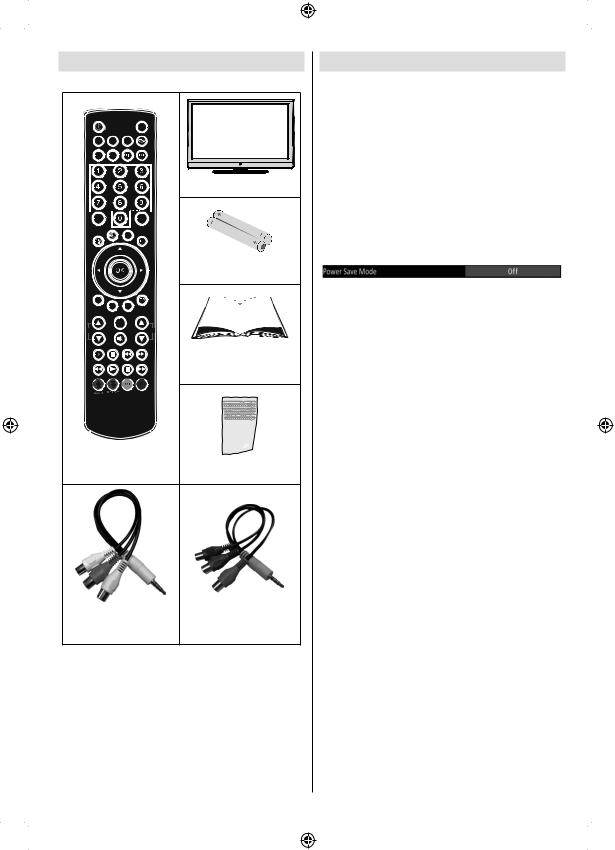
Package Contents
SLEEP |
SCREEN |
PRESETS |
|
FAV |
LANG. |
|
|
|
|
|
LCD TV |
EPG |
|
SWAP |
|
|
|
SOURCE |
|
|
|
|
Batteries: 2 X AAA |
C |
|
|
|
|
DISP. |
SEARCH |
|
|
MODE |
|
|
|
INFO |
|
|
CH |
|
V |
|
|
|
|
Instruction Book |
Remote Control |
Quick Guide |
||
|
|
|
|
|
|
|
1 X Component Video |
1 X Video & Audio |
Connection Cable |
||
Connection Cable |
|
||
Note: You should check the accessories after purchasing. Make sure that each accessory is
included.
As the manufacturer’s specification supports communication on cable lengths shall be smaller than 3m.
Environmental Information
•This television is designed to consume less energy to save environment.
You not only help to save the environment but also you can save money by reducing electricity bills thanks to the energy efficiency feauture of this TV. To reduce energy consumption, you should take the following steps:
•You can use Power Save Mode setting, located in the Other Settings menu. If you set Power Save Mode as On, the TV will switch to energy-saving mode and luminance level of TV set will be decreased to optimum level. Note that some picture settings will be unavailable to be changed when the TV is in Power Save Mode.
•When the TV is not used, please switch off at the rear rocker switch to further reduce power consumption.
•Disconnect the TV from the mains socket when it will not be used for prolonged periods.
•When the TV is left in stand-by it consumes a small amount of power switching off at the rear rocker switch or disconnect the TV from the mains will make further energy savings. Note activating the “Power Save Mode” saves on an annual bases more energy than switching off the mains when the TV is not used, to save most energy it is highly recommended that
“Power Save Mode” is switch on.
Repair Information
Please refer all servicing to qualified personnel. Only qualified personnel must repair the TV. Please contact your local dealer, where you have purchased this TV for further information.
English - 7 -
00_MB60_[GB]_(01_TV)_1910UK_IDTV_PVR_BRONZE17_24942LED_ |
YPBPR_ROCKER_10072636_50186854.indd 7 |
17.08.2011 14:10:07 |

Remote Control Buttons
1.Standby
2.Image size / Zooms videos (in Media Browser video mode)
3.Sleep Timer
4.Mono / Stereo - Dual I-II / Currrent Language (*)
(in DVB channels)
5.Favourite Mode Selection (in DVB channels)
6.Numeric buttons
7.Electronic programme guide (in DVB channels)
8.No function
9.Media Browser
10.Navigation buttons (Up/Down/Left/Right)
11.No function
12.Recordings Library
13.Programme Down / Page up - Programme Up / Page down
14.Mute
15.Programme recording
16.Pause (in Media Browser mode) / Timeshift recording
17.Rapid reverse (in Media Browser mode)
18.Play (in Media Browser mode)
19.Red button
20.Green button / List Schedule (in EPG) / Tag
/ Untag All (in favourite list) / Play-Slideshow
(in Media Browser) / Loop-Shuffle (in Media
Browser)
21.Picture mode selection / Changes picture mode
(in Media Browser video mode)
22.No function
23.Teletext / Mix (in TXT mode)
24.Subtitle on-off (in DVB channels)
25.Previous programme
26.AV / Source selection
27.Menu on-off
28.Okay (Confirm) / Hold (in TXT mode) / Edit Channel List
29.Exit / Return / Index page (in TXT mode)
30.No function
31.Info / Reveal (in TXT mode)
32.Volume Up / Down
33.No function
34.No function
35.Rapid advance (in Media Browser mode)
English
 SLEEP SCREEN PRESETS
FAV 
 LANG.
LANG. 
EPG |
SWAP |
|
SOURCE |
C |
|
DISP. |
SEARCH |
|
MODE |
|
INFO |
CH |
V |
36.Stop (in Media Browser mode)
37.Blue button / Edit Channel List / Filter (In
Favourite List&EPG)
38.Yellow button / Timeline Schedule (in EPG)
- 8 -
00_MB60_[GB]_(01_TV)_1910UK_IDTV_PVR_BRONZE17_24942LED_ |
YPBPR_ROCKER_10072636_50186854.indd 8 |
17.08.2011 14:10:09 |
LCD TV and Operating Buttons
FRONT and REAR VIEW |
Control buttons VIEW |
Control Buttons |
|
|
1. Standby Off/On button |
|
|
2. TV/AV button |
|
|
3. Programme Up/Down buttons- |
|
|
Volume Up/Down buttons |
|
|
Note:You can use +/- buttons |
|
|
to change volume. If you want |
|
P\V-AV |
to change channels, press P/V/ |
|
AV button once and then use |
|
|
|
|
|
|
+/- buttons. If you hold the P/V/ |
|
|
AV button about a few seconds, |
|
|
source OSD will be displayed. |
|
|
Main menu OSD cannot be |
|
|
displayed via control buttons. |
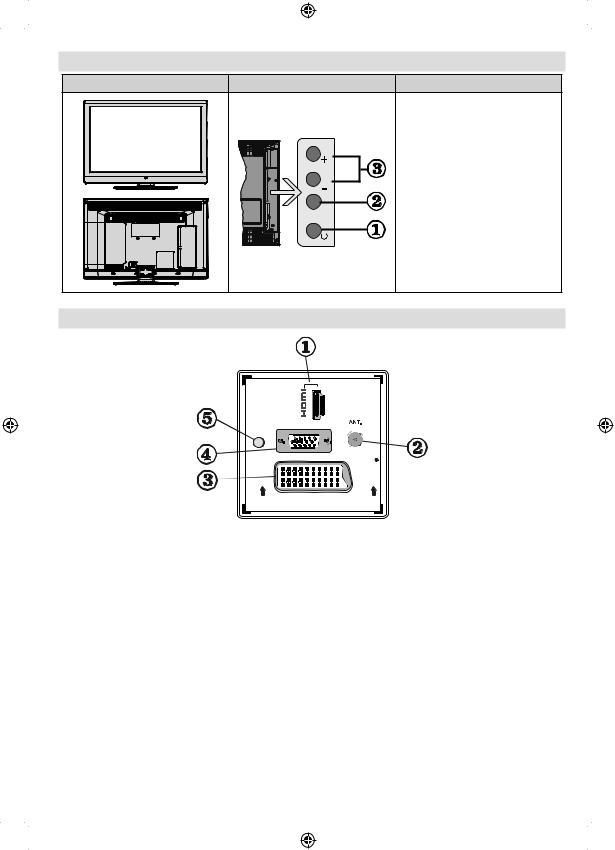
Viewing the Connections - Back Connectors
1 |
VGA |
SPDIF |
Coax.OUT |
SCART |
1.HDMI 1: HDMI Input
HDMI Inputs are for connecting a device that has an HDMI socket. Your LCD TV is capable of displaying High Definition pictures from devices such as a High Definition Satellite Receiver or DVD
Player. These devices must be connected via the HDMI sockets or Component Socket. These sockets can accept either 720p or 1080i signals. No sound connection is needed for an HDMI to HDMI connection.
2.RF Input connects to an aerial antenna system.
Note that if you use a decoder or a media recorder, you should connect the aerial cable through the device to the television with an appropriate antenna cable, as shown in the illustration in the following pages.
3.SCART input or output for external devices. Connect the SCART cable between SCART socket on TV and
SCART socket on your external device (such as a decoder, a VCR or a DVD player).
Note: If an external device is connected via the SCART socket, the TV will automatically switch to AV mode.
Note: S-VHS signal is supported via the scart socket.
4.PC Input is for connecting a personal computer to the TV set.
Connect the PC cable between the PC INPUT on the TV and the PC output on your PC.
5.SPDIF Coaxial Out outputs digital audio signals of the currently watched source. Use an SPDIF coaxial cable to trasfer audio signals to a device that has SPDIF input
English - 9 -
00_MB60_[GB]_(01_TV)_1910UK_IDTV_PVR_BRONZE17_24942LED_ |
YPBPR_ROCKER_10072636_50186854.indd 9 |
17.08.2011 14:10:09 |
Viewing the Connections - Side Connectors |
|
||
1. |
CI Slot is used for inserting a CI card. A CI card allows you to view all the channels that |
|
|
|
you subscribe to. For more information, see “Conditional Access” section. |
|
|
2. |
USB Inputs. |
|
|
|
Note that programme recording feature is available via these USB inputs. You can |
|
|
|
connect external hard disk drives to this input. |
|
|
3. |
TV control buttons. |
USB |
|
4. |
Component Video Input (YPbPr) is used for connecting component video. |
||
|
|||
|
You can connect the component video and audio sockets with a device that has |
Max:500mA |
|
|
|
5Vdc |
|
|
component output. To do this, you must use the supplied component video connection |
|
|
|
cable for enabling connection. First, plug single jack of the cable to the TV’s YPbPr socket |
|
|
|
(side). Afterwards, insert your component cable’s (not supplied) connectors into the plural |
|
|
|
part of the Component video connection cable. Colours of the connected jacks should |
|
|
|
match. |
P\V-AV |
|
5. Side audio-video connection input is used for connecting video and audio signals of external devices. To make a video connection, you must use the supplied AV connection
cable for enabling connection. First, plug singular jack of the cable to the TV’s Side AV socket. Afterwards, insert your video cable’s (not supplied) connector into the YELLOW input (located on the plural side) of the supplied AV connection cable. Colours of the connected jacks should match.
To enable audio connection, you must use RED and WHITE inputs of the side AV connection cable. Afterwards, insert your device’s audio cable’s connectors into the RED and WHITE jack of the supplied side AV connection cable. Colours of the connected jacks should match.
Note: You should use audio inputs of side AV connection cable (RED &
WHITE) to enable sound connection when connecting a device to your TV by using PC or COMPONENT VIDEO input.
6.Headphone jack is used for connecting an external headphone to the system. Connect to the HEADPHONE jack to listen to the TV from headphones (optional).
7. , switch is used for turning the TV on or off.
Power Connection
IMPORTANT: The TV set is designed to operate on 220-240V AC, 50Hz.
•After unpacking, allow the TV set to reach the ambient room temperature before you connect the set to the mains. Plug the power cable to the mains socket outlet.
Aerial Connection
• Connect the aerial ,cable TV plug to the AERIAL INPUT socket located at the rear of the TV.
1 |
VGA |
SPDIF |
Coax.OUT |
SCART |
English - 10 -
00_MB60_[GB]_(01_TV)_1910UK_IDTV_PVR_BRONZE17_24942LED_ |
YPBPR_ROCKER_10072636_50186854.indd 10 |
17.08.2011 14:10:16 |
Using USB Inputs
USB Connection
•You can connect a USB hard disk drive or USB memory stick to your TV by using the USB inputs of the TV. This feature allows you to play files stored in a USB drive or record programmes.
•2.5” and 3.5” inch (hdd with external power supply) external hard disk drives are supported.
•To record a programme, you should first connect a USB disk to your TV while the TV is switched off. You should then switch on the TV to enable recording feature. Otherwise, recording feature will not be available.
IMPORTANT !
•You may back up your files before making any connections to the TV set in order to avoid any possible data loss. Note that manufacturer will not be responsible for any file damage or dataloss.
•It is possible that certain types of USB devices (e.g. MP3 Players) or USB hard disk drives/memory sticks may not be compatible with this TV.
IMPORTANT: The TV supports only FAT32 disk formatting. NTFS format is not supported. If you connect a USB disk with NTFS format, the TV will ask you to format the content. See the section, “Format Disk” in the following pages for more information on disk formatting.
Note that ALL the data stored on the USB disk will be lost and then the disk format will be converted to
FAT32 in such a case.
USB Disk Connection
• Plug your USB device to the USB input of the TV.
Note: Plug or unplug your USB disk while the TV is switched off.
Note: If you are going to connect a USB hard disk drive to the TV set, USB connection cable used between the disk drive and the TV should have a USB logo and should be as short as possible.
Note: While formatting a USB hard disk that has 1TB (Tera Byte) or more file capacity, you can experience problems with the formatting process. In such a case, you should format the disk with your personal computer and the formatted disk type should be
FAT32.
SIDE VIEW USB MEMORY
USB
5Vdc
Max:500mA
English
CAUTION !
•Quickly plugging and unplugging USB devices, is a very hazardous operation. Especially, do not repeatedly quickly plug and unplug the drive. This may cause physical damage to the USB player and especially the USB device itself.
•Do not pull out USB module while playing or recording a file.
Programme Recording
To record a programme, you should first connect a
USB disk to your TV while the TV is switched off.
You should then switch on the TV to enable recording feature.
IMPORTANT: When using a new USB hard disk drive, it is recommended that you first format the disk using your TV’s “Format Disk” option.
•To use the recording function a USB 2.0 certified device of at least 1GB should be used, If the connected USB device is not USB 2.0 an error message will be displayed.
•Recorded programmes are saved into the connected
USB disk in .TS format (MPEG-2 transport stream).
If desirable, you can back up / copy these saved recordings into a personal computer.
Note: It is possible that recorded broadcasts in
.TS format may not be supported by your media playback software. In such a case, you should install an appropriate media playback software to your computer.
•An hour of the recordings stored occupies approximately 2 GB of space.
•For more information on recording programmes, see sections “Instant Recording”, “Timeshifting”, “Electronic Programme Guide”, “Recordings Library” or “Recording Timers” in the following parts.
•Recorded programmes are split into 1GB partitions. Names of the stored recordings’ last three digits indicates this: Such as 4801-000.ts , 4801-001.ts.
•Recorded programmes are stored in the following directory of the connected USB disk: \DVR\RECS. All recordings are indicated with a number (such as 4801-000.ts). A text (txt) file is created for each recording. This text file includes information such as broadcaster, programme, and recording time.
•If the writing speed of the connected USB disk is not sufficient, recording may fail and timeshifting feaute may not be available.
•Recordings of HD programmes can occupy bigger size on the USB disk depending on the broadcast’s resolution. For this reason it is recommended to use USB hard disk drives for recording HD programmes.
-11 -
00_MB60_[GB]_(01_TV)_1910UK_IDTV_PVR_BRONZE17_24942LED_ |
YPBPR_ROCKER_10072636_50186854.indd 11 |
17.08.2011 14:10:23 |
•Do not plug out the USB/HDD during the recording. This may harm the connected USB/HDD.
•Only two partitions on a HDD unit can be supported.
•Some stream packets may not be recorded because of signal problems, so sometimes video may freezes during playback.
•Record, Play, Pause, Display (for PlayListDialog) keys could not be used when teletext is ON. If a recording starts from timer when teletext is ON, teletext is automatically turned off. Also teletext usage is disabled when there is ongoing recording or playback.
If the recording time of an event is longer than the memory capacity, the following message will appear on the screen: “There is not enough space for ‘event’ but it will be recorded until the drive is full”.
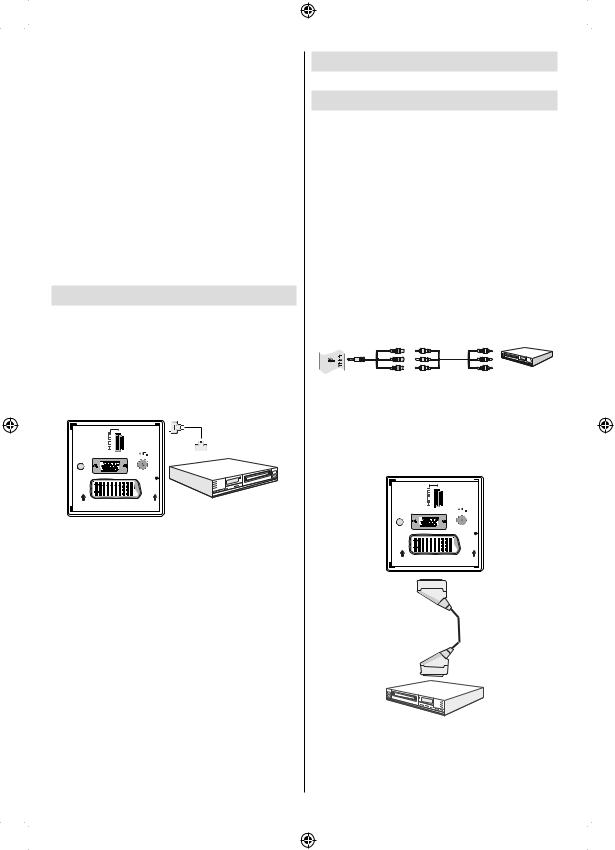
Connecting to a DVD Player via HDMI
Please refer to your DVD player’s instruction book for additional information. Power off both the TV and the device before making any connections.
Note: Not all cables shown in the illustration are supplied.
•If your DVD player has an HDMI socket, you can connect via HDMI for better video and audio quality.
1 |
|
|
HDMI Cable |
|
(not supplied) |
VGA |
|
SPDIF |
|
Coax.OUT |
|
SCART |
External device |
|
•When you connect to DVD player as illustrated above, switch to the connected HDMI source. See, Input Selection section for more information on changing sources.
Connecting to a DVD Player via Component Sockets (YPbPr) or Scart Cable
•Some DVD players are connected through
COMPONENT SOCKETS (YPbPr). In this case, you must use the supplied Component video connection cable for enabling connection. First, plug single jack of the cable to the TV’s YPbPr socket (side). Afterwards, insert your component cable’s (not supplied) connectors into the socket part of the Component video connection cable (see illustration below). Colours of the connected jacks should match.
•To enable audio connection, use the VGA/Component Audio cable. First, plug single jack of the cable to the TV. Afterwards, insert your DVD player’s audio cable’s connectors into the socket part of the
VGA/Component audio connection cable (see illustration below). Colours of the connected jacks should match.
Side view
DVD Player
YPbPr
Connection Cable
YPbPr Video Cable
(supplied)
(Not supplied)
•When the connection is made, switch to YPbPr source. See, Input selection section.
Note:ToconnectYPbPrdevice,youshouldusesupplied component (YPbPr) connection cable
•You may also connect through the SCART input.
1 |
VGA |
SPDIF |
Coax.OUT |
SCART |
Scart Cable (not supplied)
External device
•Note: These three methods of connection perform the same function but in different levels of quality. It is not necessary to connect by all three methods.
English - 12 -
00_MB60_[GB]_(01_TV)_1910UK_IDTV_PVR_BRONZE17_24942LED_ |
YPBPR_ROCKER_10072636_50186854.indd 12 |
17.08.2011 14:10:23 |
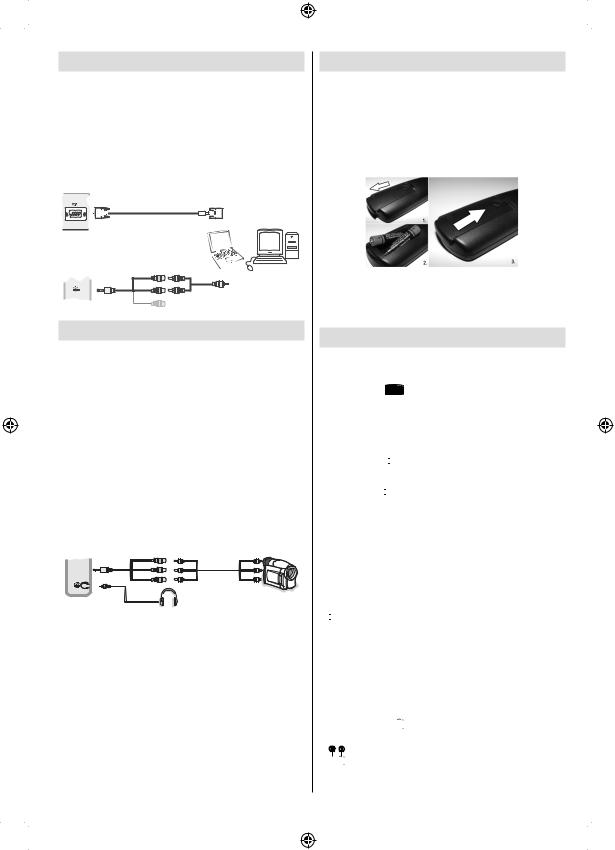
Connecting the LCD TV to a PC
For displaying your computer’s screen image on your
LCD TV, you can connect your computer to the TV set. Power off both computer and display before making any connections. Use 15-pin D-sub display cable to connect a PC to the LCD TV. When the connection is made, switch to PC source. See “Input selection” section. Set the resolution that suits your viewing requirements. Resolution information can be found in the appendix parts
|
PC VGA Cable |
|
(Not supplied) |
PC Input |
|
(back) |
Or |
|
Side Audio/Video |
|
Connection Cable |
|
(Supplied) |
SIDE AV |
PC Audio Cable |
.Side AV Input |
(Not supplied) |
|
Using Side AV Connectors
You can connect a range of optional equipment to your
LCD TV using side connectors of the TV.
•For connecting a camcorder or camera , you should use AV socket (side). To do this, you must use the supplied video/audio connection cable. First, plug single jack of the cable to the TV’s AV IN socket
(side). Afterwards, insert your camera cable’s (not supplied) connectors into the socket part of the video/audio connection cable. Colours of the connected jacks should match. See illustration below.
•Afterwards, you should switch to Side AV source. See the section Input selection in the following sections for more information.
AVConnection |
AVCable |
Cable (supplied) |
(not supplied) |
 SIDE AV
Camera
Headphone
•To listen the TV sound from headphones, you should connect headphones to your TV by using the
HEADPHONE jack as illustrated above..
Remote Control Handset
Inserting Batteries
•Remove the battery cover located on the back of the handset by gently pulling backwards from the indicated part.
•Insert two AAA/R3 or equivalent type batteries inside. Observe the correct polarity (+/-) when inserting batteries and replace the battery cover.
Note: Remove the battery from remote control handset when it is not to be used for a long period. Otherwise it can be damaged due to any leakage of batteries. Remote range is approximately 7m/23ft.
Switching On/Off
To Switch the TV On
Connect the power cord to the 220-240V AC 50 Hz.
•Switch the “ ” button on the bottom right hand side under the screen to position “|” so the TV will switch to standby mode. Then the standby LED lights up.
•To switch on the TV from standby mode either:
•Press the “ ” button, CH
 / CH
/ CH or a numeric button on the remote control.
•Press the “ ” or +/- button on the TV.
•The TV will then switch on.
Note: If you switch on your TV via CH / CH
/ CH buttons on the remote control or on the TV set, the programme that you were watching last will be reselected.
By either method the TV will switch on.
To Switch the TV to Standby
To switch the TV to low power stand by press the
“ ” button on the remote control or right hand side of the TV.
Note: When the TV is switched to standby mode, standby LED can blink to indicate that features such as Standby Search, Over Air Download or Timer is active.
To Switch the TV Off
•Switch the “ ” button on the bottom right hand side under the screen to position 2 as illustrated,
 to isolate the TV from the mains, the LED will go out.
English - 13 -
00_MB60_[GB]_(01_TV)_1910UK_IDTV_PVR_BRONZE17_24942LED_ |
YPBPR_ROCKER_10072636_50186854.indd 13 |
17.08.2011 14:10:24 |

•If the TV will not be used for a long period i.e. holidays, then unplug the power cord from the mains socket.
Input Selection
Once you have connected external systems to your TV, you can switch to different input sources.
Press “SOURCE” button on your remote control consecutively for directly changing sources.
Basic Operations
You can operate your TV using both the remote control and onset buttons.
Operation with the Buttons on the TV
Main menu OSD cannot be displayed via control buttons. “+/-” buttons will function as volume up/down as default. Even if you set other functions for these buttons, “+/-” buttons will perform as default after a short while.
Volume Setting
•Press “P/V/AV” button once and then use “+/-” buttons to increase or decrease volume, so a volume level scale (slider) will be displayed on the screen.
While Tv is on, +/- button can use as volume + or volume - as default.
Programme Selection
•Press “P/V/AV” button once and then use “+/-” buttons to change channel. By pressing “+/-” button,you can select the next or previous programme.
AV Mode
•Hold the “P/V/AV” button, source OSD will be displayed in a few second.
Operation with the Remote Control
•The remote control of your TV is designed to control all the functions of the model you selected. The functions will be described in accordance with the menu system of your TV.
English
Volume Setting
•Press “V+” button to increase the volume. Press “V-” button to decrease the volume. A volume level scale (slider) will be displayed on the screen.
Programme Selection (Previous or Next Programme)
•Press “CH ” button to select the previous programme.
•Press “CH ” button to select the next programme.
Programme Selection (Direct Access)
•Press numeric buttons on the remote control to select programmes between 0 and 9. The TV will switch to the selected programme. To select programmes between, press the numeric buttons consecutively.
When the pressing time is due for the second numeric button, only the first digit programme will be displayed. Press directly the programme number to reselect single digit programmes.
Viewing Electronic Programme
Guide (EPG)
You can view the electronic programme guide (EPG) to view information about available programmes.To view the EPG menu please press EPG button on the remote control.
•Press “ ”/“
”/“ ” buttons to navigate through channels.
•Press “ ”/“
”/“ ” buttons to navigate through the programme list.
•EPG menu displays available information on all channels.
•Please note that event information is updated automatically. If there are no event information data available for channels, EPG will be displayed with blanks.
Up/Down/Left/Right: Navigate.
OK (Options): views/records or sets timer for future programs.
INFO (Event Details): Displays the programmes in detail.
Green button: Programme schedule will be listed
- 14 -
00_MB60_[GB]_(01_TV)_1910UK_IDTV_PVR_BRONZE17_24942LED_ |
YPBPR_ROCKER_10072636_50186854.indd 14 |
17.08.2011 14:10:25 |
 Loading...