

Page 1

Publication Date: 07/04/2005 Business I.T. Systems Limited
Callisto V2.x.x
Print Management Software
Getting Started Guide
Document Revision 2.0.0.0 Page 1
Page 2

Publication Date: 07/04/2005 Business I.T. Systems Limited
Copyright Statement
Copyright © 1999 – 2005 Business I.T. Systems Ltd
Information contained in this document is the property of Business I.T. Systems
Limited. This document should not be reproduced, in part or in full, without the prior
written permission of Business I.T. Systems Ltd.
Microsoft, MS, Windows, Windows 2000, Windows XP, Windows Server 2003 ,
Microsoft Word are either registered trademarks or trademarks of Microsoft
Corporation
Other products and Companies referred to herein are trademarks or registered
trademarks of their respective Companies or mark holders.
Document Revision 2.0.0.0 Page 2
Page 3

Publication Date: 07/04/2005 Business I.T. Systems Limited
Definition of Terms
User – Defined as a person doing the printing i.e. someone using Microsoft Word or
Excel who want s to print their document.
Administrator – Defined as the person who has the responsibility of setting up
Callisto on to the network. They also have the responsibility of managing user’s
accounts and implementing user’s requirements.
Input Queue – An Input Queue is the ‘Virtual’ printer to which a User will send a
document. Assigned to each Input Queue are one or more Output Queues that
represent physical printing devices.
Output Queue - An output queue is the ‘Real’ device to which Callisto will direct a
print job. Each Output is attached to an Input Queue.
Document Revision 2.0.0.0 Page 3
Page 4

Publication Date: 07/04/2005 Business I.T. Systems Limited
Contents
Introduction..............................................................................................................................................5
How Callisto Works.................................................................................................................................5
Before Installation....................................................................................................................................6
Installation................................................................................................................................................6
Registering Your Software.......................................................................................................................6
Quick Guide to Setting up Callisto...........................................................................................................7
Setting up a Simple Accounting Configuration......................................................................................10
Setting up a Splitting Copy Count..........................................................................................................15
Document Revision 2.0.0.0 Page 4
Page 5
Publication Date: 07/04/2005 Business I.T. Systems Limited
Welcome to Business I.T. Systems’ Network Print Management Software – Callisto.
Please take a few minutes to read this guide. It will help with the installation and
initial setting up of the product.
Introduction
Callisto Version 2 is a powerful tool designed to give Network Administrators total
control of print management across entire networks and will run on servers or
workstations using Windows 2000, Windows XP or Windows Server 2003.
How Callisto Works
Callisto works by creating Queues – Input and Output Queues. Output Queues relate
to actual physical printers (or devices) that are visible to the network. Users will not
send their print jobs to an Output Queue directly but will send them to a virtual
queue called an Input Queue. The Input Queue does not relate to an actual physical
printer but simply accepts all print jobs and decides which of the Output Queues is
ready and most appropriate to accept the print job.
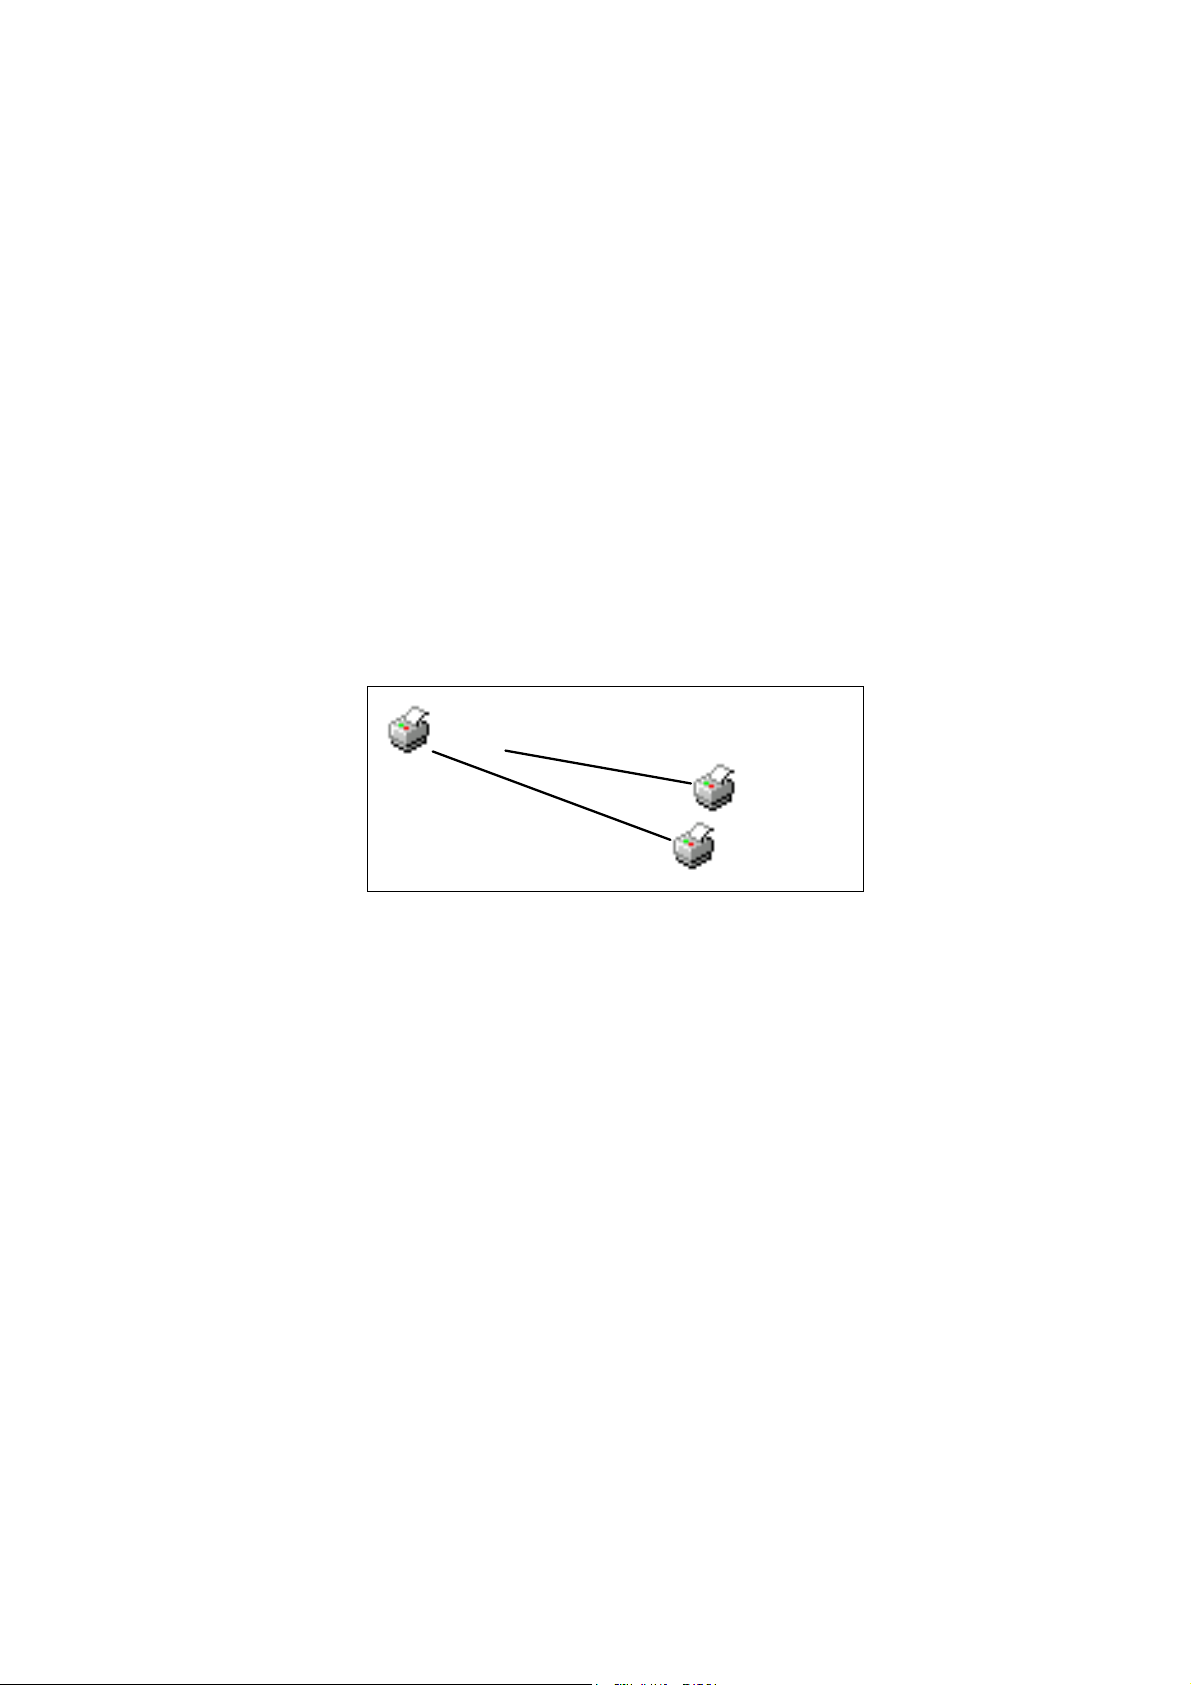
IN1_ps
OUTA_ps
OUTB_ps
The Network Administrator has created an Input Queue, IN1_ps, and has connected
this to two Output Queues, OUTA_ps and OUTB_ps. The User will send their print
jobs to the Input Queue that is visible to them as IN1_ps. The Input Queue will
decide, using the settings provided, which of the Output Queues is ready to accept the
print job.
The Administrator has considerable control when defining how Output Queues are
used. The decision algorithm uses several threshold parameters for resolving which of
the Output Queues the print job is ultimately sent. For example the Input Queue has
‘Split By Copy Count’ where a job can be split across a number of printers.
Thresholds also define the operating parameters of the Output Queues. A typical
parameter would be ‘Exclusion Rule: Maximum Page Count’ where a printer would
be excluded from use if the number of pages in a print job exceeded this value.
Callisto can, if required, monitor the status of printers i.e. out of paper, paper jam,
door open etc. so this can be involved in the decision making process.
Since printers have differing capabilities, speed, colour, duplex etc. each Output
Queue can be set with different parameters so the full potential of the system can be
realised.
Document Revision 2.0.0.0 Page 5
Page 6

Publication Date: 07/04/2005 Business I.T. Systems Limited
Before Installation
Before installing the Callisto product, check that the machine you are installing on
matches or supersedes the system requirements detailed below.
1. Server or workstation running Windows 2000, Windows XP or Windows
Server 2003
2. Minimum 128Mb RAM (Recommended 256 Mb or more).
3. Video resolution of 800 x 600 pixels, 256 colour.
4. TCP/IP and Microsoft SNMP service installed (Microsoft SNMP is not
automatically installed with Windows NT – the service must be added
manually. During installation, Callisto will check that SNMP, and service pack
6, are already installed).
5. Please ensure Internet Explorer version 4 or greater is installed
Installation
Insert the Callisto CD. The software is designed to auto-run. If for some reason is
does not start, use Windows Explorer to browse the CD contents and double-click
SETUP.EXE
Registering Your Software
Callisto is supplied with a 30-day evaluation period. If Callisto is not registered within
this period, the software will cease to operate on the 30th day.
Document Revision 2.0.0.0 Page 6
Page 7

Publication Date: 07/04/2005 Business I.T. Systems Limited
Setting up Callisto
Firstly start the Callisto Configuration Manager
1. After installing Callisto from the Callisto CD, launch the Callisto Configuration
program. Go to Start > Programs > Business I.T System Ltd > Callisto V2 >
Callisto Configuration Manager
2. Then you will see this screen.
3. The dialog asks to add users to the database. The users must be in the database
before they can print. If the first option is chosen then users are added to the
database when they print. The second option imports all the users from the
domain. The third option imports users in from a text file. Select how you
would like to insert users into the databases
Document Revision 2.0.0.0 Page 7
Page 8

Publication Date: 07/04/2005 Business I.T. Systems Limited
4. The above dialog, defines the initial balance for all the users. The administrator
can schedule when to increase or reset the users balance automatically.
5.
The Initial Balance set the initial balance of all the users’ accounts.
The Update Type defines the type of automatic update the administrator would
like to perform the user’s accounts. The administrator is given three options
None – This does not perform any update to the user’s account
Adjust Balance By – This adds a credit the user’s account. The amount
added is specified in the Update Amount Field
Reset Balance To – This resets the user’s account balance. The amount that
it is reset to is specified in the Update Amount Field.
The Update Schedule specifies how often the automatic update should occur.
The Update Schedule gives the administrator the choice to perform the
update daily, weekly or monthly.
Document Revision 2.0.0.0 Page 8
Page 9

Publication Date: 07/04/2005 Business I.T. Systems Limited
The Update Time allows the administrator to chose a time at which the
update should occur.
The Update Amount is the amount either to reset the balance, or the amount
to add to the current balance.
Once the settings have been selected, click on the next button.
6. Now the administrator needs to decide what sort of configuration they would
like to set up. The configuration of the queues is dependant on what the
administrator wants to do. For example, if the administrator wants to monitor
all the jobs printed by a particular printer then a simple one to one configuration
can be set up. If the administrator would like to split the number of copies
printed for each print job across a number of printers then the administrator
would have to configure a cluster of printers. An example how to set up each
configuration will follow.
Document Revision 2.0.0.0 Page 9
Page 10

Publication Date: 07/04/2005 Business I.T. Systems Limited
Example of Setting up a Simple Accounting Configuration
This is a typical example of a Callisto configuration. This configuration shows how to
record all the print jobs sent to a particular printer.
1. After following the steps above sections on setting up Callisto from the
previous section, you should see the follow screen. This displays all the
domains on your network
2. To find the printers installed on your Server click on your domain. To find out
your local domain and server name click on file > authentication code option.
You will be displayed with similar dialog box.
Document Revision 2.0.0.0 Page 10
Page 11

Publication Date: 07/04/2005 Business I.T. Systems Limited
3. This dialog shows your current domain name and server name. Now you know
your domain and server name, you can click on cancel to close the dialog
4. Now select your domain name from the list of domains. In this scenario click
on the BITS domain. This will show you a list of computers in the domain.
Document Revision 2.0.0.0 Page 11
Page 12

Publication Date: 07/04/2005 Business I.T. Systems Limited
5. Now click on your Server Name from the list. In this instance, click on the
Epimetheus machine. This will show you the all printers installed on this
server.
In the example below the Room 20, Room 21 and Room 25 are printers
already installed on the server. These will become the Input Queue.
6. Now create output queues for the configuration. This can be done manually or
can be automatically generated. The output queues are the real printing
devices. The easiest way to create an output queue is to automatically generate
them. This can be done by selecting File > Wizards > Convert Existing
Printers.
Please note: Output Queue (Real Printing Devices) can also be manually created.
To do this Add a Printer to the Local Machine using the Add Printer Wizard in
Windows and set the port the actual printer’s port.
To configure an Input Queue (Virtual Queue) manually, you can either add a
new printer or select an existing printer from the printers list. Then change the
port of the printer to the Callisto Port.
Document Revision 2.0.0.0 Page 12
Page 13

Publication Date: 07/04/2005 Business I.T. Systems Limited
7. When the Convert Existing Printers option is chosen, it maps all the printers
on the Server to an output queue. The Input Queue (i.e. Room 20) has its
printer port automatically set to the Callisto Port. The ‘Real_’ pre-fix denote
the Output Queue (actual physical device) , and sets the printer port to the real
printer port.
8. To save the configuration click on the Apply Button, and Click Yes to re-start
the Callisto service.
9. Test your configuration by sending a print job to the input queue (i.e. Room 20
printer); this will then be passed to the output queue (i.e. Real_Room 20).
Document Revision 2.0.0.0 Page 13
Page 14

Publication Date: 07/04/2005 Business I.T. Systems Limited
10. To view that the job has been recorded in the database, launch the Callisto
Account Manager. Go to Start > Programs > Business I.T. Systems Ltd >
Callisto Account Manager. From the History menu, click on the Job History.
This will show the history of the printed job.
Document Revision 2.0.0.0 Page 14
Page 15

Publication Date: 07/04/2005 Business I.T. Systems Limited
Example of Setting up a Splitting Copy Count
This is an example of setting up a configuration using split by copy count.
1. As described in the previous example, the Callisto Configuration Manager
displays all the Input and Output Queues on the current server.
2. The Input Queues and Output Queues were setup in the previous example. The
Input Queues are Room 20, Room 21 and Room 25. The Output Queues are
Real_Room 20, Real_Room 21 and Real_Room 25. Now drag and drop the
Input Queue (Room 20) on to the right-hand side pane
3. When asked to configure the Input Queue, Click Yes.
Document Revision 2.0.0.0 Page 15
Page 16

Publication Date: 07/04/2005 Business I.T. Systems Limited
4. Now configure the output queues. Drag and drop each output queues
(Real_Room 20, Real_Room 21 and Real_Room 25) individually on to the
Input Queue (Room 20). Please ensure to drag and drop the output queue on to
the input queue. When this occurs, you will be asked if you want to configure
this Output Queue, click Yes.
5. The Configuration should like the one below.
Document Revision 2.0.0.0 Page 16
Page 17

Publication Date: 07/04/2005 Business I.T. Systems Limited
6. Now click on the Apply Button to confirm the configuration.
Please Note: - Each time an option is changed or an Input or Output is added
it is usefully the click on the Apply Button, to save all the changes made. This
will ensure all your current settings are saved.
7. Then click on the Room 20 input queue.
Document Revision 2.0.0.0 Page 17
Page 18

Publication Date: 07/04/2005 Business I.T. Systems Limited
8. From the Engine Usage Tab, click on the Split by Copy Count Option and
Minimum Split Device Option.
Document Revision 2.0.0.0 Page 18
Page 19

Publication Date: 07/04/2005 Business I.T. Systems Limited
9. Now, click on the Apply Button to save the configuration, click Yes to re-start
service and save changes.
10. To test your configuration, send a print job with 3 copies to the input queue
(Room 20 queue in the above configuration). This should split copies of the
job across all 3 printers, with each printer getting a copy to print.
Document Revision 2.0.0.0 Page 19
Page 20

Publication Date: 07/04/2005 Business I.T. Systems Limited
11. To view that the job has been recorded in the database, launch the Callisto
Account Manager. Go to Start > Programs > Business I.T. Systems Ltd >
Callisto Account Manager. From the History menu, click on the Job History
option. This will show the history of the printed job, and the number of copies
sent to each printer.
Document Revision 2.0.0.0 Page 20
 Loading...