

Page 1
[1] PRODUCT OUTLINE
[3] UNPACKING AND
This machine is a duplex document auto fee der attached to a digital
copier.
It feeds originals automatically to allow continuous copying.
[2] SPECIFICATIONS
Document set
direction
Document set
position
Document transport
system
Document feed
sequence
Document size AB series: A3 ~ A5
Document weight 56 ~ 90g/m
Document set
quantity
Dimensions 583mm (W) x 435mm (D) x 131mm (H)
Weight About 5.4 kg
Power source Supplied from the copier.
Document size
detection
Detection size Japan: A3, B4, A4, A4R, B5, B5R
Multi copy Without E-Sort PWB installed:
Mixture of differe nt
document sizes
Random paper feed Not available
Document reverse Not allowed
Display section (LED) None
Document exchange
speed
Face up
Center reference
Sheet through type
Top take-up feed
Inch series: 11 x 17 ~ 8 . 5 x 5.5
Duplex invoice not available
2
, 11 ~ 23.9lbs
2
Max. 30 sheets (90g/m
4mm)
On the document feed tray
Inch series: 11 x 17, 8.5 x 14, 8. 5 x 11,
EX AB series: A3, B4, A4, A4R, A5
S
D
With E-Sort PWB installed:
S
D
Mixture paper feed : Not available during
copying. Available during FAX (same width
only)
S
S 16 sheets/min
8.5 x 11R, 8.5 x 5. 5
S enable, S D disable
D disable, D S enable
S enable, S D enable,
D enable, D S enable
, max. thickness
INSTALLATION
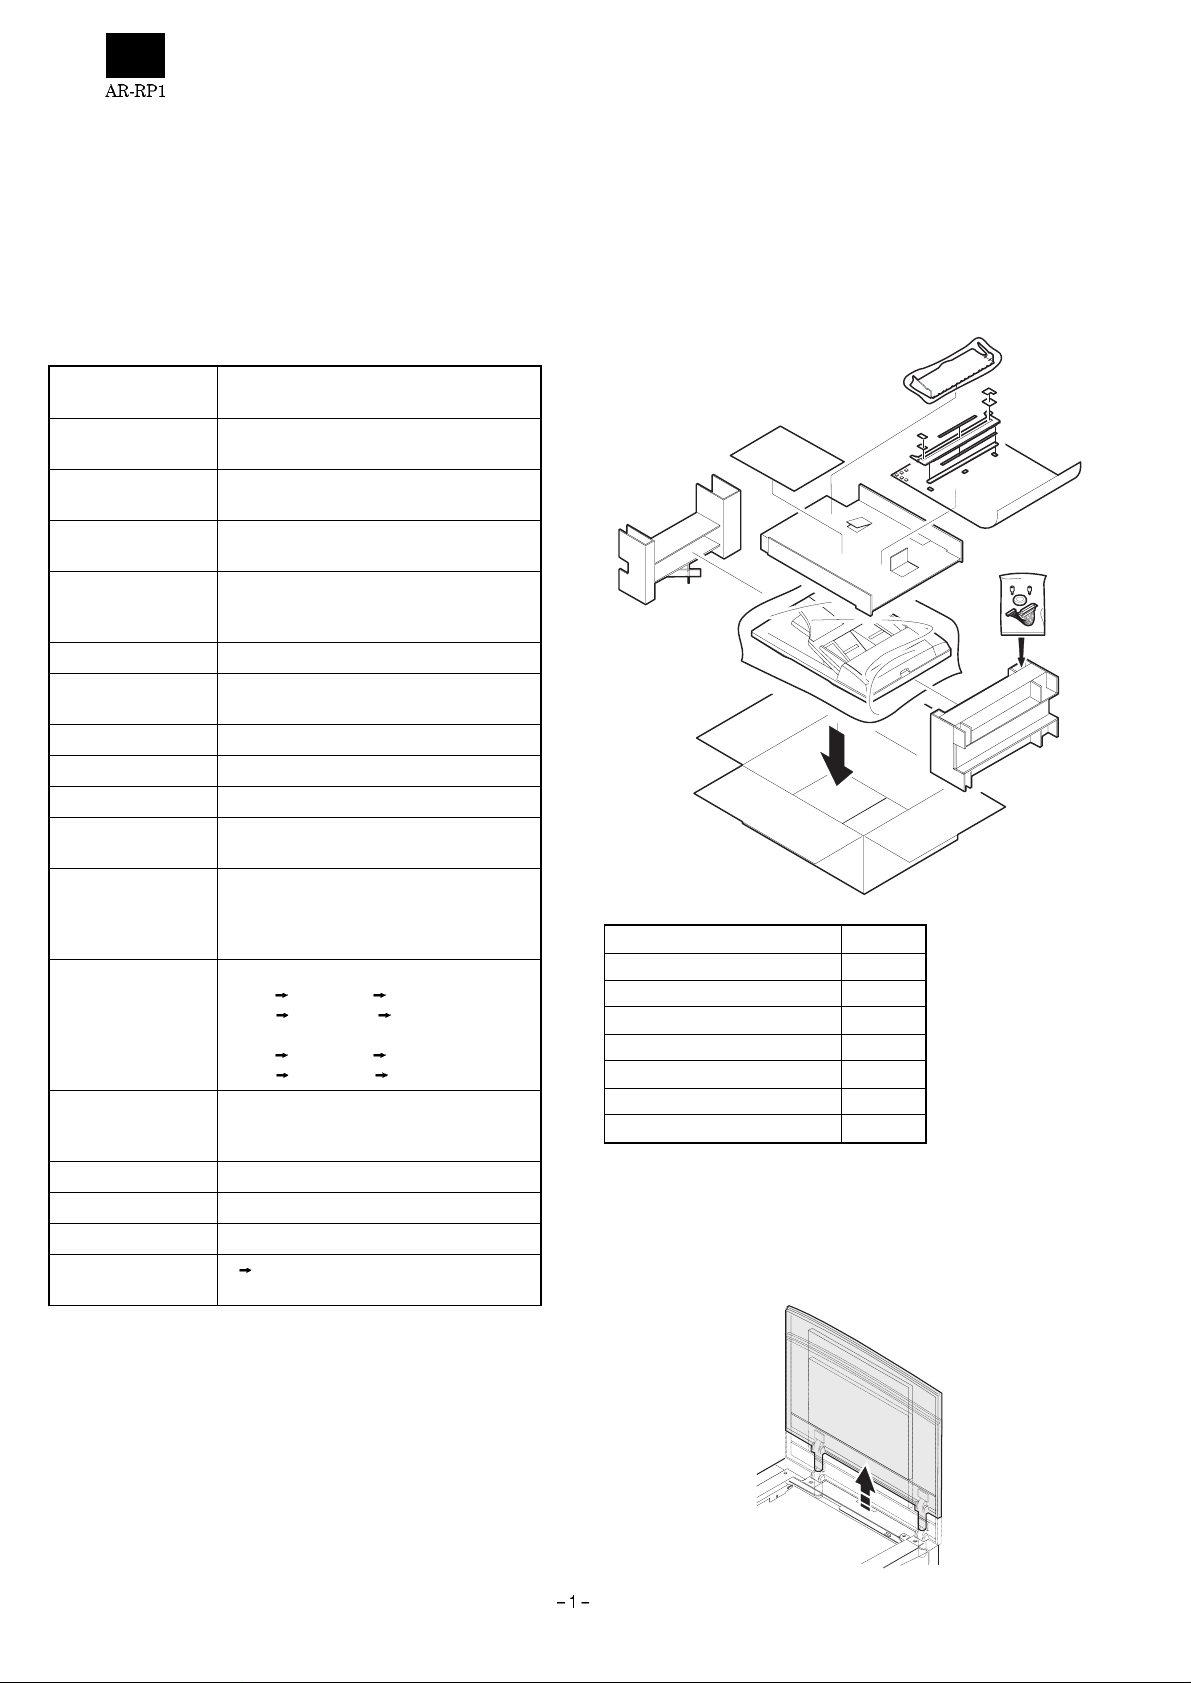
1. Unpacking
For unpacking, refer to the figure below.
Name Q’ty
Core 1
Cushion 1
SPF glass holding cover 1
SPF harness 1
Intermediate tray (AR-RP1) 1
Step screw 2
Manual 1
2. Installation
1) Remove the do cument cover.
Lift the document cover and remove it from th e copier.
Page 2
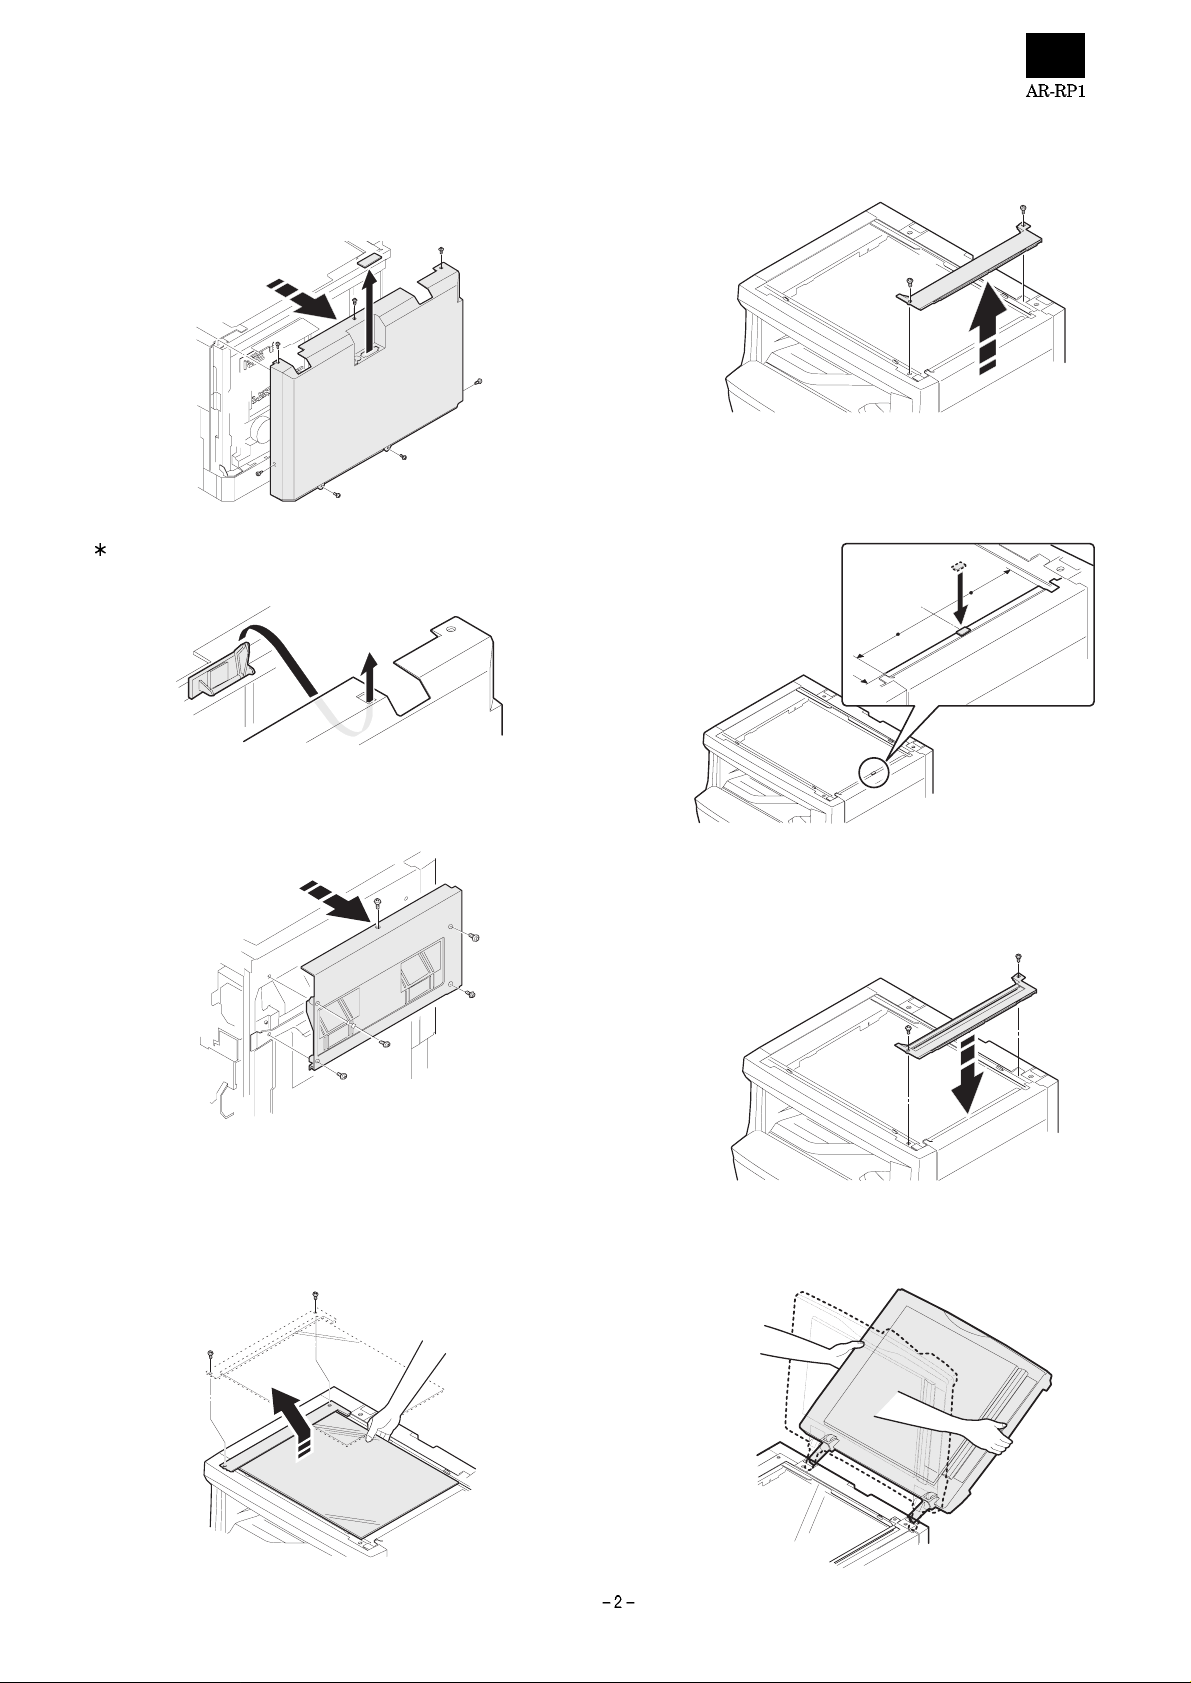
2) Remove the rear cabinet of the copier.
Remove the seven screws and remove the cabinet. Remove the
connector cover.
If a open/close detection is attach ed, be careful not to break the
actuator.
5) Remove the do cument glass holder cover (righ t side).
Remove the two screws.
6) Attach the cushion (one position).
Remove the cover of the doub le-sided adhesive tape an d paste the
cushion taking care not to allow it to extend over the plate edges.
3) Remove the right cabinet.
Remove the five screws.
4) Remove the document glass holder (left side) and the document
glass.
Remove the two screws and carefully remove the document glass
holder (left side) and the document glass. Do not separate the
glass and holder.
7) Attach the SPF glass holder cover.
After attach ing the SPF glass holding cover, attach the document
glass.
8) Install the SPF to the copier.
Tilt the SPF backward and insert the hinges into the hinge guides.
Page 3

9) Remove the PWB shield plat e.
Remove the six screws.
10) Install the SPF harness and the ring core (included together with
the unit).
Pass the S PF harness through the pla te hole from the above and
fix it to the plate with the supplied two hex cap screws. (
Pass the S PF harn ess thr ough t he ring core (
the main PWB connector (CN11) inside the copier. (
), and connect it to
)
)
11) Install the interface harness.
Connect the interface harness from the SPF to the machine and
tighten the screws.
12) Remove the filament tape.
Remove the filament tape at four positions.
1
13) Install the intermediate tray in the case of RSPF.
In the case of RSPF, install the intermediate tray by pushing it to
the inner part.
3
2
★Be careful about t he direction of the co nnector.
 Loading...